Catalog Tab
The Catalog tab facilitates six configurations used only by catalog users (except for Variations). They are:
Attributes
This section is provided for merchants that use the Catalog feature. Here, you can enter attribute for each of your items that will appear on your Catalog page. Until you have created attributes, you'll see the familiar "no attributes have been defined…" notice.
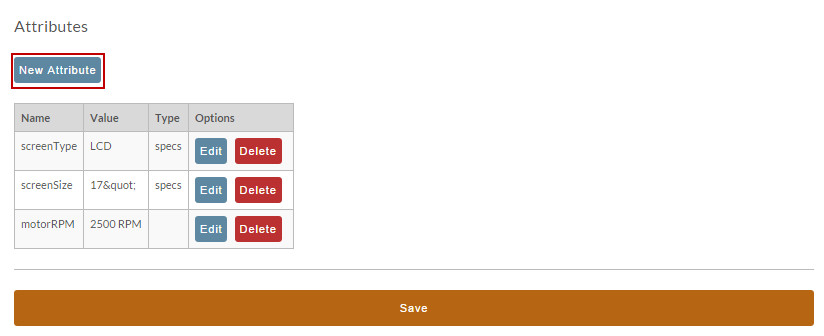
Click the "New Attribute" button to create an attribute. The following screen will appear.
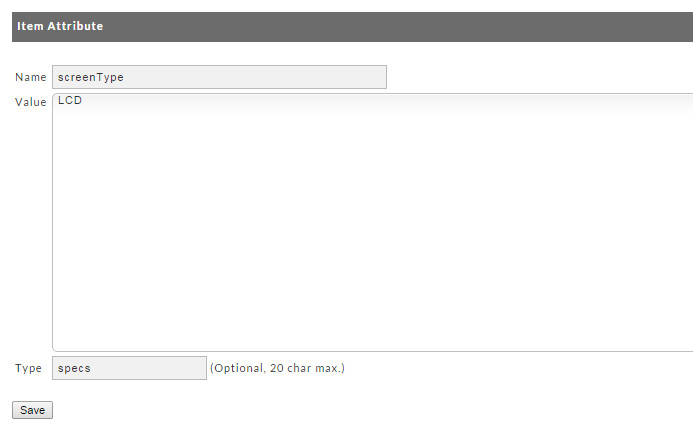
In the new attribute screen, enter the Name, Value(s) and Type (20 character max). Then click the Save button.
Exploded Diagrams
This utility is very useful for merchants that sell individual parts of a larger, complete item. Examples might be hobbies and crafts (RC cars, boats, airplanes, etc.), home appliances, computer equipment and basically anything with individual parts and pieces. Note: This feature presently works only with Mozilla Firefox.
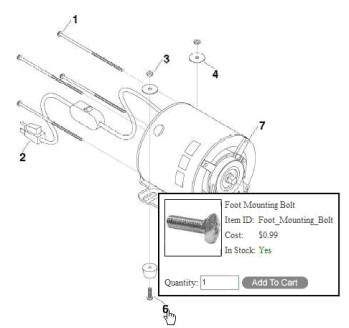
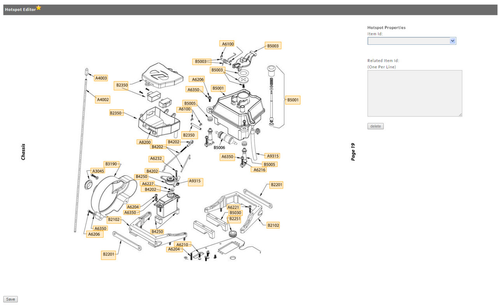
The Exploded Diagrams utility gives catalog users the ability to upload an exploded view diagram to UltraCart and create "hotspots" on any portion of the diagram (usually over a part). Once the diagram is configured and published to the web site, customers will be able to "mouse over" any hot spot (part) and readily see exploded details. In addition to viewing details like Item ID, Descriptions, Cost, etc., they will be able to click on a button to add the item to the shopping cart. This makes for a great "customer experience" by showing the actual item and its parts rather than having to scroll through a listing of parts by name or number. Like they say, "a picture is worth a thousand words" and this picture will be inter-active! The following is an example of an exploded view of our electrical motor along with the popup that appears from a hotspot.
Creating Items (parts)
Before you work with the Exploded Diagrams editor, you'll need to create a Parent Item; the object that the parts belong to and a store item for each and every part that you plan to illustrate in the exploded view and eventually sell. This is done in the same manner you create any other store item (see page – New Items). Some merchants may want to put the parent item along with all the part items into their own folder (see page – New Folders).
Exploded Image
Once you've created your Items, you'll need to upload your exploded image into the Multimedia area [tab] for the PARENT item. In our example it would be the Direct Drive Motor. To do so navigate to Item Management Item and click on your parent item. At the Item Editor screen, click on the "Multimedia" tab. The following screen will appear. 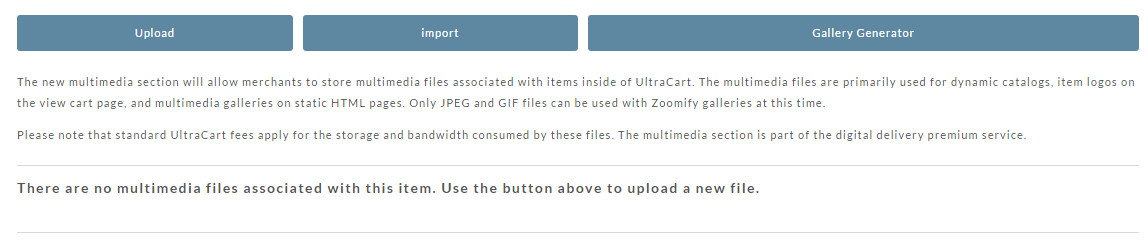
The Multimedia screen will list your uploaded graphics (if any). Click on the "Browse" button and navigate within your system to locate the graphic file you want to upload. Once located, it will be shown in the "Filename" field. You can enter a brief description into the Description Field if desired to help you identify it. Click the "Upload graphic(s)" button to complete the upload. If successful, your image will be listed, showing the Filename, a preview (may be delayed), Description (if you created one), Size, Dimensions and Date of upload. 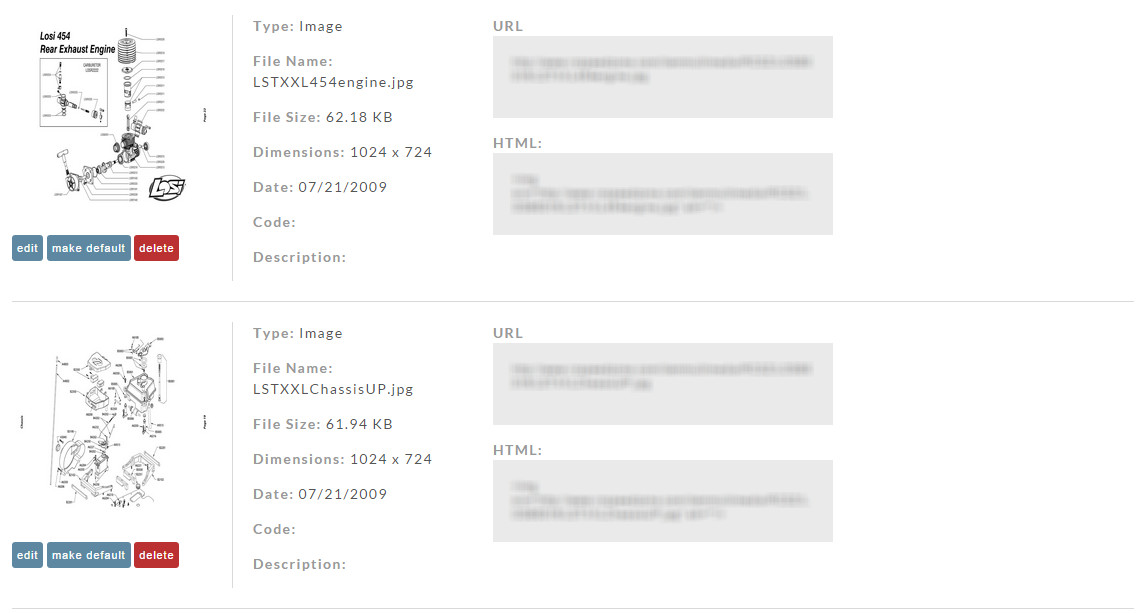
Each listed image will also be followed by 3 buttons; view, edit and delete.
Delete the Image
Click the "delete" button to remove the image. A dialog box will appear for confirmation.
View the image
Click on the "view" button to see a large view of your image and also to obtain the URL and HTML snippets for the image. 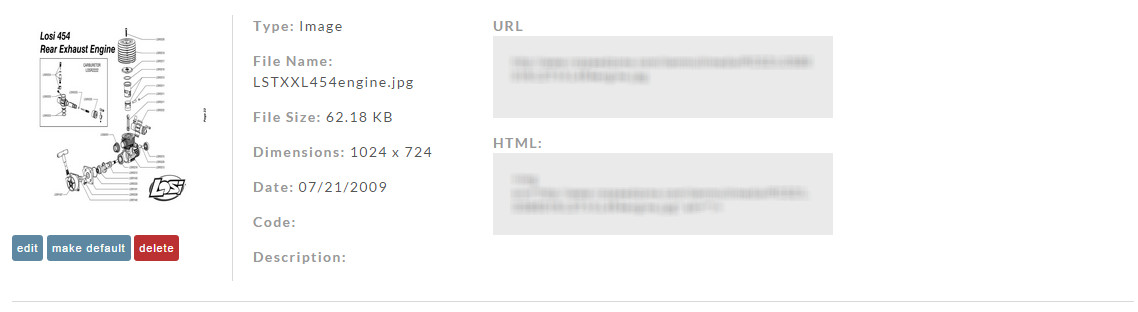
Edit the upload
You can upload a replacement image and/or change the description. To do so, click on the "edit" button. The following screen will appear: 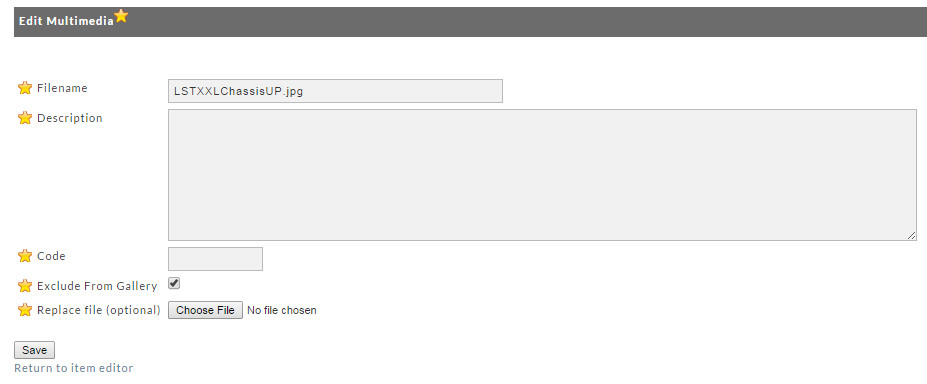
To upload a replacement graphic, click the "Browse" button and navigate to locate the new image. Once you've located it the file name will appear in the "Replace file" field. You can also change the description at this screen. Enter your changes in the Description field and click the "Save" button. You will be returned to the Multimedia screen showing your changes.
Creating Exploded Diagram
Now that the items and exploded view have been configured, we need to create the Exploded View Diagram and Hot Spots.
Navigate to Configuration Items. Click on the parent Item ID. At the Item Editor, click on the Catalog tab.
To begin creating your exploded diagram, click on the "new" button. The following screen will appear. 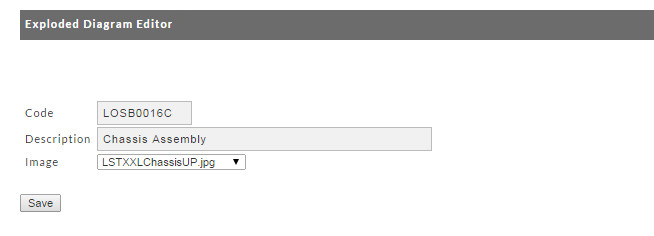
Enter a code that helps you identify this Diagram. Then enter a brief description. A list of images that you've stored in Multimedia will be presented in the drop-down field. Click the down arrow and select the Exploded View Image you uploaded previously. Once you've selected the image, the Hotspot Editor will appear with your image.
Hotspot
A Hotspot (in UltraCart) is an area that the merchant can define over a "part" in the exploded diagram view. When the customer moves the mouse pointer over that spot, a small window will appear showing; the Item ID, Descriptions, Cost, In Stock (yes/no), a text field to enter the quantity and an "add to cart" button.
Create a Hotspot
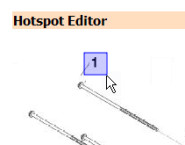 You'll use your mouse pointer to draw a square box around the spot you want to be the Hotspot. Don't worry, if you're not happy with the results, you can delete it and draw again. Since our sample diagram has each part already numbered, we will use the numbers as the hot spots. In some cases you may use the actual part as the hot spot.
Using the mouse pointer, draw a square around the number or item you want to be the hotspot. Place the mouse pointer at and above the upper left corner of the item. Press and hold the left mouse button and drag the mouse to and just below the lower right corner. You should see a blue box being drawn enclosing the object as you drag the mouse. Release the mouse button when you have enclosed the object in a box. If you are not happy with your progress, click the "delete" button below the Hotspot Properties field. You can then re-draw the box. If you click off into white space before you associate the Hotspot properties, the box will turn red simply to remind you that it's needs to be associated.
Hotspot Properties
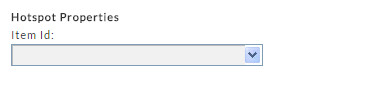
After you've drawn your Hotspot, select the Item ID that you created earlier for this part in the drop-down menu under the Hotspot Properties heading (Item ID: field). The text box to the right of the Item Id Field is for those merchants that have many store items. They may find it easier to simply enter (type) the Item ID. It must be an exact match however.
Continue the sequence of; drawing your hotspot box and associating the Item ID, for each Item (part) that you want to become Hotspots. Notice that the Hotspot box will change colors as follows; blue after drawn, red if no properties are assigned and orange when properties have been assigned.
The following is our Motor Diagram after all the Hotspots have been configured. 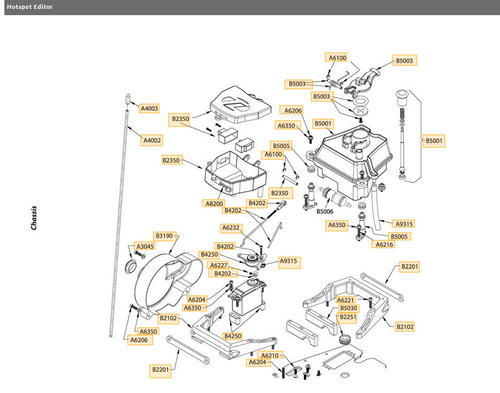
Edit a Hotspot
While in the Hotspot Editor, you can change any Hotspot properties. Click on the Hotspot and its properties will appear in the Hotspot properties field. Change its properties as desired. Click the "Save" button when finished.
Delete a Hotspot
Click on a Hotspot to select it, and then click on the "delete" button to delete it. Caution! You will not be prompted with a confirmation dialog.
Working with the Diagram
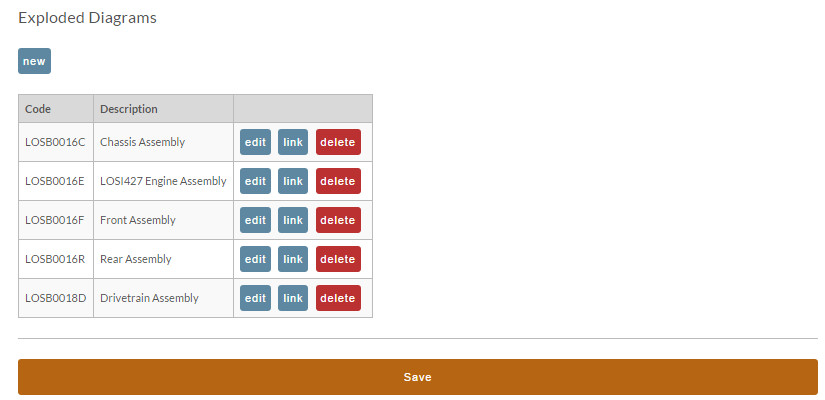
Once you have completely configured your diagram and saved your work, your diagram will be listed on the Item Editor Catalog [tab] screen. In addition to a "new" button, you will see 3 buttons for each Exploded Diagram; edit, link and delete.
Edit a Diagram
Click on the "edit" button and you'll be taken back to the Exploded Diagram Editor. There you can edit or delete Hotspots and their properties.
Delete a Diagram
Click on the Delete button to delete the diagram. You will be prompted with a "delete confirmation" dialog window.
Diagram Link
Clicking the "link" button will take you to the Exploded Diagram Link screen. 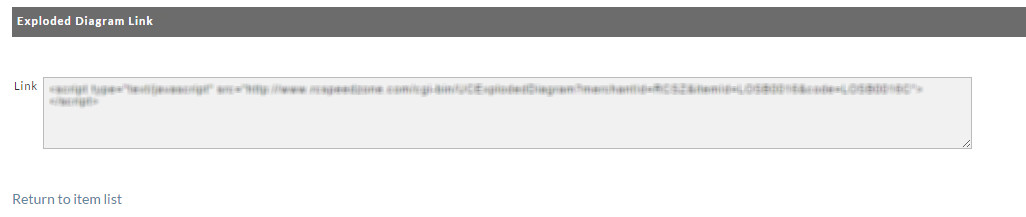
Copy the JavaScript (link) displayed on this screen and, using your html editor, paste it onto the web page you've prepared for displaying your Exploded Diagram.
Using the Exploded View
Once you've created your web page and pasted your Exploded Diagram (JavaScript), you'll post the page to your Web Site. The following illustrates our Electric Motor exploded view showing the "mouse over" on Hotspot (#6), the Foot Mounting Bolt.
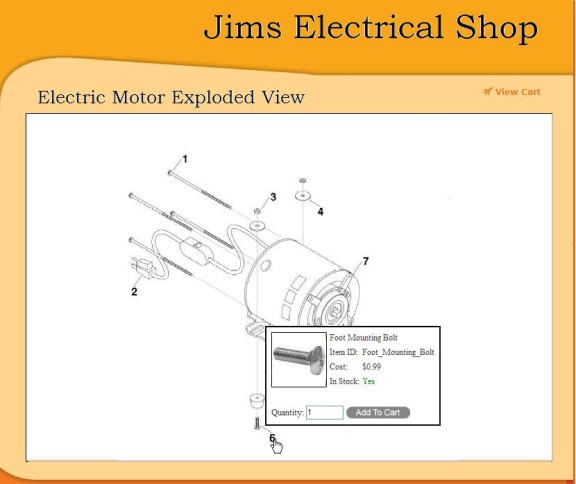
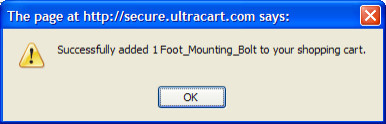
A customer can set the quantity in the box provided and then click the "Add to Cart" button. Since experience shows that customers browsing exploded views purchase more than one part, UltraCart sends a message to the screen acknowledging that it has indeed been added to the cart. This negates the customer having to move back-and-forth from the cart to the page.
When they are finished browsing and adding items (parts) to the cart, they can then click on the "View Cart" button which merchants must place somewhere on the Exploded View web page.