Groups - Catalog
This information is for the legacy Catalog that has been replaced by UltraCart StoreFronts as of May 2015.
This information remains for long time merchants who may still be using a legacy catalog. Please see the StoreFronts User Guide for current catalog technology.
The UltraCart catalog system utilizes a hierarchy of groups to organize the site. Groups are organized similar to a family tree. There is a root group from which all other groups within the catalog descend from. To use the analogy of the human body, the group hierarchy is the skeleton of the body. The content associated with the group will form the muscle and tissue of the body. Finally the templates which determine how the site actually looks will form the skin of the body. Just like a good looking body takes work both internally and externally to maintain, so does a website built within the catalog system.
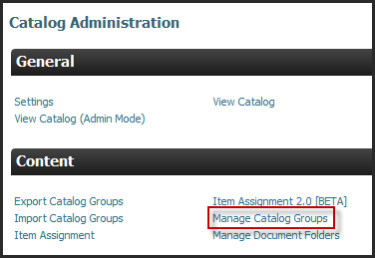
To manage the groups within the catalog, naviagate to
Login → Main Menu → Catalog → [choose a host] → Manage Catalog Groups
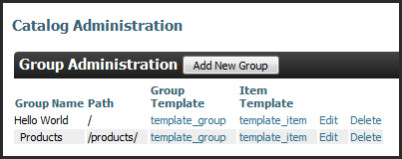
The group list will show you the hierarchy of your entire site including the name of each group, the path to the group, the group template name, and the item template name. Below is a list of the groups from the simple Hello World example in chapter 2.

From this list we can see there is only one group "Hello World" that is our root group and it is using the group template "template_group" and the item template "template_item". Continuing on the theme of the electronics from the Hello World example we would want to create a hierarchy for our site that looks more like a modern e-commerce website:
- Home Page
- Products
- TV & Video
- TVs
- Projectors & Screens
- Blu-ray & DVD players [Where our example items will be assigned]
- Audio
- Mobile Phones
- Cameras and Camcorders
- Computers
- GPS
- TV & Video
- Services
- Shops & Deals
- Gifts
- Products
Notice how the example hierarchy has numerous levels of groups that organize the site into major sections and make it easy to drill down to find very specific product categories. This example shows the nested categories in an electronic store that would get us down to the Blu-ray & DVD players where we would assign the items from the Hello World example from chapter 2.
Your information hierarchy can grow to be an elaborate structure with hundreds and possibly thousands of groups. Think carefully about the site structure in its entirety before creating the structure.
First click the "Add new group" button on the list and create the Products group under the root.
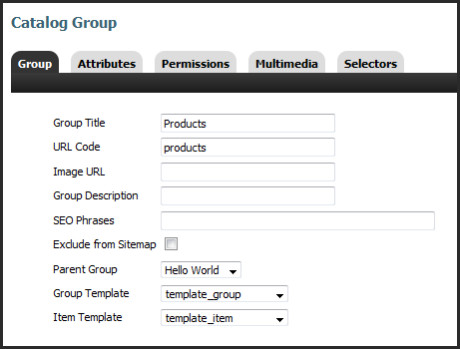
The group is given the title of "Products" with a capital P. This is how the group will appear on the website. Each group has a URL code assigned to it. This will be appended to the parent group to form the complete URL to this part of the website. The recommended practice is to use lower case letters, numbers, and underscores instead of spaces for the URL Code. The group is a child of the "Hello World" group created in Chapter 2 and will utilize the same group and item templates for now.
After the entire sample hierarchy shown above is created the list will look like this:
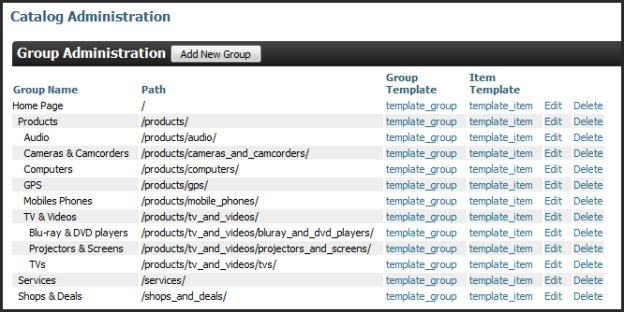
Notice how the list will slightly indent each group name under the parent group. The URL codes for each group are appended to the parent group's path to create the new path. Notice how the URL codes chosen for each group used only the recommended characters. There are no spaces and the & symbol in the title is spelled out as the word "and".
In order to complete the example hierarchy of this chapter and test it out the "template_group" will need some modification to support navigation to the child groups and back up to the parent group. Click on the "template_group" link in the group list. This is a shortcut to the template editor. The updated template is shown below:
$group.getTitle()<br>

You are currently at ${group.getPath()}<br>

#if ($group.getChildren().size() > 0)
  The following subcategories are available:<br>
  #foreach ($child in $group.getChildren())
    <a href="${baseUrl}${child.getPath()}">${child.getTitle()}</a><br>
  #end
#end

#if ($group.getItems().size() > 0)
  The following items are available:<br>

  #foreach ($item in $group.getItems())
    <a href="${baseUrl}${group.getPath()}${item.getMerchantItemID()}.html">${item.getDescription()}</a><br>
  #end
#end
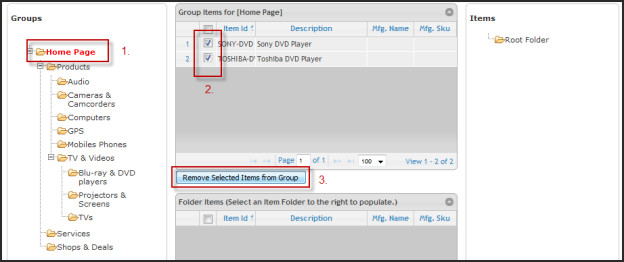
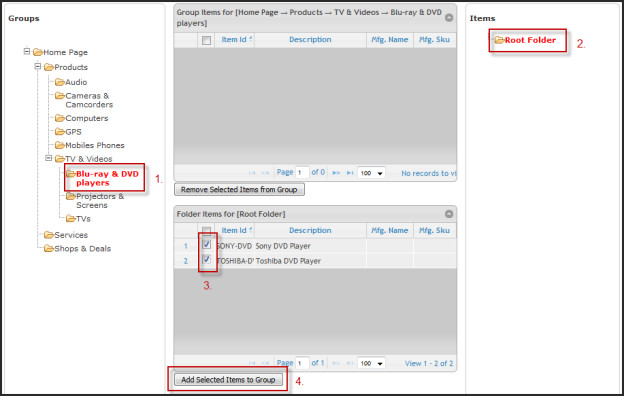
After the template is updated we need to use the item assignment tool shown in chapter 1 to remove the items from the root group and assign them to the "Blu-ray & DVD players" group. By clicking on the "Item Assignment 2.0" link on the catalog menu, perform the item assignment change is performed as shown below.
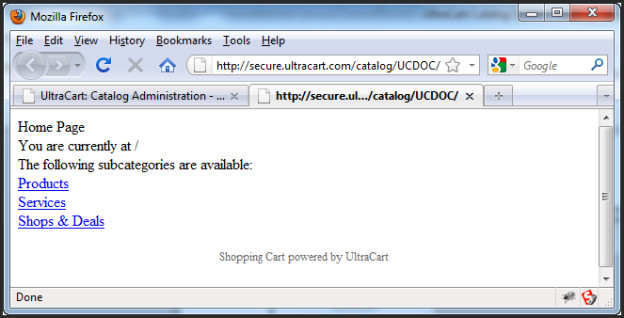
Finally the catalog can be viewed and navigation up and down the hierarchy and into the item page is possible. Click the "View Catalog" link on the catalog menu to launch the home page of the sample site. Below are screen shots of the home page showing the child groups.
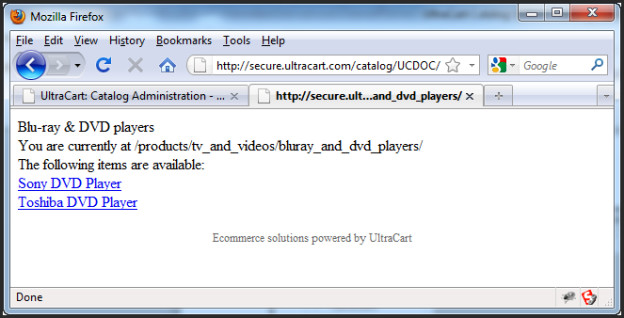
By navigating down to the "Blu-ray & DVD players" groups we arrive at the assigned items as shown below:
We have a functional group hierarchy at this point. In the next chapter we will begin the discussion of templates in depth which control the actual look and feel of the site.