Screen Branding Themes
Legacy Screen
This is a legacy screen. It has been replaced by StoreFront Themes.
Screen Branding Themes
Screen Branding Themes
UltraCart allows for a tremendous level of flexibility in customizing the look & feel of your cart. If you brand your shopping cart pages, a customer will not be able to tell any difference between pages hosted on your servers and pages hosted by UltraCart.
UltraCart supports multiple themes for the checkout. Most merchants only use a single theme (the default) for the look of their screens. There are a few merchants however that will utilize multiple themes for transitions in the look of their website. For instance, some merchants may create a theme to brand the checkout so that it looks like an affiliate's website that is sending traffic to their site.
Creating a New Theme
To create a screen branding theme navigate to:
To create a new theme click on the New Theme button shown below.
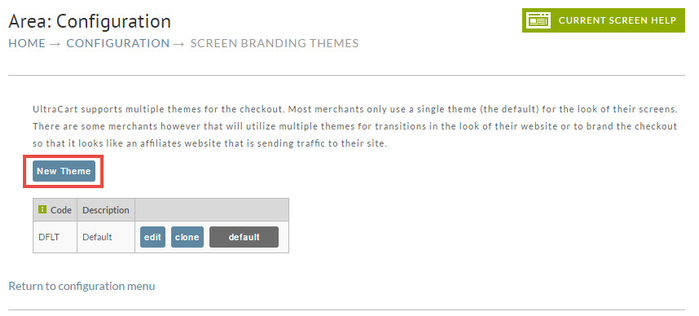
This will take you to the Theme Editor where you can configure the theme.
Editing a Theme
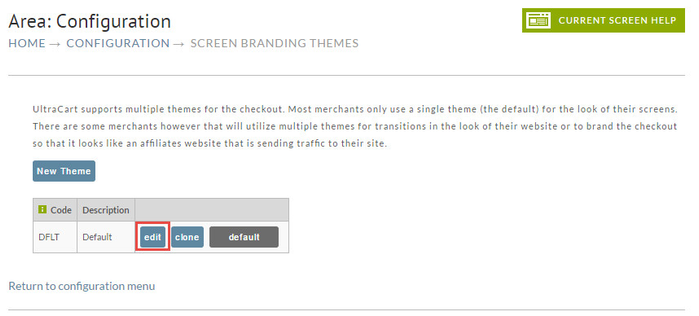
To edit an existing theme simply click the Edit button beside the theme as shown below.
Cloning a Theme
You can also clone a theme to make a complete copy of an existing theme. Often it is a good to to make a copy of an existing theme, edit it, and then make it live. To clone a theme click the Clone button as shown below.
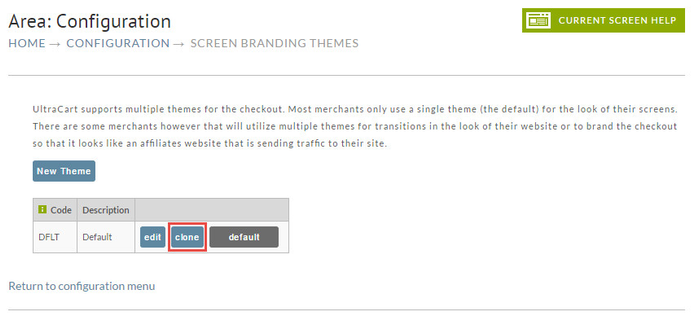
Next you will see a screen where you give the cloned theme a new code and a description.

Making a Theme the Default
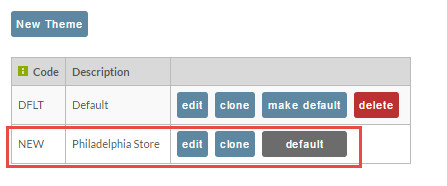
The default theme is what UltraCart will use if a theme code is not specified on a buy link. The default theme is indicated with a black box and the word default inside. If you want to change the default theme simply click the Make Default button as shown below.
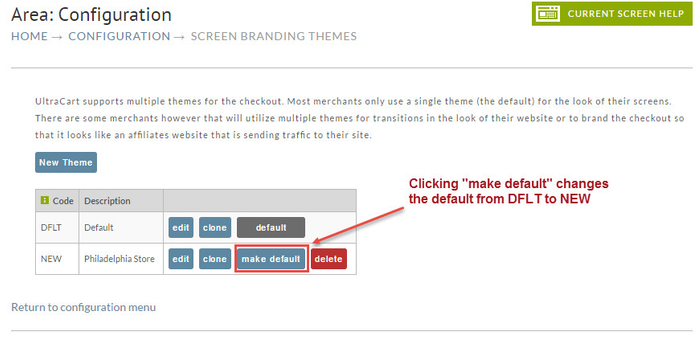
As you can see below, the NEW theme is now the default.
If you have multiple themes, make sure to read Using Secondary Screen Branding Theme.
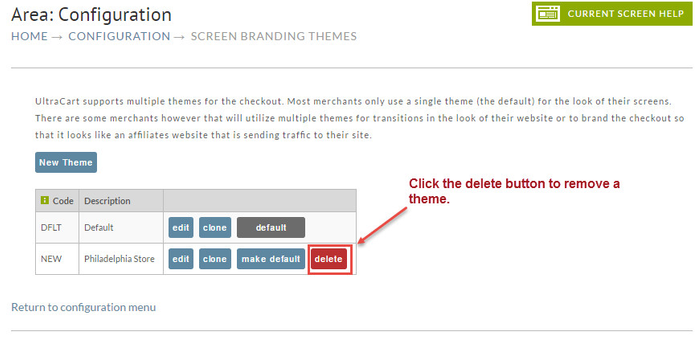
Deleting a Theme
Thee is no delete button for the Default Theme. Therefore, you cannot delete it. If you have multiple themes you can change the default to accomplish the deletion desired. Simply click the Delete button.
Basic Branding
There are basically only two main steps to accomplish [basic] Screen Branding. One is to upload your graphic(s) to UltraCart and the other is to insert the Graphic Link (generated by our system) to the screen layout desired. The following briefly outlines the steps within UltraCart to place a graphic on a screen.
Upload your graphic(s) to UltraCart.
- Determine which graphic(s) you want to upload.
- Identify where (path) they reside on your system.
- Navigate to the Screen Branding Themes section of UltraCart.
- Enter the Theme Editor by clicking on the "Edit" button to the right of the default theme.
- Click on the Graphics Tab.
- Type the location (path) of the graphic in the field provided and click on the "Upload" button.
Insert the Graphic Link code into the desired Screen Branding window.
- Obtain the Graphics Link.
- from the Graphics Library screen click on the "View" button to visually confirm your graphic appears (click on the browser "back" button to return).
- click on the "Link" button to the right of the graphic desired.
- select and copy the HTML coding from the top box (Img Tag).
- return to the Graphics Library.
- Paste the HTML Img Tag into the desired Brandable Screen.
- from the Graphics Library Screen, click on the "Screens Tab".
- click on the "Edit" button to the right of the desired screen.
- paste the Graphics Link HTML code (should still be on your clipboard).
Applying theme to the "buy links" and buy forms:
The standard buy link looks like this:
http://secure.ultracart.com/cgi-bin/UCEditor?merchantId=DEMO&ADD=BONE
When the theme code is not applied to the link the theme code set as "Default = Yes" in the screen branding theme list will be applied.
Applying the theme code to the buy link:
http://secure.ultracart.com/cgi-bin/UCEditor?merchantId=DEMO&ADD=BONE&themeCode=CSTM
When viewing the "buy form" code of an item, you'll notice that there is not reference to the themecode, so the default theme is assumed:
<form method="post" action="https://ucsupport.ultracart.com/cgi-bin/UCEditor">
<input type="hidden" name="merchantId" value="DEMO" />
<input type="hidden" name="add" value="Bone" />
<table class="uc-item-table">
<tr class="uc-item-qty-row">
<td class="uc-item-qty-label">Qty</td>
<td class="uc-item-qty-field">
<input type="text" name="quantity" value="1" />
</td>
</tr>
<tr class="uc-item-cost-row">
<td class="uc-item-cost-label">Cost</td>
<td class="uc-item-cost-value"><script type="text/javascript" src="https://ucsupport.ultracart.com/cgi-bin/UCPrice?MERCHANTID=DEMO&ITEM=BONE&output=Javascript"></script></td>
</tr>
<tr class="uc-item-submit-row">
<td></td>
<td>
<input type="submit" name="submit" value="add to cart" />
</td>
</tr>
</table>
</form>
Toy specify a theme code add a hidden input field, type as hidden and value of the theme code you want it to use:
<form method="post" action="https://ucsupport.ultracart.com/cgi-bin/UCEditor">
<input type="hidden" name="merchantId" value="DEMO" />
<input type="hidden" name="add" value="Bone" />
<input type="hidden" name="themecode" value="CSTM" />
<table class="uc-item-table">
<tr class="uc-item-qty-row">
<td class="uc-item-qty-label">Qty</td>
<td class="uc-item-qty-field">
<input type="text" name="quantity" value="1" />
</td>
</tr>
<tr class="uc-item-cost-row">
<td class="uc-item-cost-label">Cost</td>
<td class="uc-item-cost-value"><script type="text/javascript" src="https://ucsupport.ultracart.com/cgi-bin/UCPrice?MERCHANTID=DEMO&ITEM=BONE&output=Javascript"></script></td>
</tr>
<tr class="uc-item-submit-row">
<td></td>
<td>
<input type="submit" name="submit" value="add to cart" />
</td>
</tr>
</table>
</form>
Legacy Screen
This is a legacy screen. It has been replaced by StoreFront Themes.