# UltraCart Documentation — full text
# Account & Settings
https://docs.ultracart.com/account-settings
doc_type: explanation
# Account & Settings
Users, back office, integrations, and security.
:::note
This section is being built out. Guides are moving here from the existing documentation as
the docs are reorganized — see the [restructure roadmap](https://github.com/UltraCart/docs/issues/41).
:::
---
# Agentic Commerce
https://docs.ultracart.com/account-settings/agentic-commerce
doc_type: explanation
PayPal Agentic Commerce allows your products to be discovered and purchased directly within AI-powered chat conversations. When enabled, UltraCart syncs your product catalog to PayPal, which distributes it to supported AI assistant surfaces. Customers can browse, select, and pay for products without ever leaving their chat — reducing friction and opening a new sales channel for your store.
For more details on how conversational commerce works, see [AI-Powered Conversational Commerce](https://www.ultracart.com/resources/ai-powered-conversational-commerce).
## How It Works
1. **Catalog Sync** — UltraCart synchronizes your product catalog and pricing to PayPal.
2. **AI Distribution** — PayPal distributes your catalog to supported agentic commerce surfaces (AI chatbots and assistants).
3. **In-Chat Checkout** — Customers discover your products through natural conversation with AI assistants and complete purchases using PayPal payments, all within the chat.
4. **Order Fulfillment** — Orders flow directly into UltraCart for standard processing and fulfillment.
## Benefits
- **New Revenue Channel** — Reach customers already spending time in AI chat interfaces with reduced purchase friction.
- **Better Product Discovery** — AI assistants intelligently surface the right products from your catalog based on customer queries.
- **Lower Cart Abandonment** — Inline checkout eliminates the redirects that typically increase abandonment rates.
- **Expanded Reach** — Display your products across multiple AI agent surfaces without additional marketing spend.
- **Data Insights** — Track top-searched items, identify catalog gaps, and monitor conversion by surface.
## Prerequisites
Before enabling PayPal Agentic Commerce, you must have PayPal connected as a payment method on your account.
If you have not yet configured PayPal, navigate to **Configuration** → **Checkout** → **Payments** and connect your PayPal Business account. See the [PayPal Integration](/checkout-payments/payments/paypal/paypal-integration) documentation for complete setup instructions.
:::info
PayPal Agentic Commerce is currently available to US-based merchants only. Additional countries are planned for future rollout.
:::
## Enabling PayPal Agentic Commerce
### Step 1: Navigate to Integrations
From the UltraCart back office, go to **Configuration** → **Integrations**.
You will see **PayPal Agentic Commerce** listed under the **Channel Partners** section.
### Step 2: Open PayPal Agentic Commerce Settings
Click on **PayPal Agentic Commerce** to open the settings page.
### Step 3: Select Your StoreFronts
On the PayPal Agentic Commerce Settings page, you will see a list of your StoreFronts with checkboxes. Select the StoreFronts you want to enable for agentic commerce.
Each selected StoreFront will have its product catalog synced to PayPal and made available through AI assistant surfaces.
> **Important:** Only items that are assigned to a selected StoreFront will be distributed to agentic commerce surfaces. Make sure your items are assigned to the appropriate StoreFront(s) or they will not appear in AI chat results.
### Step 4: Save
Click the **Save** button to apply your changes.
That's it — your selected StoreFronts are now enrolled in PayPal Agentic Commerce. Products from those StoreFronts will begin appearing in supported AI chat surfaces as PayPal processes the catalog sync.
## Eligibility Requirements
To participate in PayPal Agentic Commerce, your store should meet the following criteria:
| Requirement | Details |
| --- | --- |
| PayPal Account | PayPal Business account connected to UltraCart |
| Product Feeds | Structured product catalog with complete item details |
| Policies | Documented fulfillment and return policies |
| Product Types | Digital or shippable physical goods (beauty, apparel, electronics accessories, digital gift cards) |
| Location | US-based merchants (additional countries planned) |
## Related Documentation
- [PayPal Integration](/checkout-payments/payments/paypal/paypal-integration) — Setting up PayPal as a payment method
- [AI-Powered Conversational Commerce](https://www.ultracart.com/resources/ai-powered-conversational-commerce) — Overview of how agentic commerce works
---
# Back Office
https://docs.ultracart.com/account-settings/back-office
doc_type: reference
# The Configuration Menu
UltraCart configuration covers all of the settings related to your online store. From this menu, you can configure your company information, your checkout settings, customize the look & feel of your cart, and set up your UltraCart back office system for your business. You can visit the Configuration section by navigating to:
:::info
Main Menu → Configuration
:::

| Name | Description |
| --- | --- |
| Account | Provides an overview of the accounts Plan, Billing, Users, and more. |
| [Accounts Receivable Retry](/account-settings/back-office/accounts-receivable-retry) | The Accounts Receivable Retry feature allows you to automatically retry payments on orders sent to Accounts Receivable, on a schedule that you can define. |
| Authorized Applications | Authorized applications are software programs that you have granted access to your UltraCart account. |
| [Auto Order Processing](/account-settings/back-office/auto-order-processing) | The Auto Order Processing section provides special settings for auto orders. |
| [Chargeback Processing](#page-not-found) | For handling chargeback disputes easy through an automated workflow process. |
| [Exporting Orders](/account-settings/back-office/back-office-exporting-orders) | The Exporting Orders screen allows you to configure export formats that will be used when exporting from certain sections of UltraCart. |
| [Linked Accounts](/account-settings/tutorials/linking-multiple-accounts) | UltraCart has the capability to link multiple accounts. When accounts are linked, users are synchronized across the various accounts. |
| [Old Order Handling](/account-settings/back-office/old-order-handling) | In order to prevent the Check Orders from piling up in accounts receivable, UltraCart can reject mail-in orders after a "user definable" number of days (typically 45 days). |
| [Order Retention](/account-settings/back-office/order-retention) | Allows UltraCart to retain your customer information so you can run reports and email marketing. |
| [Printable Documents](/account-settings/back-office/printable-documents) | The Printable Documents section is made up of 6 sections: Address Labels, Packing Slips, Invoices, Pick List, and Receipt. |
| [Quickbooks Terms and Lists](/account-settings/back-office/quickbooks-desktop-terms-and-lists) | QuickBooks Terms and Lists are applicable only to merchants that will download orders to QuickBooks and that will also utilize UltraCart's Customer Profiles. |
| [Report Delivery](/account-settings/back-office/report-delivery) | UltraCart can automatically e-mail you an executive summary of your UltraCart order traffic on a periodic basis. |
| [Service Plan](/account-settings/general-configuration/service-plan) | Legacy version of the Account page. |
| [UltraBooks](/account-settings/desktop-software/ultrabooks) | UltraBooks allows UltraCart merchants to import data directly to QuickBooks™ software. |
| [Users](/account-settings/general-configuration/users) | Provides a list of the users on the account with the ability to edit and change permissions. |
| Webhooks | Webhooks allow for notifications of events to be sent to another server. |
| [XML Postback](/account-settings/back-office/xml-postback) | A tool to transmit an xml copy of an order to a external server after it is placed. |
## Advanced
This view contains all of the areas provided in the basic view and a lot more. This view should only be using by advanced users of the system.

| Name | Description |
| --- | --- |
| [Auto Order Processing](/account-settings/back-office/auto-order-processing) | The Auto Order Processing section provides special settings for auto orders. |
| [Chargeback Processing](/orders-fulfillment/configuration-order-management/chargeback-processing-configuration) | UltraCart makes handling chargeback disputes easy through an automated workflow process. |
| [Exporting Orders](/account-settings/back-office/back-office-exporting-orders) | The Exporting Orders screen allows you to configure export formats that will be used when exporting from certain sections of UltraCart. |
| [Linked Accounts](/account-settings/tutorials/linking-multiple-accounts) | UltraCart has the capability to link multiple accounts. When accounts are linked, users are synchronized across the various accounts. |
| [Old Order Handling](/account-settings/back-office/old-order-handling) | Configuration options for how the system should handle old check payments that have not been paid. |
| [Order Retention](/account-settings/back-office/order-retention) | Allows UltraCart to retain your customer information so that you can run reports and email marketing. |
| [Printable Documents](/account-settings/back-office/printable-documents) | In this section merchants can configure Address and Shipping Label formats. |
| [QuickBooks Terms and Lists](#page-not-found) | QuickBooks Terms and Lists are applicable only to merchants that will download orders to QuickBooks and that will also utilize UltraCart's Customer Profiles. |
| [Report Delivery](/account-settings/back-office/report-delivery) | UltraCart can automatically e-mail you an executive summary of your UltraCart order traffic on a periodic basis. |
| [UltraBooks](/account-settings/desktop-software/ultrabooks) | Integration between UltraCart and QuickBooks™ works through a downloadable piece of software called UltraBooks. |
| [XML Postback](/account-settings/back-office/xml-postback) | UltraCart's XML Post Back feature gives merchants the opportunity to have orders automatically "posted" to their server shortly after the order is placed. |
---
# Account
https://docs.ultracart.com/account-settings/back-office/account
doc_type: reference
# About
The Account configuration page is the account overview page. The Account page consists of 6 sections:
1. Overview
2. Billing Information
3. Users and Permissions
4. Merchant Profile
5. Regional Settings
6. Account Status
# Overview section

The Overview section provides hyperlinks to the UltraCart [Terms of Service](https://www.ultracart.com/legal/terms-and-conditions.html) and [Privacy Policy](https://www.ultracart.com/legal/privacypolicy.html). You can also click to view the [Service Plan](/account-settings/general-configuration/service-plan) section.
You'll also see in this section, the Account Sign-up date, the current [Service Plan](/account-settings/general-configuration/service-plan), and the account status.
# Billing Information

To add/update your billing credit card details for account service billing, click on the hyperlinked Credit Card name/CC number.
:::info
**To Review the billing line items for the past 6 months, click on the hyperlinked Last Charge or Balance amount.**
:::
## Billing Activity

# Users and Permissions

Each UltraCart account has one owner user and can have additional staff users depending upon the service plan.
You can also assign users to groups for role specific permission assignments.
# Merchant Profile

The Merchant profile is the section where you will configure your company name, main website URL, the State/Zip/Country where your company is located.
# Regional Settings

You'll configure the appropriate regional settings for: Currency, Weight & Distance.
# Account Status
The Account Status will show a toggle button: Deactivate Account / Reactivate Account

Click the Deactivate button to close your account (final bill will be processed upon the deactivation of the account.)
# Related
[Service Plan](/account-settings/general-configuration/service-plan)
---
# Accounts Receivable Retry
https://docs.ultracart.com/account-settings/back-office/accounts-receivable-retry
doc_type: reference
# Accounts Receivable Retry
The Accounts Receivable Retry feature allows you to automatically retry payments on orders sent to Accounts Receivable on a schedule that you can define. These order can end up in Account Receivable based on a number of different setting within the account not limited to auto order payments that have been declined.
:::note
During trial mode this feature is free so you can see the effectiveness of it on your store. To continue using this feature past the end of the trial click **Continue After Trial**.
:::
# Settings
Main Menu → Configuration → (Back Office) Accounts Receivable Retry
# 
| Field Name | Description |
| --- | --- |
| Retry Day | The day that the retry will be attempted after the order is sent into Accounts Receivable. Max number of days 7. |
| Coupon Code | Allows you to apply a coupon / discount to the order. |
| Reject at End | Will reject the order at the end of the number of retries. If not configured the order will simply stay in Accounts Receivable |
| Notify Successful | Allows the system to sent an email if a retry payment is Successful. By default this email is set to the Owner User |
| Notify Rejection | Allows the system to sent an email if the retry payment is Rejected. By default this email is set to the Owner User |
These settings allow you to set the number of retires (max. 7) and when each retry will take place. In the example above we are doing a single retry a day after the order was sent into accounts receivable. Below we will show an example with 2 retries, one on the first day and another on the third day.
:::note

:::
# Email Notifications

Email notifications for successful and/or unsuccessful order authorization.

You can assign the email notifications to one or more your ultracart users by clicking the drop-down selection list and then clicking the users email address.
# Statistics
The statistics section will appear after orders begin processing.
## Default view

The statistics shows **conversion percentage** along with **total revenue**, **number of attempts**, **number of successes**, and any **discounts** applied to orders being retried from within accounts receivable.
You can change the statistics reporting period using the 'from' and 'to' address fields along the top right of the statistics section.
:::info
Please note that the statistics section only appears when there is activity within the month.
You can run the **Merchant Comments** report in the [reporting](/reports-analytics/reporting) area if you need to locate orders that were processed by the accounts receivables retry.
:::
## Detailed View
Clicking  button in the top right corner will open the detailed statistics view:

This view provides a snapshot of the performance of each of the scheduled configured retry days again showing you **conversion percentage** in a bar graph, along with **total revenue**, **number of attempts**, **number of successes**, and any **discounts **applied.
Clicking the graph  toggle button will display a bar graph displaying **Revenue By Day** performance:

The **Download **toggle button will prompt you with a download button:

Clicking the download button will generate a excel spreadsheet titled "arRetryReport.xlsx".

Helpful Links
[Accounts Receivable](/orders-fulfillment/order-management/accounts-receivable)
## Pricing
This is the same rate shown as **CC Rate** when you compare UltraCart service plans. Pricing for Accounts Receivable Retry is based on the service plan currently selected for your account:
- New Business = Not available
- Small = 3% of processed payments
- Medium = 2.5% of processed payments
- Large = 2% of processed payments
- Enterprise = 1% of processed payments
This fee applies only to payments that Accounts Receivable Retry successfully reprocesses. It is not charged on any other order, and it does not apply at all unless you enable Accounts Receivable Retry, since the feature is off by default. If you use your own payment gateway and it never sends an order to Accounts Receivable, this fee never applies to you.
# Related Documentation
[Accounts Receivable](/orders-fulfillment/order-management/accounts-receivable)
[Email Delivery](../../orders-fulfillment/order-management/review-order/email-delivery.md) covers the customer-facing billing update emails that accompany a retry schedule, which are separate from the Notify Successful and Notify Rejection notifications configured above. Those go to your own users; the billing update email is what asks the customer to fix the payment.
[Email Delivery and Engagement Queries](../../reports-analytics/tutorials/data-warehouse-bigquery/sample-queries/email-delivery-and-engagement.md) reports delivery, open, and click rates for those emails across the whole account, and correlates them with payment recovery.
---
# Auto Order Processing
https://docs.ultracart.com/account-settings/back-office/auto-order-processing
doc_type: reference
# Auto Order Processing
The Auto Order Processing section in UltraCart provides special settings to control the behavior of your auto orders. These settings are organized into six distinct sections: General, Notifications, Retry Settings, Payment Settings, Shipping Settings, and Links.
### Navigation
:::note
Main Menu → Configuration → Order Management → Auto Order Processing
:::
## General
The General settings allow you to configure how custom fields and coupons behave with auto orders.

### Fields
This section contains four configurable fields:
- **Propagate Custom Fields:** When checked, custom fields from the original order will be carried over to subsequent auto order rebills.
- **Remove None Option:** This setting removes, the None option from the Customer Selectable Auto order schedule, forcing the customer to select a schedule option.
- **Skip Coupons From Original Order:** When checked, coupons applied to the original order will not be applied to subsequent auto order rebills.
- **Ignore Coupon Expiration:** When checked, coupons applied to the original order will continue to be honored on rebills even if their expiration date has passed.
- **Do Not Bill Customer for Prior Missed Shipments:** If a customer restarts an order auto order, do not try to bill them for any missing order to catch up on the orders.
## Notifications
The Notifications section allows you to suppress specific email communications related to auto order events.
### Auto Order Skip Notification Settings
By checking the boxes on this screen, you will suppress the sending of emails related to events on the recurring orders.

### Fields
This section contains four configurable fields:
- **Skip Receipt Email:** By selecting this option the system will now skip the Receipt email for any recurring auto order. The customer will get no notification that a new order has been placed for them as part of an auto order.
- **Skip Shipment Notification:** By selecting this option, the system will no longer provide Shipment notification emails to the customer when an order is shipped.
- **Skip Problem Emails:** This setting suppresses the "Auto Order Update Billing" & "Auto Order Update Billing Decline" email notifications that would normally be sent out when a decline occurs on the processing of an auto order.
- **Skip 3rd Party Marketing Emails:** When the rebill occurs, don't enroll the customer in any 3rd party marketing email programs like iContact, GetResponse, MailChimp, etc.
- **Suppress Easy Cancel Emails:** If not otherwise suppressed, after the Receipt Email is sent to the customer for the auto order transaction, a second email is sent to the customer which provides them a cancellation link that would prevent any future orders from occurring.
- **Prohibit Cancellation Until:** Block the customer from canceling an auto order until at least a certain number of days after shipment. This prevents trial merchants from having the customer quick cancel on them and limiting their chance of rebill.
## Retry Settings
By default, UltraCart attempts to process a failed auto order three times with a three-day delay between attempts. If an auto order fails three times, it will be cancelled. Merchants can adjust the number of retries and the frequency of these attempts in this section.
:::note
Warning: Increasing the number of tries may impact your credit card processing fees.
:::
### Processing Retries Configuration

### Fields
- **Number of Retries:** Enter the desired number of times UltraCart should attempt to re-process a failed auto order. If left blank, the default is 3 retries.
- **Delay Between Retries (Days):** Enter the number of days UltraCart should wait between retry attempts. If left blank, the default is 3 days.
- **Recommendation:** We recommend a delay of at least 3 days. This provides sufficient time for a decline attempt, which can create a temporary "hold" against the card's available credit for the attempted transaction amount, to expire (typically 2-3 business days).
- **Try Cancel Item After Max Retries:** When checked, this setting will trigger the processing of an order with a **cancel item** if one has been configured and the auto order reaches its maximum number of retries.
- **Send Failures to Accounts Receivable:** When checked, failed auto orders will be sent to Accounts Receivable, allowing you to follow up with the customer directly.
## Payment Settings
The Payment Settings section allows you to restrict certain credit card types from being used for _recurring_ auto orders.
:::note
Warning: If you restrict a card type (e.g., Visa), a customer can still use their Visa for the original auto order purchase. However, when the recurring order processes (e.g., a month later), it will fail. Ensure you understand the ramifications of this feature before using it. If in doubt, contact UltraCart Support.
:::

### Fields
- **"Prohibit Credit Cards That Expire In \_\_ Months"**: This setting validates the customer's credit card, requiring its expiration date to be equal to or greater than the defined number of months.
- **Prohibit E-Checks**: If e-checks are a configured payment method, selecting this option will suppress the E-Check form from appearing as a payment method for auto orders.
- **Auth Test Zero Dollar Orders**: (\*\*\*Only appears if valid for your configured payment gateway) If selected, this activates settings within the auto order tab of the item editor:
- **"Auth Test Amount"**: Define the amount the card should be tested for authorization. If left blank, the default test amount is $1.
- **"Auth Test Amount for Future Order"**: Allows you to define an amount to test for the first future authorization. If successful, it then proceeds to the auth test amount for the zero-dollar purchase on day one. The future authorization remains open but is not captured.
- **Use Same Rotating Transaction Gateway for Rebills**: (\*\*\*Only appears if valid for your configured payment gateway) This overrides the default rotating gateway rules and ensures the same Rotating Transaction Gateway (RTG) used on the original order is maintained for rebills.
- **Delay Rotating Transaction Gateway Cascade**: (\*\*\*Only appears if valid for your configured payment gateway) By default, the cascade (rollover) to the next gateway initiates on a decline. If this setting is selected, a 6-hour delay occurs before the cascade.
- **Restrict American Express**: Restricts American Express from being used as a payment method for auto order purchases.
- **Restrict Diners Club**: Restricts Diners Club from being used as a payment method for auto order purchases.
- **Restrict Discover**: Restricts Discover from being used as a payment method for auto order purchases.
- **Restrict JCB**: Restricts JCB from being used as a payment method for auto order purchases.
- **Restrict MasterCard**: Restricts MasterCard from being used as a payment method for auto order purchases.
- **Restrict Visa**: Restricts Visa from being used as a payment method for auto order purchases.
## Shipping Settings

### Field
- **Ship Via Lowest Cost Method**: This setting allows the system to find the lowest cost shipping method and use it for any future auto orders.
### Cancel Reasons
This configuration allows you to set custom cancelation reasons that are required to be selected when an auto order is cancelled.

Once the options configured, they will be displayed within the Auto order editor screen as shown below. This option is only present if configured and are required to cancel an auto order.

You can then report on this data, to see why customer are cancelling their auto orders with the Cancel Reason Report
[Cancel Reason Report](/reports-analytics/reporting/auto-order-reports/cancel-reason-report)
### Window
The Window settings allow you to select a customer time period for the system to process your auto orders, by default the system starts this process at 12 am (midnight) Eastern. If you would like the system to process your auto order later in the day you can use the following setting to set when the system should start processing your auto order and end processing your auto orders. The window must be at least 4 hours
:::note
It is still possible for auto order to process outside of this window if the processing is being help up by a delay from the payment gateway.
:::

### Links
This simply provides a cancelation link that can be placed on your website or within an email so that the customer can cancel their auto order at any time. This link will be different based your merchant ID and storefront URL.

# Related Documenation
[Auto Order Tab](/items-catalog/item-management/item-editor/auto-order-tab)
---
# Notifications about Auto Order Problems
https://docs.ultracart.com/account-settings/back-office/auto-order-processing/notifications-about-auto-order-problems
doc_type: explanation
# Notifications about Auto Order Problems
As UltraCart attempts to process auto orders each day it can send users on an UltraCart account notices about problems that are occurring. Currently the notifications cover:
- Orders canceled due to too many failed attempts
- Expired cards
- No shipping method available
- Decline Warnings
When these problems occur a user can take proactive steps to contact the customer and address the problem or fix their configuration issue (in the case of no shipping method availability). To receive these notices the user must have the auto orders notification configured. To configure this notification go to:
:::note
[Main Menu](https://ultracart.atlassian.net/wiki/404?key%3Dmerchant%3Bsearch%3Fq%3D%2FmainMenu.do) → [Configuration](https://ultracart.atlassian.net/wiki/404?key%3Dmerchant%3Bsearch%3Fq%3D%2Fconfiguration%2FconfigurationMenuLoad.do) → [Users](https://ultracart.atlassian.net/wiki/404?key%3Dmerchant%3Bsearch%3Fq%3D%2Fconfiguration%2FuserListLoad.do) → Edit
:::
Under the notifications you simply need to check the "Auto Orders" notification as shown below.

---
# Understanding Emails Related to Auto Order Processing
https://docs.ultracart.com/account-settings/back-office/auto-order-processing/understanding-emails-related-to-auto-ord
doc_type: reference
# Understanding Emails Related to Auto Order Processing
During the life-cycle of an auto order there are numerous emails that can go out to the customer and/or the merchant. This document will explain the types of emails that go out, to whom, and the event that triggers the sending.
| Recipient | Trigger Event | Editable Template | Suppressible | Notes |
| --- | --- | --- | --- | --- |
| Customer | Pre-shipment Notification | Y (auto order preshipment) | N/A - only sent if the merchant configures it | The pre-shipment notice is sent to the customer X days before the actual shipment takes place. The preshipment notice is configured on the auto order schedule along side the delays and steps. |
| Merchant (users with auto orders notification selected) | No shipping methods available | | | This email occurs when UltraCart tries to rebill an item and no shipping methods can be determined for the new order it is trying to process. The email will contain details of the cart contents to assist the merchant in troubleshooting their configuration issue. Until this issue is corrected the auto order will not successfully process. |
| Customer | Declined Card | Y (auto order update billing decline) | Y - if "Skip Problem Notice Email" is selected | Sends the customer a note that their card has been declined on the attempted rebill. The number of times this can be send is configured under Main Menu -> Configuration -> Auto Order Processing. The email contains a link for the customer to update their billing information. :::info ### Default Message You should review and update the message to your preference. By default the message states that the auto order has been cancelled. You may wish to reword the defaulted message. Below is the default message: groovy ::: |
| Customer | Merchant clicks the "Send Billing Update Email" button in the auto order editor | Y (auto order update billing) | | Sends the customer the "auto order update billing" message. :::info ### Default Message You should review and update the message to your preference. By default the message states that the auto order has been cancelled. You may wish to reword the defaulted message. Below is the default message: groovy ::: |
| Merchant (users with auto orders notification selected) | Declined Card | | | Let's the merchant know that a rebill has failed in case they want to proactively contact the customer to get updated billing information. |
| Customer | Canceled (Billing Failure) | Y (auto order update billing) | Y - if "Skip Problem Notice Emails" is selected | Once an auto order has been canceled due to billing failures, UltraCart can email the customer with a link to update their credit card information and reactivate the recurring billing. |
| Merchant (users with auto orders notification selected) | Canceled (Billing Failure) | | | Once an auto order has been canceled due to billing failures, UltraCart sends the merchant a notification in case they want to be pro-active with the customer and obtain updated information to reactivate the billing. |
| Customer | Expired Card | N | Y - if "Skip Problem Notice Emails" is selected | When a card is expired, UltraCart will send the customer an email with a link to update their billing information. |
| Merchant (users with auto orders notification selected) | Expired Card | | | When a card is expired, UltraCart will send the merchant a notice about the expired card in case they want to be pro-active with the customer in obtaining new billing information. |
| Customer | Canceled (By Customer) | N | Y - if "Skip Problem Notice Emails" is selected | An order can be canceled by the customer via the following ways: 1. They use the self service form (the cancel link given to the merchant to put on their website at the bottom of the auto order processing configuration screen). 1. If they enter their email, first, last, and last 4 digits of their card the cancellation is instant. 2. If they enter only their email then the system will send them an email with a link to click in order to cancel for security reasons. 2. Via enabled selfservice Auto Order Management options in the [My Account Customer Portal](/customers-crm/my-account-customer-portal) 3. A program written by the merchant to call the Order Management Web Service makes a call to one of the two cancel as customer API functions available. 4. \*\*\*The merchant uses the auto order editor and clicks the cancel as customer button. |
| Customer | Cancelled (clicking "Cancel" button or unselecting the "enabled" checkbox in the auto order editor then saving the change.) NOTE: Manually selecting the “Disabled” status will also trigger this notifcation. | N | Y - In the storefronts "Emails" menu choose "Delivery Options" then select the "Skip notification" checkbox for the "Auto order cancel" | Auto order cancelling can occur: 1. Clicking the cancel button that appears in the auto order search results 2. The "Cancel" button in the auto order editor 3. Unselecting the "enabled" checkbox in the auto order editor then saving the changes. 4. If the cancel option is enabled in the My Account, Customer portal, and the customer uses that to cancel the auto order. 5. If enabled, and the Customer uses the “Easy Cancel” transactional email notification (**Auto Order - Confirmation)** |
[Auto Order FAQ](/guides/ultracart-documentation/tutorials/item-management-tutorials/auto-order-faq)
[Email Templates - Email Notifications](/account-settings/email-notifications/email-templates-email-notifications)
---
# Back Office - Exporting Orders
https://docs.ultracart.com/account-settings/back-office/back-office-exporting-orders
doc_type: how-to
## Introduction
The **Exporting Orders** feature in UltraCart allows merchants to configure and save export mappings for order data. These exports can be used to integrate with third-party accounting, shipping, or ERP systems. UltraCart supports flexible export options to accommodate a wide variety of legacy back-office environments.
## Prerequisites
> **Prerequisite:** User accounts must have appropriate permissions enabled to configure and run exports. See the [User Permissions](#) section below.
:::note
[Home](https://ultracart.atlassian.net/wiki/404?key%3Dmerchant%3Bsearch%3Fq%3D%2FmainMenu.do) → [Configuration](https://ultracart.atlassian.net/wiki/404?key%3Dmerchant%3Bsearch%3Fq%3D%2Fconfiguration%2FconfigurationMenuLoad.do) → [Exporting Orders](https://ultracart.atlassian.net/wiki/404?key%3Dmerchant%3Bsearch%3Fq%3D%2Fconfiguration%2FexportOrderListLoad.do)
:::
# Step-by-Step Instructions
1. Navigate to Exporting Orders
:::note
Main Menu → Configuration → Exporting Orders
:::
If no exports have been configured, you’ll be prompted to create a new mapping.
### 2\. Create a New Export Mapping
Click the **New** button to begin. Merchants can create and save multiple mappings for use in different departments (e.g., Accounts Receivable vs. Shipping). This is especially useful if those departments require different fields.

### Name the Mapping
Enter a descriptive name in the **Name** field. This helps you identify the export format when executing an export.

### 4\. Choose Export File Format
UltraCart supports the following file formats:
- **XML** (recommended)
- **CSV** (comma-delimited)
- **TXT** (tab-delimited)
- **Excel (.xls)**
- **Mail Order Manager 5**
UltraCart can export information in XML (Extensible Markup Language), CSV (Comma Separated Values), TXT (tab Delimited Text) or Excel formats, and Mail Order Manager 5. XML has become the standard information exchange format between different systems. XML is the preferred format of UltraCart. XML can represent information that does not have a flat structure. Orders are an excellent example of information that does not conform to a flat structure because each order can contain numerous items, etc. Due to this fact the XML format can represent the entire order information while the CSV format can only contain summary detail (no item detail).

**Tip:** Use **XML** when exporting complex order data (e.g., multiple items per order), as it supports nested structures better than flat formats like CSV.
#### XML DTD or XML W3C Schema
UltraCart can export orders in 2 different XML formats: DTD and W3C Schema. The choice of export format depends mainly on which tools will be used to process the export. As a general rule, if you are utilizing the export file with Microsoft tools or Microsoft Access, you should use the W3C schema format. All other languages should generally utilize the DTD format. Please consult the documentation included with your processing tool for more information.
### 5\. Set Alternate MIME Type (Optional)
Default MIME types may cause files to open in the browser. To force download or use with custom applications, enter an alternate MIME type (e.g., `application/octet-stream`).

Type the alternate mime type in the box provided.
### 6\. Configure Kit Filtering (Optional)
If exporting kit items:
- **Filter Kit Items** – Exclude the parent kit item, spreading cost to components.
- **Filter Kit Components** – Exclude the components, rolling their weight up to the kit item.
Only one of these can be selected at a time.

### Advanced Options

### 7\. Set Default Export Mapping
When exports are run from **Accounts Receivable** or **Shipping**, UltraCart will use the mapping you select as the default.
> **Tip:** Set a default export mapping for both departments to ensure consistent format and output.

Click on the check box for the file format desired.
### 8\. Configure Spreadsheet Columns (Field Mapping)
For flat file exports (CSV, TXT, Excel), map each field you want to export:
- Click **Add All Fields** to auto-populate the mapping.
- Or use the drop-down to add specific fields one at a time.
- Optional: Check **Field Names in First Row** to include headers.
#### Column Definitions
| Column | Description |
| --- | --- |
| **Field** | Choose UltraCart fields to include and set their order. |
| **Name** | Optional. Rename fields in the output file. |
| **Custom Value** | Optional. Insert static text or identifiers at any point in the row. |

From this screen you can either select to "add all fields" or by using the drop down select the number of fields you would like to add to the export.
There are two columns in the field mapping screen; Field and Name (optional). A third column will sometimes appear for custom values (explained later).
Field Name
This column allows you to select the field(s) you want exported and in what order. Simply select each field in the order desired as you go down the column. If you populated all boxes and need to add more, click the "add more fields" button in the title bar.
Add all Fields
You can populate the Field column with all of UltraCart fields by clicking the "add all fields" button located in the title bar.
Filed Names in first row (checkbox)
This feature, when checked, will place the Field name or optional name (if configured) in the first row of the exported file. This is very helpful for merchants that import into an existing data base file and need to match up the fields.
Name (optional)
This field allows you change the Field Name to one of your liking in the output (exported) file. Type the name for each field you want to change in the text box to the right.
Custom Value* (optional)
The first field listed in the drop-down list for the Field Column is "Custom". You can add several Custom Value fields anywhere you chose. When selected, the Name column will shift to the right making room for a new column and text box. Here you can enter any data that you want to appear at that specific point in every record. It will not become part of the UltraCart Order record, only the export.
Below is an example where the merchant configured (mapped) the export to insert 2 Custom fields; a Depot Number at the beginning of each record and a "Department Code" just after the Shipping Date field.

#### 9\. Include Custom Fields 1–7
Custom fields allow you to include external tracking data (e.g., site name or campaign). To populate:
1. Add a custom field to your buy URL:
```
CopyEdit
```
`&CustomField1=YourValue`
2. Map `CustomField1`–`CustomField7` in your export.
**Mapping the Custom Field**
Within the selectable field listing is Custom Fields 1 thru 7. Simply select each custom field desired and enter a name (optional) of your liking.
#### 10\. Remove a Field
To remove a mapped field:
1. Click the red **X** icon next to the field.
2. Click **Save**.
3. Reopen the mapping to confirm the field is removed.

### 11\. Save and Preview
- Click **Save** to store the export configuration.
- Click **Save and Preview** to generate a sample output.
- **XML** opens in the browser.
- **CSV, TXT, Excel** downloads a sample file.

### User Permissions
:::info
### User Login Permissions
In order for a user to run a the order export, they will need the following user permissions:
- **Edit Settings** (Required to be able to edit the "export mappings" used to generate the order exports)
- **Access Accounts** (Receivables (required to run the export from the export order page)
:::
# Frequently Asked Questions
### Can I export all orders at once?
> **Answer:** Excel exports are limited to 20,000 records per file. For merchants with high order volume, break your export into smaller date ranges. This limitation does not apply to XML exports.
### Can I create a report that includes the Merchant comments and/or Special Instructions?
> **Answer:** UltraCart’s Order Export feature lets you build reusable export mappings that pull **Merchant Comments** (internal notes added by your team) and **Special Instructions** (customer-provided notes) together with all standard fulfillment data. This creates a single CSV (or other format) file perfect for warehouses, 3PLs, or picking/packing processes.
## Step-by-Step Configuration
1. Navigate to **Main Menu → Operations → Order Management → Export Orders**.
2. In the **Export Mapping** dropdown, choose **New** (or **Manage Mappings** if editing an existing one).
3. Give the mapping a clear name, e.g., “Fulfillment Export – Comments Included”.
4. Select output format (CSV is recommended for most fulfillment systems).
5. Add these key fields (search or browse the field list):
**Core Order Fields**
- Order ID
- Order Date
- Merchant Comments
- Special Instructions
**Shipping & Customer Details**
- Ship To First Name / Last Name
- Ship To Company
- Ship To Address 1 & 2
- Ship To City, State, Postal Code, Country
- Ship To Phone
- Ship To Email
**Fulfillment Item Details**
- Item ID / SKU
- Item Description
- Quantity
- Price (or Cost if using your internal cost)
- Shipping Method
**Additional Useful Fields**
- Order Status
- Order Total
- Gift Message (if used)
- Tracking Number (for completed orders)
6. Arrange the columns in the exact order your fulfillment team or system needs.
7. Save the mapping.
## How to Run the Export
1. Return to the Export Orders screen.
2. Select your new mapping from the dropdown.
3. Apply filters (date range, status = “Pending Fulfillment”, etc.).
4. Click **Export** to generate and download the file.
#
Next Steps
- [User Management: Assigning Permissions](/account-settings/general-configuration/users/user-configuration-screen)
- [Accounts Receivable Overview](/orders-fulfillment/order-management/accounts-receivable)
- [Shipping Configuration](/orders-fulfillment/shipping)
---
# Integration Programming Techniques
https://docs.ultracart.com/account-settings/back-office/back-office-exporting-orders/integration-programming-techniques
doc_type: explanation
The intention of this section is to point merchants in the appropriate direction to have integration programming done. Integration programming is necessary to convert UltraCart's XML and CSV formats into the appropriate format for the legacy system that will be importing. Merchants should have a software developer create an application in languages such as Java, VB, Perl, or C/C++ that is capable of reading the XML or CSV format, transforming the information into the appropriate format, and outputting a file suitable for import by the legacy system. If merchants are using XML as the export format then XSLT is an excellent technology to convert from one XML format to the legacy systems format. After writing an integration program, configure the web browser to associate the custom mime type with the application. The integration application is a type of helper application in the browser configuration.
# Export (from) Locations
Merchants can export orders from two different locations; Accounts Receivable or Order Management. As mentioned earlier, merchants can configure different export settings for each of the different export locations.
# Accounts Receivable
Clicking on the Export Orders button from the Accounts Receivable Department will not offer a screen to select the export type. These will default to the format you set for these departments at Configuration > Export Orders. If you did not define a format for these departments, orders will be exported in XML format.
## Accounts Receivable Screen Heading

## Order Management (Tools)

---
# NetSuite
https://docs.ultracart.com/account-settings/back-office/netsuite
doc_type: how-to
# NetSuite
[Oracle NetSuite](https://www.netsuite.com/portal/home.shtml) is a cloud based Enterprise Resource Planning (ERP) suite that manages financials, inventory, order processing, and customer relationship management on a single platform.
UltraCart's NetSuite integration sends your orders into NetSuite as **Sales Orders**, creating or updating the customer record each order needs. It connects using NetSuite's SuiteTalk web services with Token Based Authentication (TBA), so no NetSuite user password is stored in UltraCart.
Orders flow in one direction, from UltraCart into NetSuite. Nothing is sent back from NetSuite into UltraCart, including order status, tracking numbers, and invoice information.
## What the integration creates
For each order, the integration creates or updates the following records in NetSuite.
| Record | What happens |
| --- | --- |
| **Customer** | Located if one already exists, otherwise created |
| **Customer address book** | Missing billing and shipping addresses are added to the customer |
| **Customer subsidiary** | The order's subsidiary is added to the customer if not already assigned |
| **Sales Order** | Created with line items, addresses, shipping, and payment method |
The integration modifies existing NetSuite customer records when it needs to. If a customer is found but does not have the address used on the order, that address is added to their address book, and the same applies to subsidiary assignment. NetSuite requires both before it will accept the sales order.
The integration never deletes anything, and never modifies a sales order after it has been created.
## Before you begin
Complete the following in NetSuite before configuring the integration.
- Enable the **SOAP Web Services** feature on your NetSuite account.
- Create a **Token Based Authentication** integration record and an access token, with permission to search and create Customers and Sales Orders.
- Confirm the **subsidiary** you want orders assigned to exists and is active.
- Confirm the **location** you want orders assigned to exists and is active.
- Confirm every product you sell exists in NetSuite as an **active item**.
- Confirm your **payment method** names match the payment types and credit card brands you accept, such as Visa, MasterCard, American Express, Discover, and PayPal.
## Navigation
:::info
Main Menu → Configuration → (middle menu) Integrations → NetSuite
:::
## Configuration
Enter all seven fields on the NetSuite configuration screen, then click **Save**.

| Field | Where it comes from |
| --- | --- |
| **Account** | Your NetSuite account ID |
| **Consumer Key** | Your NetSuite TBA integration record |
| **Consumer Secret** | Your NetSuite TBA integration record |
| **Token** | Your NetSuite access token |
| **Token Secret** | Your NetSuite access token |
| **Subsidiary** | The name of the subsidiary orders should be assigned to |
| **Location** | The name of the location orders should be assigned to |
Enter **Subsidiary** and **Location** as names, exactly as they appear in NetSuite, not as internal IDs.
### Item configuration
Set each UltraCart item's accounting code to the matching NetSuite **Item ID**, or keep your UltraCart item IDs identical to your NetSuite item IDs. The integration uses the accounting code when one is set, and falls back to the merchant item ID when it is not.
If any item on an order cannot be matched to an active NetSuite item, the entire order fails to import.
### Shipping method configuration
:::warning
Every other mapping in this integration is done by name. Shipping methods are the exception.
Set the accounting code on each UltraCart shipping method to the NetSuite shipping method's **internal ID**, meaning the numeric ID rather than the name. If it is not set, orders that require shipping will fail to import.
:::
## When orders are sent
Orders transmit to NetSuite after the **payment phase**, as soon as payment has been processed.
The sequence is:
1. The order is placed and moves through your normal order flow.
2. Payment is processed.
3. A record is queued for transmission.
4. A background service sends the order to NetSuite.
Orders rejected from [Accounts Receivable](./accounts-receivable-retry.md) before payment is processed are never sent. Once the integration is enabled, every other order is queued.
**There is no backfill.** Only orders reaching the payment phase after you save your credentials are sent to NetSuite. Orders placed before you enabled the integration are not imported, and there is currently no way to send them. Enter those into NetSuite manually if you need them there, and plan your go live date accordingly.
## How your order data maps into NetSuite
### Customers
The integration looks for an existing customer before creating a new one.
When the order has a company name on the billing address, it searches your NetSuite customers by company name and uses the first active match. When there is no company name, it searches by first and last name, then confirms the match if either the customer has an address with a matching postal code, or the customer's email address matches the order's billing email.
When no match is found, a new customer is created. Orders with a company name are created as a company customer, and orders without one are created as an individual person. First name, last name, email, daytime phone, and evening phone are carried over. Billing and shipping addresses are added to the customer's address book, and when both addresses are the same, a single address is created and marked as the default for billing and shipping.
:::tip
Company name matching is a partial match. If you have customers with similar company names, such as "Acme" and "Acme Holdings", an order can attach to the wrong one. Distinct company names in NetSuite give the most reliable results.
:::
### Line items
Each item is matched against the **Item ID** in NetSuite, and the item must be active. Kit components are not sent individually, so only the parent kit item appears on the sales order.
Each line is sent with its quantity and its extended amount after any item level discount has been applied.
Supported NetSuite item types are inventory items, non inventory items (sale, resale, and purchase), service items, discount items, other charge items, subtotal items, payment items, and markup items.
### Shipping and shipping cost
An order requires shipping unless its shipping weight is zero, or no shipping method was selected. When shipping is required, the shipping cost sent to NetSuite is the shipping and handling total minus any shipping discount, and the shipping method is set from that method's accounting code.
### Payment methods
The payment method on the order is matched by name against your active NetSuite payment methods. For credit card orders the card brand is used, such as Visa, MasterCard, or American Express. If the card type is not available on the order, Visa is assumed.
When no matching payment method is found, the order still imports and is simply created without a payment method. This is the expected behavior for purchase orders, and results in the order being billed as an invoice rather than a cash sale.
### Order status
The status of the sales order created in NetSuite depends on the order.
| Your order | NetSuite sales order status |
| --- | --- |
| Requires shipping | **Pending Fulfillment** |
| No shipping required, order total greater than zero | **Pending Billing** |
| No shipping required, order total of zero | **Pending Fulfillment**, with all lines closed |
The last row covers free and zero dollar orders. They are recorded in NetSuite for your records, but all lines are closed so they are not fulfilled or billed.
### Dates, order numbers, and tax
The date on the NetSuite sales order is the date the order was imported into NetSuite, which can differ from the date the order was placed in UltraCart.
Your UltraCart order ID is stored in the **Memo** field of the NetSuite sales order. Use it to cross reference an order between the two systems.
Tax amounts are not sent to NetSuite. NetSuite calculates tax according to your own account configuration.
## Duplicate protection
Before creating a sales order, the integration checks whether a transaction already exists in NetSuite with the UltraCart order ID in its **Memo** field. When one is found, the order is treated as already imported and nothing further is created, so an order can be safely resent without creating a duplicate.
Because a sales order is never updated after it is created, changes made to an order in UltraCart after it has been imported are not reflected in NetSuite, and resending the order does not update it.
## Error Queue
Orders that fail to transmit are not lost. They stay queued and are retried automatically.
The **Error Queue** at the bottom of the NetSuite configuration screen lists each order that failed, showing the **Order ID** and the **Error** returned. It displays "None" when empty. Each row gives you the option to retry that order immediately rather than waiting for the next scheduled attempt, or to remove that individual record.

### Automatic retries
Every queued order is retried every 24 hours, indefinitely, until it either succeeds or is removed from the queue.
Most problems are therefore self correcting. If an order failed because a product was missing in NetSuite, or a shipping method accounting code was not set, correct the underlying configuration and the order imports on its own within 24 hours with no further action. To avoid waiting, use the retry option on that row.
:::warning
The **Clear Queue** button removes every record in the queue at once, and those orders are permanently abandoned. They are never sent to NetSuite and cannot be restored, so any order you clear has to be entered into NetSuite by hand. Use the per row controls when you only need to deal with a single order.
:::
### Common errors
| Message | What it means | How to fix it |
| --- | --- | --- |
| **Unable to locate subsidiary** | The configured subsidiary name does not match an active NetSuite subsidiary | Check the spelling of the **Subsidiary** field and confirm the subsidiary is active in NetSuite |
| **Location must be configured before import can occur** | The **Location** field is blank | Enter the NetSuite location name on the NetSuite configuration screen |
| **Unable to find location** | The configured location name does not match an active NetSuite location | Check the spelling of the **Location** field and confirm the location is active in NetSuite |
| **Unable to locate item \[X\] in NetSuite** | An item on the order has no matching active NetSuite item | Create the item in NetSuite, activate it, or correct the item's accounting code in UltraCart so it matches the NetSuite Item ID |
| **Shipping method must be configured with NetSuite internal id as the accounting code** | The order's shipping method has no accounting code | Set the accounting code on that UltraCart shipping method to the NetSuite shipping method's internal ID |
| **Unable to establish customer** | The customer could not be found or created in NetSuite | Usually a NetSuite permission issue, or a required field enforced by your NetSuite configuration. Contact UltraCart Support |
| **Customer record did not contain appropriate billing or shipping address record** | The order's address could not be matched to or added to the customer's NetSuite address book | Often caused by NetSuite address validation rules or restricted permissions. Contact UltraCart Support |
| **Unexpected internal error** | An unhandled error occurred | Contact UltraCart Support. The details are captured automatically |
Errors returned directly by NetSuite, such as a required custom field, a closed accounting period, or an insufficient permission response, are passed through exactly as NetSuite worded them.
### If orders suddenly stop importing
The most common causes, in order:
1. An expired or revoked NetSuite access token. TBA tokens can be revoked in NetSuite, and permission changes to the integration role also break the connection.
2. A new product not yet created in NetSuite, or created but left inactive.
3. A new shipping method added in UltraCart without its accounting code set.
4. A renamed subsidiary or location in NetSuite.
Because retries continue every 24 hours, correcting any of these clears the backlog automatically.
## What is not included
The following are not currently part of this integration.
| Not supported | Detail |
| --- | --- |
| **Backfill of historical orders** | Only orders placed after the integration is enabled are sent |
| **Order updates** | Changes made in UltraCart after import are not pushed to NetSuite |
| **Cancellations, refunds, and returns** | Not sent to NetSuite |
| **Coupons and order level discounts** | Not sent as discount lines. Item level discounts are reflected in each line's amount |
| **Tax** | Not sent. NetSuite calculates its own |
| **Inventory synchronization** | Stock levels are not pulled from NetSuite into UltraCart |
| **Fulfillment and shipment records** | Item fulfillments are not created |
| **Invoicing and payment application** | Invoices and customer payments are not created |
| **Status or tracking write back** | Nothing flows from NetSuite back into UltraCart |
| **Multiple currencies** | Orders are imported in your primary currency |
| **Custom fields** | Custom NetSuite fields are not populated |
| **Departments, classes, and sales reps** | Not assigned. Only subsidiary and location are set |
## Getting help
A detailed log is recorded for every import attempt, successful or not, and is retained for 90 days. It shows each step the integration took, including the subsidiary, location, customer, and items it resolved, along with the request sent to NetSuite and the response received.
When contacting UltraCart Support about a NetSuite import, include the UltraCart order ID, the date and time of the attempted import, and the error message shown in the Error Queue.
## Related Documentation
- [Oracle NetSuite SOAP Web Services](https://docs.oracle.com/en/cloud/saas/netsuite/ns-online-help/chapter_N3427197.html) - NetSuite's documentation for enabling and using SuiteTalk
---
# Old Order Handling
https://docs.ultracart.com/account-settings/back-office/old-order-handling
doc_type: how-to
# Configuring Check Order Management
This guide explains how to configure UltraCart to automatically reject outstanding check orders after a specified period and how to enable reminder emails for customers with unfulfilled check orders.
## Overview
UltraCart provides tools to manage check orders efficiently, helping prevent them from accumulating in your accounts receivable. You can set a timeframe after which unfulfilled check orders are automatically rejected. Additionally, you can configure the system to send reminder emails to customers, prompting them to complete their mail-in payments.

## Steps
### Step 1: Accessing Check Order Configuration
1. Log in to your UltraCart account.
2. Navigate to Main Menu > Configuration > Order Management > Old Order Handling
note
**Note:** The exact path to this setting may vary slightly based on your UltraCart account configuration. Consult your UltraCart dashboard or contact support if you cannot locate it.
**Note:** The exact path to this setting may vary slightly based on your UltraCart account configuration. Consult your UltraCart dashboard or contact support if you cannot locate it.
### Step 2: Setting the Check Order Rejection Period
1. Locate the setting labeled "Reject mail-in orders after X days".
2. In the provided input box, enter the desired number of days after which check orders should be automatically rejected if payment has not been received.
- **Typical Value:** 45 days.
- **Maximum Suggested Value:** 365 days.
:::info
**Tip:** Setting an appropriate rejection period helps keep your accounts receivable tidy. Even if a check arrives after rejection, the order can still be retrieved and processed manually.
:::
### Step 3: Enabling Check Order Reminders
1. Locate the checkbox option labeled "Remind customers about old orders."
2. Check this box to enable automatic reminder emails to customers for outstanding check orders.
note
**Note:** When enabled, UltraCart typically sends these reminders approximately two weeks after the order date, which often encourages customers to complete their payments.
**Note:** When enabled, UltraCart typically sends these reminders approximately two weeks after the order date, which often encourages customers to complete their payments.
### Step 4: Saving Your Configuration
1. After setting the rejection period and enabling reminders (if desired), click the **Save** button to apply your changes.
## Expected Outcome
Once configured, UltraCart will automatically manage your check orders:
- Any check order that remains unpaid beyond the specified rejection period will be automatically moved to a rejected status.
- If enabled, customers with outstanding check orders will receive a reminder email after two weeks, encouraging them to send their payment.
---
# Order Retention
https://docs.ultracart.com/account-settings/back-office/order-retention
doc_type: how-to
# Configuring Order Retention
This guide explains how to manage your order history retention settings in UltraCart, allowing you to control how long your customer data is stored for marketing and historical analysis.
## Introduction
Retaining your customer's order history is a powerful tool for effective marketing, enabling you to engage with both new and long-standing customers through targeted email campaigns and re-engagement strategies. UltraCart automatically provides **one year of order history retention absolutely free.** This allows you to leverage historical purchasing data for marketing initiatives and to set up [Auto-Order Sequences](https://www.google.com/search?q=%23about-auto-orders) at any time.
By default, UltraCart retains your order history for an infinite number of years, as per our Terms and Conditions. Please note that retaining data beyond the initial free year incurs a charge of **$7 per month for each additional year of data actually retained**. You will receive a monthly email notification 30 days before any order older than your specified retention threshold is scheduled for deletion, giving you the opportunity to adjust your settings if needed.
:::note
Warning: If you choose to decrease your order retention period, be aware that once order information is deleted by the system, it cannot be recovered. To prevent data loss, it is highly recommended to perform regular Order downloads of any historical information that falls outside your new retention threshold. UltraCart processes deletions on a monthly calendar, meaning the oldest month's data is purged at the beginning of each new month. We advise performing downloads on a monthly or yearly basis to ensure you consistently save historical data before it is deleted.
:::
## Navigation
To access order retention settings, navigate to:
:::note
`Configuration` → `Order Management` → `Order Retention`
:::
## Steps to Configure Order Retention
1. Log in to your UltraCart account.
2. Navigate to `Configuration` → `Order Management` → `Order Retention`.
3. On the Order Retention page, locate the dropdown menu titled "Select the number of years you want your records retained at UltraCart."
4. From the dropdown menu, choose your desired number of years for order history retention.
5. Click the **Save** button to apply your changes.

## About Auto Orders
Active (enabled) auto orders have a separate retention policy:
- **Active Auto Orders:** These records are retained as long as the auto order remains active.
- **Disabled/Inactive Auto Orders:** Once an auto order is disabled or becomes inactive, its record will be available for purging at the end of that month's billing period, subject to the general order retention settings.
## About Rejected Orders
Rejected orders have a fixed retention period:
- Rejected orders are retained for **1 year only**, regardless of your general order retention settings.
## Performing Order Downloads
To download your order history for archiving, you can typically find this option within your UltraCart account under `Order Management` or `Reports`.
:::info
Tip: Regular downloads (e.g., monthly or annually) are crucial to prevent loss of valuable historical data if you decide to reduce your online retention period.
:::
## Conclusion
By configuring your order retention settings, you maintain control over your valuable customer data, balancing your marketing and reporting needs with data storage costs. Always remember to download historical data if you opt for shorter retention periods.
## Next Steps
- Explore UltraCart's [Order Export options](https://www.google.com/search?q=link/to/order-export-doc) to set up automated data backups.
- Review your current marketing strategies to leverage your retained customer history effectively.
---
# Printable Documents
https://docs.ultracart.com/account-settings/back-office/printable-documents
doc_type: reference
# Navigation
:::note
Configuration → Order Management → Printable Documents
:::
# Introduction
The Printable Documents section is made up of 6 sections: Address Labels, Packing Slips, Invoices, Pick List, and Receipt. Below we will go over the different sections and the options within those sections.
## Address Labels
UltraCart has support for a variety of standard Avery address label formats that are available at most office product supply stores. Simply select the format desired from the drop-down menu named Predefined Format.

If the built-in formats do not meet a merchant's needs they can define the dimensions of custom label sheets in the section immediate below this field.
All the measurements needed for UltraCart to handle a sheet of address labels must be in centimeters. There is field at the bottom of the form called "Top of Form Adjustment". This is for adjustments needed to offset the physical paper loading characteristics of printers. To test out the layout of the labels click the preview button.
## Packing Slips
Typically, the default margins are perfectly acceptable unless the merchant is printing the packing slips on business letterhead that has logos that do not fit in the margins.
To configure Custom packing slips click on the "Custom" radio button and specify the top and bottom margins in the fields provided. Additionally, several other attributes can be included on the Packing Slip by checking the appropriate check boxes on each item you want included.

The last item in the list, Logo Graphic, provides a drop-down list of graphics for selection.
### Logo Graphic Sizing
For best results the image should be at least 800 pixels in width. The height should be determined by the amount of content that the header graphic needs to contain.
As an example if we take the following logo that is 500 pixels wide.

and then modify the image to have a total width of 800 pixels we will end up with something like this.

:::note
This image can then be uploaded into [Main Menu](https://secure.ultracart.com/merchant/mainMenu.do) → StoreFronts → File Manager → [U](https://secure.ultracart.com/merchant/configuration/branding/themeListLoad.do)pload File
:::
An example of a real world packing slip graphic is below.

If your image still doesn't look right, please contact support at 209-383-9870 as there maybe an option that can be turned on for your account to resolve this.
## Invoices

## Quotes

| Option Name | Description |
| --- | --- |
| Omit Customer Service | This option will hide the customer service contact information on the quote. |
| Logo Graphic | Allows an image to be placed at the top of the quote. |
| Sort Items | |
## Pick List

| Option Name | Description |
| --- | --- |
| Show Kitting | This option will show the kit item and its components on the pick list. |
## Receipt

---
# QuickBooks Desktop - Terms and Lists
https://docs.ultracart.com/account-settings/back-office/quickbooks-desktop-terms-and-lists
doc_type: reference
# QuickBooks Terms and Lists
QuickBooks Terms and Lists are applicable only to merchants that will download orders to QuickBooks and that will also utilize UltraCart's Customer Profiles. These Terms and Lists should not be confused with other QuickBooks Codes that are required when configuring QuickBooks for downloading orders. For more information about QuickBooks Codes, see [Section 13 - UltraBooks](/account-settings/desktop-software/ultrabooks).
By entering the Payment Terms, QuickBooks Classes and Sales Rep Code a single time on the QuickBooks Terms and Lists screen (in UltraCart), they will then appear in drop-down lists to simplify entry when editing your Customer Profiles.
## Terms and Lists descriptions
| **ITEM** | **DESCRIPTION** |
| --- | --- |
| **Payment Terms** | If you would like to set the terms by customer profile you can configure the list of available terms here. These should match up identically with the terms list in your QuickBooks (complete those first). Each term should be no longer than 31 characters. Place each term on a different line. |
| **Sales Rep Code** | If you would like to link (and track) orders and customer profiles to sales representatives in your organization, then enter the list of codes that you would like to use. Each sales rep code should be no longer than 10 characters long. Place each sales rep code on a different line. |
| **QuickBooks Classes** | **Customer Profile:** If you would like to set the QuickBooks class by customer profile you can configure the list of available classes here. These should match up identically with the class list in your QuickBooks. Each class should be no longer than 31 characters. Place each class on a different line. **Users of BEOE:** If you would like to assign a QB class to orders placed via the Back-End Order Entry tool, you can configure a QB class for each user on the account. Please note that this will override any class associated with the customer profile. This type of configuration is typically used to track a commission structure for inside sales reps. Each of your configured users will appear in this section with a text box provided to enter their unique code. |
## Configuring the Terms and Codes
### QuickBooks Configurations
The Payment Terms, Sales Rep Code and QuickBooks Codes should be defined in QuickBooks first.
#### Payment Terms list
Open (run) your QuickBooks software and from the main menu, navigate to:
:::note
Lists → Customer & Vendor Profile Lists → Terms List
:::
The following screen shows the above path in QuickBooks.

When the Terms List appears, click the "Terms" button in the lower left corner to select your editing option, (i.e., New, Edit, Delete, etc.)
#### Sales Rep Codes
Open (run) your QuickBooks software and from the main menu, navigate to:
:::note
Lists → Customer & Vendor Profile Lists → Sales Rep List
:::
The following screen shows the above path in QuickBooks.

Editing the Sales Rep List is about the same as we learned earlier with the Terms List. Click the Sale Rep button in the bottom, left of the Sales Rep List and select your editing needs from the list.
#### Classes Lists
Open (run) your QuickBooks software and from the main menu, navigate to:
:::note
Lists → Class Lists
:::
The following screen shows the above path in QuickBooks.

When the Class List appears, click the "Class" button in the lower left corner to select your editing option, (i.e., New, Edit, Delete, etc.)
:::note
If you cannot locate Classes, then it must be enabled. In QuickBooks navigate to:
Edit → Preferences → Accounting → Company Preferences

:::
### UltraCart Configuration
Now that your QuickBooks configurations are complete, it's time to configure the exact same codes (those that you want configured) in UltraCart.
Log in to your UltraCart account and Navigate to:
:::note
[Main Menu](https://ucsupport.ultracart.com/merchant/mainMenu.do) → [Configuration →](https://ucsupport.ultracart.com/merchant/configuration/configurationMenuLoad.do) Integrations → (**Accounting** section) → [QuickBooks Terms and Lists](https://ucsupport.ultracart.com/merchant/configuration/quickBooksTermsAndListsLoad.do)
:::

Enter your information for each section. Click the `save` button when finished.
### Customer Profile (edit) Screen
Once you have configured both QuickBooks and UltraCart codes they will appear at the Customer Profile editing screen. In UltraCart, Navigate to:
:::note
[Main Menu](https://ucsupport.ultracart.com/merchant/mainMenu.do) → [Customer Profiles](https://ucsupport.ultracart.com/merchant/customerprofile/customerProfileMenuLoad.do) → [Manage](https://ucsupport.ultracart.com/merchant/customerprofile/customerProfileListLoad.do) → Edit
:::
Below is a sample Customer Profile screen showing the Sales Rep. Code, Terms and QuickBooks Classes fields with drop-down choices. You would simply click the down arrow to select your choices for each field. Click the `save` button when finished.
- [x] 
- [x] [ff8080814e02fcbc014e02fcffdf0008](#) - examine
---
# QuickBooks Desktop - UltraBooks
https://docs.ultracart.com/account-settings/back-office/quickbooks-desktop-ultrabooks
doc_type: explanation
Integration between UltraCart and QuickBooks™ works through a downloadable piece of software called UltraBooks. The software needs to be installed on the same PC as as your QuickBooks™ account program. When the program is launched it will prompt you for the same login information that you use to access UltraCart. UltraBooks then securely downloads all the new (completed) orders and creates sales receipts in QuickBooks™ for each of the orders.
:::info
Intuit has announced that QuickBooks Desktop 2021 will no longer be supported after May 31, 2024.14 Additionally, Intuit will stop selling some Desktop products to new customers as of July 31, 2024.15 Users of QuickBooks Desktop 2021 and older versions are advised to upgrade to a supported 'Plus' version before July 31, 2024, as these 'Plus' versions are subscription-based and include annual upgrades to the newest version of QuickBooks Pro or Premier Plus.1 After May 31, 2024, QuickBooks Desktop 2021 users will no longer have access to live technical support or additional features inside the program.3 Furthermore, QuickBooks Desktop 2024 and Enhanced Payroll will still be usable until May 2027, but internet-based features such as payroll and updates will no longer be available after May 31, 2027.
UltraCart recommends [QuickBooks online integration](/account-settings/back-office/quickbooks-online)
:::
:::info
Transcluded from [UltraBooks](/account-settings/desktop-software/ultrabooks).
:::
# Related
[https://quickbooks.intuit.com/learn-support/en-us/undeposited-funds/what-s-the-undeposited-funds-account/00/271928](https://quickbooks.intuit.com/learn-support/en-us/undeposited-funds/what-s-the-undeposited-funds-account/00/271928)
---
# QuickBooks Online
https://docs.ultracart.com/account-settings/back-office/quickbooks-online
doc_type: how-to
# About
Intuit's accounting solution QuickBooks Online (QBO) is an account solution that is aimed at small to medium sized merchants looking for a cloud based alternative to the desktop versions of the industry leading accounting software.
UltraCart offers an integration that will import the accounting data from UltraCart into your QuickBooks Online account.
# Important Notes
## Taxes
QuickBooks Online automatically calculates sales tax for the nexus that you configure in QBO. Unlike QuickBooks desktop where [UltraBooks](/account-settings/desktop-software/ultrabooks) can manage all the tax related items, the integration with QBO relies completely on their tax tables to recalculate sales tax. We recommend that you match your QBO sales tax configuration nexus up with the UltraCart sales tax configuration and leverage [UltraCart Managed Rates](/compliance-legal/sales-tax) or the integration with [Avalara](/compliance-legal/sales-tax) or [TaxJar](/compliance-legal/sales-tax).
## Import Life-cycle
The import process into your QuickBooks Online takes place after an order has been completed (shipped) within UltraCart.
# Navigation
:::info
Main Menu → Configuration → (middle menu) Back Office → QuickBooks Online (BETA)
:::
# Connecting UltraCart to QuickBooks Online
## Step 1
The first step is to connect to your QuickBooks Online account:

Click the "Connect Quickbooks Online Account" button then log into our QuickBooks Online account to complete the connection:

After completing your login, authorize the application as shown below.

# Configuring QuickBooks Online Integration
After successfully connecting to your QBO account, you'll be presented with the full configuration for the integration. In the top section you can disconnect the integration or pause it as shown below.

You'll be presented with additional configuration sections:
- Customers
- Order Settings
- Error Queue
## Customers
In this section, you'll configure how customers are created and matched during the order import:

| **Field ** | **Description** |
| --- | --- |
| **Mark customers as non-taxable if no tax was charged** | Marks customers as non-taxable if no tax was charged on the order. |
| **Uppercase all name information** | Imports the customer name details in uppercase. |
| **Match orders to customers based on name and email address if possible** | Match orders to customers based on name and email address if possible |
| **Match orders to customers based on name and city if possible** | Match orders to customers based on name and city if possible. |
| **Automatically update customers with the latest information from order** | Automatically updates customers with the latest information from order |
| **Import by company name instead of last name, first name when possible** | Import by company name instead of last name, first name when possible |
| **Default Terms** | Set's the default terms that apply to purchase orders |
| **Default Type** | Set's the default purchase type. |
| **Import as Customer** | Select this only if you wish to have all the orders imported from UltraCart assigned to a single customer record. This is typically used to assigned the imported customers as "UltraCart Customers" or "Web Orders", or something similar. :::info PLEASE NOTE: Configuring the 'Import as Customer' will override the other "matching" settings. If you wish to have the customers imported to their own customer record, please leave this drop-down menu unconfigured (the blank option in the drop-down list is selected. ::: |
## Orders
This section controls how Invoices and Sales Receipts are created in your QBO account. There is a setting for each type of account document and then a shared section that applies to both document types. By default orders that use the purchase order payment method will import as invoices and all other orders will import as sales receipts.

## Order Settings Fields
| Field Name | Description |
| --- | --- |
| **Allow Online ACH Payment** | Enables importing ACH (bank transfer) payments from UltraCart orders into QuickBooks invoices. |
| **Allow Online Credit Card Payment** | Enables importing credit card payment details for invoices created in QuickBooks. |
| **Import all orders as invoices** | Forces all orders to be imported as invoices instead of sales receipts, regardless of payment status. |
| **Mark to be printed (Invoices)** | Flags imported invoices in QuickBooks as “To Be Printed.” |
| **Use Shipping date as invoice date** | Sets the invoice date in QuickBooks to match the shipment date instead of the order date. |
| **Import Terms** | Imports payment terms from UltraCart orders into QuickBooks invoices. |
| **Email (Invoices)** | Automatically emails the invoice to the customer from QuickBooks after import. |
| **Default Invoice Terms** | Specifies the default payment terms (e.g., Net 30) applied to invoices if not defined on the order. |
| **Mark to be printed (Sales Receipts)** | Flags sales receipts in QuickBooks as “To Be Printed.” |
| **Default Deposit to Account** | Defines which QuickBooks account (e.g., Undeposited Funds) receives deposited payments from sales receipts. |
| **Mark all items as non-taxable if no tax was charged** | Ensures items are marked non-taxable in QuickBooks if the UltraCart order did not include tax. |
| **Use QuickBooks default item descriptions** | Uses item descriptions configured in QuickBooks instead of those from UltraCart. |
| **Let QuickBooks assign document number** | Allows QuickBooks to auto-generate invoice or receipt numbers instead of using UltraCart order IDs. |
| **Class - Import** | Imports class values from UltraCart into QuickBooks for transaction classification. |
| **Class - Map Screen Branding (Legacy Only)** | Maps UltraCart screen branding to QuickBooks classes (legacy functionality). |
| **Class - Map StoreFront** | Maps UltraCart StoreFronts to QuickBooks classes for reporting segmentation. |
| **If ShipTo address is missing, copy BillTo to ShipTo** | Automatically copies billing address to shipping address if no shipping address exists. |
| **Use Full Country Names instead of ISO codes** | Sends full country names (e.g., “United States”) instead of ISO codes (e.g., “US”) to QuickBooks. |
| **Skip importing zero dollar orders** | Prevents orders with a total value of $0 from being imported into QuickBooks. |
**Notes & Best Practices**
> **Tip:** Use **“Let QuickBooks assign document number”** if you want to maintain consistent numbering within QuickBooks accounting workflows.
> **Tip:** Enable **“Skip importing zero dollar orders”** if you use promotions, samples, or test orders to keep your accounting records clean.
> **Warning:** Changing tax-related settings (like non-taxable mapping) can impact financial reporting. Verify with your accounting team before enabling.
## Additional Configuration
### Configuring Payment Methods
If you print QuickBooks deposit slips for recording bank deposits, correctly identifying the payment method is imperative.
To add payment methods to your Quickbooks Online configuration, log into your Quickbooks Online account, then:
1. Click the **Gear Icon **
2. Click **All Lists**
3. Select **Payment Methods**
4. Add, Edit or Delete by clicking the **payment method name**
5. Make sure to check mark the credit card box if you are adding a credit card (this is how you will add customer’s credit card details)
\*You may want to add each separate credit card type (**Visa**, **MasterCard**, **Discover**, **American Express**, **JCB**, **Diners Club**), otherwise create a 'catch all' payment type for "**Credit Card**"
Next, log into UltraCart and navigate to the Credit And Debit Card settings:
Main Menu > Configuration > (middle menu) Checkout > Payments > ("Credit and Debit Cards" section) Settings
1. Enter the payment methods as they appear in QuickBooks Online, into the "Payment method Quickbooks code" field:

2. Click the 'x' button to exit out of the pop up window.
3. Click the save button on the payments configuration field.
### Item Configuration
When configuring items within QBO, make sure that the **UltraCart ItemID** is the same as either the QuickBooks **Item Name** or **Item SKU**, otherwise the item will not be recognized and the import will fail.
See also: [https://quickbooks.intuit.com/learn-support/en-us/manage-lists/import-products-and-services-from-excel/00/185613](https://quickbooks.intuit.com/learn-support/en-us/manage-lists/import-products-and-services-from-excel/00/185613)
:::info
### Quickbooks Codes do not apply to QBO integration
If you are migrating to QBO from the QB desktop and have previously been using UltraBooks with QB desktop application, please note that the "QuickBooks Codes" you previously configured are not valid with the QBO integration. If you were using the QuickBooks codes for item mapping, you'll need to configure the **Ultracart ItemID** in either the QBO **Item Name** or QBO **Item SKU**. (NOT the UltraCart SKU field, but the QuickBooks Online SKU field.)
:::
## Error Queue
The last section is the Error Queue.

### Example Errors
**Error Code: 6000**
_Failed to re-process order. Add Failed Error: Failed to Add Customer \[Accounts Payable\]. Error: ERROR CODE:6000, ERROR MESSAGE:A business validation error has occurred while processing your request, ERROR DETAIL:Business Validation Error: Tax Exemption Reason should be specified incase customer is marked as not taxable, MORE ERROR DETAIL:BusinessValidationError_
**Solution:**
To resolve this issue, the Tax exempt customer needs to have tax exempt reason configured in the tax tab of the customer profile editor:
:::info
Operations → [Customer Profiles](https://secure.ultracart.com/merchant/customerprofile/customerProfileMenuLoad.do) → [Manage](https://secure.ultracart.com/merchant/customerprofile/customerProfileAppLoad.do) → Add/Edit profile → Taxes
:::
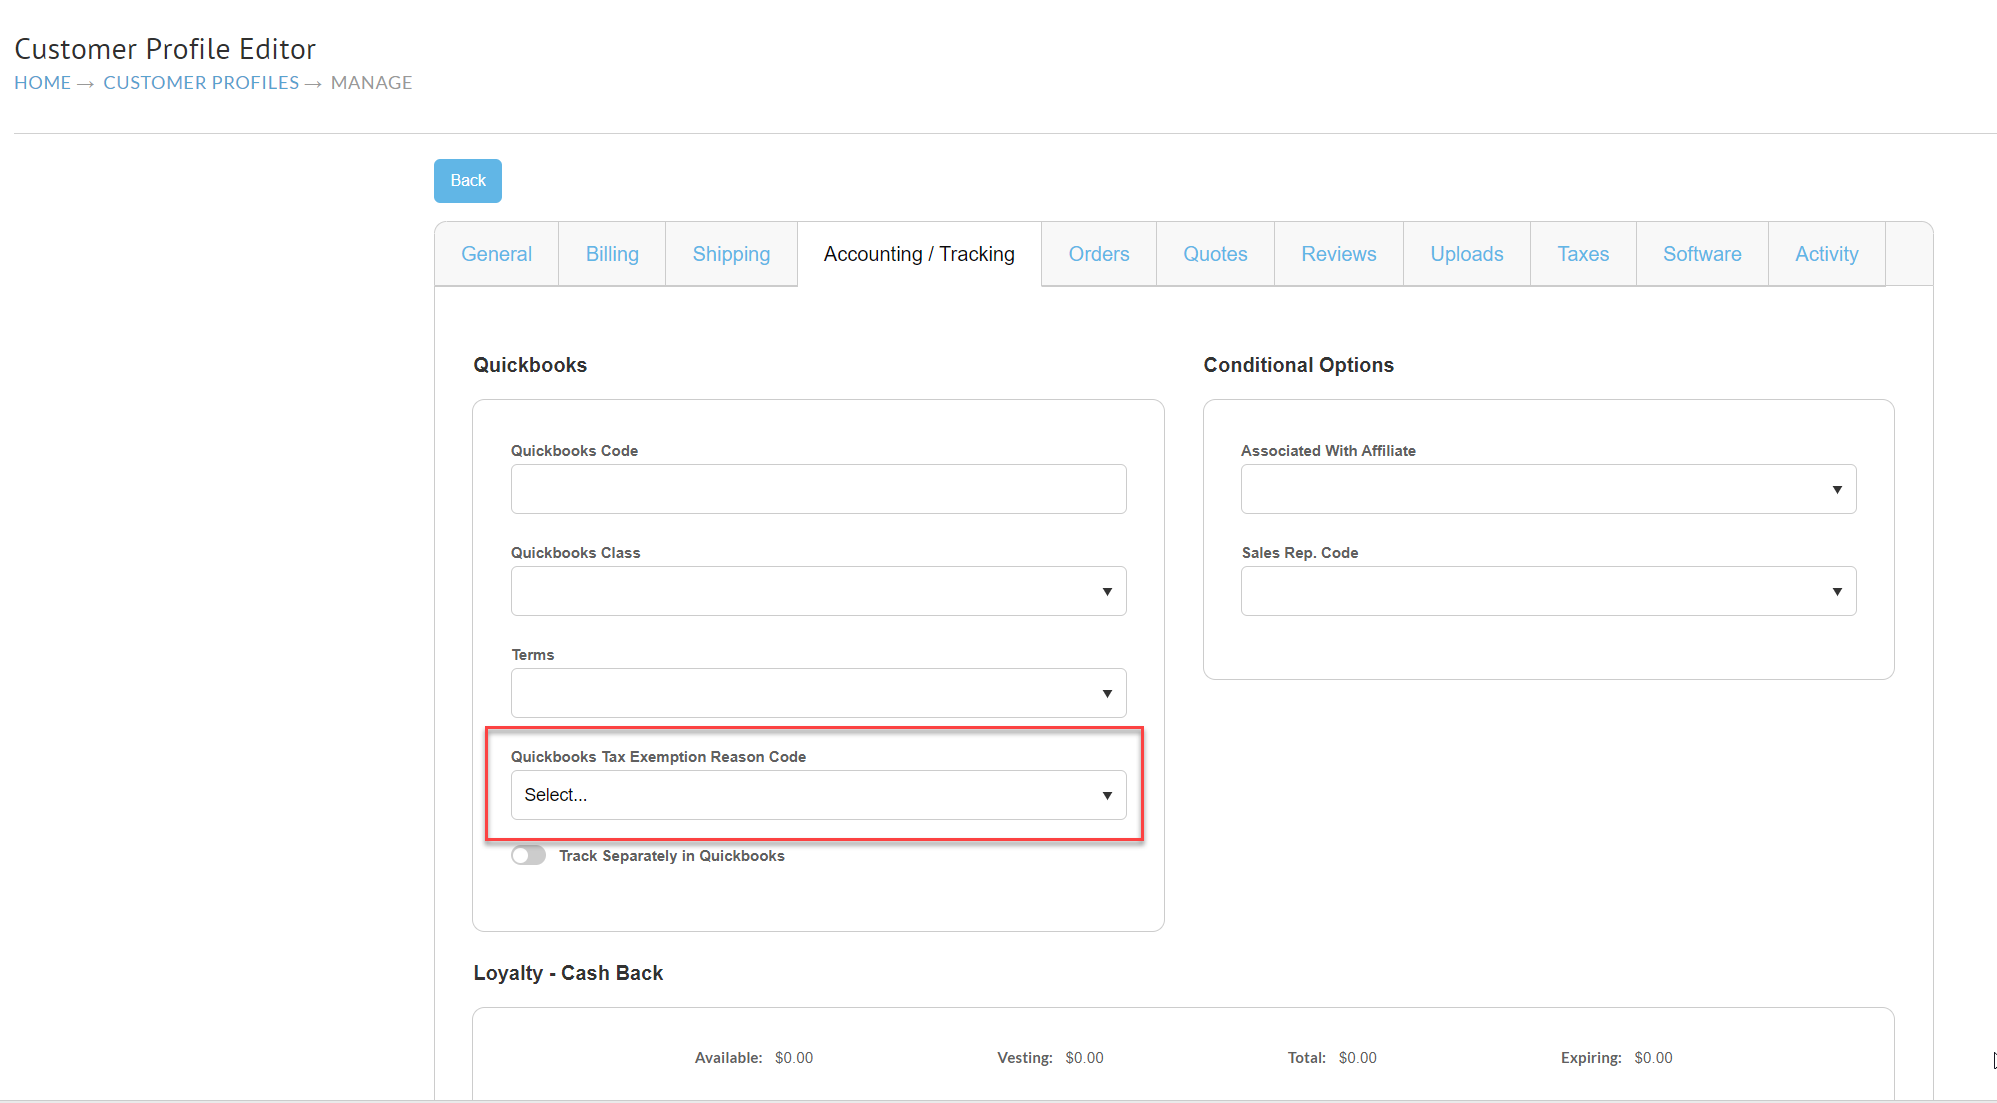
## Requeue Orders for Import into Quickbooks Online
If you have orders that need to be manually queue for import, navigate to the 'Batch Order Operations' :
Main Menu > Operations > Order Management > ('Tools' section) Batch Order Operations
Enter the OrderID's into the top section, then click the button titled '**Queue**' orders for QuickBooks Online
# Frequently Asked Questions
**Q: Why am I seeing the error: “Administrator permissions are required to connect this application”?**
A: This error occurs because QuickBooks Online only allows users with **Company Admin** or **Primary Admin** roles to authorize third-party integrations such as UltraCart.
If your user account does not have sufficient permissions, the connection attempt will fail during the OAuth authorization step.
* * *
### How do I verify my user role in QuickBooks Online?
1. Log in to QuickBooks Online.
2. Click the **Gear icon** (top right).
3. Navigate to:
- **Account and Settings**, or
- **Manage Users**
4. Locate your user profile and check your assigned role.
* * *
### What should I do if I am not an admin?
If you do not have admin privileges:
- Contact your company’s **Primary Admin** or **Company Admin**.
- Ask them to either:
- Complete the integration themselves, or
- Temporarily grant you admin access to authorize the connection.
* * *
### How do I complete the connection after getting admin access?
Once logged in with admin permissions:
1. In UltraCart, navigate to:
```
Configuration → Integrations → Accounting (section) → QuickBooks Online
```
2. Select the **QuickBooks Online** integration.
3. Click **Connect** or **Re-authorize**.
4. Follow the QuickBooks OAuth prompts.
5. Approve the application access request.
After successful authorization, UltraCart will connect and begin syncing sales data.
* * *
### What if I am already an admin but still see this error?
If you already have admin permissions and still encounter the error:
- Confirm that:
- You are logged into the correct QuickBooks company.
- Your session has not expired.
- Log out and log back into QuickBooks Online, then retry.
- Clear browser cache or try an incognito window.
If the issue persists, contact UltraCart support with:
- A screenshot of your QuickBooks **user role page**
- Confirmation of the company file you are attempting to connect
* * *
### Can I have the purchase order number import with the QuickBooks Online integration??
Answer: Yes, the PO number will be imported by default. You can inspect the integration logs to see the transmitted payload in the order import into QuickBooks Online.

* * *
**Important Note:** QuickBooks enforces strict OAuth authorization rules. This requirement is controlled by Intuit and cannot be bypassed within UltraCart.
> **Tip:** Always perform integrations using an admin account initially to avoid authorization issues.
# Related Documentation
Import Products into QuickBooks Online via Spreadsheet:
[https://quickbooks.intuit.com/learn-support/en-us/manage-lists/import-products-and-services-from-excel/00/185613](https://quickbooks.intuit.com/learn-support/en-us/manage-lists/import-products-and-services-from-excel/00/185613)
Make a copy of your QuickBooks Online Company file:
[https://quickbooks.intuit.com/learn-support/en-us/back-up-data/make-a-copy-of-your-quickbooks-online-advanced-company-formally/00/461773](https://quickbooks.intuit.com/learn-support/en-us/back-up-data/make-a-copy-of-your-quickbooks-online-advanced-company-formally/00/461773)
Backup and Restore QuickBooks Online Company data:
[https://quickbooks.intuit.com/learn-support/en-us/back-up-data/back-up-and-restore-your-quickbooks-online-advanced-company/00/482774](https://quickbooks.intuit.com/learn-support/en-us/back-up-data/back-up-and-restore-your-quickbooks-online-advanced-company/00/482774)
Intuit QuickBooks Online Support Portal:
[https://quickbooks.intuit.com/learn-support/en-us/](https://quickbooks.intuit.com/learn-support/en-us/)
QuickBooks Support: Sales Tax Configuration:
[https://quickbooks.intuit.com/learn-support/en-us/help-article/sales-taxes/set-use-automated-sales-tax-quickbooks-online/L4Lx8eL7V\_US\_en\_US](https://quickbooks.intuit.com/learn-support/en-us/help-article/sales-taxes/set-use-automated-sales-tax-quickbooks-online/L4Lx8eL7V_US_en_US)
Quickbooks Online Search:
[https://quickbooks.intuit.com/learn-support/en-us](https://quickbooks.intuit.com/learn-support/en-us)
---
# Report Delivery
https://docs.ultracart.com/account-settings/back-office/report-delivery
doc_type: how-to
# Configuring Report Delivery Settings
UltraCart provides a convenient way to receive an executive summary of your order traffic directly via email. You can customize the frequency of these reports to suit your business needs. This guide explains how to configure these settings and how they impact other reports within UltraCart.
## Introduction
The Report Delivery feature allows you to schedule automated email reports containing an executive summary of your UltraCart order data. This ensures you stay informed about your sales performance without manually generating reports.
## Prerequisites
To configure report delivery settings, you need:
- Access to your UltraCart account.
- Permissions to modify `Configuration` settings.
## Step-by-step Instructions
Follow these steps to configure your report delivery settings:
1. **Navigate to Report Delivery Settings:** From your UltraCart dashboard, go to `Home` → `Configuration` → `Report Delivery`.
2. **Choose Delivery Frequency:** On the Report Delivery page, you will find options to select how frequently you wish to receive the executive summary report. You can choose from:
- **Every specified day count:** Enter a number (e.g., `5` for every 5 days, `10` for every 10 days).
- **Semi-monthly:** Reports will be sent twice a month.
- **Monthly:** Reports will be sent once a month.
3. **Save Your Selection:** After making your desired delivery selection, click the **Save** button to apply your changes.
note
Note: Your report delivery settings will also influence the date range displayed in the "Current Period Sales" report on the Reporting page.
Note: Your report delivery settings will also influence the date range displayed in the "Current Period Sales" report on the Reporting page.
## Affect on Current Period Sales Dates
The frequency setting you choose for your executive summary report also determines the date range displayed in the "Current Period Sales" report found on the `Reporting` page.
Setting
Current Period Sales Report Date Range
Every X days
If set to 1 day (the default), the report will show month-to-date data. If set to anything other than 1 day, it will show the specified interval (e.g., the last 5 days).
Semi-monthly
Will show either the 1st to the 15th of the month, OR the 16th (or current date if beyond that) to the end of the month (28th-31st, depending on the month).
Monthly
Will initially advance to the end of the following month, then sync to the end of the current month from there forward.
### Projected Sales
The "Projected Sales" figure displayed in your reports is an estimate. It is calculated based on the sales performance during the current period and projected into the next period, providing an outlook on potential future sales.
## Conclusion
By configuring your Report Delivery settings, you can automate the process of receiving crucial sales data, helping you monitor your UltraCart store's performance efficiently. Understanding how these settings affect other reports, like "Current Period Sales," ensures you interpret your data accurately.
## Next Steps
- Explore other reports available in the `Reporting` section of UltraCart to gain further insights into your store's performance.
- Consider setting up additional alerts or notifications for critical events in your UltraCart account.
---
# XML Postback
https://docs.ultracart.com/account-settings/back-office/xml-postback
doc_type: reference
:::tip
UltraCart Webhooks supercede the XML Postback. They are superior in every way.
Please see the [Webhooks guide](/developer/essentials/webhooks) for help using webhooks.
:::
# XML Postback
## Introduction
UltraCart’s **XML Postback** feature allows merchants to automatically receive an XML copy of an order shortly after it is placed. This process enables merchants to perform custom server-side operations such as validation, logging, or integration with external systems.
Although still available, **UltraCart recommends using** [**Webhooks**](/developer/essentials/webhooks) **instead**, as they provide more robust functionality and greater flexibility.
### Key Benefits
- Automatically receive orders in XML format after they are placed.
- Perform server-side validation or custom business logic.
- Optionally receive updated order status changes.
- Receive updates for Auto Orders when they change.
* * *
## Prerequisites
> **Prerequisite:** This feature is intended for advanced merchants or developers with programming experience.
To use XML Postback, you must:
1. Have a web server that supports **HTTPS**.
2. Create a script capable of:
- Receiving one order per postback (in XML format).
- Performing your desired functions.
- Returning an HTTP **200 OK** response to UltraCart.
* * *
## XML Postback Script
UltraCart will post an XML message to your configured URL. This message is equivalent to manually exporting one order in the **W3C Schema XML format** from _Order Management → Export Orders_.
Popular languages for handling XML Postbacks include PHP, Python, Perl, Java, Ruby, and C#.
- Example script: [xmlPostBackExample.php](https://ultracartfa.s3.amazonaws.com/101/xmlPostBackExample.php?utm_source=chatgpt.com)
- XML Schema reference: [ultracart.xsd](https://secure.ultracart.com/xml/ultracart.xsd?utm_source=chatgpt.com)
> **Tip:** Your script should immediately acknowledge receipt of the XML (return `200 OK`) and offload heavy processing to a queue (database, Redis, SQS, etc.). This prevents timeouts and allows UltraCart to deliver high-volume postbacks efficiently.
:::note
Programmers need to be aware that the XML is within the HTTP body, not in parameters.
:::
## Configuring XML Postback
1. Log in to your UltraCart account.
2. Navigate to:
**Main Menu → Configuration → Development → XML Post Back**
3. Choose one or more configuration options:

### Option 1: Transmit to URL when order placed
- UltraCart posts the order once it is created.
- Postbacks repeat until your server responds with **200 OK**.
### Option 2: Transmit to URL when stage changes
- UltraCart posts whenever the **current\_stage** field changes.
- Stages include:
- `IN` (Inserting)
- `AR` (Accounts Receivable)
- `PC` (Pending Clearance) ← Checks orders and Amazon Payments
- `SD` (Shipping Department)
- `CO` (Completed Order)
- `PO` (Preorder)
- `QR` (Quote Request)
- `QS` (Quote Sent)
- `REJ` (Rejected)
- …and more
### Option 3: Transmit Auto Order Status to URL
- UltraCart posts updates when an **auto order** changes.
- Example fields:
- `auto_order_code`
- `original_order_id`
- `status` (active, cancelled, declined, terminated)
- `next_attempt`, `failure_reason`
### Refund Postbacks
If you use the second option "Transmit to URL when stage changes" then UltraCart will also send you an XML postback when a refund occurs. When refunds occur the order can be in multiple stages (SD or CO typically) so you will want to look for the following elements in the XML:
- `subtotal_discount_refunded`
- `subtotal_refunded`
- `other_refunded`
- `tax_refunded`
- `shipping_handling_refunded`
- `buysafe_refunded`
- `total_refunded`
- `refund_dts`
If a refund has occurred, the elements "total\_refunded" and "refund\_dts" will always exist. The other elements mentioned above will exist if that component of the order was refunded.
:::warning
UltraCart will not send duplicate notifications. If you configure the second option (stage changes), you will not receive any notifications via the first option. Instead, when an order is placed, you'll receive a postback with the appropriate stage change (depends on the status/success of the order).
:::
### Save Changes
Once you've entered the URL into the appropriate field, click on the "Save" button at the bottom of the screen. Your configuration is complete.
##### **Auto Order Update XML details**
```groovy
auto_order
original_order_id
auto_order_code
firstname
lastname
email
address
address2
city
state
zip
company
country
home_phone
cell_phone
office_phone
custom_field_1
custom_field_2
custom_field_3
custom_field_4
custom_field_5
custom_field_6
custom_field_7
status = active, card declined, cancelled upgrade, cancelled downgrade, cancelled, terminated
next_attempt
attempt
failure_reason
status
cancelled_by
cancelled_dts
original_items
item
item_id
description
unit_cost
quantity
auto_order_items
auto_order_item
original_item_id
quantity
frequency_override
next_shipment
next_item_id
no_orders_after
override_unit_cost
override_unit_cost_next_x_orders
percentage_discount
next_preshipment_notice
```
### Advanced Configuration
### Multiple URLs
- Enter multiple URLs separated by a **space**.
- UltraCart retries all configured URLs until each returns **200 OK**.
- **Warning:** We recommend no more than 2–3 URLs. All must succeed, or the postback is retried.
### Logs

- Use the **Log** button in the XML Postback configuration screen to review:
- Order ID
- Timestamp
- Server response
When you click on the log it will show you the order id, timestamp, and result for each transmission. Notice that we can quickly see that UltraCart
is having trouble connecting to this server.

For each transmission you can see what is sent to your server and what is returned as shown below.

:::info
Notice that UltraCart is logging the response back from your server.
**It only cares about the 200 result code to determine success**,
but logging the response from your server allows you to output information that you can review in the logs for debugging purposes.
:::
### Error Handling
- UltraCart disables postbacks after **50 consecutive errors**.
- Queued postbacks resume once you re-save the XML Postback configuration.
Common HTTP errors:
| Code | Meaning |
| --- | --- |
| 200 | OK |
| 301 | Moved Permanently |
| 302 | Redirect |
| 400 | Bad Request |
| 401 | Unauthorized |
| 403 | Forbidden |
| 404 | Script not found |
| 405 | Method Not Allowed |
| 500 | Internal Server Error |
The complete list can be found at [http://www.w3.org/Protocols/rfc2616/rfc2616-sec10.html](http://www.w3.org/Protocols/rfc2616/rfc2616-sec10.html)
## Handling Read Timeouts
- UltraCart allows up to **60 seconds** for your server to respond.
- Always queue the XML immediately; never run long processes in the postback handler.
:::note
Do not try and perform complex processing of the XML postback document on your receiver. Simply queue up the XML document in a persistent storage (database, Redis, SQS, etc.) and then perform your more complex processing in a decoupled fashion. This will allow you to receive a greater velocity of XML postbacks from UltraCart and fan out the processing of those postbacks appropriately.
:::
## Restarting Postbacks After Errors Have Halted Postback Processing
:::warning
If UltraCart encounters 50 consecutive errors from your server, it will disable the XML postback and email you. The transmissions will queue up until you edit your XML Postback configuration.
After reviewing the logs to determine the cause of the errors. To restart the processing of the queued orders, re-save the XML PostBack settings (Click the save button on the XML Postback configuration page.)
:::
## How do I resend historical data to my server via XML postback?
Identify the first and last order id for the range of data that you want to resend to your new XML postback URL. Use the [batch order operation](/orders-fulfillment/order-management/batch-order-operations) utility to populate the XML postback queue.
## Refunds
Orders with partial refunds will report the item Id's of the refunded items, whereas complete refunds will not include the item Id's by default.
:::info
**Please Note**
If you need the complete refunds to report the item ID's in the order, contact UltraCart by emailing [support@ultracart.com](mailto:support@ultracart.com) stating your UltraCart MerchantID requesting that we enable the merchant property "**XML Postback - Skip Adjustment for Refund**".
With this property is enabled, it will prevent refunded items from being removed from the XML postback, so you will see these items in your refund transaction XML packet.
Pay close attention to these optional elements that will indicate the refunding of the item:
- **quantity\_refunded**
- **total\_refunded **
:::
## Frequently Asked Questions (FAQ)
Q: "I notice that there's an xml element, and that there could be more than one. Is it often that post backs come in with multiple orders in them?"
A:_ _The XML Postback transmissions are always a single order only.
Q: Are the merchant notes, special instructions, gift message, and comments transmitted in the XML document?
A: Yes, if they are present on the order then they are populated in the XML. We don't populate empty elements for these fields though. The element names are:
- special\_instructions
- comments
- gift\_message
- merchant\_notes
Please consult the [XML Schema](https://secure.ultracart.com/xml/ultracart.xsd) for a full description of the XML document structure.
Q: My server is returning a 500 error code. What does that mean?
A: When your server returns a 500 error it means that the code on the other side (your side) has experience an unhandled error condition. Typically that is a null pointer exception, database error, etc. Please check your server logs for further details.
Q: When an order is successfully charged to the customer's credit card and goes to my Fulfillment Queue, what is its XML stage state while in the queue?
A: XML postback does not recognize that it's held in the fulfillment transmission queue. The state of the order will be the shipping department so the current\_stage element in the XML will read "SD".
(NOTE: The XML will not register a new stage change until the order is either marked as shipped (which would trigger the XML stage "CO" or if the order were to be marked as "Rejected" then the XML would read "REJ")
Q: When an order goes to the A/R queue either because of a fraud issue or a shopping cart timed out, besides an "AR" state, did it ever have an "IN" status?
A: IN = Inserting, so it's just an initial stage while the order record is being processed. If you actually seeing these in XML postbacks to your system, email Support with the orderID for review (it's something that really should not appear in most cases.
Q: When that A/R order is successfully processed (credit card) and goes to the Fulfillment Held Queue?
A: In this situation, the stage changes from "AR" to "SD" and an XML postback will occur if you have it configured to send one when stages change.
Q: I'm trying to find if there's: (1) a flag indicating it's an auto-order AND (2) a way to tie it back to the original order?
A: If the order is an auto order there will be these elements in the XML:
- auto\_order\_code
- auto\_order\_original\_order\_id
Q: Is there a postback when an Auto order is cancelled? (updated 9/1/2014)
A: Yes. The auto order configuration now has a separate configuration field "Transmit Auto Order Status to URL when auto order changes" for auto orders.
If configured, auto order cancellations will trigger a XML Postback transmission when status changes.
Q: Our XML transmission appear to have stopped yesterday, why is that?
A: UltraCart will disable the XML postback after 50 consecutive non HTTP 200 responses. UltraCart will continue to queue up the requests and will send them only once the merchant goes back into the XMP Postback configuration page and saves the configuration, which reset the hold and releases the queued orders from immediate transmission. (So for example if you were doing some database maintenance for an hour that interrupted the transmissions, you would need to resave the settings to get things processing again.)
Q: Why does the postback not happen instantaneously after the order is processed?
A: XML postback requests are added to a queue when the order is placed. The queue is processed asynchronously by a background job once a minute. The number of postbacks that can be handled each cycle depends upon the throughput speed of the remote servers. Performing the postbacks in the background makes sure a merchant's slow or unresponsive server does not destabilize the front end of the platform. If there is a large spike in orders to the platform, the number of cycles to clear out the postback queue will vary.
Q: What information is in the order XML postback?
A: The complete XSD schema file for the order XML postback is located here: [http://secure.ultracart.com/xml/ultracart.xsd](http://secure.ultracart.com/xml/ultracart.xsd)
Q: In the XML postback, each item has a field called item_reference_oid. Can you describe this data?
A: The item\_reference\_oid in the XML postback is a read-only field that references UltraCart's internal object identifier (merchant\_item\_oid) for an item. This field is not intended for use as a unique identifier by merchants. Use **merchant\_item\_id** instead of item\_reference\_oid.
- **Uniqueness**: The item\_reference\_oid is tied to the merchant\_item\_oid, which is unique to each item in your UltraCart catalog across all orders. It does not vary per order; it remains consistent for the same item across different orders.
- **Recommended Practice**: Merchants should use the **merchant\_item\_id** field as the unique identifier for items. The **merchant\_item\_id** is designed for merchant-facing identification and is more suitable for tracking and managing items in your workflows.
- **Limited Use**: The item\_reference\_oid is primarily used internally by UltraCart, such as in specific API calls like ItemApi.updateItem(). For most purposes, you should rely on merchant\_item\_id instead.
Schema: [http://secure.ultracart.com/xml/ultracart.xsd](http://secure.ultracart.com/xml/ultracart.xsd)
Q: Can I configure more than one URL within one of the three configuration fields?
A: Yes. To configure more than one URL into one of the URL configuration fields, simply separate each URL with a SPACE.
**PLEASE NOTE: Both endpoints must be able to deal with duplicates. If any endpoint fails, the postback is marked as a failure and when retried, each endpoint gets the postback again. **
When the postback occurs does it always pass the full set of customer data including custom fields?
There is quite a bit of order information in the XML postback, including customer data and the custom fields 1-7.
Is there a way it identifies it self as an auto-order vs an initial order?
On an order XML postback there is an element for the auto\_order information. Inside that element there is a field for auto\_order\_original\_order\_id. If that is the same as the order\_id in the XML document then this is the original order in the auto order sequence. If it's different then it's a rebill.
Just to clarify for each successful auto-order charge it will go through the main postback URL right? (not the auto-order status change URL)
Orders go through one URL and auto order status information through another. They can be the same URL if you want to configure it that way and just teach the one script to parse the XML document and then look at the content differently.
For the auto-order status change postback, do you have an XML schema for that? or is it the same as the normal postback? is their a particular field that we should check for?
There is not a schema file for this yet, but the easiest thing to do is configure a dummy URL, let the auto order XML postback fire, and then check the log under the XML postback configuration to see a copy of the document it tried to send.
We moved our XML Postback script to a new server via Cloudflare, and since then then our XML Postback is not longer working and is now disabled.
At this point in time you cant configure an XML postback to a URL that is fronted by Cloudflare. (XML postback requires a non-[SNI](https://en.wikipedia.org/wiki/Server_Name_Indication) hosted environment.)
## Conclusion
The XML Postback feature enables merchants to build custom integrations by receiving orders and updates directly to their server. However, UltraCart strongly recommends migrating to **Webhooks**, which provide a more modern and flexible solution.
* * *
## Next Steps
- Learn more about [UltraCart Webhooks](/developer/essentials/webhooks)
- Review the [XML Schema](https://secure.ultracart.com/xml/ultracart.xsd?utm_source=chatgpt.com)
- Contact [UltraCart Support](mailto:support@ultracart.com) for advanced configurations
---
# Call Centers
https://docs.ultracart.com/account-settings/call-centers
doc_type: reference
# Overview
Configure popular call centers to take orders for you and import them into UltraCart.
### Navigation
:::note
[Home](#) → [Configuration](#) → CallCenters
:::

# Integrations
| Name | Description |
| --- | --- |
| **Custom (Generic)** | Configure call center and/or order import, using one of the three API's ([Channel Partner API](/guides/ultracart-documentation/reference/channel-partner-api)) |
# Custom Call Center
Simply Click "New" to create a new custom Call Center integration.

After clicking "New" you will see the following configuration page.

| Field Name | Description |
| --- | --- |
| Code | This is the custom code used to identify the Call Center (Limited to 5 characters) |
| Name | Name of the Call Center |
| FTP Password | The password for the FTP if used (Optional) |
| CVV2 | This is to set the CVV2 as a optional Field (Recommended) |
| Skip Customer Email | This will skip any emails to the customer that would normally come from UltraCart |
| Ignore Arbitrary Unit Cost | This will ignore any override cost on the items for Auto order items |
| Skip Tax Recording in Avalara and TaxJar | Will simply skip the collection of sales tax within those two providers. |
---
# Channel Partners
https://docs.ultracart.com/account-settings/channel-partners
doc_type: reference
Here merchants can configure order processing from popular market places and sales channels.
# Navigation
:::note
Main Menu → Configuration
:::

| Option Name | Description |
| --- | --- |
| [Amazon Seller Central](/account-settings/channel-partners/amazon-seller-central) | UltraCart integrates with your Amazon Seller Central account using the Amazon Marketplace Web Service. Please note there is a $30.00/month charge for using this premium service. |
| [Buy.com](#page-not-found) | If you are selling products on Buy.com then UltraCart can automatically process your orders and return shipping confirmations to Buy.com. Please note there is a $30.00/month charge for using this premium service. |
| [Custom (Generic)](/guides/ultracart-documentation/reference/channel-partner-api) | The UltraCart channel partner API allows merchants to import orders into the UltraCart system from channels that we are not directly integrated into. :::warning Beta Feature The custom channel partner API is new and considered BETA. Please make sure you thoroughly test all integration code and closely monitor it. ::: |
| [eBay](/account-settings/external-integrations/ebay) | UltraCart provides a tight integration with eBay to manage the full life-cycle of listing products and converting them to UltraCart orders. Please note there is a $30.00/month charge for using this premium service. |
| EDI | EDI stands for Electronic Data Interchange and started before what is now known as the "Internet" was in its infancy. |
---
# Amazon Seller Central
https://docs.ultracart.com/account-settings/channel-partners/amazon-seller-central
doc_type: explanation
:::info
**This integration has been discontinued**
Attention: Due to implementation of strict data protection policy (DPP) implemented by Amazon, this integration is no longer available. (\*We do have manual spreadsheet upload tools that can be enabled on your account, by request. If interested, please email [support@ultracart.com](mailto:support@ultracart.com) along with your Merchant ID.)
:::
Amazon Seller Central
# Important Note Regarding Amazon's Data Protection Policy
:::warning
As of May 29th, 2020, Amazon has implemented new strict data protection policy (DPP). This policy prevents UltraCart from transmitting the customers' personally identifiable information (PII) to a 3rd party (this includes fulfillment services. If you are fulfilling your products using 3rd party fulfillment service, your fulfillment house will need to contact Amazon to become approved for directly importing the Amazon orders from Amazon.
In order to view the PII details of an imported Amazon order, you'll need to enable the user permission 'View Amazon PII" in the user editor:

:::
:::warning
If no user is configured to receive the notification for "Amazon Seller Central File Processing Errors", then any user with the "Edit Setting" permission will now receive the error messages generated by Amazon Seller Central.
:::
# ~Amazon Seller Central~
~The Amazon Seller Central channel partner allows you to have your orders for Amazon automatically flow down into UltraCart and the corresponding tracking and inventory information flow back up to Amazon. This greatly simplifies your interaction with the Amazon marketplace because it allows your shipping department to interact with all orders in a uniform fashion.~
~To begin configuring Amazon Seller Central on your account navigate to:~
:::note
[~Main Menu~](http://menuhome) ~→~ [~Configuration~](http://menuconfiguration) ~→ Integrations → ~[~Amazon Seller Central~](http://docs.ultracart.com/configuration/amazonSellerCentralSettingsLoad.do@merchant)
:::
## ~Pricing~
~Amazon Seller Central is included in the Medium, Large and Enterprise account plans. When you activate Amazon Seller Central the account will automatically update to the new plan if needed.~
## ~Sections~

~At the top of the page, there are three tabs to the page:~
1. ~Settings~
2. ~Error Log~
3. ~Import~
| **~Name~** | **~Description~** |
| --- | --- |
| ~Settings~ | ~This is the primary tab. You'll configure the settings for the ASC integration~ |
| ~Error Log~ | ~This is the location to check when troubleshooting import issues.~ _~(Accessible only once you have configured the settings tab with at least your ASC credentials.)~_ |
| ~Import~ | ~Tnis is where you can upload your item~ [~import spreadsheet.~](#page-not-found) |
## ~Authentication Credentials~
~To integrate your UltraCart account to Amazon Seller Central simply click on the link in the text section that appears directly above the three credentials fields:~
~"~~The first configuring step is to authorize UltraCart Integration to make API calls against your Amazon Seller Central (ASC) account.~
~Please visit ~[~UltraCart Integration~](https://sellercentral.amazon.com/apps/store/dp/amzn1.sellerapps.app.a4d59163-ba90-4f4a-abee-2a38f8a69717)~ within the Amazon Seller Central Marketplace and authorize our application." ~
1. ~Navigation from your Amazon Seller Central dashboard (You must do this with the Primary user on your ASC account):~
2. ~Click '~**~Apps & Services'~**~, then Click '~**~Discover Apps~**~', then in the search field type '~**~UltraCart Integration'~**~.~
3. ~Next, click '~**~UltraCart Integration'~**~ in search results, then on the right side, Click the '~**~Authorize Now'~**~ button to initiate the authorization.~
4. ~The next page will auto populate with the UltraCart Developer's Name and Developer ID, click the '~**~Next~**~'~
5. ~You'll be prompted with an agreement checkbox. Select the checkbox, then click the '~**~Next~**~' button.~
6. ~You'll be presented with your '~**~Seller ID'~**~, '~**~Marketplace ID~**~', & '~**~MWS Auth Token~**~'~
7. ~Copy and paste the displayed ASC credentials into UltraCart, then save the changes.~
:::info
**~Keep your Credentials secure~**
**~IMPORTANT NOTE:~**~ Make sure to keep your credentials secure - you do not want to give anybody access to your ASC account!~
:::

~This will take you to the~ **~Amazon Seller Central Marketplace.~**

**~In the app store, select UltraCart app~** ~then click the button on the right side of the page titled "~**~Authorize now~**~" located along the right side of the page :~

~Once this is done simply follow the steps to complete the authorization process, to get the integration credentials:~
Amazon Seller Central Seller ID
Amazon Seller Central Marketplace ID
MWS Auth Token
~You will need to copy & paste the three credentials, as you will need to configure these credentials within UltraCart:~

~Next, return to UltraCart and paste in the three credentials into UltraCart, then click the save button to cave the updated credentials.~
### ~Amazon Web Services 'Action Required' Application Re-authorization ~
~The Amazon Web Service requires periodic reauthorization every 12 months. You'll receive an email notification when the reauthorization deadline is approaching.~
~An example of the action email from Amazon:~
**~From:~**~ Amazon Marketplace Web Service ~
**~Sent:~**~ Thursday, May 20, 2021 3:30 AM~
**~To:~**~ ~[~xxxxxxxxxxxx@xxxxxx,com~](mailto:americanhealthnets@gmail.com)
**~Subject:~**~ ACTION REQUIRED - Your software application authorization will expire in 9 days~
Dear xxxxxxx,
Action is required by you to renew your authorization to enable software applications from BPS Info Solutions, Inc. to access your Amazon selling account on your behalf using Amazon Marketplace Web Service. This might impact your Amazon integration, including your Amazon Pay integration if you have one.
For your security, we periodically contact you to confirm that only software application providers with whom you are actively working are allowed to access your Amazon selling account data on your behalf.
The provider listed below has access to your account. That access will expire on 2021-05-29.
Please either renew or revoke this access to your account on the Manage Your Apps page in Seller Central. You can access this page at any time by signing into Seller Central and selecting Manage Your Apps in the Apps & Services menu. If you do not renew the developer’s access before the expiration date then that access will be suspended and their software will no longer access your data. You can re-authorize suspended access from Manage Your Apps page.
Developer ID:123680290990
Developer nickname: BPS Info Solutions, Inc.
Access expiration date: 2021-05-29
~Configuration Fields~
~There are numerous options on how you process orders for Amazon Seller Central that you will want to consider configuring. Below is a screen shot of this section of the configuration with an explanation of each field.~

| **~Field~** | **~Description~** | **~Optional~** |
| --- | --- | --- |
| ~Don't process orders placed before (MM/DD/YYYY)~ | ~You should configure this field to prevent UltraCart processing orders that may already exist in your ASC account. If you are not sure what to put here, enter today's date to be safe!~ | ~Yes - Recommended~ |
| ~Screen Branding Theme Code~ | ~If you want all ASC orders to be associated with a specific screen branding theme for email messaging purposes, enter that code in this field~ | ~Yes~ |
| ~Ignore Specific Amazon Item Ids~ | ~If you need to ignore certain items on Amazon you can enter them here~ | ~Yes~ |
| ~Ignore Specific Amazon Order Ids~ | ~If you need to ignore certain order ids on Amazon you can enter them here~ | ~Yes~ |
| ~Import orders as purchase orders~ | ~Some merchants want the orders to flow in as purchase orders for accounting purposes. If that is your style of accounting you can check this box~ | ~Yes~ |
| ~Import orders as completed---(Bring them in for just accounting purposes)~ | ~This setting will send the orders to completed to bypass shipping department.~ | |
| ~Include Price in Hourly Inventory File~ | ~If you want UltraCart to send the latest prices in each hourly inventory file then check this box.~ | ~Yes~ |
| ~Send Complete Inventory Files Hourly~ | ~If you are listing products manually on Amazon, but want UltraCart to send inventory information check this box.~ | ~Yes~ |
| ~Default Lead Time~ | ~Configured in minutes. ~ | |
| ~Send Emails Directly~ | ~Amazons default policy is that no direct email communication with the customer should take place. If you notice on all the Amazon orders that come in the email is a proxied through Amazon so they can monitor your communication. If you are going to enable this feature, please make sure you have discussed this with Amazon and obtained their permission first.~ | ~No~ |
| ~Send All Unconfigured Items in Inventory File for Category~ | ~If you are sending complete inventory file for manually listed items then you'll need to pick which Amazon category the items are in. Typically merchants are selling in a single Amazon category~ | ~Yes~ |
| ~Inventory Buffer~ | ~Since UltraCart updates Amazon hourly about inventory changes, you may want to have a buffer on what you report to Amazon to prevent overselling a product during periods when you are having high volume sales, such as during the holiday season.~ ~For instance, you may want to set the buffer to 2 so that you report 2 less units to Amazon than you really have in inventory at the moment to account for the delayed process of the inventory update.~ ~NOTE: If you have multiple distribution centers (DC) then you'll see a separate "Inventory Buffer" configuration field for each DC.~ | ~Yes - Recommended~ |
## ~Shipping~
~Within the Amazon Seller Central system you can configure four different types of methods:~
- ~Standard~
- ~Expedited~
- ~Two-Day~
- ~One-Day~
~When orders flow down from Amazon UltraCart has to translate the shipping code on Amazon to your internal shipping method. UltraCart does this by giving you the ability to configure a mapping and priority. Below you will see the configuration for each method. For example if you want Standard Shipping to map to USPS: First Class, USPS: Priority Mail, and then UPS: Ground you would check each of those boxes. If you specify a priority then UltraCart will pick the~ **~LOWEST~** ~priority (so 1 is first, 2 second, etc.) based upon availability for their address. If you don't specify any priorities then UltraCart will always select the cheapest shipping method that rates for the given items and address on the order.~
### ~Note Regarding Shipping Method Service Levels~
:::info
**~Shipping Method Mapping~**
~NOTE:~ **~You are required to configure at least one shipping method to each of the Shipping services levels.~**
~However, you control which levels are available to your customers based on your configuration within Amazon.~
~So, for example, if you are not providing a "1 Day" shipping method in Amazon, then no orders will be imported with the "1 Day Shipping" service level.~
:::

## ~Item Configuration~
1. ~You'll also need to configure the "Amazon" tab for each of your items. Your choose the appropriate category form the provided list for the product and then fill in the required field (you may wish to further configure additional field that appear on the tab.)~
2. ~If your Amazon SKU and UltraCart itemID differ, then you'll also need to navigate to the "Other" tab in the item editor and configure the Amazon SKU for the UltraCart item into the Channel Partner SKU Mapping section:~

### ~Item syncing tools~
~The following tools are available to sync your items between UltraCart and Amazon Seller Central:~
- [~Amazon Seller Central Manual Upload~](#page-not-found)~ -This feature is for those merchants using Amazon Seller Central to sell their items and that have already uploaded their spreadsheet inventory. This section allows those merchants to force an immediate upload to Amazon of changed item data instead of having to wait for the normal hourly upload job. Merchants that already have Amazon Seller Central configured will see the following upload screen. ~
- [~Amazon Seller Central Import~](#page-not-found)~ - ~**~This feature is for those merchants using Amazon Seller Central to sell their items. Those users will have a special Excel spreadsheet provided by Amazon that UltraCart can read to import their store items into the system.~**
:::info
**~Helpful resources~**
# ~Related resources~
~Amazon Seller Central Inventory File Templates~
[~https://www.amazon.com/gp/help/customer/display.html?nodeId=200186090~](https://www.amazon.com/gp/help/customer/display.html?nodeId=200186090)
~Amazon Seller Central Building Your Spreadsheet~
[~https://www.amazon.com/gp/help/customer/display.html?nodeId=200203300~](https://www.amazon.com/gp/help/customer/display.html?nodeId=200203300)
:::
## ~Learning About Errors~
~One critical step in configuration is making sure that UltraCart can notify the proper individuals within your organization about errors. UltraCart does this by sending emails to any users with the Amazon Seller Central notification selected. Make sure that at least one user has this notification by navigating to:~
:::note
[~Main Menu~](https://ultracart.atlassian.net/wiki/404?key%3Dmerchant%3Bsearch%3Fq%3D%2FmainMenu.do) ~→~ [~Configuration~](https://ultracart.atlassian.net/wiki/404?key%3Dmerchant%3Bsearch%3Fq%3D%2Fconfiguration%2FconfigurationMenuLoad.do) ~→~ [~Users~](https://ultracart.atlassian.net/wiki/404?key%3Dmerchant%3Bsearch%3Fq%3D%2Fconfiguration%2FuserListLoad.do)
:::
~Click edit on the user to receive the notifications and then check the Amazon Seller Central notification on their user as shown below.~

## ~Reviewing the Error Log~

~If you see documents in the inbound orders section of the error log page, click the "reprocess" button then review the error details. ~
~The issue will usually reside in either the shipping method mapping or in the item sku mapping.~
~If the log details displayed after clicking the "reprocess" button are not obvious, click the "download" button and inspect the order details. Again, you'll probably want to focus on the address, and item details to see if anything jumps out at you regarding the shipping methods that you have mapped on the "Settings" tab (this is the configuraiton section where you selected which individual shipping methods you have configured in UltraCart correspond with the Amazon shipping method option options ("Standard Shipping, "Expedited Shipping" , "Two-Day Shipping" & "One-Day Shipping"). ~
~If you are unable to determine the cause and appropriate configuration changes, email ~[~support@ultracart.com~](mailto:support@ultracart.com)~ for further assistance.~
### ~Channel Partner Mapping Errors~
~See ~[~Channel Partner Mapping for Amazon Seller Central Import~](/account-settings/channel-partners/amazon-seller-central/channel-partner-mapping-for-amazon-selle)
## ~Disabling Integration~
~If you want to turn off the Amazon Seller Central integration, remove the four MWS credential fields configured in the Authentication Credentials section and save the page.~
# ~Frequently Asked Questions~
### ~Q: We have orders that come in from our Amazon Seller Central account, we want to find out why orders are coming through in situations where we do not have inventory to fill for an item? ~
~Answer: Amazon processes information through asynchronous batch files. In high volume scenarios that can get you into trouble. High volume sellers with ASC integration use the~ **~inventory buffer~** ~option to help protect against over selling scenarios. (Example: One of our higher volume merchants uses a inventory buffer setting of 2 on their configuration. That means UltraCart reports to Amazon two less than the merchant actually has in inventory in order to account for the fact it can take Amazon up to an hour to process an inventory file change, and with sales happening on Amazon, eBay and their own website it provides "a buffer" to their inventory that accounts for sale that are occurring from other sources. This setting is under Configuration -> Channel Partners -> Amazon Seller Central -> Inventory Buffer (See the "Options" section above)~
### ~Q: I need to configure the item type in the Amazon tab of the item editor, but its not clickable?~
~Answer: That's an outdated way to configure the item details. If you have a small n umber of items to list, you can do that directly from the Amazon web interface. If you have a large number of items, then the better option will be to use the~ [~Amazon Seller Central Import~](#page-not-found) ~tool, located:~
~Main menu > Items > Tools > Amazon Seller Central Import~
~Amazon provides the import spreadsheet, its a complex spreadsheet, which is why this option is better for accounts with large item counts.~
~You can find more details about the product categories and the their corresponding product types here:~
[~https://services.amazon.com/services/soa-approval-category.htm/ref=asus\_soa\_snav\_cat~](https://services.amazon.com/services/soa-approval-category.htm/ref=asus_soa_snav_cat)
### ~Q: UltraCart sends inventory files to our Seller Central account, but puts in a default of 1,000 for every item. We want the amounts to actually be correct, so if something is low or out of stock that Amazon gets the correct inventory. How do we make this work correctly? ~
~Answer: If an item is not set to track inventory then the behavior is to tell Amazon 1000 units.~ [~Enable inventory tracking~](/items-catalog/item-management/item-editor/shipping-tab-item-editor) ~on the item, configure the proper inventory level, and then give UltraCart an hour to send a file and Amazon a half hour to process that before the change reflects. ~
### ~Q: I just ran the Amazon Seller Central import. ~~I noticed that your Amazon implementation is not sending the correct Amazon price to Amazon SC. The Amazon template that we upload to your system has different pricing for our Amazon items however, the items on Amazon have the UltraCart item pricing instead. I can’t find any errors on Amazon. What is happening to the price from my import file?~
~Answer: UltraCart sends the price configured within UltraCart for the item(s), the price in the Amazon import template file is ignored. ~
:::info
**~Important Amazon Listing Rule~**
~Amazon's terms and conditions state that a merchant must sell their items on Amazon at the lowest price you sell anywhere else or they can terminate your account.~
:::
---
# Channel Partner Mapping for Amazon Seller Central Import
https://docs.ultracart.com/account-settings/channel-partners/amazon-seller-central/channel-partner-mapping-for-amazon-selle
doc_type: how-to
# Overview
This document shows how to respond to an Amazon Seller Central import error regarding item level Channel Partner Mapping. This maps (links) the UltraCart item to the Amazon item.
## Identifying the issue
:::note
[Main Menu](http://menuhome/) → [Configuration](http://menuconfiguration/) → [Amazon Seller Central](http://docs.ultracart.com/configuration/amazonSellerCentralSettingsLoad.do@merchant) → "Error Log" (tab) → Inbound Orders → "Retry" Inbound Orders
:::
The error will appear something like this:
Processing Document \[29,657,378,583\]
ERROR: Item \[Bone\] specified in import file does not exist. The description for this item is \[TJ's DOGGIE BONES (5 lbs.)\]
shipping service level \[FreeEconomy\] specified in import file does not map.
Purchase Date \[9/17/14 10:06 PM\]
Payment Date \[9/17/14 10:06 PM\]
Considering processing of \[107-8021825-4549819\] with \[1\] lines
Ignoring order id \[107-8021825-4549819\] because one or more of the items are misconfigured. Look at the lines above in this log file for ones that say \[specified in import file does not exist\]. You have to create (or map) those item ids before this order will import.
## Applying Channel Partner Mapping
To correct for this issue, you'll need to navigate to the item, edit the item and navigate to the Other tab and Choose "Channel Partner Mapping" (Appears directly below the "Other" section after you've clicked the "Other" tab).
:::note
[Home](#) → [Items](#) → Edit Item → Other → Channel Partner Mapping
:::

After you've update the channel partner mapping fields and saved the changes, navigate back to the "Error Logs" tab of the Amazon Seller Central configuration page and click the "Reprocess" button.

---
# Call Center Integration Information
https://docs.ultracart.com/account-settings/channel-partners/call-center-integration-information
doc_type: how-to
# Call Center
The typical scenario is a CSV or XML file transmitted to our FTP server. If the file contains credit cards then it must be PGP encrypted. Order of operations:
1. Receive file format specifications from call center with an example file.
1. Must contain the following:
1. The call center's order ID
2. Shipping Cost if available (if not we will determine shipping cost)
3. Credit Card Number and Expiration
4. Email (optional)
5. Billing Address
6. Shipping Address
7. Must be able to handle multiple items, using multiple rows/order or 10-column pairs on a single row
2. If PGP encryption send call center our PGP public key.
3. CDQ Signed and project begins
4. Development implements channel partner
5. Configure channel partner on merchant (this creates the virtual FTP account)
6. Send virtual FTP credentials to call center.
7. Call center sends over live test file.
8. Process live file. Project complete.
| Spreadsheet fields | Required? |
| --- | --- |
| call center order id | Yes |
| billing address | Yes |
| shipping address | Yes |
| e-mail | No |
| day phone | No |
| evening phone | No |
| item ID | Yes |
| qty. | Yes |
| shipping method | Yes |
:::note
The call center must provide list of all shipping method codes.
:::
---
# Channel Partner Mapping for SPS Commerce Import
https://docs.ultracart.com/account-settings/channel-partners/channel-partner-mapping-for-sps-commerce
doc_type: how-to
# Introduction
**SPS Commerce** is a cloud-based supply chain solutions provider that positions itself as an _Intelligent Supply Chain Network_, connecting retailers, brands, manufacturers, distributors, and logistics providers. The platform manages **33M+ SKUs**, integrates with **400+ systems**, serves **50,000+ subscribing customers**, and processes **750M+ transactions** powering over $650B in GMV annually
This document details the channel partner item mapping process for SPS Commerce channel partner integration.
## Applying Channel Partner Mapping to Items
To configure the channel partner mapping for your items, you'll need to navigate Item Management.
:::note
[Home](https://ultracart.atlassian.net/wiki/404?key%3Dmerchant%3Bsearch%3Fq%3D%2FmainMenu.do) → [Items](https://ultracart.atlassian.net/wiki/404?key%3Dmerchant%3Bsearch%3Fq%3D%2FitemsMenu.do) → Edit Item → Other ('Advanced View') → Channel Partner Mapping
:::
For each the item, edit the item and navigate to the **Other** tab and Choose "**Channel Partner Mapping**" (Appears directly below the "Other" section after you've clicked the "Other" tab).

After entering the item Mapping details in the SPS Commerce row, save the changes.
---
# GoHighLevel Channel Partner Integration
https://docs.ultracart.com/account-settings/channel-partners/gohighlevel-channel-partner-integration
doc_type: reference
# External Steps
The GoHighLevel channel partner is powered by a webhook that accepts incoming payloads representing orders. To send an order to the GoHighLevel channel partner, you must first have configured a GoHighLevel channel partner within the UltraCart website. Those details are listed in the **Internal Steps** that follow.
**Method**: `POST`
**URL**: https://api.ultracartstorefront.com/gohighlevel/webhook/order/{merchant\_id}
Replace {merchant\_id} with your UltraCart Merchant ID (uppercase). Here is an example of a complete url for our demo account: https://api.ultracartstorefront.com/gohighlevel/webhook/order/DEMO
**Authentication: Basic**. You supply the username and password of your choosing. This must match when you provide in your UltraCart GoHighLevel configuration (see Internal Steps) below.
**Payload:**
```js
{
"order_id": "ORD847K2M",
"customer": {
"first_name": "Sarah",
"last_name": "Johnson",
"email": "sarah.johnson@ultracart.com"
},
"items": [
{
"merchant_item_id": "SHIRT_BLUE_LARGE",
"quantity": 3
}
],
"shipping": {
"first_name": "Sarah",
"last_name": "Johnson",
"address1": "1247 Oak Street",
"city": "Denver",
"state": "Colorado",
"postal_code": "80202",
"country_code": "US"
}
}
```
Response: A successful response will return a status code 200 and a response body of “Webhook received”.
# Internal Steps
Open your web browser and login to [https://secure.ultracart.com](https://secure.ultracart.com)
## Navigation
:::info
Main Menu → Configuration → (Middle Menu) Integrations → "Channel Partners" (Section) → GoHighLevel
:::
## Configuring the GoHighLevel Settings
The username and password are required. These should match whatever you are using as your Basic Authentication for your webhook requests (See External Steps above).
| Field | Description | Required |
| --- | --- | --- |
| GoHighLevel Username | This is the value used in your Basic Authentication username field | Yes |
| GoHighLevel Password | This is the value used in your Basic Authentication password field | Yes |
| Quickbooks Code | If you use Quickbooks, you may specify a code here to help your Quickbooks understand that these orders are from GoHighLevel | No |
| StoreFront | Selecting a storefront will mark all GoHighLevel orders as belonging to that StoreFront. | No |
| Ignore Specific Item Ids (one per line) | Supply GoHighLevel items to be ignored during the import. | No |
| Ignore Specific Order Ids (one per line) | Any GoHighLevel orders listed here will not be imported. | No |
| Import orders as purchase orders | When enabled, forces all orders to be imported as a Purchase Order. | No |
| Omit Tax Information | If checked, all orders will have their Arbitrary Tax set to zero to avoid double taxation (assuming GoHighLevel collected tax already). | No |
| Send Emails Directly | Checking this field will cause UltraCart to skip all direct communication with customers and allow GoHighLevel to handle communications. | No |
---
# ShipStation Channel Partner Integration
https://docs.ultracart.com/account-settings/channel-partners/shipstation-channel-partner-integration
doc_type: reference
ShipStation is a popular integration for both direct shipping and also for integration to other channel partners. The purpose of this guide is to walk you through how to configure ShipStation as a channel partner so that orders placed on sites like TikTok, Etsy, etc. can be pulled from ShipStation and routed through UltraCart.
First login to your ShipStation account:

Connect your ShipStation account to TikTok or whatever marketplace you are interested in. We’ll leave that step out of the scope of this documentation. Once it’s connected click on Connect and manage stores as shown below.

Make sure the store you’re looking to connect is visible in the list:

Next click on the Settings icon in the top right corner as shown below.

Expand the Account menu on the left and then click on API Settings:

Select API Version = V1 API and then click generate. Select a six month expiration time period. The API keys will popup on the screen as shown below.

Within UltraCart navigate to Configuration → Integrations → ShipStation as shown below.

Click New to create a new ShipStation channel partner:

Enter a code for the channel partner. Then paste in the username and password values from your ShipStation V1 API key. Once you’ve entered your credentials, click the Refresh button. The Store list will populate with the ShipStation stores if the credentials are correct. Select the correct ShipStation store from the list. Choose skip emails since the marketplace will typically send the confirmation emails to the customer.

# ShipStation Integration – Field Reference Table
| **Field Name** | **Description** |
| --- | --- |
| **Code** | A short internal identifier for the ShipStation channel partner configuration (e.g., “TikTK”). |
| **Name** | A descriptive name for the integration, typically matching the connected store or marketplace. |
| **ShipStation Username** | The username associated with the ShipStation account used for API communication. |
| **ShipStation Password** | The API password (or API key) used to authenticate the connection to ShipStation. |
| **ShipStation Store** | A dropdown list populated after successful authentication. Select the specific ShipStation store to associate with this integration. |
| **Refresh** (button) | Retrieves and updates the list of available ShipStation stores using the provided credentials. |
| **Skip Customer Emails** | If enabled, UltraCart will not send customer email addresses to ShipStation. |
| **Associate with StoreFront** | Allows linking this ShipStation integration to a specific StoreFront instance. |
| **Packing Slip – Omit Pricing** | When checked, pricing details will be removed from packing slips generated through this integration. |
| **Packing Slip – Omit Regular Order ID** | Omits the standard UltraCart Order ID on packing slips (useful for marketplaces requiring alternate IDs). |
| **Do Not Hold Shipments** | Prevents UltraCart from putting orders in a hold status before passing them to ShipStation. |
| **Skip Tax Recording in Avalara or TaxJar** | Ensures that transactions transmitted through this channel are not recorded in connected tax services (Avalara or TaxJar). |
| **Add Item Ids to Order (one per line)** | Allows entry of item IDs that should automatically be added to every order transmitted through this integration. Useful for inserts, promotional materials, or mandatory add-on items. |
| **Send alert after** _**X**_ **business hours without an order imports** | Triggers an alert if no orders have been imported within the specified number of business hours. **\*Requires Integration Log Health Report notifications to be configured.** |
## Shipping Service Mapping
Next, you'll need to specify how UltraCart should map the ShipStation shipping method name to your UltraCart store. UltraCart will perform a shipping method calculation based upon the methods you select below. For example, if you select three available shipping methods for "Standard" (You define this name), UltraCart will calculate which of these methods is available for each ShipStation order that comes through and pick the one that has the top priority and then least expensive one if the priority is not specified. Your preferred method should have a priority of one, then two, etc.
NOTE: You’ll be presented with a configuration and mapping for one shipping service level. To add additional shipping service levels, save the settings then return to the configuration page.
At this point the channel partner is configured. It will poll hourly for new orders and transmit back shipping information as well hourly.
## Item/SKU Mapping
For orders coming in via the **ShipStation Channel Partner** integration, UltraCart requires an exact matching **Item ID** (or SKU) for every product line item on the incoming order.
If the SKU from TikTok Shop does not match an existing Item ID in your UltraCart catalog, the order will either fail to import cleanly.
### For Kit/Component Items Specifically:
- Create a parent **Kit Item** in UltraCart with the exact SKU that TikTok Shop / ShipStation will send.
- Define the individual **components** (child items) under that kit with the proper quantities.
- When the order imports, UltraCart will automatically expand the kit and deduct inventory from the components (as long as the kit is properly configured with “Kit” item type and component relationships).
**Important Considerations:**
- Component quantities are handled by UltraCart’s kit logic, they are not passed from ShipStation/TikTok. As long as the parent SKU matches and the kit is set up correctly, the correct component counts will be applied on import.
- Make sure each component item also exists in your catalog with its own Item ID (even if hidden from the storefront).
---
# Walmart Channel Partner Integration
https://docs.ultracart.com/account-settings/channel-partners/walmart-channel-partner-integration
doc_type: reference
# Integrating Walmart.com as a Channel Partner
Import orders placed on Walmart.com into your UltraCart account. The channel partner integration will also send back updates to Walmart.com for shipped orders, including tracking information.
**Please note: This integration does not perform product listing, you'll do that from Walmart.com**
## Navigation
:::info
Main Menu → Configuration → (Middle Menu) Integrations → "Channel Partners" (Section) → Walmart.com
:::
# Integration Steps
## Configuring the Walmart.com Settings
In order for UltraCart to connect to your Walmart.com account, you'll need to configure the following fields:

Configure the following two credentials:
- Walmart.com Client ID
- Walmart.com Client Secret
:::note
You will obtain these credentials from [Walmart.com](http://Walmart.com) as shown below.
:::
From Walmart.com click on Settings, then scroll down to API and click on Consumer IDs & Private Keys

Next click on the Walmart Developer Portal button at the bottom of the page.

The next screen will have your Client ID and Client Secret Key as shown below.

In addition to the credentials the following additional settings appear:

| **Field** | **Description** | **Required** |
| --- | --- | --- |
| [Walmart.com](http://Walmart.com) Client ID | This is your Walmart account Client ID. | Yes |
| [Walmart.com](http://Walmart.com) Client Secret | This is your Walmart Client Secret. | Yes |
| Don't process orders placed before (MM/DD/YYYY) | Any order prior to the configured date will not be imported into UltraCart. | No, but recommended |
| Screen Branding Theme Code | For merchant processing orders through the legacy Screen Branding Themes. | No |
| Ignore Specific [Walmart.com](http://Walmart.com) Item Ids (one per line) | Configure Walmart items that should not be processed for import into Ultracart. | No |
| Ignore Specific [Walmart.com](http://Walmart.com) Order Ids (one per line) | Configuring any Walmart orders that should not be imported into UltraCart. | No |
| Import orders as purchase orders | When enabled, forces all orders to be imported as a Purchase Order, regardless of the payment method used within Walmart.com when the purchase was made. | No |
| Send Emails Directly | (We do not recommend selecting this. Most merchants should let [Walmart.com](http://Walmart.com) send the notices from the information UltraCart feeds [Walmart.com](http://Walmart.com).) | No |
# Shipping Method Mapping
Next, you'll need to specify how UltraCart should map the [Walmart.com](http://Walmart.com) shipping method name to your UltraCart store. UltraCart will perform a shipping method calculation based upon the methods you select below. So for instance if you select three available shipping methods for standard, UltraCart will calculate which of these methods is available for each [Walmart.com](http://Walmart.com) order that comes through and pick the one that has the top priority and then least expensive one if the priority is not specified. Your preferred method should have a priority of one, then two, etc.
# Frequently Asked Questions
**Question: I am integrating Walmart.com as a channel partner. I don't see a Walmart tab in the item editor, why not?**
_Answer: Since Ultracart is not performing product listings, there is no need for a tab of the field mapping. Please log into your Walmart.com account to manage your products. _
**Question: We recieved a error about a item mismatch, so we created the missing items in Ultracart. How do I resend the order transmission?**
_Answer: UltraCart automatically retries sending the pending order transmissions on an hourly basis._
# Related Documents
[https://marketplacelearn.walmart.com/releasenotes](https://marketplacelearn.walmart.com/releasenotes) Walmart release notes.
---
# Login failed. Please make sure this IP has been authorized to access the system.
https://docs.ultracart.com/account-settings/common-integration-issues/login-failed-please-make-sure-this-ip-ha
doc_type: how-to
# Error Message
"Login failed. Please make sure this IP has been authorized to access the system."
This message will be returned for any Unauthorized IP address that attempts a remote connection using the JavaScript API, SOAP API, or one of the legacy XML APIs. This is a security measure to lessen the chance of someone stealing credentials and harming a merchant's account.
# Solution
(A user with "**Edit Users**" permission enabled)
Login to [https://secure.ultracart.com](https://secure.ultracart.com) and navigate to:
:::note
Home → [Configuration](#) → [Users](#)
:::
Navigate from the Main Menu, first clicking **Configuration**, Then clicking **Users:**
****
From the **Users and Permissions** section, click the edit button for the login that will be used to connect remotely.

Scroll down the page a little, and in the left column will be `Permissions`.
To the right of `API Access` is a link `[IP Addresses]`.

Add each IP address that needs access. The error message you receive will report the IP address that was denied access.

_**When finished, remember to click the `Save` button at the bottom of the screen.**_

---
# Desktop Software
https://docs.ultracart.com/account-settings/desktop-software
doc_type: explanation
UltraCart provides two pieces of desktop software to make accounting and shipping easier.
[UltraBooks](/account-settings/desktop-software/ultrabooks) is a free piece of software that downloads orders from UltraCart and creates sales receipts/invoices inside of QuickBooks. This eliminates the double entry typically associated with accounting.
[UltraShip](/account-settings/desktop-software/ultraship) is a piece of software that provides easy multi-carrier shipping capabilities.
---
# UltraBooks
https://docs.ultracart.com/account-settings/desktop-software/ultrabooks
doc_type: how-to
**Latest Version: 7.0**
UltraBooks - Sending orders to QuickBooks™
UltraBooks is a program that interfaces UltraCart with QuickBooks Desktop version. Please see [QuickBooks Online](/account-settings/back-office/quickbooks-online) for our integration with QBO.
## Introduction
Many online merchants use Intuits industry leading QuickBooks™ accounting software to maintain their company books. UltraCart has enhanced support for Merchants using QuickBooks™ with the addition of our QuickBooks™ integration tool called **UltraBooks.**
UltraBooks allows UltraCart merchants to import data directly to QuickBooks™ software. There's no need to deal with file formats and data conversion as UltraBooks does it all for you. Once configuration steps are complete, merchants simply run UltraBooks and it handles all the communication and importing between UltraCart and QuickBooks™.
## Getting Help
As of version 5.7, you may (and should) create a support request within Ultrabooks. Doing so will upload your settings and the temporary database used by Ultrabooks. If you don't use the built-in feature, Ultracart staff will just ask for these files manually before anything else. So upgrade and use the built-in feature. It greatly accelerates conflict resolution.
To create a support case, you must be first authenticated with the system. Once you've performed the authentication (See the 'Accounts' screen), click on the Help button at the top right of the application. Follow the instructions within.

## Change Log
| **Version** | **Release** | **Notes** |
| --- | --- | --- |
| 7.0 | 2026-06 | Jumped to version 7.0 due to upgraded .NET libraries. Also: New Order Import option, "Show full price with a separate discount line," imports each item at full price with the discount as its own QuickBooks line rather than just the discounted total. |
| 6.4 | 2025-09 | Added PayPal Fastlane and Stripe Link as specific payment method validations |
| 6.3 | 2024-08 | Added Google Pay and Apple Pay as specific payment method validations. |
| 6.2 | 2023-03 | Additional logging, clear order cache button on Help Screen. Misc. bug fixes. |
| 6.1 | 2022-02 | - Shipping Tax Code Override (new checkbox in Settings - Orders) - Force all Purchase Orders to be Sales Orders instead of Invoices (new checkbox in Settings - Orders) |
| 6.0 | 2021-06 | Additional error handling when connecting to Quickbooks. We did a major rev to 6.x because of the bug fixes in 5.10. They were significant enough to warrant a major version change. Everyone should upgrade to 6.x when possible. |
| 5.10 | 2021-03 | Tax bug fixes and additional logging. |
| 5.9 | 2020-06 | - Added Comments and Special Instructions to templating engine. You may now display these values within your memo field (or elsewhere, but that makes little sense). - Added new template field for the "Other" field, allowing such things as Order IDs to appear there. This was a request by a merchant because the memo field isn't available to some of the report builder screens, while Other is, allowing them to place the Order ID on some printouts. - Added a default value for payment Authorization Codes if one happens to not be present within the order details. Authorization Codes are only used by Quickbooks Payments Gateway, and therefore this default value is only needed by those merchants. While an authorization code should always be present for an order, experience has shown this value is sometimes missing. Without a dummy value to fill the void, the order is rejected by Quickbooks. |
| 5.8 | 2020-06 | Added LiftGate and Residential to the templating engine. You may now display these two booleans within your memo field (or somewhere else). |
| 5.7 | 2020-02 | Removed the use of LiteDB for data storage within the UltraBooks application. All data storage is now done using the system registry. This makes Ultrabooks perform better within hosted environments and other restrictive installations where it may or may not have access to the local filesystem. |
| 5.6 | 2020-02 | - The log files were moved out of the Documents directory into the local application directory. This will eliminate conflicts with cloud based replicators like Dropbox and Microsoft One-Drive. - The Help page now has the ability to create a support case with UltraCart directly. This eliminates the need to find and send in log files. Responses to issues should improve drastically as several round trip emails are now eliminated. - UltraBooks now supports the Avalara AvaTax plugin for QuickBooks. The Order settings page has a checkbox for "Use AvaTax". When checked, all customers and transactions are tagged with the "AVATAX" tax item (as directed by Avalara). |
| 5.5.3 | 2020-01 | 1. Customer profile "qb class" field was not being used properly. It now is considered when determining what Quickbooks class (if any) to associate with the transaction. Remember that the "Import Class" checkbox must be checked in your Settings for this field to apply. 2. Added error handling to correctly return back to user a notification of errors that happen when edits that require single-user mode fail because Quickbooks is running in multi-user mode. |
| 5.5.2 | 2019-12 | Added new settings tab "QuickBook Payments" and a field "Merchant Account Number" where you can supply your Quickbooks Payment merchant account number. Some orders are completing without that number in the transaction details. It's still required to add a Quickbooks Payment order into Quickbooks, so you must manually supply it here. See [https://quickbooks.intuit.com/learn-support/en-us/merchant-services/locate-your-merchant-account-id-mid-number/00/228856](https://quickbooks.intuit.com/learn-support/en-us/merchant-services/locate-your-merchant-account-id-mid-number/00/228856) |
| 5.5.1 | 2019-10 | Added additional logging to help troubleshoot some tax rate updating issues specific to one merchant. |
| 5.5 | 2019-09 | - Additional logging and feedback on Terms matching between order/customer and QuickBook payment terms - Bug fix on payment details implemented in 5.4. We missed a change in a date format (now included timezone), preventing the date from being parsed properly. |
| 5.4 | 2019-09 | Updated payment details to work with `QuickBooks Payments` payment gateway. |
| 5.3 | 2019-09 | New Setting: General Settings → Manual Import will disable the automatic validation and import of any downloaded orders. This was requested by a merchant who wished to review all orders and prevent certain orders from flowing into Quickbooks. The default for this setting is false. Additional internal logging to aid troubleshooting. |
| 5.2 | 2019-04 | Added new button to customer mapping screen allowing for the existing customer record to be used, but updating it with the current order's information. This provides the best-of-both-worlds scenario of keeping the existing customer record with its history and also ensuring it has the latest information. Added three new check boxes to the Customer Settings screen. - Match by Name and Email - Match by Name and Zip - Automatically update Customer record These values allow for a looser matching criteria when determining if an existing customer is the same as an order. |
| 5.1 | 2019-02 | - Reworked flow. Entire process of downloading and importing orders happens with one click of the Download button. This includes dealing with customer mappings. - Changed address templates to include city, state, zip and country. Previously, those fields were given to QuickBooks and allowing it to decide where to place them. This would lead to errors when address fields 4 and 5 were taken and QuickBooks tried to place the additional data in those fields. :::warning Important Changes with 5.1 RC1 **Please read this carefully. Your data will be incorrect otherwise.** This version of UltraBooks changes address field usage. Prior versions had 5 address fields and also added city, state, zip and country to the billing and shipping areas. Behind the scenes, QuickBooks would add the city, state, zip, and country to the address 4 and 5 fields. If those fields were already filled, an error would occur. **UltraBooks no longer sends QuickBooks the city, state, zip, and country separately.** These fields are now part of the templates to ensure there are no errors. **You must**: review the templates in the Settings and ensure city, state, zip, and country are present in one of the five address fields. If you previously had nothing in Address4 and Address5, you are fine. Those will default to correct usage. But if you did have something there, you will need to adjust your templates. _Simply blank out those fields if you wish to use the UltraBooks defaults_. The default for field Address5 is now: `[BillToCity], [BillToState] [BillToZip] [BillToCountryCode]` Example: Duluth, GA 30097 USA  ::: |
| 5.0.8 | 2018-11 | Bug fix. Ship to zip code was used instead of bill to zip code for the invoice Bill To Address during certain circumstances. |
| 5.0.5 | 2018-04 | This is the beginning of tracking changes in a change log. This version adds a new setting in the General Settings tab called "Auto Import". When checked, downloaded orders are automatically validated and imported if no issues were found. This allows UltraBooksNG (next generation) to function in a batch mode similar to the legacy version of UltraBooks. |
## Background
**UltraBooks is an installed Microsoft Windows application that connects up to the central UltraCart system and downloads orders into Intuit's United States editions of QuickBooks™ version 2004-Current (Pro, Premium or better versions).**
\*\*\*\*The software is not compatible with Mac, Online, Canadian, International, or Simple Start versions of QuickBooks™.
When the UltraBooks program is launched it will prompt you for the same login information that you use to access your UltraCart account. UltraBooks then securely downloads all the new (completed) orders.
## What Type of Data will UltraCart Import?
UltraBooks will create customer profiles for your customers automatically if they do not already exist. After creating the customer profile, UltraBooks will create a sales receipt or, in the case of purchase orders, an invoice for each completed order (i.e. marked as shipped). Those using QuickBooks™ Merchant Services (QBMS) will also have credit card transaction information imported.
## Getting Started
To begin the UltraBooks Configuration navigate to:
:::note
Main Menu → Configuration → UltraBooks
:::
### Required Software:
- **Microsoft VC++ Redistributable**
- **Microsoft .NET Framework (v4.8) -** Windows 10 (1903+) and Windows 11 already include 4.8
- **QuickBooks™ SDK QBFC 13.0**
- **UltraBooks v7.0**
In order to use UltraBooks you must first download and install all the required components onto the same PC that QuickBooks™ is installed (for server installations see the note at end of the installation section). It's recommend that you read through all the UltraBooks documentation before you install the software discussed below.
| **Step** | **Name** | **Location** | **Description** | |
| --- | --- | --- | --- | --- |
| 1. | Microsoft VC++ Redistributable | [https://aka.ms/vs/17/release/vc\_redist.x86.exe](https://aka.ms/vs/17/release/vc_redist.x86.exe) | Core Microsoft Visual C++ Foundation | |
| 2. | Microsoft .NET Framework (v4.8) | [https://dotnet.microsoft.com/download/dotnet-framework/net48](https://dotnet.microsoft.com/download/dotnet-framework/net48) _(Windows 10 (1903+) and Windows 11 already include 4.8)_ | .NET Framework | |
| 3. | QuickBooks™ SDK QBFC 13.0 | [https://www.ultracart.com/qbsdk130.exe](https://www.ultracart.com/qbsdk130.exe) | Quicken Connectivity Library | |
| 4. | UltraBooks v7.0 | [https://www.ultracart.com/UltraBooksInstall\_v7.0.msi](https://www.ultracart.com/UltraBooksInstall_v7.0.msi) | Main Application | |
- The installer will install the application and create a desktop icon named 'UltraBooks v5' to launch the application.
- If you wish to pin the application to your Start Menu or Task Bar, click the desktop icon, and then right click on the running application to pin UltraBooks wherever you desire.
- For technical reference, the application installs to C:\\Program Files (x86)\\UltraCart\\UltraBooksNG\_5.10\\
### Prior Versions of UltraBooks
:::info
**Uninstall previous versions**
Only one version of UltraBooks may be installed at a time. Please uninstall any older versions before installing a new one. Your settings will be saved.
:::
- Latest version (**link is directly above, scroll up 5 inches**).
- [UltraBooks 6.4](http://www.ultracart.com/UltraBooksInstall_v6.4.msi)
- [UltraBooks 5.10](http://www.ultracart.com/UltraBooksInstall_v5.10.msi)
- We've removed prior versions due to a bug with tax importation.
### Supported Versions of QuickBooks: QuickBooks 2012 through 2020 (Pro, Premium, Accountant or Enterprise)
:::info
**Quickbooks Compatability**
**UltraBooks is an installed Microsoft Windows application that connects up to the central UltraCart system and downloads orders into Intuit's United States editions of QuickBooks™ version 2012-Current (Pro, Premium or better versions).**
This software is not compatible with Mac, Online, Canadian, International, or Simple Start versions of QuickBooks™.
QuickBooks Point Of Sale (POS) version is also not supported.
QuickBooks Online is supported as a seamless integration with UltraCart. See [QuickBooks Online](/account-settings/back-office/quickbooks-online) for more information.
:::
### Software download links within secure.ultracart.com
You may also install UltraBooks via links in the ultracart.com site. In UltraCart, navigate to:
:::note
Main Menu → [Configuration](https://ucsupport.ultracart.com/merchant/configuration/configurationMenuLoad.do) → (middle menu) Back Office → [UltraBooks](https://ucsupport.ultracart.com/merchant/configuration/accountingIntegrationLoad.do)
:::

After clicking on the `UltraBooks` link you'll be taken to the UltraBooks configuration screen (shown below).
There you'll find instructions for installing the required software. We've even provided hyperlinks that will take you to the install process for each application.

After installing the required software, enter the configuration mode by clicking the `Configuration Mode` button on the UltraBooks screen.
:::info
**Note Regarding Server Installations**
Question: We run our QuickBooks from our server, do we have to install UltraBooks on the server or can each user needing to use it install UltraBooks on their workstation?
Answer: It is okay to install UltraBooks onto workstations, provided that each employee will be downloading the orders into the **same** QBW file.
:::
## Configuration Mode
### QuickBooks Codes
Clicking the `Configuration Mode` button at the bottom of the Configuration Screen will enable your merchant account for QuickBooks™ configuration and present the "UltraBooks™ Configuration Mode" screen. There, you will be shown a list of your specific areas that will need accounting codes.
:::tip
Assigning accounting codes allows UltraBooks to match up and properly categorize data in UltraCart to data in QuickBooks™ each and every time you download data.
:::

Click on the `QuickBooks Code Configuration Checklist` link to be taken to the Unconfigured QuickBooks Codes Screen. Each time you return to the main UltraBooks configuration page, you will be presented with the list of pending items until all have been configured.
### Unconfigured QuickBooks Codes
This is a helpful screen for the entering of the QuickBooks Codes. It will list all the UltraCart items that have yet to be assigned appropriate QuickBooks Codes. In addition, each item is a link that when clicked, will take you to the appropriate screen for configuration. The next time you return to the Unconfigured QuickBooks Codes screen, that particular item will no longer be listed. It's imperative that you complete all the items and that the codes match perfectly with those in QuickBooks.

#### Coupon QuickBooks Codes
Each of your "active" coupons (Main Menu → Configuration → Checkout → Coupons) must also have a QuickBooks™ code associated with it. Edit each of your coupons and enter the corresponding QuickBooks™ code in the field.

Typically merchants have a single Item called "Discount" in their QuickBooks™ file that they associate with all of their UltraCart coupons. Click on Lists -> Item List in QuickBooks™ to review your discount items.
##### Creating a QuickBooks™ Discount Item
Note: Once you create a discount item, you cannot change it to another type.
1. Go to the Lists menu and click Item List.
2. Click Item at the bottom of the list and then click New.

1. In the New Item window, click the Type drop-down list and choose Discount.
2. Enter an item name, such as Discount.
3. Enter the description that you want QuickBooks™ to put on your sales forms when you apply the discount.
4. Enter the discount amount or percentage:
If the discount is a percentage, enter the number of the discount followed by the % symbol. For example, 5% tells QuickBooks™ to multiply the previous line by .05. _In the case of downloaded UltraCart sales, you will want to leave the Amount field blank._
1. Enter the account that you use to track discounts you give to customers. You can use either an expense account or an income account. When an income account tracks discounts on sales, the account is often called a "contra-income" account.
2. Click the Tax Code drop-down list and choose a tax code for this item.
If you select a taxable code, the discount you specify on taxable sales is applied before the sales tax is calculated. If you select a non-taxable code, the discount is applied after the tax is calculated.
1. Click OK or click "Next" to create another item.
#### Payment Method QuickBooks Codes
In UltraCart navigate to:
:::note
Configuration → Checkout (section) → Payments
:::
For each of the payment methods you have enabled in UltraCart you will need to specify what the corresponding code is in QuickBooks™.
Run QuickBooks™ and from the drop down menus click on Customers -> Enter Sales Receipts. You can also access this from the Home window. Click on the "Create Sales Receipts" button.

Then, click the drop-down under Payment Method

Lastly, click on the Payment Method desired or, click "Add Item" if it doesn't exist.
##### Deposit to Account
Also located on the UltraCart Configuration -> Payments screen is a field called QuickBooks™ deposit to account. This is the account you want the funds to be deposited into in QuickBooks™ when the sales receipts are added. By default, if this field is left blank the funds go into the "un-deposited Funds Account". The following are sections of the payments screen depicting the location of those codes.
**COD**

**Credit Cards**

**Paper Checks / Money Orders / Electronic Checks **

**PayPal**

To specify a different account click on the Chart of Accounts in QuickBooks™ and enter the name of the account you want to deposit funds into. Please note this is the **NAME** of the account and not the number!

##### Surcharge QuickBooks™ Code
The Surcharge QuickBooks™ code depicted above for Credit Cards and COD are to allow merchants to charge for those special services payment options. These codes come from the Item List in QuickBooks™. You'll probably need to create new Items in the QuickBooks™ Item List for these surcharges. The Item List can be found under the "Lists" menu or by clicking on the "Items & Services" icon on the Home screen. You'll see a row of menus at the bottom of the Item List window. Click on the Item drop down and select "new" to create a new item. Remember to enter the "name" you assign the item into the Surcharge QuickBooks™ Code field.
Each of your unique tax jurisdictions inside of UltraCart must have a corresponding entry in the QuickBooks™ system. To make this part of the configuration easier, UltraBooks can automatically add the missing tax jurisdiction to your QuickBooks™ file during the import process if it exists in UltraCart. So it is very important to configure the QuickBooks™ Codes inside of UltraCart for each tax jurisdiction.
#### Shipping Method QuickBooks Codes
Each of your shipping methods needs to have a QuickBooks™ code associated with it. Click on Configuration -> Checkout -> Shipping -> Methods. Then for each of the methods click on Edit -> Other (tab). In the QuickBooks™ code field enter the corresponding item name in QuickBooks™.

Most merchants typically set up a single Item in QuickBooks™ that represents their shipping costs such as "Shipping and Handling". Click on Lists -> Items List inside of QuickBooks™ to view your item list. Add an item for Shipping and Handling if it does not already exist.
#### Tax Rate QuickBooks Codes
Click on Configuration → Sales Tax. Start drilling down into your States, then Counties, then Cities going as deep as you have configured tax . At each level configure the QuickBooks™ tax code. During the import process, UltraBooks will present you with an import dialog if a sales tax item isn't configured in QuickBooks™ and needs to be.
:::tip
UltraBooks v5.0+ will automatically sync UltraCart tax fields with QuickBooks if you allow it to do so. If you wish to manage this process completely on your own, check the "Use legacy tax code method" on the UltraBooks Order Settings screen.

:::
The typical naming convention for the code is " Sales Tax" at the state level, then " Sales Tax" at the county level, and finally " Sales Tax" at the city level. An Example for a state sales tax code would be: "CASalesTax". For more information on configuring your sales tax within UltraCart, see page .

##### Setting up Sales Tax in QuickBooks
This section only discusses where to set up your Tax Items and Codes in QuickBooks™. You may want to learn more about sales tax concepts. QuickBooks™ will help you understand how QuickBooks™ uses sales tax items, rates, and codes to track the sales tax you collect from your customers and pay to your tax agency. The QuickBooks™ help section has a tutorial about tracking and paying sales tax that should be very helpful to the novice.
###### Turn on Sales Tax in QuickBooks
. First you need to make sure you have turned on Sales Tax if you haven't done so already.
- Go to the Edit menu and click Preferences
- In the Preferences window, click Sales Tax in the list on the left.
- Click the Company Preferences tab.
- For the question "Do You Charge Sales Tax?" select "Yes".

There are several other settings that you will need to make decisions on.
QuickBooks will insist that you set up a most common sales tax item. This will usually be your state sales tax. However, it may be multiple jurisdictions such as state, county, and city tax. These will need to be created before QuickBooks will accept Sales Tax.


You may need to get expert advice for your company tax settings.
###### Sales Tax Codes
Depending on your state and local sales tax requirements, the preset taxable (TAX) and non-taxable (NON) sales tax codes you see may be the only ones you'll need. If your tax agency requires you to specify additional sales tax codes to track taxable and non-taxable sales, such as for non-taxable out of state sales, refer to QuickBooks™ Help for more information on how to set up additional sales tax codes and for some examples of commonly-used non-taxable sales tax codes.
###### To add a sales tax code
1. Go to the Lists menu and click Sales Tax Code List.
2. Click Sales Tax Code at the bottom of the list and then click New.

1. In the New Sales Tax Code window, enter a sales tax code you want to use and a description for it.
2. Choose whether the code is Taxable or Non-Taxable.
3. Click OK.
###### Sales tax items, rates, and tax agencies
QuickBooks™ uses sales tax items to calculate and add sales tax charges when you make a taxable sale. When you set up a sales tax item, you assign it a sales tax rate and associate it with the tax agency to which you pay the sales tax.
1. Still in the Sales Tax Preferences window, click the "Most common sales tax" drop-down list and choose . The New Item window opens with Sales Tax Item already selected in the Type drop-down list.
2. Enter a sales tax name. Use the name that you assigned for this location in UltraCart. This name appears as one of the choices in the Tax field on your sales forms.
3. Enter a description for the way this sales tax item will appear as a line item on your sales forms. The description prints on your sales forms after the final line item. You can't edit it on the forms themselves. Users frequently use the name of the sales tax item as the description.
4. Enter the sales tax rate. The percentage you enter is the rate you set up in UltraCart. For example, your sales tax rate for XYZ County might be 8.25% (or 8 and 1/4 cents per dollar purchased). This rate also appears on your sales forms.
5. In the Tax Agency drop-down list, select . This will open the New Vendor window where you'll set up the tax agency (a vendor) to which you pay this sales tax.
6. In the Vendor Name field, enter the name of your tax agency. For example, in California, sales tax is paid to the Board of Equalization. You can enter the other information now, such as the address and opening balance, or you can do it later.
7. Click OK to close the New Vendor window.
8. Click OK to close the New Item window.
9. Repeat steps 1 through 8 for each sales tax item you need to set up for your business.
###### Selling to Non-taxed customers
If your out-of-state sales aren't taxed, set up a single sales tax item with a 0% rate. You also need to set up sales tax codes to track your non-taxable out-of-state sales. This is required even if you were not going to have any out-of-state sales at all.
### Other Codes (Gift Certificates)
If you are selling gift certificates to customers then you will need to create an item called "Gift Certificate" which will be used when the customer redeems the certificate.
### When to Import into QuickBooks
The 2nd part to the above screen allows you to indicate when (under what circumstances) you want to import orders into QuickBooks. The options are based on the state or status of your orders.

As seen above, the three options to import orders are:
1. after shipment
2. after payment (shipped in UltraCart/Fulfillment House) or
3. after payment (shipped in QuickBooks)
The recommended time is after the order has shipped (and is complete). If you want to import the order after the payment is processed there are two methods depending upon whether you are shipping the order from within QuickBooks or UltraCart/Fulfillment House.
:::tip
If you choose option 3; to ship after payment (shipped in QuickBooks), the order will be marked shipped in UltraCart. It will be the responsibility of QuickBooks to notify the customer of the tracking information (number). UltraBooks does not currently export tracking information back to UltraCart.
:::
### Matching UltraCart Items with QuickBooks Items
#### Different scenarios required different actions
It's absolutely necessary to set up UltraBooks Items that exactly match each of your UltraCart Items. When doing so, one of the following scenarios will apply:
| **Option** | **Results (box checked)** |
| --- | --- |
| Uppercase all name information | All customer names will be converted to upper case during import. |
| Import by company name instead of last name, first name when possible | Whenever a company name is present, the record will be imported by such. |
| Default Terms for new customers | If you wish new customers assigned a default/initial Terms, enter it here. The value must be a valid Terms found in your QuickBooks application. Within QuickBooks, navigate to Lists → Customer & Vendor Profile Lists → Terms List |
| **Option** | **Results (box checked)** |
| --- | --- |
| Canadian Version | Allows use of the Canadian version of QuickBooks™. |
#### **Order Settings**
| **Option** | **Results (box checked)** |
| --- | --- |
| Import all orders as invoices | ALL orders will be imported as Invoices. (Normally, Credit Card orders are imported as Sales Receipts and Purchase Orders as invoices). |
| Import as Sales Orders instead of Receipts | Records are created as Sales Orders |
| Mark customers as non-taxable if no tax was charged | |
| Mark all items as non-taxable if no tax is charged | In most cases, this is good to have checked. |
| Use legacy tax code method (no tax groups) | Prior versions of UltraBooks would use a single tax code to represent all taxes collected for an order. The new version uses tax groups (automatically created for you) to correctly represent the tax collected at all levels. This eliminates a host of issues the old system caused. Checking this box will use the old system. |
| Mark sales receipts as "`to be printed`" | When you select `Print Forms/Sales Receipts` in QuickBooks™, all sales receipts will appear in a list for batch printing. You can still de-select certain ones prior to printing. |
| Mark Invoices as `"to be printed" in QuickBooks` | When you select `Print Forms/Invoices` in QuickBooks™, all invoices will appear in a list for batch printing. You can still de-select certain ones prior to printing. |
| Use QuickBooks default item descriptors | If the QuickBooks item has a description, then that description is used on the invoice/receipt. Otherwise, the UltraCart description is used. |
| Import credit card information (Requires QuickBooks™ 2006 or 2005 (R5 and later)) | This feature no longer works with v5.0 due to PCI compliance rules. |
| Import QBMS Transaction Information | This feature is for merchants that have the QuickBooks™ Merchant Services payment gateway configured. It will import the transaction information for orders that were processed via QBMS. |
| Import Terms | Some merchants have terms spelled out in the checkout that will become part of the order. This options will insure those terms are imported to become part of the QuickBooks™ sales record. |
| Import Sales Rep | The Sales Rep name is configured on the Customer Profile and will be imported along with the order. |
| Import Class | The Class is configured on the Customer Profile and will be imported along with the order. |
| Import Referral Code into Memo | This is a special field. It will not apply to 99% of merchants. |
| Allow QuickBooks™ to assign the invoice/sales receipt | This would be used if you are making direct entry into QuickBooks™ as-well-as importing. This will help avoid collisions. |
| Ignore kit component items | This is only used by merchants that have kits in their Item Configuration. |
| Use shipping date as invoice date | |
| If ShipTo address is missing, copy BillTo to ShipTo | Some merchants well digital goods and have no shipping address but still charge tax. This setting will prevent missing ship to addresses for orders without any shipping information. |
| Map Screen Branding to QuickBooks Order Class | Legacy sites only. If you're still using the old screen branding, why haven't you upgraded to StoreFronts?? It's free, and provides a vastly superior mobile checkout experience for your customers. |
| Map StoreFront to QuickBooks Order Class | Assigns the StoreFront server name to your Order classes. If checked, UltraBooks will expect to find an Order class with the same name as your storefront server name ([www.mystore.com,](http://www.mystore.com,) etc). |
| Sales Receipt/Invoice No. Prefix | If you want to precede your Sales Receipt of Invoice with a special Prefix, enter it into the box provided |
| Default Invoice Terms | QuickBooks™ invoice form allows merchants to set various payment terms. Here you can define the Default term when the Invoice is created during import. |
#### **Templates**
Templates are a new feature to v5.0 allowing for custom control of the Invoice/Receipt Address blocks. Each ShipTo and BillTo address blocks contain 5 lines. These templates allow you to specify each line exactly as desired. The template tokens are surrounded by square brackets. You may also enter other characters and symbols to be interpreted literally when the templates are processed. A full list of template tokens is found at the bottom of the Templates screen. As of 6/23/2017, the list of tokens was as follows, but is sure to change with time.
- \[AdvertisingSource\]
- \[AutoOrderCode\]
- \[AutoOrderOriginalOrderId\]
- \[BillToAddress1\]
- \[BillToAddress2\]
- \[BillToCompany\]
- \[BillToFirstName\]
- \[BillToLastName\]
- \[BillToTitle\]
- \[ChannelPartnerCode\]
- \[ChannelPartnerOrderId\]
- \[Comments\]
- \[CustomField1\]
- \[CustomField2\]
- \[CustomField3\]
- \[CustomField4\]
- \[CustomField5\]
- \[CustomField6\]
- \[CustomField7\]
- \[DayPhone\]
- \[Email\]
- \[EveningPhone\]
- \[MerchantNotes\]
- \[OrderId\]
- \[PlacedByUser\]
- \[SalesRepCode\]
- \[ScreenBrandingThemeCode\]
- \[ShipToAddress1\]
- \[ShipToAddress2\]
- \[ShipToCompany\]
- \[ShipToFirstName\]
- \[ShipToLastName\]
- \[ShipToTitle\]
- \[StoreFront\]
- \[UpsellPathCode\]

### **Importing Orders**
Importing orders is a three step process with the majority of time spent validating mappings.
1. Download the orders. Orders without validation errors will download into QB's.
2. Validate the orders. If one or more orders fails to validate for downloading, then you'll need to review the flagged orders and:
1. Fix any issues.
2. Revalidate the orders
3. Re-download orders if new mappings were created
3. Import to QuickBooks
#### Validating Mappings
Select the orders to validate (or all if desired), and click the Validate Mappings button. UltraBooks will examine each order and report back any issues to correct. If the order had no issues, a green "Ready to Import" text will appear in the Status column. Those orders may be then imported into QuickBooks. The reported issues are detailed, so read through any issues and take appropriate action.
The order below has issues.

Validation Notes:
- "**Look up**" data is data we pull from Quickbooks, such as a listing of tax codes, vendors, and other list items created within QuickBooks. **This does not include customers. **
- The "**Sync**" button is needed if you make changes to those lists, such as adding a new tax code.
- "**Mark exported**" for order you wish to skip and not import into Quickbooks. Ultrabooks automatically marks anything successfully imported. If you wish a skip, mark it as exported and ultrabooks will remove it from the list and not download it again.
These orders are ready to import.

:::warning
The 'Mark as Imported' button completely bypasses QuickBooks. It provides a means of removing unwanted orders from the UltraBooks import queue.
Be careful that you do not remove wanted orders!
:::
## **Common Tasks**
### **Re-importing an Order**
**UltraBooks will only export orders that are in the "completed" state (have been marked as shipped). Once exported via UltraBooks, they will be tagged as "Exported to QuickBooks™".**
**If, for some reason, you want to re-export an order, you'll need to reset its export status. To do so, log in to your account and navigate to:**
:::note
Main Menu → Order Management → Review Orders
:::
**In the search screen, enter the order ID or whatever search criteria necessary to locate the order. Once you have located the order:**
- **click on the order ID to bring the record into the order editor.**
- **click on the "Edit Customer Information" link.**
- **click on the "other" tab.**
- **locate the "Exported to QuickBooks™" field.**
- **remove the check mark by clicking on it.**
- **click the Save button at the bottom of the screen.**
**That particular order is reset to be exported to QuickBooks™ the next time your run UltraBooks.**
### **Importing Historical Orders**
**After you have done your initial configuration you can import historical orders (orders placed before UltraBooks configuration) by navigating to the** [**Batch Order Operations**](/orders-fulfillment/order-management/batch-order-operations) **page, where you will have choices for flagging order(s) for downloading by entering in either the list of orderIDs (or the range of orderIDs) the clicking the button "reset exported to QuickBooks". **
### **Manually Entering Orders into QuickBooks**
**If you're going to enter sales receipts or invoices manually into QuickBooks™ in addition to having UltraBooks import information, make certain that you do not use a number that will conflict with UltraCart orders. For instance manual sales receipts/invoices may be done in the 1000-9999 range while UltraCart orders would be in the 10000+ range. UltraBooks assumes that if the invoice/sales receipt with the same number exists then it needs to be deleted and replaced by the new one in the event that the merchant is re-downloading order information. It has no way of distinguishing something that is hand entered from something that is downloaded and dealing with it in any other way.**
### **Processing Refunds**
**If the refund takes place before the order is exported to QuickBooks then the transaction will reflect it. **
:::info
If the refund takes place after the order has been exported to QB then it currently has to be manually adjusted within QuickBooks.
:::
** **
### **UltraBooks Errors and Troubleshooting**
:::info
**Troubleshooting UltraBooks - Ultrabooks.log**
UltraBooks v5.0+ now automatically reports most errors back to ultracart.com. UltraCart system engineers will receive the errors and investigate. However, you may be contacted for your log file (ultrabooks.log) which will reside within your installation directory, **C:\\Program Files\\UltraBooks** , The log file provide the full context to what is causing the error.
Additionally, the validation and import of each order is captured and reported to ultracart.com. This information is tied to the order and viewable by UltraCart support. If you have questions about an order, contact UltraCart support and they will assist you.
**If your issue requires further investigation by UltraCart Engineers, please use the "Contact UltraCart" form, located in the Help menu of the UltraBooks Application.**

1. **Enter email and then enter any pertinent notes that you can provide regarding the issue.**
2. **Click the "Create a Support Case" button to send the case to UltraCart Support.**
:::
## **Disabling UltraBooks**
**If you should decide to disable UltraBooks integration, navigate to;**
:::note
Main Menu → Configuration → UltraBooks
:::
**Pressing the "Disable" button will prevent future downloading of orders. There will be no warning dialog for this action. However, the codes you have entered will remain intact. You can again configure UltraBooks without having to re-enter the codes (except for any additions that you may have made in Coupons, Gift Charge / Wrap Papers, Payment Methods, Shipping Methods or Tax Rates.**

## **Frequently Asked Questions (FAQ)**
#### **Question: Why do I receive "Unable to update the tax rate for a jurisdiction" when importing an order?**
**\*\*Symptom\*\* When importing an order into QuickBooks via UltraBooks, the import fails with the following error:**
System Error: Unable to update the tax rate for a jurisdiction. Please notify UltraCart Support for order # \[ORDER-ID\].
**Answer: Cause**
**This error occurs when QuickBooks cannot match or update the sales tax rate for one or more tax jurisdictions associated with the shipping or billing address on the order. The jurisdiction is either missing, misconfigured, or inactive in your QuickBooks tax settings.**
**Resolution**
1. **Log in to your QuickBooks account.**
2. **Navigate to Taxes and open your Sales Tax settings.**
3. **Locate the jurisdictions associated with the state, county, or municipality of the order's address.**
4. **Verify that each applicable jurisdiction is active and has a valid tax rate configured.**
5. **Correct any missing or invalid jurisdiction entries and save your changes.**
6. **Return to UltraBooks and retry the order import.**
> **Note: This error is isolated to your QuickBooks tax configuration and does not indicate a problem with the order data in UltraCart. No action from UltraCart Support is required unless the error persists after correcting your jurisdiction settings.**
**Still seeing the error?**
**If the import continues to fail after reviewing all jurisdictions, contact UltraCart Support and include the order number from the error message.**
* * *
#### **Question: I am trying to log into UltraBooks but I'm getting a message that says I need to activate my IP?**
**Answer: When you receive this prompt, you will need to log directly into the UltraCart website and complete the IP Activation step there. Upon successfully completing the IP activation, you will be able to go back to the UltraBooks application and log in with your user.**
* * *
#### **Question: Can UltraBooks be used with cloud-hosted Quickbooks hosting services?**
**Yes, provided that the hosting service allows the required Utrabooks application and related software components to be installed on the cloud server. Installation of the software must be done by a server administrator, but once the installation is complete it can be used by a normal Windows user on the server.**
* * *
#### **Question: We recently upgraded Quickbooks and now we cannot get UltraBooks to connect to download orders?**
**If you view the UltraBooks log file and see an error like this:**

**Then you will need to check the "Integrated Applications Preferences" settings inside your Quickbooks account:**
1. **Go to the Edit menu and click Preferences.**
2. **In the Preferences window, click Integrated Applications in the list on the left.**
3. **Click the Company Preferences tab.**
4. **Make sure the Don't allow any application to access this company file check box is cleared.**
5. **Click OK to save your preferences.**
6. **Leave QuickBooks open and remain logged in as the Administrator.**
7. **Open your UltraBooks application log in and click the download button to initiate the connection to Quickbooks.**
8. **Switch to QuickBooks by pressing or choosing QuickBooks from the taskbar.**
**If you see a message asking whether the UltraBooks should be allowed access to your company file, click Yes.**
9. **Open the integrated applications preferences**
10. **Highlight UltraBooks name in the list of applications to specify that you are allowing access.**
11. **Select Properties.**
12. **Select the Allow this application to login automatically check box.**
13. **Select the Software Access user (from step 2 above) and click OK. You can select any user with full access rights, such as "Admin".**
14. **Click OK to close the preference screen.**
15. **Now your add-in application will be able to access your company file data even if QuickBooks is not running.**
* * *
#### **Question: I am using inventory assemblies in QuickBooks. When I export orders from Ultracart into QuickBooks the parts of the inventory assemblies also show up on the sales receipts which is messing up my inventory counts. How can I configure the downloads so that only the item sold shows up?**
**Answer: Launch UltraBooks application then click on the options button and check the box "Ignore Kit Components". Click the save button. Close UltraBooks and relaunch it to have the save changes take affect.**
* * *
#### **Question: We recently updated our Quickbooks and we have multiple people in our organization using UltraBooks to import our orders and recently one of our bookkeepers is unable to connect?**
**Answer: Quickbooks has a limitation restricting 3rd party applications connecting to QB's where the QB's server has multiple QB files open at the same time. **
** See: **[**http://www.smartvault.com/support/kb305-error-0x80040438-the-application-trying-to-connect-to-quickbooks-is-not-supported-while-multiple-instances-of-quickbooks-are-running/**](http://www.smartvault.com/support/kb305-error-0x80040438-the-application-trying-to-connect-to-quickbooks-is-not-supported-while-multiple-instances-of-quickbooks-are-running/)
** Example of the error captured in the log:**
** **** **
* * *
#### **Question: We have multiple ultracart accounts that are linked together, can I initiate the order download for each account at once or do I need to log into each account separately via the UltraBooks application?**
**Answer: You will need to log into each account - one-at-a-time - and perform the order download/import into your Quickbooks account. **
* * *
**Question: I received the following error when trying to download orders into Quickbooks. Error! A system error has prevented 'Import Order' from completing. Please contact UltraCart Support. Error: There was an error when saving a SalesReceipt. QuickBooks error message: This Merchant Account Services transaction must have an Authorization Code. It looks like it's coming from a specific order, \*\*\*\*\*-00046023, that doesn't have an authorization code. Looking at the backend of QBMS, there was no authorization code issued for the payment. I don't know why as all other orders have one. Is it possible to modify the backend of the order with some random numbers to get it to download? Or do I have to do it manually? I can't download any other orders as this one is blocking me from doing so.**
**Answer: This is a known issue with the Quickbooks Payment Gateway. For some unknown reason, they just don't provide an auth code at times. We've talked it through with them numerous times and they can't/won't fix it. We have a field you can supply a dummy value to make the import work. See the screenshot below. The field for you to enter the dummy value is located at the bottom of the order settings screen in the UltraBooks v5.\* application:**

---
# Copy of UltraBooks Error 3140
https://docs.ultracart.com/account-settings/desktop-software/ultrabooks/copy-of-ultrabooks-error-3140
doc_type: how-to
# UltraBooks Error 3140 (The specified account is invalid or the wrong type.)
If UltraBooks is trying to import a sales receipt, for example number 6387, and receives the following error:
> Add Sales Receipt Error 3140: There is an invalid reference to QuickBooks DepositToAccount "8000002F-1312405403" in the SalesReceipt. QuickBooks error message. The specified account is invalid or of the wrong type.
This error means that UltraBooks is attempting to import sales receipt and deposit the funds into the wrong account type. Look in your QuickBooks under Lists -> Chart of Accounts. You need to find an account that is either of the type **Bank** or **Other Current Asset**. Enter this account name into the QuickBooks Deposit to Account Code under Main Menu -> Configuration -> Payments within UltraCart. Once you've made the configuration change, please try your UltraBooks import again.
---
# How do I import orders into QuickBooks?
https://docs.ultracart.com/account-settings/desktop-software/ultrabooks/how-do-i-import-orders-into-quickbooks
doc_type: how-to
Use the [UltraBooks](/account-settings/desktop-software/ultrabooks) desktop software. This is only supported for desktop version of QuickBooks and not the online version.
---
# How do I mark an order as exported to QuickBooks
https://docs.ultracart.com/account-settings/desktop-software/ultrabooks/how-do-i-mark-an-order-as-exported-to-qu
doc_type: how-to
This tutorial describes how to mark an order as exported to QuickBooks. This operation needs to be done whenever you manually enter an order into QuickBooks and want UltraBooks to stop trying to import it.
First look up the order under Operations -> Order Management -> View All Orders. After you've loaded the individual order click on the Edit Customer Information button as shown below.

Now click on the Other tab.

Finally check the Exported to QuickBooks box and click save.

---
# UltraBooks Error 3160
https://docs.ultracart.com/account-settings/desktop-software/ultrabooks/ultrabooks-error-3160
doc_type: how-to
# UltraBooks Error 3160 (cannot delete a particular object)
If UltraBooks is trying to import a sales receipt, for example number 6387, and receives the following error:
> Add Sales Receipt Error 3160: Cannot delete the object specified by the id = "B9D9-1285186506". QuickBooks error message: Did not delete this transaction. This transaction had deposited payments.
This error means that UltraBooks is attempting to import sales receipt 6387 but because it already exists in QuickBooks it cannot complete the import. Whenever UltraBooks sees an existing sales receipt with the same number it assumes you are trying to import it again. Therefore, QuickBooks attempts to delete the existing one before importing. The deletion is failing because sales receipt 6387 has a deposit against it, hence, the error message.
What typically occurred is that someone entered a sales receipt manually which caused a collision in the numbering sequence. When manually entering sales receipts we would recommend changing the number in QuickBooks to something in the 100000 range. That will prevent the automatically imported web orders from colliding with the manually entered ones.
To resolve the above example you would need to bring up sales receipts 6387 and change it to something higher. Once you have changed it, the import should work fine.
---
# UltraBooks Error 3260
https://docs.ultracart.com/account-settings/desktop-software/ultrabooks/ultrabooks-error-3160/ultrabooks-error-3260
doc_type: how-to
UltraBooks/QuickBooks error 3260 during UltraBooks download attempt.
## Problem
We've added a new user to our UltraCart account but when they try to run UltraBooks and download new orders into QuickBooks they encounter a "3260 error".
## Background
The error is a QuickBooks error message "QuickBooks Sync Error 3260: The import failed because you do not have sufficient file permissions in QuickBooks."
See the following for more details:
[http://dataservices.intuit.com/support/articles/sln41004](http://dataservices.intuit.com/support/articles/sln41004)
## Solution
The issue is that QB requires "Sensitive Accounting Activities" access for the QB user (see the screen shot below). Upon granting that access and clicking `Finish`, this error goes away.

---
# UltraShip
https://docs.ultracart.com/account-settings/desktop-software/ultraship
doc_type: reference
# Introduction
UltraCart offers more fulfillment integrations than any other shopping cart software. However there are situations when outsourcing your shipping department can be detrimental to your business. If you have thousands of sku’s that are easily confused by fulfillment center employees, if your international shipments mean complicated customs forms, or any other reason, you can use UltraShip to do fulfillment in-house.
UltraCart wrote a piece of software to make sure that you won’t lose precious time or money in getting your shipments to your customer quickly and efficiently. You can read more about it in this document.
Here are some of the bullet points:
- UltraCart proprietary software
- High Volume shipping software
- Windows-based
- Supports:
- USPS: Stamps.com, VIPParcel.com, EasyPost
- Fedex
- UPS
- DHL (Global)
- Integrated with a label printer, scale, and barcode scanner
- No need to exchange batch files via the browser
- Save money by shipping faster
UltraShip takes the effort out of your in-house shipping department. Instead of having to transfer information yourself, you need only launch your UltraShip software, click, print, package, and ship.
## Hardware
The following equipment is recommended by UltraCart to make sure your system works smoothly, however you may try equipment that you currently own to cut down on costs.
### Scanner (Zebra/Symbol)
Recommended Model:
URL: [https://www.barcodesinc.com/symbol/part-ls2208-7azu0100zna.htm](https://www.barcodesinc.com/symbol/part-ls2208-7azu0100zna.htm)
Part # LS2208
:::info
Any Zebra/Symbol scanner listed on the SDK compatibility chart should be OK to use:
[https://www.zebra.com/us/en/support-downloads/software/developer-tools/scanner-sdk-for-windows.html](https://www.zebra.com/us/en/support-downloads/software/developer-tools/scanner-sdk-for-windows.html)
:::
:::info
After connecting the scanner, please see the owners manual to scan the OPOS/JPOS bar code. This will change the scanner mode into OPOS instead of keyboard wedge.
:::
### USB Scale
Onyx Products (Stamps.com) 70 lb USB scale
URL: [https://onyxproducts.com/products/70lb-scale](https://onyxproducts.com/products/70lb-scale)
Onyx Products (Stamps.com) 5 lb USB scale
URL: [https://onyxproducts.com/products/5lb-scale](https://onyxproducts.com/products/5lb-scale)
### Serial Port Scale (Legacy)
Part #: 70-2453-4
Description: Fairbanks Scale Model 70-2453-4 (MUST BE THIS EXACT MODEL)
### 4x6 Label Printer
Any Zebra ZPL compatible printer listed below. Tested with Zebra GX420d. These can be obtained refurbished off Amazon for approximately $125.
- 2824Z Series
- 2844Z Series
- Pax4
- ZE500 Series
- 105SL
- 105SL Plus
- S4M (V53 Firmware)
- ZM Series (V53 Firmware)
- Xi3 Plus Series
- Xi4 Series, KR403
GC Series
- GK Series
- GX Series
- GT800
- 2824 Plus Series
- ZD500 Series
- ZP Series
- ZT200 Series
- ZT400 Series
- ZT500 Series
- ZT600 Series
- HC100
- GK888 Series
- GT888
UltraShip is available with UltraCart plans medium or higher. The installation and any troubleshooting is done remotely by an UltraCart technician.
# Requirements
UltraShip is installed by UC Professional Services due to the complexity of the interactions with scanners, printers, databases, and external software.
To setup an installation contact [support@ultracart.com](mailto:support@ultracart.com), make the Subject Line of message: "UltraShip Installation Request for Merchant XXXX" (Replace "XXXX" with your actual UltraCart Merchant ID.)
You will be required to provide a workstation with:
- Windows Vista or Windows 10
- 4GB of RAM or better
- Zebra Label printer
- Zebra/Symbol USB Bar-code Scanner (optional)
- Onyx Products (Stamps.com) USB Scale (optional)
# Functionality
The UltraShip application is capable of the following functionality:
- Updating item bar-codes
- Verification only of order packing
- Cross dock shipping
- Single order packing
- Batch order packing
# Pricing
UltraShip is included with UltraCart pricing plans medium and up.
# Navigation
## Login
The login information used for UltraShip is the same as the UltraCart web interface. Below is an example of the login dialog that you will see after launching the application.

## Main Menu
UltraShip has a simple main menu that presents each of the functions that exist within the application.

The names of each option on the main menu are fairly self explanatory.
## Settings
The settings menu controls all the different options that are available within the UltraShip application.

### Dazzle
The Dazzle section allows for the configuration of where the Endicia Dazzle software is located on the machine and the different layout files used for each class of USPS postage. Layout files determine which printer Dazzle uses for the postage, the size, and layout of the label. Since most merchants use the Zebra printer, most of the layouts used with UltraShip start with the prefix of Zebra.
### Printers
The printers section allows for the configuration of where each printer will route the document. No matter what carrier is used on an order, the packing slip will always go to the printer configured in this section. For Stamps.com, DHL, EasyPost and FedEx labels the Shipping Label and 4x6 Label printer will be used. Endicia Dazzle and UPS Worldship automatically use the printer that is configured within that piece of software.
Other Settings
| Setting | Description |
| --- | --- |
| Scale Com Port | If you are using the Fairbanks scale listed above, this is the COM port on the machine that the scale is connected to. |
| Database Server | The name of the SQL Server database. Typically this is localhost or \\\\MACHINE\_NAME\\SQLExpress depending upon the type of install performed by UC Professional Services |
| Skip Packing Slip | Some merchants print out the packing slips from the web interface and distribute them to different shipping stations. When that type of workflow is used a second copy of the packing slip is not necessary. Checking this box will suppress the printing of packing slips. |
| Immediate Upload | Causes the tracking numbers to immediately upload to the central UltraCart system after the shipment is processed (recommended) |
| Override Password | To print users from skipping the pack verification set with the bar-code scanner a password can be set. Once an override password is configured, the user of UltraShip has to scan each item or know the override password for a manual item selection. |
| Print Special Instructions on a Separate 4x6 Label | For merchants that allow special instructions to be entered during the checkout this option will print them on a separate 4x6 label. This label is typically attached near the shipping label so that the person delivering the package will see the instructions. |
| Single Packing Slip on Gift Orders | Typically UltraCart will print two packing slips for a gift order. One packing slip is traditionally mailed to the buyer in a regular envelope and the gift one (without price information) is placed in the box. Some merchants do not want the second copy to mail to the buyer and therefore suppress that printing. |
### UPS
Each the of the flags in the UPS section control the type of data that is passed to UPS Worldship via the shared database.
### USPS
When 'Use Label Server' is configured, UltraShip will automatically determine if the shipment uses an API based label server to generate the 4x6 label and print it to the configured Zebra label printer.
## Update Item Bar-codes
After clicking the update item bar-codes option on the main menu a screen will appear with two tabs. The first tab will show you all the items within your store that do not have a bar-code on them.

To update the bar code associated with an item click on the item and then scan the bar code. UltraShip will automatically send the bar-code information to UltraCart and remove the item from the list. To update the barcode for a specific item (even one with an existing barcode) click on the second tab of the window labeled "update individual items".

Simply enter the item ID, scan the barcode, and click update.
## Verify Order Packing
The Verify Order Packing option is simple to use. First scan the barcode on the packing slip print out. UltraShip will retrieve the order details and display the quantity for each item that should be scanned. As the user scans each item the quantities will update. Once everything is scanned the complete button will enable.

## Cross Dock Orders
Cross docking is the process of bringing in items on one truck (typically from a distribution center) and packing them for shipment without first placing them on the shelf. To make cross docking easier, UltraShip will allow you to pickup the item, scan the bar code, and locate all the orders that have that item within it. Since most orders are for a single item, packing these orders first eliminates about 90% of the product from the cross dock area of the warehouse. The remaining orders with multiple products are easier to find. To start a cross dock order, click on "Cross Dock Orders" from the main menu. A screen will appear for you to enter or scan the bar code into as shown below.

After scanning a bar-code, UltraShip will show the matching orders as shown below.

After selecting the order to pack, the next screen is the same as the Pack Orders screen discussed below.
## Pack Orders
The pack orders section of UltraShip allows the user to pack individual orders one at a time. First a list of all the orders within the shipping department is displayed.

Click on the order ID to pack (or scan the barcode from a printed packing slip). The next screen is the actual pack order screen.

Packing an order involves a series of steps. The first operation is to select the items that are going into the box. You can either scan the barcode on the item which will increment the quantity or click on the row within the spreadsheet. Some merchant require a barcode to be scanned for every single item. In case the barcode will not scan, a manual barcode entry field is provided to allow the user to type in the barcode. Once all the items are counted off (or in the case of a multi-box shipment the pack button is clicked) then the pack box section enables. The pack box section first retrieves and prints the packing slip. Next you have to enter the weight of the package (or if you are using the Fairbanks Scale click the Read Scale button). Next you need to enter the dimensions of the shipment. Entering dimensions is typically only required if the shipment is large where it might qualify for dimensional weight. Finally the label will generate. In the case of UPS the label is generated asynchronously. UltraShip will provide the label identifier which is written on the box and then associated with the label. For all other labels they print synchronously and can be immediately affixed to the box.
After the order is packed the screen will close and return to the order selection list. If you have the 'upload tracking immediately' option the tracking number will upload after step four is completed.
## Batch Pack Orders
The batch pack orders screen allows for rapid printing of packing slips and shipping labels for a range of orders. It is critical that the packing solution generated by UltraCart match the real world shipping scenario (including packaging material weight, etc.).

First select the orders to pack. The number on the "Process" button will reflect how many orders are selected. Once you click process, UltraShip will print packing slips, labels, and upload tracking information for each order until it is complete. It doesn't mind if the orders are for different carriers, but typically merchants will sort them by item id so they can quickly pack all the similar orders first. There are options to change the 'ship on date' or 'packing orders for date' to take care of orders that will ship in the future.
:::info
There is a 1,000 order record limit for the batch packing of order. So, if you are going over that limit you'll need to process some orders to get under the record limit or create a new shipping distribution center and move some of the order over into that DC in the meantime. (For example of you have a lot of back orders that are being held for a period of time before processing for shipment.)
:::
### Batch Processing Orders for Reprinting
If, for some reason, you need to reprocessing a batch of orders due to a problem with printing of the a batch of orders. You can do so by using the [Batch Order Operations](/orders-fulfillment/order-management/batch-order-operations) '[Move](/orders-fulfillment/order-management/batch-order-operations)' operation.
If you process large batches, you may need to first generate the "[Packed By](/reports-analytics/reporting)' report in order to identify the orders that need to be moved back to Shipping department for reprocessing.
# Troubleshooting
### Problem: International shipments that are in the shipping department are not appearing in UltraShip when printing labels, why is that?
Answer: Make sure that the items are configured with customs information details which is located in the [Customs sub-tab](https://ultracart.atlassian.net/wiki/pages/viewpage.action?pageId=917859) of the Shipping tab in the item editor.
### Problem: Fairbanks scale won't read and locks up.
Answer: Within the Windows Device Manager, adjust the advanced com port settings as shown below:


### Problem: An order with a partial refund on one of its items won't appear for packing, or won't complete packing, in UltraShip.
Answer: UltraShip does not support shipping an order that carries a partial refund on an item. There is no setting or override to allow it. If an order already shows the refund as processed, ship it outside UltraShip instead, and have whoever processed the refund coordinate directly with whoever is handling fulfillment for that order.
:::tip
Queued refunds process overnight, so there is often a same-day window to avoid this. If whoever queues a partial refund flags it to fulfillment right away, fulfillment can still pick and ship the order through UltraShip normally before the refund processes and blocks it.
:::
# Change Log
| Version | Date | Changes |
| --- | --- | --- |
| 2.0.0 | 06/22/2020 | Migration to USPS label server printing (Stamps.com, VIPParcel.com, Express1) as primary method of printing USPS postage. Require Zebra ZPL compatible 4x6 printer for Stamps.com international USPS label. Update to Zebra/Symbol scanner SDK to support wider range of scanners. Support for Onyx Products (Stamps.com) USB scales as the primary scale option. |
---
# UltraShip - Restart SQL Server SQLExpress
https://docs.ultracart.com/account-settings/desktop-software/ultraship/ultraship-restart-sql-server-sqlexpress
doc_type: how-to
# SQL Server (SQLExpress) Restart
From time to time the SQL Express server can go offline, while this is not very common it can happen. To resolve this simply follow the steps below. For this example we are using Windows 10.
1. Use the search bar to lookup the "Services" desktop app.

2. From here we will need to scroll down until we find "SQL Server (SQLEXPRESS)" and click on it.

3. A new screen will pop up from the server status section click on "Start" is the server is not running.

4. Click "Ok" to complete the process.
---
# Email Notifications
https://docs.ultracart.com/account-settings/email-notifications
doc_type: reference
# Navigation
:::note
Configuration → Email Notifications
:::
# Introduction
These options affect communication with your customers. This section can be viewed in two ways: Basic and Advanced.
You'll find the buttons to change from Basic to Advanced or Advanced to Basic in the upper right corner of the screen. In the following example, Basic is selected.

:::warning
If you are using Storefronts please see the following documentation, [Changing an email template](/storefronts-themes/storefront-topics/changing-an-email-template), for additional help
:::
Let's start with the basic view.
## Basic View

This view only contains one option for Email Templates. This feature is used to configure the different emails that can be sent to your customers based on the number of items they have purchased.
## Advanced View
This section contains several options in regards to emails for your customer and for configuring your own email server to send those emails.

| Name | Description |
| --- | --- |
| [Email Addresses](/account-settings/email-notifications/email-addresses) | UltraCart allows you to have receipts sent through your own email server so they come from your address instead of from the standard @ultracart.com email addresses. |
| [Email Form Wizard](/account-settings/email-notifications/email-form-wizard) | UltraCart provides a simple way for you to receive form submissions from your website and have them emailed directly to you. |
| [Email Templates](/account-settings/email-notifications/email-templates-email-notifications) | The UltraCart platform is configured to send emails on your behalf in response to customer events. |
| [Wholesale Signup/Approval Notification](/account-settings/email-notifications/wholesale-signup-approval-notification) | This is the template that UltraCart will use to send e-mail messages to your wholesale customer after they signup and when they are approved. |
:::info
By default, the Receipt and Shipment Notification emails will be sent to the customer from _**uc.order@ultracart.com**_
:::
---
# Email Addresses
https://docs.ultracart.com/account-settings/email-notifications/email-addresses
doc_type: reference
# Overview
UltraCart allows you to have receipts sent through your own email server so they come from your address instead of from the standard @ultracart.com email addresses. This feature is **optional** for most fields and should only be configured by merchants that have an email server capable of sending authenticated SMTP traffic.
:::info
**Abandon Return Email**
The Abandon Return Email fields must be configured in order for the return email tool to function. More about [Return Email](#page-not-found).
:::
:::info
**Affiliate Broadcast**
The Affiliate Broadcast fields must be configured in order for the return email tool to function.
:::
## Navigation
:::note
[Home](https://secure.ultracart.com/merchant/mainMenu.do) ` →` [Configuration (Email Notifications)](https://secure.ultracart.com/merchant/configuration/configurationMenuLoad.do) `→` [Email Addresses](https://secure.ultracart.com/merchant/configuration/emailAddressesLoad.do)
:::
# Configuration page
# Email Service Configuration
## Email server

UltraCart allows you to have receipts sent through your own sending domain or email server so emails arrive from your address instead of from the standard @[ultracart.com](http://ultracart.com) email addresses. This feature is **optional** and should only be configured by merchants that have an email server capable of sending authenticated SMTP traffic.
You may configure a different email server for each StoreFront or legacy theme. Legacy Themes are managed here: Home → Configuration → [Screen Branding Themes](https://ucsupport.ultracart.com/merchant/configuration/branding/themeListLoad.do)
## Email Type Configuration Sections
### SMTP Sending Type
Each email notification will be display like the following:

IF you have multiple SBT and or Storefront hosts configured in your account, then you'll see a separate configuration section for each email notification, for each SBT/SF, followed by the next email notification type, etc.
Within each configuration section there are a number of fields required which are described below.
| **Field** | **Description** | **Required** |
| --- | --- | --- |
| **Type** | Toggle switch between the SMTP and Sending Domains configurations. | Yes |
| **Server** | The hostname of the SMTP server. For example [smtp.gmail.com](http://smtp.gmail.com) | Yes |
| **Alternate Port** | If left blank, the default port (25) is used, but some servers (i.e. gmail) require port 465 for secure SMTP | No |
| **Username** | The username of the email account. Often this is also the email address | Yes |
| **Password** | The password of the email account. | Yes |
| **Email** | The email address | Yes |
| **Friendly Name** | The name that appears in the email header. Typically this would be something like XYZ Company Customer Service | Yes |
| **Options** | Three options are: **Copy to Theme →** Applies the configured details to all email notifications for the theme. **Copy to All → Applies the configured details to all email notifications for ALL of the themes.** **Clear Entire Theme →** Clears the credentials from all of the email notifications for the theme. | |
### Sending Domains Type
:::tip
**Sending Domains is recommended**, since Sending Domains configuration provides full MTA transparency and logging of the email transmissions. If you have the email addresses configuration set to SMTP instead of Sending Domains, it will override the Sending Domains configuration within the settings tab of the Storefront Communications. So, make sure the slider for Sending Type is set to ‘Sending Domains’.
:::
StoreFront Communications utilizes email sending domains to transmit email messages instead of SMTP through your own email server. The reason for email being sent this way are:
- Easier to configure than SMTP
- Company email infrastructure is typically not designed or permitted to handle the volume of email associated with marketing.
- Email sending domains allow UltraCart to receive detailed events regarding: delivery, bounce, open, click and spam complaints.
- Provides merchants visibility into the delivery of their transactional emails (receipts, etc.) within the UltraCart interface (not possible with direct SMTP)
Once you configure your sending domain within StoreFront Communications, any existing email addresses associated with this domain will start using the sending domain instead of SMTP.

| **Field** | **Description** | **Required** |
| --- | --- | --- |
| **Type** | Toggle switch between the SMTP and Sending Domains configurations. | Yes |
| **Sending Domain** | Select the Sending Domain (will appear after the required DNS entries are configured.) | Yes |
| **Email Address** | The email address from your domain that should appear as the "From" address in the outgoing emails | Yes |
| **Friendly Name** | The name that appears in the email header. Typically this would be something like XYZ Company Customer Service | Yes |
| **Options** | Three options are: **Copy to Theme →** Applies the configured details to all email notifications for the theme. **Copy to All → Applies the configured details to all email notifications for ALL of the themes.** **Clear Entire Theme →** Clears the credentials from all of the email notifications for the theme. | |
## Explanation of each of the email notification types
Each different type of notification allows you to configure the email server that it will be sent to. The different types of notifications that are configurable are:
| **Notification** | **Description** | **Required to Use** |
| --- | --- | --- |
| Abandon Return Email | Used to send the email to a customer that abandons to encourage them to come back for a discount | Yes |
| Affiliate Broadcast | Used to send a mass email to your affiliates | Yes |
| Affiliate Signup | Used to send a confirmation email to affiliates after they signup | No |
| Auto Order Cancel | Used to send an email to the customer when they cancel their auto order | No |
| Auto Order Confirmation | Used to send an email to the customer when they signup for an auto order | No |
| Auto Order Update Billing | Used to send an email to the customer when their card expires and needs updating | No |
| Auto Order Update Billing Decline | Used to send an email to the customer when their card declines and needs updating | No |
| **Notification** | **From Email Address** |
| --- | --- |
| IP Block Notification (after 6 accumulated failed login attempts) | [support@ultracart.com](mailto:support@ultracart.com) |
| Password Reset Notification | [support@ultracart.com](mailto:support@ultracart.com) |
| Accounts Receivable | [uc.order@ultracart.com](mailto:uc.order@ultracart.com) |
| Auto Order | [uc.order@ultracart.com](mailto:uc.order@ultracart.com) |
| Billing Reminder | [uc.notify@ultracart.com](mailto:uc.notify@ultracart.com) |
| Customer Receipt | [uc.order@ultracart.com](mailto:uc.order@ultracart.com) |
| Customer Reminder | [uc.usernotify@ultracart.com](mailto:uc.usernotify@ultracart.com) |
| Digital Delivery Notification | [uc.order@ultracart.com](mailto://uc.order@ultracart.com) |
| Donation Receipts | [uc.order@ultracart.com](mailto:uc.order@ultracart.com) |
| Expired Card Reminder | [support@ultracart.com](mailto:support@ultracart.com) |
| Fulfillment Transmission | [uc.ship@ultracart.com](mailto:uc.ship@ultracart.com) |
| Placed Order Notification | [uc.order@ultracart.com](mailto:uc.order@ultracart.com) |
| Shipment Notification | [uc.usership@ultracart.com](mailto:uc.usership@ultracart.com) |
| Shipping Department | [uc.ship@ultracart.com](mailto:uc.ship@ultracart.com) |
| Statistics | [uc.stat@ultracart.com](mailto:uc.stat@ultracart.com) |
| Wholesale Signup | [uc.order@ultracart.com](mailto:uc.order@ultracart.com) |
All notification e-mails are signed using DomainKeys, so if your server supports DomainKey verification, you should enable that feature. You can [read more about DomainKeys at Wikipedia](http://en.wikipedia.org/wiki/DomainKeys) .
Additionally, UltraCart publishes "SPF" records for e-mail verification. If your e-mail client has the ability to verify SPF records, you should enable this option for [ultracart.com](http://ultracart.com/) e-mail addresses.
### Troubleshooting Email Notification issues
#### Question: "We are noticing that the password reset email notification for the Affiliate Dashboard login is being sent from an Ultracart email address ("uc.usernotify@ultracart.com"), even though we have configured our own email address in the [Email Addresses](/account-settings/email-notifications/email-addresses) configuration page... Why is that?"
Answer:
For security reasons emails with passwords will always come from an Ultracart email. This is to prevent domain spoofing and other security issues.
#### Question: "My email notifications regarding order activity in my account have stopped arriving, and I have not made any changes, and I'm getting emails from other sources... Why is that?"
Answer:
UltraCart does not control from end to end the delivery of the email notifications we send out. If your email notifications suddenly stop coming through, the most likely cause is that the email is being captured at some point after we send it and it gets to your inbox. The instructions in the previous section regarding DomainKeys and SPF records will help, as will the configuration of the email addresses in your email clients contact list and the use of "whitelisting" email filter rules to make sure that the emails are not being flagged as spam and either your email server level or email client level.
A good simple test is to temporarily configure another email address that is on another server (so if you have your own domain email addresses, try configuring a gmail.com (or yahoo.com, hotmail.com, etc). email address on another user on your account that has the same email notifications configured. If the notifications arrive to that account's inbox, then you know that the problem resides at your own email server or email client, and you'll want to make sure that you implement DomainKeys/SPF records, and email whitelisting to ensure the emails make it through to your inbox okay.
:::info
**Email account forwarding**
If you configure your email account to forward to another of your email accounts (so you only have to check one account for all your messages) this can create a problem where email notifications (emails that are notification only that you do not reply to) will begin, at some point, begin being treated as spam at the email account that is receiving the messages and then forwarding them to your other email address. the net result is that these emails "fall through the cracks" and do appear even though other emails are making it through to the email account from which you read your emails.
:::
#### Question: "Today we received a email notification from google titled "Critical Security Alert" and the message stated that "Someone just used your password to try to sign in to your account. Google blocked them, but you should check what happened. Check activity..." and it appears that our emails from ultracart are no longer being sent (the default Ultracart address is the one being sent instead)?
EXAMPLE MESSAGE FROM GOOGLE:

Answer: You'll first want to verify that the IP address identified in the message is an Ultracart IP address. If so, then you'll click 'Yes' in the message. You will also need to update your google account to whitelist all of the ([External IP Addresses Used By UltraCart](/checkout-payments/payments/configure-transaction-gateway/external-ip-addresses-used-by-ultracart)).
---
# Steps to Improve Email Delivery
https://docs.ultracart.com/account-settings/email-notifications/email-addresses/steps-to-improve-email-delivery
doc_type: how-to
# About
Email delivery is becoming increasingly complicated, so its important to take steps to ensure your email client is properly configured so that valid emails are deliverable.
# Bounce notifications
UltraCart utilizes Amazon SES for our transactional email delivery.
The following bounce reasons may affect delivery to your email address:
| **BounceType** | **Bounce SubType** | **Description** | **Special Notes** |
| --- | --- | --- | --- |
| `Permanent` | `General` | The recipient's email provider sent a hard bounce message, but didn't specify the reason for the hard bounce. | **Important!** When UltraCart receives this type of bounce notification, we will immediately mark the recipient's email address as undeliverable. (Sending messages to addresses that produce hard bounces can have a negative impact on our reputation as a sender. Continuing to send email to addresses that produce hard bounces, might pause our ability to send additional email.) |
| `Permanent` | `Suppressed` | The recipient's email address is on the Amazon SES suppression list because it has a recent history of producing hard bounces. For information about removing an address from the Amazon SES suppression list, see [Using the Amazon SES global suppression list](https://docs.aws.amazon.com/ses/latest/DeveloperGuide/sending-email-global-suppression-list.html). | |
| `Transient` | `General` | The recipient's email provider sent a general bounce message. You might be able to send a message to the same recipient in the future if the issue that caused the message to bounce is resolved. | **Note** If you send an email to a recipient who has an active automatic response rule (such as an "out of the office" message), you might receive this type of notification. Even though the response has a notification type of `Bounce`, Amazon SES doesn't count automatic responses when it calculates the bounce rate for your account. |
| `Transient` | `MailboxFull` | The recipient's email provider sent a bounce message because the recipient's inbox was full. You might be able to send to the same recipient in the future when the mailbox is no longer full. | |
| `Transient` | `ContentRejected` | The recipient's email provider sent a bounce message because the message you sent contains content that the provider doesn't allow. You might be able to send a message to the same recipient if you change the content of the message. | |
| `Transient` | `AttachmentRejected` | The recipient's email provider sent a bounce message because the message contained an unacceptable attachment. For example, some email providers may reject messages with attachments of a certain file type, or messages with very large attachments. You might be able to send a message to the same recipient if you remove or change the content of the attachment. | |
# Steps to improve email delivery
The following are steps that you can take to improve the deliverability of the UltraCart email notifications to your email address/client.
# Add UltraCart addresses to your email client contacts list
Please make sure that you have added our email addresses to your email clients contact list:
- [uc.order@ultracart.com](mailto:uc.order@ultracart.com)
- [uc.notify@ultracart.com](mailto:uc.notify@ultracart.com)
- [uc.usership@ultracart.com](mailto:uc.usership@ultracart.com)
- [uc.ship@ultracart.com](mailto:uc.ship@ultracart.com)
- [uc.stat@ultracart.com](mailto:uc.stat@ultracart.com)
- [support@ultracart.com](mailto:support@ultracart.com)
Whitelist the Ultracart Public IP addresses:
:::info
Transcluded from [External IP Addresses Used By UltraCart](/checkout-payments/payments/configure-transaction-gateway/external-ip-addresses-used-by-ultracart).
:::
For more details on whitelisting IP addresses in Gmail, see:
[https://www.maketecheasier.com/blacklist-whitelist-ip-addresses-gmail/](https://www.maketecheasier.com/blacklist-whitelist-ip-addresses-gmail/)
# Set up DKIM to prevent email spoofing
Please review the following knowledgebase article form Google regarding the generation and configuration of your own DKIM key:
[https://support.google.com/a/answer/174124?hl=en](https://support.google.com/a/answer/174124?hl=en)
## Steps to set up DKIM
1. Generate the domain key for your domain at the URL above.
2. Add the public key to your domain's DNS records. Email servers can use this key to verify your messages' DKIM signatures.
3. Turn on DKIM signing to start adding a DKIM signature to all outgoing messages.
# Setup SPF record verification
Sender Policy Framework (SPF) is an email authentication method that specifies the mail servers authorized to send email for your domain**. **SPF helps protect your domain from spoofing, and helps ensure that your messages are delivered correctly. Mail servers that get mail from your domain use SPF to verify that messages that appear to come from your domain actually are from your domain.
For more details see: [https://support.google.com/a/answer/33786](https://support.google.com/a/answer/33786)
- **SPF help prevents spoofing**—Spammers can forge your domain or organization to send fake messages that appear to come from your organization. This is called _spoofing_. Spoofed messages can be used for malicious purposes, for example to communicate false information, to send out harmful software, or to trick people into giving out sensitive information. SPF helps receiving servers verify that mail sent from your domain is actually from your organization, and is sent by a mail server authorized by you.
- **SPF helps deliver messages to recipients’ inboxes**—SPF helps prevent messages from your domain from being delivered to spam. If your domain doesn’t use SPF, receiving mail servers can’t verify that messages appearing to be from your domain actually are from you. Receiving servers might send valid messages to recipients' spam folders, or might reject valid messages.
## Step 1: Create your TXT record for SPF
A TXT record for SPF defines the mail servers that are allowed to send mail for your domain.
A single domain can have only one TXT record for SPF. However, the TXT record for a domain can specify multiple servers and domains that are allowed to send mail for the domain.
#### TXT record contents
If all email from your organization is sent from G Suite, use this line of text for your TXT record:
`v=spf1 include:_spf.google.com ~all`
If you send mail in one or more of these ways _in addition to G Suite_, you must create a custom TXT record for SPF:
- You send mail from other servers.
- You use a third-party mail provider.
- Your website uses a service that generates automatic emails, for example you have a "Contact us" form.
Create your TXT record using the information in [Server information for your TXT record](https://support.google.com/a/answer/33786#server-info) and [TXT record format](https://support.google.com/a/answer/33786#spf-record-format).
About settings that are managed by your domain host: [https://support.google.com/a/answer/35232](https://support.google.com/a/answer/35232)
Related Documentation:
[https://docs.aws.amazon.com/ses/latest/DeveloperGuide/notification-contents.html#bounce-types](https://docs.aws.amazon.com/ses/latest/DeveloperGuide/notification-contents.html#bounce-types)
---
# Troubleshooting email notification delivery issues
https://docs.ultracart.com/account-settings/email-notifications/email-addresses/troubleshooting-email-notification-deliv
doc_type: how-to
# Troubleshooting email notification delivery issues
### Question: How come I am not receiving my emails any more when I did not change any settings?
Answer:
**Please note that UltraCart does not control from end to end the delivery of the email notifications we send out.**
Your email client may be capturing the email notification as spam. (And, in some instances, your ISP mail have spam folder at the server level that you may need to check).
All notification e-mails are signed using DomainKeys, so if your server supports DomainKey verification, you should enable that feature. You can read more about DomainKeys at Wikipedia.
Add these addresses to your email spam filter rules:
| Expired Card Reminder - [support@ultracart.com](mailto:support@ultracart.com)
Auto Order - [uc.order@ultracart.com](mailto:uc.order@ultracart.com)
Accounts Receivable - [uc.order@ultracart.com](mailto:uc.order@ultracart.com)
Billing Reminder - [uc.notify@ultracart.com](mailto:uc.notify@ultracart.com)
Shipment Notification - [uc.usership@ultracart.com](mailto:uc.usership@ultracart.com)
Customer Receipt - [uc.order@ultracart.com](mailto:uc.order@ultracart.com)
Customer Reminder - [uc.usernotify@ultracart.com](mailto:uc.usernotify@ultracart.com)
Digital Delivery Notification - [uc.order@ultracart.com](mailto:uc.order@ultracart.com)
Donation Receipts - [uc.order@ultracart.com](mailto:uc.order@ultracart.com)
Placed Order Notification - [uc.order@ultracart.com](mailto:uc.order@ultracart.com)
Statistics - [uc.stat@ultracart.com](mailto:uc.stat@ultracart.com)
Shipping Department - [uc.ship@ultracart.com](mailto:uc.ship@ultracart.com)
Fulfillment Transmission - [uc.ship@ultracart.com](mailto:uc.ship@ultracart.com)
Wholesale Signup - [uc.order@ultracart.com](mailto:uc.order@ultracart.com) |
| --- |
Additionally, UltraCart publishes "SPF" records for e-mail verification. If your e-mail client has the ability to verify SPF records, you should enable this option for [ultracart.com](http://ultracart.com/) e-mail addresses.
If your email notifications suddenly stop coming through, the most likely cause is that the email is being captured at some point after we send it and before it gets to your inbox.
The instructions in the previous section regarding DomainKeys and SPF records will help, as will the configuration of the specified email addresses list above in your email clients contact list, along with the use of "whitelisting" email filter rules, to make sure that the emails are not being flagged as spam and either your email server level or email client level.
A good simple test is to temporarily configure another email address that is on another server. So, if you have your own domained email addresses, try configuring a gmail.com (or yahoo.com, hotmail.com, etc.) email address on another user on your account that has the same email notifications configured. If the notifications arrive to that account's inbox, then you know that the problem resides at your own email server or email client, and your;ll want to make sure that you implement DomainKeys/SPF records, and email whitelisting to ensure the emails make it through to your inbox okay.
:::info
If you configure your email account to forward to another of your email accounts (so you only have to check one account for all your messages) this can create a problem where email notifications (emails that are notification only that you do not reply to) will begin, at some point, begin being treated as spam at the email account that is receiving the messages and then forwarding them to your other email address. the net result is that these emails "fall through the cracks" and do appear even though other emails are making it through to the email account from which you read your emails.
:::
---
# Email Form Wizard
https://docs.ultracart.com/account-settings/email-notifications/email-form-wizard
doc_type: how-to
# Navigation
:::note
Configuration → Email Notification → Email Form Wizard
:::
# Introduction
UltraCart provides a simple way for you to receive form submissions from your website and have them emailed directly to you.
## Step 1 - General Settings
The section provides some basic configuration needed to build the form.
The first thing you will need to do is provide a Subject for the email that will be sent to you. A good example of this would be: "Contact Us Form Feedback"

Next you will need to select the users that you would like to receive this email. Only user that have been configured within the account will be displayed here. So If the email you would like to send this message to is not listed you will first need to crate a new user with that email.
Simply check the box to the left of the user if you would like them to receive this email. This can be sent to multiple users.

Next you will need to provide a URL that you would like the form to redirect the customer to after they submit the form.

Generally you will want to send the customer to a Thank you page or something that lets them know that their information was sent.
Next you will need to provided a list of the fields you would like the form to contain, generally this is information like: Name, Email Address, Phone, and Comments. But you can build this out how you would like based on the information you are trying to collect.
:::warning
Because the field name Email is used to send this information to the users it can not be used within this list. You will need to name that field something a bit different like Email Address, or Contact Email.
:::

Once this is complete simply click Next to move on to the next area.
## Step 2 - Form Code
One the next screen the code needed to use your form will be provided. This code will be different for each merchant as it is based on the information you configured on the first page.

Simply Copy and Paste the form into your website and it will be ready to use. Please make sure to test as you will want to make sure you are getting all the information you need from your customers. Once you have the code simply click on Return to COnfiguration Menu.
---
# Email Templates - Email Notifications
https://docs.ultracart.com/account-settings/email-notifications/email-templates-email-notifications
doc_type: reference
#
# Email Notifications
## Introduction
The UltraCart platform is configured to send emails on your behalf in response to customer events. You may customize your email using html and [#](#) to meet your needs. All notifications are optional and may be turned off. You will not use all notifications.
## Types of Emails
| Notification Type | Description | Used By |
| --- | --- | --- |
| aMember | Sent when an order is placed in a store configured with aMember integration. | Merchants with [aMember](http://www.amember.com) integration |
| Auto Order Cancel | Sent in response to a customer canceling an Auto Order | Merchants who offer trials, recurring, or continuity programs |
| Auto Order Update Billing | Sent in response to an Auto Order customer card being declined for the final time | Merchants who offer trials, recurring, or continuity programs |
| Auto Order Update Billing Decline | Sent in response to an Auto Order customer card being declined the first time | Merchants who offer trials, recurring, or continuity programs |
| Digital Delivery | For digital orders, contains the secure links for downloading digital content | Merchants offering digital content for sale |
| Notification | Option | Description |
| --- | --- | --- |
| Auto Order Update Billing | Decline on First Only | Normally, an email is sent every time a recurring order has a declined payment. The default is 3 tries, but this is configurable by the Merchant. When this option is set, an email is sent to the customer only on the first decline. There will be additional tries, but those tries won't result an additional emails to the customer. |
| Digital Delivery | Skip Email to Buyer when Gift | Only sends email to gift recipient and skips the buyer |
| Receipt | Hold Receipt Until Payment Processes | Delays the receipt until payment has been processed by the Merchant |
| | Hide Coupon Details | Hides coupons from displaying in order details. |
| | Remove Excessive Blank Lines | Trims excessive blank lines in **text** format emails. Does nothing to **html** emails. |
| | Attach Invoice | Attaches a PDF invoice to the email |
| Receipt Gift | Hold Receipt Until Payment Processes | Delays the receipt until payment has been processed by the Merchant |
| | Hide Coupon Details | Hides coupons from displaying in order details. |
| | Remove Excessive Blank Lines | Trims excessive blank lines in **text** format emails. Does nothing to **html** emails. |
| | Attach Invoice | Attaches a PDF invoice to the email |
| Shipment | Hide Prices | Zeroes out prices on within the email. |
| | Attach Invoice | Attaches a PDF invoice to the email |
| **Share this Cart** | Allow Cart Sharing | This must be checked for the external REST call to work. |
| **Share this Item** | Allow Item Sharing | This must be checked for the external REST call to work. |
## Screen Branding
Screen Branding is a way to present multiple store fronts to customers within the same account. It can also be used to display different Look & Feel whenever desired, such as sales or events. There is a set of email notifications for each screen branding theme. If you have a single screen branding theme, then you'll see in your Available Notifications list each notification once. Some UltraCart merchants have nearly a hundred themes (true story), and those merchants will see 700-800 notifications in their list. It's important to pay attention to which theme you're editing as you edit emails.
Some email tags pull files from your Graphics Library to use in your emails. You have a different Graphics Library for each theme as well. So if you're seeing an email with missing graphics or styles, verify the email's theme against your Graphics Library.
To view your Screen Branding themes, navigate to:
:::note
[Home](#) → [Configuration](#) → [Screen Branding Themes](#)
:::
## Using the UltraCart Notifications Screen
Navigate to:
:::note
[Home](#) → [Configuration](#) → [Email Notifications](#)
:::
### Selecting an Email
There are two lists containing email notifications. The first list `Your Email Notifications` contains those notifications you've previously configured. The second list contains new notifications. The two lists help keep separate those notifications you use and those you don't.
Selecting an email from the list will display it on the page.
When you select an email, 4 different panels will display. They are shown below.
1. Notification Options
2. Test Order IDs
3. [Tags](#) applicable to this Notification.
4. Subject, HTML, and Text fields for editing the email.

#### Notification Options
See the [#](#) section for specifics about options. Changing an option takes place immediately.
#### Test Orders
For each email notification (for each screen branding theme too), you may provide an Order ID for previewing the email. This order ID is saved with the configuration for quick retrieval. This can be useful for troubleshooting why a particular email looks strange. If you leave this blank, the the last order placed on your system will be used to preview. The order IDs are saved when you click one of the save buttons in the main editing panel.
:::tip
For the "Share this Cart" notification, the test order id fields may contain a comma separated list of item ids to simulate a shopping cart. If left blank, the last order is retrieved and the items from it are used to mock up a shopping cart.
For the "Share this Item" notification, the test order id fields may contain an item id. If left blank, the first item from the most recent order is retrieved and used during testing.
:::
#### Subject, HTML, and Text Fields
All fields in this section may contain tags, which are expanded into merchant/order specific information.
### Editing an Email
To edit an email, just type into the fields.
### Saving Changes
There are four buttons above each text field. All four will save **the entire email** including subject, html message, text message, and test orders.

They differ in terms of previewing. The buttons above the HTML field will preview the html message. The buttons above the text field will preview the text message.
### Previewing
There are three choices when previewing an email.
- Popup - This will save your edits and display a light box with your email. The light box is deliberately small to mimic the preview panel of many email clients. It's good to keep this size in mind.
- Open in new Window - This will save your edits and display the email in a new window.
- Email Me - This will save your edits and save you a copy of the test email
:::tip
Many email services such a Google will not allow
#end
## Used for HCAA09 OSMG0896
#if($item.getAttributeValue("hhSpecAdditional") != "")
$item.getAttribute("hhSpecAdditional")
#end
#if ($item.getAttributeValue("hhYouWillNeed") != "")
You Will Need
$item.getAttribute("hhYouWillNeed")
#end
##Used by OSMG0896
#if ($item.getAttributeValue("hhComments") != "")
Comments
$item.getAttribute("hhComments")
#end
```
---
# Eye4Fraud
https://docs.ultracart.com/account-settings/external-integrations/eye4fraud
doc_type: how-to
# Introduction
Eye4Fraud is an external fraud protection vendor that you can easily integrate with your UltraCart account. They offer guaranteed fraud protection for ecommerce merchants. For more details on their offering visit their website [https://www.eye4fraud.com/](https://www.eye4fraud.com/)
# Configuration
To configure the Eye4Fraud integration navigate to:
Configuration → Integrations → Eye4Fraud
The integration will require you to input your Eye4Fraud API Login and API Key.
# Processing
After the payment is processed, the order will be submitted to the Eye4Fraud engine and held in the Operations → Fraud Review department. After two minutes UltraCart will check for the results from their fraud scoring engine. If the order is approved it will seamlessly move on to your shipping department. If a result is not available, UltraCart will continue to poll hourly until the result becomes available.
If the order is marked as fraud, an email notification will be sent to all the users on your account that have Orders/Payments → Fraud Review notification configured. At that point the merchant will need to visit the [Fraud Review department](/orders-fulfillment/order-management/fraud-review) and refund and reject the order.
---
# Google Shopping / Product Search
https://docs.ultracart.com/account-settings/external-integrations/google-shopping-product-search
doc_type: how-to
# Introduction
**Google Shopping** (also known as _Google Product Search_) is a product discovery platform where merchants can list their products to appear in Google search results. This integration enables UltraCart merchants to generate and submit product feed files directly to Google Merchant Center.
When configured, UltraCart automatically generates a feed file (`/feeds/googlebase.xml`) that Google fetches on a schedule you define. You can also configure per-item feed attributes through the Item Editor and perform bulk updates using the Batch Import/Export tools.
> **Tip:** Google Shopping operates on a cost-per-click (CPC) model — you are only charged when a customer clicks your listing.
* * *
# Prerequisites
- An active **Google Merchant Center** account
- Verified ownership of your StoreFront domain
- Complete and accurate product data for all listed items
- Google Product Search Services enabled in UltraCart (see Part 1 below)
- Items configured with a valid product category and image URL (see Part 2 below)
* * *
# Part 1 — Set Up Google Merchant Center & Register Your Feed
## Step 1 — Sign Up for Google Merchant Center
Create or log in to your [Google Merchant Center](https://merchants.google.com) account.
## Step 2 — Verify StoreFront Domain Ownership
Google requires domain verification by uploading a verification HTML file to your StoreFront.
1. Download the verification file from Google (e.g., `googlee60e2b25881f8fd6.html`).
2. Log in to **secure.ultracart.com** and navigate to:
**StoreFronts → \[Select StoreFront\] → File Manager**
3. Click the **Upload** icon and upload the file to the root directory (`/`).
4. Return to Google Merchant Center and confirm verification.
> **Note:** The verification file must remain in the root directory for ongoing verification.
## Step 3 — Activate Google Product Search in UltraCart
Navigate to:
**Configuration → External Integrations → Google Product Search**

1. Set **Feed Schedule** to `Daily` (recommended).
2. Select a **Title Format**:
- Description Only
- Item ID Only
- Description + Item ID
- Item ID + Description
3. Click **Save**.
> **Tip:** If your customers often search by SKU, use **Description + Item ID**.
## Step 4 — Register the Feed in Google Merchant Center
1. In Google Merchant Center, go to **Products → Feeds** and click **\+ Feed**.
2. Configure:
- **Mode:** Standard
- **Feed Type:** Products
- **Target Country:** Your target market
- **Input Method:** Scheduled Fetch
3. Set the **File URL** to your feed file, e.g.:
```
https://yourstore.ultracartstore.com/feeds/googlebase.xml
```
4. Set **Fetch Frequency** to Daily and save.
## Step 5 — Confirm the Feed File
After enabling the integration, confirm the feed file exists in your StoreFront File Manager under the `/feeds/` directory.

The full URL to register with Google follows the pattern:
```
https://[your-storefront-domain]/feeds/googlebase.xml
```
> **Tip:** UltraCart regenerates this file daily at 5AM EST. Use the **Update Now** button on the configuration page to force an immediate rebuild.
* * *
# Part 2 — Configure Items for Google Shopping
Once Google Product Search is enabled, a **Google Product Search** tab appears in the Item Editor for each product. Every item must either have this tab fully configured or have **Omit from Feed** enabled.

## Category
Each item must include a Google category. If none is provided, the Item Management folder structure is used automatically.
- Separate category levels with `>` (Shift + Period).
- Do not use other separators (commas, dashes, colons).
- Do not end a category with a trailing `>`.
| Valid | Invalid |
| Valid | Invalid |
| Field | Description |
| --- | --- |
| ISBN | International Standard Book Number |
| Format | paperback, hardback, audiobook, or ebook |
| Author | Author's name |
| Publisher | Publisher's name |
### Music
| Field | Description |
| --- | --- |
| Artist | Artist's name |
| Format | cd, mp3, tape, or vinyl |
| Release Date | Release date |
| Issue | Possible Cause | Solution |
| --- | --- | --- |
| Spreadsheet fails to upload | File format changed or extra columns added | Ensure column headers match the original export exactly |
| Google attributes not updated | Column mapping mismatch | Verify column names and that UltraCart auto-mapped correctly |
| Products missing from Google feed | Missing required attributes | Cross-check with Google Merchant Center's required fields list |
* * *
# FAQ
### How do I force the feed to rebuild immediately?
On the Google Product Search configuration page (**Configuration → External Integrations → Google Product Search**), click the **Update Now** button at the bottom of the page. The feed will rebuild within a few minutes. Normally the feed rebuilds daily at 5AM EST.
### What fields are required by Google for product listings?
At minimum, Google requires: ID, Title, Description, Link, Image link, Availability, Price, Brand, GTIN, Condition, and Google Product Category. Some categories (Apparel, Media, Software) require additional attributes such as color, size, or age group. Always check [Google's Product Feed Specification](https://support.google.com/merchants/answer/7052112).
### What if I don't see the "Google Product Search Columns" export option?
This export preset is available only for merchants using the legacy product feed integration. If you don't see it, verify your user permissions include Item Management → Batch Item Export access. Contact UltraCart Support if it's missing.
### Can I update only certain fields in a bulk import?
Yes. Leave non-required columns blank and UltraCart will only update fields that contain data in your uploaded spreadsheet, leaving existing values untouched.
### My import completed, but Google still shows missing attribute errors. Why?
After updating items in UltraCart, you must regenerate or resubmit your Google Product Feed to push changes to Google Merchant Center. Use **Update Now** on the configuration page.
### Can I automate product data updates?
Yes. Merchants using Google Product Feeds within StoreFront can configure automatic daily feed submissions to Google Merchant Center, eliminating the need for manual batch operations once the feed is set up.
* * *
# Related Documentation
[Complete list of Google Product Categories](https://www.google.com/basepages/producttype/taxonomy.en-US.txt)
[Google Product Search Data Specification](https://support.google.com/merchants/answer/7052112)
[How to Fix Your Google Product Feed (Store Growers)](https://www.storegrowers.com/google-shopping-feed/)
---
# Help Scout
https://docs.ultracart.com/account-settings/external-integrations/help-scout
doc_type: how-to
This tutorial will walk you through the process of connecting UltraCart to your Help Scout account.
First navigate to Configuration → External Integrations → Checkout

## API Integration
The first section of the configuration is for the API connection. Enabling the API allows UltraCart to create customers within your Help Scout CRM and update them with information from the order such as their address. It’s not mandatory to connect the API portion of the integration.

The following properties are updated on the Help Scout customer via their API:
- /firstName
- /lastName
- /jobTitle
- /organization
- /address/city
- /address/state
- /address/postalCode
- /address/country
- /address/lines
- /emails
## Side Car App
The second part of the integration is an Application that loads beside your tickets in Help Scout to provide additional information about the customer and their orders when the CSR is looking at a ticket from the customer within Help Scout.
Check the enabled box, copy off the secret key and callback URL to a text document, and then click save.

Within Help Scout click Manage → Apps.

Scroll down to the bottom of the page and click Build a Custom App as shown below.

Now click on Create an App.

On the next screen follow the steps described below.

1. Enter the name “UltraCart” for the App Name.
2. Select “Dynamic Content” for the Content Type.
3. Paste in the Callback URL provided on the UltraCart configuration screen that you saved off.
4. Paste in the Secret Key provided on the UltraCart configuration screen that you saved off.
5. Select the Help Scout mailboxes that you want this app to service.
6. Save
At this point when you bring up a case within Help Scout the content on the right had side will dynamically generate based upon a lookup within UltraCart on the customer’s email.
---
# Import WooCommerce
https://docs.ultracart.com/account-settings/external-integrations/import-woocommerce
doc_type: how-to
# Importing Your Store into UltraCart
UltraCart provides two import utilities to help you migrate your existing online store:
one for **WooCommerce** and one for **Shopify**. Both utilities are accessed from
**Home → Configuration** in the UltraCart merchant console.
Each importer can bring over customers, items (products), your catalog structure, and
historical orders. Shopify additionally supports importing blog articles. Imports can be
run more than once — you can start with customers and items, verify the results, and
then re-run the utility to bring over catalog and orders.
* * *
## WooCommerce Import
### What it does
The WooCommerce importer connects to your live WooCommerce store over the REST API
using a set of API keys. Depending on the options you select it will:
- Pull your **customers** into UltraCart's customer database.
- Pull your **products** (including variations) into UltraCart's item catalog.
- Pull your **product categories** and build them into an UltraCart StoreFront catalog,
with products placed into the appropriate categories.
- Pull your **historical orders** and re-create them as placed orders in UltraCart so
your reporting and customer order history carry forward.
The importer will show live progress as it runs and produces a log you can review.
### Before you start — generate WooCommerce API credentials
UltraCart authenticates against WooCommerce using a REST API key pair, **not** your
normal WordPress admin login. To generate one:
1. Log in to your WordPress / WooCommerce admin.
2. Go to **WooCommerce → Settings → Advanced → REST API**.
3. Click **Add Key**, give it a description, choose a user with sufficient
permissions, and set permissions to **Read** (or Read/Write).
4. WooCommerce will display a **Consumer Key** (starts with `ck_`) and
**Consumer Secret** (starts with `cs_`). Copy both — the secret will not be shown
again.
:::info
Full WooCommerce documentation:
[https://woocommerce.com/document/woocommerce-rest-api/#section-2](https://woocommerce.com/document/woocommerce-rest-api/#section-2)
:::
### Filling out the configuration screen
| Field | What to enter |
| --- | --- |
| **API Username** | Your WooCommerce Consumer Key. Must begin with `ck_`. |
| **API Password** | Your WooCommerce Consumer Secret. Must begin with `cs_`. |
| **Hostname** | The hostname of your WooCommerce store (for example `www.mystore.com`). Do not include ` or a trailing path. |
When you submit the form, UltraCart will do a quick credential check against your
WooCommerce site. If the keys or hostname are wrong, you will see an error and nothing
will be imported.

### Checkbox options
- **Import Customers** — Imports every customer record from WooCommerce into
UltraCart's customer database.
- **Import Items** — Imports every product (and each variation of a variable product)
as an UltraCart item. Existing items that were previously imported from WooCommerce
are matched by their WooCommerce product/variation ID and will not be duplicated.
- **Import Catalog into StoreFront** — Imports WooCommerce product categories and
builds them into a StoreFront catalog, associating the imported items with the
correct categories. **This option requires selecting a target StoreFront** from the
drop-down. You must also import items (either in this run or a prior run) for the
catalog to be populated.
- **Import Orders** — Imports historical orders from WooCommerce. Each imported order
is tagged with its original WooCommerce ID so it is not imported twice if you re-run.
You must select at least one of the four checkboxes.
---
# Importing a Shopify site into UltraCart
https://docs.ultracart.com/account-settings/external-integrations/importing-a-shopify-site-into-ultracart
doc_type: how-to
## Shopify Import
### What it does
The Shopify importer connects to your Shopify store's Admin API using an access token.
Depending on the options you select it will:
- Pull your **customers** (with an optional cutoff date).
- Pull your **products and variants** into UltraCart's item catalog, with an option to
overwrite existing items.
- Pull your **historical orders** (with an optional cutoff date) and re-create them as
placed orders in UltraCart.
- Pull your **Smart Collections** into an UltraCart StoreFront catalog.
- Pull your **blog articles** into an UltraCart StoreFront.
### Before you start — generate a Shopify Admin Access Token
The importer requires an **Admin API access token** from a custom Shopify app you
create on your store. See our detailed walkthrough here:
<[Importing a Shopify site into UltraCart](#) >
At a high level:
1. In your Shopify admin, go to **Settings → Apps and sales channels → Develop apps**.
2. Create a new app and grant it **read** (or read/write) access to the scopes you
need — at minimum: customers, products, orders, collections, and content (blogs).
3. Install the app on your store; Shopify will then issue an **Admin API access**
**token** starting with `shpat_`. Copy it — it is shown only once.
### Filling out the configuration screen
| Field | What to enter |
| --- | --- |
| **Shopify Access Token** | The Admin API access token from your custom app. Must begin with `shpat_`. |
| **Shopify Domain Name** | Your permanent Shopify domain. Must end with `.myshopify.com` (for example `mystore.myshopify.com`). Do not use your custom vanity domain here. |
| **StoreFront** | The UltraCart StoreFront to associate imported orders, catalog collections, and blog articles with. **Required** if you are importing the catalog or blog articles. |
When you submit the form, UltraCart will test your access token against your Shopify
domain before starting the import.
### Checkbox options
- **Import Customers** — Imports customer records from Shopify.
- **Since** (optional) — Enter a date in `MM/DD/YYYY` format to import only
customers created on or after that date. Leave blank to import all customers.
- **Import Items** — Imports Shopify products (and each variant) as UltraCart items.
- **Overwrite** — When checked, existing UltraCart items that match a Shopify
product will be overwritten with the latest data from Shopify. Leave unchecked to
skip items that already exist.
- **Import Orders** — Imports historical orders from Shopify as placed orders in
UltraCart.
- **Since** (optional) — Enter a date in `MM/DD/YYYY` format to import only orders
placed on or after that date. Leave blank to import all orders. For a large, long
running store, a Since date is strongly recommended.
- **Import Smart Collections into StoreFront** — Imports your Shopify Smart
Collections as an UltraCart StoreFront catalog. **Requires selecting a StoreFront.**
- **Import Blog Articles into StoreFront** — Imports your Shopify blog articles into
the selected StoreFront's content. **Requires selecting a StoreFront.**
You must select at least one of the five checkboxes.
* * *
## General tips
- **Run in stages.** For a large store, it is often easier to import customers and
items first, review them in UltraCart, then return and import catalog and orders.
- **Use Since dates on Shopify.** If you have years of orders and customers, using
the Since fields dramatically shortens the import and lets you focus on recent data.
- **Imports are idempotent by ID.** Both importers tag imported records with their
originating WooCommerce / Shopify ID, so re-running will not create duplicate items
or orders. (For Shopify items specifically, use **Overwrite** if you want existing
items refreshed.)
- **Credentials use a dedicated API user / app, not your admin login.** Both
platforms require you to generate API credentials from within their admin before
running the import.
- **Watch the progress screen.** The importer reports per-step progress
(customers → items → catalog → orders) and produces a log file you can download if
anything needs to be investigated.
---
# Importing a WooCommerce site into UltraCart
https://docs.ultracart.com/account-settings/external-integrations/importing-a-woocommerce-site-into-ultrac
doc_type: how-to
:::info
**This page has moved.** The current documentation is at [Import WooCommerce](/account-settings/external-integrations/import-woocommerce). Please update any bookmarks or links.
:::
---
# InboxGeek
https://docs.ultracart.com/account-settings/external-integrations/inboxgeek
doc_type: how-to
InboxGeek offers real-time notification of when customers are reachable by email. By configuring an InboxGeek integration you can leverage this functionality within high value StoreFront Communication marketing flows/campaigns.
First login to your InboxGeek account, next click on Platforms and then Add New Platform as shown below.

Now enter “UltraCart” for the name, select “Webhook” for the integration and then enter “[api.ultracartstorefront.com](http://api.ultracartstorefront.com)” for the domain as shown below then click on Create Platform.

The next piece of information is tricky to obtain. First open your browser’s Developer Tools → Network → XHR. Then click on the pencil icon associated with the platform we just created. The entry that is in the network tab will contain the platform ID. In this example the ID would be 1449. Write that down.

Next we need to obtain our API key. Click the person icon in the upper right and then the Settings option,

Click on API Access and then click the button in the bottom right twice until the API key is copied to your clipboard.

Now within UltraCart navigate to Configuration → Integrations → InboxGeek and paste in the API key and platform id number then click save.
## Using InboxGeek within StoreFront Communications
Within your Flow/Campaign you will add a new Step of type InboxGeek as shown below:

The only configuration option available to the number of days to wait for an InboxGeek notification before going down the alternate path:

While a customer is waiting at this step, UltraCart will add the customer to the InboxGeek list so that their system starts monitoring for live notifications to send back to UltraCart. Once UltraCart receives a notification it will dispatch the customer down the “Yes” branch. After the max wait days is reached the customer will be forced down the “No” branch. Here is an example below.

---
# Integrating PCI Pal with UltraCart
https://docs.ultracart.com/account-settings/external-integrations/integrating-pci-pal-with-ultracart
doc_type: how-to
# Configuring PCI Pal to communicate with UltraCart
[https://www.pcipal.com/pci-compliance-solutions/](https://www.pcipal.com/pci-compliance-solutions/)
Within UltraCart, navigate to Home → Configuration → Integrations (tab) → Other (section) → PCI Pal.
This is a direct link to the path above:
[https://secure.ultracart.com/merchant/configuration/pciPalSettingsLoad.do](https://secure.ultracart.com/merchant/configuration/pciPalSettingsLoad.do)

The fields shown in the screenshot above should be provided directly by PCI Pal. The names of the fields were provided by PCI Pal, so your PCI Pal rep will be familiar with them and can provide any assistance with gathering those values and describing those values as needed.
The only field that is specific to UltraCart is the Rotating Gateway. UltraCart must know which payment gateway to use when interacting with PCI Pal. You must select a payment gateway that you have configured within UltraCart. Currently, the only supported gateway is Braintree Payment Solutions (Blue). If you need support for another gateway, notify your PCI Pal representative and then contact UltraCart support. There is a small amount of configuration to activate another payment gateway.
Payment gateways are managed in UltraCart here:
Home → Configuration → Checkout → Payments
This is a direct link to the path shown above:
[https://secure.ultracart.com/merchant/configuration/payment/v5/methodsLoad.do](https://secure.ultracart.com/merchant/configuration/payment/v5/methodsLoad.do)
# Preventing direct credit card entry
UltraCart has a user permission that will disable direct credit card entry within the Manual Order screen. Combined with PCI Pal, this will allow customer service representatives to take orders using PCI Pal and ensuring they do not create orders by receiving credit card numbers directly into their possession. This permission will ensure a call center and its employees remain outside PCI scope should an issue arise.
To activate this permission for a user or group, edit the user or group and check the permission named “`Back End Order Entry (Prevent Direct Credit Card Entry)`“.
For more information on setting user or group permissions, see [User Configuration Screen](/account-settings/general-configuration/users/user-configuration-screen) .
# Using PCI Pal when entering an order
The manual entry screen is found here:
Home → Operations → Order Management → Manually Add Order
Here is a direct link to the path listed above:
[https://secure.ultracart.com/merchant/orderentry/orderEntryApp.do](https://secure.ultracart.com/merchant/orderentry/orderEntryApp.do)
Once PCI Pal is properly configured, a new Payment Method button will appear in the payments section. Also, if you have the user permission set, a message will appear notifying the customer service representative that direct credit card entry is disabled.

The steps for taking an order using UltraCart an PCI Pal are as follows:
1. Enter all other information in the screen including billing and shipping addresses, items, shipping method, and miscellaneous information. The PCI Pal interaction should be the last thing done. Technically, the PCI Pal session will only require a billing address, but for the best experience, complete all other sections as well, saving PCI Pal for the part of order completion.
2. Click the PCI Pal payment button. This will display the PCI Pal area and an orange button named `Start/Restart PCI Pal Session`. Click that button to start the session.

3. When your PCI session appears, the rep will enter the Link ID into their phone system to sync the PCI Pal session with the phone call. When done properly, the phone icon will turn green.
4. Once connect, the rep will use PCI Pal per their instructions to collect card number, expiration date, and cvv number. When all information is collected, click the `Process` button to transfer that information from PCI Pal back to UltraCart.

5. After transferring the card information from PCI Pal to UltraCart, the order entry screen will display the message below. Click the `Process Order` button at the bottom of the UltraCart screen to complete the order.

---
# IPQualityScore
https://docs.ultracart.com/account-settings/external-integrations/ipqualityscore
doc_type: how-to
# About
[https://www.ipqualityscore.com/](https://www.ipqualityscore.com/)
IPQS, is dedicated to enhancing businesses' fraud prevention and security efforts. The goal is simple. To provide instant, impactful protection that safeguards you and your customers. With advanced tools, we measure various risk signals, helping your business to stay ahead of any threats.
# Configuration

To configure IPQualityScore to your UltraCart Account, you’ll configure your IPQualityScore API key, then configure the ‘Hold for Review’ Rick Limit (Default is 75.)
---
# Keap (formerly Infusionsoft)
https://docs.ultracart.com/account-settings/external-integrations/keap-formerly-infusionsoft
doc_type: how-to
# Introduction
UltraCart offers seamless integration with Keap, a popular sales and marketing automation platform (formerly known as Infusionsoft). This integration allows you to cascade contacts, orders/invoices, and shipping information from UltraCart to your Keap account. You can also map order and shipping details to custom fields you've configured in Keap.
note
**Note:** While the company has been renamed to Keap, some backend references and UI elements within UltraCart may still refer to it as "Infusionsoft."
**Note:** While the company has been renamed to Keap, some backend references and UI elements within UltraCart may still refer to it as "Infusionsoft."
UltraCart provides free integration with Keap to streamline the flow of customer and order data. This includes comprehensive mapping capabilities for order and shipping information to custom fields within your Keap account. Orders can be tracked from UltraCart Order IDs to Keap Invoices and Orders using the `Invoice.Description` and `(Order) Job.JobNotes` fields. For field definitions, refer to the Keap API Help.
# Configuration
To integrate Infusionsoft, Log into your account and then navigate:
:::note
Main Menu → [Configuration](https://secure.ultracart.com/merchant/configuration/configurationMenuLoad.do) → [Integrations](https://secure.ultracart.com/merchant/configuration/configurationMenuLoad.do) -> [Infusionsoft ](https://secure.ultracart.com/merchant/configuration/infusionsoftLoad.do)
:::
:::tip
The configuration screen has excellent tooltips, so please visit the page and read each tooltip to configure your instance.
- Your integration is tested upon saving. If you have an invalid API Key or App Name, the page will let you know.
- Please read the notes in the Product Mapping section carefully. There are two ways to map products.
- For order field mappings, we've only added the order fields requested by existing customers. If you need additional ones, let us know. We did this to keep things fast.
:::
# Credentials
The Credentials section is where you'll set up your Keap API key and App Name.
- **API Key:** Enter your Keap API Key.
- **App Name:** Enter your Keap App Name (e.g., `your_app_name.infusionsoft.com`).
- **Enabled:** Select this checkbox to enable communication with Keap. You can uncheck it temporarily to disable the integration.

# Abandoned Cart Contact
If you specify a Contact Tag in this section, UltraCart will process abandoned shopping carts and create a Keap contact record for them. This contact will be tagged with the value you provide. This allows you to set up campaigns in Keap that are triggered by this specific tag.
- **Abandon Tag:** Select an optional tag for abandoned carts.
- **Products-Tags:** If checked, UltraCart will examine the abandoned cart and use the Product Contact Tags mapping to create product tags as well. Be mindful of your campaign setup, as this might lead to unwanted side effects if your campaigns assume products are purchased when they are merely abandoned. However, this information can be useful for targeting marketing efforts if your campaigns account for both abandoned and purchased products.

# Affiliate → Contact
These settings apply if you have the UltraCart Affiliate Management program configured:
- **Add affiliate info to new customer:** If checked, affiliate information is added to new customer notes in Keap.
- **Add affiliate info to order:** If checked, affiliate information is added to order notes in Keap.
- **Map affiliate to Contact:** If checked, the affiliate name is added as a contact tag in Keap.
- **Create affiliate contact tag if needed:** If checked, an affiliate contact tag will be created in Keap if it doesn't already exist.
- **Affiliate Contact Tag Category:** Select an optional contact tag category for affiliates.

# Order → Contact
## (Contact Creation)
When an order is sent to Keap, a call to `ContactService.addWithDupCheck` is made to replicate customer information.

These settings govern that behavior:
| Field | Description |
| --- | --- |
| Lead Source Field | This field can presently be set to "Coupon" or left Blank. :::info ### Need another field _Need a different field? contact support at_ [_support@ultracart.com_]() ::: |
| Contact Tags Type to see a list of tags: \*[Values are from Infusionsoft](https://www.infusionsoft.com/product-blog/what-are-tags-infusionsoft) | Configure Infusionsoft Contact Tags. Enter a comma separated list of Group **NAMES** here. When a contact is added, a call to ContactService.addToGroup() will be made for each group, effectively tagging the contact. |
| New Customer Tag | Optional: Select tag for new contacts. **New Customer** tag: the contact is tagged as a new customer if no other order in the order history contains the customers email address |
| Repeat Customer Tag | Optional: Select tag for repeat contacts. |
| Mailing List Tag | Optional: Select tag for mailing list. |
| Primary Address | Select either 'Billing' or 'Shipping'. |
| Action Set Id | Optional: Value is an integer. Please see [ContactService.runActionSequence](http://help.infusionsoft.com/api-docs/contactservice#runActionSequence) |
| Create Lead Source | If this checkbox field is selected, then a lead source will be created, if it doesn't exist. |
| Mailing List Filter | If this checkbox selected, then only send to Infusionsoft if customer checked Mailing List checkbox during their ultracart checkout. |
| Skip Order Creation | Select this checkbox if you do not have the Infusionsoft e-commerce component. |
## Sales Rep → Contact Owner
### (Sales Rep Mapping)
If an order contains a Sales Rep Code (usually this is supplied using the back office manual entry screen), and a matching User ID is found below, the Infusionsoft Contact record **Owner ID** field will be set to the given User ID. The user id must be a valid user in your Infusionsoft system. The User ID is an **integer**. If there is a Sales Rep Code associated with the UltraCart order and no match is found, a warning will be noted in the logs.
note
**Note:** If you do not have any product to product mappings above, be sure to check the "Skip Order Creation" checkbox at the top or these tags will not be applied because the product mappings will error out before this sequence is run.
**Note:** If you do not have any product to product mappings above, be sure to check the "Skip Order Creation" checkbox at the top or these tags will not be applied because the product mappings will error out before this sequence is run.

## Product → Contacts
You may map UltraCart Item IDs to Infusionsoft [Contact Tags (Groups)](http://ug.infusionsoft.com/article/AA-00304/0/Use-tags-to-segment-your-lists.html) here. If a product is found to have a tag mapping, then any contact created will be assigned that tag.

# Optional Settings
## Order → Invoice/Order
There are two ways to cascade orders to Infusionsoft:
1. OrderService.placeOrder
2. InvoiceService.addBlankOrder
There are advantages to each. placeOrder allows promo code fields to be added correctly, but requires you to keep your Infusionsoft account in **\*\*\*test merchant\*\*\*** mode to avoid double charging customer cards.
:::note
**Note: if you choose placeOrder and accidentally change your Infusionsoft account, order replication will fail. The customer's card will NOT be charged twice. (NOTE: addBlankOrder method allows you to run your Infusionsoft account in any mode, but promo codes must go in notes fields.)**
:::
:::note
**If you chose to use **[**OrderService.placeOrder**](http://help.infusionsoft.com/api-docs/orderservice#placeOrder)** to cascade orders to Infusionsoft, you MUST keep your Infusionsoft account in **`test merchant mode`** or the order replication will fail.**
:::

## Order → Product Mapping
If a product mapping is not found during order replication, a search will be made in your Infusionsoft[Product](http://developers.infusionsoft.com/dbDocs/Product.html) table where ProductName = UltraCart Item ID (case sensitive).
If that also returns no match, the item will not be cascaded to your system and an error will be noted in the logs here.
## Infusionsoft Custom Order Field

This section allows you to map Infusionsoft custom order fields to the following UltraCart order fields:
- Advertising Sources
- CustomField1
- CustomField2
- CustomField3
- CustomField4
- CustomField5
- CustomField6
- CustomField7
## Product Mapping
If a product mapping is not found during order replication, a search will be made in your Infusionsoft[Product](http://developers.infusionsoft.com/dbDocs/Product.html) table where ProductName = UltraCart Item ID (case sensitive).
If that also returns no match, the item will not be cascaded to your system and an error will be noted in the logs here.

### Batch Product Mapping Process for Large Item Count Configuration
:::note
### Large Item Count Configuration
**\*\*PLEASE NOTE\*\***
If you have a large number of items to map between UltraCart and Infusionsoft, you can configure one item in the Product Mapping section, then save the changes.
Then perform a Batch Item Export to generate a spreadsheet in which you can then configure the remaining item mappings, then importing the rest of the item via the Batch Item Import.
This may be more efficient process than trying to map them in the UltraCart backend UI.
For more details see [Batch Item Export](/items-catalog/tools/batch-item-export) & [Batch Item Import](/items-catalog/tools/batch-item-import).
:::
## Product → Campaign
You may map UltraCart Item IDs to Infusionsoft Action Sets (Campaigns) here. If a product is found to have a Action Set ID mapping, then that action set will be triggered for each product.
note
**Note:** If you do not have any product to product mappings above, be sure to check the "Skip Order Creation" checkbox at the top of these actions will not fire.
**Note:** If you do not have any product to product mappings above, be sure to check the "Skip Order Creation" checkbox at the top of these actions will not fire.

## Goal Achievement
If you use a Creation Method of `InvoiceService.addBlankOrder`, then the manual payment made during order synchronization will not trigger goal achievements within your campaign. As a workaround, you may modify your campaigns and include an API call to begin your campaigns. This API call is called via the Infusionsoft [Funnel Service](http://help.infusionsoft.com/api-docs/funnelservice#achieveGoal). This is an advanced operation. For help setting up a campaign to work with this, please contact Infusionsoft and ask for help creating a goal "that can be triggered by the FunnelService".
In this section you may associate one of the following with a goal:
1) an Infusionsoft Product or
2) an Infusionsoft Product Category or
3) UltraCart Item ID or
4) UltraCart Folder ID.
You will need four pieces of information:
1) Will a Product or Product Category be the trigger?
2) What is the name _or_ id of the Product or Product Category? If you provide an integer, it is assumed to be an id, else a name is assumed.
The funnel service takes two parameters.
3) The first is the integration name.
4) The second parameter is the call name.

## Shipping and Tracking
Infusionsoft does not have standard shipment tracking tables. However, it is popular with UltraCart merchants to cascade UltraCart shipping and tracking information into custom **Order** fields (Infusionsoft [Job](http://help.infusionsoft.com/developers/tables/job) table).
Please see this [Infusionsoft documentation](http://ug.infusionsoft.com/article/AA-00224/0/How-do-I-create-custom-fields.html) for help setting up custom fields. Please remember that when referencing custom fields below, they must begin with and underscore. So if you set up a custom field named ShipmentDate, you would enter **\_**ShipmentDate below.

# Monitoring
At the bottom of your Infusionsoft configuration is a link to the [Infusionsoft Logs](https://ultracart.atlassian.net/wiki/404?key%3Dmerchant%3Bsearch%3Fq%3D%2Fconfiguration%2Finfusionsoft%2FinfusionsoftLogLoad.do). Click that link to view the logs.

:::tip
Review your logs often. (The logs contain verbose information geared toward UltraCart support, but if you're receiving an error from Infusionsoft, it will be evident. Do your best to remedy the issue, and contact UltraCart support if you cannot.)
:::
:::note
**Any user who has "Edit Settings" permission will receive an email each time there's an error replicating an order to Infusionsoft.** We limit this to one email per eight hours, but you will receive one each time there's an error.
- Infusionsoft is known to have intermittent connection failure issues. We'll retry each replication numerous times, but you'll still get an email about it. We can't tell why the order replication failed.
- There is no way to turn this off or disable it. Either fix your issue, contact us about our issue, or turn off your Infusionsoft integration.
:::
# Frequently Asked Questions
## Q: I was placing some test orders and noticed that the test orders were never transmitted to InfusionSoft, why?
A: The transmissions to InfusionSoft occur **after** the placed order has moved beyond the payment stage (the A/R department), so make sure that when you are testing that you either configure the test credit card to go to the shipping or completed stages or, if you use the "keep in A/R department" setting that you then go into the A/R and process the order there to send it to the shipping/completed stages. IF you still do not see the order details appearing in InfusionSoft, check the InfusionSoft log located at the bottom of the InfusionSoft configuration page in UltraCart.
---
# Infusionsoft Logs
https://docs.ultracart.com/account-settings/external-integrations/keap-formerly-infusionsoft/infusionsoft-logs
doc_type: reference
# Infusionsoft Log View
You can access the Infusionsoft log by click on either link found at the top and bottom of the page, as shown below.

The Infusionsoft logs provides a display of all the files pulled from Infusionsoft over the last month. This view provides the date and time the file was received along with the status of the file and the UltraCart Order id assigned to the order.

# Infusionsoft File View
From the log view you can click the "View" to pull up an individual file. This allows you to see if there were any errors with the file or see exactly what was passed within said file.

---
# Kount
https://docs.ultracart.com/account-settings/external-integrations/kount
doc_type: reference
# About
[Kount’s](http://www.kount.com) award-winning anti-fraud technology empowers online merchants and payment service providers around the world. With Kount, merchants approve more orders, uncover new revenue streams, and dramatically improve their bottom line all while minimizing fraud management cost and losses. Boost Sales, Beat Fraud with Kount.
# Navigation
To integrate Kount within UltraCart, navigate to:
:::note
Home → [Configuration](https://secure.ultracart.com/merchant/configuration/configurationMenuLoad.do) → (middle menu) External Integrations → Kount
:::
# Integration Steps

You'll configure the following Kount credentials, which you'll obtain from Kount.
| Field | Description |
| --- | --- |
| Kount Merchant Id | Required credential (provided by Kount.com) |
| Data Collection Service URL | Required credential (provided by [Kount.com](http://Kount.com)) |
| Risk Inquiry Service URL | Required credential (provided by [Kount.com](http://Kount.com)) |
| Risk Inquiry Service API Key | Required credential (provided by [Kount.com](http://Kount.com)) |
# Fraud Review of Orders
Whenever an order is flagged for review by Kount.com it will go into your Order Management → Fraud Review sections as shown below.

When you click on this department you'll see a list of orders as shown below.

You'll want to review the order, Kount status, transaction details, UltraCart fraud score, etc. and then make a decision on whether you want to allow the order to move forward as shown below.

---
# ONTRAPORT
https://docs.ultracart.com/account-settings/external-integrations/ontraport
doc_type: how-to
# **Introduction**
**OfficeAutoPilot is now ONTRAPORT!**
## Introduction
ONTRAPORT (formerly OfficeAutoPilot / SendPepper) is a powerful CRM and automation platform that integrates seamlessly with UltraCart. ONTRAPORT can:
- Retrieve item details from UltraCart
- Receive notifications for new orders, refunds, and auto-order status changes
- Track affiliate conversions using their partner pixel
- Maintain product and contact records using UltraCart’s transmissions
This guide walks through configuration, product mapping, monitoring transmissions, and optional features such as resending notifications.
* * *
## Prerequisites
Before configuring the integration, make sure you have:
- An active ONTRAPORT account
- API key (if using API method)
- Conversion domain (if using Partner Tracking Pixel method)
- Administrative-level access to the UltraCart account
- Items created in both UltraCart and ONTRAPORT (recommended)
* * *
## Configuration

1. Navigate to:
**Main Menu → Configuration → External Integrations → ONTRAPORT**
2. Choose an integration method:
- **API Integration**
Requires a single ONTRAPORT API key. This is the recommended method.
- **Partner Tracking Pixel**
Requires entering the ONTRAPORT sub-domain for each StoreFront theme.
> **Tip:** If you’re unsure which method to select, contact ONTRAPORT Support for guidance.
3. Complete the configuration fields displayed for the selected method.
4. Save your configuration.
* * *
## API Integration

When the API method is selected, UltraCart provides a simple configuration screen requiring only the ONTRAPORT API key. Obtain the UltraCart Integration Key from ONTRAPORT Support.
> **Note:** API keys occasionally expire or become invalid (“stale”). If transmissions suddenly fail with a **403 error**, refresh your ONTRAPORT API key and re-enter it into UltraCart.
* * *
## Partner Tracking Pixel

If you use ONTRAPORT’s partner/affiliate tracking system, select the **Partner Tracking Pixel** method. You must:
1. Copy the host portion of the conversion URL provided by ONTRAPORT.
2. Enter that host into the **ONTRAPORT Sub-domain** field for each StoreFront theme.
This allows the system to fire ONTRAPORT’s conversion pixel on UltraCart receipts.
As shown in the screen shot above you copy the host name from the conversion URL provided by ONTRAPORT and enter it in the ONTRAPORT Sub-domain field provided for each Theme (It may be "[**ontraport.ontraport.com**](http://ontraport.ontraport.com)". You can verify that with ONTRAPORT).
* * *
## Product Mapping

Regardless of which integration method you choose, you must complete **Product Mapping**.
- If no Product Name is entered, UltraCart sends the **UltraCart Item ID** as the ONTRAPORT Product Name.
- If Item IDs differ between systems, manually enter the correct ONTRAPORT Product Name per item.
> **Warning:** If items are duplicated in UltraCart, make sure to update the custom field `oapProductid`. Leaving the duplicated value in place results in incorrect product data being transmitted to ONTRAPORT.
* * *
## Types of Information Sent to ONTRAPORT
UltraCart transmits the following:
| Type | Description |
| --- | --- |
| **AffiliateId** | Affiliate identifier. |
| **Affiliate Approved** | True/False. |
| **Sale** | Sent for every successful order. |
| **Refund** | Sent for every refund. |
| **Auto Order Status** | Sends recurring order status such as: _active, card declined, cancelled, terminated_, etc. |
ONTRAPORT may also poll UltraCart to retrieve up-to-date item details.
* * *
## Monitoring Transmissions
The bottom of the ONTRAPORT configuration page displays the **Transmission Log**.

Each entry includes:
- Transmission type
- Status
- Description
- Full request payload
- Response code from ONTRAPORT
Click **View** beside any log entry to see the XML details.

> **Tip:** When first configuring ONTRAPORT, monitor the transmission log frequently to ensure all data is flowing correctly.
> If you have any problems with the integration, these transmission logs can be incredibly valuable to ONTRAPORT support personnel.
* * *
## Review Order Actions: _Resend OntraPort Notification_

UltraCart provides the ability to **resend** the ONTRAPORT order notification if needed. This option appears only when:
- ONTRAPORT is configured in the UltraCart account, **and**
- You are viewing an order in **Order Management → Review Order**.
### How to Access the Option
1. Open any order under **Order Management**.
2. Click **Review** to view order actions.
3. From the top-right corner, click **Tools**.
4. If ONTRAPORT is configured, you will see:
**Resend OntraPort Notification**
### What This Option Does
Selecting **Resend OntraPort Notification** will retransmit the order information to ONTRAPORT, generating the same payload used in the original transmission.
### When to Use It
You may use this feature when:
- The original ONTRAPORT transmission **failed** (e.g., API key expired, 403 errors).
- You have **corrected item mappings**, tags, or other ONTRAPORT-related configuration.
- Important **order changes** were made after the original transmission (e.g., corrected items, updated customer data).
- A merchant needs to manually **retrigger ONTRAPORT workflow automations** associated with the order.
> **Note:** The option will _not_ appear unless ONTRAPORT integration is currently active.
* * *
## Frequently Asked Questions
### Why do order totals differ between UltraCart and ONTRAPORT?
ONTRAPORT does **not** store shipping or handling charges. These differences are expected when reconciling order totals.
### Why was only one of my items transmitted to ONTRAPORT?
If an item contains a value in the `oapProductid` field, UltraCart transmits that value instead of the Item ID. If items were duplicated, this field may not have been updated.
### Why did ONTRAPORT stop receiving my order data?
If using the API method, the API key may have expired or become invalid. Refresh the key and re-enter it in UltraCart. If the problem persists, gather:
1. Example contact experiencing the issue
2. Order form URL
3. Form name in ONTRAPORT
4. Screenshot of your ONTRAPORT key
5. Transmission log entry (using **View**)
6. Integration method (API or Partner Pixel)
Then contact ONTRAPORT Support.
### Why are some orders never transmitted?
UltraCart only sends data for **successful, paid** orders. Orders in:
- Accounts Receivable
- Pre-Orders
- Quote Requests
- Pending Clearance
- Fraud Review
…are _not_ transmitted because no payment has occurred.
**Question: How do I add tags to my items so that once purchased, the tag will be added to the newly created Contact in Ontraport, triggering a campaign or other follow up action?**
Answer: Within Ontraport, create a campaign, and the trigger should be a new trigger Purchases (and select the product purchased) :

This trigger will add them to the campaign, and then you can add another step below that trigger which adds the contact to any tag of your choosing.
* * *
## Conclusion
ONTRAPORT and UltraCart form a powerful two-way integration that synchronizes products, sends order activity, and triggers CRM workflows. With proper configuration and regular monitoring of the Transmission Log, merchants can maintain a clean, reliable automation pipeline.
* * *
## Next Steps
- Review **StoreFront → Communications** documentation for automation enhancements
- Configure item-level tags for ONTRAPORT campaigns
- Explore UltraCart Webhooks and REST API options
- Contact ONTRAPORT Support for custom campaign or workflow advice
---
# Reviews.io
https://docs.ultracart.com/account-settings/external-integrations/reviews-io
doc_type: how-to
UltraCart has an integration with [Reviews.io](http://Reviews.io) that will allow the merchant to request a review from the customer utilizing a new step in a StoreFront Communications flow.
The first step is to configure your [Reviews.io](http://Reviews.io) store name and API key under Configuration → Integrations → [Reviews.io](http://Reviews.io)

After the credentials are configured, you can create a [StoreFront Communications Flow](/storefronts-themes/storefront-communications/flows) that is triggered by order shipped. We recommend a wait step that is long enough for your typical shipping plus enough time for the customer to get familiar with your product and form an opinion on it.

---
# Salesforce.com Integration Guide
https://docs.ultracart.com/account-settings/external-integrations/salesforce-com-integration-guide
doc_type: explanation
# Introduction
UltraCart is pleased offer complete two-way integration with the [Salesforce.com](http://salesforce.com) CRM platform. With this integration, you may incorporate UltraCart actions into your existing Salesforce.com CRM workflows & processes, as well as communicate events from Salesforce.com to UltraCart, allowing your organization to harness the e-commerce power of UltraCart through a familiar Salesforce.com interface.
# Available Features
- Product Synchronization
- Customer Profile Synchronization
- Create Salesforce.com Opportunities for Orders
- Send new/changed products from UltraCart to Salesforce.com
- Apply changes made to products in Salesforce.com to UltraCart
- Create Person Accounts for Affiliates
- Send Refunds to Salesforce.com
- Send Auto-Order Notifications to Salesforce.com
# Prerequisites
To begin, you will need the following:
- An active [UltraCart](http://www.ultracart.com) account
- [Salesforce.com](http://salesforce.com) Enterprise or Unlimited
- The user name, password, and security token for the Salesforce.com user UltraCart will use to connect to your Salesforce.com instance.
:::warning
Salesforce.com Developer accounts will work for testing, but are not supported by Salesforce.com for production use.
:::
:::note
You must have a Salesforce.com **Enterprise Edition** account for production API access. You can not connect a Salesforce.com trial account to UltraCart.
:::
# Salesforce Integration Companies
If you're new to Salesforce and would like to hire a consultant that is familiar with Salesforce.com developer and UltraCart integrations then consider contacting:
| Company | Website | Phone |
| --- | --- | --- |
| Tech Guys Who Get Marketing | [http://www.techguyswhogetmarketing.com/](http://www.techguyswhogetmarketing.com/) | (888) 372-8823 |
An integration consult can help you write the Salesforce workflow automation logic that you need to implement your company's vision for sales dominance.
### Next Step: [Retrieve your security token](/account-settings/external-integrations/salesforce-com-integration-guide/retrieving-your-security-token)
# Areas to Explore
If you have already configured your Salesforce integration, you should review our documentation on each section:
- [Configuration](/account-settings/external-integrations/salesforce-com-integration-guide/connecting-ultracart-to-salesforce-com)
- [Field Mapping](/account-settings/external-integrations/salesforce-com-integration-guide/mapping-ultracart-fields-to-salesforce-c)
- [Data Management](/account-settings/external-integrations/salesforce-com-integration-guide/salesforce-com-data-management)
- [Status(Monitoring)](/account-settings/external-integrations/salesforce-com-integration-guide/monitoring-the-integration-service)
- [Logging](/account-settings/external-integrations/salesforce-com-integration-guide/salesforce-logging)
as well as our [Frequently Asked Questions](#page-not-found) page.
---
# Configuring Salesforce.com Outbound Messages
https://docs.ultracart.com/account-settings/external-integrations/salesforce-com-integration-guide/configuring-salesforce-com-outbound-mess
doc_type: how-to
# Introduction
Salesforce.com utilizes a pair of features to integrate with external systems such as UltraCart, Outbound Messages and Workflow Rules. For complete integration with UltraCart, you will need to configure several Outbound Messages, and then create Workflow Rules to notify UltraCart when you make changes. This process is fairly detailed, but only needs to be done once.
# Getting Started
1. Login to Salesforce.com, and click on** **your user name at the top right of your screen. From the drop down menu, select **Setup**.

2. Click to expand the **Create** in the App Setup section. Once it has expanded, click on **Workflow & Approvals** to expand that section. You will now be able to click on **Outbound Messages**.

# Creating an Outbound Message
When you click the Outbound Messages link, you will be taken to a screen listing your existing Outbound Messages (if any).
Click on the **New Outbound Message** button to begin creating the first Outbound Message.

The first step is to select the object that will be the subject of this message. Let's begin with the Product object. Select **Product** from the drop down, and click on Next.

Now we come to the message configuration screen, shown below.
# Outbound Message Configuration

1. In the **Name** field, input "UltraCart Product Message."
2. In the **Endpoint URL**, enter [https://salesforce-soap.ultracart.com/axis/services/SFPartnerProductNotification](https://salesforce-soap.ultracart.com/axis/services/SFPartnerProductNotification)
3. If you have a dedicated API user, select that user name in th**e User to send as** field. If you don't have a dedicated user, use an account that has access to all of the default objects and fields.
4. Check the box next to **Send Session ID**. This feature will allow UltraCart to verify that a message received is a valid Salesforce.com message related to your account.
5. Under **Product fields to send**, the only value that should be in the **Selected Fields** section. If you do not see the field "Id" under the **Selected Fields** header, select the "Id" entry underneath the **Available Fields** header, and click on Add.
That's it! Click the **Save** button. You will need to repeat the process for the Account and Contact objects as well. The process is exactly the same as described above, except that you will choose the appropriate object, and use a different URL for each object, as shown below.
### [Previous](/account-settings/external-integrations/salesforce-com-integration-guide/mapping-ultracart-fields-to-salesforce-c) → Next Step: [Configuring Salesforce.com Workflow Rules](/account-settings/external-integrations/salesforce-com-integration-guide/configuring-salesforce-com-workflow-rule)
---
# Configuring Salesforce.com Workflow Rules
https://docs.ultracart.com/account-settings/external-integrations/salesforce-com-integration-guide/configuring-salesforce-com-workflow-rule
doc_type: how-to
# Introduction
In Salesforce.com, a workflow is a set of tasks to be automatically performed when a specified event occurs. To allow for proper notification to UltraCart when certain actions occur, we create several Workflow Rules that utilize the [previously configured Outbound Messages](/account-settings/external-integrations/salesforce-com-integration-guide/configuring-salesforce-com-outbound-mess).
# Getting Started
1. Login to Salesforce.com, and click on your user name at the top right of your screen. From the drop down menu, select **Setup**.

2. Click to expand the **Create** in the App Setup section. Once it has expanded, click on **Workflow & Approvals** to expand that section. You will now be able to click on **Workflow Rules**.

# Creating a Workflow Rule
Salesforce.com will display a list of existing Workflow Rules (if any are present). Click on the **New Rule** button to begin creating the necessary rules.

As with the Outbound Message configuration, we need to select the object that will be the subject of this Workflow Rule. For this exercise, we'll once again use the Product object. Select **Product** from the drop-down menu, and click on next.

This opens up the rule configuration screen, shown below. Until you select the necessary options, your screen may look slightly different.

Follow these steps to set up the Rule:
1. Enter "UltraCart Product Notification Workflow" in the **Rule Name** field.
2. Under **Evaluation Criteria**, check the **created, and every time it's edited** radio button
3. Under **Rule Criteria**, select **formula evaluates to true** from the dropdown menu labelled Run this rule if the following. This will cause the section below the drop-down to update. It should now look like this:

4. In the large text area below the drop-down, simply enter the text "1=1" (without the quotation marks)
5. Click on **Save & Next** to proceed to the Workflow Actions screen.
# Creating Workflow Actions
This screen is used to configure what action or actions should occur when this rule is triggered. Click on the down triangle next to **Add Workflow Action**, and select the option labeled **Select Existing Action** to bring up the action selection window.

1. Change the Search drop-down to the **Outbound Message** option.
2. Select the Outbound Message named **UltraCart Product Message**, and click the arrow labeled **Add** to move it to the **Selected Actions** list.
3. Click the **Save** button to complete the creation process.

After saving the rule, you will be taken to a summary screen. To activate the newly created rule, click on the **Activate** button.

Again, you'll want to repeat this process twice more, once for the Contact object, and once for the Account object.
[Previous](/account-settings/external-integrations/salesforce-com-integration-guide/configuring-salesforce-com-outbound-mess)
[Salesforce.com Integration FAQ](/account-settings/external-integrations/salesforce-com-integration-guide/salesforce-com-integration-faq)
---
# Connecting UltraCart to Salesforce.com
https://docs.ultracart.com/account-settings/external-integrations/salesforce-com-integration-guide/connecting-ultracart-to-salesforce-com
doc_type: how-to
# Introduction
:::note
Before following these instructions, make sure that you have [retrieved your security token](/account-settings/external-integrations/salesforce-com-integration-guide/retrieving-your-security-token).
:::
To connect UltraCart to your Salesforce.com instance, you will need to provide your Salesforce.com login information. UltraCart will then use these credentials to act on your behalf when creating or updating records and objects in Salesforce.
# Credential Installation
1. Navigate to the Salesforce.com configuration page.
:::note
[Home→](#)[Configuration→](#) \[External Integrations\] (1) → \[Advanced\] (2) →[Salesforce.com](#) (3)
:::

The initial configuration screen is now displayed, and you will now enter your salesforce.com credentials
1. In the **API User Name** field, enter the e-mail address associated with the account you wish UltraCart to use to communicate to Salesforce.com.
2. In the **Password** field, enter your Salesforce.com password with your security token. For example, if your password was 'password01', and your security token was 'abc123456', you would enter 'password01abc123456' into the password field.
3. By default, UltraCart assumes that you are talking to a **Production** instance of Salesforce. If you are testing against a **Sandbox** instance, select it from the drop-down specified.
4. Click **Save** to continue. UltraCart will verify your credentials by performing a test connection to Salesforce. If there is an issue communicating with Salesforce, the screen will reload and an error message describing the issue will be displayed.

After your credentials have been verified, the screen will reload, and will have a new section labeled **Options**.

1. Enter the desired maximum API call count made by UltraCart in the **Maximum API Calls Per Day** field. Please remember that you receive 1,000 API calls per Salesforce license that you have with a **minimum of 5,000** per organization. If you have other programs besides UltraCart making API calls to your Salesforce instance, please make sure to account for this usage when determining the maximum API calls UltraCart is allowed per day. Further details on API limits can be found on [Salesforce.com's website.](http://help.salesforce.com/HTViewHelpDoc?id=integrate_api_rate_limiting.htm)
2. If you want UltraCart to notify you when errors occur with your Salesforce.com integration, enter a number greater than 1 in the **Send error notification after** field.
:::note
This limit applies only to "optional" activities. Even if UltraCart has reached the maximum number of API calls, it will continue to make required API calls when mandatory events occur, such as a customer placing a new order.
:::
# Selecting Integration Systems
UltraCart supports several different Integration Systems with Salesforce.com. You can enable any combination of systems as desired. A brief description of each system is provided in the table below.
:::note
For many merchants, the default options marked with (recommended) are the only systems activated. If you are unsure if you should enable an option, ask your Salesforce.com administrator for assistance.
:::
Enable Product Synchronization
This module instructs UltraCart to synchronize item information into Salesforce.com Product objects.
Enable Customer Profile Synchronization
This module instructs UltraCart to synchronize customer profiles into Salesforce.com objects. Depending on your Salesforce.com configuration, UltraCart will either create an Account & a Contact for each customer profile, or if you have enabled Person objects in Salesforce.com, UltraCart will create a single Person object for each customer profile. Optionally, you can configure Salesforce.com to notify UltraCart of changes to customer information, which can then be automatically applied to the corresponding UltraCart customer profile.
Create Salesforce.com Opportunities for Orders
This module instructs UltraCart to create Opportunities for each order placed through your store. When this module is enabled, UltraCart will create a fully populated Opportunity for your orders. Additionally, UltraCart will create Accounts, Contacts, or Person objects as needed for the new Opportunity. If you have enabled Product Synchronization, UltraCart will populate the Opportunity with the individual items purchased.
Send New / Changed Items to Salesforce.com
When enabled, this module will automatically update Salesforce.com each time you add or modify an item in UltraCart. Changes made in UltraCart will take approximately 5 minutes to be reflected in Salesforce.com.
Apply changes made to Products in Salesforce.com to UltraCart Items
When enabled, this module will process outbound messages from Salesforce.com related to your items, and automatically update the UltraCart item to reflect the changes made in Salesforce.com. For this functionality to operate properly, you will need to create the necessary Outbound Message and Workflow Rule options in Salesforce.com.
Create Person Accounts for Affiliates
When enabled, this module will create Person Accounts in Salesforce.com for each of your affiliates. If your Salesforce.com instance is not configured for Person Accounts, this setting is ignored.
Send Refunds To Salesforce
When enabled, UltraCart will attempt to push refund information to Salesforce.com. If located, the original OpportunityLineItem records will be updated to reflect a refund amount. You will need to make sure that you have mapped the UltraCart Order ID to a custom Salesforce.com record (see below) for this feature to function properly.
Suppress Account Creation
If checked, UltraCart will not create new account records if it is unable to locate a match. Use this feature with caution, as enabling it may cause Opportunities to have incomplete information or missing relationships.
Send Auto-Order Notifications to Salesforce
This feature will cause UltraCart to attempt to update existing opportunities when certain auto-order events occur, such as a cancellation or declined payment. You will need to make sure you have mapped a custom field for Auto Order status for this feature to function properly.
:::info
In the section above, when _synchronization_ is mentioned, please be aware that it is occurring _at a moment in time_ and not historically. For example, UltraCart will sync product changes back and forth to Salesforce.com, but it will not synchronize historical records. Attempting to synchronize thousands of customers and products using the Salesforce.com API is not practical.
:::
After selecting the desired integration options, click on **Save**.
### Next Step: [Mapping UltraCart fields to Salesforce.com fields](/account-settings/external-integrations/salesforce-com-integration-guide/mapping-ultracart-fields-to-salesforce-c)
---
# Mapping UltraCart fields to Salesforce.com fields
https://docs.ultracart.com/account-settings/external-integrations/salesforce-com-integration-guide/mapping-ultracart-fields-to-salesforce-com
doc_type: how-to
:::note
**You may not need to configure any field mappings!** By default, UltraCart automatically maps standard fields to their corresponding fields in Salesforce.com. [Here is the list of fields that UltraCart will map automatically](/account-settings/external-integrations/salesforce-com-integration-guide/mapping-ultracart-fields-to-salesforce-c/salesforce-com-field-mapping). This screen is for non-standard mappings.
:::
You may desire to include information from UltraCart that is not included in the standard Salesforce.com fields. Or, you may desire to put standard information in a different place. One UltraCart merchant has billing information mapped to the standard billing fields, and also uses this screen to map the billing information to additional fields to meet their needs. This screen gives you that flexibility. All that is needed is to map the particular UltraCart field to a target Salesforce.com custom field.
Map as many fields as possible to your Salesforce.com instance. The more information you have in your Salesforce.com records, the more options you have in creating tasks and workflows around specific points of data.
:::info
The list of UltraCart fields may appear somewhat random. It is. Rather than include the entire set (close to 1,000) fields available, UltraCart has only included **merchant requested** fields. That is why you see the billing fields in the order section, and not the shipping fields. If you need a field and don't see it, contact UltraCart support and request it!
:::
Step 1: Navigate to the Salesforce.com mapping page.
:::note
[Home](#) → [Configuration](#) → \[External Integrations\] (1) → \[Advanced\] (2) → [Salesforce.com](#) (3) → \[Field Mapping tab\].
:::

This will bring up the field-mapping interface, shown below.

This page is divided into sections, one for each object type you can use with Salesforce.com. In each section is a list of fields on that object, and to the right, there is a drop-down selection box that will allow you to choose a corresponding Salesforce.com custom field.
| Left Column | Right Column |
| --- | --- |
| UltraCart | Salesforce.com |
:::note
Because of the way Salesforce.com handles currency and number conversion, you should only select fields of a similar type. While Salesforce.com will allow you to map numeric fields to text fields, this is not recommended.
:::
If you are using multiple UltraCart accounts, and they are all communicating with one Salesforce.com instance, it is **highly recommended** that you create a custom field on the Salesforce.com standard objects to contain the UltraCart Merchant ID. Once those fields are created, simply map them using the drop-down fields in the **Merchant ID Mapping** section. If you wish UltraCart to populate an additional Affiliate ID field, select the desired field from the **Secondary Affiliate ID** drop-down.

Finally, if you have renamed any of your default objects, you will need to tell UltraCart which objects to use instead. To do this, simply click on the checkbox labeled **Show Advanced Object Mapping Options**, and select the appropriate object for each type.

### [Previous](/account-settings/external-integrations/salesforce-com-integration-guide/connecting-ultracart-to-salesforce-com) → Next Step: [Configuring Salesforce.com Outbound Messages](/account-settings/external-integrations/salesforce-com-integration-guide/configuring-salesforce-com-outbound-mess)
---
# Salesforce.com Field Mapping
https://docs.ultracart.com/account-settings/external-integrations/salesforce-com-integration-guide/mapping-ultracart-fields-to-salesforce-com/salesforce-com-field-mapping
doc_type: reference
# Salesforce.com Field Mapping
For each Salesforce.com Object type there is a table showing what can be mapped into the field from the UltraCart side.
## Account Object
UltraCart Object
UltraCart Field
Salesforce Field
Order
First Name + Last Name
Name
Order
Billing Address 1
BillingStreet
Order
Billing City
BillingCity
Order
Billing State
BillingState
Order
Billing Zip
BillingPostalCode
Order
Billing Country
BillingCountry
Order
Shipping Address 1
ShippingStreet
Order
Shipping City
ShippingCity
Order
Shipping State
ShippingState
Order
Shipping Zip
ShippingPostalCode
Order
Shipping Country
ShippingCountry
Order
Day Phone
Phone
Order.CustomerProfile
First Name + Last Name
Name
Order.CustomerProfile
Billing Address 1
BillingStreet
Order.CustomerProfile
Billing City
BillingCity
Order.CustomerProfile
Billing State
BillingState
Order.CustomerProfile
Billing Zip
BillingPostalCode
Order.CustomerProfile
Billing Country
BillingCountry
Order.CustomerProfile
Phone
Phone
Order.CustomerProfile
Business Notes
Description
## Account (Person) Object
UltraCart Object
UltraCart Field
Salesforce Field
Order
First Name + Last Name
Name
Order
Billing Address 1
BillingStreet
Order
Billing City
BillingCity
Order
Billing State
BillingState
Order
Billing Zip
BillingPostalCode
Order
Billing Country
BillingCountry
Order
Shipping Address 1
PersonMailingAddress
Order
Shipping City
PersonMailingCity
Order
Shipping State
PersonMailingState
Order
Shipping Zip
PersonMailingPostalCode
Order
Shipping Country
PersonMailingCountry
Order
Shipping Address 1
ShippingStreet
Order
Shipping City
ShippingCity
Order
Shipping State
ShippingState
Order
Shipping Zip
ShippingPostalCode
Order
Shipping Country
ShippingCountry
Order
Billing Title
PersonTitle
Order
Email
PersonEmail
## Contact Object
UltraCart Object
UltraCart Field
Salesforce Field
Order
Billing First Name
FirstName
Order
Billing Last Name
LastName
Order
Shipping Address1
MailingStreet
Order
Shipping City
MailingCity
Order
Shipping State
MailingState
Order
Shipping Zip
MailingPostalCode
Order
Shipping Country
MailingCountry
Order
Shipping Phone
Phone
Order
Billing Title
Title
Order
Email
Email
Order
Billing Address 1
Order
Billing Address 2
Order
Billing City
Order
Billing State
Order
Billing Postal Code
Order
Billing Country
Order
Merchant ID
Order.CustomerProfile
Billing First Name
FirstName
Order.CustomerProfile
Billing Last Name
LastName
Order.CustomerProfile
Day Phone
Phone
Order.CustomerProfile
Billing Title
Title
Order.CustomerProfile
Email
Email
Order.CustomerProfile
Billing Address 1
Order.CustomerProfile
Billing Address 2
Order.CustomerProfile
Billing City
Order.CustomerProfile
Billing State
Order.CustomerProfile
Billing Postal Code
Order.CustomerProfile
Billing Country
Order.CustomerProfile
Merchant ID
Order.CustomerProfile
Allow 3rd Party Billing
Order.CustomerProfile
Allow COD
Order.CustomerProfile
Allow PO
Order.CustomerProfile
Auto Approve COD
Order.CustomerProfile
Auto Approve PO
Order.CustomerProfile
Minimum Item Count
Order.CustomerProfile
No Free Shipping
Order.CustomerProfile
Tax Exempt
Order.CustomerProfile
Tax ID
Order.CustomerProfile
Customer Profile ID
Order.CustomerProfile
Single Sign On ID
Order.CustomerProfile
Billing Address 1
Order.CustomerProfile
Billing Address 2
Order.CustomerProfile
Billing City
Order.CustomerProfile
Billing State
Order.CustomerProfile
Billing Postal Code
Order.CustomerProfile
Billing Country
Order.CustomerProfile
Merchant ID
## Custom Object
| UltraCart Object | UltraCart Field | Salesforce.com Field |
| --- | --- | --- |
| Order | Payment Type | |
| Order | Order ID | |
| Order | Company Name | |
| Order | Custom Field 1 | |
| Order | Custom Field 2 | |
| Order | Custom Field 3 | |
| Order | Custom Field 4 | |
| Order | Custom Field 5 | |
| Order | Shipping & Handling Total | |
| Order | Shipping Method | |
| Order | Review Link | |
| Order | Credit Card Type | |
| Order | Credit Card Exp Month | |
| Order | Credit Card Exp Year | |
| Order | Credit Card Num Last 4 | |
| Order.Affiliate | Affiliate ID | |
| Order.Affiliate | Affiliate Name | |
| Order.Affiliate | Affiliate E-Mail | |
| Order.Affiliate | Affiliate Commission Amt | |
| Order.AutoOrder | Auto Order Code | |
| Order.AutoOrder | Cancelled By User | |
| Order.AutoOrder | Cancellation Date | |
| Order.AutoOrder | Failure Reason | |
| Order.AutoOrder | Next Charge Attempt | |
| Order.AutoOrder | Rotating Gateway Code | |
| Order.CustomerProfile | Allow 3rd Party Billing | |
| Order.CustomerProfile | Allow COD | |
| Order.CustomerProfile | Allow PO | |
| Order.CustomerProfile | Auto Approve COD | |
| Order.CustomerProfile | Auto Approve PO | |
| Order.CustomerProfile | Minimum Item Count | |
| Order.CustomerProfile | No Free Shipping | |
| Order.CustomerProfile | Tax Exempt | |
| Order.CustomerProfile | Tax ID | |
| Order.CustomerProfile | Customer Profile ID | |
| Order.CustomerProfile | Single Sign On ID | |
:::note
If you are mapping fields to a custom object in Salesforce then the object must have a relationship to the Opportunity table so that the column Opportunity\_\_c exists on the custom object.
:::
## Opportunity Object
UltraCart Object
UltraCart Field
Salesforce Field
Order
Order ID
Name
"Closed Won"
StageName
Order
Total
Amount
"100"
Probability
Order
Creation Date
CloseDate
Order
Payment Type
Order
Order ID
Order
Custom Field 1
Order
Custom Field 2
Order
Custom Field 3
Order
Custom Field 4
Order
Custom Field 5
Order
Custom Field 6
Order
Custom Field 7
Order
Shipping & Handling Total
Order
Shipping Method
Order
Tax County
Order
Order Comments
Order
Order Notes
Order
Order Merchant Notes
Order
Payment Status
Order
Shipped Date
Order
Payment Method
Order
Current Stage
Order
Mailing List
Order
Advertising Source
Order
Merchant ID
Order
Coupon Code
Order
Review Link
Order
Credit Card Type
Order
Credit Card Exp Month
Order
Credit Card Exp Year
Order
Credit Card Num Last 4
Order
Single Sign on CCID
## Opportunity Line Item Object
UltraCart Object
UltraCart Field
Salesforce Field
Order.Item
Quantity
Quantity
Order.Item
Unit Price After Discount
Unit Price
Order.Item
Description
Description
Order
Creation Date
ServiceDate
Order.Item.Option#
Name
Order.Item.Option#
Value
Order.Item
Parent Kit Item ID
## Product Object
UltraCart Object
UltraCart Field
Salesforce Field
Item
Description
Name
Item
Item ID
ProductCode
Item
Description
Description
"true"
IsActive
---
# Monitoring the Integration Service
https://docs.ultracart.com/account-settings/external-integrations/salesforce-com-integration-guide/monitoring-the-integration-service
doc_type: reference
UltraCart has developed a powerful, yet easy to use, dashboard that shows you the status of your Salesforce.com integration. This dashboard gives you the information necessary to troubleshoot any integration issues, as well as keep a pulse on the activity occurring between Salesforce.com and UltraCart.
To access the dashboard
:::note
[Home](#) → [Configuration](#) (External Integrations) → [Salesforce.com](#) → \[Status tab\].
:::

The dashboard contains a number of helpful items. First, the top section shows the overall health of your Salesforce.com integration. This section also shows how many API calls UltraCart has made to Salesforce.com, as well as the last time UltraCart contacted Salesforce.com.
Below the health check section is the Integration Log. This log shows you the last 10 actions that UltraCart performed relating to the Salesforce.com integration. Items with the  icon are informational in nature. If an item has an  icon, this means that the message shows that something unexpected occurred, but does not prevent the successful communication between Salesforce.com and UltraCart. These messages typically are displayed when UltraCart is unable to create or update an object in Salesforce.com. In each case, the message will include the feedback provided to UltraCart by Salesforce.com when the operation was attempted.
Messages with the  icon indicate an issue that is preventing the successful communication between Salesforce.com and UltraCart. In the example above, the user name or password was changed in Salesforce.com, but the change was not made in UltraCart. When an error occurs with the  icon present, UltraCart will discontinue communication with Salesforce.com until the issue is resolved. If UltraCart is in this state, the health check section will reflect this fact, as demonstrated in the picture below.

If you are unable to determine the reason that the health check is failing, or are unable to make the necessary corrections to resolve the issue, please contact our professional services team for assistance.
---
# Retrieving your Security Token
https://docs.ultracart.com/account-settings/external-integrations/salesforce-com-integration-guide/retrieving-your-security-token
doc_type: how-to
Follow the steps below to retrieve your security token.
:::note
Please note that your security token may be used by other third-party applications, including the Salesforce.com plug-in for Microsoft Outlook. If you reset your security token, you will need to update it in each application.
:::
1. Log into your [Salesforce.com](https://login.salesforce.com/) account.
2. Click on **Setup** in the top navigation section. 
3. On the left, click on **My Personal Information**.

4. Select **Reset My Security Token**, and press the **Reset My Security Token** button.

5. Your security token will then be sent to the e-mail address associated with that Salesforce.com user account.

### Next Step: [Connecting UltraCart to Salesforce.com](/account-settings/external-integrations/salesforce-com-integration-guide/connecting-ultracart-to-salesforce-com).
---
# Salesforce.com Data Management
https://docs.ultracart.com/account-settings/external-integrations/salesforce-com-integration-guide/salesforce-com-data-management
doc_type: reference
# Introduction
One of the most powerful features of the UltraCart integration system is the ability to automatically manage products and their prices automatically. If you selected this integration option during setup, then you may want UltraCart to "bootstrap" your Salesforce.com configuration with your existing item information. To get started, log into your UltraCart account, and navigate to the Data Management screen.
:::note
[Home](#) → [Configuration](#) → \[External Integrations\] (1) → \[Advanced\] (2) → [Salesforce.com](#) (3) → \[Data Management tab\].
:::

# Data Synchronization
There are three distinct primary tasks you can perform from the Data Synchronization panel:

| Task | Description |
| --- | --- |
| Retrieve Custom Objects & Fields | This task will connect to your Salesforce.com instance, and download all custom fields and custom objects you have created. The data retrieved is used primarily to assist in [mapping additional UltraCart fields](/account-settings/external-integrations/salesforce-com-integration-guide/mapping-ultracart-fields-to-salesforce-c). |
| Push Items To Salesforce.com | This task will begin the process of creating Product objects in Salesforce.com for each of your UltraCart items. Before running this task, it is recommended that you [configure any desired custom fields](/account-settings/external-integrations/salesforce-com-integration-guide/mapping-ultracart-fields-to-salesforce-c) for optional UltraCart item information. :::info This is a time-consuming process, and will use quite a large number of Salesforce.com API calls. You should use this option only when necessary. As long as you have the ["Send New / Changed Items to Salesforce.com" integration option activated](/account-settings/external-integrations/salesforce-com-integration-guide/connecting-ultracart-to-salesforce-com), UltraCart will automatically keep your items in sync. ::: |
| Perform Item Reconciliation | This task will attempt to reconcile all of your UltraCart items with their corresponding Salesforce.com products. It can detect invalid relationship records, mis-matched item descriptions, pricing information, and more. After this task is complete, UltraCart will create a spreadsheet detailing the results of the reconciliation process, as well as what steps were taken to resolve the issues. |
# Person Accounts
If you have Person Accounts enabled on your Salesforce.com instance, you will see an additional section on this tab:

| Option | Description |
| --- | --- |
| Person Account Record Type | Salesforce.com will allow you to create multiple objects that correspond to a combination of a contact & account record. By default, the only one configured is **Person Account**. If you have created an additional combination object, or have renamed the default object, select the desired Salesforce.com object type from this drop-down. Only objects that meet the criteria for this record type are shown. |
| Orders with Customer Profiles | This will allow you to specify what actions should be taken when an order is placed **with** a customer profile, and an existing Contact / Account pair does not exist. You can specify to create a **Person Account** record, or create separate **Contact & Account** records. |
| Orders without Customer Profiles | This will allow you to specify what actions should be taken when an order is placed **without** a customer profile, and an existing Contact / Account pair does not exist. You can specify to create a **Person Account** record, or create separate **Contact & Account** records. |
---
# Salesforce.com Integration FAQ
https://docs.ultracart.com/account-settings/external-integrations/salesforce-com-integration-guide/salesforce-com-integration-faq
doc_type: explanation
# Salesforce.com Integration FAQ
### Q: At what point does the Salesforce sync activate and how to I deactivate it?
A: You configure the integration under Main Menu -> Configuration -> Salesforce.com. After you have applied your credentials, UltraCart will start communication with your Salesforce.com account. If you want to disable the integration you can come back to the same page and there will be a "Remove Credentials" button.
### Q: Is the sync two ways for every object with the exception being Products (requires Outbound messaging)?
A: No, the synchronization is mostly one way with UltraCart sending information to Salesforce.com as orders flow in. If you apply the proper settings, the item/product information can synchronize in both directions.
### Q: If Person Accounts are enabled how does UC determine which account type to create (Account/Contact vs Person Accounts)?
A: If you turn on Person Accounts then UltraCart will always create a Person Account in Salesforce.com for the order unless the order is associated with a customer profile in UltraCart that is already associated with an Account in Salesforce.com
### Q: What is the largest number in the Maximum API calls Per Day field allowed by UltraCart?
A: Don't get silly. You get 1,000 API calls per day per paid user on Salesforce.com. So if you have 10 people on your Salesforce.com instance you would get 10,000 calls per day.
### Q: How do I send multiple tracking numbers to Salesforce.com on the Opportunity?
A: When mapping the Order fields make sure to map "Tracking Numbers" instead of "Tracking Number". This will send all the tracking numbers on the order to Salesforce. If the field you're mapping into is a textarea then the tracking numbers will be one per line. If the field is a string then the tracking numbers will be separated by a comma. Below is a screen shot of the field you need to map highlighted in red.

### Q: If Field Mappings are only for custom Salesforce fields, how do I change what does in a standard field?
A: That is not currently possible. We will map things into their logical corresponding fields for all intrinsic Salesforce.com object fields.
### Q: Where do I set "Enable Customer Profile Synchronization" option?
A: After you have configured the credentials on the first tab of the Salesforce.com configuration, an options section will appear.
### Q: Can I integrate with a Salesforce Sandbox for testing purposes? Is it possible to setup a test order that can be ignored?
A: You can configure the integration to talk to your Sandbox account at first and then after testing change it to your production environment. After you are in production we can only talk to the production environment. You would need to use a separate UltraCart account if you wanted to have a test environment for your Sandbox on a long term ongoing basis.
### Q: For return customers on their second order, will the Salesforce integration create a new account (duplicate) or use the existing Account/Contact?
A: If you have customer profiles enabled, then UltraCart will use the account / contact associated with that customer profile. If customer profiles are not used, UltraCart attempts to find the correct account / contact via e-mail address, followed by customer information such as name and address. When using customer profiles, UltraCart stores the Account and Contact Ids from Salesforce within its database for future use.
### Q: Can we push Customer Profiles into Salesforce before an order has been completed?
A: Currently, you cannot.
### Q: Are accounts / opportunities ownership always assigned to the user that was supplied for integration credentials.
A: Yes, this is a limitation of Salesforce. One solution is to create a Salesforce user exclusively for API use, then use workflows and triggers to transfer ownership to the desired user.
### Q: What is the normal delay time between an order entered and the push to Salesforce?
A: As long as your configuration is correct, and UltraCart has not detected any issues with your Salesforce instance, UltraCart will try to push the order information as soon as the order has been marked paid. If you're performing real-time charge during checkout then this process will happen asynchronously in the background and typically completes a few seconds after the customer has seen the receipt.
### Q: Will the Salesforce opportunity be updated when the order is shipped?
A: Yes, as long as one or more of the following custom mappings is configured:
- Shipping Method
- Tracking Number
- Tracking URL
Any mapping for these fields must be mapped to a custom field on the Opportunity object.
---
# Salesforce Logging
https://docs.ultracart.com/account-settings/external-integrations/salesforce-com-integration-guide/salesforce-logging
doc_type: reference
# Salesforce Logging
The Salesforce.com integration also provides detailed logging on the operations that are being performed and the queue of work that is waiting to be performed. To access the logging go to:
:::note
[Home](https://secure.ultracart.com/merchant/mainMenu.do) → [Configuration (External Integrations)](https://secur.ultracart.com/merchant/configuration/configurationMenuLoad.do) → [Salesforce.com](https://secu.ultracart.com/merchant/configuration/salesforceConfigurationLoad.do) → [Log](https://secu.ultracart.com/merchant/configuration/salesforceLogLoad.do)
:::
The logging screen is broken up into two sections: Pending Transactions and Activity Logs.

## Pending Transactions
The top section is the queue of work waiting to be performed. If you have a large order flow, are experiencing errors in your configuration, or are importing historical information then the queue will build up.
Beside each record in the queue is a status. If it's already been attempted one then there will be a last activity timestamp, a message of why the last attempt failed, the number of attempts so far, and the next retry time. The more failed attempts on a queue entry the logger the duration between retry attempts. You can force a particular queue entry to process immediately by clicking the "Retry Now" button. You can also remove individual queue records with the "remove" button or clear the entire queue with the "remove all" button.
## Activity Log
The activity log shows the time, order id, activity, status, and message associated with each operation that UltraCart performs on your Salesforce account. If everything is flowing smoothly the log should contain only successful transactions. The log will show the last 2,000 operations performed by UltraCart on your account. If you click the order ID associated with the activity record it will open the order in a new window.
---
# Sending previous orders to Salesforce
https://docs.ultracart.com/account-settings/external-integrations/salesforce-com-integration-guide/sending-previous-orders-to-salesforce
doc_type: how-to
## Introduction
While UltraCart will automatically create opportunities for your orders, it may sometimes be necessary to re-send orders to Salesforce. For example, if you have orders that were processed prior to enabling Salesforce.com integration, you may want to push those orders into Salesforce for more accurate reporting.
## Batch Order Operation
To send or resend UltraCart orders to Salesforce, you will need to use the Batch Order Operation tool. This tool allows you to quickly perform a number of different operations on a group of orders you specify. You can read more about Batch Order Operations [on its documentation page](/orders-fulfillment/order-management/batch-order-operations). Navigate to the Batch Order Operation screen:
:::note
[Operations](#) → [Order Management](#) → [Batch Order Operation](#)
:::
Once you are on the screen, enter the desired order ids, or the desired order id range, and click on the "send to salesforce.com" button.

The orders will then be queued for transmission to Salesforce.
## Verification
You can verify that the order or orders were sent to Salesforce.com by navigating to the Salesforce Log screen:
:::note
[Home](#) → [Configuration](#) (External Integrations) → [Salesforce.com](#) → Log
:::
You will notice that the matching order ids will appear in the pending transactions section.

---
# Smarty Streets Integration
https://docs.ultracart.com/account-settings/external-integrations/smarty-streets-integration
doc_type: how-to
**Last Updated:** June 22, 2026
This guide covers connecting a [Smarty](https://www.smarty.com/) (formerly SmartyStreets) account to UltraCart so the platform can verify, standardize, and autocomplete shipping addresses during checkout.
* * *
## Overview
Smarty is a third-party address verification service. When connected, UltraCart sends the shipping address a customer enters at checkout to Smarty, which checks it against authoritative postal data (USPS CASS data in the U.S., plus international datasets) and returns either a verified/standardized version of the address or an indication that it could not be matched.
UltraCart uses that result in two ways:
- **Address verification** confirms a shipping address is real and deliverable, and can offer the customer a corrected (standardized) version to accept.
- **Address autocomplete** suggests complete addresses as the customer types, reducing typos and abandoned fields.
The verification work happens server-side: UltraCart calls Smarty with your account credentials, so no embedded API key is exposed in the storefront. This integration is what powers the storefront [Address Validation](/storefronts-themes/storefront-visual-builder/advanced-topics/shipping-address-validation) feature at checkout. Without an active, enabled Smarty connection, address validation does not run.
:::info
Smarty bills for the lookups it performs. Review [Usage Limits and Cost Control](#) before enabling on a high-traffic storefront.
:::
* * *
## Prerequisites
- A Smarty account. Sign up at [smarty.com/signup](https://www.smarty.com/signup).
- A Smarty subscription that includes the lookups you intend to use (US Address Verification, International, and/or US Autocomplete).
- A **Secret Key** credential pair from Smarty: an **Auth ID** and an **Auth Token**. These are created in the Smarty dashboard under **API Keys**.
- UltraCart account access with permission to edit **Configuration → Checkout → Shipping**.
> **Important:** Use a **Secret Key** (Auth ID + Auth Token) pair, not a website/embedded key. Because UltraCart performs verification server-to-server, the secret-key credentials never reach the shopper's browser.
* * *
## Where to Configure
All Smarty settings live on the Shipping Checkout Options screen:
**Configuration → Checkout → Shipping → Checkout Options**

Scroll to the **Smarty Streets Address Verification** panel near the bottom of the page.

* * *
## Setup
### 1\. Create a Secret Key in Smarty
1. Sign in at [smarty.com](https://www.smarty.com/).
2. Open the **API Keys** area of your account.
3. Create (or copy) a **Secret Key**. Note the **Auth ID** and **Auth Token** values.
4. Make sure the key's allowed subscriptions cover US Address Verification, and International and/or US Autocomplete if you plan to use them.
### 2\. Enter your credentials in UltraCart
1. Go to **Configuration → Checkout → Shipping → Checkout Options**.
2. Find the **Smarty Streets Address Verification** panel.
3. Check **Enable Smarty Streets address verification**.
4. Enter your **Auth ID** and **Auth Token**.
5. Click **Save**.
:::info
For security, UltraCart masks the stored Auth ID and Auth Token (for example `••••••••4446`). The fields show only the last few characters. To change a value, type a new full value over the masked one and save; leaving the masked value untouched keeps the existing credential.
:::
### 3\. Choose your verification behavior
With credentials in place, set the behavior toggles described in the [Settings Reference](#):
- **Verify the shipping address at checkout** turns verification on.
- **Offer the corrected address as a suggestion** lets customers accept Smarty's standardized version.
- **When the customer will not provide a verified address** decides what happens when an address can't be confirmed.
- **Enable address autocomplete** turns on type-ahead address suggestions.
Click **Save** after adjusting these.
### 4\. Confirm the storefront is wired up
Verification and the suggestion/confirm prompts are rendered by the storefront checkout. Confirm your checkout has the Address Validation elements in place, as described in the [Address Validation](/storefronts-themes/storefront-visual-builder/advanced-topics/shipping-address-validation) guide.
* * *
## Settings Reference
| Setting | Default | Description |
| --- | --- | --- |
| Enable Smarty Streets address verification | Off | Master switch for the integration. Must be on for any verification or autocomplete to occur. |
| Auth ID | (empty) | The Auth ID half of your Smarty secret key. Masked once saved. |
| Auth Token | (empty) | The Auth Token half of your Smarty secret key. Masked once saved. |
| Verify the shipping address at checkout | Off | When on, the shipping address entered at checkout is sent to Smarty for verification. |
| Offer the corrected address as a suggestion | Off | When on, if Smarty returns a standardized version that differs from what the customer typed, the customer is shown a "Did you mean…?" prompt to accept the corrected address. |
| When the customer will not provide a verified address | Require a phone number | Controls what happens when an address cannot be verified and the customer declines the suggested correction. Options: **Allow the order through**, **Require a phone number**, **Block the order**. See [How Verification Behaves at Checkout](#). |
| Enable address autocomplete | Off | Turns on type-ahead address suggestions as the customer types. Handled server-side, so no embedded key is required in the storefront. |
| Monthly autocomplete request limit | 100 | Caps autocomplete lookups per month. `0` = unlimited. |
| Monthly verification request limit | 1000 | Caps verification lookups per month. `0` = unlimited. |
* * *
## How Verification Behaves at Checkout
When **Verify the shipping address at checkout** is enabled, the address a customer enters is checked against Smarty before the order can proceed. There are three possible outcomes:
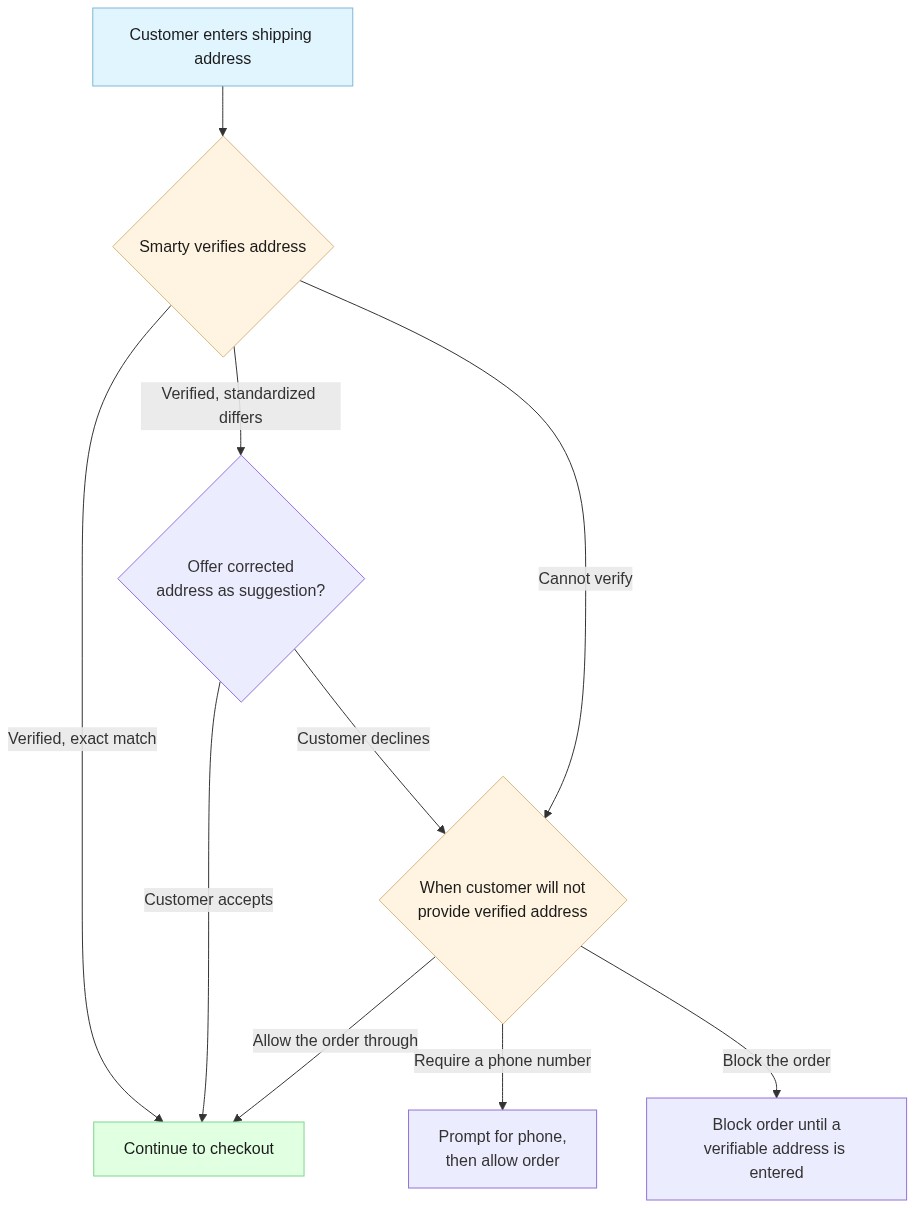
- **Exact match** — the address is deliverable and matches what the customer typed. Checkout continues.
- **Standardized correction** — Smarty returns a cleaned-up version (for example, fixing the ZIP+4 or street suffix). If **Offer the corrected address as a suggestion** is on, the customer sees a "Did you mean the suggested address?" prompt and can accept the correction or keep their entry.
- **Cannot verify** — Smarty can't confirm the address. The **When the customer will not provide a verified address** setting decides the fallback, with three choices:
- **Allow the order through** — the customer may proceed with their unverified address; no extra prompt is shown.
- **Require a phone number** — the customer may proceed but must supply a phone number, so you can reach them about delivery.
- **Block the order** — the order cannot be completed until the customer enters an address Smarty can verify.
The actual prompts the customer sees (the suggestion modal and the confirm/block modal) are part of the storefront checkout. See the [Address Validation](/storefronts-themes/storefront-visual-builder/advanced-topics/shipping-address-validation) guide for how those modals are configured and what the shopper experiences.
* * *
## Usage Limits and Cost Control
Smarty charges per lookup, so UltraCart provides two monthly caps to protect against unexpected cost:
- **Monthly verification request limit** — the maximum number of address verification lookups UltraCart will perform per calendar month. Defaults to `1000`.
- **Monthly autocomplete request limit** — the maximum number of autocomplete lookups per calendar month. Defaults to `100`.
Set either value to `0` for unlimited. When a limit is reached, UltraCart stops sending that type of request to Smarty for the remainder of the month, and checkout proceeds without that assistance until the next month resets the counter.
:::info
Set these limits in line with your Smarty plan's included volume so a traffic spike doesn't run up overage charges. For a busy storefront, raise the verification limit (or set it to `0`) only after confirming your Smarty subscription can absorb the volume.
:::
* * *
## Troubleshooting
### Address validation never appears at checkout
**Symptoms**: Customers are never prompted to confirm or correct an address.
**Cause**: The integration is disabled, credentials are missing/invalid, or the storefront checkout is missing the Address Validation elements.
**Solution**:
1. Confirm **Enable Smarty Streets address verification** and **Verify the shipping address at checkout** are both checked.
2. Re-enter the Auth ID and Auth Token (type fresh full values over the masked ones) and save.
3. Verify the checkout has the suggestion and confirm elements in place — see the [Address Validation](/storefronts-themes/storefront-visual-builder/advanced-topics/shipping-address-validation) guide.
### Verification stops partway through the month
**Symptoms**: Address validation worked earlier in the month, then stopped.
**Cause**: The **Monthly verification request limit** was reached.
**Solution**: Raise the limit or set it to `0` for unlimited, confirming your Smarty plan can absorb the volume. The counter resets at the start of each calendar month.
### Credentials appear masked and won't update
**Symptoms**: The Auth ID/Auth Token fields show masked dots and edits don't seem to take.
**Cause**: UltraCart masks stored credentials and only replaces them when a new full value is typed in.
**Solution**: Clear the field, type the complete new Auth ID / Auth Token value, and click **Save**.
### Autocomplete isn't suggesting addresses
**Symptoms**: No type-ahead suggestions while entering an address.
**Solution**:
1. Confirm **Enable address autocomplete** is checked and saved.
2. Confirm the **Monthly autocomplete request limit** hasn't been reached (or set it to `0`).
3. Confirm your Smarty plan includes US Autocomplete.
* * *
## Related Documentation
- [Address Validation](/storefronts-themes/storefront-visual-builder/advanced-topics/shipping-address-validation) — the storefront checkout feature this integration powers
- [Smarty signup](https://www.smarty.com/signup) — create a Smarty account
- [Smarty documentation](https://www.smarty.com/docs) — provider-side API keys and subscriptions
---
# Third Party Membership Management Services Integrated with UltraCart
https://docs.ultracart.com/account-settings/external-integrations/third-party-membership-management-servic
doc_type: reference
# About
UltraCart is integrated with the following third party Membership management services:
## aMember
[aMember Integration](/account-settings/external-integrations/amember-integration)
## Member Mouse
[MemberMouse Integration](/account-settings/external-integrations/wishlist-member-integration/membermouse-integration)
## WishList Member
[Wishlist Member Integration](/account-settings/external-integrations/wishlist-member-integration)
---
# Twilio
https://docs.ultracart.com/account-settings/external-integrations/twilio
doc_type: how-to
**Last Updated:** June 3, 2026
* * *
## Overview
UltraCart sends SMS messages, such as order and shipment notifications, through Twilio. You connect your own Twilio account so messages go out from your own phone number and are billed directly by Twilio.
This guide shows you where to find your Twilio Account SID, Authentication Token, and phone number in the Twilio Console, and how to enter them in UltraCart.
:::info
SMS sent through this connection is billed directly by Twilio at Twilio's rates. UltraCart does not add a markup on messages.
:::
## Prerequisites
- An active Twilio account. You can create one at [twilio.com](https://www.twilio.com/).
- At least one Twilio phone number with SMS capability.
- StoreFront administrator access in UltraCart.
## Step 1: Locate Your Twilio Credentials
Log in to the Twilio Console at [console.twilio.com](https://console.twilio.com/).
### Account SID and Authentication Token
On the Console dashboard, the home page you land on after logging in, find the **Account Info** panel. It contains the two values UltraCart needs:
- **Account SID:** a string that begins with `AC`.
- **Auth Token:** hidden by default. Select the show icon to reveal it, and the hide icon to conceal it again.
:::warning
Your Auth Token is a secret. Anyone who has both your Account SID and Auth Token can send messages and run up charges on your Twilio account. Only enter it into systems you trust, and never share it.
:::
### Phone Number
In the Console left menu, go to **Phone Numbers > Manage > Active numbers**. This lists every number on your account. Copy the number you want UltraCart to send from.
If you do not have a number yet, go to **Phone Numbers > Buy a number** and purchase one with SMS capability first.
## Step 2: Enter Your Credentials in UltraCart
1. In UltraCart, open your **StoreFront**.
2. In the left menu, select **Communication > Settings**.
3. Scroll to the **Twilio** section.

4. Enter the values you copied from Twilio:
- **Account SID:** paste your `AC` Account SID.
- **Authentication Token:** paste your Auth Token.
- **Phone Numbers:** enter your Twilio phone number, then select the **+** button to add it. You can add more than one number.
5. Save your settings.
Once saved, UltraCart can send SMS through your Twilio number.
## Phone Number Format
Enter a valid US phone number that you own in Twilio. Twilio displays numbers in E.164 format, which is a plus sign and the country code followed by the number, for example `+15551234567`. Enter the number exactly as it appears on your account.
## Troubleshooting
### Messages are not sending
**Symptoms:** SMS messages do not arrive.
**Check:**
- The Account SID and Auth Token match the values in your Twilio Console exactly, with no leading or trailing spaces.
- The phone number is active in your Twilio account and has SMS capability.
- Your Twilio account has enough balance to send messages.
### Credential or authentication errors
**Cause:** The Account SID or Auth Token is incorrect, or the Auth Token was changed in Twilio.
**Solution:** Re-copy both values from the **Account Info** panel in the Twilio Console and re-enter them in UltraCart. If you recently rotated your Auth Token in Twilio, update it here as well.
### The phone number is rejected
**Cause:** The number is not entered in a valid format, or it is not owned by your Twilio account.
**Solution:** Confirm the number appears under **Phone Numbers > Manage > Active numbers** in Twilio, and enter it as a valid US number.
---
# UPS WorldShip Integration
https://docs.ultracart.com/account-settings/external-integrations/ups-worldship-integration
doc_type: explanation
For merchants that ship via UPS, UPS WorldShip software is the core component of their shipping operation. This software does all of the work necessary to prepare a shipment for UPS (including packing slip printing and tracking number assignment). This chapter covers configuring UPS WorldShip software to accept an UltraCart import.
[Configuring an Import Map](/account-settings/external-integrations/ups-worldship-integration/configuring-an-import-map)
[Configuring an Export Map](/account-settings/external-integrations/ups-worldship-integration/configuring-an-export-map)
[Preparing to Export from UltraCart](/account-settings/external-integrations/ups-worldship-integration/preparing-to-export-from-ultracart)
[Importing a UPS WorldShip Export File](/account-settings/external-integrations/ups-worldship-integration/importing-a-ups-worldship-export-file)
Related:
[Applying Customized UPS Rate Tables](/orders-fulfillment/shipping/shipping-methods/applying-customized-ups-rate-tables)
# FAQ
Q: I recently generated labels for 7 packages in an order that were then reprocessed with 7 new labels/tracking numbers. But when I perform th eimport of the tracking numbers its still including the original 7 tracking numbers. What do I need to do to get the cancelled tracking numbers removing from the import file?
Answer: Make sure that you perform the "Void" of the original label/tracking numbers, as described in the following UPS 'Help" doc:
[https://www.ups.com/us/en/help-center/shipping-support/void-shipment.page#contentBlock-13](https://www.ups.com/us/en/help-center/shipping-support/void-shipment.page#contentBlock-13)
Perform the import for the new labels after voiding the original ones.
### Q: Why doesn't UltraCart talk directly to UPS like we do other carriers for real-time estimates?
_Answer: UPS decided that they were going to use their technology as a wedge against the other carriers. The UPS Ready contract that we would have been required to sign strictly prohibited things like displaying rates from multiple carriers on the same screen as well as building software like UltraShip. This is unacceptable to us because it drastically limits the functionality that we can provide to our merchants._
_Domestic Rates_
_UltraCart maintains an internal database of all the domestic rate tables, zone charts, additional service fees, as well as fuel surcharges. This allows UltraCart to accurately estimate domestic rates to the penny with the UPS website. Merchants still have to be very careful of the options that they select on the UPS website to make sure they are doing an apples to apples comparison._
_International Rates_
_Since we're unable to have a database of all the international zone tables, rate charts, etc. from every origin point to destination point we have to use another carrier as a proxy. We basically estimate with another carrier and then apply % markups or discounts based upon how the averages work out. We definitely recommend that merchants do not ship UPS international based upon these rates as there can be no guarantees on how accurate they are._
# UPS WorldShip Documentation
[https://www.ups.com/us/en/business-solutions/business-shipping-tools/worldship/worldship-support.page](https://www.ups.com/us/en/business-solutions/business-shipping-tools/worldship/worldship-support.page)?
---
# Configuring an Export Map
https://docs.ultracart.com/account-settings/external-integrations/ups-worldship-integration/configuring-an-export-map
doc_type: how-to
The next step in integrating UltraCart with UPS WorldShip is to configure an export map so that tracking information and quickly be exported from UPS WorldShip and imported into UltraCart. First, start the UPS WorldShip software and select the Connection Assistant from the UPS OnLine Connect menu.

**Figure 362** **\- Opening the Connection Assistant**
Select "Create a new map for Export" and then click the Next button.

**Figure 363 - Creating a new map**
Next, choose "Shipment" as the Export Data Type and click the next button.

**Figure 364 - Choosing the Export Data Type**
On the third step, select "By File", enter "c:\\upsimport\\export.csv" in the Currently Selected File field, enter "UltraCartExport" in the DSN field, select "Microsoft Text Driver" in the ODBC Drivers list, and click the Next button.

**Figure 365 - Configuring Data Source**
On the next screen, select New Map, enter "UltraCartExport" in the New Map Name field, and click the Next button.

**Figure 366 - Naming Export Map**
On the next screen, simply click the "Finish" button. This will cause an "ODBC Text Setup" dialog to appear like the one in the figure below. Simply click the OK button on this dialog.

**Figure 367 - Configuring ODBC Text Setup**
The next step is to configure the columns that UPS will export into the text file. First click on the "Package" tab, click the "Tracking Number" field in the left hand list, and then click the "Add" button. At this point your screen should look like the figure below.

**Figure 368 - Adding first column to export**
After adding the tracking number, the next step is to add information about the ship to address. Click on the "Ship To" tab and then click the "Add All Columns" button. At this point your screen should look like the figure below.

**Figure 369 - Adding Ship To Columns to Export**
The final step in the configuration of the export file contents is to select "Overwrite existing file" and "Include header row". The header row is very important because it allows UltraCart to determine the meaning of each column in the export file. After selecting the two options, click the OK button.

**Figure 370 - Export Header Option**
At this point, the export map is complete. The next section details exporting information using the newly created map.
---
# Configuring an Import Map
https://docs.ultracart.com/account-settings/external-integrations/ups-worldship-integration/configuring-an-import-map
doc_type: how-to
The UPS WorldShip software is very selective about the settings used to perform an import. A lot of screen shots are used in this section of the manual to make sure that the setup of an import map goes as smooth as possible. First, start the UPS WorldShip software and select the Connection Assistant from the UPS OnLine Connect menu.

**Figure 340** **\- Opening the Connection Assistant**
Select "Create a new map for Import" and then click the Next button.

**Figure 341** **\- Creating a new map**
Select the "Shipment" import data type from the list of available and click Next.

**Figure 342** **\- Selecting the Import Type**
On the next screen, select the "By File" Data Source and then click the "Browse" button shown in the figure below.

**Figure 343** **\- Selecting Data Source Type**
Browse to the directory that the import files will be saved in. For this example, the directory is c:\\upsimport. Change the "Files of type" option to "Text Files (\*.txt; \*.csv)". Click on the import.csv (saved from an UltraCart UPS WorldShip Export) and then click the "Open" button.

**Figure 344** **\- Browsing for import file**
Enter "UltraCartImport" in the Data Source Name (DSN) field. Select "Microsoft Text Driver (\*.txt; \*.csv)" from the list of ODBC drivers and click Next as shown in the figure below.

**Figure 345** **\- Naming the Data Source and Selecting ODBC Driver**
Next, select "New Map", name your map "UltraCartImport", and click the Next button as shown below.

**Figure 346** **\- Naming the Import Map**
The next screen provides instructions for the remainder of the mapping configuration. Click the "Finish" button to procedure to the next part of the configuration.

**Figure 347** **\- Instructions on preparing the Import Map**
The next window that will appear on your screen is the ODBC Text Setup dialog. Just click the "OK" button.

**Figure 348** **\- ODBC Text Setup**
The next screen is where all the mapping between the text file and the UPS import format occurs. The first step is to designate "import.csv" as the "Primary Table". Simply click the "Primary Table" button as shown below.

**Figure 349** **\- Specifying the Primary Table**
Next, select "Ship To" from the drop down box under WorldShip Fields as shown in the figure below.

**Figure 350** **\- Selecting Ship To from the WorldShip Fields**
The next step is to connect fields on the left handle column to fields on the right hand column. Click on the field name on the left hand side and matching entry on the right hand side then click the "Connect" button. A little red chain link will appear beside each column name and an entry will be added to the "What You Have Mapped So Far". After mapping most of the Ship To fields the screen should look like the figure below.

**Figure 351** **\- Mapping Ship To Fields**
There are two other sections that must be mapped between the import file and UPS. Click on the "Package" from the WorldShip Fields drop down as shown in the figure below.

**Figure 352** **\- Selecting Package Mapping**
Map the "PackageType" and "Weight" columns as shown in the figure below.

**Figure 353 - Mapping Package Fields**
Finally, select "Shipping Information" from the drop down list and map "ServiceType" and "BillingOption" as shown in the figure below.

**Figure 354** **\- Mapping Shipment Information**
The final step in completely the map is defining the key for the import table. Since each Order's ID is unique in UltraCart, this serves as the CustomerID field and the key for the table. To define the key, select "CustomerID" from the left hand list and click the "Define Key" button shown in the figure below. After defining the key, click the OK button to finalize the map.

**Figure 355** **\- Defining Key**
---
# Importing a UPS WorldShip Export File
https://docs.ultracart.com/account-settings/external-integrations/ups-worldship-integration/importing-a-ups-worldship-export-file
doc_type: how-to
Now that an export map has been defined, an actual export can take place from UPS WorldShip. From the UPS OnLine Connect menu, select "Batch Export"

Select the appropriate data range to export data from. Don't worry if too much data is exported from UPS because UltraCart will only match it to the orders that are currently in the shipping department.

The next screen will just be a confirmation of the number of records that will be exported. Click the Next button to continue with the export. After the export is performed a confirmation dialog like the one shown below will appear. The export file c:\\upsimport\\export.csv has been created at this point.

Now, log into UltraCart and navigate to the shipping department.
:::note
Main Menu → Order Processing → Shipping Department
:::
Click on the "Import UPS WorldShip" button located at the top of the screen. The next screen will allow you to browse to the export file on your local hard drive and upload it. Click the browse button, locate the file "c:\\upsimport\\export.csv" and then click the upload button. The final screen in the import process will display the matches between each UPS WorldShip export record and orders in the UltraCart Shipping Department. Verify that each match is correct. If there is a mismatch, check the "Incorrect Match" box and process that order manually. If the customer should not be notified of the shipment then check the "Skip Customer Notification" box. Once the Submit button is pressed, all the orders that were matched correctly will be marked as shipped and customer notifications will be sent.
Related resources:
[https://www.ups.com/us/en/help-center/shipping-support/void-shipment.page#contentBlock-13](https://www.ups.com/us/en/help-center/shipping-support/void-shipment.page#contentBlock-13)
---
# Importing an UltraCart Shipping Export File
https://docs.ultracart.com/account-settings/external-integrations/ups-worldship-integration/importing-an-ultracart-shipping-export-f
doc_type: how-to
Now that an import map has been defined, an actual import can take place. From the "UPS Online Connect" menu, select "Batch Import" as shown in the figure below.

**Figure 356** **\- Starting Batch Import**
Select the "UltraCartImport" map from the list provided and click the Next button as shown below.

**Figure 357** **\- Selecting the Import Map**
UPS will examine the import file to determine how many records it contains and then display a preview dialog like the one in the figure below. Click Next to actually perform the import.

**Figure 358** **\- Import Preview**
After the import has completed, a summary dialog will appear like the one in the figure below. Click Save to finish the import.

**Figure 359** **\- Import Summary**
After importing shipments, there will be entries in the "Imported Shipments" section as shown in the figure below.

**Figure 360** **\- Imported Shipments**
To process the shipments, click on the "Imported Shipments" entry in the list. Next, select "Mark Shipments" from the "Activities" menu or click F4. Finally choose "Process Imported Shipments Manually" from the "Activities" menu as shown in the figure below.

**Figure 361** **\- Processing Imported Shipments Manually.**
---
# Preparing to Export from UltraCart
https://docs.ultracart.com/account-settings/external-integrations/ups-worldship-integration/preparing-to-export-from-ultracart
doc_type: how-to
The export for UPS WorldShip is slightly different from a typical export because of the way the UPS WorldShip software import works. First create a directory on the computer called "c:\\upsimport" from the command line or Windows Explorer.
Next log into UltraCart and go to the Shipping Department.
Main Menu Order Management Departments Shipping
Set the view via the change view menu to "combined" and click the "change view" button. All orders will be listed together and a "Select All" box will appear at the top of the list. Click the "Select All" checkbox. Finally click the "Export UPS WorldShip" button. The web browser will prompt to save a file called "import.csv". Make sure the file is saved to "c:\\upsimport" as "import.csv". UltraCart will only export orders that are being shipped via UPS even though all the orders are selected. Follow the directions below to configure the import map and actually import the file into the UPS WorldShip software. After you have completed this configuration, you need only perform the final step to import subsequent export files.
---
# Wicked Reports
https://docs.ultracart.com/account-settings/external-integrations/wicked-reports
doc_type: reference
# Introduction
Wicked Reports is a platform that focuses on marketing attribution. UltraCart has a direct integration with Wicked Report’s API to send data over to their system.
You can learn more about their service at [https://www.wickedreports.com/](https://www.wickedreports.com/)
# Configuration
To configure the Wicked Reports integration go to Configuration → Integrations → Wicked Reports. The configuration on the UltraCart side is simple and only requires an API key.
# What Data is Transmitted?
UltraCart makes four different types of transmissions to Wicked Reports for Order, Order Item, Contact and Refunds. All of the transmission are logged in our [Integration Logs](/reports-analytics/reporting/integrations-reports/integration-log-health-report) system and tied to the order for transparency.
- Order
- SourceSystem = UltraCart
- SourceId = UltraCart’s Order ID
- CreateDate
- ContactEmail
- ContactId = Order Email
- OrderTotal
- Country
- City
- State
- Subscription Id = Auto Order Code
- IP\_Address
- OrderPayments
- PaymentDate
- Amount
- Status = APPROVED/FAILED
- Order Item
- SourceSystem = UltraCart
- SourceID = Item ID
- OrderID = UltraCart Order ID
- Product ID = Item ID
- Qty
- PPU = Item unit cost with discount
- Contact
- SourceSystem = UltraCart
- SourceID = Email
- CreateDate
- Email
- FirstName
- LastName
- City
- State
- Country
- IP\_Address
- Refunds
- SourceSystem = UltraCart
- OrderID = UltraCart Order ID
- PaymentDate = Refund date
- Amount = The amount refunded
- Status = REFUNDED / PARTIALLY REFUNDED
---
# Wishlist Member Integration
https://docs.ultracart.com/account-settings/external-integrations/wishlist-member-integration
doc_type: how-to
# Before you begin
Your Wordpress and WishList Member server should be up and running. That is outside the scope of this document. You should also have all of your WishList Member Levels created.

# Steps
You need two values to integrate with UltraCart.
1. The proper url.
2. The API Key.
## WishList Member url
This value needs to be the **base** of your **Wordpress** installation. The easiest way to determine this is to login to your Wordpress admin console. Look at the url. You want everything up to and including the slash before `wp-admin`.
For example, here is a url to one of the Wordpress WishList Member admin pages:
[http://superstorez.com/WishList.Member/wp-admin/admin.php?page=WishListMember&wl=settings&mode2=others](http://superstorez.com/WishList.Member/wp-admin/admin.php?page=WishListMember&wl=settings&mode2=others)
From that, I can tell that my Wordpress base is this: [http://superstorez.com/WishList.Member/wp-admin/](http://superstorez.com/WishList.Member/wp-admin/admin.php?page=WishListMember&wl=settings&mode2=others)
That is the url to enter in the UltraCart configuration page here:
[https://secure.ultracart.com/merchant/configuration/wishlist\_member/wp-admin/wishListMemberListLoad.do](https://secure.ultracart.com/merchant/configuration/wishlist_member/wishListMemberListLoad.do)
## API Key
Within your WishList Member admin panel, browse to Settings → Miscellaneous.

On the Miscellaneous tab, scroll down to the API Key. Copy that value.

Add both values to the WishList Member New Instance screen.
To create a new integration instance, go here: [https://secure.ultracart.com/merchant/configuration/wishlist\_member/wishListMemberEditLoad.do](https://secure.ultracart.com/merchant/configuration/wishlist_member/wishListMemberEditLoad.do)

Create all the integration instances you need. UltraCart can integrate with an unlimited number of WishList Member servers.
## Important Note Regarding Authentication Errors
:::note
If the authentication fails, please be sure that your WishList Member site is not being cached. This will prevent proper cookie exchange. The following was relayed from WishList Member support about this issue:
_It appears that the issue is from WP engine cache at live site. (looks like WP engine caches the cookie for none admin path) I think if you clone your live site into WP engine staging area. then UltraCart should work with no problem because staging area does not have cache. So, its worth it to give it a try to ensure if issue is really from cache._
_In order to solve the issue at live site, Please kindly contact to WP-engine support and ask them to exclude any url with "wlmapi/2.0/" from cache. ( they do if you contact them). It should fix the issue with API and as result ultra cart issue will be fixed._
:::
## Item Configuration
After you finish creating integration instances, edit each item and associate it with a WishList Member Level.
[HOME](https://secure.ultracart.com/merchant/mainMenu.do) → [ITEMS](https://secure.ultracart.com/merchant/item/itemListLoad.do?categoryId=0) → MY\_DIGITAL\_ITEM ITEM EDITOR
Click on the Digital Delivery tab and scroll to the bottom.

In the WishList Member section, select the server and membership level associated with your digital item.

That will complete your WishList Member integration.
## Notification to the Customer of their login credentials
When the order is placed and processed for payment, UltraCart communicates the purchase to Wishlist and Wishlist then generates the login credentials and emails them to the customer.
### Storefronts
In the storefronts Receipt template and Email Notification receipt template you can use the** $order.isPurchased **velocity statement to customize the receipt page and email notification to notify the customer of the emailing coming form Wishlist member that contains their login credentials.
Example:
Attention: Your login credentials are being sent to you in a separate message from wishlistmember.
#end
## End Conditional ifitem "monthly_subscription"is purchased
Here's how this appears in editor within the receipt\_html.vm :

And here is how it appears when previewing the receipt with an order that contains the "monthly\_subscription":

See the following document for an example of how to edit the template to include the message: [Adding Item Specific Content to the Receipt](/storefronts-themes/storefront-topics/adding-item-specific-content-to-the-rece)
(this example is for editing the receipt template to the actual checkout but the velocity coding is essentially the same for the email template.
### For Legacy "Screen Branding Themes"
In UltraCart email notification and screen branding, you can use the IfPurchased token to customize the receipt to notify the customer of the email coming from Wishlist member containing their login credentials.
\[IfPurchased=item1,item2,item3, etc.\] Your item specific text or html goes here between the opening and closing IfPurchased tags \[/IfPurchased\]
**Using the "IfPurchased" tokens to customize the receipt**
1
[IfPurchased=001]
Your login credentials will arrive
ina separate message from wishlist member. Please check your inbox
# Frequently Asked Questions
## Question: If a refund is processed in UltraCart, will UltraCart unsubscribe the customer from their wishlist subscription?
Answer: Yes, Ultracart will make a call to Wishlist Member to unsubscribe the customer from their current subscription.
## Question: After configuring Wishlist configuration page, I'm seeing the following error in the logs. Why?

Answer: If you are encountering this error after configuring WishList Member, log into your WordPress backend and check to make sure that the home page site is not set to be "Protected" by Wishlist Member, as it needs to be set to "Unprotected".
---
# MemberMouse Integration
https://docs.ultracart.com/account-settings/external-integrations/wishlist-member-integration/membermouse-integration
doc_type: reference
# Overview
[MemberMouse](https://membermouse.com/) is a membership plugin for the wordpress platform that can be integrated with your UltraCart account in order to manage members/subscriptions.
## Navigation
:::info
Main Menu → Configuration → (middle menu) External Integrations → Member Mouse
:::
# Integration Steps
## Step 1 - Configuring a New Instance
After navigating to the the Membermouse configuration page, click the "New Instance" button:

On the next page you'll configure the MemberMouse account credntials, which you'll obtain from MemberMouse:

Complete the form and then save the changes.
| Field | Description |
| --- | --- |
| Integration Version | Defaults to "2.2x" |
| Description | The description is just a free form field.
(Most people put the name of the server or some other identifier in there,
because they might have multiple WP servers they're funneling into their UC account.) |
| Member Mouse API request.php URL | You'll gather this credential from Member Mouse. |
| Member Mouse API Key | You'll gather this credential from Member Mouse. |
| Member Mouse API Secret | You'll gather this credential from Member Mouse. |
| Unsubscribe on Refund or Auto Order Cancel | If selected, the customer will be unsubscribed when their order is either refunded or their auto order is cancelled. |
| Membership Level | Default is 1. Please refer to Member Mouse documentation regarding Membership Level assignment. |
## Step 2 - Configuring the MemberMouse items
To configure the MemberMouse subscription item, navigatee to the Item Management area then edit the item to be configure with MemberMouse. In the item editor, navigate to the Digitial Delivery" tab, then scroll down to the MemberMouse section:

Complete the item configuration for all your MemberMouse items.
**Congratulations! You've configured MemberMouse with your UltraCart account.**
# Troubleshooting
If you are encounter an problem with the your MemberMouse integration, navigate to the MemberMouse configuration page within your UltraCart back-end, then scroll down to the "Information & Logging" section (Above the save button at the bottom of the page) then click the "View Server Logs" button:

---
# Zoho Desk
https://docs.ultracart.com/account-settings/external-integrations/zoho-desk
doc_type: how-to
This tutorial guides you through connecting your UltraCart account with Zoho Desk to enhance your customer support capabilities. By integrating, your support agents will have immediate access to contextual customer information directly within Zoho Desk, enabling them to provide more efficient and informed support.
## Overview
The UltraCart Zoho Desk integration allows merchants to display comprehensive customer insights, such as Lifetime Value (LTV), order history, and auto orders, directly within any support ticket in Zoho Desk. This provides support agents with a holistic view of the customer, facilitating quicker access to relevant order and auto order information and a better understanding of the customer's value and loyalty.
### Pre-requisites:
A Zoho Desk account with a pricing plan of Professional or higher.
note934105e0-5ddc-4327-92da-979a976747e3
**Prerequisite:** At this time, the UltraCart Zoho Desk extension is a private extension and requires a Professional or higher pricing plan to install.
**Prerequisite:** At this time, the UltraCart Zoho Desk extension is a private extension and requires a Professional or higher pricing plan to install.
### Follow these steps
1. Log in to your Zoho Desk account.
2. Open a new browser tab and log in to your UltraCart account.
3. In UltraCart, navigate to `Configuration` > `Integrations`.
4. Locate the `CRM` section and click the `Connect` button next to `Zoho Desk`.
5. On the Zoho connection screen that appears, review the access permissions and click the `Accept` button. This grants UltraCart permission to access information such as settings, configurations, tickets, associated data, contacts, accounts, and sub-resources within your Zoho account.

6. After accepting the connection, you will see a screen indicating that your Zoho Desk API connection has been established. If you have not previously installed the extension, click the "here" link to begin the installation process.
7. Configure the departments and profiles for which the UltraCart extension should load.
:::note
**Tip:** These settings can be modified later under the Zoho Marketplace Installed Extensions screen.
:::

## Expected Outcome
Once the connection is made and the extension is configured, when viewing a ticket in Zoho Desk, click on the marketplace icon in the upper right corner to show the right panel where the extension loads. This will display the UltraCart integration, providing contextual customer information such as:
- **Customer Name:** Identifies the customer associated with the ticket.
- **Customer Since:** Shows the date the customer first engaged with your business.
- **Lifetime Value (LTV):** Understand the customer's overall value to your business.
- **Auto Orders:** View any recurring orders or subscriptions the customer has, including their next ship date, status, and payment type.
This integration empowers your support agents to quickly access relevant customer data, improving their ability to resolve issues and provide personalized support.
UltraCart will also establish the contact in Zoho Desk when an order is placed so ensure that the contact’s email, first name and last name are already populated when a ticket comes in.
## Reporting on your ticket data
Once the integration is connected, UltraCart also copies your Zoho Desk tickets into your [Data Warehouse (BigQuery)](../../../reports-analytics/tutorials/data-warehouse-bigquery/index.md), where they sit alongside your orders, customers, and auto orders. That makes it possible to answer questions Zoho Desk cannot answer on its own, such as how many tickets you receive per order, or whether your highest-value customers contact support more often than everyone else.
- [Zoho Desk Ticket Data Reference](../../../reports-analytics/tutorials/data-warehouse-bigquery/zoho-desk-tickets/index.md) describes the ticket columns, the data sets, and the value conventions to watch for.
- [Zoho Desk Ticket Reporting Queries](../../../reports-analytics/tutorials/data-warehouse-bigquery/zoho-desk-tickets/ticket-reporting-queries.md) provides ready-to-run SQL for ticket volume, resolution time, agent workload, and comparisons against order data.
- [Reporting on Zoho Desk Custom Fields](../../../reports-analytics/tutorials/data-warehouse-bigquery/zoho-desk-tickets/custom-field-reporting.md) covers the custom fields your agents fill in on each ticket.
## Troubleshooting
If you encounter issues with the integration:
- Verify that your Zoho Desk pricing plan is Professional or higher.
- Ensure you have clicked both the `Accept` button on the Zoho connection screen and the "here" link to install the extension.
- Check the "Zoho Marketplace Installed Extensions" screen in Zoho Desk to confirm the UltraCart extension is installed and configured for the correct departments and profiles.
---
# Configuring Zoho Desk AI Agents for Ticket Drafting
https://docs.ultracart.com/account-settings/external-integrations/zoho-desk/configuring-zoho-desk-ai-agents-for-tick
doc_type: how-to
This guide outlines the steps to configure UltraCart's AI agents to integrate with Zoho Desk. By setting up these agents, you can automate the analysis of incoming support tickets and generate draft responses grounded in real-time UltraCart store data.
The AI agents do not send emails directly to customers. Instead, they create ticket drafts within Zoho Desk, allowing your support team to review, edit, and approve responses before they are sent.
* * *
## Prerequisites
Before configuring the AI agents, ensure the following are established:
1. **A Zoho Desk Account:** You must have an active Zoho Desk account with admin privileges.
2. **UltraCart-Zoho Desk Integration:** The base integration between UltraCart and Zoho Desk must be successfully configured. Please refer to the [**Zoho Desk Integration Guide**](/account-settings/external-integrations/zoho-desk) to complete this step.
3. **AI Agents:** At least one AI Agent available in UltraCart - [**Setting Up AI Agents**](#page-not-found)
* * *
## Conceptual Overview
It is important to understand how Zoho Desk concepts map to UltraCart's AI setup:
- **Zoho Departments:** Broad functional areas within your support organization (e.g., "Customer Support," "Sales," "Technical Issues").
- **Zoho Classifications:** Specific categories or tags used within Zoho to define the nature of a ticket (e.g., "Refund Request," "Shipping Delay," "Product Question").
- **UltraCart AI Classification Routine:** A set of natural language instructions provided in UltraCart that tells the AI how to read an incoming ticket and assign it to the correct Zoho Classification.
- **UltraCart AI Agents:** Virtual assistants configured to handle specific Departments and Classifications. They use detailed instructions to draft policy-compliant responses.
* * *
## Step-by-Step Configuration
### **Step 1: Configure Departments and Classifications in Zoho Desk**
The foundation of the routing system exists within Zoho Desk. You need to define the structure that UltraCart will read.
1. Log in to your **Zoho Desk** account.
2. Navigate to **Setup** (gear icon).
3. **Departments:** Under **General**, ensure your desired departments are created.
4. **Classifications:** Depending on your Zoho Desk configuration, setup specific fields or tags to represent ticket classifications (e.g., under **Customization > Fields** for a specific department). These are the values UltraCart will import.
note95d4451b3225
**Note:** Ensure your Departments and Classifications are distinct and clearly named, as this simplifies the AI training process later.
**Note:** Ensure your Departments and Classifications are distinct and clearly named, as this simplifies the AI training process later.
### **Step 2: Navigate to Zoho Desk Settings in UltraCart**
1. Log in to your UltraCart backend.
2. Navigate to **Configuration > Integrations > Zoho Desk**.
The configuration page below will load, reflecting the departments and classifications pulled from your Zoho Desk account.
### **Step 3: Define AI Classification Instructions**
The "AI Classification" section is where you train the "dispatcher" AI. Its sole job is to look at a new ticket and decide which Zoho classification it belongs to.
In the large text area provided, write natural language prompts instructing the model on how to identify classifications.
**Example Classification Instructions:**
```markdown
**Role:** You are the primary support ticket dispatcher for a nutritional supplement company. Your task is to analyze the content of incoming emails, determine the customer's primary intent, and assign the ticket to exactly **ONE** of the following Classifications.
**Priority Protocol:** If a ticket contains multiple issues, you must prioritize assignment based on the following order of urgency:
1. **Highest Priority:** Adverse Reactions or Allergy Alerts (health & safety concerns)
2. Financial Disputes (chargebacks, fraud claims)
3. Product Defects or Damages (broken glass, open seals)
4. Delivery Problems
5. Account Access Issues
6. Subscription Changes
7. Lowest Priority: General Questions or Feedback
**Critical Time-Based Rules:** Before assigning general categories, apply these specific rules based on timing mentioned in the ticket:
* **The "Order Lockdown" Rule:** If a customer wants to modify an order (e.g., change address, cancel a single non-recurring order) and states the order was placed *within the last 4 hours*, classify this immediately as **Shipment Or Delivery** so the warehouse can catch it. If the order was placed *more than 4 hours ago*, classify it as **Subscription Modifications** (as it's likely too late to stop the current shipment).
* **90-Day Guarantee:** If a customer requests a refund for their first order within a 90-day window mentioning the money-back guarantee, classify as **Refunds Or Returns**.
**Classification Definitions:**
Use the following criteria to assign the final classification:
* **Adverse Reactions Or Allergy Alerts:** Assign this classification if the customer mentions *any* negative physical reactions after taking a product (e.g., nausea, headaches, jitters, rashes), fears of an allergic reaction to ingredients, or general safety concerns. This is the highest priority category regardless of other content.
* **Chargebacks Or Payment Disputes:** Assign this if the customer explicitly mentions terms like "chargeback," "dispute with bank," "fraudulent charge," or "unauthorized transaction."
* **Subscription Cancellations:** Assign this for requests to *permanently* end a monthly supplement plan, stop future auto-ships, or complaints about unexpected recurring billing. Do not use this for temporary pauses.
* **Subscription Modifications:** Assign this for requests to adjust existing subscriptions, such as pausing/skipping next month's delivery, changing delivery frequency, swapping out supplement types in their bundle, or updating a payment method.
* **Shipment Or Delivery:** Assign this for issues involving lost packages, tracking numbers not updating, items damaged in transit (broken bottles), or immediate order modifications caught within the 4-hour lockdown window.
* **Refunds Or Returns:** Assign this for standard return inquiries, exchange requests for different flavors/types, or claims under the 90-Day Guarantee.
* **Personalized Assessment Questions:** Assign this if the ticket mentions the online "Wellness Quiz," questions about their quiz results, or why specific vitamin packs were recommended to them based on their assessment.
* **Product Usage Or How-To:** Assign this for general questions about directions (e.g., "take with food?"), dosage recommendations, ingredient sourcing, or non-shipping defects (e.g., "safety seal was missing under the cap").
* **Account Or Technical Support:** Assign this for issues regarding login failures, password resets, or errors on the website checkout page.
* **Other:** Only assign this if the customer intent is completely unclear, or the content is corrupted or in a foreign language requiring translation.
```
### **Step 4: Configure Agents and Routing Logic**
In the **Agents** section, you define which AI persona handles which type of ticket based on the classification determined in Step 3.
The routing logic depends on how you check the boxes next to an agent's name:
| Configuration | Behavior |
| --- | --- |
| Department Checked, No Classifications Checked | **The "Catch-All" Agent:** This agent can be assigned _any_ ticket that enters that specific department, regardless of its classification. |
| Department Checked, Specific Classifications Checked | **The Specialist Agent:** This agent will _only_ be assigned tickets that match the checked classifications within that department. It will not handle generic tickets. |
**Best Practice for Routing:** It is highly recommended to configure a "generalist" agent for a department (no specific classifications checked) to act as a fallback for tickets that don't fit narrow criteria, alongside "specialist" agents for complex workflows like Refunds or Technical Support.
A department with no catch-all agent leaves genuinely ambiguous tickets unassigned even when classification succeeds, so if you're troubleshooting an unassigned ticket, confirm this setting first. See [Troubleshooting: Tickets Not Being Classified](#troubleshooting-tickets-not-being-classified) for the other causes.
### **Step 5: Define Individual Agent Ticket Instructions**
Once an agent is assigned a ticket, it needs to know _how_ to respond. This is controlled by Agent Ticket Instructions.
1. Click the link or button associated with configuring specific agent instructions (refer to the [Ticket Instructions Configuration documentation](/customers-crm/ai-agents/personality-and-instruction-examples/ticket-instructions-configuration) for detailed steps on this interface).
2. Provide detailed prompts for that specific agent persona. This includes:
- **Tone:** e.g., "Professional and empathetic," or "Direct and technical."
- **Policies:** e.g., "We offer a 30-day return window. If the order date is older than 30 days, politely decline the return and explain the policy."
- **Data Usage:** Instruct the agent on how to use inserted UltraCart data (like order status or tracking links) in the response.
[Ticket Instructions Configuration](/customers-crm/ai-agents/personality-and-instruction-examples/ticket-instructions-configuration)
* * *
## Best Practices
- **Iterative Training:** Your first set of classification instructions won't be perfect. Review how the AI classifies real tickets and refine the instructions in the "AI Classification" text area regularly.
- **Explicit Policy Instructions:** When defining Agent Ticket Instructions, be extremely clear about your business policies. The AI only knows what you tell it. If a refund policy has exceptions, state them clearly in the prompt.
- **Human in the Loop:** Remember that these agents draft responses. Your human support team is the final quality control gate. Encourage them to edit drafts before sending, as this provides a feedback loop to improve future instructions.
* * *
## Troubleshooting: Tickets Not Being Classified
If a ticket doesn't get assigned a Zoho Classification, it never enters Round Robin. It sits unassigned until someone reclassifies it manually. As of September 2026, two things can cause this, and UltraCart now logs both so you can diagnose the cause yourself instead of opening a support ticket.
### Classification error or timeout
If the AI Classification Routine can't process a ticket for any reason, including a transient error calling Zoho, the ticket used to be skipped with no record left behind. Now, any skipped ticket writes an entry to the Zoho Desk integration log with the ticket number and the reason it was skipped. The ticket is also set to the **Other** classification as a fallback instead of being left blank, so it still flows into Round Robin rather than sitting unassigned.
Check **Configuration > Integrations > Zoho Desk** for the integration logs and look for the skip reason before contacting support.
### Credit card content is never classified
If a ticket's content appears to contain a credit card number, UltraCart never sends it to the AI classifier. This is a permanent security requirement and doesn't change with future updates. When this happens, UltraCart writes a log entry so you know the exclusion occurred and can classify the ticket manually.
:::note
If classification itself is succeeding but tickets still sit unassigned, the cause may not be classification at all. Confirm a catch-all agent is configured for the department, as described in [Step 4](#step-4-configure-agents-and-routing-logic).
:::
---
# General Configuration
https://docs.ultracart.com/account-settings/general-configuration
doc_type: reference
The configuration page contains 8 tabs, the first tab is the "Back Office" tab. These options affect the back office functionality of your store.
The Back Office tab contains the following links:
**In the 'Basic' View**

| Name | Description | View |
| --- | --- | --- |
| Account | The Account page contains the following sections: - Overview (Sign-up Date, Current Service Plan designation, Account Status) - Billing Information (This is where your billing credit card details are configured.) - User and Permissions (Add,Edit your users on the account.) - Merchant Profile (Company Name, Main Website URL, Geographical location) - Account Status (Deactivate Account / Reactivate Account) | Both |
| Accounts Receivable Retry | An automated service that can re-attempt transactions on orders sitting in Accounts Receivable to generate additional revenue. | |
| [Authorized Applications](https://ucsupport.ultracart.com/merchant/configuration/apiManagementApp.do) | Home > Developer Tools > REST API > API Logs Authorized applications are software programs that you have granted access to your UltraCart account. Authorized applications can be third party applications that you've granted permission to or internally developed applications. | |
| Auto Order Processing | | |
| Linked Accounts | | |
| Order Retention | | |
| Report Delivery | | |
| [Service Plan](/account-settings/general-configuration/service-plan) | Configure billing credit card details for service billing, review recent billing activity, close/open account | Both |
| [Users](/account-settings/general-configuration/users) | Configure/Edit users for accessing UltraCart | Both |
| Webhooks | | |
| **In the Advanced View**  | Field | Description |
 View |
| --- | --- | --- |
| Account | The Account page contains the following sections: - Overview (Sign-up Date, Current Service Plan designation, Account Status) - Billing Information (This is where your billing credit card details are configured.) - User and Permissions (Add,Edit your users on the account.) - Merchant Profile (Company Name, Main Website URL, Geographical location) - Account Status (Deactivate Account / Reactivate Account) | Both |
| Accounts Receivable Retry | An automated service that can re-attempt transactions on orders sitting in Accounts Receivable to generate additional revenue. | Both |
| Authorized Applications | Home > Developer Tools > REST API > API Logs Authorized applications are software programs that you have granted access to your UltraCart account. Authorized applications can be third party applications that you've granted permission to or internally developed applications. | |
| Auto Order Processing | | |
| Chargeback Processing | | |
| Exporting Orders | | |
| Linked Accounts | | |
| Old Order Handling | | |
| Order Retention | | |
| Printable Documents | | |
| QuickBooks Terms and Lists | | |
| Report Delivery | | |
| [Service Plan](/account-settings/general-configuration/service-plan) | Configure billing credit card details for service billing, review recent billing activity, close/open account | Both |
| UltraBooks | | |
| [Users](/account-settings/general-configuration/users) | Configure/Edit users for accessing UltraCart | Both |
| Webhooks | | |
| XML Post Back | Configure, Company name, main store URL, and the zip, state, and country of your company's primary headquarters | Both |
---
# Service Plan
https://docs.ultracart.com/account-settings/general-configuration/service-plan
doc_type: reference
# Overview
The Account/Service Plan page allows you to view billing activity and other imortant account details regarding your UltraCart account.
:::note
[Home](#) → [Configuration](#) → Account
:::
**The Account/Service Plan page consists of 7 sections:**
1. **Overview**
- Displays the account's sign-up date, current plan, and account status.
2. **Billing Information**
- Displays the credit card on file, next billing date, and balance.
3. **Users and Permissions**
- Lists the owner user and staff users, with options to add, edit, or make owner.
4. **Merchant Profile**
- Displays store information, including company, website URL, and location.
5. **Security Settings**
- Displays 2FA settings.
6. **Regional Settings**
- Displays regional settings, including currency, weight, and distance.
7. **Account Status**
- Displays the current account status and options to deactivate the account.
## Overview
Your account type is determined by the features used, along with the gross sales during each billable period. Trial accounts will be provided details regarding the number of trial days remaining. Click here to view UltraCart [Pricing](http://www.ultracart.com/pricing).

To view and select your Service Plan, click either the hyperlinked '**Service Plan Section**' or the hyperlink on the **Current Plan**.
## Service Plan Selection

The service plans will be presented with the currently active service plan appearing with a green checkmark in the top right corner. The remaining plans will either appear with a green 'Choose Plan' button and if there are any plan levels that currently do not apply to the account configuration will be greyed out in appearance with red highlighting of the issue that are preventing selection of that plan. You can mouseover the red items to get more detail on that conflict with selection of that service plan level.
After making your Service Plan selection, click the 'Back' button to return to the Account configuration page.
## Billing Information
The Billing information section will display the card on file for the account, the next and last months billing date, along with the last charge and any remaining balance on the account.

The Billing Credit Card section consists of the fields to enter (and update) the credit card details provided to process the UltraCart service charges.
To add or update the billing credit card, billing name and billing address details on file, click 'Edit the credit card associated with this account', or alterntively, click on the existing name and card details listed on file.
:::info
**'Edit Users' Permission Required**
- To access the service plan page, your user login must have the "Edit Service Plan" permission.
- All users that have the "Edit Service Plan" permission will receive billing and payment notifications.
:::
### How To Update The Credit Card On file
:::note
[Home](#) → [Configuration](#) → Account → Billing Information → 'Edit'
:::
Then enter your credit card details or update existing details on file, then click the _**save**_ button to save your changes.

When you are done updating billing information, simply click the save button at the bottom of the page.
## Billing Activity
The Billing Information section also provide the last 6 months of Billing Activity. If you have billing questions, this is the first place to look.
To view the Billing Activity, click on the hyerlinked Balance:

The Billing activity section provides a line item breakdown of the UltraCart service charges including basic service plan fees, premium service fees (including digital delivery storage and bandwidth calculated at the end of each billable cycle), integration fees, setup fees, Premium Support fees, etc.
### Descriptions For Common Billing Line Items
:::info
**Common Billing Line Items**
- Basic [Pricing](http://www.ultracart.com/pricing/)
- Premium Service fees (see bottom section of [pricing](http://www.ultracart.com/pricing/) page)
- Custom SSL renewal ($59.00 / annual fee)
- Google Product Search fees
- [Order retention](/account-settings/back-office/order-retention) fees beyond one year
- Channel Partner Integrations
- [Professional Services](http://www.ultracart.com/resources/pro-services/) & Pro Support payments: Account Setup Packages, Custom Checkout, Catalog setup, Web Development
- Declined card processing fee (a $1.00 processing fee is assessed for each declined transaction)
- Fraud Score Checks $0.01 per card check (See: [Fraud Prevention](/checkout-payments/fraud-prevention))
- Storefront 'Digital storage overage - 100 MB included then overage for additional storage'
:::
## Users and Permissions
# Users and Permissions

Each UltraCart account has **one owner user** and can have **additional staff users depending upon the service plan.**
NOTE: You can also assign users to groups for role specific permission assignments.
There are two types of users in UltraCart: Owner User and Regular User.
### Owner User
- The initial user created is automatically granted the "Edit Users" permission and is the Owner User.
- The Owner User has control over the account and other users.
- The Owner User cannot be edited or removed by other users, even those with the "Edit Users" permission.
- The Owner User can:
- Edit their own account
- Relinquish ownership to another user
- Change the account owner
### Regular User
- Any user who is not the Owner User is a Regular or Staff User.
- Staff Users can be created and assigned permissions as needed.
- Staff Users have limited access to the account and can be edited or deleted by users with the "Edit Users" permission.
:::info
**Important Notes About User Permissions**
- Users should only have the permissions they need to perform their job.
- Users should not share login credentials with others.
- Each user must have a valid email address on file in order to response to email notifications such as password reset, IP block resets, etc.
- **The "Edit Users" permission is a 'Admin' permission that should be granted carefully, as it allows users to add and edit other users and also change their own assigned user permissions.**
:::
## Merchant Profile
Merchant Profile allows you to specify very important information about your Company. This information is used throughout UltraCart so please be sure that it is correct and up-to-date.

Make sure that thse details are up to date and accurate.
To edit these settings simply click on any one of the hyperlinked options to open the profile page as shown below:

Field details
| **Field** | **Information needed** |
| --- | --- |
| Company | Enter your Company Name - This is also your account name in UltraCart |
| Store URL | Enter your Store URL (web site) using an absolute URL |
| Zip/Postal Code | Enter your Postal Zip Code |
| State/Province | Enter your State or Province |
| Country | Enter your Country from the drop-down menu |
When you have finished entering your information, click the `save` button to save your changes & return to the main Configuration menu.
## Regional Settings
Merchant Profile allows the merchant to set their personal preference for weight measurements (pounds or kilograms) and distance measurements (inches or centimeters).

To edit these setting simply click on any one of the options to open the edit page as shown below.

Use the "drop-down" menu to choose your setting in each category. Click the "Save" button to return to the Account page.
# Frequently Asked Questions
**Question: Can UltraCart provide us an invoice for our monthly service?**
Answer: UltraCart does not generate invoices for the monthly service billing. Instead, UltraCart sends out a billing email notification to each user on the account that has the "Edit Service Plan" user permission enabled. In addition, the last 6 months of billing line items are listed in the Service Plan page.
\*Upon request, UltraCart can provide a spreadsheet containing your accounts complete billing history.
**Question: Does UltraCart provide alternative payment option to Credit Cards, such as PayPal or by Paper Check?**
Answer: UltraCart requires a credit card on file for service billing. However, if there is an extenuating circumstance (like the hacked credit card) requiring a temporary solution, prepayments of 6 months or 12 months, via Paypal may be accepted. In order to arrange your prepayment please email [billing@ultracart.com](mailto:billing@ultracart.com)
**Question: What is digital storage overage**?
Answer: Your billing line item "Digital storage overage - 100 MB included then xxx at $0.xxx/MB" appears to reflect usage-based fees for storing digital content beyond your plan's included allowance. Each service plan includes 100MB, then for any additional storage an overage fee is applied. Each service plan tier has an overage fee, with the larger service plans having a lower overage fee. Things that can contribute to the overage will be the number of legacy screen branding themes (if any), along with the active (non ‘Locked’) storefront hosts. Ensure that unused storefront hosts are locked and that within each active storefront, unused themes are deleted, to reduce your storage footprint. If you sell digital delivery items, the digital delivery files also apply to the storage, so make sure to review the uploaded digital delivery files and remove any that are no longer sold.
# Related Docs
[Order Retention](/account-settings/back-office/order-retention)
[Salesforce.com Integration FAQ](/account-settings/external-integrations/salesforce-com-integration-guide/salesforce-com-integration-faq)
---
# Close Account
https://docs.ultracart.com/account-settings/general-configuration/service-plan/close-account
doc_type: how-to
# Closing your UltraCart account
:::note
UltraCart does not monitor account or user(s) activity! Therefore, it is imperative that merchants take the appropriate action to close their account when they've decided to do so. Billing is automatic and will occur on a monthly basis as long as the account is in the "open" status.
:::
## Service Plan Screen
The closing of an account takes place on the Service Plan screen.
To discontinue your UltraCart account, Log into your account and navigate to:
:::note
Main Menu → Configuration → Account → Scroll to bottom of the page.
:::
Scroll to the bottom of the Service Plan screen to locate the Other Options section.

**UltraCart provides a reminder at the bottom of this screen that we bill in arrears and how billing will occur upon closing the account.**
## Close the account
:::note
UltraCart support personnel do not close accounts! Per the terms and conditions of service, merchants are required to close their account themselves.
:::
To close the account, select the "Deactive Account" button, where you'll be presented with the Cancellation Feedback questionaire.

Please take a minute to complete the questionnaire.
## Confirm Closing
It's also recommended that you return to the Account page to confirm the closing of the account. To confirm, click on the balance in the Billing Information section opf the page.
There will be a date stamp (in the Billing Activity section) thus recording the account as closed and listing the user taking the action.

It is recommended that you print a copy of the Billing Activity page for your permanent record. Below is an example of how the bottom section of the Service Plan page will look after the account has been closed.
## Final Billing Details
:::note
**Please note that UltraCart service is billed in arrears meaning that when a payment is recorded it is for the previous months service.**
**If you discontinue service, UltraCart will automatically finalize the billing**
**on your account for the open service period (the billing period will be displayed directly below the closed account checkbox).**
**UltraCart does not prorate your bill for early termination.**
**UltraCart provided a 30 day free trial period and then began billing at the end of each billable period. The billing begin date and end date for the period is displayed so that you may take that into account when closing the account.**
**Should you encounter any problems logging into or closing your account,**
**simply send a message to** [**Support@ultracart.com**](mailto:Support@ultracart.com) **stating so or call support at 209-383-9870.**
:::
## Reopen Account
To Reopen an Account, click the check box to the left of the prompt "Reopen Account". Then click the "Save" button.

## Closed Account Retention Policy

# UltraCart Closed Account Data Retention Policy FAQ
## What happens to my data when my UltraCart account is closed or deactivated?
When your UltraCart account is deactivated (either by you or by UltraCart):
- All account information, store settings, customer records, and order history remain **temporarily accessible** for **30 calendar days** following the deactivation date.
- After the 30-day retention period, your account and all associated data are **permanently deleted** from UltraCart systems and cannot be recovered.
- During this 30-day window, you are responsible for exporting any data you wish to retain, particularly your historical **order records**.
> **Important:** UltraCart does not provide data restoration after the 30-day period has ended. Plan to complete your exports promptly.
---
# How to update Credit Card on File
https://docs.ultracart.com/account-settings/general-configuration/service-plan/how-to-update-credit-card-on-file
doc_type: how-to
## Introduction
This guide walks you through updating the credit card information associated with your UltraCart account. Keeping your payment method current ensures uninterrupted service and accurate billing.
## Prerequisites
> **Prerequisite:** Your user account must have the **Edit Service Plan** permission to update billing information.
**NAVIGATION: [Home](#) → [Configuration](#) → [Service Plan](#)**
:::info
- **All users that have the "Edit Service Plan" permission will receive periodic billing and payment notification emails. Only add this user permission to users that need ability to access/update the billing credit card details on file and recieve notifications related to billing processing.**
:::
# Step-by-step Instructions
**Navigate to the Service Plan Page**
- From the UltraCart **Home** screen, go to **Configuration** > **Service Plan**.

**Locate the Billing Credit Card Section**
- On the Service Plan page, scroll to the **Billing Information** section.

- **Update Cardholder Information**
- Ensure the **Name**, **Billing Address**, and other cardholder details are accurate.
- **Enter New Card Details**
- Provide the updated:
- **Credit Card Number**
- **Expiration Date**
- **Security Code (CVV)

**
- **Save Changes**
- Click the **Save** button to apply the changes.
## Conclusion
Once saved, your new credit card details will be used for future billing. Ensure all entered information is accurate to prevent payment issues.
## Next Steps
- Review your [Service Plan settings](/account-settings/general-configuration/service-plan) for additional billing and subscription options.
- Confirm that your updated payment method is reflected in your next invoice cycle.
For additional (related) information see: [Service Plan](/account-settings/general-configuration/service-plan)
---
# Reopen Account
https://docs.ultracart.com/account-settings/general-configuration/service-plan/reopen-account
doc_type: how-to
# Instructions For Reopening Account
Log into your account then navigate:
Main Menu → Configuration → Account
- Click the "Reactivate account" button at the bottom of the page.

# **Related Documentation**
**[docs.ultracart.com/display/ucdoc/Service+Plan](/account-settings/general-configuration/service-plan)**
---
# Users
https://docs.ultracart.com/account-settings/general-configuration/users
doc_type: explanation
Navigation
:::note
[Configuration](https://ultracart.atlassian.net/wiki/404?key%3Dmerchant%3Bsearch%3Fq%3D%2Fconfiguration%2FconfigurationMenuLoad.do%3FresetLastTab%3Dtrue) → [Users](https://ultracart.atlassian.net/wiki/404?key%3Dmerchant%3Bsearch%3Fq%3D%2Fconfiguration%2FuserListLoad.do)
:::

note
### Access Requirement
NOTE: Only users with the "Edit Users" permission will have access to the users configuration page. The initial configured (first created) user is automatically granted the "Edit Users" permission. All other users must be specifically given this permission before they will be able to access this area.
### Access Requirement
NOTE: Only users with the "Edit Users" permission will have access to the users configuration page. The initial configured (first created) user is automatically granted the "Edit Users" permission. All other users must be specifically given this permission before they will be able to access this area.
# User Introduction
The User configuration screen consists of two sections the Owner User section and the Regular User section.

## Owner User
This user identifies the Owner of the UltraCart account. This user also has over all control of the account and the other users of the account.
note
Note: the owner user cannot be edited or removed by any other users, including users with the _edit users_ permission. Therefore, if the owner will not be actively managing the account, the owner should configure one or more trusted users with the _edit users_ permission, and not share their owner user with any other users.
Note: the owner user cannot be edited or removed by any other users, including users with the _edit users_ permission. Therefore, if the owner will not be actively managing the account, the owner should configure one or more trusted users with the _edit users_ permission, and not share their owner user with any other users.
:::note
**Caution: If an Owner is leaving the account, for whatever reason, the Owner must assign another user as Owner.**
The individual that completed the signup wizard effectively became the OWNER of the account.
**The owner is the only user that can:**
- **Edit the owners account**
- **Relinquish ownership to another user that represents the owner of the account.**
:::
### **Change Account Owner**
If you need to change the owner of an account first login as the owner user. Then click on:
:::note
[Configuration](https://ultracart.atlassian.net/wiki/404?key%3Dmerchant%3Bsearch%3Fq%3D%2Fconfiguration%2FconfigurationMenuLoad.do%3FresetLastTab%3Dtrue) → [Users](https://ultracart.atlassian.net/wiki/404?key%3Dmerchant%3Bsearch%3Fq%3D%2Fconfiguration%2FuserListLoad.do)
:::
On the user page you will see the list of regular users below the owner. Next to each regular user is a Make Owner button. Click that button (shown below in red square) next to the user you wish to make the new owner.
note
Note: the make owner buttons **only appear to the current owner user** when they are viewing this section.
Note: the make owner buttons **only appear to the current owner user** when they are viewing this section.

### Forced Change of Ownership
Sometimes the ownership must be changed to a new user and the current Owner is either unable or unwilling to voluntarily transfer the Owner User to the new Owner User. In this case, UltraCart will require that the new Owner submit (usually through email) proof of ownership of the company.
## Regular Users
A regular user is simply any other user on the account that is not the owner.
There is no limit on the number of users that can be configured, however, the number of configured users affects which [service plan](/account-settings/general-configuration/service-plan) the account uses.
It is best to create a new user for any person that needs access into the account.
note
### User notes
- The general rule is to limit user permissions to their role in the organization. This not only helps to keep roles understood, but it also prevents users from committing errors in areas where they are not trained.
- Each user should have a valid email address on file that they have direct access to. There might be times they need to respond to "IP Address activation" receive reset passwords, receive emails from UltraCart support and more.
- The "Edit User" permission is one that you should take particular care in granting. Like an "Admin User" in other systems, this user permission grants access to adding and editing users. They may grant themselves access to any part of the system.
### User notes
- The general rule is to limit user permissions to their role in the organization. This not only helps to keep roles understood, but it also prevents users from committing errors in areas where they are not trained.
- Each user should have a valid email address on file that they have direct access to. There might be times they need to respond to "IP Address activation" receive reset passwords, receive emails from UltraCart support and more.
- The "Edit User" permission is one that you should take particular care in granting. Like an "Admin User" in other systems, this user permission grants access to adding and editing users. They may grant themselves access to any part of the system.
## **Managing Users on your UltraCart Account**
To **add** a new user, click on the "add" button at the top of the Regular Users section.

To **DELETE** an existing user, click on the "delete" button next to the user you would like to remove from the account.

:::note
**Caution!** You cannot UNDO this action.
:::
note
Only Users with "Edit Users" permissions can create, edit or delete a User. A User cannot delete themselves.
Only Users with "Edit Users" permissions can create, edit or delete a User. A User cannot delete themselves.
#### Edit an Existing User
To edit an existing user, simply click on the "edit" button next to the user you would like to edit.
note
When the edit screen displays, notice the password field is completely blank. For security purposes, UltraCart never displays passwords. To change the user's password enter a new password and repeat the new password in the confirmation field. If you do not wish to change a user's password, you may leave this field blank.
When the edit screen displays, notice the password field is completely blank. For security purposes, UltraCart never displays passwords. To change the user's password enter a new password and repeat the new password in the confirmation field. If you do not wish to change a user's password, you may leave this field blank.
:::note
**Support personnel cannot see nor change your password.** In cases of denied access (incorrect credentials during log-in for example), a password reset email containing a temporary password can be sent to the email address recorded for that user.
:::
## FAQ
### Q: What does the “Permission Denied” message mean, and how should a user resolve it?

This type of message appears when a user attempts to access a page or perform an action for which they do not have the required permissions. The example above shows a user missing the **Edit Items** or **View Items** permission.
In such cases, the user should **contact their account administrator** or the **owner user**. The account admin can review the message and decide whether to:
- Grant the missing permission(s) needed for the task.
- Remove a restrictive permission that may be preventing access.
To adjust permissions, the account owner can navigate to:
**Configuration → Users → \[Edit button\] → Permissions**
> **Tip:** UltraCart recommends granting the minimum permissions necessary for a user’s role. This helps maintain security and prevents unintentional changes to important configuration areas.
* * *
### Q: Who can edit user permissions?
Only users with the **“Edit Users”** permission can create, modify, or delete user accounts. The **Owner User** is automatically granted this permission and can delegate it to trusted administrative users as needed.
* * *
### Q: Why can’t I delete or edit the Owner User?
The Owner User cannot be deleted or modified by any other user, even those with **Edit Users** permission. Ownership must be voluntarily transferred by the current owner or forcibly changed by UltraCart Support in special cases.
* * *
### Q: What should I do if I forgot my password?
If you cannot log in due to a forgotten password, use the **Forgot Password** link on the login page. UltraCart will send a reset email containing a temporary password to the registered email address for your user account.
* * *
### Q: Can multiple people share the same user login?
No. UltraCart strictly enforces unique user sessions. If multiple people log in using the same credentials, the system will automatically terminate the earlier session.
> **Warning:** Sharing credentials violates PCI security requirements. Each person accessing UltraCart must have their own user account.
# **Related**
[](/account-settings/general-configuration/users/user-configuration-screen)
[http://docs.ultracart.com/display/ucdoc/User+Configuration+Screen](/account-settings/general-configuration/users/user-configuration-screen)
[](/account-settings/general-configuration/users/user-configuration-screen)
#### Users Sharing a Single Login
:::note
Individuals cannot share user accounts simultaneously. Attempting to share the user login with multiple people will result in your login session being timed out by the next person logging in.
Sharing accounts is strongly discouraged
:::
PCI requirements dictate that each person on the system should have their own login to an account and logins can not be simultaneously shared. So if another person logs in with the same credentials, it will invalidate the first person's session (knock them off). Therefore, owners should create an individual user account for every single person that is accessing UltraCart, giving only the necessary permissions to each user. There are no additional fees for additional users.
#### Suggested User Configuration
:::tip
### User configuration Tips
- Most users do not need access to the configuration or reporting sections of the system.
- Creating a user as" customer service" to avoid an individual's name appearing on correspondence with customers is a good idea.
- Only provide the permission that the specific user requires to do there job. Permission like "edit users" and "delete orders" should be enabled only for the admin or owner users.
You should enable the least possible permission and instruct the user to contact you if they encounter a "permission denied" type message when attempting access. You can then assess whether they need access and then adjust the permission accordingly.
:::
---
# FTP Configuration User Guide
https://docs.ultracart.com/account-settings/general-configuration/users/ftp-configuration-user-guide
doc_type: how-to
# Overview
FTP is a very convenient way to access a lot of files on a remote server. UltraCart provides FTP server access to allow users access to:
- Storefronts
- Catalog
- Digital delivery
- Item multimedia
- Screen branding graphics
Using the FTP server with the catalog allows a merchant to upload static content like HTML, CSS, graphics, and JavaScript.
# Configuring User FTP Password
### Navigation
:::note
[Home](https://secure.ultracart.com/merchant/mainMenu.do) → [Configuration](https://secure.ultracart.com/merchant/configuration/configurationMenuLoad.do?resetLastTab=true) → [Users](https://secure.ultracart.com/merchant/configuration/userListLoad.do)
:::
The first step in accessing the FTP server is to configure an FTP password on the user.
First click Configuration in the left-hand navigation, then click Account and Users in the flyout menu, and click Users on the Configuration page, as shown below.

Alternatively you can set your own FTP password from the Your Preferences screen by clicking your merchant name at the top of the left-hand navigation and selecting Your Preferences, as shown below.

From the Users configuration, Click "Edit" on the user to set the FTP password on. If a user does not have administrator permissions they will have to request an FTP password be set by the administrator.

On the user editor screen there is a section labeled "New FTP Password" with fields to enter and confirm the new password.

# FTP Host/User Credentials
After an FTP password is configured the FTP server is accessed with the following credentials:
Notice that the values in angle brackets are replaced with the actual values for the account.
Please make sure to study the format for the credentials carefully.
:::warning
The FTP server is very sensitive to failed login attempts and will quickly block an IP address for three failed attempts
:::
# FTP Client Configuration
One of the most popular FTP clients available for free is CuteFTP. This quality open source FTP client is downloadable from [https://installer.globalscape.com/pub/cuteftp/cuteftp.exe](https://installer.globalscape.com/pub/cuteftp/cuteftp.exe)
The screen shot below shows the proper configuration in the CuteFTP site manager for accessing the UltraCart FTP server.
(Please NOTE: A previously recommended FTP client, Filezilla, is no longer recommend due to issues with malware that is inserted from some file download repositories.)

**You can use the FTPS with TLS/SSL (AUTH TLS Explicit) option within CuteFTP.**

The other field highlighted on the configuration screen is the server type. The UltraCart FTP server supports FTPES (FTP over explicit TLS/SSL). If this option is available, UltraCart recommends using it because the FTP control port used to transmit the username and password will be encrypted making the communication very secure.
While a complete tutorial on how to use FTP or CuteFTP in particular is out of the scope of this guide, below is a brief explanation of the windows. Notice the client is divided into two sides "Local site" and "Remote site". The remote site represents the UltraCart FTP server.

## FTP Folder Hierarchy
Off the root folder there are four child folders:
- catalogs
- digital-delivery
- item-multimedia
- screen-branding
- storefronts
---
# User Configuration Screen
https://docs.ultracart.com/account-settings/general-configuration/users/user-configuration-screen
doc_type: reference
## Introduction
The **User Configuration Screen** allows administrators to manage user accounts within UltraCart. This includes:
- Contact and login details
- Password and security settings
- Permissions and access control
- Email notification preferences
This screen is essential for controlling who can access specific areas of your UltraCart account and what actions they are allowed to perform.
**Navigation:**
`Home Menu → Configuration (Account and Users) → Users → Add or Edit User`

* * *
## Prerequisites
Before adding, editing, or removing users, ensure the following:
> **Prerequisite:** The logged-in user must have the **Edit Users** permission enabled.
- This permission is located under:
**Permissions → Admin → Edit Users**
- Only highly trusted users or account administrators should be granted this permission due to its broad access capabilities.
- The ‘**Owner User’** cannot be edited by any other user.
> **Warning:** Users without this permission will not be able to create, modify, or delete user accounts.
* * *
## Understanding Permission Restrictions
UltraCart uses a granular permission system to control access across all areas of the platform.
### Permission Denied Messages
If a user attempts to access a feature without the required permissions, they may encounter a:
- **Permission Denied**
- **Access Restricted**
- **Insufficient Permissions**
message within the interface.
> **Note:** These messages typically indicate that the user is missing one or more required permissions for that specific area or functionality.
### How to Resolve Permission Issues
If a user encounters a permission error:
1. Identify the area or feature they attempted to access.
2. Relay the error message and context to the account administrator.
3. The administrator should:
- Review the required permissions for that feature
- Determine whether access should be granted
- Update the user’s permissions accordingly
> **Tip:** Permission errors are intentional safeguards. Only grant access that aligns with the user’s role and responsibilities.
* * *
# User Configuration Introduction
There are six sections that can be configured for each user. This includes:
| Section | Description |
| --- | --- |
| Contact Information | Mandatory Fields that can only seen by you and UltraCart staff |
| New Password | You only need to populate these fields for new passwords. The are intentionally left blank the rest of the time. note5d2ab35e-f070-480b-8e18-0fa072033345 A secure password should contain both letters and numbers and not contain an English word or easily guessable value. A secure password should contain both letters and numbers and not contain an English word or easily guessable value. |
| New FTP Password | You only need to configure this if you are going to use UltraCart's FTP. noteada160de-2e30-47a4-acb8-56ee90b4f6f3 **FTP URL:** `merchantftp.ultracart.com` **User ID:** / _(Example:_ `DEMO/johna`_)_ **Password:** Whatever you fill in the New FTP Password field. **FTP URL:** `merchantftp.ultracart.com` **User ID:** / _(Example:_ `DEMO/johna`_)_ **Password:** Whatever you fill in the New FTP Password field. |
| UltraSecure One-Time Password Token | You only need to configure this if you are going to use UltraSecure. note1a074ac1-2b7f-4111-8989-c0b388c61d9d A secure password should contain both letters and numbers and not contain an English word or easily guessable value. This password will need to be different then your main account password. A secure password should contain both letters and numbers and not contain an English word or easily guessable value. This password will need to be different then your main account password. |
| Permissions | Please spend some time considering how to set these up. There could be security risks to your company if you are not careful with who has access to what areas of UltraCart. |
| Email Notifications | Email Notifications are what are sent to you when certain actions take place in your account. These are not for your customer, but for your information only. |
## Contact Information
The contact information applies to this individual user only. It is very important that you configure each user with correct names and emails for obvious reasons. When a user contacts support via phone or email regarding account information, our support personnel will use the information entered here to help make accurate identification.

| Field | Description |
| --- | --- |
| Login | In the login field, enter the user's first initial and last name. If there are very few users, then first names only are acceptable. This will be the login name that the user will use to access their account. |
| Name | Please enter the full name of the user. |
| Email | Please enter the email address used to contact this user. It is very important to make sure this field is correct and a valid email. |
| Phone | Please enter the phone number used to contact the user. |
## New Password
This section allows you to set a secure password for the new user or change the password for an existing user.

A secure password (8-25 characters) should contain both letters and numbers and not contain an English word or easily guessable value. The password has to be reentered into the confirm password field a second time (since the password is not visible the first time it's typed). A good technique for creating a safe password is to think of a memorable, but not easily guessable phrase, then use the first letter of each word plus an additional digit or two inserted somewhere within the password, so that the final password is not something that would be contained in the dictionary.
## New FTP Password
This Section allows you to setup access to the account via FTP. This is mostly used for catalog and screen branding configuration.

The Password here will need to be something different from the main password but again should contain both letters and numbers and not contain an English word or easily guessable value.
**Related: **[**FTP Configuration User Guide**](/account-settings/general-configuration/users/ftp-configuration-user-guide)
## UltraSecure One-Time Password Token
UltraCart supports two factor authentication on your UltraCart account to enhance the security of your account. Two factor authentication means you have something you know (your regular password) and something you have (the token on your phone that is generating the one time password). Previously UltraCart used physical tokens from CryptoCard (deprecated) and our own OTP application for Android (deprecated), but has now standardized on the open source project Google Authenticator that is available for all the major mobile phone platforms. There are two primary benefits to using an OTP token:
1. Enhanced security
2. Removes the requirement for IP activation
3. Removes the requirement for a password change every 90 days.

**Related: **[**UltraSecure OTP Tokens**](/account-settings/other-configuration/ultrasecure-otp-tokens)
## Group Membership
Use group memberships to assign same permissions to multiple Users.

## Permissions
Permissions allows you to set the level of access you want each user within your account to have. You should only grant each user the minimum permissions they need to perform their job tasks.
Simply place a check in the box to the left of the permissions you want to grant to this user.

### Admin
:::note
**These permissions should be restricted to only those users that are administrators on the account.**
:::
| Field | Description |
| --- | --- |
| Edit Service Plan | This gives a user access to the account's billing ([SERVICE PLAN](/account-settings/general-configuration/service-plan)) area. :::info **This Permission also triggers Service Plan "Billing Activity" Notification emails** Any user that has this permission configured will receive the automated service billing email notification for the account. This may confuse the user into thinking they are being charged when the message is indicating billing activity on the UltraCart account. Only give this permission to users on the account that need to be able to review the UltraCart related Service Plan billing activity and the updating of the billing credit card number on file. ::: |
| Edit Users | No one but the Owner on the account and/or a very trusted employee should have access to this permission. With this setting you can add or delete users whenever you want. |
| Link New Accounts | This permission allows the user to link New Accounts to a [linked accounts](/account-settings/tutorials/linking-multiple-accounts) configuration. |
### Advanced
| Field | Description |
| --- | --- |
| Affiliate Management | Allows the user to navigate to the Affiliate Management location. |
### Configuration
| Field | Description |
| --- | --- |
| Edit Customer Notification | Allows the user to access the email notification section, which controls the emails sent to customers. |
| Edit Export Settings | Allows the user to use the Exporting Orders section. The user will also need the Edit Settings permission. |
| Edit Fraud Rules | Allows user to access and edit the [Fraud Prevention Rules](/checkout-payments/fraud-prevention) |
| Edit Gift Giving | Allows the user to make changes to the [gift giving](/checkout-payments/gift-giving) section of the checkout. \*The user will also need the permission to edit settings. |
| Edit Look and Feel | Allows the user to make changes to the screen branding themes. Screen branding themes control the look and feel of your checkout pages. |
| Edit Return Policy | Allows the user to make changes to the global Return Policy page. |
| Edit Settings | Allows the user access to all of the configuration area. |
| Edit Settings - Auto Order Processing | Allows the user to access the **Auto Order Processing** configuration page. Use this one to provide edit access to the auto order processing configuration page only. |
| Edit Tax Rates | Allows the user access to Sales Tax. The user will also need the Edit Setting permission. |
| ~Facebook~ | ~Allows the user to access to configure the Facebook-UltraCart Integration.~ |
| Manage Marketing | Allows the user to access the marketing section, which includes Emails and 3rd party Emails. |
### Conversations
| Field | Description |
| --- | --- |
| Phone System Administrator | Provides Administrator permissions to manage the Phone System configuration. |
| Phone System Agent | Enables access to the Phone System |
| Phone System Supervisor | |
| SMS/Web Chat Administrator | Enable for administrators of the SMS/Chat |
| SMS/Web Chat User | Enable for users/operators of the SMS/Chat |
### Data Warehouse
[Learn more](/guides/ultracart-documentation/tutorials/data-warehouse-bigquery)
These same Level1–Level4 tiers also determine which UltraCart service account can read data for the in-app AI Report Builder. To let it join your UltraCart data with datasets in your own BigQuery project, see [Joining UltraCart Data with Your Own External BigQuery Datasets](/reports-analytics/tutorials/data-warehouse-bigquery#joining-ultracart-data-with-your-own-external-bigquery-datasets).
| Field | Description |
| --- | --- |
| Grant Permissions to Others | The owner user can delegate the assignment of the Level1-Level4 BigQuery data access by assigning this permission to a user. |
| Level 1 - Standard Access (No PII) (Owner Managed) | |
| Level 2 - Low sensitive data (Owner Managed) | |
| Level 3 - Medium sensitive data (Owner Managed) | |
| Level 4 - High sensitive data (Owner Managed) | |
### Development
| Field | Description |
| --- | --- |
| API Access (\[IP Addresses\]) | This is a special use setting typically configured on a user that is configured on the account specifically for use in API integration. Limiting this setting to users that are otherwise limited to very little access to the UltraCart backend improves security. :::info **IP Addresses (white-listing)** When configuring a user with API permission, you will also click on \[IP Addresses\] then enter in the IP address(s) of the servers where you are implementing API scripts, this "white-listing" process protects against intrusion attempts where a hacker attempts to copy and edit your API implementation and then place their version on another website. The "IP Addresses" field can hold about 15 IP addresses. You can use The asterisk character to apply an IP range. The wildcard format is `###.###.###.*` ::: |
### Items
| Field | Description |
| --- | --- |
| Destructive Import Options | **Enable only for users performing advanced Item Imports**. This enables the "destructive" import options that erase/overwrite catalog assignments, related item assignments, item attributes, or delete items. |
| Edit Items | Allows the user to make changes to the items configured within the account. This also includes adding and removing items from the account. |
| Edit Reviews | Allows the user to view and make changes to customer reviews. |
| View Items | "Read only" permission to view the items and item editor but can't make changes to the items configuration. |
### Operations
| Field | Description |
| --- | --- |
| Access Accounts Receivable | Allows the user to navigate to the Accounts Receivables location. |
| Access Quotations | Allows the user to go into the Quotes review location. |
| Access Reports | Allows the user to access the Reporting section and run all available reports (subject to other restrictions such as PII access). |
| Access Reports without PII | Allows the user to navigate to the Reporting location, but restricts access to reports that contain PII (Personally Identifiable Information.) :::info Reports containing Personally Identifiable Information (PII) will display the PII details as random text and numbers if the user has the _“restrictive” user permission_ titled ‘**Access reports without PII**' enabled. To view the reports with the PII details, you’ll need to remove that restrictive user permission. ::: |
| Access Shipping Department | Allows the user to navigate to to the Shipping Department location. |
| Accounts Receivable - Skip Payment Processing | Enabling this permission, allows the A/R (viewing a specific order) to display the 'Skip Payment Processing' button , as well as the 'Authorize Orders' button, in the Payment processing section. \*Only enable if the user requires these actions as part of their role responsibilities. |
| Back End Order Entry | Allows access to the Back End Order Entry (BEOE). Since the BEOE tool allows for overriding of item costs and shipping costs on-the-fly, you may choose to be selective about which users have access to the BEOE tool. |
| Back End Order Entry (Customer Profiles) | Allows the user to access customer profiles search tool when using the BEOE tool. |
| Back End Order Entry (Prevent Direct Credit Card Entry) | Select this to restrict direct credit card entry (for example to limit them only to the PII protected CC entry by the customer via phone call. |
| Back End Order Entry (Shared Templates) | Select this to allow templates a user creates to be shared to other users. |
| Delete Order | Deleting an order removes it from your system there is no way to get it back. |
| Edit Catalog | Allow the user access to the Catalog configuration pages. _(**\*Applies only to the deprecated legacy catalog system**)_ |
| Edit Order | Allows the user to Edit, Delete and make changes to customers orders. |
| Edit Order Items After Payment Processed | Allows the user to edit order items in placed orders that have been processed for payment. |
| Edit Order Price | Allows the user to modify the pricing on an order, including item prices, discounts, and totals. **Use with caution as it impacts financial reporting.** |
| Free Replacement Shipment | Allows the user to create replacement shipments for orders at no charge. Typically used for damaged or lost shipments. |
| Manage Auto Orders | Allows the user to have access to review or make changes to auto orders. The user will also need the permission to Review Orders. |
| Manage Auto Orders (Cancel) | Allows the user to have access to review or make changes to auto orders, including cancelling. The user will also need the permission to Review Orders. This allows for more granular permissions for customer representatives. |
| Manage Chargebacks | Allows the user to access the Chargeback Processing section. The user will also need the Edit setting permission. |
| Manage Customer Profiles | Allow the user to have access to the Customer Profiles section. This will allow the user to edit, delete, and add customer profiles. |
| Manage Gift Certificates | Allows the user to edit and create Gift certificates within the marketing section. |
| Postpone Auto Orders | Allows the user to delay the next processing date of an auto order |
| Refund Manual Tax Calculation | This allows the tax amount in the order to be manually edited. Normally the tax is calculated, and not directly editable. |
| Refund Order | Allows the user to issue a refund on orders. |
| Review Orders | Allows the user access into the Order Management section. |
| View Amazon PII | Enable this for users that are reviewing orders and need to be able to see the Personally Identifiable Information. |
### Operations - Bulk
The **Operations – Bulk** permissions allow users to perform bulk order actions directly from the **View Orders** search results page.
| Field | Description |
| --- | --- |
| Bulk - Auto Order Export | Allows the user to export selected Auto Orders in bulk from the View Orders search results. |
| Bulk - Batch Operations | Allows the user to perform supported batch-level operations on multiple selected orders simultaneously. |
| Bulk - Delete | Allows the user to delete multiple selected orders at once. Use with caution. |
| Bulk - Download | Allows the user to download selected orders in bulk (format dependent on export configuration). |
| Bulk - Export | Allows the user to export selected orders using available bulk export tools. |
| Bulk - Export Customers | Allows the user to export customer records associated with the selected orders. |
| Bulk - Export Orders | Allows the user to export full order data for the selected orders. |
| Bulk - Import Customers | Allows the user to perform bulk customer import operations when applicable from the orders interface. |
| Bulk - Print Invoices | Allows the user to print invoices for multiple selected orders simultaneously. |
| Field | Description |
| --- | --- |
| Communications - Download Lists/Segments | Enable for marketing users that may require access to this customer data |
| Communications - Readonly | note2b510175-88dd-43ec-b00a-db968a58003c Allow ‘Read only' access to the Communications area. PLEASE NOTE: This is a **restrictive** user permission. If enabled it will override, the **‘Communications - Use**’ and '**Full Access**’ permissions! Allow ‘Read only' access to the Communications area. PLEASE NOTE: This is a **restrictive** user permission. If enabled it will override, the **‘Communications - Use**’ and '**Full Access**’ permissions! |
| Communications - Use | Allow editable access to the Communications area. |
| Full Access | Allow editable access to the Communications area. Enable for users with role to create and edit Flows, Campaigns, etc. notecafcab05-5e24-4ae8-9035-a0e3304b5c44 **Important Note Regarding Email Notification triggered by this permission** If no user on the account has the email notification "Marketing: Storefront Communications" enabled on the account, then all users with full permissions to the Storefront will received the notification, since this notification is related to additional service fees. In order to prevent the broadcast of this email notification to all users with the "full permission" permission, make sure to configure at least one user on the account with the email notification. **Important Note Regarding Email Notification triggered by this permission** If no user on the account has the email notification "Marketing: Storefront Communications" enabled on the account, then all users with full permissions to the Storefront will received the notification, since this notification is related to additional service fees. In order to prevent the broadcast of this email notification to all users with the "full permission" permission, make sure to configure at least one user on the account with the email notification. |
| Recordings | Allows user to access the shopping session recordings. |
| Upsells - Readonly | Allow 'Read Only' access to the upsells area to review but not edit the flows. If unchecked, the user will have create/edit/delete permissions. |
| Visual Builder Enable/Disable Protected Content | Allows user to enable/Disable protected content within the Storefront Visual Builder editor. Enable only for the admin users. |
## Email Notification
Just like Permissions the Email Notification section allow you to set each user with their own set of email notifications. This allows you to have one user that only handles order that need to be shipped or another user that is looking at auto order (recurring orders).
Simply place a check in the box to the left of the notification you want to grant to this user.

#### The Configurable Email Notifications Appear in Sections
### **Affiliate Management**
| Field | Description |
| --- | --- |
| Affiliate Signup | Check this box to have UltraCart send notification for any new "Affiliate" Signups. |
### **Channel Partners**
| Field | Description |
| --- | --- |
| eBay | Notifications related to sales activity on eBay. |
### **Conversations**
| Field | Description |
| --- | --- |
| Unread SMS messages | Enable for users that are users of the SMS Conversations, to notify them when a SMS message has been received that needs follow up. |
### **Customers**
| Field | Description |
| --- | --- |
| Auto Order Cancellations | Select this checkbox to be notified whenever an auto order is cancelled. |
| Auto Orders | Select this box to be alerted to any problem with processing of a scheduled auto order. (The message will include reference to the auto order customer and the transaction response recorded from the gateway.) |
| Customer Feedback | Select this box to receive notifications related to the "[Case Management](/customers-crm/my-account-customer-portal)" tool that is part of the "[My Account, Customer Portal](/customers-crm/my-account-customer-portal)" |
| Wholesale Signup | Select this box to receive notifications related to [Wholesale Signups](/customers-crm/customer-profiles/configuration-customer-profiles) |
### **External Integrations**
| Field | Description |
| --- | --- |
| Integration Log Health Report | Sends a daily email notification related to the account integrations. See also the integration logs reports in the reporting area: - Integration Logs - All Provides a snapshot view of the integration logs unfiltered. - Integration Logs - Critical Provides a snapshot view of the integration logs filtered on critical errors. - Integration Logs - Errors Provides a snapshot view of the integration logs filtered on all errors/warnings. :::info **Note:** Starting on August 1, 2021, if your account does not have at least one user with the notification enabled, UltraCart will send the notification to all users on the account with edit settings permissions. ::: :::info **Note: Daily Integration Health Report Delivery -** The report will only be sent if there are 1 or more critical issues in the log reports. ::: |
### **Item Management**
| Option | Description |
| Option | Description |
| Option | Description |
| Option | Description |
| --- | --- |
| Option | Description |
| --- | --- |
| Field | Description |
| --- | --- |
| Automated Sales Report | If selected, will send out the automated sales summary report (see [Report Delivery](/account-settings/back-office/report-delivery)) |
# Frequently Asked Questions
### Question: "Where can I enter the email addresses of the people in my company who should be notified when an order is placed"
Answer: The ‘**order placed**’ email notification in the user editor should be selected for each user that should receiving the order placed notification. This is user notification is set individually. Navigate to: Main Menu > Configuration > Users , there you’ll edit each user that shouldbe receiving the order placed notification and in the Email Notifications section, in the ‘Orders/Overall’ section select the checkbox for ‘Order Placed’ then optionally select the option settings that appear for the order placed notification:

Save the changes. Repeat for each user that needs to be notified of the placed orders.
### Question: "Recently we've been missing some email notifications of orders, and in a couple of cases the emails are showing up hours later. Why might this happen?"
Answer: You'll need to contact your email server administrator to discuss delivery processing. It can very wildly based upon the target server. For example someone on gmail will usually have the email in their inbox within 1-2 seconds after it's sent to them, but other email servers may be overloaded and take an hour or more to receive an email. If your email server is down for any reason when our high speed outbound sends attempt to contact it then the message requeues at progressive intervals until the target server becomes available.
### Question: "Is there a way to get text alerts when new orders come in? Sometimes we get folks to order online past our normal business hours and we were wondering if Ultracart could send text notifications to our cell phones?"
Answer: We do not have text alerts. Hoever, you can setup a user with no permissions (since the user is not being used for accessing the account backend), then configure this user with the appropriate email notifications for that user, configuring this user with the email associated with the users mobile phone email address, so that the notifications are forwared to the phone.For example if you are using Verizon and google "verizon email to text" you'll see Google give you the instructions as the first result.
- ["Verizon email to text"](https://www.google.com/search?q=verizon+email+to+text&oq=verizon+email+to+text&aqs=chrome..69i57j0l5.122j0j7&sourceid=chrome&es_sm=122&ie=UTF-8)
- ["Sprint email to text"](https://www.google.com/search?q=verizon+email+to+text&oq=verizon+email+to+text&aqs=chrome..69i57j0l5.122j0j7&sourceid=chrome&es_sm=122&ie=UTF-8#safe=off&q=sprint+email+to+text)
- ["AT&T email to text"](https://www.google.com/search?q=verizon+email+to+text&oq=verizon+email+to+text&aqs=chrome..69i57j0l5.122j0j7&sourceid=chrome&es_sm=122&ie=UTF-8#safe=off&q=at%26t+email+to+text)
### Question: "I was attempting to edit a user and the login changed from the users' login to my own, why?"
Answer: The web browser form filling is inserting your login into the page. You can temporarily disable form filling in your web browser or setup an additional browser profile that does not contain your stored autofill information.
In Chrome browser:
To Turn Off 'Autofill':
1. Click the three dots menu
2. Click 'Settings'
3. Click 'AutoFill'
4. Click 'Addresses and more'
5. Click the slider button to the off setting.
To Add a new browser profile:
1. Click your active browser profile (It's directly to the left of the "three dots" menu)
2. Click the '+Add' button
3. Enter an name and photo.
4. Save
:::info
### Password Manager
If you have a password manager installed, such as LastPass, please also inspect the settings in the password manager, as well.
:::
# Related Documentation
[Your Preferences](/account-settings/your-preferences)
[**Receiving Email Notifications of Orders**](/account-settings/tutorials/receiving-email-notifications-of-orders)
[**Logging Into Your UltraCart Account**](/get-started/logging-into-your-ultracart-account) [** **](/account-settings/tutorials/receiving-email-notifications-of-orders)
---
# New FTP Password
https://docs.ultracart.com/account-settings/general-configuration/users/user-configuration-screen/new-ftp-password
doc_type: how-to
# Overview
UltraCart has implemented a new virtual File Transfer Protocol (FTP) server that will allow you to transfer (download/upload) files.
The FTP password differs from your regular login password and must be configured seprately within the user editor
### How does FTP work?
FTP stands for File Transfer Protocol. It is the standard Internet protocol for transferring files from one computer to another. FTP requires two computers, one running an FTP server, the other running an FTP client (software). The exchange is initiated by the client who logs in under an accepted user name and password. Once this occurs, a session is opened and stays open until closed by either the client or the server, or until it times out. While the session is open, the client may execute numerous FTP commands on the server. These include commands to change directories, list files, get files and put files.
# Configuring the FTP Password for An UltraCart User
In order to access the FTP server you must first establish a FTP password by navigating:
### The User Editor
:::note
[Home](https://secure.ultracart.com/merchant/mainMenu.do) ` → [Configuration (Back Office)](https://secure.ultracart.com/merchant/configuration/configurationMenuLoad.do) →` [`Users`](https://secure.ultracart.com/merchant/configuration/userListLoad.do) → Edit User
:::
:::info
Only users with the "Edit Users" permission can access the users area and make changes. If you do not have access to modify YOUR user profile, please contact your UltraCart account administrator.
:::
OR
The My Preferences Editor
:::note
[Home](https://secure.ultracart.com/merchant/mainMenu.do) ` → (Mouse over MerchantID appearing above home) → `My Preferences
:::
## User Editor View of the "New FTP Password" section
Each user of your UltraCart account can establish their individual FTP password.

### Example configuration
Let's pretend that we were on an account where our merchant ID was "TEST", login was "Michael", and FTP Password was "winningrace".
Then our FTP information would look like:
**Server:** MerchantFTP.ultracart.com
**Username:** TEST/Michael
**Password:** winningrace
### Accessing UltraCart's FTP server
You can utilize most any FTP software (FileZilla, SmartFTP, Robo-FTP, to name a few) to transfer files.
Set up a site in your FTP software as follows:
**Host** (FTP Server): MerchantFTP.ultracart.com
**Username**: merchant id/login
**Password**: FTP Password
The following is a screen shot from an FTP client showing the sample configuration from above as a "new site" (FTP).
(\*Please note, Filezilla ia no longer recommended due to reports of malware. Please look at other options, such as CuteFTP.)

**Accessible Files in UltraCart**
- Catalog Arbitrary File System
- Catalog Group Multimedia
- Catalog Logs
- Digital Delivery
- Item Multimedia
- Screen Branding Graphics Library
---
# Users Group Editor
https://docs.ultracart.com/account-settings/general-configuration/users/users-group-editor
doc_type: how-to
# About
The Users Group Editor allows you to predefine the permissions and email notifications that can be applied to multiple user logins on your account.
## Navigation
:::note
[Home Menu](#) → [Configuration (Back Office)](#) → [Users](#) > "Groups" ('Add' button)
:::
Clicking the Add (or edit for existing groups) will ope the Group Editor:

You'll give the group a name, then you'll select the permissions & email notifications that apply to all members of the group.
You can apply the group to your users while creating or later when editing the group. (You can also apply the group to an individual user when editing a specific user .
---
# How to forward an e-mail with headers
https://docs.ultracart.com/account-settings/how-to-forward-an-e-mail-with-headers
doc_type: how-to
## Introduction
When diagnosing issues regarding e-mail notifications, UltraCart Support will frequently ask for the entire e-mail message, including the headers. The header of an e-mail provides very valuable information on how an e-mail was generated, to whom it was sent, why it was sent, and what servers and systems did the message traverse to arrive in the mailbox. Unfortunately, in the spirit of simplicity, the most common e-mail programs do not make it easy to find this information. This article will walk you through the process using several of the most common e-mail programs and services.
## Microsoft Outlook
The screen shots below were taken from Office 2010. Office 2007 and 2013 may appear a bit different, but the process is the same.
1. From your message list, double-click on the e-mail message so it opens in its own window

2. Click on the File menu option

3. Click on the Properties button near the bottom of the window

4. This will bring up the properties window. At the bottom of the window is a section labeled **Internet headers**. Place your cursor inside the box, and click it. Next, press **CTRL+A**, followed by **CTRL+C**. You have now copied all of the headers onto your clipboard. Simply paste the results into a message to UltraCart Support.

## GMail / Google Apps
1. Log into your GMail / Google Apps account

2. From your Inbox, click on the message you wish to send to UltraCart Support

3. Once the message is open, you will first need to click on the large drop-down arrow, labeled in the image below as **A**. Next, select the menu item **Show Original**, labeled **B**.

4. This will open the full message contents in a new tab. It will look similar to the image below. Click your mouse in the window, and press **CTRL+A**, followed by **CTRL+C**. The contents of the message are now saved to your clipboard. Simply paste the contents into a new message to UltraCart Support.

## Apple Mail
These screen shots were taken with OS X Lion, but the process is the same for all modern releases of OS X.
1. Select the message you wish to forward to UltraCart Support in the message list, so that the message is displayed in the right pane

2. Next, click on the **View** menu, navigate to the **Message** sub-menu, and select **Raw Source**.

3. This will display the Raw Source window. Click your mouse inside this window, and press **Command+A**, followed by **Command+C**. The contents of the raw source window are now saved on your clipboard. Simply paste this into a new message to UltraCart support

## Other E-Mail Software
If you use software other than the ones documented here, and are unable to find the message source or message headers, let us know and we'll work with you to get the information to us.
---
# UltraSecure OTP (One-Time Password) Tokens
https://docs.ultracart.com/account-settings/other-configuration/ultrasecure-otp-one-time-password-tokens
doc_type: how-to
## Introduction
UltraSecure OTP Tokens enhance the security of your UltraCart account by implementing two-factor authentication (2FA). Two-factor authentication adds an extra layer of security by requiring two distinct forms of verification to log in: something you know (your password) and something you have (a dynamically generated one-time password from a token on your mobile device).
UltraCart supports any authenticator application that provides one-time password functionality, including popular options like Google Authenticator, Authy, 1Password, and Yubico Authenticator.
Using an OTP token provides significant benefits for UltraCart users:
- Enhanced security for your account.
- Removes the requirement for IP activation. Without an active OTP token, logging in from a new or unrecognized IP address triggers an email verification step before access is granted. An active OTP token bypasses this step, so you can log in immediately from any location.Setup Instructions
## Setup Instructions
### Download an Authenticator App
To begin, download a compatible authenticator application to your mobile phone. UltraCart recommends the Google Authenticator App, which is available for all major mobile phone platforms.
Apple iOS (iPhone, iPad)
Search for "Google Authenticator" in the App Store.
Android
Search for "Google Authenticator" in the Google Play Marketplace.
LastPass Authenticator
Search for "LastPass Authenticator" in the appropriate app store for your device.
Yubico Authenticator
Search for "LastPass Authenticator" in the appropriate app store for your device.
### Link to UltraCart Account
The authenticator application is easy to integrate with your UltraCart account.
1. Log in to your UltraCart account.
2. Mouse over your Merchant ID/Avatar located directly above "Home" in the main left-hand menu.
3. Click the [**Your Preferences**](https://secure.ultracart.com/merchant/configuration/yourPreference3Load.do) button that appears in the dropdown menu.
4. Scroll down to the "2FA" (Two-Factor Authentication) section.
5. Click the "chain link" icon next to the "OTP Serial Number" field to view the setup instructions.

### Scan QR Code & Activate
Follow the on-screen instructions to link your authenticator app to your UltraCart account:
1. Open your chosen authenticator app (e.g., Google Authenticator) on your mobile device.
2. Select the option to "Scan a QR Code".
3. Use your phone's camera to scan the QR Code displayed on your UltraCart screen.
4. Once the QR code is scanned, a 6-digit one-time password (OTP) will appear in your authenticator app.
5. Enter this 6-digit number into the "OTP Password" field on the UltraCart screen.
6. Click **Test & activate**.
note
**Note:** If successfully configured, you will be returned to your Preferences page, and your OTP Serial Number will be displayed in the "OTP Serial Number" field. Your token is now active and will be required for every subsequent login to UltraCart.
**Note:** If successfully configured, you will be returned to your Preferences page, and your OTP Serial Number will be displayed in the "OTP Serial Number" field. Your token is now active and will be required for every subsequent login to UltraCart.
## Logging in with OTP Token
When two-factor authentication is enabled for your UltraCart user, the login process will include an additional verification step.
1. Navigate to the UltraCart Merchant Login page.
2. Enter your Merchant ID, Login (username), and Password as usual.
3. After submitting your initial login credentials, if 2FA is required, you will be prompted for to enter your security code.
4. Open your authenticator application (e.g., Google Authenticator, Authy, 1Password) on your mobile device.
5. The app will display your current OTP password. These codes refresh approximately every 30 seconds.
6. Enter the 6-digit UltraSecure Code displayed in your authenticator app into the input and click **Submit Code** to continue.

:::note
**Tip:** The authenticator app will indicate the time remaining until the next code refresh. If there is little time left, it is recommended to wait for the OTP token to refresh to avoid using an expired code.
:::
note
**Note:** Once an OTP code has been used, it cannot be used again for that or any other UltraCart account.
**Note:** Once an OTP code has been used, it cannot be used again for that or any other UltraCart account.
## Using on Multiple Accounts
Once you have an UltraCart token configured in your authenticator app, you can use the same token for multiple UltraCart accounts.
1. Log in to the additional UltraCart account you wish to link.
2. Navigate to **Main Menu >** [**Your Preferences**](https://secure.ultracart.com/merchant/configuration/yourPreference3Load.do).
3. Scroll down to the "OTP Serial Number" field and enter the serial number displayed in your phone's authenticator app. The serial number typically looks like
`GA##########@UltraCart`, but the `@UltraCart` portion is optional.
## Removing Token
To remove an OTP token from your user account:
1. Navigate to **Main Menu >** [**Your Preferences**](https://secure.ultracart.com/merchant/configuration/yourPreference3Load.do).
2. Scroll down to the "OTP Serial Number" field.
3. Clear out the serial number from this field.
4. Click **Save**.
## Frequently Asked Questions
### Question: I lost my phone and now I cannot log into my account, what do I need to do?
**Answer:** If you lose your phone and cannot access your OTP token, you will need to contact UltraCart support. UltraCart staff will remove your OTP configuration after verifying your identity. Verification will typically involve calling the number on file for your user login, or contacting the account owner or another admin user.
:::note
Tip: Ensure your user contact details are always up-to-date by regularly checking the "Your Preferences" section in your UltraCart account.
:::
### Question: I have a Yubikey and use the Yubico Authenticator instead of the Google Authenticator. Is the Yubico Authenticator compatible?
**Answer:** Yes, the Yubico Authenticator is compatible. However, since the Yubico Authenticator application requires you to physically plug your Yubikey into your phone, you will need a Yubikey model that is compatible with your phone's input type - [Logging into UltraCart using the Yubico Authenticator application](/get-started/logging-into-your-ultracart-account/logging-into-ultracart-using-the-yubico)
---
# UltraSecure OTP Tokens
https://docs.ultracart.com/account-settings/other-configuration/ultrasecure-otp-tokens
doc_type: reference
This page has moved: [UltraSecure OTP (One-Time Password) Tokens](/account-settings/other-configuration/ultrasecure-otp-one-time-password-tokens)
---
# Google Integration
https://docs.ultracart.com/account-settings/tutorials/google-integration
doc_type: tutorial
# About
Integration of [Google Shopping](https://en.wikipedia.org/wiki/Google_Shopping) is vital to success of your online business. The Google Shopping platform is used to list your products across all of Google's Services.
In order to manage your products on Google, you’ll need a [Google Merchant Center](https://www.google.com/retail/solutions/merchant-center/) account.
[Getting Started with Google Merchant Center](https://www.google.com/retail/get-started/)
The Google Merchant Center lets you manage how your in-store and online product inventory appears on Google.
Below is a list of Google Integration points within UltraCart:
- [Google Analytics](/storefronts-themes/tracking-analytics/google)
- [Google Adwords](/marketing-loyalty/tutorials/collecting-google-gclid-parameters-and-r) - reporting CLID back to Google Adwords
- [Google Product Search](/account-settings/external-integrations/google-shopping-product-search) - lists products on Google Shopping
- [Google Tag Manager](/account-settings/tutorials/google-integration/google-tag-manager)
- [Google Trusted Stores](/marketing-loyalty/tutorials/google-trusted-stores-feed) - reviews and ratings by Google Shopping customers
- [Google Orders](#page-not-found) - transfers orders placed on Google Shopping into the UltraCart system for processing
- [Google Maps API](/storefronts-themes/navigation-search/store-locator#connect-google-maps) - used to provide a better checkout experience for your customers
- [Google Auto Complete](/storefronts-themes/storefront-topics/enabling-and-disabling-google-autocomplete) - used to provide a better checkout experience for your customers
- [Google reCAPTCHA](/storefronts-themes/storefront-topics/recaptcha-configuration) - used to secure your feedback forms
# Frequently Asked Questions
**Question:** How do I test out the google integrations?
**Answer:** You should use the Tag Assistant tool to troubleshoot the Google integrations.
:::info
PLEASE NOTE: Google now requires you to be logged into your google account to launch and run the debug tool:
[https://tagassistant.google.com/](https://tagassistant.google.com/) . [https://support.google.com/tagassistant/answer/10039345#zippy=%2Cin-this-article](https://support.google.com/tagassistant/answer/10039345#zippy=%2Cin-this-article)
**UltraCart is unable to diagnose issues with the Google integrations.**
:::
**Question:** I am attempting to verify my Google Merchant Center Account, but I am getting an error that the google analytics and tag manager scripts are rendering outside of the head. How can I resolve this issue to get verified?
Answer: UltraCart renders the Google scripts lower in the page so they do not hold up the first paint. The scripts work correctly where they render, but Merchant Center cannot verify you through them. Use the ‘Add an HTML tag or file’ verification option instead:

Add verification HTML tag to storefront for Google Merchant verification.

Google runs one verification service across Search Console and Merchant Center, so a token you add for either one satisfies both. [Google Search Console verification](../../../storefronts-themes/seo/google-search-console-verification.md) covers the two routes that work on a StoreFront: a DNS `TXT` record, or a verification file placed in the File Manager. Either verifies your Merchant Center account.
Once the record or the file is in place, return to your Google account and click the ‘Verify your online store’ button.
Related Documentation:
[https://ultracart.atlassian.net/wiki/spaces/ucdoc/pages/3888316425/Attribution+Analysis?search\_id=dd5b62c8-d438-4147-83f5-0e5207a67cde&additional\_analytics=queryHash---75738ae31c760e2b1985a0605d8ad8e88d14eec0a745661a9613f9fe36de8207](/orders-fulfillment/order-management/review-order/attribution-analysis)
[Understanding UTM Collection](/get-started/navigating-ultracart/ultracart-dashboard/using-ultracart-analytics/understanding-utm-collection)
[Using UltraCart Analytics](/get-started/navigating-ultracart/ultracart-dashboard/using-ultracart-analytics)
---
# Google Tag Manager
https://docs.ultracart.com/account-settings/tutorials/google-integration/google-tag-manager
doc_type: tutorial
# Integrating Google Tag Manager into Your UltraCart Storefront
## Introduction
Google Tag Manager (GTM) is a tag management system that allows you to quickly and easily update tracking codes and related code fragments (collectively known as tags) on your website or mobile app. Without GTM, these code fragments often need to be manually updated directly in your website's code. GTM simplifies this process, enabling marketers to deploy and manage tags without requiring developers for every change.
### Google Tag Manager vs. Google Analytics
While often used together, Google Tag Manager and Google Analytics serve different purposes:
- **Google Analytics** is an analytics tool used to track and report website traffic. It collects data about user behavior, such as page views, session duration, bounce rates, and conversion goals, providing insights into how users interact with your site.
- **Google Tag Manager** is a deployment tool. It does not collect data itself but acts as a container for various tags, including the Google Analytics tracking code. GTM allows you to manage _when_ and _how_ your Google Analytics tag (and other tags like Google Ads conversion tracking, Facebook Pixel, etc.) fires on your website.
In essence, GTM helps you _implement_ Google Analytics and other tracking tools more efficiently, while Google Analytics _collects and reports_ on your website data.
## Integrating Google Tag Manager into your Storefront
To integrate Google Tag Manager into your UltraCart Storefront, you will configure specific settings within the UltraCart interface.
### Prerequisites
- A Google Tag Manager account and a configured container.
- Your Google Tag Manager Container ID (e.g., `GTM-XXXXXX`). This ID can be found in the first code block after initial setup or at the top of the Google Tag Manager user interface.
:::note
**Navigate:**
Storefronts → Choose Storefront → (Storefronts menu) **Privacy & Tracking** → **Google** (tab) → Scroll down to ‘**Tag Manager**’
:::
**Configure Tag Manager Credentials**: In the 'Tag Manager' section, you will find the following fields:

- **Container ID** (Required)
- In the **Container ID** field, paste your Google Tag Manager Container ID. This ID is typically formatted as "GTM-XXXXXX". You can locate this ID in the first code block provided by Google Tag Manager during setup, or at the top of the Google Tag Manager user interface.


Setup and installation - Tag Manager Help - Google Help
[https://support.google.com/tagmanager/answer/6103696?hl=en](https://support.google.com/tagmanager/answer/6103696?hl=en)
Try using this chrome plugin for testing the google tag manager:
[https://get.google.com/tagassistant/](https://get.google.com/tagassistant/)
:::info
**Note:** UltraCart automatically places the necessary Google Tag Manager scripts into the `` and `` sections of your Storefront pages. You may receive a warning that the script is not rendering in the head section of the page; the script is still functional. Please allow up to 24 hours after configuring your Container ID for Google to begin registering traffic.
:::
- **Server Side Script URL** (Optional - Advanced)
- The Server Side Script URL field is for advanced users who are hosting their own tag manager container.
If you are unsure whether you need this, you most likely do not. If applicable, enter the URL for your self-hosted tag manager container here
- **Opt in to** (recommended)
- The Opt in to and required for settings allow your UltraCart Storefront to comply with General Data Protection Regulation (GDPR) requirements.
- Select the appropriate options based on your privacy policy and legal advice.
- **Google Tag Gateway — First-party serving** (Optional)
- Serves your Google tags from your own store domain instead of Google’s, recovering conversion and analytics data that Safari’s tracking prevention and ad/content blockers would otherwise discard.
- Requires a GTM Container ID or GA4 ID (configured above).
- Billed at $5 per million relayed measurement requests. See **Google Tag Gateway (First-Party Serving)** below for details.
:::note
**Disclaimer:** This is not legal advice. The General Data Protection Regulation is complex and each merchant should obtain legal advice to discover how the regulation applies to their specific business.
:::
## Google Tag Gateway (First-Party Serving)
**Google Tag Gateway** serves your Google tags from your own store domain instead of Google’s. This recovers conversion and analytics data that Safari’s Intelligent Tracking Prevention and ad/content blockers would otherwise discard — with no re-tagging, no new dashboards, and no change to your existing Google setup.
### Multi-Domain and Headless Setups
Google Tag Gateway relays traffic only for tags loading on the StoreFront domain where it is enabled. It does not extend first-party serving to pages hosted on a different domain.
This matters for merchants running a split setup, for example a WordPress site as the front end with UltraCart handling checkout on a StoreFront domain. Enabling Google Tag Gateway in UltraCart affects only tags that load on UltraCart-hosted pages, such as checkout and receipt pages. Tags loading on the WordPress domain continue to load directly from Google and are not relayed.
> **Note:** The largest share of blocked or shortened conversion data typically comes from the landing page a shopper first visits, since that is where most ad-attribution tags fire. If your landing pages live on a separate domain from your StoreFront, enabling Google Tag Gateway on the StoreFront alone recovers only the tracking that runs on UltraCart-hosted pages.
To get full-funnel benefit from Google Tag Gateway in a split-domain setup, the landing page and checkout need to share the same domain. Contact [UltraCart Support](https://www.ultracart.com/help/support.html) to discuss migrating a WordPress front end into StoreFront.
### Why enable it
When a shopper’s browser loads Google tags from `googletagmanager.com` and sends measurement hits to `google-analytics.com`, two things quietly erode your data:
- **Ad and content blockers** block requests to Google’s tracking domains outright, so the tag never loads and the hit never sends.
- **Safari’s Intelligent Tracking Prevention** caps analytics cookies to roughly seven days and blocks many cross-site requests, shortening attribution and remarketing windows.
With Google Tag Gateway enabled, those same tags load from — and post their measurement hits to — your own storefront domain. Because the request is first-party (the domain the shopper is already on), blockers let it through and the cookie lives its full intended lifetime. The result is more complete conversion and event data feeding the same GA4 and Google Ads reports you already use.
:::info
**Note:** Nothing about your existing Google Privacy and Tracking setup changes. Same GA4 property, same Google Ads account, same GTM container, same dashboards. Google Tag Gateway is transport plumbing underneath — not a re-tagging project. This implements Google’s own published “Google tag gateway for advertisers” (first-party serving) model.
:::
### Privacy
Google Tag Gateway is **not** a blind reverse proxy. For every request it builds a fresh, minimal request to Google from a strict **allowlist**: only Google’s own measurement cookies (such as `_ga` and `_gcl_*`) are forwarded. Your customers’ cart, checkout, login, and CSRF cookies are dropped before the request is built, the raw shopper IP is never sent to Google (only a coarse country/region is derived from it), and identity and authorization headers are stripped. Only the measurement data the Google tags already collect flows through — nothing more.
### Custom and Third-Party Tags in Your GTM Container
Google Tag Gateway loads your entire GTM container through the relay path, including any custom tags you have configured, such as a custom conversion tag fired on the receipt page rather than one of UltraCart's native Adwords Conversion ID or GA4 fields.
The **allowlist** behavior described above still applies at the request level. Google Tag Gateway forwards only recognized Google measurement traffic, such as `_ga` and `_gcl_*` cookies and standard GA4 or Google Ads hit formats. A custom tag that sends data using the standard Google measurement libraries benefits from first-party serving the same way a native tag does. A custom tag that sends data to a non-Google endpoint, such as a different analytics vendor or a private webhook, is not relayed and continues to fire against its original destination unchanged.
> **Important:** If you use a custom tag to fire a Google conversion event, verify with Google Tag Assistant that the tag is present, firing, and connecting through your StoreFront domain after Google Tag Gateway is enabled. This confirms your specific configuration is being relayed as expected.
### What still goes directly to Google (and why that's expected)
After enabling Google Tag Gateway, you (or your developer) will still see some requests to `google.com` and `doubleclick.net` in the browser's Network tab. This is expected and by design. Only part of Google's tag surface is eligible for first-party serving; the rest is Google's own serving-scope boundary, not the relay dropping or mishandling anything.
**Served first-party from your store domain:**
| Purpose | Request |
| --- | --- |
| Google tag loader scripts | `gtm.js`, `gtag/js` |
| GA4 event measurement | the `/g/collect` beacon (Google serves it under an obfuscated path on your domain, such as `/a/g/c`) |
**Still sent directly to `google.com` / `doubleclick.net` — on every Tag Gateway deployment:**
| Purpose | Endpoint |
| --- | --- |
| Google Ads conversion measurement | `/ccm/collect` |
| Remarketing and audience calls | `/rmkt/collect`, `/pagead/viewthroughconversion`, `/pagead/1p-user-list` |
| DoubleClick cookie-sync | `ad.doubleclick.net` |
| GA4 Google Signals | `stats.g.doubleclick.net` |
| GA4 service/session calls | `analytics.google.com/g/s/collect` |
Some GA4 traffic may also route directly to a regional endpoint (such as `region1.analytics.google.com`) to satisfy Google’s EU and regional data obligations. This too is Google’s own routing, not the relay.
These direct requests still return a success status, and your Google Ads conversion attribution keeps its resilience against Safari’s Intelligent Tracking Prevention (ITP). What matters is _how_ the identifier cookies are written, not where the beacon is sent: because the relay runs on your own domain and sets Google’s first-party cookies (`_gcl_*`, `FPID`) through the response’s `Set-Cookie` header — server-set, not written by JavaScript — ITP’s roughly seven-day cap on JavaScript-set cookies does not shorten them. Attribution stays intact even though the conversion beacon itself still travels to Google.
Seeing `google.com` or `doubleclick.net` requests in the Network tab is therefore normal and does not require troubleshooting.
> **Note:** The relay is path-agnostic — it forwards requests to Google without filtering by endpoint. If Google adds new endpoints to its first-party serving surface in the future, those requests begin flowing through your own domain automatically, with no configuration change on your side.
### Requirements
- A GTM **Container ID** or GA4 ID configured in the Tag Manager section above.
- On the Google side, enable **“Google tag gateway for advertisers”** for your tag (in GA4 / Google Ads). Google Tag Gateway is the transport; Google still has to accept first-party serving for that tag.
### Pricing
Google Tag Gateway is billed on usage at **$5 per million measurement requests**. Only successfully relayed requests are billed — rejected, blocked, or invalid requests are not charged. There is no setup fee, no minimum commitment, and no separate charge for the infrastructure or re-tagging. Usage is metered per storefront and rolled into your normal UltraCart billing cycle.
The figures below are **illustrative** only — actual volume depends on your traffic and how many measurement hits each page view fires.
| Monthly measurement requests | Monthly Google Tag Gateway cost |
| --- | --- |
| 500,000 | $2.50 |
| 1,000,000 | $5.00 |
| 5,000,000 | $25.00 |
| 25,000,000 | $125.00 |
### How to enable it
1. In the **Tag Manager** section, check **Google Tag Gateway → First-party serving**.
2. UltraCart provisions the first-party measurement path and load-balancer routing automatically and rewrites your storefront’s tag snippet to serve from your own domain.
3. Enable **“Google tag gateway for advertisers”** for your tag on the Google side (GA4 / Google Ads).
4. Validate end-to-end with Google Tag Assistant and GA4 realtime to confirm hits route through your own domain.
Google Tag Gateway is **default off** and fully reversible — uncheck the box at any time to turn it off.
### Test Your Website (Optional)
After configuring your Container ID, you can test your website to ensure Google Tag Manager is properly integrated.
1. **Access the Test Feature**:
- On the "Install Google Tag Manager" pop-up, locate the "3. Test your website (optional)" section.
- An example URL will be provided, such as `https://t1000.ultracartstore.com/`.
- Click the **Test** button next to the URL.
2. **Use Google Tag Assistant**:
- Google provides a Chrome browser plugin called **Google Tag Assistant** which can help with testing your Google Tag Manager implementation. You can download it from `https://get.google.com/tagassistant/`.
- The **Google Tag Assistant** tool can help troubleshoot issues.
3. **Allow Time for Data Registration**:
- Please allow up to 24 hours after configuring your container ID for Google to begin registering traffic.
### Google Troubleshooting tool
[https://tagassistant.google.com/](https://tagassistant.google.com/) . [https://support.google.com/tagassistant/answer/10039345#zippy=%2Cin-this-article](https://support.google.com/tagassistant/answer/10039345#zippy=%2Cin-this-article)
---
# Linking Multiple Accounts
https://docs.ultracart.com/account-settings/tutorials/linking-multiple-accounts
doc_type: tutorial
# Linking Multiple Accounts
UltraCart has the capability to link multiple accounts. When accounts are linked, users are synchronized across the various accounts, switching between accounts is quick, and searching for orders across multiple accounts at once is possible.
:::info
Before you can link a new account, you need to signup for the secondary UltraCart account and have the owner user credentials. You can do this from the signup button at [http://www.ultracart.com/](http://www.ultracart.com/)
:::
## Identifying the Current Account
The left hand navigation clearly shows you which account you are logged into as shown in the screen shot below.

## Linking an Account
Linked accounts work by having one parent account with one or more child accounts linked to it. You can only link an account to one parent so choose your parent account carefully. Once you have selected which account is going to be the parent account you need to log in to it as the owner user.
:::warning
Only the **OWNER** user can see or perform the account linking operation.
:::
Once you are logged in as the owner user go to the following page as shown below:
:::note
[Configuration (General)](https://ultracart.atlassian.net/wiki/404?key%3Dmerchant%3Bsearch%3Fq%3D%2FmainMenu.do) → [Linked Accounts](https://ultracart.atlassian.net/wiki/404?key%3Dmerchant%3Bsearch%3Fq%3D%2Fconfiguration%2FlinkedAccountsLoad.do)
:::

Below is a screen shot of the Linked Accounts screen when no account is linked. Perform these steps to link an account:

1. Notice the screen displays the merchant ID and company name of the account you are currently logged in to. This is to help you keep track of which account you are in when setting up linking.
2. Notice the warning about needing the **OWNER** credentials for the child account labeled number two.
3. Enter the **OWNER** credentials for the child account that you want to link into the fields provided. Any other credentials will not work!
4. Select which regular users from the parent account you want to synchronize to the child. For your convenience the default is all users. If you select "Some Regular Users" then you are presented a list of all the users on the parent. Just check the boxes for the ones you want to synchronize down. There is a select/unselect all box provided in the header to make handling long lists of users easier.
5. Click the **link child** button.
## Seeing Linked Accounts
After you have linked accounts you can see them on the Linked Accounts page in the Child Account section as shown below. In this example we have linked two child accounts, but synchronized only some of the users.

If you click on the number of users shown in the table a drop down listing which users are on the account is displayed. If you click on the user's login it will take you to the user editor on the **parent** account (which you are currently logged in to) so you can quickly make some changes to the user.
If you want to remove a linked account just click the **Unlink** button. This will separate the two accounts and stop synchronization, but the users on the child account will still be exactly like they were when the unlink operation took place. It does not revert them to the state before they were linked.
## Switching Accounts
If you want to switch between accounts, hover over the merchant ID on the left hand navigation and click on the Account menu item as shown below.

Next a dialog will appear showing you all the linked accounts that you can switch to as shown below.

Clicking the **switch** button next to an account will change your current account.
It's important to understand where your browser will be redirected based upon where you are at in UltraCart.
| **Current Page** | **Page After Switch** |
| --- | --- |
| Accounts Receivable | Accounts Receivable |
| Shipping Department (single DC) | Shipping Department (single DC) |
| Shipping Department (multiple DC) | Shipping Department Selection Menu |
| Review Orders Search | Review Orders Search (blank start) |
| URLs without Parameters | Same URL |
| Any Other Page | Main Menu |
After you have switched accounts you will notice that the merchant ID on the left hand navigation is updated.
## Editing Users
To edit users in a linked account configuration you still go to
:::note
[Main Menu](https://ultracart.atlassian.net/wiki/404?key%3Dmerchant%3Bsearch%3Fq%3D%2FmainMenu.do) → [Configuration](https://ultracart.atlassian.net/wiki/404?key%3Dmerchant%3Bsearch%3Fq%3D%2Fconfiguration%2FconfigurationMenuLoad.do) → Users
:::
but the operation needs to be performed on the **PARENT** account. If you go to edit users on one of the child accounts you will receive the following screen.

When you edit users on the parent account there is a new section at the bottom of the user editor that will appear labeled **Linked Accounts**. If you edit your own owner user then it will display:

If you edit any of the regular users you will see a list of all the linked accounts and whether they are on the linked account.

If you want to add/remove a user from one of the linked child accounts simply change the check box associated with that account and save the user.
## Your Preference Updates / Password Changes
To make things easier on users, any changes they make from the 'Your Preferences' are synchronized across all the accounts. So even if the user logs into a child account and is forced to change their password for PCI compliance reasons, that change is instantly synchronized across all of the accounts. The 'Your Preferences' screen is located by hovering over the merchant ID on the left navigation and clicking Your Preferences as shown below.

Please note that your password, FTP password, and optionally (UltraSecure Code) are synchronized across all the accounts.
:::note
Your Virtual FTP username for each account still requires the merchant ID component. Remember the format is /. For example **MER01/joey**
:::
## Review Orders - Searching Linked Accounts
The purpose of linked accounts is to make switching between them simpler. The only operation that is carried out across the linked accounts is order searching. When you are on the review orders screen you will notice that a check box labeled **Search Linked Accounts** will appear. Checking that box will perform the search across all the accounts. Don't check this box unless you really need it! That action will cause the system to work harder and the mixed account result will limit functionality.

:::info
The auto complete search only covers the account you are currently logged in to.
:::
If you have search results that contain orders from multiple accounts then the results pane is simplified and will look like the screen shot below.

You will notice there is no slide show, batch operation buttons, etc. When you click on any of the links associated with the order it will open that particular order, but it will switch your session to that account.
:::info
Remember the purpose of searching across linked accounts is to find the customer that purchased from one of your multiple stores that doesn't know which one it was. If you need some of the more advanced functionality, you can switch accounts and perform another search to isolate just that customer.
:::
# Frequently Asked Questions
**Q: "I just linked my two accounts together and there may be a potential issue with email notifications.I'm getting email notifications for account "2" orders to my** [**a**](mailto:info@purebiogenics.com)**ccount "1" email address. Is there a way to have my order notifications sent to my the user email configured on each account?**
A: No, when you link accounts then the users are the same across all accounts. You do not have the ability to have different emails for the same user. The email address on the Parent Account becomes the email address for that user on all linked accounts.
### Q: I have [linked](#) multiple UltraCart Accounts together, if I link a new account, will the existing fraud rules apply?
A: Yes, the existing fraud rules be auto populated to newly [linked accounts](#).
### Q: I have [linked](#) multiple UltraCart Accounts together, can I search orders across all the linked accounts?
A: Yes, in the View Orders search form, there will be a checkbox field titled ‘**Search Linked Accounts**', that you can select when searching for an orderID located in another account:

Please note that the search results when searching linked accounts, the search results will display a message above the search results stating:
”**Results From Linked Accounts**
**Your search results contain orders from linked accounts. The functionality of the review order screen has been limited.**
**You can click on the link for the orders listed below and they will open up in the proper account.**
**Do not open up orders from different accounts in separate windows and attempt to edit them or you will receive error messages.**”

# Related Documentation
[Batch Item Copy Store-To-Store](/items-catalog/tools/batch-item-copy-store-to-store)
---
# Receiving Email Notifications of Orders
https://docs.ultracart.com/account-settings/tutorials/receiving-email-notifications-of-orders
doc_type: tutorial
Receiving Email Notifications of Orders
# Introduction
There are users and other certain people that need to receive Order Information via email. These emails are referred to as "Email Notifications" and they basically provide critical information to help users efficiently process their orders. there are two categories; Shippers and Users.
This tutorial will show you the proper way to configure these two different categories of Email Notifications.
## Shipping
There are several different methods for Shippers to receive order information from Merchants. Sending notifications via email is typically used by merchants that handling shipping "in house" and/or your fulfillment center has reasons to prefer them that way. UltraCart allows you to configure it either way and some merchants configure both.
Our use of "in house" doesn't necessarily mean your shipper is in the same building although that is often the case. Even if they are in the room next to they are your Distribution Center and they may require order information transmitted to them via email. This type of email notification of orders is configured in the Shipping Section under Transmission Mechanism.
it's important to setup your system properly so that orders are transmitted on a scheduled basis so not to build up within the UltraCart system. Lets take a look at where and how to configure your Transmission Mechanism.
### Transmission Mechanism
First you'll need to login to your account and navigate to:
:::note
[Main Menu](#) → [Configuration](#) → Checkout → [Shipping](#) → Distribution Center (tab)
:::
At this location you'll see a Distribution Center already listed for you with "default" as the code. Click the Edit Button so you can enter your DC information.

Your screen will now look like the following.

Edit your Distribution Center information. The Latitude and Longitude coordinates will fill in (later) automatically based on your edits.
While still on the same screen, click on "Transmission Mechanism" tab. If you clicked on Save after completing the above, you'll need to click on the Edit button again and then click the "Transmission Mechanism" tab. The screen should now list all Transmission Mechanism's. The list is very, very long so we removed the middle section in the following screen shot to save space. Click on the Radio Button for Email (SMTP), complete the fields and click SAVE.

Below is a description of all the fields on this transmission mechanism that you may want to configure.
| Field | Description | Required |
| --- | --- | --- |
| Company Name | The name of the company that is doing the shipping. This may be a vendor or a third party logistics company. | Y |
| Email | The email address to send the orders to. | Y |
| CC Email | Email address to copy the orders to. You can specify more than one CC email address by separating them with commas. | |
| Max Orders Per Email | If you have a large order volume you may need to break the batches into several emails. A good idea would be to batch the orders into 100 orders per email. | |
| Generic Two Way for USPS | Allows the fulfillment house to send back tracking information on the orders. | |
| Remove Bill to Address | Strips the bill to address information from the order. This is useful if you are using a drop ship scenario. | |
| Hide Price Information | Set this to yes if you want to hide the price information from the shipper. This can be useful in a drop ship scenario. | |
| Introduction Text | A Block of free form text that is displayed at the beginning of the email. This is a good place to put instructions to the shipper on how to handle your batch of orders. | |
| Post Script Text | A Block of free form text that is displayed at the end of the email. This is a good place to put final instructions to the shipper. | |
### Transmission Schedule(s)
After you have configured the transmission mechanism it is a good idea to configure a time schedule for the email batches to transmit. To do this navigate:
:::note
[Main Menu](#) → [Configuration](#) → Checkout → [Shipping](#) → Distribution Center (tab) → (edit button)
:::
Next click on the "Transmission Schedules" tab. Then in the next screen click the "New Schedule" button.

You can choose the time of day (EST time zone) and the days of the week to send the transmissions. In this example we are sending a batch at 8AM EST, Monday through Friday. Click the SAVE button when finished.

:::info
You can configure more than one transmission schedule. We recommend contacting your shipper and find out what their cut-off times are for the day and setting the transmission time to one hour before that.
:::
## Users
You can configure Email Notifications to be sent to any of the users on your account. The proper way to configure this is at each individual users profile :
:::note
[Main Menu](#) → [Configuration](#) → [Users](#) → \[edit\]
:::
Once you are on the Users screen you'll see two columns divided by sections. Scroll down the right column to the "Email Notifications" section. The following screen shot highlights the settings involving order notification. In addition to receiving an email notification, there are check boxes to include a copy of the order.

Below is a description of the most typical usage.
| Notification | When to Use |
| --- | --- |
| Order Needs Shipping | To notify a shipping department of an order. The user should log into UltraCart, go to the Shipping Department, and process the order there. They should not work on the order details included in the email. |
| Order Placed | This is a notification for every single order that goes through the account. This is the finger on the pulse notification. |
| Process Credit Card Payment | This notification is sent when an order goes into Accounts Receivable. The merchant should login, go to Accounts Receivable, and process the credit card payment. |
| Process PayPal Payment | If a PayPal notification comes in for an order and does not match the order details, this notification is sent out to the user. The user would need to review the payment notification details and contact the user to straighten out the payment. |
| Quotation Request | When a customer requests a quote, this notification is sent to the user. The user should login to UltraCart, go to the Quotation Requests section, modify the order pricing, and send out the quote. |
## Frequently Asked Questions
_Question:
__I did not receive email notifications from UltraCart. Why?_
**Answer:
**Your email client may be capturing the email notification as spam. (And, in some instances, your ISP mail have spam folder at the server level that you may need to check).
All notification e-mails are signed using DomainKeys, so if your server supports DomainKey verification, you should enable that feature. You can [read more about DomainKeys at Wikipedia](http://en.wikipedia.org/wiki/DomainKeys).
Add these addresses to your email spam filter rules:
Expired Card Reminder - [support@ultracart.com](mailto:support@ultracart.com)
Auto Order - [uc.order@ultracart.com](mailto:uc.order@ultracart.com)
Accounts Receivable - [uc.order@ultracart.com](mailto:uc.order@ultracart.com)
Billing Reminder - [uc.notify@ultracart.com](mailto:uc.notify@ultracart.com)
Shipment Notification - [uc.usership@ultracart.com](mailto:uc.usership@ultracart.com)
Customer Receipt - [uc.order@ultracart.com](mailto:uc.order@ultracart.com)
Customer Reminder - [uc.usernotify@ultracart.com](mailto:uc.usernotify@ultracart.com)
Digital Delivery Notification - [uc.order@ultracart.com](mailto://uc.order@ultracart.com)
Donation Receipts - [uc.order@ultracart.com](mailto:uc.order@ultracart.com)
Placed Order Notification - [uc.order@ultracart.com](mailto:uc.order@ultracart.com)
Statistics - [uc.stat@ultracart.com](mailto:uc.stat@ultracart.com)
Shipping Department - [uc.ship@ultracart.com](mailto:uc.ship@ultracart.com)
Fulfillment Transmission - [uc.ship@ultracart.com](mailto:uc.ship@ultracart.com)
Wholesale Signup - [uc.order@ultracart.com](mailto:uc.order@ultracart.com)
Additionally, UltraCart publishes "SPF" records for e-mail verification. If your e-mail client has the ability to verify SPF records, you should enable this option for ultracart.com e-mail addresses.
** **
---
# UltraCart Errors
https://docs.ultracart.com/account-settings/ultracart-errors
doc_type: reference
For a complete listing of UltraCart Errors, please visit: [UltraCart System Messages](#page-not-found)
---
# Check Out message regarding possible bot abuse
https://docs.ultracart.com/account-settings/ultracart-errors/check-out-message-regarding-possible-bot
doc_type: how-to

# Message
During a checkout a warning message was displayed:
"To prevent abuse from automated bots, you must click continue shopping before adding any more products to your cart"
# Reason
This message appears after the checkout has been visited multiple times in a short period of time without updating the cart, giving the appearance of being an automated bot. It's a bot prevention technique used to prevent a bot from taking over the checkout. (Such as adding so many items to the cart as to cause items with inventory tracking to become totally allocated to a single shopping session.
# Solution
Clicking the continue shopping button tells UltraCart that it's a person and not a automated bot.
---
# UltraCart Server Time Zone
https://docs.ultracart.com/account-settings/ultracart-server-time-zone
doc_type: reference
The UltraCart Servers are based on: **Current UTC, [Time Zone (Coordinated Universal Time)](https://www.utctime.net/)**
**This corresponds to EST/DST (America/New York) depending on the [time of the year](https://en.wikipedia.org/wiki/Daylight_saving_time_in_the_Americas#Canada_and_the_United_States).**
[https://www.utctime.net/utc-time-zone-converter](https://www.utctime.net/utc-time-zone-converter)
---
# XML Export Format
https://docs.ultracart.com/account-settings/xml-export-format
doc_type: reference
# XML Export Format
This document provides more details about the XML export format for orders generated by UltraCart.
## Schema Visualization
Below is a picture of the entire schema. Elements shown in dashed lines are optional and may not exist in your XML.
The XSD schema is attached at the bottom of this document and a live copy is here:
[http://secure.ultracart.com/xml/ultracart.xsd](http://secure.ultracart.com/xml/ultracart.xsd)
## Understanding the Nested Structures
The Order XML is a set of nested data structures represented in XML fashion. At a high level you have:
- Order
- Item
- Option
- Lot
- Coupon
- Customer Profile
- Transaction Details
- Transaction Detail
## Locating QuickBooks Accounting Code Related Fields
| Parent Element | Element | Description |
| --- | --- | --- |
| order | gift\_charge\_accounting\_code | QuickBooks code associated with the gift charge fee. |
| order | gift\_wrap\_accounting\_code | QuickBooks code associated with the gift wrap fee. |
| order | surcharge\_accounting\_code | QuickBooks code associated with the surcharge fee. |
| order | shipping\_method\_accounting\_code | QuickBooks code associated with the shipping method. |
| order | payment\_method\_accounting\_code | QuickBooks code associated with the payment method. |
| order | payment\_method\_deposit\_to\_account | QuickBooks deposit to account associated with the payment method. |
| order | tax\_country\_accounting\_code | QuickBooks code associated with the country tax (deepest level code used by UltraBooks) |
| order | tax\_state\_accounting\_code | QuickBooks code associated with the state tax (deepest level code used by UltraBooks) |
| order | tax\_county\_accounting\_code | QuickBooks code associated with the county tax (deepest level code used by UltraBooks) |
| order | tax\_city\_accounting\_code | QuickBooks code associated with the city tax (deepest level code used by UltraBooks) |
| order | tax\_postal\_code\_accounting\_code | QuickBooks code associated with the postal code tax (deepest level code used by UltraBooks) |
| item | accounting\_code | QuickBooks code associated with the item |
| coupon | coupon\_accounting\_code | QuickBooks code associated with the coupon. |
| customer\_profile | qb\_code | QuickBooks customer name to import these orders for the customer profile. |
| customer\_profile | qb\_class | QuickBooks customer class field for the customer profile used on the order. |
## XSD Download
[Click here to download a copy of the XSD](pathname:///confluence/1376307/ultracart.xsd).
---
# Your Preferences
https://docs.ultracart.com/account-settings/your-preferences
doc_type: reference
## Introduction
The **Your Preferences** area in UltraCart allows individual users to customize their account settings, personal information, login credentials, notifications, and navigation experience.
This section is designed to give each user control over how they interact with the UltraCart system—without affecting other users on the account. From updating your profile image to configuring email notifications and reorganizing menu navigation, these settings help tailor the platform to your workflow.
You can access **Your Preferences** by hovering over your **Merchant ID** in the top-left corner of the UltraCart interface and selecting **Your Preferences** from the dropdown menu.
* * *
## Prerequisites
Before accessing or modifying settings in **Your Preferences**, ensure the following:
- You have a valid UltraCart user account and are logged in.
- Your user permissions allow access to the specific sections you want to modify.
- To access or modify **Email Notifications** and certain permission-related settings:
- You must have the **Edit Users** permission enabled.
> **Note:** If you do not have the required permissions, you may see limited options or receive a permission-related message. Contact your account administrator to request access.
* * *
## Accessing Your Preferences

1. Log in to your UltraCart account.
2. Locate your **Merchant ID** in the top-left corner.
3. Hover over the Merchant ID to open the dropdown menu.
4. Click **Your Preferences**.
\[Image Placeholder – Merchant ID dropdown menu\]
* * *
## Your Information
This section stores your personal account details used internally within UltraCart.
- Name
- Email address
- Phone number
This information is not shared with customers but may be used by UltraCart Support if needed.

* * *
## Profile Image
You can configure a profile image that represents you within the system.
- Uses **Gravatar** (linked to your email address), or
- Upload a custom image
> **Note:** Your profile image may be visible to customers during Web Chats.

* * *
## UltraCart Login
Use this section to update your login credentials:
- Username (Login)
- Password
### Password Requirements
- Minimum 8 characters
- At least one uppercase letter
- At least one number

* * *
## Two-Factor Authentication (2FA)
Enhance account security by enabling 2FA.
- Link a mobile device using an OTP serial number
- Works with UltraSecure Codes

* * *
## New FTP Password
Update your FTP password for development or file access purposes.
> **Warning:**
>
> - Your FTP password must be different from your UltraCart login password
>
> - Most users will not need this feature (primarily for developers)
>

* * *
## Email Notifications
Configure which system events trigger email notifications.
Each notification includes two options:
- **Notification Enabled** – Receive an email alert
- **Include Order Details** – Include detailed order data in the email
Examples include:
- Order placed
- Payment processing events
- Shipping notifications
- Reporting alerts
> **Prerequisite:**
> You must have the **Edit Users** permission to access this section.

* * *
## Menu Navigation
Customize your UltraCart menu to match your workflow.
### Available Actions
- **Reorder menu items** using drag-and-drop
- **Hide/show items** using the eye icon
- **Expand submenus** by clicking menu items with arrows
- **Reset menu** to default settings
This allows you to prioritize frequently used areas like:
- Order Management
- Reporting
- Catalog

* * *
## Accessibility

This section lets a merchant user adjust how the backend UI renders for their own login, independent of storefront or checkout appearance.
The first setting in this section is **Enhanced Contrast**, a toggle that strengthens color contrast across the backend interface to improve readability.
* * *
## Sign Out
Mouse over the merchantID that appears above the main menu, then choose **Sign Out** to securely log out of your UltraCart account.

* * *
## FAQ
### Q: Why can’t I see the Email Notifications section?
**A:**
You likely do not have the **Edit Users** permission. This permission is required to view and modify notification settings. Contact your account administrator to request access.
* * *
### Q: Why are some settings missing or disabled?
**A:**
UltraCart uses role-based permissions. If a setting is not visible or editable, your user account may not have the required permissions. Reach out to your administrator to review your access.
* * *
### Q: Will my profile image be visible to customers?
**A:**
Yes. If you use UltraCart Web Chat, your profile image (Gravatar or uploaded image) may be displayed to customers during interactions.
* * *
### Q: Do I need to configure an FTP password?
**A:**
Most users do not. This feature is intended for developers who need FTP access for advanced storefront customization.
* * *
### Q: Can I reset my navigation menu?
**A:**
Yes. Use the **Reset Navigation Menu** option in the Menu Navigation section to restore the default layout.
* * *
### Q: What happens if I don’t meet the password requirements?
**A:**
UltraCart will reject the password update until it meets the minimum security requirements (length, uppercase letter, and number).
* * *
## Conclusion
The **Your Preferences** section provides essential tools for customizing your UltraCart experience at the user level. By configuring your profile, notifications, and navigation, you can streamline your workflow and improve efficiency.
* * *
## Next Steps
- Review your **User Permissions** to ensure full access to needed features
- Configure **Email Notifications** for operational awareness
- Enable **2FA** to improve account security
- Customize your **Navigation Menu** for faster access to key tools
* * *
# Related Documentation
[User Configuration Screen](/account-settings/general-configuration/users/user-configuration-screen)
---
# Zapier Integration
https://docs.ultracart.com/account-settings/zapier-integration
doc_type: explanation
# About
[Zapier](https://zapier.com/sign-up/), an app and data automation tool, moves info between your web apps automatically, so you can focus on your most important work.
:::info
03/10/2020 - The UltraCart integration to Zapier is currently in beta. You can connect to our Zapier integration using our [public invite](https://zapier.com/developer/public-invite/29448/6cb05268760a08e9c88d189554d41430/).
:::
:::info
**Navigation:** Main Menu → Configuration → (Middle menu) Development > Zapier
:::
The current Zapier integration supports triggers for:
- Order Placed
- Order Payment Processed
- Order Shipped
- Order Refund
# Related
[Configuring New Kajabi Integration via Zapier](/guides/ultracart-documentation/tutorials/item-management-tutorials/configuring-new-kajabi-integration-via-z)
---
# Checkout & Payments
https://docs.ultracart.com/checkout-payments
doc_type: explanation
# Checkout & Payments
Checkout configuration, payment methods, and fraud prevention.
:::note
This section is being built out. Guides are moving here from the existing documentation as
the docs are reorganized — see the [restructure roadmap](https://github.com/UltraCart/docs/issues/41).
:::
---
# Abandon Interval
https://docs.ultracart.com/checkout-payments/abandon-interval
doc_type: how-to
# Abandoned Interval
* * *
## Introduction
In e-commerce, customers often add items to their shopping carts but leave without completing a purchase. This is known as an **abandoned cart**. UltraCart provides powerful features to help you manage these abandoned carts and re-engage customers, potentially recovering lost sales.
This feature allows merchants to set the length of time that the shopping cart session cookie will "hold" an item or items if and when a customer abandons the cart, either by navigating away or leaving the cart in an inactive state.
:::note
[Configuration](https://ultracart.atlassian.net/wiki/404?key%3Dmerchant%3Bsearch%3Fq%3D%2Fconfiguration%2FconfigurationMenuLoad.do) → Checkout → [Abandon Interval](https://ultracart.atlassian.net/wiki/404?key%3Dmerchant%3Bsearch%3Fq%3D%2Fconfiguration%2FabandonIntervalLoad.do)
:::
* * *
## Understanding the Abandon Interval
The **Abandon Interval** determines how long an item remains "held" in a customer's shopping cart session after they become inactive. This setting is crucial, especially if you have **Track Inventory** enabled, as items in abandoned carts are subtracted from your available inventory. Setting this value too high can lead to items appearing out of stock even if you have physical inventory on hand.
### Setting the Abandon Interval
To configure the Abandon Interval:
1. Navigate to **Configuration** > **Checkout** > **Abandon Interval**.
2. From the drop-down menu, select the desired length of time for items to be retained in the cart. The default setting is 1 hour. (Minimum 1 hour - Maximum 672 hours)
3. Click the **Save** button.

* * *
## Leveraging an Abandon Cart Flow
An Abandon Cart flow is an effective way to prompt customers to complete abandoned purchases. These emails can include incentives, such as coupons, to encourage customers to return to their carts.
### How Abandon Cart flows Work
Abandon Cart is triggered by customer inactivity in their shopping cart or by closing the session. They are sent after a specified duration of inactivity and can offer a coupon that remains valid.
### Configuring an Abandon Cart Flow
To access the Abandon Cart flow configuration:
1. Navigate to **Main Menu** > **Storefronts** > **Select your host** > **Communications** \> **Flows**.
2. Click on **Flow Library**
3. From the Public Library section select **Example: Abandon Cart** > **Start**

* * *
## Advanced Strategies
Beyond the basic settings, you can use UltraCart's features to enhance your abandoned cart recovery efforts.
### Abandoned Cart Leads
UltraCart provides a report to export information about abandoned carts, which can then be used in third-party marketing systems or for further analysis.
To access the Abandon Lead Report:
1. Navigate to **Operations** > **Reporting** > **Abandon Lead Report**.
If the customer abandons the cart either via the abandon interval or by leaving the checkout, if they have filled in at least their email and email their information will be sent to the Abandon Lead report.
Related Documentation:[Abandon Lead Report](/reports-analytics/reporting/marketing-reports/abandon-lead-report)
* * *
## Conclusion
Effectively managing abandoned carts and utilizing Abandon Cart Flows are crucial strategies for maximizing your sales. By understanding and configuring the Abandon Interval and leveraging the Return Email feature, you can significantly improve your chances of recovering lost revenue and keeping your inventory accurate.
---
# Advertising Sources
https://docs.ultracart.com/checkout-payments/advertising-sources
doc_type: reference
# Introduction
Advertising sources allow you to track how your customers hear about your store. They will indicate the source during the checkout process. Tracking advertising sources is the best way to learn where your advertising dollar is having the most impact.
To begin configuring your advertising sources, navigate to the following page
:::note
[Home](#) → [Configuration](#) → Checkout \[section\] → [Advertising Sources](#)
:::
# Tracking Mechanism
The tracking mechanism allows you to define the behavior of the "How did you hear about us?" option in your checkout.

## Tracking Mechanisms
There are four primary choices for specifying the tracking mechanism's behavior
Do not track advertising sources
If this is selected, the tracking mechanisms are disabled. No further configuration is required.
Allow customers to enter their source in a field
If this option is selected, a blank text box will appear allowing the customer to enter whatever they chose. This is commonly used by merchants who do not want a list of their advertising sources publicly displayed for competitive reasons.
Allow customers to select a source from a list
If this option is selected, customers will be able to choose from a list of pre-configured advertising sources.
Allow customer to select from a list then enter a free form answer
If this option is selected, customers will be able to choose from a list of pre-configured advertising sources. If the customer selects the "Other" option, they are presented with an empty text field in which they may enter whatever text they desire.
## Mechanism Options
There are additional configuration options that can be enabled
Optional for the customer during checkout
If this is selected, then the customer will be able to proceed through the checkout process without specifying an advertising source.
Show for repeat customers with profiles
By default, if you are using customer profiles, UltraCart will not ask a repeat customer for their advertising source. If you want to collect this information from existing customers with each order, activate this option.
Omit other option
If this option is selected, customers will no longer have the option of choosing "Other" as their advertising source.
# Selectable Sources
If you have chosen either **Allow customers to enter their source in a field **or **Allow customer to select from a list then enter a free form answer** as your preferred tracking mechanism, then you will need to specify the allowed values below. You will also be able to specify aliases for each source. These are useful if a customer entered "google.com", and the source name was "Google". Advertising sources are specified on a per-screen-branding-theme basis.

## Adding a New Source
You will need to create the list of selectable advertising sources for each of your screen branding themes. To begin, click the **New Source** button.

Enter a description for in the **Source** text box. Upon initial configuration, you will not have any Unassigned Aliases, so you can ignore this section for now. Press **Save** when you are finished to return to the Selectable Source List screen.
## Assigning Aliases
Occasionally your customers may select the **Other** option when specifying an Advertising Source during checkout, and enter free-form text in the provided text field. In order to track those other entries properly, you will use the Aliases functionality. When a customer enters free-form text that does not match any existing advertising source or alias, it will be added to the Unassigned Aliases window shown on the Edit screen of each of your advertising sources. You will then need to select each advertising source, and configure which aliases apply to which sources. To begin, click on the **Edit** button next to the advertising source.

In the left hand box, UltraCart displays any unassigned aliases that may exist for the current screen branding theme. If you want an unassigned alias to be associated with this advertising source, simply select it in the left hand box, and click the right arrow. Similarly, to remove an assigned alias from this advertising source, select it from the right hand box, and click the left arrow. When you have finished, press the **Save** button. You will need to repeat this process for each advertising source.
# Advertising Source Report
After you've received some orders, you will probably want to run a report to see how your customers are hearing about your store. To run an Advertising Source Report, navigate to the appropriate reporting screen.
:::note
[Home](#) → [Reporting](#) → [Advertising Sources Report](#)
:::

Enter a desired date range, or click on one of the common date ranges, and press **Generate Report**. Depending on the size of your report, and the number of other UltraCart merchants running reports, your report will either be delivered immediately, or scheduled for offline creation. In either case, the report will be delivered as a standard Excel workbook.
---
# Allowed Countries
https://docs.ultracart.com/checkout-payments/allowed-countries
doc_type: reference
# Allowed Countries configuration
Some merchants choose to only serve a set number of countries like the United States, Canada, and Mexico because international shipping is either too complex for their volume or too expensive for the products sold. You can customize which countries are allowed (ie - selectable from the country drop-down field during checkout) by navigating:
:::note
[Home](#) → [Configuration](#) → Checkout \[section\] → [Allowed Countries](#)
:::

The Allowed Countries screen displays a list of countries, each with a checkbox to the left of the country name.
## Allowed Countries (checkbox)
If you wish to allow customers from a specific country to place orders in your online store, check the box next to that country. Only the selected countries in the list will appear in the country drop-down menu selection presented to customers during checkout.
## State Optional (Checkbox)
Some countries do not have a formal state/province, for those countries you can select the "State Optional" checkbox, so that the customer will not be required to enter a State/Province for their location.
**Remember to click the "Save" button when finished updating the Allowed Countries and/or State Optional configuration. **
:::info
Please note that PayPal orders do not enforce state requirements regardless for non-US and Canada addresses.
:::
## State Codes
UltraCart currently supports state code validation for three countrie: U.S, Canada, and Australia.
#### United States
| Name | Abbreviation |
| --- | --- |
| Alabama | AL |
| Alaska | AK |
| American Samoa | AS |
| Arizona | AZ |
| Arkansas | AR |
| California | CA |
| Colorado | CO |
| Connecticut | CT |
| Delaware | DE |
| District of Columbia | DC |
| Federated States of Micronesia | FM |
| Florida | FL |
| Georgia | GA |
| Guam | GU |
| Hawaii | HI |
| Idaho | ID |
| Illinois | IL |
| Indiana | IN |
| Iowa | IA |
| Kansas | KS |
| Kentucky | KY |
| Louisiana | LA |
| Maine | ME |
| Marshall Islands | MH |
| Maryland | MD |
| Massachusetts | MA |
| Michigan | MI |
| Minnesota | MN |
| Mississippi | MS |
| Missouri | MO |
| Montana | MT |
| Nebraska | NE |
| Nevada | NV |
| New Hampshire | NH |
| New Jersey | NJ |
| New Mexico | NM |
| New York | NY |
| North Carolina | NC |
| North Dakota | ND |
| Northern Mariana Islands | MP |
| Ohio | OH |
| Oklahoma | OK |
| Oregon | OR |
| Palau | PW |
| Pennsylvania | PA |
| Puerto Rico | PR |
| Rhode Island | RI |
| South Carolina | SC |
| South Dakota | SD |
| Tennessee | TN |
| Texas | TX |
| Utah | UT |
| Vermont | VT |
| Virgin Islands | VI |
| Virginia | VA |
| Washington | WA |
| West Virginia | WV |
| Wisconsin | WI |
| Wyoming | WY |
| Armed Forces Africa | AE |
| Armed Forces Americas | AA |
| Armed Forces Canada | AE |
| Armed Forces Europe | AE |
| Armed Forces Middle East | AE |
| Armed Forces Pacific | AP |
#### Canada
| Name | Abbreviation |
| --- | --- |
| Alberta | AB |
| British Columbia | BC |
| Manitoba | MB |
| New Brunswick | NB |
| Newfoundland and Labrador | NL |
| Northwest Territories | NT |
| Nova Scotia | NS |
| Nunavut | NU |
| Ontario | ON |
| Prince Edward Island | PE |
| Quebec | QC |
| Saskatchewan | SK |
| Yukon Territory | YT |
#### Australia
| Name | Abbreviation |
| --- | --- |
| Australian Capital Territory | ACT |
| New South Wales | NSW |
| Northern Territory | NT |
| Queensland | QLD |
| South Australia | SA |
| Tasmania | TAS |
| Victoria | VIC |
| Western Australia | WA |
---
# BIN Validation
https://docs.ultracart.com/checkout-payments/bin-validation
doc_type: explanation
BIN Validation
# BIN Validation
UltraCart can utilize a 3rd party service to check if a credit card BIN (the first six digits) is a prepaid credit card. This system does not guarantee to block 100% of the pre-paid cards out. This is a good idea if you're doing a free trial and trying to block pre-paid cards from being used to abuse your offer. Who needs BIN validation?
BIN validation is typically used by merchants who are marketing a free trial offer and/or using a 3rd party affiliate network. By validating the BIN and blocking prepaid/gift cards it will eliminate two potentially huge problems:
- Customers using a gift card to get the free product knowing there is no chance that they can be re-billed when they don't return it.
- Affiliates using gift cards to place fraudulent sales and receive the commissions.
The math on either type of fraud is very simple. If the product costs $5 to manufacturer, $5 to ship, and then $40 of commission to the affiliate then a prepaid/gift card used to obtain the product with no chance of a rebill equates to a $45 loss for the merchant. So if a merchant loses $45 for each fraudulent transaction on their free trial, then as long as they block 1 out of 900 transaction attempts they will break even on the cost of BIN validation. Some UltraCart merchants utilizing external BIN validation have reported it blocking 10-15% of the attempts when they launched their free trial campaign.
## Enabling Bin Validation
Enabling Bin Validation is accomplished in our Fraud Prevention Section.
Navigate:
HOME → CONFIGURATION → CHECKOUT → Fraud Prevention
Scroll down to the Credit Card Rules section. Then locate the "if credit card BIN is" rule. Enter the BIN numbers as demonstrated below. Also set the action desired from the drop down list and the click the "Apply" button.

## Filter BIN Rule to certain store Items
Once you've clicked the "Apply" button the following screen will appear. This screen allows you to add a message that will appear on the order within the Merchant Notes field. The customer will NOT see this information.
You can also set Item Filters on this screen. This forces this rule to only apply to any Item Id you've listed in the box. Leave blank to apply to all items.

## Example of Message to the Customer
Here is an example of what the customer will see if they try to use a card with matching BIN number.

---
# Checkout Text
https://docs.ultracart.com/checkout-payments/checkout-text
doc_type: how-to
## Introduction
The UltraCart checkout process is available in different languages. This feature allows merchants to further tune the checkout by adjusting the text used within the entire checkout process (screens).
## Getting Started
:::note
[Main Menu](#) → [Configuration](#) → (middle menu) Checkout → (advanced View enabled) [Checkout Text](#)
:::
By default, UltraCart has provided translations for English and Spanish. Additional languages (French, German, Italian, Portuguese) will be available, but are listed as beta translations. These translations, while provided by native speakers, have not been as extensively used and tested by our merchants, some are not even finished. However the ability to add your own translation is there as well, so if you don't agree with the translator's interpretation, simply change it. To request access to the additional languages, please contact customer support. (If Support is unaware of the language option, let them know it is in Merchant Properties as: Checkout - Beta Languages)
:::note
Due to internationalization issues with various browsers, UltraCart does **not** recommend utilizing non-roman characters in your translation text, as some browsers will display such characters as a "box" or question mark.
:::

## Editing a Translation
To edit some of the wording (text) for field prompts that appears on checkout screens, click on the "edit" button to the right of the language you have configured for your checkout. The following screen will appear (we've used English for our examples):

For ease of use, all of the strings used in the checkout process are organized according to where and how they are used in the checkout. The **message key** is used to uniquely identify a piece of text in the checkout. Each message key follows this general format
**Section / Type.****Screen / Page.Element**
:::info
Use your browser's Find function to quickly locate the message you want to modify. Modern browsers such as Chrome and Firefox will also search the text within input fields.
:::
If you want to use the default text as a starting point, simply click on the right arrow button (appears as "=>") next to the defaulted text to copy its contents to the right field. Once you have completed your changes, click on **Save** to continue.
:::tip
Given that changes on this text editor screen will make changes that all your customers will see, it's recommended that administrators use caution in granting Permissions to this page.
:::
## How to customize checkout text with new Storefronts?
To make these changes in the Storefronts, navigate:
:::note
[Main Menu](#) → Choose Storefronts host → (in storefronts menu) Themes → (make sure its the active theme) → Locales → eng.default.json
:::
:::info
Transcluded from [Changing Checkout Text](#page-not-found).
:::
---
# Configuration - Checkout Terms
https://docs.ultracart.com/checkout-payments/configuration-checkout-terms
doc_type: reference
# Overview
Checkout Terms provides a method for merchants to specify and display "terms and conditions of the sale". It also displays (and enforces) a checkbox to be displayed to the customer that the customer must select to indicate they agree with the displayed terms in order to complete their checkout.
When this feature is utilized, the terms will appear on the Review screen of the regular checkout (it will also appear for the single page checkout users.)
To configure your checkout terms, navigate to:
:::note
[Home](#) → [Configuration](#) (Checkout section) → [Checkout Terms](#)
:::
# Checkout Terms
You'll see a field in which you can enter the terms to be displayed to the customer during their checkout.

You'll also have a checkbox option that you'll select if the terms are entered into the configuration field in HTML,
which allows you to improve the presentation of the terms by including such things defining the size of the terms,
including a scroll bar (useful for complex terms details.)
:::info
ATTENTION: IF you have multiple storefront hosts (and or the old Screen Branding Themes) there will be a separate configuration section for each configured storefront host and screen branding theme.
:::
# "Global" Terms and "Item" Level Terms
The configuration of the Check Terms as detailed above will apply to all items in your account.
In addi tion to the Global terms you can specify special checkout terms for an item that will be included with the main store terms and conditions in the checkout.
This is a great way to have customers agree to terms for a specific item when purchased, but not have customers see terms about a product they are not purchasing.
You can configure item specific checkout terms by editing an item and navigating to the "Terms" section located in the "Other" tab of the item editor:
:::note
[Home](#) → [Items](#) → Edit item → Other (tab) → Terms
:::

---
# Configuration - Customer Service
https://docs.ultracart.com/checkout-payments/configuration-customer-service
doc_type: how-to
## Introduction
The **Customer Service** configuration controls the contact information displayed to customers throughout your storefront, checkout, and email communications.
UltraCart pre-populates this section using the details provided during account signup. If you need to use alternate branding details—such as a different customer service email, name, or phone number—you can update them here.
This page also supports multi-theme storefronts, rotating gateways, and email template integration.
> **Note:** Customer service settings should be reviewed whenever you add a new _Screen Branding Theme_ or modify your storefront’s contact workflows.
* * *
## Prerequisites
Before updating your customer service configuration:
- You must have administrator-level access or permission to edit **Configuration → Customer Service**.
- If your StoreFront uses **multiple Screen Branding Themes**, confirm which theme’s customer service settings you are editing.
- If you use **Rotating Gateways**, understand that gateway-level customer service settings may override theme-level values in some email reply scenarios.
* * *
## Configuring Customer Service Information
1. Navigate to:
**Home → Configuration → (Checkout tab)→ Customer Service**
2. Locate the **Screen Branding Theme** you want to configure.
Each theme includes its own separate Customer Service section.
3. Enter or update the following fields:
- **Contact Name**
- **Customer Service Email**
- **Customer Service Phone Number**
4. Click **Save** to apply changes.
> **Tip:** When using multiple themes—for example, for separate brands or language variants—ensure each theme’s customer service details reflect the correct brand identity.

* * *
## Screen Branding Themes
If your account includes **multiple Screen Branding Themes**, you will see a dedicated Customer Service configuration block for each one.
This allows each theme to present unique contact information appropriate to its brand or business line.
:::info
Screen Branding Themes has been deprecated.
:::
* * *
## Important Note for Merchants Using Rotating Gateways
:::note
Home: Configuration → (middle menu) Checkout → Payments → ('Credit and Debit Cards' section) Rotating Gateways
:::
If Rotating Gateways are configured, the **Rotating Gateway Editor** includes its own customer service email and phone number configuration fields:

When both the Gateway and Customer Service page specify a value:
- **Email replies** may route to the email address provided in the rotating gateway rather than the theme-level customer service email.
- A notification banner appears at the top of the Customer Service page when rotating gateway data is detected.

* * *
## Routing of Email Replies
When a customer replies to an order notification sent from the default UltraCart from-email address, UltraCart routes the reply using the following logic:
1. **If the order used a Screen Branding Theme with defined customer service info:**
The reply is routed to the theme’s configured email address.
2. **If Rotating Gateways supply customer service contact details:**
Gateway-level settings may take precedence and receive the replies.
> **Note:** To avoid unexpected routing behavior, ensure customer service contact info is consistent across your themes and any rotating gateways.
* * *
## Using Customer Service Data in Email Templates
You can insert customer service contact information into StoreFront Transactional Email Templates using the following Visual Builder elements:
- orderCustomerServiceEmail

- orderCustomerServicePhone

To use these:
1. Go to **StoreFront → Communications → Transactional Emails**.
2. Open the template you wish to edit.
3. Click the pencil icon to open the Visual Builder Editor
4. Open the Hierarchy panel. The default templates will have the customer service details appearing in the ‘Customer Service Panel’

* * *
## Frequently Asked Questions
**Question: What’s is the 'short code' for displaying customer service contact details in transactional emails?**
Answer: In the storefront visual builder editor, the Customer service contact email and phone number are configured using the following Visual Builder elements:
- orderCustomerServiceEmail
- orderCustomerServicePhone
* * *
## Related Documentation
- StoreFront → Communications → [Transactional Emails](/storefronts-themes/storefront-communications/transactional-emails)
- [Rotating Gateway Settings](/checkout-payments/payments/rotating-transaction-gateway)
* * *
## Conclusion
Configuring the Customer Service section ensures your storefront presents consistent, accurate contact information across checkout and all customer-facing communications. For merchants using multiple themes or rotating gateways, reviewing these settings is especially important to ensure correct routing of customer replies.
---
# Digital Delivery
https://docs.ultracart.com/checkout-payments/digital-delivery
doc_type: reference
#
Overview
Some merchants sell digital content that requires downloading. These can take many forms such as; pdf, mp3, mp4, .doc, etc. In UltraCart you can setup your account to automatically provide a way for your customers to download them from you. You will need to assign the document(s) to each item that they correspond to in UltraCart. Since they are all uploaded in the digital library you only need to upload it one time there to use it in multiple items.
:::note
A digital delivery download link only works for a completed order and is never publicly
reachable. If you want a file anyone can download without buying anything, such as a demo or a
trial version, host it in the StoreFront's file system instead. See
[File Manager: Uploading large files](../storefronts-themes/pages-content/file-manager.md#uploading-large-files).
:::
note190918ac-ec6f-40da-bedd-9756286b82e0
**Note: Storage and Bandwidth Fee's Apply to Digital Download Content** UltraCart's digital content delivery system is priced based upon the bandwidth used to deliver the merchandise and the storage associated with the content. Please see the [pricing plans](https://www.ultracart.com/pricing-november-2017/growing-business.html) for the bandwidth and storage fees.
**Note: Storage and Bandwidth Fee's Apply to Digital Download Content** UltraCart's digital content delivery system is priced based upon the bandwidth used to deliver the merchandise and the storage associated with the content. Please see the [pricing plans](https://www.ultracart.com/pricing-november-2017/growing-business.html) for the bandwidth and storage fees.
## Navigation
:::note
[Home](https://secure.ultracart.com/merchant/mainMenu.do) ` →` [Configuration (Checkout)](https://secure.ultracart.com/merchant/configuration/configurationMenuLoad.do) `→` [Digital Delivery (Settings)](https://secure.ultracart.com/merchant/configuration/digitalDeliveryLoad.do)
:::
## General Settings
Here you can configure the specific expiration details of the temporary download links generated for their digital download purchase items. The default settings are 5 download attempts and/or 72 hours from successful payment for their purchase.
View Digital Delivery (Configuration screen)

| Field | Description |
| --- | --- |
| **Download attempts** | The number of download connections before the temporary download link becomes expired. |
| **Link Expiration (In Hours)** | The number of hours the temporary download link lasts. |
| **Accept All Payment Methods** | If you check this box then the customer will be allowed to pay by any of your configured payment methods. (Normally only credit cards and PayPal would be presented, since other payment methods like checks, for example, would require you to manually process for payment in accounts receivables before the download link would be sent to the customer. |
# Item Configuration
Some merchants sell digital content that requires downloading. These can take many forms such as; pdf, mp3, mp4, .doc, etc. In UltraCart you can setup your account to automatically provide a way for your customers to download them from you. You will need to assign the document(s) to each item that they correspond to in UltraCart. Since they are uploaded into the digital library you can link them to multiple items.
:::info
### Configuring item as non shippable
Configuring your digital delivery items with a weight of zero ("0.00") will cause UltraCart to treat the item as a non shippable item.
:::
As you can see from the image below, the configuration tab selected is "Digital Delivery" in the item editor. Please read the section on Digital Library to upload your files ([Upload files](/items-catalog/item-management/digital-items/upload-files)) as you will need to add your media into the library before it is made available as a choice in the Digital Delivery area.
**View of the Digital Delivery tab of the Item Editor**

### Digital Delivery Tab
note69eedbe3-e0ab-46cd-8415-e7213966ca21
**Note: Storage and Bandwidth Fee's Apply to Digital Download Content:** UltraCart's digital content delivery system is priced based upon the bandwidth used to deliver the merchandise and the storage associated with the content. Please see the pricing plans for the bandwidth and storage fees.
**Note: Storage and Bandwidth Fee's Apply to Digital Download Content:** UltraCart's digital content delivery system is priced based upon the bandwidth used to deliver the merchandise and the storage associated with the content. Please see the pricing plans for the bandwidth and storage fees.
For more details regarding the Digital Delivery tab of the item editor, see
[Digital Delivery Tab](/items-catalog/item-management/item-editor/digital-delivery-tab)
.
## Digital Delivery Email
:::note
[Home](https://secure.ultracart.com/merchant/mainMenu.do) ` →` [Configuration (Email Notifications)](https://secure.ultracart.com/merchant/configuration/configurationMenuLoad.do) `→` [Email Notifications](https://secure.ultracart.com/merchant/configuration/notificationsApp.do)
:::
You can customize the content of the digital delivery email notification sent to the customer by selecting the "Digital Delivery" template from the drop down menu. This notification is sent out to the customer after the payment for their order has been processed. So orders that go into the "Pre-orders" and "Accounts Receivable" departments will not have sent the digital delivery notification.
## Resetting The Digital Delivery Download Link For An Existing Order
When a customer requests a new download link for their purchase, you can trigger an email to be sent to the customers email address by pulling up their order in the "view all orders (in any stage)" search results, then clicking on the "digital delivery reset" button located in the "Tools" section of action buttons along the left side of the order invoice.
:::note
[Operations](https://ultracart.atlassian.net/wiki/404?key%3Dmerchant%3Bsearch%3Fq%3D%2FmainMenu.do) → [Order Management](https://ultracart.atlassian.net/wiki/404?key%3Dmerchant%3Bsearch%3Fq%3D%2ForderProcessingMenu.do) → [View All Orders (in any stage)](https://ultracart.atlassian.net/wiki/404?key%3Dmerchant%3Bsearch%3Fq%3D%2ForderProcessingMenu.do) → Search Results (viewing order invoice)
:::

note03a73a98-77c8-44b9-99b4-dd2ababac2bb
**Note:** These digital buttons only appear when the order invoice you are reviewing contains one or more items that are configured with digital delivery files in the digital delivery tab of the item editor (with one or more digital files appearing in the "selected files" box.)
**Note:** These digital buttons only appear when the order invoice you are reviewing contains one or more items that are configured with digital delivery files in the digital delivery tab of the item editor (with one or more digital files appearing in the "selected files" box.)
| Button | Description |
| --- | --- |
| Digital Delivery Report | A report of the download attempts for this order. |
| Digital Delivery Reset | Reset the download counters for the order and resend the customer a new download link. |
You can view the digital delivery report to see if any download attempts remain and also see the IP address of the last recorded attempt.
### Sample Digital Delivery Report

### Sample Digital Delivery Reset email

# Related Documentation
[Digital Delivery Tab](/items-catalog/item-management/item-editor/digital-delivery-tab)
[Email Templates - Email Notifications](/account-settings/email-notifications/email-templates-email-notifications)
---
# Fraud Prevention
https://docs.ultracart.com/checkout-payments/fraud-prevention
doc_type: reference
# Fraud Prevention
Credit card fraud is fast growing problem for online merchants. As a merchant, you are liable for every processed credit card transaction even if fraudulent. Fraud can hurt your business in the following ways: lost revenue, wasted productivity, and penalties such as charge backs and higher interchange rates.
The UltraCart fraud prevention system is a set of industry leading rules that will help protect your UltraCart store from potential customer fraud. The fraud prevention system configuration is located at:
:::note
[Home](http://menuhome) → [Configuration (Checkout)](http://menuconfiguration) → [Fraud Prevention](https://ucsupport.ultracart.com/merchant/configuration/fraudApp.do@merchant)
:::
## How it Works
The fraud prevention system utilizes a set of rules that are run against the order before credit card processing takes place. The rules compare the details of the current order and previous transactions to determine if a fraudulent action is taking place. If a rule is broken then the merchant can decide to reject the transaction or send the order to Accounts Receivable for further review.
Rules fall into five different types:
| Rule Type | Description |
| --- | --- |
| Exemption | These rules are the first ones checked by the system. If an order matches these rules then the order is exempted from all other rules. These rules are typically added to exempt your office or call center from the fraud prevention system during the order taking process. |
| Credit Card | These rules focus around checking the credit card for fraud. This includes checks like number of attempts, changing the card, blocking prepaid/gift, etc. |
| Credit Card (Premium) | This rule checks and confirms if Card Type = Prepaid or Gift Card. This is a premium feature ($0.05 per card validated). |
| IP/Subnet | These rules focus on the origination of the order traffic and velocity of the orders originating from a portion of the internet. |
| Address | These rules focus on the addresses on the order and allow merchants to block known fraudsters (establish fraud filter on a fraudulent order) or hold orders for review that have different billing/shipping addresses. |
| Address (Premium) | These rules are a premium feature ($0.01/card validated) |
| Affiliate | These rules attempt to block affiliates from submitting fraudulent orders in an attempt to earn commissions. |
## Configuring Rules
The top section of the page displays all the rules that can be configured on an UltraCart account like the screen shot below.

Notice below that each rule reads like a simple sentence. So if I want to decline transactions over $500 then I would enter the amount, select the desire action from the drop down list and click apply.

After clicking the apply button a popup dialog will appear allowing the configuration of additional options/filters for the rule as shown below.

In this example we have configured a custom decline message to display to the customer and then clicked apply. Other filters include:
- Items - the rule will only execute if the order contains one of these items. For example if you are blocking prepaid/gift cards you would want to filter it down to only the item(s) that represent the free trial.
- Gateway - the rule will only apply if one of the checked rotating transaction gateways is being used.
- Screen Branding - the rule will only apply to the selected screen branding theme.
:::info
When an optional filter is left empty/unchecked then the rule will apply to all of the items, gateways, or screen branding themes accordingly.
:::
After clicking Apply, your new fraud rule will be added.
To view or remove existing fraud rules, click [**Search Existing Fraud Rules**](https://secure.ultracart.com/merchant/configuration/fraudSearchLoad.do) at the top of the Fraud Prevention page. Use the search form to find specific rules, or simply click Search to view all fraud rules set up on your UltraCart account.

### Note Regarding Exemption Rules
:::info
### Adding IP Exemption Rules
When adding an IP Exemption, the dialog window that appears is the same one as is used with adding decline rules. Just go ahead and save that dialog window and the exemption rule will be created.
:::
# Establishing Fraud Filters based on the details of a placed order

When you encounter an order that you deem fraudulent, you can create fraud filters based upon the following order details:
- IP Address Range
- Credit Card XXXX-XXXX-XXXX-0664 (Full credit card will be used for filter)
- Address (Numeric portion of street & Zip Code / Postal Code)
- Email Address

## "If prepaid or gift card"
Note: This Fraud filter rule is provided via a 3rd party service that can determine if the CC number provided by the customer is either a prepaid or gift card. This could be useful in auto filtering customers from auto order "Trial" purchases that are configured with a very small initial purchase price ("pay only shipping today" type offers) as these types of recurring billing can be targets for 'scammers' using cards that have just enough money on the card to pass the initial validation of the trial purchase but not enough to cover the subsequent purchase(s).
:::warning
**PLEASE NOTE THAT THIS SERVICE WILL ACCRUE A $0.01 SERVICE FEE FOR EACH CARD VALIDATED.**
The charge applies to every single CC validated, but there is order caching. So, don't get dinged for multiple authorization attempts on the checkout. For example, if the customer initially entered the wrong billing address causing a decline due to AVS mismatch then, corrected the details and resubmitted the order, the $0.01 fee would be applied only once, not for each authorization attempt.
:::
## Order Handling for flagged orders
The fraud rules have a setting for how to handle the fraudulent checkout/order.

There are four possible choices for fraudulent order handling:
- "**Flag for review**" → Sends the order to the Accounts Receivable and places a note in merchant comments.
- "**Process payment and modify**" → Processes the payment and then modifies the order (i.e. - tagging a value into the custom field)
- "**Process payment and review**" → Processes the payment and then places the order into the Fraud Review order management page.
- "**Decline transaction**" → Gives the customer a decline message at the point of finalizing the order.
## Flag for Review
If you select the flagged for review option then the orders will be sent to:
:::note
[Home](http://menuhome) → [Order Management](https://ucsupport.ultracart.com/merchant/orderProcessingMenu.do@merchant) → [Accounts Receivable](http://docs.ultracart.com/orderprocessing/ar/accountsReceivableListLoad2.do@merchant)
:::
When you bring up the order within Accounts Receivable the merchant notes will contain an automatic note generated by the fraud rule. In the example below the order tripped the rule "If transaction exceeds 25.00, then flag for review". You can see the merchant comments has a note informing the user why the order was sent to the Accounts Receivable department.

:::note
### User Notifications
Make sure that you have configured one or more users to receive the "Process Credit Card Payment" & "Fraud Review" notification located:
[Home](http://menuhome/) → [Configuration](http://menuconfiguration/) → [Users](http://docs.ultracart.com/configuration/userListLoad.do@merchant)

:::
:::note
### Receipt Email
By default the customer will receive a receipt email even if their order is sent to Accounts Receivable for review.
If you want to change this behavior, navigate:
[Home](http://menuhome/) → [Configuration](http://menuconfiguration/) → Email Notifications → [Email Templates](http://docs.ultracart.com/configuration/notificationsApp.do@merchant)
For the receipt template choose the option "Hold Receipt Until Payment Processes". This will cause the receipt email to be held until you successfully process the payment within the Accounts Receivable section.

Visit Email Notifications page at: [Email Templates - Email Notifications](/account-settings/email-notifications/email-templates-email-notifications)
:::
## Best Practices
Wow, there sure is a lot of functionality in the fraud prevention system, but I'm new to fraud prevention so what are the best practices for an initial setup?
| Category | Rule | Recommend Value | Comments |
| --- | --- | --- | --- |
| Exemption | If IP address matches | Enter the IP address for your office and/or call center | If you don't know what you IP address is then go to [http://www.ipchicken.com](http://www.ipchicken.com) and it will tell you your IP address. |
| Exemption | If Customer logged into profile with pricing tier | | You typically don't want to block your B2B customers with profiles for any reason. |
| Credit Card | If single transaction exceeds | 2X average sale = flag for review, 4X average sale = decline | Make sure fraudsters aren't using your store to test the maximum card limits. |
| Credit Card | If user _changes_ credit card number this many times for attempted transactions | 4 | Make sure fraudsters aren't testing a bunch of cards on your account to find valid ones. |
| Credit Card | If prepaid or gift card _(Note: This is a 3rd party service and will cost you $0.05/card validated)_ | | Use this rule on your free trial items. See this [blog post for the importance of this rule](https://ultracart.atlassian.net/wiki/pages/viewpage.action?pageId=4194349). |
| IP/Subnet | If weekly attempted transaction count for IP Subnet Exceeds | 10 | Prevent fishing attempts from the same IP addresses. |
| Address | If fraud score exceeds | 5 = Flag For Review | This is our legacy fraud prevention system which uses a 3rd party and provides a good holistic check of the order. |
| Address | If billing address does not match shipping | Flag for Review | Use this if you have high value products and strict AVS checking configured on your credit card rules. |
| Affiliate | If affiliate generates multiple sales with the same IP address within one week | | The same IP rarely should be generating multiple sales. You must be using the UltraCart affiliate system for this rule to work. |
## Reporting
UltraCart collects statistics of how each rule performs on a daily basis. To access the report go to:
:::note
[Home](http://menuhome) → [Reporting](http://docs.ultracart.com/report/reportMenuLoad.do@merchant) → [Fraud Rule Statistics Report](http://docs.ultracart.com/report/fraudRuleStatReportLoad.do@merchant)
:::
The report is easy to run. Just pick a date range as shown below. There are quick selectors on the right to make things easy.

The report that opens is an Excel spreadsheet as shown below.

For each rule there is a column by date of the number of times the rule was checked, # of declines (or exemptions), # of passes, and percentages. The far right column of the spreadsheet will summarize the information for the date range. In this example spreadsheet we can see that the rule to block prepaid/gift cards on our free trial blocked 3.85% of the transactions for the time period.
## Frequently Asked Questions
### Q: What message does the customer receive when they trip a fraud filter?
A: If the fraud rule is set to decline and you did not enter an optional customer message than the message "Your payment has been declined. Make sure the billing address matches the location that the credit card statement is mailed. Please verify the information and try again." is returned to the customer.
### Q: Will the customer receive a receipt if the order is held for review?
A: See the Flag For Review section above which covers this. There are options on the email notification configuration that you can adjust.
### Q: I have [linked](/account-settings/tutorials/linking-multiple-accounts) multiple UltraCart Accounts together, if I link a new account, will the existing fraud rules apply?
A: Yes, the existing fraud rules be auto populated to newly [linked accounts](/account-settings/tutorials/linking-multiple-accounts).
### Q: Can I block an email domain, so that orders are not placed from a free email provider?
A: Yes, simply add an email rule where the email is \*@thedomain.com. This would then allow you to decline, or send any order into A/R with said email address.
### Q: How is the Fraud Prevention fraud score calculated?
A: MaxMind's fraud score is a proprietary composite value derived from machine learning models and heuristics. Unfortunately, there is no direct breakdown of how each individual factor contributes to the overall score (e.g., weighting of Distance vs. Proxy Score), as this is not provided by MaxMind to maintain the integrity of their models. However, the detailed checks allow you to inspect the raw indicators that influenced the score. Pay attention to the Proxy detection checks and the ‘Ship Forwarder = True’ and ‘Email Carder = True’, as these indicators usually trigger a fraud review.
---
# Credit Card Fraud Prevention Best Practices
https://docs.ultracart.com/checkout-payments/fraud-prevention/credit-card-fraud-prevention-best-practi
doc_type: explanation
# About
Credit card fraud remains a significant challenge for online merchants, particularly in the United States. In 2023, consumers reported losing more than $10 billion to fraud, marking a 14% increase over reported losses in 2022 \[[Federal Trade Commission](https://www.ftc.gov/news-events/news/press-releases/2024/02/nationwide-fraud-losses-top-10-billion-2023-ftc-steps-efforts-protect-public)\]. Specifically, credit card fraud was the most reported type of identity theft in 2023, with 416,582 reports made to the Federal Trade Commission (FTC) \[[Upgraded Points](https://upgradedpoints.com/credit-cards/credit-card-fraud-and-id-theft-statistics/)\].
The United States continues to be the most credit fraud-prone country globally, accounting for 46% of global credit card fraud losses \[[Merchant Cost Consulting](https://merchantcostconsulting.com/lower-credit-card-processing-fees/credit-card-fraud-statistics/)\]. This disproportionate share underscores the heightened risk faced by U.S. merchants and consumers.
The financial impact of credit card fraud is projected to escalate, with global losses expected to reach $43.47 billion by 2028. \[[Techopedia](https://www.techopedia.com/credit-card-fraud-statistics)\] This trend highlights the critical importance of implementing robust fraud prevention measures.
Failing to address credit card fraud can lead to substantial financial losses, damage to brand reputation, and erosion of customer trust. Merchants may also face increased operational costs due to chargebacks and fraud-related disputes. Moreover, businesses that do not prioritize fraud mitigation may become more attractive targets for cybercriminals, further exacerbating the problem.
# Best Practices
Here are some best practices for merchants to prevent credit card fraud:
- Use the Address Verification System (AVS) to verify billing addresses.
- Require card security codes such as CVC2 and CVV2 for every purchase.
- Enable [3D Secure 2.0](/checkout-payments/payments/paay-co-3ds-2-0-psd2), via Paay.co
- Maintain PCI compliance across all your point-of-sale (POS) systems.
- Consider integrating [IPQualityScore](https://www.ipqualityscore.com/)
- Consider integrating [Kount](/account-settings/external-integrations/kount)
- Consider integrating [Eye4Fraud](/account-settings/external-integrations/eye4fraud)
- Employ as many of the rules that are applicable in the UltraCart [Fraud Prevention](/checkout-payments/fraud-prevention) configuration page.
(\*Use the ‘**Process Payment and Review**’ action for these rules where possible.)
**\*** Some suggested rules (for complete rules available see: [Fraud Prevention](/checkout-payments/fraud-prevention) :
- In ‘Address Rules (Premium)' section: ‘**If fraud score exceeds \_\_**’
- In 'Address Rules' section: ‘**If billing address does not match shipping**’
- In ‘Payment Rules’ section: ‘**If user changes credit card number this many times for attempted transactions \_\_**’
- In ‘IP/Subnet Rules’ section: ‘**If IP country does not match bill to/ship to country**’
---
# Disable Fraud Scoring
https://docs.ultracart.com/checkout-payments/fraud-prevention/disable-fraud-scoring
doc_type: how-to
If you would like to disable the fraud scoring feature which is now a premium feature, follow these simple steps.
First click on the Configuration menu on the left of your account.

Now click on the checkout section as shown below.

Now click on Fraud Prevention as shown below.

Scroll to the bottom of the page and click delete for the rule that starts with "If fraud score exceeds..."

---
# Preventing Carding Attack
https://docs.ultracart.com/checkout-payments/fraud-prevention/preventing-carding-attack
doc_type: how-to
# What is a Carding Attack?
Carding is a financial attack where individual take stolen credit cards or pre-paid cards and test them for validity before selling them to other people. The industry referrers to people that perform these attacks as “carders”. Most people will cancel their credit card quickly after losing their wallet so the testing aspect of carding is one of the most important things for a thief to do.
More details on carding can be found in this [Investopedia article](https://www.investopedia.com/terms/c/carding.asp).
# The Problem with Carding Attacks
The major problem with allowing a carding attack against your site is the per-transaction fees that your financial institution charges when a credit card transaction is attempted. An ounce of prevention is far easier than having to work with your financial institution after suffering a carding attack.
Some payment processors, such as PayPal, have their own mitigation systems in place to prevent carding attacks, but it often amounts to temporarily shutting down your payment processing until the attack passes or can be mitigated upstream. This can cause a merchant to suffer the loss of real sales if not addressed quickly.
# Blocking a Carding Attack
The simplest way to block a carding attack is to limit the number of transaction attempts allowed per IP address using the [Fraud Prevention](/checkout-payments/fraud-prevention) system. First navigate to Configuration → Checkout → Fraud Prevention
Scroll down to the IP/Subnet Rules section of the page as shown below.

We recommend that you configure daily and weekly attempt thresholds by IP. The rules would be:
- If daily **attempted** transaction count for IP **address** exceed **5** then **Flag For Review**.
- If weekly **attempted** transaction count for IP **address** exceed **10** then **Flag For Review**.
If you choose **Flag For Review**, the transactions will go to Accounts Receivable with notes about the fraud rule being tripped. Merchants can review those transactions in case some are legitimate.
If you choose **Decline**, the carder will be told all the transaction attempts were declined without being given the valuable feedback that the decline came from the financial institution.
# Exempting IP Address
If you have a call center that is placing a lot of orders for customers by driving your checkout, make sure you exempt their IP address using the exemption filters available at the top of the fraud prevention section.

---
# Free Promotional Item
https://docs.ultracart.com/checkout-payments/free-promotional-item
doc_type: how-to
# Free Promotional Item
## Overview
The free promotional item feature allows you to give a customer a free item when they purchase a certain size order.
This feature makes it easy to run promotions without giving a customer a coupon. Simply specify the minimum subtotal and the item ID that they receive free at that price point. Please note that customer only receives one level of items. A level can have more than one item given away free by separating multiple item ids with commas. **Removable** allows the customer to remove the free item. Once removed, it will not be automatically added again.
Every promotion can also carry an optional start and end date, so you can schedule one ahead of time or retire it on a set day. See [Start and End Dates](#start-and-end-dates).
:::note
[Home](https://secure.ultracart.com/merchant/mainMenu.do) → [Configuration (Checkout)](https://secure.ultracart.com/merchant/configuration/configurationMenuLoad.do) → [Free Promotional Item](https://secure.ultracart.com/merchant/configuration/freePromotionLoad.do)
:::

## Global and Storefront Specific Configuration
Use the Drop-down List to switch between global and storefront specific configuration of Free Promotional Items.
:::info
**Be Aware of Duplicate Item Configuration**
**Please Note: **If you configure a free promotional item in the global and also at the storefront level, both will appear for the storefront. So, make sure to verify that you do not accidentally have duplicates configured, as they will appear in the checkout for the storefront(s).
:::
## By Subtotal
Simply specify the minimum subtotal and the item ID that they receive free at that price point. Please note that customer only receives one level of items. A level can have more than one item given away free by separating multiple item ids with commas.

Simply specify the minimum subtotal and the item ID that they receive free at that price point. Please note that the customer receives only one free item. Click the "Save" button when finished.
:::info
A level can have more than one item given away free by separating multiple item ids with commas.
:::
### Removable
Removable allows the customer to remove the free item.
\*Once removed, it will not be automatically added again.
## By Required Item
Alternatively you can give your customer a free promotional item when they purchase a specific item. The required item id field does support **\*** as a wildcard character. For example if you wanted to give away a BALLCAP each time they purchase any item that starts with MEMBERSHIP then you would enter MEMBERSHIP\*, BALLCAP, and match quantity box.

Specify the "**Required Item**" that triggers the inclusion of the **free promo "Item ID(s)**".
### Match Quantity
Checking the box under Match Quantity allows you to specify that for each of the required item that is in the customer's cart they will receive a Free Promotional Item. So if your customer has 3 T-Shirts in their cart and the Free Promotional Item was a hat, they would receive 3 hats with their order. If you do not specify match quantity it will default to 1 free promotional item regardless of the number of Required Item Ids they have in their cart.
### Removable
Removable allows the customer to remove the free item.
\*Once removed, it will not be automatically added again.
## Start and End Dates
Both the subtotal table and the required item table have optional **Start Date** and **End Date** columns. Use them to schedule a promotion ahead of time, or to retire one on a set day instead of remembering to come back and delete it.
Leave both blank and the promotion runs indefinitely. Promotions you configured before these columns existed have no dates set, so they keep running exactly as they did.
The two dates are independent. Set only a start date to launch a promotion on a future day and leave it running, or set only an end date to retire a promotion that is already live.
| Field | Format | Blank means |
|---|---|---|
| Start Date | `MM/DD/YYYY` | The promotion has already started |
| End Date | `MM/DD/YYYY` | The promotion never ends |
Dates apply per row, so one storefront can run several promotions on different schedules.
### How the dates are interpreted
Both dates are inclusive, and both run on Eastern time to match the rest of your UltraCart account. A promotion with an end date of `09/30/2025` still applies for all of September 30 and stops at the end of that day.
### What happens outside the window
A promotion that has not started yet, or whose end date has passed, is skipped. Its free item is not added to carts. If a customer already has the free item in their cart when the promotion ends, UltraCart removes it the next time the cart is evaluated, so a customer who is partway through checkout on the final day can see the free item come off their order.
An expired promotion stays configured rather than deleting itself. To run it again, clear the end date or enter a new one.
Note: You can exclude items from counting towards a free promotional offer by checking the "Exclude from Free Promotion" checkbox on the first tab of the item editor.
**Remember to click the "Save" button when finished making changes.**
## Order Placement via the B.E.O.E.
:::warning
BEOE -
If you are running into a issue were an item is being removed from the BEOE when the cost is set to zero, the cause of this is that the item is configured as a Free Promotional item. When free promotional items are added to the BEOE and set to a unit cost of zero. The BEOE views this as a free promotional item and is removed from the cart because the other conditions are not met. The solution for this setup a kit of that item and use that kit item for actual orders if you need to set the price to zero sometimes with the BEOE.
:::
## Exclude Items From Free Promotional Item (Item Editor setting)
You can exclude items from counting towards the Free Promotional Item configuration by editing the item and selecting the "Exclude from Free Promo" checkbox field on the first tab of the item editor:

## Exclude From Pricing Tier Customers
Most likely you'll only want to offer the free promotional items to your retail customers. So, if you have configured Pricing Tiers for setting up wholesale customers, you can select the "Exclude from Free Promotion" checkbox within the Pricing Tiers editor, to exclude the from promotional offerings from purchases where the customer is placing their order using a customer profile that has been assigned a pricing tier.
**Navigate**
:::note
[Home](https://secure.ultracart.com/merchant/mainMenu.do) → [Configuration (Checkout)](https://secure.ultracart.com/merchant/configuration/configurationMenuLoad.do) → [Items](http://docs.ultracart.com/configuration/pricingtier/pricingTierListLoad.do)
:::

## Frequently Asked Questions
### Question: What is the limitation with automatic promotional item removal?
Answer: UltraCart evaluates Free Promotional Item threshold conditions when items are **added** to the cart. It does not re-evaluate when items are removed or quantities are reduced. If the cart subtotal drops below the qualifying threshold after the promotional item has already been added, the promotional item remains in the cart.
There is no native setting to change this behavior. The **Removable** option controls only whether the customer can manually remove the item. It has no effect on automatic threshold re-evaluation.
### Question: What workaround can merchants use?
Answer: For merchants using SinglePage Checkout or a custom StoreFront, implement a JavaScript cart-change listener to handle removal:
1. Listen for quantity-change and item-remove events on the cart.
2. After each change, recalculate the cart subtotal excluding the promotional item.
3. If the subtotal is below the threshold, call the cart update API to remove the promotional item by item ID.
4. If the subtotal recovers to or above the threshold, the native auto-add logic will re-insert the item on the next qualifying cart operation, with no additional handling required.
> **Note:** The specific API calls and event hooks depend on your checkout type. Contact UltraCart support for implementation guidance.
---
# Gift Giving
https://docs.ultracart.com/checkout-payments/gift-giving
doc_type: reference
# Overview
The gift giving feature allows customers to enter a Gift Message during checkout. This action signifies that the purchase is a Gift and therefore predetermined handling fees may be added to the total cost.
During configuration, merchants can enable Gift Giving, set a 'base fee gift' charge and/or a 'per item gift charge' and establish a maximum gift message length. Some merchants may want to charge a per item fee.
Enter the amount in the box provided. If both the base fee and per item fee are configured, UltraCart will combine the two and show the total as one handling charge during checkout.
**Navigate**
:::note
[Home](#) → [Configuration (Checkout)](#) → [Gift Giving](https://secure.ultracart.com/merchant/configuration/giftSettingsLoad.do)
:::

| Field Name | Description |
| --- | --- |
| **Allow Gift Giving** | When Checked, Gift Giving will be enabled in the standard checkout. :::info Please Note: Gift Giving is not supported in Single Page Checkout. ::: |
| **Gift Charge (Base Fee)** | If configured, will apply a fee for gift giving to the order . Enter in standard 2 decimal space format (Example: to apply a $2 fee enter: 2.00 ) |
| **Gift Charge (Per Item Fee)** | If configured, will apply a gift giving fee per item in the order. Enter in standard 2 decimal space format (Example: to apply a fifty cent fee enter: .50 ) |
| **Maximum Gift Message Length** | If configured, limits the purchaser's gift message to the specified number of characters. |
| **Skip gift receipt** | If configured, will suppress the [gift receipt email notification](/account-settings/email-notifications) from being sent. |
| **QuickBooks Code** | If you've configured [UltraBooks](/account-settings/desktop-software/ultrabooks) for downloading of orders from UltraCart into QuickBooks, configure the [QuickBooks code](/account-settings/desktop-software/ultrabooks) here. |
| **Make sure you hit the  button to save your changes.** ## Gift Message Field in Checkout Once gift giving is enabled, a Gift Message text box will appear on the Shipping (checkout) screen along with the fees that you configure (see screen shot below).  ## Wrapping Paper UltraCart allows merchants to configure a set of wrapping papers that customers can choose during the checkout process. Merchants can offer gift giving with or without wrapping services. Merchants upload thumbnail pictures of their wrapping paper to UltraCart which will be displayed during checkout. Fees, base and per item, can also be configured for each wrapping paper.  ### New Wrapping Paper Editor  | Field Name |
 Decription |
| --- | --- |
| Thumbnail Picture | Use this file browsing button to browser your computer drive to locate and upload an image representing the wrapping paper. |
| Title | This is the label displayed to the customer for the wrapping paper selection. |
| Cost (Base Fee) | If configured, applies the specified fee to the customers purchase. Enter in standard 2 decimal space format (Example: to apply a $2 fee enter: 2.00 ) |
| Cost (Per Item Fee) | If configured, applies the fee for each item in the order. Enter in standard 2 decimal space format (Example: to apply a fifty cent fee enter: .50 ) |
| QuickBooks Code | If you've configured [UltraBooks](/account-settings/desktop-software/ultrabooks) for downloading of orders from UltraCart into QuickBooks, configure the [QuickBooks code](/account-settings/desktop-software/ultrabooks) . |
| FulFillment SKU | If configured passes the SKU to Sprocket Express. :::info **FOR SPROCKET EXPRESS FULFILLMENT USERS ONLY!** ::: |
### Changing the Wrapping Paper
Click the Edit button to the right of the wallpaper image to make changes. The edit screen will appear. Make changes as necessary and click on the "Save" button.
:::info
PLEASE NOTE: Fulfillment houses may not support gift messages or gift wrap options. So, if you have a fulfillment service configured in the transmission mechanism section of the Distribution Center(s) on your account, it is important to check with them to verify whether or not they support these options before configuring this feature.
:::

## **Checkout Process with Gift Wrapping**
Allowing customers to give gifts and/or choose wrapping will add the Gift and Wrapping Paper section to the shipping screen during the checkout process. In addition to entering their shipping information, customers have the opportunity to enter a gift (text) message that will appear on the packing slip for the recipient to read, and select a wrapping paper (if configured) if desired. A typical gift screen during the checkout would look like the following sample.
If and when a customer indicates the order is a gift, then the checkbox to specify "use my shipping address as my billing address" will not appear. Typically, people that order gifts will have them drop shipped to the recipients address so both billing and shipping screens will eventually be shown during checkout.

## Packing Slips
Since UltraCart has the ability to print packing slips, it takes into account that gift orders should not contain pricing information on the gift packing slip.
**UltraCart will print two separate packing slips (one that can be mailed back to the purchaser and one that is included with the gift).
**Part of the gift charge specified earlier can cover the additional postage required to mail the purchaser a packing slip, when the order ships (if the merchant wishes to provide this notification).
**
**
---
# Minimum Amount
https://docs.ultracart.com/checkout-payments/minimum-amount
doc_type: reference
# Overview
This feature is useful for merchants that sell a lot of inexpensive products. By setting a minimum order subtotal or minimum item count requirement, a merchant can ensure that the profit margin on the order will be enough to cover transaction fees, etc.
Minimum Amount Configuration allows you to enforce checkout restrictions based on the following criteria:
- Minimum Item Count
- Minimum Subtotal
**Navigation**
:::note
[Home](#) → [Configuration (Checkout)](#) → [Minimum Amount](#)
:::

For example, you can enter a minimum item count of 10 with a minimum subtotal amount of $10.00. Click the "Save" button when finished.
:::info
A merchant can enter a minimum for either field or you can leave blank if it does not apply to your cart requirements.
:::
---
# Multi Currency
https://docs.ultracart.com/checkout-payments/multi-currency
doc_type: reference
# Multi-Currency Configuration page
Multi-Currency configuration allows the customer to change their shopping cart into their native currency via a hyperlink displayed in the shopping cart table.
**Navigation**
:::note
[Home](https://ultracart.atlassian.net/wiki/404?key%3Dmerchant%3Bsearch%3Fq%3D%2FmainMenu.do) → [Configuration](https://ultracart.atlassian.net/wiki/404?key%3Dmerchant%3Bsearch%3Fq%3D%2Fconfiguration%2FconfigurationMenuLoad.do)(checkout) → (Choose: "Advanced View")[Multi-Currency](https://ultracart.atlassian.net/wiki/404?key%3Dmerchant%3Bsearch%3Fq%3D%2Fconfiguration%2FmultiCurrencyLoad.do)
:::

:::info
We recommend merchants changing their base currency from USD to fully test it out against your gateway.
- Your payment gateway must support the base currency if it is not USD.
- You are responsible for performing complete end to end testing of your e-Commerce store to make sure everything works properly with a non-USD base currency before going live!
- Some features inside UltraCart may still display a dollar sign even after you change your base currency to a Non-USD setting.
:::
## Base Currency Code
The Base Currency Code is the default currency used in the display of your shopping cart.
There are presently 13 available currencies:
1. AUD
2. CAD
3. CHF
4. EUR
5. GBP
6. JPY
7. MXN
8. NZD
9. RUB
10. SGD
11. TRY
12. USD
13. BRL
## Allow Customer Selectable Currency
Selecting the **Allow Customer Selectable Currency** check box will add to the shopping cart a drop down list that will allow the customer to change the currency to any of the other available currencies.

## Enable Item Level Currency
When this checkbox is selected, the item editor will have a drop down box to select the currency to be assigned to the item. The drop down menu field will appear to the right of the cost field.

### Using the CurrencyCode parameter on buy links and buy forms
:::info
**Using CurrencyCode on buy links/ buy form code**
You can also manually assign a currency code via the "CurrencyCode" parameter.
Example on a buy link URL assigning the Australian dollar "AUD":
[http://secure.ultracart.com/cgi-bin/UCEditor?merchantId=DEMO&ADD=BONE&CurrencyCode=AUD](http://secure.ultracart.com/cgi-bin/UCEditor?merchantId=DEMO&ADD=BONE&CurrencyCode=AUD)
Same example using the buy form code, using a hidden input field:
:::
## Change Cart to Match Currency of First Item
When this checkbox is selected the behavior of the shopping cart will be to use the currency assigned to the first item added to the cart to the rest of the items added to the shopping cart.
:::info
**The Multi-Currency feature is new and is considered Beta.**
Therefore, we recommend merchants changing from USD setting at this time, do so by fully testing it out against your gateway.
- Your payment gateway must support the base currency if it is not USD.
- You are responsible for performing complete end to end testing of your e-Commerce store to make sure everything works properly with a non-USD base currency before going live!
- Some features inside UltraCart may still display a dollar sign even after you change your base currency to a Non-USD setting.
(The daily currency conversion feed is provided by [XE.com](http://www.xe.com/))
:::
## Impact of Multi Currency on Reporting
:::info
When you set the base currency of your UltraCart account as shown above.
Then no matter what currency the customer chooses to see during the checkout, everything is converted to the base currency for reporting. So if you are selling in USD and your merchant account charges in USD, then your base currency should be USD and your reporting will be USD. Generally speaking the base currency code for the UltraCart account will be whatever your merchant account and financial institution is transacting in.
:::
# Related Documents
[Multicurrency Configuration and Shipping Methods in UltraCart](/checkout-payments/multi-currency/multicurrency-configuration-and-shipping)
---
# Multicurrency Configuration and Shipping Methods in UltraCart
https://docs.ultracart.com/checkout-payments/multi-currency/multicurrency-configuration-and-shipping
doc_type: how-to
# Multicurrency and Shipping Methods
**Last Updated:** June 26, 2026
* * *
## Overview
Shipping method rates in UltraCart do not have an individual currency setting. The currency displayed and charged for shipping and handling is derived from the currency assigned to the cart at checkout. To present shipping costs in a currency other than USD, multicurrency must be enabled at the store level and configured appropriately.
* * *
## How Shipping Currency Is Determined
When a customer reaches checkout, UltraCart determines the active cart currency based on the store's multicurrency configuration. Shipping and handling charges are then presented in that same currency. There is no field within the shipping method editor to set a per-method currency — the shipping rate display currency always follows the cart currency.
* * *
## Enabling Multicurrency
Multicurrency is configured at the store level. To enable it:
1. In the UltraCart merchant backend, navigate to **Configuration > ('Checkout') > Multi-Currency**.
2. Enable the multicurrency feature by selecting either or both of these checkbox settings:
\* ‘**Allow customer selectable currency**’
\* '**Enable Item Level Currency**'
3. Select ‘**Base Currency Code**’ (drop-down list)
:::info
IMPORTANT:
- YOUR PAYMENT GATEWAY MUST SUPPORT THE BASE CURRENCY IF IT IS NOT USD.
- YOU ARE RESPONSIBLE FOR PERFORMING COMPLETE END TO END TESTING OF YOUR E-COMMERCE STORE TO MAKE SURE EVERYTHING WORKS PROPERLY WITH A NON-USD BASE CURRENCY BEFORE GOING LIVE!
- SOME FEATURES INSIDE ULTRACART MAY STILL DISPLAY A DOLLAR SIGN EVEN AFTER YOU CHANGE YOUR BASE CURRENCY TO A NON-USD SETTING.
:::
4. Select ‘**Change Cart to Match Currency of First Item**'
When this checkbox is selected, a customers shopping cart will be automatically assigned the currency of the first item they add to their cart.
5. Save the configuration.
Once enabled, the cart will use the customer's resolved currency, and all charges including shipping will display in that currency.
* * *
## Assigning Currency to Items
With multicurrency enabled, individual items can be assigned a specific currency and price rather than relying on exchange rate conversion. This is useful when you want to set exact EUR prices rather than converting from USD.
To assign a currency to an item:
1. Open the item in the Item Editor.
2. Navigate to the Cost section, below the Item ID, Title and Extended Description fields.
3. If multi-currency is enabled, the Currency selection drop-down list appears directly to the right of the Cost field. Select desired currency for the item:

4. Save the item.
Items without an explicit currency override will have their USD price converted at the configured exchange rate.
> **Note:** Shipping method rates are not subject to per-item currency overrides. Shipping currency is always determined by the cart-level currency setting.
* * *
## Troubleshooting
### Shipping still displays in USD even with multicurrency enabled
**Symptoms:** Checkout shows shipping costs in USD despite multicurrency being active.
**Root Cause:** The cart's active currency may not be resolving to the expected currency. This can happen if the customer's locale or browser settings are not triggering the correct currency selection, or if the multicurrency configuration does not include the target currency.
**Diagnosis:** Confirm the target currency (for example, EUR) is listed and active in Configuration > Multicurrency. Test checkout from a session that should resolve to that currency and inspect the cart currency field.
**Solution:** Ensure the target currency is enabled in the multicurrency configuration and that the currency selection logic (geo-IP, manual selection, or URL parameter) is set up to route the customer to the correct currency.
* * *
## Related Documentation
- Multicurrency Configuration - Full multicurrency setup reference
- Shipping Method Configuration - Creating and managing shipping methods
---
# Order ID Scheme
https://docs.ultracart.com/checkout-payments/order-id-scheme
doc_type: reference
# Order ID Scheme
Order ID Scheme allows you to choose between a Date and Time stamp based scheme and an numeric (incremental) orderID.
### Navigation
:::note
Home → [Configuration (Checkout)](https://secure.ultracart.com/merchant/configuration/configurationMenuLoad.do) → [Order ID Scheme](https://secure.ultracart.com/merchant/configuration/orderIdSchemeLoad.do)
:::

## Order ID Schemes
There are two orderID schemes to choose from: "Date and Time based" and a sequential "Numeric" scheme.
## Date and time based
The date and time based scheme is the default order ID scheme used by UltraCart when you create your account.
DEMO-YYYYMMDDHHMM-RRRRRR
Where DEMO is the Merchant ID, YYYY is the year, MM is the month, DD is the day, HH is the hour, MM is the minute, and RRRRR is a random unique identifier.
The first four digits after the merchant ID and hyphen are the year. the next four digits represent the month and day, and the next four represent the hour (in 24 hour format) and minutes of the day, and the final six digits after the second hyphen are a random number string designed to eliminate duplicate orderID's placed within any given minute.
So a real orderID in the Date and Time based scheme appears like this:
DEMO-201212051603-233424
## Numeric
If you would like to have a sequential order ID scheme then select numeric, enter a starting number, and select the width of the ID (UltraCart will place leading zeroes in front of the number).
The alternate format, numerically increasing, uses your designated starting number then increments upward one for each successful order.

An example numeric order ID with a staring number of one thousand and a width of ten would be: DEMO-0009103113
:::info
- UltraCart recommends selecting a significantly high starting number and a width of at least ten digits. Selecting a low starting number might give customers the indication that the online store has not been around for a long time or does not have a large volume of business.
- Merchants should never reset the starting number lower than an existing order ID or a collision will occur.
:::
### Declined Transactions with Numeric Order Ids
Before UltraCart communicates with your payment gateway, it generates an order ID. For example if might generate DEMO-000012345 as the order ID. The order ID is transmitted to the credit card company in the transaction attempt. If the transaction fails you may see a log of this in the gateway's interface. UltraCart will try not to discard the allocated order ID in most cases. It will reuse it until a successful transaction is placed. This prevents gaps in your order ID sequence.
:::info
While UltraCart will attempt to reuse declined transaction Order IDs, this behavior is not guaranteed due to the distributed architecture of the UltraCart platform. IF another order number was already allocated the next sequential number, then any subsequent orders will start up after that order. Therefore, it is recommended that you do not rely upon the uninterrupted sequential order id property in critical business functions.
:::
---
# Parameters that can be passed to UCEditor
https://docs.ultracart.com/checkout-payments/parameters-that-can-be-passed-to-uceditor
doc_type: reference
# Parameters that can be passed to UCEditor
This document describes the `UCEditor` URL, the primary entry point for integrating your website with the UltraCart shopping cart system.
* * *
## `UCEditor` Overview
The URL `http://secure.ultracart.com/cgi-bin/UCEditor` is the fundamental link between your website and your UltraCart account. It serves two main purposes: displaying the contents of a customer's shopping cart and adding items to it. You can interact with `UCEditor` using either **HTTP GET** or **HTTP POST** requests.
### Why "UCEditor"?
The name `UCEditor` (UltraCart Editor) reflects its original purpose as a "cart editor" over 15 years ago. Despite significant evolution and hundreds of updates to its functionality, the URL remains unchanged due to hundreds of thousands of existing links across the web.
### Common Use Case
In a typical setup, your product display pages will include an "Add to Cart" button. This button is often part of an HTML form that sends data to the `UCEditor` URL, allowing customers to easily add products to their cart.
* * *
## URL Parameters
### `MerchantID` (Required)
This parameter identifies your UltraCart account.
- **Format:** 1-5 character merchant ID
- **Example:** `http://secure.ultracart.com/cgi-bin/UCEditor?MerchantID=DEMO`
### `ADD` (Optional)
This parameter allows you to add a single item to the cart.
- **Format:** The Item ID of the product you wish to add.
- **Example:** `http://secure.ultracart.com/cgi-bin/UCEditor?MerchantID=DEMO&ADD=MyItemID`
## Proper URL for Use with Storefronts
When integrating `UCEditor` with an UltraCart Storefront, you must replace the default `secure.ultracart.com` hostname with your specific storefront's hostname.
For example, if your storefront's domain is `demo.ultracartstore.com`, the `UCEditor` URL would be
`http://demo.ultracartstore.com/cgi-bin/UCEditor`
* * *
## Cart Management Parameters
These parameters control how items are added to or cleared from the cart.
### `ClearCart` (Optional)
When present, `ClearCart=true` will empty the customer's shopping cart of all existing items _before_ processing any new `ADD` parameters or multiple item additions.
- **Example:** `http://demo.ultracartstore.com/cgi-bin/UCEditor?MerchantID=DEMO&ClearCart=true&ADD=NewItem`
### `NewCart` (Optional)
When present, `NewCart=true` will completely reset the customer's shopping session by removing all items and other existing cart information _before_ processing any new `ADD` parameters or multiple item additions. This creates a completely fresh cart.
- **Example:** `http://demo.ultracartstore.com/cgi-bin/UCEditor?MerchantID=DEMO&NewCart=true&ADD=FirstItem`
* * *
## Force to Single Page Checkout
### `SinglePageCheckout` (Optional)
Using `SinglePageCheckout=true` will force the customer's shopping session into the single-page checkout flow, regardless of your store's default checkout configuration.
- **Example:** `http://demo.ultracartstore.com/cgi-bin/UCEditor?MerchantID=DEMO&SinglePageCheckout=true`
:::note
Note: Once a customer's session is forced into the single-page checkout, it cannot be reverted to the multi-page checkout within the same session. SinglePageCheckout=false is not a valid parameter and will have no effect.
:::
## Pre-populating Cart Data From an External Form
You can pre-populate various fields within the UltraCart checkout process by passing specific parameters to the `UCEditor` URL via either an HTTP GET or POST request.
### General Parameters
| Parameter | Notes |
| --- | --- |
| `AdvertisingSource` | Specifies the advertising source associated with the customer's visit or order. This can be used for tracking marketing campaigns or referrals. |
| `AutoOrderSchedule` | Allows you to pre-select a customer-selectable auto-order schedule, enabling recurring shipping options from your site. |
| `Quantity` | The quantity of the item to add to the cart. This parameter is typically paired with the `ADD` parameter (e.g., `ADD=ItemID&Quantity=5`). |
| `CustomField1` | Up to 50 characters maximum. |
| `CustomField2` | Up to 50 characters maximum. |
| `CustomField3` | Up to 50 characters maximum. |
| `CustomField4` | Up to 50 characters maximum. |
| `CustomField5` | Up to 50 characters maximum. |
| `CustomField6` | Up to 50 characters maximum. |
| `CustomField7` | Up to 50 characters maximum. |
| `OptionName#` | Used in pairs with `OptionValue#` to pass item options. For example, to pass two options, you would use `OptionName1`, `OptionValue1`, `OptionName2`, and `OptionValue2`. |
| `OptionValue#` | The value corresponding to the `OptionName#`. |
| `VariationName#` | Similar to `OptionName#` and `OptionValue#`, these parameters are used in pairs with `VariationValue#` to pass item variation values. |
| `VariationValue#` | The value corresponding to the `VariationName#`. |
| `ShippingCheapestMethod` | When present, UltraCart will automatically select the cheapest available shipping method for the order. |
| `ShippingMethod` | Used to force a specific shipping method. The value should be the exact name of the shipping method. For example, to force "INTL FLAT" shipping, use `&ShippingMethod=INTL%20FLAT`. |
| `SinglePageCheckout` | Set to `true` to force the cart into single-page checkout. (Note: This cannot be reverted to multi-page checkout within the same session by setting it to `false`.) |
| `ImmediateFinalize` | Attempts to immediately finalize the order. **Only use this if you are providing all necessary billing, shipping, credit card information, and the cheapest shipping method parameters simultaneously.** |
| `ImmediateThirdPartyHandoff` | Attempts to immediately hand off the browser to a third-party payment processor (e.g., [http://CCBill.com](http://CCBill.com) ). |
| `PayPalExpressCheckout` | Pass `true` to initiate a PayPal Express Checkout session. |
| `UpsellPathCode` | Specifies a particular upsell path that should be displayed to the customer during the checkout process. |
| `ADD_` | Adds a specified quantity of an item to the cart. For example, an input field named `ADD_BONES` with a value of `10` would add 10 units of the item with ID "BONES" to the cart. |
| `REMOVE_` | Removes the specified item ID from the cart if it exists. For example, an input field named `REMOVE_SHIRT` would remove the item with ID "SHIRT". |
### Billing Information Parameters
| Parameter | Description |
| --- | --- |
| `BillingFirstName` | The customer's billing first name. |
| `BillingLastName` | The customer's billing last name. |
| `BillingCompany` | The customer's billing company name. |
| `BillingAddress1` | The first line of the customer's billing address. |
| `BillingAddress2` | The second line of the customer's billing address. |
| `BillingCity` | The customer's billing city. |
| `BillingState` | The customer's billing state or province. |
| `BillingPostalCode` | The customer's billing postal code or zip code. |
| `BillingCountry` | The customer's billing country. |
| `BillingDayPhone` | The customer's billing daytime phone number. |
| `BillingEveningPhone` | The customer's billing evening phone number. |
| `Email` | The customer's primary email address. |
| `CCEmail` | An optional secondary email address for sending copies of order notifications. |
### Shipping Information Parameters
| Parameter | Description |
| --- | --- |
| `ShippingFirstName` | The customer's shipping first name. |
| `ShippingLastName` | The customer's shipping last name. |
| `ShippingCompany` | The customer's shipping company name. |
| `ShippingAddress1` | The first line of the customer's shipping address. |
| `ShippingAddress2` | The second line of the customer's shipping address. |
| `ShippingCity` | The customer's shipping city. |
| `ShippingState` | The customer's shipping state or province. |
| `ShippingPostalCode` | The customer's shipping postal code or zip code. |
| `ShippingCountry` | The customer's shipping country. |
| `ShippingDayPhone` | The customer's shipping daytime phone number. |
| `ShippingResidentialAddress` | Accepts `Yes` or `No` to indicate if the shipping address is residential. |
### Address Copying Logic Parameters
These parameters control how billing and shipping addresses can be copied from one to the other.
| Parameter | Notes |
| --- | --- |
| `BillingSameAsShipping` | Copies the shipping address details to the billing address fields, overwriting any existing billing information. This parameter does not consider other billing-related parameters. |
| `DefaultBillingSameAsShipping` | Copies the shipping address details to the billing address fields, overwriting existing billing information, **unless** `BillingDifferent=true` is also present. |
| `DefaultShippingSameAsBilling` | Copies the billing address details to the shipping address fields, overwriting existing shipping information, **unless** `ShippingDifferent=true` is also present. |
| `BillingDifferent` | This parameter acts as a **cancel action** for `DefaultBillingSameAsShipping`. If `true`, it prevents `DefaultBillingSameAsShipping` from copying the shipping address to billing. It has no effect on its own. |
| `ShippingDifferent` | This parameter acts as a **cancel action** for `DefaultShippingSameAsBilling`. If `true`, it prevents `DefaultShippingSameAsBilling` from copying the billing address to shipping. It has no effect on its own. |
### Credit Card Information Parameters
:::note
Warning: Directly passing raw credit card numbers and CVV2 codes is not recommended due to PCI compliance requirements. UltraCart strongly recommends using Hosted Fields for secure collection of sensitive payment information.
:::
| Parameter | Notes |
| --- | --- |
| `CreditCardType` | The type of credit card (e.g., "Visa", "Mastercard", "American Express", "Discover"). |
| `CreditCardNumberToken` | **Replaces** `CreditCardNumber`. Use this parameter when integrating with UltraCart's Hosted Fields solution for secure card number tokenization. See the [Hosted Fields documentation](https://www.google.com/search?q=link/to/hosted/fields/docs) for details. |
| `CreditCardExpMonth` | The two-digit expiration month of the credit card (e.g., "01" for January, "12" for December). |
| `CreditCardExpYear` | The four-digit expiration year of the credit card (e.g., "2025"). |
| `CreditCardCVV2Token` | **Replaces** `CreditCardNumberCvv2`. Use this parameter when integrating with UltraCart's Hosted Fields solution for secure CVV2 tokenization. See the [Hosted Fields documentation](https://www.google.com/search?q=link/to/hosted/fields/docs) for details. |
| `PaymentType` | Accepts `"Credit Card"`, `"Check"`, or `"eCheck"`. |
### Additional Parameters
| Parameter | Notes |
| --- | --- |
| arbitraryunitcost | allows you to set a cost for the item within a range of valid prices |
| ReferralCode | Must match an actual referral program unless UltraCart support has turned on a flag to allow any arbitrary code to be passed |
| OVERRIDECATALOGURL | URL That the customer is sent to after they have completed the order. This overrides the default behavior of sending them back to whatever the referrer header of the original request indicated. |
| OVERRIDECONTINUESHOPPINGURL | URL that the customer is sent to after they click continue shopping. This overrides the default behavior of sending them back to whatever the referrer header of the original request indicated. |
| ThemeCode | Sets the theme code of the branding to be used during the checkout. This should be used by merchants that have multiple branding themes. Not Applicable for newer merchants on StoreFronts. |
| RtgCode | Sets the specific rotating transaction gateway that should be used to process this order. |
| CurrencyCode | If you have [multi-currency](/checkout-payments/multi-currency) enabled, this parameter sets the specific currency code for the checkout. |
| COUPON | Code of a coupon to add to the cart |
| ClearCoupon | If this parameter is "true" then all coupons on the cart are removed. |
| GiftCertificate | Gift certificate code to apply to the cart. |
| AFFID | Appends Affiliate ID to a buy link. (Note you can also add the also append the Sub-ID) |
| SUBID | Appends a sub-ID to the affiliate which allows for tracking where the link is used (more details [here](/guides/ultracart-documentation/tutorials/affiliate-management-tutorials/allowing-affiliates-to-use-sub-ids) regarding using Sub-ID's with affiliate links) |
| PREFERREDDCCODE | CODE (Where CODE= the Distribution Center Code - This parameter is used with accounts that have multiple distribution centers in order to force an order to use a specific distribution center to the order. |
| SendToUrl | Immediately send the browser to another url after adding the information to the cart. This URL must be one of the permitted ones based upon your UltraCart account merchant profile, catalogs, StoreFronts or SSL certificates. :::info ### SendToUrl - whitelist requirement You must contact support to have them whitelist the host address to which the customer will be sent. Each domain that is used as the target must be white listed by our support staff in order to prevent abuse as an open relay. ::: |
| ImmediateContinueShopping | Immediately send the browser back to the page that clicked the add to cart button. |
| ImmediateCheckout | If specified the customer is forced in to an immediate checkout. |
| LanguageIsoCode | If you are using a multi-lingual StoreFront, you can pass the three letter ISO language code to trigger a specific language. By default StoreFronts will look at the browsers Accept-Language header to determine which language the customer desires so we recommend only passing this if you dealing with a checkout only scenario and and a external single language website. |
| passThru | Any parameter that starts with **passThru** will be carried through to the next page. :::info ### passThru Size Limit The limit is 10kb of passThru parameters. ::: Examples: - &passThruGreen=Red - &passThru\_showWarning=true - &passThruVip=1 :::info The [token](/storefronts-themes/tracking-analytics) for retrieving the passThru value is **\[passthru\]** ::: |
| prop\_= props\_json= | Cart Properties are new features of UltraCart shopping carts and orders. They supplement custom fields by allowing for a nearly unlimited number of custom properties for a cart. They are designed for and accessible only through the UltraCart Rest API. There are two methods for setting cart properties: simple and json. **Simple** add query parameters using the format prop\_=value. Examples: ?merchantId=DEMO&prop\_color=red&prop\_vip=true&prop\_bilbo=baggins **JSON** For a json parameter, create an **array** of CartProperty objects ('name' and 'value'), then url encode it and pass it as the `props_json` parameter. Example: Cart properties of A=Anteater, B=Boar, and C=Cat. JSON (notice this is an array): `[{name:"A", value:"Anteater"},{name:"B", value:"Boar"},{name:"C", value:"Cat"}]` Url encode the above json like this: %5B%7Bname%3A%22A%22%2C+value%3A%22Anteater%22%7D%2C%7Bname%3A%22B%22%2C+value%3A%22Boar%22%7D%2C%7Bname%3A%22C%22%2C+value%3A%22Cat%22%7D%5D The actual parameter should be thus: `/cgi-bin/UCEditor?merchantId=DEMO&props_json=%5B%7Bname%3A%22A%22%2C+value%3A%22Anteater%22%7D%2C%7Bname%3A%22B%22%2C+value%3A%22Boar%22%7D%2C%7Bname%3A%22C%22%2C+value%3A%22Cat%22%7D%5D` Once added, these parameters may be accessed easily through the UltraCart provided SDKs. Here is one such example from our PHP library: [https://github.com/UltraCart/rest\_api\_v2\_sdk\_php/blob/master/lib/models/CartProperty.php](https://github.com/UltraCart/rest_api_v2_sdk_php/blob/master/lib/models/CartProperty.php) and more importantly, once the cart becomes an order, as an order property [https://github.com/UltraCart/rest\_api\_v2\_sdk\_php/blob/master/lib/models/OrderProperty.php](https://github.com/UltraCart/rest_api_v2_sdk_php/blob/master/lib/models/OrderProperty.php) |
### Passing multiple items at once
In certain cases you may wish to create a buy link or buy form that add multiple items, which can be accomplished with adding multiple "add" parameters:
```html/xml
http://secure.ultracart.com/cgi-bin/UCEditor?MerchantID=DEMO&ADD=BONE&ADD=DOG-COLLAR
```
What if you need to be able to include the qty of each item, in the situation above there are only two options, leave the qty out and let the customer adjust the quantity after adding the items to the shopping cart, or including a quantity parameter which would have to be the same for both.
```html/xml
http://secure.ultracart.com/cgi-bin/UCEditor?MerchantID=DEMO&ADD=BONE&ADD=DOG-COLLAR&QUANTITY=3
```
In many situation you may wish to add multiple items to the cart at once but also have the ability to define a separate quantity for each item, To do so, you will use a modify version of the buy link parameters, that uses a underscore to tie together the ADD statement with it's own quantity (this applies to other parameter, such as the OptionName1 and OptionValue1, etc.
The following variation of the previous code example uses this variation, passing three of the item "Bone" (box of bones) and 1 of the color, passing the size and color options:
```html/xml
http://secure.ultracart.com/cgi-bin/UCEditor?MerchantID=DEMO&ADD_BONE=3&ADD_DOG-COLLAR=1&ADD_DOG-COLLAR_OptionName1=SIZE&ADD_DOG-COLLAR_OptionValue1=X-Large&ADD_DOG-COLLAR_OptionName2=COLOR&ADD_DOG-COLLAR_OptionValue2=BLACK
```
* * *
### Using Parameters
There are two main styles of links that merchant's use:
1) View Cart
2) Buy Link (Item)
View Cart - specify MerchantID only
Buy Link - specify MerchantID and ADD parameters.
All the other parameters can be used creatively to produce the checkout experience desired. If you have any questions, please contact UltraCart Support.
In order to make the single page checkout automatically display the calculated shipping options, add this script to the footer edit field:
```html/xml
```
\-------
#### Sample uceditor form code skeleton
```html/xml
```
\-------
Sample uceditor form for adding multiple items at one time. The merchant id is SRVCO and the items are T200SAVINGSKIT and T300SAVINGSKIT :
```html/xml
```
# Related Documentation
[Buy Links](/get-started/managing-items/buy-links)
---
# Passing in continue shopping URL
https://docs.ultracart.com/checkout-payments/parameters-that-can-be-passed-to-uceditor/passing-in-continue-shopping-url
doc_type: how-to
In recent versions of web browsers, if the domain between two URLs is different then Safari (and now Chrome) will not send the full referrer URL. Instead they are sending the just the domain. This change in browser behavior is done to try and limit invasive ad tracking technologies, but it has ramifications for websites using UltraCart in a checkout only method. Merchants will observe the behavior of the continue shopping button always taking the customer back to their home page.
# Automatic Configuration Using JavaScript (Recommended)
The solution to this problem is to programmatically provide the current URL to the UCEditor endpoint using the OVERRIDECONTINUESHOPPINGURL parameter. If you place the following script on your page, it will find all your buy links, view cart links and buy forms and automatically fix them. This script does assume that you have jQuery present on your page.
```js
```
# Manual Configuration for Forms
Let’s say that your existing form HTML looks like this:
```html
```
You would need to modify the code by inserting an additional hidden input that contains the desired continue shopping URL as shown below.
```html
```
# Manual Configuration for Buy/View Cart Links
Assuming that your current buy link looks like:
```
https://secure.ultracart.com/cgi-bin/UCEditor?merchantId=DEMO&ADD=BOOTS
```
and your page URL is:
```
https://www.mysite.com/boots.html
```
You will need to take the URL of your current site and URL encode that value. You can do that with [this site](https://www.urlencoder.org/). The encoded value looks like this:
```
https%3A%2F%2Fwww.mysite.com%2Fboots.html
```
Finally you need to append that to the existing URL as the OVERRIDECONTINUESHOPPINGURL parameter. The final link would look like this:
```
https://secure.ultracart.com/cgi-bin/UCEditor?merchantId=DEMO&ADD=BOOTS&OVERRIDECONTINUESHOPPINGURL=https%3A%2F%2Fwww.mysite.com%2Fboots.html
```
---
# Passive Branding
https://docs.ultracart.com/checkout-payments/passive-branding
doc_type: explanation
Passive Branding adds a "Powered by UltraCart" logo to your shopping cart, providing confidence to your customers that the purchase process will be safe and secure.
:::note
[Home](#) → [Configuration](#) → [Checkout Configuration](/guides/ultracart-documentation/configuration/checkout-configuration) → [Passive Branding](#)
:::

## Passive Branding
Passive branding is the placement of a small **Powered By UltraCart** logo at the bottom of the view cart page and powered by text on other pages. This small logo lets your customers know that your store is powered by UltraCart and gives them confidence that their ordering process will go smoothly. If a customer is curious about UltraCart and clicks on the image, a new browser window will open with information about UltraCart. The customer's shopping experience will be uninterrupted. UltraCart would appreciate it if merchants would leave this setting on.
---
# Payments
https://docs.ultracart.com/checkout-payments/payments
doc_type: reference
:::note
[Home](https://ultracart.atlassian.net/wiki/404?key%3Dmerchant%3Bsearch%3Fq%3D%2FmainMenu.do) → [Configuration (Checkout)](https://ultracart.atlassian.net/wiki/404?key%3Dmerchant%3Bsearch%3Fq%3D%2Fconfiguration%2FconfigurationMenuLoad.do) → [Payments](https://ultracart.atlassian.net/wiki/404?key%3Dmerchant%3Bsearch%3Fq%3D%2Fconfiguration%2Fpayment%2Fmethods2Load.do)
:::
# Introduction
UltraCart provides a flexible and comprehensive set of payment methods to help you accept payments from customers worldwide. This guide covers all configurable payment options available in your UltraCart account, organized by category easy setup and management.
Payment methods are configured in **Configuration → Checkout → Payments**. Each method can be individually enabled or disabled, and many offer advanced settings for restrictions, gateways, and compatibility with third-party services.
If you’re just **getting started** and want to offer the broadest variety of payment methods (credit cards, Apple Pay, Google Pay, PayPal, PayPal Credit, PayPal Fastlane, and more), **we recommend** [**connecting PayPal.**](/checkout-payments/payments/paypal) **PayPal** supports multiple payment types and integrates seamlessly into your checkout process, making transactions quick and easy for your customers.
> **Note:** Some payment methods require third-party integrations (e.g., Stripe, PayPal, Sezzle) and valid credentials. Always review setup requirements and test configurations in a sandbox before going live.
## Prerequisites
- An active UltraCart account with administrative access.
- For gateway-integrated methods (e.g., Stripe, PayPal), valid credentials from the provider.
- Test your configurations in a sandbox environment before going live.
## Sectional Overview
There are five main sections to this page:
| **Section** | **Description** |
| --- | --- |
| PayPal | This is the section for configuring PayPal as a wholistic payment solution. Enable PayPal to allow your customers to checkout using: - Credit and Debit cards - Crypto wallet - Apple Pay - Google Pay - PayPal - PayPal Pay Later - Venmo - PayPal Fastlane. |
| Credit and Debit Cards | This section is where you will configure your payment gateway (Stripe, [http://Authorize.net](http://Authorize.net) , Quickbooks, etc.) to accept credit/debit cards. - Visa - MasterCard - Discover - AMEX - JCB - Diners Club - E-check |
| Stripe | Stripe serves as a primary gateway for cards and alternative payments. Connect Stripe to unlock these methods, which appear under the Stripe section. - **Stripe**: Core Stripe integration for cards and ACH. - **Amazon Pay**: One-click payments for Amazon customers. - **Link**: Stripe's saved payment method for faster checkouts. - **Klarna**: "Buy now, pay later" installments (Europe/U.S.). - **Afterpay/ClearPay**: Short-term interest-free payments (Australia/U.S.). - **Zip**: Flexible payment plans for higher AOV. |
| Sezzle | Connect and enable Sezzle to offer Buy now, pay later to your customers. |
| Advanced Payments | This section contains additional payment types that you may provide to your customers. This section includes the following payment types: - [Affirm](/checkout-payments/payments/affirm-payment-method) - Cash - Cash On Delivery (COD) - Electronic Checks - Insurance - Loan Hero - Money Orders - Paper Checks - Purchase Orders - Quote Requests - Wire Transfers |
# PayPal

PayPal integration allows for quick, secure payments via PayPal accounts, guest checkout, and related services. Connect your PayPal account once, then enable individual options.
- **PayPal**: Standard PayPal payments, including guest checkout.
- **PayPal Pay Later**: Offers "buy now, pay later" financing options at checkout.
- **PayPal Fastlane**: Speeds up checkout for returning PayPal users with one-click.
- **Venmo**: Accepts Venmo payments (U.S. only, via PayPal integration). _\*Preferred by Millennials-GenZ_
- **Apple Pay**: Mobile wallet payments for iOS devices.
- **Google Pay**: Android and web-based wallet payments.
- **Crypto**: Cryptocurrency payments processed through PayPal's crypto service.
> **Note:** PayPal services may incur additional fees; review [PayPal's pricing](https://www.paypal.com/us/business/pricing) for details.
noteada1c5b8-1e29-4fe9-954c-44a8f1beee02
If you’ve already connected your PayPal account and enabled credit and debit card payments in PayPal settings, you’re all set! Customers can enter their card details directly at checkout without logging into PayPal.
If you’ve already connected your PayPal account and enabled credit and debit card payments in PayPal settings, you’re all set! Customers can enter their card details directly at checkout without logging into PayPal.
# Credit and Debit Cards

If you already have a preferred payment gateway or processor (e.g., Stripe, [http://Authorize.net](http://Authorize.net) , QuickBooks Payments), you can configure them in the [**Credit and Debit Cards**](/checkout-payments/payments) section.
| | **Description** |
| --- | --- |
| **Settings** | Click the box to the left of the payment method that you wish to configure. **In almost all cases, there will be additional information to add to complete the configuration.** Once you have completed the required configuration details, click the "Save" button at the bottom of the screen. |
| **Connect Single (Gateway)** | Here you will configure your specific credit card gateway with its configuration credentials. |
| **Connect Multiple (Rotating)** | This is an advanced configuration option which allows you to configure multiple credit card gateways. See: [Rotating Transaction Gateway](/checkout-payments/payments/rotating-transaction-gateway) for more details. |
## Credit and Debit Card Settings

### Credit Card Settings

| Field Name | Description |
| --- | --- |
| Card Type | Displays the credit or debit card brand being configured (American Express, Diners Club, Discover, JCB, Mastercard, Visa). Each row contains settings specific to that card type. |
| Payment method QuickBooks code | Enter the QuickBooks payment method code that should be associated with transactions for this card type when exporting orders to QuickBooks. |
| Payment method QuickBooks deposit to account | Specifies the QuickBooks account where deposits for this card type should be recorded during QuickBooks synchronization. |
| Surcharge QuickBooks code | Defines the QuickBooks payment or surcharge code used when exporting surcharge-related transactions for this card type. |
| Surcharge transaction fee | Enter a fixed surcharge fee amount to apply to transactions processed with this card type. |
| Surcharge transaction percentage | Enter the percentage-based surcharge to apply to transactions processed with this card type. |
| Restrictions | Displays any configured restrictions for the card type. For example, a card type may be restricted from use in specific regions or states. |
| Edit | Opens the restriction configuration window for the selected card type, allowing the merchant to configure or modify usage restrictions. |
#### An Important Note About Surcharge Fees
**Warning:** Credit card surcharges are additional fees added to an order to offset the merchant’s credit card processing costs. While surcharging is legal in many jurisdictions, it is heavily regulated by card network rules, federal law, and state-specific requirements. Merchants should carefully review their merchant account agreement and card brand compliance requirements before enabling surcharges. Many merchant accounts prohibit or strictly limit passing surcharge fees to customers, and violations can result in fines, processing holds, or even termination of the merchant account.
Important restrictions may include:
- Debit and prepaid cards generally cannot be surcharged, even when processed as credit transactions.
- American Express equal-treatment rules can create compliance conflicts with Visa and Mastercard surcharge limitations.
- Some states and territories prohibit or restrict surcharges entirely.
- Card brands impose caps on allowable surcharge percentages and require the fee to not exceed the actual processing cost.
- Visa and Mastercard typically require advance registration and customer disclosure signage before surcharging is implemented.
Due to the complexity of these requirements, merchants should consult both their payment processor and merchant agreement before implementing any surcharge program.
### General Credit Card Transaction Information

### Test Credit Card Configuration

UltraCart allows you to configure payment information that can be used for placing test orders. This is very useful when a store is live,
but orders need to be placed to test new functionality. By using test credit card numbers it removes the hassle of voiding charges on real credit cards.
For more, see the following knowledge base article: [Test Credit Card or Electronic Check Payments](/checkout-payments/payments/test-payments-in-ultracart)
### [http://Paay.co](http://Paay.co) 3DS/PSD2 (Alpha)

**EMV 3DS is a global payment security standard. You can think of it like the chip & pin on your physical credit card, but for card-not-present (CNP) purchases.**
3-D Secure is a protocol that enables card issuers to authenticate consumers, secure purchases, and prevent CNP fraud.
Also referred to as 3DS2, EMV 3DS allows card issuers to authenticate consumers without adding friction to the payment process. Everything happens behind the scenes using risk-based-authentication.
Provides issuers with access to over 150 additional data parameters resulting in a 95% authentication rate
Is optimized for web, mobile, and in-app purchases
Enables Strong Customer Authentication (SCA) so merchants are able to comply with PSD2
The Payment Services Directive 2 is a banking regulation issued in the European Economic Area (EEA) by the European Banking Authority (EBA). PSD2 is an open banking initiative that seeks to improve consumer protection, boost competition, and innovation. The legislation states that merchants must use Strong Customer Authentication (SCA) on e-commerce transactions when the acquirer and the issuer are both in the EEA.
Unlike the frictionless authentication, SCA doesn’t happen behind the scenes. Instead, it requires consumers to verify their identity using two of three elements:
- Something they are (biometric)
- Something they have (phone)
- Something the know (password)
- This is known as two-factor authentication.
PAAY supports SCA by enabling the use of two-factor authentication. Its flexibility allows issuers to set authentication preferences using their preferred risk and regulatory factors. In other words, issuers decide how the customer will be authenticated by using a one-time-passcode, knowledge-based questions, or biometrics.
to learn more about [http://Paay.co](http://Paay.co) , please see [FAQ](https://www.paay.co/faq), [Case Studies](https://www.paay.co/case-studies), & [contact us](https://www.paay.co/contact?hsCtaTracking=018c1365-42cc-4dd1-b7c3-25e836f29376%7C27eb5c02-003b-42d6-9dae-94bc3f648617)
# Stripe

Stripe serves as a primary gateway for cards and alternative payments. Connect Stripe to unlock these methods, which appear under the Stripe section.
- **Stripe**: Core Stripe integration for cards and ACH.
- **Amazon Pay**: One-click payments for Amazon customers.
- **Link**: Stripe's saved payment method for faster checkouts.
- **Klarna**: "Buy now, pay later" installments (Europe/U.S.).
- **Afterpay**: Short-term interest-free payments (Australia/U.S.).
- **Zip**: Flexible payment plans for higher AOV.
> **Prerequisite:** A Stripe account with API keys. Use the **Connect** button to link.
:::note
**Question**: What if I don't have a [gateway](/checkout-payments/payments/paypal/upgrading-the-latest-paypal-payment-proc)?
:::
# Sezzle
Sezzle is a payment method that allows the customer to split their purchase into four equal payments over a period of several weeks. Sezzle assumes all credit risk associated with offering the customer this purchase option.
Learn more about the [Sezzle integration](/checkout-payments/payments/sezzle).

# Advanced Payment Methods

The advanced payment methods are considered "advanced" because they are used in a more limited fashion. This is in part due to the fact that many of these payment options are not based on a real-time validation process like the "Common" Methods. These methods may not be appropriate for many storefronts.
To configure an Advanced Method simply click on the Slider to make it green.
Once you've made your selection and configured any additional details, click the Save button on the bottom of the screen. You will be returned to the "Configuration" screen. (In most cases you'll configure more than one Payment Method.)
The following are brief descriptions of the Advance Methods:
| **Method** | **Notes** |
| --- | --- |
| Affirm | Provides installment payment options, including a 4-payment plan and monthly installments. |
| Cash | Allows cash payments; not recommended for most merchants due to operational challenges. |
| C.O.D | Enables "Cash on Delivery" payments; typically not recommended for most merchants. |
| Coinbase (Deprecated) | Previously supported Bitcoin wallet and exchange service. No longer available due to deprecated API. :::warning ### Deprecated API Coinbase eliminated the Payment API. ::: |
| Electronic Checks | Supports payments via electronic checks; recommended only with a properly configured gateway. |
| Insurance | Specialty payment solution designed for medical industry applications. |
| LoanHero | Custom payment plan tailored for medical financing needs. |
| Money Orders | Adds a money order payment option; not generally recommended for most merchants. |
| Paper Checks | Allows payment via paper checks with configurable "payable to" details. |
| Purchase Orders | Adds a purchase order payment method. Typically for business-to-business transactions. |
| Quotes Requests | Lets customers request a quote instead of completing payment immediately. [Quotes Tutorial](/guides/ultracart-documentation/tutorials/order-management-tutorials/quotes-tutorial) |
| Wire Transfer | Supports direct bank transfers; not typically recommended for most merchants. |
## Payment Restrictions
This feature allows you to place payment restrictions on any particular payment method configured on your account. Learn more about [Payment Restrictions.](/checkout-payments/payments/payment-restrictions)
## Transaction Gateways
### Purpose
Transaction gateways provide Internet based interfaces into the major credit card processing networks like FDC, NDC, Nova, and many more. Transaction gateways are analogous to a retail merchant's point-of-sale terminal.
:::info
**Integrated Gateways**
[Credit Card Processing Transaction Gateway Integration list](/guides/ultracart-documentation/tutorials/payment-gateway-tutorials/configuring-a-payment-gateway-tutorial/credit-card-processing-transaction-gatew)
:::
note5c225761-7aab-4e89-9ec1-806cba02fa4d
**Reasons to Signup with a Gateway**
Even if a merchant has a retail point of sale terminal already, they will still require a transaction gateway, due to PCI regulations that prohibit the exposure of the full credit card number. Since the full credit card number is obfuscated, having an credit card gateway configured with the account is integral to the payment processing of the placed orders. Additional benefit of having an integrated gateway include reduced data entry by keeping merchants from having to reenter order information to process the order. This reduces the time to process orders and removes potential errors from having to retype the order details into another system. In addition, UltraCart also has the ability to process orders in batch in a parallel fashion, which means authorizing even hundreds of orders can be accomplished in a matter of seconds. The Accounts Receivable chapter will cover processing orders with the transaction gateway in more detail.
**Reasons to Signup with a Gateway**
Even if a merchant has a retail point of sale terminal already, they will still require a transaction gateway, due to PCI regulations that prohibit the exposure of the full credit card number. Since the full credit card number is obfuscated, having an credit card gateway configured with the account is integral to the payment processing of the placed orders. Additional benefit of having an integrated gateway include reduced data entry by keeping merchants from having to reenter order information to process the order. This reduces the time to process orders and removes potential errors from having to retype the order details into another system. In addition, UltraCart also has the ability to process orders in batch in a parallel fashion, which means authorizing even hundreds of orders can be accomplished in a matter of seconds. The Accounts Receivable chapter will cover processing orders with the transaction gateway in more detail.
notea6c2d8ce-bcee-4cbb-a078-428eef790072
**Credit Card processing Gateway Credentials**
The credentials will be provided to you by the gateway, or you will log into the account to generate the configuration credentials that you'll configure in Ultracart.
**Credit Card processing Gateway Credentials**
The credentials will be provided to you by the gateway, or you will log into the account to generate the configuration credentials that you'll configure in Ultracart.
### View of Gateways Configuration page
To set up and configure your transaction gateway, click the **Connect Single** button in the Credit and Debit Cards block. This will direct you to a page displaying the available payment gateways along with their configuration requirements.
.gif)
#### Transaction Gateway Authorization Model
The "Authorization Model" refers to how the credit card authorization transaction are handled.

There are three "Authorization Model" options:
| **Authorization Model** | **Description** |
| --- | --- |
| **Auth and Capture** | means that both authorization and flagging for settlement occur in one transaction, in real-time. :::tip This is the default setting and the appropriate authorization model for most merchants. ::: |
| **Auth then Capture** | means an AUTH transaction (real time) followed by a delayed CAPTURE transaction for settlement, which will occur when the order is marked as shipping in the shipping department. :::info non shippable items will be processed in Auth and Capture mode. ::: |
| **Auth Only** | means the transactions simply are authorizing for checking the validity of the card and available credit for the payment transaction. :::note These transactions are NOT flagged for capture of payment. This model is not recommended fro the vast majority of merchants. ::: |
### Supported Gateways
Currently UltraCart supports over 35 of the top transaction gateways. The transaction gateway a merchant selects is dependent on the ones that their merchant credit card processing bank will support. Contact the bank account representative to determine available options, pricing information, and setup information. After establishing an account with one of the transaction gateways, complete UltraCart's gateway configuration section for your gateway by selecting the checkbox for it from the list of gateways.
:::info
**Limitations of Support**
UltraCart has some limitations with regards to transaction gateway integration. UltraCart only supports charging the customer's credit card. The transaction gateway's web site provides the remaining functionality such as issuing credits, transaction activity inquiry, etc.
You can review the integration details for the integrated payment gateways here: [Credit Card Processing Transaction Gateway Integration list](/guides/ultracart-documentation/tutorials/payment-gateway-tutorials/configuring-a-payment-gateway-tutorial/credit-card-processing-transaction-gatew)
**PCI regulations that prohibit the exposure of the full credit card number. Since the full credit card number is obfuscated, having an credit card gateway configured with the account is integral to the payment processing of the placed orders and wel as for processing refund, when needed.**
**Due to PCI requirements to protect the integrity of the stored CC details (the CC number is obfuscated through out the order lifecycle) when looking for a new gatewway, UltraCart strongly recommends selecting one of the gateways listed as supporting \*\*\*refund\*\*\* transaction.**
:::
### Unsupported Gateways
There are literally hundreds of different transaction gateways available. UltraCart supports some of the most popular transaction gateways on the market today. If a merchant credit card processing bank does not offer one of UltraCart's supported transaction gateways, please contact [support@ultracart.com](mailto:support@ultracart.com). Typically, a short amount of time is required to add support for additional gateways.
:::info
**Requirements for integration of new gateway**
UltraCart requires the gateway to have an API integration rather than a web site handoff. This is due to the inherent lack of robustness to the website handoff approach.
:::
### Test Gateway
Only certain gateways allow for a "test" mode, which means you can only use a valid credit card, and real funds are processed. So, to help with initial account setup and testing, UltraCart has created a test transaction gateway, selectable from the Transaction Gateways tab on the Payments Configuration screen.

After selecting the test gateway, enter your Ultracart MerchantID and select the card types, then scroll to bottom of the page and click the save button to save the changes.
This gateway behaves like a "real" gateway, allowing you to completely test the system's functionality.
While it does not actually capture payments, it does allow you to perform a complete checkout to a receipt
so that you can add orders without actual transaction charges being accrued against a real credit card.
:::info
### Test Gateway is for Testing only!
The UltraCart Test Gateway is for initially testing only, so make sure to configure your real credit card gateway after initial testing against the test gateway is completed.
:::
To use the gateway, simply select it from the Transaction Gateways screen, and enter your Merchant ID. Select the payment types you want the gateway to handle, and press "Save".
## Rotating Transaction Gateways
Rotating transaction gateways allow a merchant to spread credit card transactions across multiple gateways. While available to all UltraCart merchants, it is primarily intended for merchants with substantial transaction volume. Merchants should thoroughly test their configuration before going live with this feature.
:::note
[Home](https://ultracart.atlassian.net/wiki/404?key%3Dmerchant%3Bsearch%3Fq%3D%2FmainMenu.do) → [Configuration (Checkout)](https://ultracart.atlassian.net/wiki/404?key%3Dmerchant%3Bsearch%3Fq%3D%2Fconfiguration%2FconfigurationMenuLoad.do) → [Payments](https://ultracart.atlassian.net/wiki/404?key%3Dmerchant%3Bsearch%3Fq%3D%2Fconfiguration%2Fpayment%2Fmethods2Load.do) → [Rotating Transaction Gateways](https://ultracart.atlassian.net/wiki/404?key%3Dmerchant%3Bsearch%3Fq%3D%2Fconfiguration%2Fpayment%2FrotatingTransactionGatewaysListLoad.do)
:::
For more regarding Rotating Transaction Gateways, navigate here: [Rotating Transaction Gateway.](/checkout-payments/payments/rotating-transaction-gateway)
* * *
# Frequently Asked Questions
### When are Credit Cards Charged?
The answer depends on various details. Please visit the following document for more information: [When are Credit Cards Charged](/checkout-payments/payments/when-are-credit-cards-charged).
### Transparent Payment Processing Status
If an order is captured after the specified number of failed authorization attempts, the customer receives a receipt for the placed order. While the receipt does not directly reference the final transaction authorization attempt, it may be interpreted by the customer as proof of a successful payment. You can alter the default settings for the emailed receipt and the text displayed in the receipt provided in the customer's web browser to make things more transparent. See the following for more details: [Tutorial - Transparent payment processing status of placed orders](/guides/ultracart-documentation/tutorials/payment-gateway-tutorials/tutorial-transparent-payment-processing).
### Recommended Payment Types
We are considering adding a gateway that offers e-check processing along with credit card processing. There are a number of gateways that offer e-check processing, for example [Authorize.Net](http://authorize.net/) offers e-check support. However, customers rarely use e-check payments when offered. E-check transactions amount to fractions of a percent for most merchants because most people/businesses that want to draft money out of their account will already have a PayPal account with their checking account linked (or prefer to send a paper check). Our advice regarding payment processing is as follows:
- Visa/MC is a given.
- AMEX is a good idea as many business customers have AMEX.
- PayPal - always a good idea. Some merchants have seen a 30% boost in transactions by supporting PayPal.
- Amazon Payments - new, but gaining strong traction with customers.
### Connecting Your Bank Account for Payouts
UltraCart does not directly store or manage your bank account information for receiving payouts. Bank account configuration is handled within the specific payment processing gateway or service you have enabled.
#### For Credit Card / ACH Gateways
- Log in to your account with the payment gateway provider.
- Navigate to their merchant settings or payout/banking section.
- Add and verify your bank account details (routing number, account number, account type).
- Once verified, the gateway will automatically deposit funds from settled transactions according to their schedule (typically 1-3 business days after settlement).
#### For PayPal and Similar Services
- In your PayPal Business account, go to Wallet > Bank accounts (or the equivalent section).
- Add and confirm your bank account.
- Set your preferred withdrawal method and schedule.
#### UltraCart Configuration Notes
- **Ensure** the gateway is correctly configured in your UltraCart merchant account under Payments > Payment Methods.
- **Test** a small transaction end-to-end to confirm funds flow to the correct account.
- **Contact** your gateway provider's support for any verification delays or payout issues.
:::note
Important: Never enter sensitive banking details directly into UltraCart (besides the payment service credentials for integrating the payment service). All bank account management occurs in the external gateway interface for security and compliance reasons.
:::
* * *
# Related Documents
[Configure Transaction Gateway](/checkout-payments/payments/configure-transaction-gateway)
[UltraCart Test Gateway](/checkout-payments/payments/ultracart-test-gateway)
[Checkout Payment Options](/checkout-payments/payments/checkout-payment-options)
[Test Credit Card or Electronic Check Payments](/checkout-payments/payments/test-payments-in-ultracart)
[Payment - Filters (tab)](https://ultracart.atlassian.net/wiki/pages/createpage.action?spaceKey=ucdoc&title=Payment%20-%20Filters%20%28tab%29&linkCreation=true&fromPageId=1377155)
[Rotating Transaction Gateway](/checkout-payments/payments/rotating-transaction-gateway)
[When are Credit Cards Charged](/checkout-payments/payments/when-are-credit-cards-charged)
---
# Affirm Payment Method
https://docs.ultracart.com/checkout-payments/payments/affirm-payment-method
doc_type: reference
##
# About
[Affirm.com](https://www.affirm.com) provides your customers the option of installment payment purchases. Affirm offers a 4 payment plan and also a monthly installment payment plan.
## Supported Storefront Themes
The Affirm payment method requires a Visual Builder enabled theme. See the table below for themes that support Affirm payment method:
| Theme | Theme Version |
| --- | --- |
| Elements | v2.08 or higher |
| Hero | v1.09 or higher |
| Jewel | v1.07 or higher |
| Lifty | v1.08 or higher |
| ~Native~ | Not Supported as of v1.07 |
| Natural VB | v1.06 or higher |
# Setup Instructions
Setting up Affirm is easy once you have completed [their application](https://www.affirm.com) process and setup an account with them.
\*The application approval process may take 1-2 business days for approval.
### Affirm Credentials
Before you begin you will need the following pieces of information from Affirm:
- Affirm API Public Key
- Affirm API Private Key
- Affirm Financial Products Key (\*this should be left blank unless otherwise instructed by Affirm)
- Affirm Environment
### Configuring Affirm at UltraCart
Once you've received the necessary credentials, log in to your UltraCart account and Navigate to:
[Main Menu](#) → [Configuration](#) → Checkout → [Payments](#)
At the Payments screen, scroll down to the 'Advanced Payments' section, then select the slider button for Affirm:

Affirm settings will prompt you for your Affirm credentials:

Enter the data you received from Affirm.
Then select Live or Sandbox from the drop-down list (there are separate public/private keys for Live and Sandbox environment.)
Then click the Save button.
:::note
SAVE SAVE SAVE – If you do not click the save button your information will not be saved. If you think you have forgotten, simply repeat the steps above to go back to the Payments area and confirm your credentials are saved.
:::
# Frequently Asked Questions
### Question: Is the Affirm payment method compatible with the single page checkout?
Answer: No. The Affirm payment method is implemented with the defaulted multi-page checkout. Visual Builder enabled themes can customize the single page checkout to include Affirm payment option using the 'checkoutpaymentmethod' element.
### Question: Is the Affirm payment method compatible with auto orders?
Answer: No. The Affirm payment method is not compatible with auto orders. The auto orders will process via credit card payments via your standard [credit card transaction gateways](/checkout-payments/payments/configure-transaction-gateway) in the [transaction gateways list](/guides/ultracart-documentation/tutorials/payment-gateway-tutorials/configuring-a-payment-gateway-tutorial/credit-card-processing-transaction-gatew).
### Question: Is the Affirm payment method compatible with upsell after offers?
Answer: No. The Affirm payment method is not compatible with upsell after offers. The upsell offers will process via credit card payments via your standard [credit card transaction gateways](/checkout-payments/payments/configure-transaction-gateway) in the [transaction gateways list](/guides/ultracart-documentation/tutorials/payment-gateway-tutorials/configuring-a-payment-gateway-tutorial/credit-card-processing-transaction-gatew).
### Question: Is the Affirm payment method compatible with the the "pre-order" item configuration?
Answer: No. The Affirm payment method is an asynchronous, "Push payment" method similar to PayPal. So, with pre-order items you're going to have to stick with credit cards, to ensure that the placed orders are held for later payment processing.
---
# Alternative Payment Systems
https://docs.ultracart.com/checkout-payments/payments/alternative-payment-systems
doc_type: explanation
# Introduction
**Alternative Payment Methods (APMs)** include any non-traditional payment type, such as digital wallets, bank transfers, Buy Now Pay Later (BNPL) services, and other regional or emerging solutions. These methods enhance conversion rates by allowing customers to pay using familiar local options or stored credentials.
## UltraCart Integrated APMs
- Affirm
- Amazon Pay
- Android/Google Pay
- Apple Pay
- Klarna
- Sezzle
- PayPal Fastlane
- Stripe Link
# Important Note Regarding APMs and Fraud Prevention Rules Processing
APMs enable rapid, authenticated checkouts through saved payment information. Because of this streamlined process, **payments are authorized and captured immediately**, before standard fraud screening can occur.
> **Important:** If you have existing **Fraud Prevention Rules** configured to **“Flag for Review”**, Fastlane and other APMs processed checkouts may bypass the Accounts Receivable department and instead go to the ‘Fraud Review’ order location for Review since the payment transaction completes in real time.
## Recommended Configuration
To ensure proper handling of APMs transactions:
1. Enable ‘Fraud Review’ in the Order Task Generation Configuration
[Order Task Generation](/orders-fulfillment/configuration-order-management/order-task-generation)
[Tasks](/customers-crm/tasks)
2. Configure the ‘Orders/Payments-> Fraud Review’ for one or more users on your account.
[User Configuration Screen](/account-settings/general-configuration/users/user-configuration-screen)
3. Users monitoring the orders should enable the Fraud Review widget on the Home page.
[UltraCart Dashboard](/get-started/navigating-ultracart/ultracart-dashboard)
**If the review later determines the order to be fraudulent, issue a refund from within UltraCart.**
> **Summary:** Using “Process payment and then review” allows you to benefit from your Alternative Payment Methods (APMs) instant checkout speed while maintaining effective fraud oversight.
---
# Amazon Payments
https://docs.ultracart.com/checkout-payments/payments/amazon-payments
doc_type: explanation
:::info
**Amazon Pay is now offered through Stripe.** UltraCart's direct Amazon Payments Advanced integration has been replaced by Amazon Pay as an additional payment method delivered through the Stripe gateway and the `checkoutexpresscheckoutstripe` Visual Builder element. The child pages under this article (Signup, Configuring, FAQ) describe the legacy direct integration and are retained for reference only.
:::
## Overview
Accept Amazon Pay on your storefront to let hundreds of millions of Amazon customers check out in a few clicks using the shipping addresses and payment methods stored in their Amazon account.
- **Seamless experience.** Buyers log in with their Amazon.com credentials and pay without leaving your branded checkout.
- **Mobile-friendly.** The express checkout element adapts to phones and tablets.
- **No redirects.** Buyers stay on your site throughout the purchase.
## How it works today
Amazon Pay is now delivered as an Additional Payment Method (APM) through Stripe. When you enable Stripe as your gateway and add the `checkoutexpresscheckoutstripe` element to your checkout, Amazon Pay appears alongside Stripe's other express checkout options (Klarna, Link, Apple Pay, Google Pay) for eligible customers.
## Prerequisites
1. **Stripe must be enabled as a payment method in UltraCart.** See [Stripe Gateway Integration](/guides/ultracart-documentation/tutorials/payment-gateway-tutorials/configuring-a-payment-gateway-tutorial/credit-card-processing-transaction-gatew/stripe-gateway-integration) for setup instructions.
2. **Amazon Pay must be enabled in your Stripe dashboard.** In Stripe, go to _Settings → Payment methods_ and enable Amazon Pay. Stripe handles the underlying connection to Amazon, so no separate Amazon Payments Advanced merchant account is required.
3. **Your storefront theme must include the Visual Builder.** The latest Visual Builder-enabled themes include the express checkout element by default.
## Implementation
Amazon Pay (along with the other Stripe APMs) is rendered through the Visual Builder element:
```none
checkoutexpresscheckoutstripe
```
This element is included in current Visual Builder themes. Merchants using a custom theme can add it manually through the Visual Builder or theme source editor on the checkout page.
:::info
**Note:** Amazon Pay through Stripe is **not available** for auto order purchases or upsell offers and will be suppressed during checkout in those scenarios.
:::
For the full list of additional payment methods available through Stripe and detailed implementation notes, see [Stripe Gateway Integration → Additional Payment Methods via Stripe](/guides/ultracart-documentation/tutorials/payment-gateway-tutorials/configuring-a-payment-gateway-tutorial/credit-card-processing-transaction-gatew/stripe-gateway-integration).
## Pricing
Transaction fees for Amazon Pay through Stripe follow Stripe's pricing for additional payment methods rather than the legacy Amazon Payments Advanced rates. See your Stripe dashboard for current rates.
## Legacy documentation
The pages below describe the legacy direct Amazon Payments Advanced integration. They are retained for historical reference but are no longer the recommended path:
- [Signup Amazon Payments (legacy)](/checkout-payments/payments/amazon-payments/signup-amazon-payments)
- [Configuring Amazon Payments (legacy)](/checkout-payments/payments/amazon-payments/configuring-amazon-payments)
- [FAQ about Amazon Payments (legacy)](/checkout-payments/payments/amazon-payments/faq-about-amazon-payments)
---
# Configuring Amazon Payments
https://docs.ultracart.com/checkout-payments/payments/amazon-payments/configuring-amazon-payments
doc_type: how-to
:::warning
**Legacy documentation.** Amazon Pay is now offered through Stripe rather than the standalone Amazon Payments Advanced integration described on this page. For current setup instructions, see [Amazon Payments](/checkout-payments/payments/amazon-payments). This page is retained for reference only.
:::
:::info
This integration is specific to the "Amazon Payments Advanced".
:::
# Logging into Seller Central
To log in to Amazon Seller Central go to:
:::note
[https://sellercentral.amazon.com/](https://sellercentral.amazon.com/)
:::
# Switching to Amazon Payments Advanced (Sandbox View)
After logging in to Amazon Seller Central you will see a dashboard. The Amazon Seller Central website manages your sales on Amazon.com as well as your Checkout by Amazon. Look at the top navigation bar. If the navigation bar has a drop down that shows www.amazon.com as shown below:

then click the drop down list and select "Amazon Pay (Sandbox)" as shown below:
# Amazon Payments Getting Started Guide
Amazon has provided a simple step by step guidance through the configuration process as shown below.

This tutorial will work through each of the steps in their checklist.
## Step 1 - Get Your Login with Amazon Client ID
UltraCart does not use Login with Amazon. Click the "I have completed this step" checkbox as shown below.

## Step 2 - Get API Access
Click the "+Show" link as shown below.

Copy the Access Key ID and Secret Access Key into a temporary text document on your computer. You will need those later on for the UltraCart portion of the configuration. Once you have copied those off, click the "I have completed this step" checkbox.
## Step 3 - Integrate with Your Existing Site
At this point we need to look up one more piece of information below going to UltraCart and configuring Amazon Payments. In the upper right corner of Seller Central click Settings -> Integration Settings as shown below.

Copy the Merchant ID as shown below into the same text document used in Step 2.

While on the Integration Settings page we can quickly configure the Instant Notification Settings URL. This allows Amazon to proactively notify UltraCart about the flow of Amazon payments through the various stages. Click Edit next to the Integration Settings and then configure the Integrator URL as:
```
https://secure.ultracart.com/cgi-bin/UCAmazonPaymentsIPN
```
:::note
This URL is case sensitive. We recommend copying and pasting the value into the Amazon field.
:::
After saving the Integration Settings should look like this:

Open another browser window, login to your UltraCart account and navigate to:
:::note
Main Menu → [Configuration](https://secure.ultracart.com/merchant/configuration/configurationMenuLoad.do) → [Checkout](https://secure.ultracart.com/merchant/configuration/configurationMenuLoad.do) → [Payments](https://secure.ultracart.com/merchant/configuration/payment/methodsLoad.do)
:::

Within the Common Payment Methods Section, check the "Amazon Payments" check box.

:::info
**Make sure that when copying the credentials into the UltraCart configuration fields that there are no extra spaces in the front or back of the credentials, as this will cause the credentials to fail the validation upon saving. You can copy the credentials into notepad or text editor to make sure that you have no additional whitespace. Then copy into the UltraCart configuration spaces.**
:::
Copy and paste the Amazon Merchant ID, Amazon Access Key ID, and Amazon Secret Access Key into the fields provided (shown below). Check the Test Against Amazon Sand Box checkbox. We will perform a test transaction in this tutorial before turning the integration on live.

Scroll to the bottom of the page and click Save. At this point you can mark Step 3 as completed in Amazon's setup guide as shown below.

## Step 4 - Test Your Integration
In this step, we will create a test buyer account and use it to purchase an item from our UltraCart store. Click the "create test buyer account" link as shown below.

This will open up a new tab in your browser. Click on the "Create a new test account" button as shown below.

Fill out the form with appropriate information as shown below. We've called this user "Tester 1". We've selected all the addresses from the stock address book for this user as well.
:::info
In the screen shown below, make sure to use your own name and email address when creating the test user (leave all example addresses selected.)
:::

Once you've click the Create account butt, he page should show a confirmation and show the new test user.

Now we need to add any (non auto order item) from your store to the UltraCart checkout by clicking a buy link. The checkout should now have a "Pay with Amazon" button displayed with a small red S (to indicate SandBox Mode) as shown below.

Click the Pay with Amazon button. A customer login window will appear in as shown below.

Enter the email and password for the sandbox user configured above and then click the Sign in button. After signing in, the checkout will progress to the shipping address page as shown below.

The customer's default address will automatically be selected from their address book. They can choose any other address from their Amazon address book and/or add a new one. Click Continue and the checkout will progress to the options page. Notice that this page does not present payment options since Amazon payments was already selected earlier in the checkout process.

Click the Continue button to progress to the Review page. The customer is shown their selected shipping address and are directed to select a payment method. Their default payment method is already selected as shown below.


Click the Finalize Order button. UltraCart will communicate with Amazon Payments, initiate the payment and obtain the full address information from the customer. Notice that the receipt has all the customer information filled in.

Back on the Amazon Getting Started Guide we can mark off that Step 4 is complete by checking the box as shown below.

## Step 5 - Go Live
First we need to provide some final information for Amazon to deposit the payments into a bank account. Click the "Click here to begin" link as shown below.

This will open up a new window. Don't be surprised if you need to log in again. Enter your Amazon email & password and click Sign in if prompted. On the Seller Account Information page, complete any of the missing fields. Pay close attention to the sections "Business Profile Amazon Payments" and "Deposit Method".

Click "Edit" on this section.
You may already have a bank account on file for sales from Amazon.com. You'll need to click "Add" for the "Amazon Payments Advanced" as shown below.

Select your existing bank account or use the new bank account option to register a new one as shown below.

Now go back into your UltraCart account and turn off the sandbox option under:
:::note
[Home](https://secure.ultracart.com/merchant/mainMenu.do) → [Configuration](https://secure.ultracart.com/merchant/configuration/configurationMenuLoad.do) → [Checkout](https://secure.ultracart.com/merchant/configuration/configurationMenuLoad.do) → [Payments](https://secure.ultracart.com/merchant/configuration/payment/methodsLoad.do)
:::
Uncheck the "Test Against Amazon Sand Box" checkbox as shown below and then scroll down and click Save.

Now mark step 5 as completed by clicking the checkbox shown below.

At this point all of the steps should say "Completed" in green. Now click the "Switch to Production" button on the right of the page as shown below.

Now that we're in the production mode of Amazon Payments we need to configure the IPN notification URL one more time. In the upper right corner of Seller Central screen, click Settings -> Integration Settings as shown below.

On the Integration Settings page configure the Instant Notification Settings URL. This allows Amazon to proactively notify UltraCart about the flow of Amazon payments through the various stages. Click Edit next to the Integration Settings and then configure the Integrator URL as:
```
https://secure.ultracart.com/cgi-bin/UCAmazonPaymentsIPN
```
:::note
This URL is case sensitive. We recommend copying and pasting the value into the Amazon field.
:::
After saving the Integration Settings the screen should look like this:

:::note
Failure to configure the Integrator URL for Instant Notifications will result in slower processing of Amazon orders on your UltraCart account.
:::
From the dashboard, click on Create Configuration for your Store Connection as shown below.

Complete the store configuration. Pay careful attention to the JavaScript origins field and populate that with the URL to your StoreFront.

# Troubleshooting Going Live Errors
## Error code: InvalidAccessRequest
When testing your Amazon Pay integration with a live transaction you might come across a message that says:

In the details of that message you find the error code **InvalidAccessRequest**.
To resolve this issue, configure the JavaScript origins on your Store Connection configuration shown above.
Frequently Asked Questions: [FAQ about Amazon Payments](/checkout-payments/payments/amazon-payments/faq-about-amazon-payments)
---
# FAQ about Amazon Payments
https://docs.ultracart.com/checkout-payments/payments/amazon-payments/faq-about-amazon-payments
doc_type: reference
:::warning
**Legacy documentation.** Amazon Pay is now offered through Stripe rather than the standalone Amazon Payments Advanced integration described on this page. For current setup instructions, see [Amazon Payments](/checkout-payments/payments/amazon-payments). This page is retained for reference only.
:::
## _To view the list of Questions, click "Amazon Payments FAQ" below. Then, to view an answer for a particular question, click the question. _
Amazon Payments FAQ
When a decline occurs, do I receive an email notification?
When a decline response occurs and the "Amazon returned DECLINED for the authorization" note appears on the order, the order then moves to Accounts Receivable and sends an email to all users with the notification; "Process Amazon Payment".
Whitelisting merchant email notifications
Since the order email notifications UltraCart sends out are notification only emails and you do not reply to them, your email client may eventually begin to mark/filter those notification as SPAM.
See: the "Default Email Addresses and Troubleshooting sections for more details in this help doc; "[Email Addresses](/account-settings/email-notifications/email-addresses)".
Do I receive the customers full email address for Amazon Payments orders to send them their digital products?
Yes, you receive the customers actual full email address just like you would for any credit card on your store.
Are auto orders (recurring orders) compatible with Amazon Payments?
No, not at this time. Amazon Payments is not displayed when the cart contains an auto order item just like PayPal.
I understand the fee is 2.9% +$0.30 per transaction (over $10). Is that fee in addition to the credit card fee?
That is the entire fee for processing the Amazon Payments transaction. Please note the fee structure is lower for transactions under $10 and the percentage also drops for merchants that process higher volumes of payments.
How frequently does Amazon pay?
There’s a 14 day reserve after your account is established, after which you begin at Tier 1, which is a 7 day reserve. Higher volume merchants can submit their account to be evaluated for Tier-2, which lowers the reserve to 3% of daily purchase volume and any outstanding refunds/claims. More information about our full reserve policy is here: [https://payments.amazon.com/help/Amazon-Payments-Advanced/Getting-Paid/What%27s-a-Reserve](https://payments.amazon.com/help/Amazon-Payments-Advanced/Getting-Paid/What%27s-a-Reserve)
Is it basically acting in place of the merchant account? If yes, how is it different?
Amazon Payments does not replace your merchant account which allows direct credit cards. What it does allow is the customer to login to their Amazon account and use the addresses and credit cards they have on file with Amazon. It gives the customer a very fast way to check out.
How does it handle refunds?
Use the refund functionality within UltraCart just like you would credit cards. It all happens automatically.
How does it handle chargebacks?
Amazon leverages all of it's anti-fraud technology while processing payments. There is still a chance of a chargeback scenario similar to any other payment method. Amazon will contact you via the Amazon Seller Central web interface if there is a disputed charge.
Why do Amazon Payment orders go into pending clearance?
When properly configured, Amazon Payment orders stay in the pending clearance section of UltraCart for a few minutes. The orders go through the Confirm Order -> Authorization -> Capture. If you have live orders staying in the pending clearance section longer than that then you failed to configure the Amazon Payments Instant Payment Notification feature in step 3 of the configuration tutorial. If you fail to configure this UltraCart will check all pending clearance orders at 9AM EST and release them so that they will still flow.
Is Amazon Payments compatible with Upsell After?
Yes (see also the following Q/A regarding shippable items and upsell after)
upsell after offer- added a tangible/shippable item into the order (initial purchase item is billing only) but it's ignored. Why?
The way the Amazon payments integration works, it requires the initial checkout to contain a shippable item in order for an upsell after that requires shipping details to be triggered.
Is Amazon Payments compatible with the Single Page Checkout?
Yes, the Amazon Payment option will appear in the single page checkout configuration. However, the Amazon Payment components must load in sequence, so that payment option requires that the customer go through a multi-page flow if they select that payment option.
Why is the the payment button is not appearing in my checkout?
If your button disappears when you un-check the sandbox testing setting, your account may have a hold on it that is preventing the live mode form functioning. Please contact Amazon customer service to ask them to review your account and confirm that is ready to function in the live mode.
Can I test my live Amazon Payments account with my own Amazon account?
No, Amazon will detect that the two accounts are associated because of the email or credit card number. You should use another unrelated Amazon account other than the business such as an employee's personal Amazon account.
I am testing the live account and I am getting an error "Amazon Pay is currently not available on this site. Try a different payment option." What do I need to do to resolve this error?
There are two possible errors that will cause this error message to display.
| Error code | Cause | Solution |
| --- | --- | --- |
| **InvalidAccessRequest** | Your Amazon Payments merchant account hasn’t been verified and is inactive. | To get your Amazon Payments merchant account verified, provide Amazon Payments with all required documents. [Learn more](https://pay.amazon.com/help/BNU8UTA8Z5U7SRJ#InvalidAccessRequest) |
| **InvalidButtonAccessRequest** | The URL on which you added the Amazon Pay button hasn’t been verified. | Add the website URL to your Allowed JavaScript origins and Return URLs in Integration Central. [Learn more](https://pay.amazon.com/help/BNU8UTA8Z5U7SRJ#InvalidButtonAccessRequest) |
## Error code: InvalidAccessRequest
When testing your Amazon Pay integration with a live transaction you might come across a message that says:
**_Something went wrong_**
_Amazon Pay is currently not available on this site._
_Try a different payment option._
In the details of that message you find the error code **InvalidAccessRequest**.
### What's the issue?
You can’t process live transactions because your Amazon Payments merchant account hasn’t been verified and is inactive.
### How can I solve it?
To get your Amazon Payments merchant account verified, provide all required documents.
To understand what information is required and how to upload it, check the performance notifications in your Amazon Payments merchant account in Seller Central.
1. Sign in to Seller Central with your Amazon Payments merchant account.
2. From the drop-down menu on top of the page, choose **Amazon Pay (Production view).**
3. Click **Performance**, and then click **Performance Notifications**.
4. Provide all required information and complete all steps outlined in the notification.
If you haven’t received any performance notification, [contact merchant support](https://sellercentral.amazon.com/gp/contact-us/contact-amazon-form.html) for assistance.
Note After you submit documents, Amazon Payments will review your information, and might contact you for further clarification, if needed, within 4-7 business days. Contact will likely come via email. Check your emails regularly.
## Error code: InvalidButtonAccessRequest
When testing your Amazon Pay integration with a live transaction you might come across a message that says:
**_Something went wrong_**
_Amazon Pay is currently not available on this site._
_Try a different payment option._
In the details of that message you find the error code **InvalidButtonAccessRequest**.
### What's the issue?
Amazon Pay can't process this transaction because the URL on which you added the Amazon Pay button hasn't been added to your **JavaScript origins**, **Return URLs**, or both in the [Client/Store ID configuration](https://sellercentral.amazon.com/external-payments/amazon-pay/integration-central/lwa). It's also possible that the URL you added hasn't been verified by Amazon Payments yet.
### How can I solve it?
If you've already added the URL of the website where the error occurred to your [Client/Store ID configurations](https://sellercentral.amazon.com/external-payments/amazon-pay/integration-central/lwa), the URL might still be under review. Wait for email confirmation from Amazon Payments that your URL has been verified before you enable Amazon Pay on your website.
If you haven't added the URL of the website where the error occurred to your **JavaScript origins**, **Return URLs**, or both in Seller Central, follow the steps below:
1. Sign in to Seller Central with your Amazon Payments merchant account.
2. From the drop-down menu on top of the page, choose **Amazon Pay (Production view).**
3. Click **Integration**, and then click **Integration Central**.
4. At the bottom of Integration Central, click **View client ID/store ID(s)**.
5. Choose you corresponding configuration from the drop-down **App or store name**. If you haven't set up a configuration yet, click **Create new configuration**.
6. Click **Edit** and add your website URLs to the **Allowed JavaScript origins **and **Return URLs.**
7. Click **Save changes.**
8. Wait for email confirmation from Amazon Payments that your URL has been verified before you enable Amazon Pay on your website.
Note Verification of newly added JavaScript origins and Return URLs can take up to 48 hours. After verification is complete, you receive an email notifying you of the status. If the JavaScript origin or Return URL is approved, the URL will show under **JavaScript origins** or **Return URLs**. Rejected URLs don't show.
Reference Documenation:[https://pay.amazon.com/help/BNU8UTA8Z5U7SRJ](https://pay.amazon.com/help/BNU8UTA8Z5U7SRJ)
---
# Signup Amazon Payments
https://docs.ultracart.com/checkout-payments/payments/amazon-payments/signup-amazon-payments
doc_type: how-to
:::warning
**Legacy documentation.** Amazon Pay is now offered through Stripe rather than the standalone Amazon Payments Advanced integration described on this page. For current setup instructions, see [Amazon Payments](/checkout-payments/payments/amazon-payments). This page is retained for reference only.
:::
.
:::note
This information and more can be found directly on Amazon Payments site at the following link. [https://pay.amazon.com/us/help/201212200](https://pay.amazon.com/us/help/201212200)
:::
# Signing up for Amazon Pay
Getting ready to use Amazon Pay requires just a few steps. In the following topics, you'll learn what you need to do in the following five areas:
- **Before you start:** Collect the information you'll need to register.
- **Sign up:** Register for your Amazon Payments Merchant account.
- **Set up:** Get your account information set up on the Seller Central website.
- **Integrate:** Get your website working with Amazon Pay.
## Before you start
Amazon Pay is available for merchants with a U.S presence. You must have a U.S.-based street address, a U.S.-based bank account, a credit card associated with a U.S. street address, and a U.S.-based phone number.
If your business meets the above qualifications, you're all set to register for Amazon Pay.
Collect the information listed below before you start the registration process so you'll be ready to set up your account.
- Have a U.S.-based phone number for our registration service to contact you.
- Have a credit card (issued by a U.S.-based bank).
- Have a checking account with a U.S.-based bank (you can set this up after registration).
- Have your business taxpayer ID, EIN, or personal social security number available for the online tax document interview (you can set this up after registration).
## Sign up
After you gather the necessary information, follow these simple steps to sign up.
1. Visit [https://pay.amazon.com](https://pay.amazon.com/) and click **For merchants**.
2. Click the **Sign Up** option that is right for you — already using a cart or e-commerce provider, or not using a cart provider.
3. Follow the prompts on the page to select your e-commerce provider and create your Seller Central account (if you selected that you have one). If you selected that you have no e-commerce provider, create your Seller Central account, which is also your Seller ID account.
Click the Go To Seller Central button to take you into the Seller Central website. Continue to the [Configuration Tutorial](/checkout-payments/payments/amazon-payments/configuring-amazon-payments).
## Integrate
[For detailed information about integration with Amazon Pay, read the Configuring Amazon Payments](/checkout-payments/payments/amazon-payments/configuring-amazon-payments) for more details.
## Related:
[FAQ about Amazon Payments](/checkout-payments/payments/amazon-payments/faq-about-amazon-payments)
---
# Cardinal Commerce
https://docs.ultracart.com/checkout-payments/payments/cardinal-commerce
doc_type: explanation
# Cardinal Commerce - What is 3d Secure, Verified by Visa, SecurePay, J/Secure?
Cardinal Commerce has developed their own integration with 3d Secure (an XML Protocol initiated by VISA to increase fraud protection and subsequently used by MasterCard and JCB), which gives you a fast, easy and simple integration of Verified by Visa, MasterCard SecureCode and JCB J/Secure brand names. This integration currently only works with Authorize.net 3.1.
The intent of these programs is to increase to your bottom line and a decrease your liability for fraud. Since Visa and MasterCard support it, they have their guarantee on it.
## Benefits
Cardinal Commerce points the following out as benefits to accepting VbV and SecureCode on your website:
• Reduction in chargebacks
• Ability to accept more good orders
• Increase Customer confidence while shopping at your site. The safer a Customer feels, the more likely they will come back.
• Your business may be eligible for lower processing rates
Cardinal Commerce states they provide:
• Industry Recognized Customer Service and Integration Team
• Low monthly cost to accept
• One integration for your business and all upgrades will be maintained by us
• Access to all payment brands through your integration, including Google Wallet, PayPal, Bill Me Later and more
• We can also take you into Mobile Commerce with our Mobile Platform, Cardinal MAX
## Helpful Links
Customers
• [Customers](http://www.cardinalcommerce.com/customers/studies2.htm)
Contact Cardinal Commerce here:
• [Contact Us](http://www.cardinalcommerce.com/contact/default.htm)
# Setup Instructions
## Cardinal Commerce Credentials
Setting up Cardinal Commerce in your UltraCart account is easy once you have completed their application process and setup an account with them. Before you begin you will need the following pieces of information from Cardinal Commerce:
- Processor ID
- Merchant ID (this is different than your UltraCart merchant ID)
- Transaction Password
- Environment
- Test
- Production
## Login to UltraCart and Navigate to Payments
:::note
[Main Menu](#) → [Configuration](#) → Checkout → [Payments →](#) [T](#)ransaction Gateways (tab).
:::
A. Click on the Transaction Gateway tab.
B. Click on the Advanced tab if not already selected.
C. Click on Authorize.net 3.1. The page will expand showing more text fields.Scroll down to the bottom of the Authorize.net 3.1 section.
D. Click the blue "Configure" button to the right of "VDV/3DS (via Cardinal Commerce)".

You will now land on the Cardinal Commerce screen.

## Input your Cardinal Commerce Credentials
This is where you insert the required fields that you received from Cardinal Commerce under the Payer Authentication area. Notice that there is a drop down for Test and Production. When you are testing your system with Cardinal Commerce you use the Test environment. Once you are satisfied that your system is working correctly, go back to this area to switch it to the Production environment and your system will now be live.

:::note
SAVE SAVE SAVE – If you do not click the save button your information will not be saved. If you think you have forgotten, simply repeat the steps above to go back to Authorize.net 3.1 in the Payments > Transaction Gateway area and confirm your credentials are saved.
:::
---
# Checkout Payment Options
https://docs.ultracart.com/checkout-payments/payments/checkout-payment-options
doc_type: explanation
Please see the current documentation here: [Payments](/checkout-payments/payments)
Options Tab, Payments configuration, Charge during Checkout.
The Options tab, the third tab of the Payments configuration screen, allows you to configure the charge during checkout properties used to manage the customer purchase experience. You are able to turn on or off the Charge during Checkout settings, and also define the conditions which will result in a captured order, as well as white-list IP addresses of external order forms.
:::note
[Home](https://ultracart.atlassian.net/wiki/404?key%3Dmerchant%3Bsearch%3Fq%3D%2FmainMenu.do) → [Configuration](https://ultracart.atlassian.net/wiki/404?key%3Dmerchant%3Bsearch%3Fq%3D%2Fconfiguration%2FconfigurationMenuLoad.do) → [Payments](https://ultracart.atlassian.net/wiki/404?key%3Dmerchant%3Bsearch%3Fq%3D%2Fconfiguration%2Fpayment%2FmethodsLoad.do) → [Options \[tab\]](https://ultracart.atlassian.net/wiki/404?key%3Dmerchant%3Bsearch%3Fq%3Dconfiguration%2Fpayment%2FoptionsLoad.do)
:::
# Charge During Checkout
The charge during checkout setting allows you to specify whether or not UltraCart will attempt to charge the customer's card before the transaction is completed. There are pros and cons for each method, so please review carefully the information provided before making a decision.
:::info
By default, UltraCart is set to Charge During Checkout = "Yes" with a capture on failure after the third attempt, which will allow you to review the decline responses by reviewing the order from the [Accounts Receivables](/orders-fulfillment/order-management/accounts-receivable) department.
:::

# Charge During Checkout - NO
To have the credit card processed in the [Accounts Receivable](/orders-fulfillment/order-management/accounts-receivable) Section check the "No" button.

Tab-Charge During Checkout – "NO"
:::info
**Importance of having CC gateway integration**
PCI compliance is an important part of your online store, and requires that you and your vendors, such as UltraCart and your payment gateway, work together to make sure that each step in the payment process is performed with the appropriate controls and safeguards. To this end, your merchant account provider/gateway may require you to submit proof of PCI Compliance. ** As part of our regular and ongoing compliance with the safeguards related to PCI regulations, the ultracart user interface has been changed to prohibit access to the complete credit card number.** This change eliminates liability related to unintended exposure of sensitive credit card details that could lead to misuse and abuse of your customers credit card information.
A credit card processing gateway is required in order to process the credit card payments for the placed orders:
[Credit Card Processing Transaction Gateway Integration list](/guides/ultracart-documentation/tutorials/payment-gateway-tutorials/configuring-a-payment-gateway-tutorial/credit-card-processing-transaction-gatew)
:::
# Charge During Checkout - YES
To charge the credit card in real-time during the checkout process, check the "Yes" button. Then click on the "Save" button at the bottom of the screen. You will return to the Configuration Menu.
:::note
If the credit card fails during checkout, an error message is displayed to the customer and they have an opportunity to enter a new credit card number. If the credit card transaction gateway returns an approval code, then the order is placed and immediately moved to the shipping department. Due to restrictions that prevent the storing the CVV number in databases that contain the rest of the credit card billing details, it's recommended that real-time processing take place, and that Charge During Checkout be set to "Yes" in order to allow for the most complete authorization (AVS & CVV rules applied).
:::

### Charge During Checkout Features Optional
- After \_\_\_ attempts at processing the payment collect the order information and store in accounts receivable.
This setting is configured by default on new accounts to 3 attempts, which allows the customer to receive a couple of decline responses then review and resubmit their order before being captured to a receipt and the order moving into the A/R department for your review of the transaction attempt responses from the credit card gateway. If left blank, and a customer is either providing incorrect billing details or the gateway is otherwise unable to respond with a recognized approval code, they will not be able to finalize the order to a receipt. Also, decline attempts against a valid credit card number create temporary holds against the available credit on the card, which last typically 2-3 business days, So, if this field is left blank, then the customer could end up will these held/available credit deductions for as many attempts as they try to finalize the order until they give up, which can cause customer support headaches, so we recommend configuring this setting to either 3 or 4 attempts.
:::info
**Customer Perspective Of The Payment**
If the order is captured after the specified number of failed authorization attempts, the customer receives their receipt for the placed order. While the receipt does not directly make reference to the the final transaction authorization attempt, the receipt itself may be interpreted by the customer as being proof of an successful payment. You can alter the default settings in regard to the emailed receipt and also to the test displayed in the receipt provided in the customers web browser to make things more transparent. See the following for more details:
[Tutorial - Transparent payment processing status of placed orders](/guides/ultracart-documentation/tutorials/payment-gateway-tutorials/tutorial-transparent-payment-processing)
:::
Immediate Finalize Security

Charge During Checkout - Immediate Finalize Security
---
# Configure Transaction Gateway
https://docs.ultracart.com/checkout-payments/payments/configure-transaction-gateway
doc_type: how-to
There are two parts to this section. First is Transaction Gateways where you select your gateway provider(s). You will then be shown fields for that gateway's particular information requirements. Second is Transaction Gateway Authorization Mohyhydel where you select one of three supported models.
# Purpose of Transaction Gateways
Transaction gateways provide Internet based interfaces into the major credit card processing networks like FDC, NDC, Nova, and many more. Transaction gateways are analogous to a retail merchant's point-of-sale terminal.
# Supported Gateways
Currently UltraCart supports over 90 transaction gateways. The transaction gateway a merchant selects is dependent on the ones that their merchant credit card processing bank will support. Contact the bank account representative to determine available options, pricing information, and setup information. After establishing an account with one of the transaction gateways, complete UltraCart's gateway configuration.

UltraCart is pleased to be an Authorize.Net Certified Shopping Cart provider. This certification insures that UltraCart has passed all the technical requirements for security and reliability set forth by Authorize.Net. Merchants can trust the reliability of UltraCart and Authorize.Net
**Reasons to Signup with a Gateway**
Even if a merchant has a retail point of sale terminal already, they should still consider signing up with a transaction gateway. UltraCart's support for transaction gateways keeps merchants from having to reenter order information to process the order. This reduces the time to process orders and removes errors from typing. UltraCart also has the ability to process orders in batch in a parallel fashion. This results in authorizing hundreds of orders in a matter of seconds. The Accounts Receivable chapter will cover processing orders with the transaction gateway in more detail.
# Limitations of Support
UltraCart has some limitations with regards to transaction gateway integration. UltraCart only supports charging the customer's credit card. The transaction gateway's web site provides the remaining functionality such as issuing credits, transaction inquiry, etc.
# Supported Gateways
There are literally hundreds of different transaction gateways available. UltraCart supports some of the most popular transaction gateways on the market today. We will try to keep this image updated, but we are constantly adding new Transaction Gateways so check in your UltraCart account first to see if your payment gateway is there.
Navigate:
:::note
[Home](#) → [Configuration (Checkout)](#) → [Payments](#) → Credit and Debit Cards (section)
:::

## Selecting Your Gateway
Once you have clicked on "Connect Single", you'll be presented with the integrated payment gateways list:

### Payment Transaction Gateways
To enter your gateway information, click on the checkbox next to the name of your gateway provider. You will then be shown fields for that gateway's particular information requirements. If you have multiple gateway providers, repeat this process for each provider, being sure to correctly specify which gateway handles which payment types. (The Figure above shows a sample with one gateway selected which illustrates the additional fields that appear).
## Transaction Gateway Authorization Model
The Transaction Authorization Model determines the how the authorization is processed. There are three options, the first two are the most commonly used options:

| Authorization Model | Description |
| --- | --- |
| Auth and capture | Simultaneously reserves funds on your customers credit card and captures them. This method should be used if you are capable of shipping out the merchandise quickly after processing the credit card transaction. |
| Auth then capture | Authorizes the funds in the accounts receivable section, but does not capture the funds until the shipment is completed. Choose this model if you are not capable of shipping merchandise quickly after it has been purchased. Make sure you have a thorough understanding of how to move orders completely through the UltraCart system before choosing this model. Failure to mark orders as shipped can result in un-captured funds. This model is only supported by: - Atlantic-Pacific Processing - Authorize.Net JSON - CyberSource - Durango - ECHO - Group ISO - LinkPoint - Merchant e-Solutions - Moneris e-Select Plus - Network Merchants - PayJunction - Paymentech - PayPal Express Checkout - PayPal Payflow Pro v4.x - PayPal Web Payments Pro - PsiGate - Quantum Payment - SecurePay gateways - SkipJack - Transaction Pro - TransFirst eLink - Verifi :::info **NOT ALL GATEWAYS SUPPORT THIS OPTION** **There are several exceptions under this model. If an order contains only digital content, does not require shipping, or is being transmitted to a fulfillment provider, then a simultaneous authorization and capture will occur.** ::: |
| Auth only | UltraCart only performs the authorization step. Capturing of the funds is done manually or automatically using the facilities provided by the transaction gateway. :::info **This model is only supported by the Plug'N Pay and TRPM gateways at this time.** ::: |
:::info
**Auth and Capture is the most common authorization Model, and is the recommended authorization model for most merchants.**
**Different gateway providers support different transaction models so be sure to read the details provided for each authorization model to ensure your selection here is supported by your particular gateway.**
:::
# Transaction Gateways vs. Rotating Transaction Gateways
Merchants with high volume or higher risk products and services may choose to integration multiple gateways, either simultaneously or as back-ups to their main gateway.
:::info
**Transaction Gateways vs. Rotating Transaction Gateways**
You can have more than one gateway configured within the Transaction Gateways tab **provided that they do not process the same credit card type**. So, for example, of you had two gateways and "Gateway#1" processes only **Visa** and **Mastercard** and "Gateway#2" handles only **AMEX** and **Discover**, then that can be properly configured within the "Transaction Gateways" tab.
**However, if you have multiple transaction gateways processing the same card types, then they must be configured in the Rotating Gateways Tab.**
**See: [Rotating Transaction Gateway](/checkout-payments/payments/rotating-transaction-gateway) **
:::
# Whitelisting UltraCart IP addresses Used When Processing Transactions
:::info
If your gateway or fulfillment provider requires you provide a list of allowed IP addresses, you should provide them with the following addresses.
- 74.116.32.26
- 74.116.32.25
- 64.74.121.2
- 64.74.121.5
- 68.171.171.133
All traffic from the production UltraCart environment will originate from one of these IP addresses.
:::
---
# External IP Addresses Used By UltraCart
https://docs.ultracart.com/checkout-payments/payments/configure-transaction-gateway/external-ip-addresses-used-by-ultracart
doc_type: reference
:::info
If your gateway or fulfillment provider or email server requires you provide a list of allowed IP addresses, you should provide them with the following addresses.
- 52.200.85.63
- 35.169.188.36
- 34.225.48.115
- 35.170.241.190
- 35.169.97.31
All traffic from the production UltraCart environment will originate from one of these IP addresses.
:::
---
# Migrating to Stripe Connect
https://docs.ultracart.com/checkout-payments/payments/configure-transaction-gateway/migrating-to-stripe-connect
doc_type: how-to
## If Stripe is your only gateway
To migrate to Stripe Connect simply navigate to: Main Menu > Configuration > Checkout > Payments > Credit and Debit Cards Sections and click on Connect Single as shown below.

From here you will need to scroll down to the until you get to the Stripe configuration then simply remove the check box as show below.

Once you have unselected Stripe you will need to select Stripe Connect as the new gateway and click the link to Connect as shown below.

After click on Connect, you should see the following page.

You will be taken to a new page that will allow UltraCart to Connect to Stripe Connect. There will be some additional details that will need to be provided to allow for this connection. Please fill out the required fields and click Continue. Once the process has been complete you will be taken to the following page where you will need to click “Connect my Stripe Account” to complete the process.

This will bring you back to UltraCart with the configuration complete.

## If Stripe is set as a Rotating gateway
To migrate to Stripe Connect simply navigate to: Main Menu > Configuration > Checkout > Payments > Credit and Debut Cards Sections and click on Rotating Gateways as shown below.

From the Rotating Gateways screen you will need to Edit your current Stripe Gateway.

Once you have unselected Stripe you will need to select Stripe Connect as the new gateway and click the link to Connect as shown below.

After click on Connect, you should see the following page.

You will be taken to a new page that will allow UltraCart to Connect to Stripe Connect. There will be some additional details that will need to be provided to allow for this connection. Please fill out the required fields and click Continue. Once the process has been complete you will be taken to the following page where you will need to click “Connect my Stripe Account” to complete the process.

This will bring you back to UltraCart with the configuration complete.
# Related Documentation
# [Migrating to Stripe Connect](#)
---
# Methods (tab)
https://docs.ultracart.com/checkout-payments/payments/methods-tab
doc_type: reference
# Overview
Under the Methods tab you will indicate which Payment Method(s) you want to accept. PayPal and/or Credit Cards may already be selected if you made those choices from the Payment Wizard (initial set-up).
The following are configurable payment methods:

Once you check a box to select a method, additional fields may appear for completion. A "Save" button is provided at the bottom of the screen. Clicking this button will save the information you have entered and return you to the Configuration Menu.
Some merchants will see text fields labeled **QuickBooks™ codes** during configuration. These will only appear for those merchants that have enabled UltraBooks. For more information about UltraBooks, see page .
## PayPal
If you have already set up PayPal via our Payment Wizard mentioned earlier then you probably can skip this section. We do recommend you obtain a thorough understanding of PayPal and its integration Options.
To accept PayPal as a Payment Method, click the check box to the left of the "PayPal" field. More fields will be revealed.

PayPal business email: enter the email address that corresponds to your PayPal business account.
Integration method: click the single method that you desire.
- PayPal Express Checkout
- PayPal Payments Pro
Simply follow Step 1 to configure your Instant Payment Notification and Step 2 to configure your API permissions to complete the setup process.
Clicking on the "Advanced tab" will display secondary section of configuration that will allow you to configure your First Party API setting rather then configure the steps above, along with a list of other configuration options.
First Party API Credentials. The information for these fields is provided by PayPal when you obtain your API Credentials (API Signature).
| Name | Description |
| --- | --- |
| **API User Name** | Enter the User Name supplied by PayPal |
| **API Password** | Enter the API Password supplied by PayPal |
| **API Signature** | Enter the API Signature supplied by PayPal |
## Amazon Payments
To accept Amazon Payments as a Payment Method, click the check box to the left of the "Amazon Payment" field. More fields will be revealed

Simply provide the Amazon Merchant ID, Access Key ID, and Secret Access Key to complete the setup process.
## Credit Cards
To accept Credit Cards as a Payment Method, click the checkbox to the left of the "Credit Cards" Field. More fields will be revealed to complete the configuration.
UltraCart currently supports the Six major types of credit cards: Visa, MasterCard, American Express, Discover, Diners Club, and JCB. For each supported card, check the checkbox to the right of the card name. Only check those that your transaction gateway supports.

| Name | Description |
| --- | --- |
| Charge appears on statement as | Enter the name of the company that will appear on the customer's credit card statement. To alleviate confusion to the customer, the billed by name will be printed on their receipt. This will help customers associate the charge on their credit card with the online store if the company name and DBA are different. This also helps prevent them from initiating a charge back. |
| Charge During Checkout | This option tells the system if the customer will be charge in real time when the order is placed or after. It is always recommended to keep this setting to yes unless you are setup to charge the customer after shipment. |
| Collect Card Verification Value number | When this box is checked, the customer MUST enter the Card Verification Value (CVV2) number that appears on the back of their credit card. Note: Discover Card calls it the "Cardmember ID". This is performed only momentarily for real-time charge during checkout. This data is NOT retained in the database! This is highly recommended as it provides an additional check that lessens the chance of an individual placing an order by obtaining the card number alone. :::warning However, if you have set your "charge during checkout" configuration to "NO", and have this field checked, then you will have to contact the customer to re-obtain the CVV2 when you finally processes the order. ::: |
| After Failed Attempts | This setting will tell the system how many time the customer card can fail before the order is collect and sent to Accounts Receivable. If set to Blank then the customers card can fail over and over again until the customer corrects the issue. |
## Affirm
To accept Affirm as a Payment Method, click the checkbox to the left of the "Affirm" Field. More fields will be revealed to complete the configuration.

To complete the setup process for Affirm simply provide the Affirm API Public Key, API Private Key, Financial Products Key, and set the Affirm Environment.
## Cash
To accept Cash as a Payment Method, click the checkbox to the left of the "Cash" Field.
:::info
Cash orders are placed through the Back End Order Entry application (launch from the [order management menu](https://secure.ultracart.com/merchant/orderProcessingMenu.do)).
:::
## COD (cash on delivery)
To accept COD (cash on delivery) as a Payment Method, click the checkbox to the left of the "COD" Field. More fields will be revealed to complete the configuration.

| Name | Description |
| --- | --- |
| Approved customers only | Check this box if you want to accept COD orders for your "pre-approved customers only". You must enable customer profiles for this functionality. |
| Surcharge Transaction Fee | This is a merchant's opportunity to pass along the cost of C.O.D. fees to the customer. Enter the amount in dollars and cents. |
| Surcharge Transaction Percentage | This percentage is in addition to the surcharge transaction fee. Enter the percentage in decimal. |
## Paper Checks - Money Orders - Electronic Checks
Paper checks, Electronic checks and Money Orders all follow the same configuration, simply click the box to the left of the desired payment option to display the configuration for each.

| Name | Description |
| --- | --- |
| Payable to | If the checks or money orders need to be made payable to a company name that differs from the one selling the items, it should be entered here. |
| Company | Enter the Company selling the product here. |
| Address line 1 | Specify the location where customers mail the checks or money orders. Some large merchants use a cash management and lockbox service provided by their corporate bank and will specify a post office box where the mailings should go. |
| Address line 2 | This field is to be used when the address is two lines in length (P.O. Box, etc.). |
| Fields 5-8 | Enter the City, State/province, Zip/postal code, and Country. |
The following is an example of what will appear at the bottom of an order that is held in Accounts Receivable for approval.

## Purchase Orders
To accept Purchase Orders as a Payment Method, click the checkbox to the left of the "Purchase Order" Field. More fields will be revealed to the right.

| Name | Description |
| --- | --- |
| Approved customers only | Check this box to restrict purchase orders for approved customers only. Most merchants that approve purchase orders will make them available for "approved customers only". Note: You must also enable customer profiles for this functionality. If you haven't already done so, go to: :::note Configuration → Shopping Cart Checkout Configuration → Customer Profiles and check the box for "Enable Customer Profiles". ::: |
| Prevent Duplicate PO Numbers | This option will do just want it say, it will keep a customer from using a PO Number that has already been used on another order. |
## Quote Request
To accept Quote Request as a Payment Method, click the checkbox to the left of the "Purchase Order" Field. More fields will be revealed to the right.

| Name | Description |
| --- | --- |
| Approved customers only | Check this box to restrict purchase orders for approved customers only. Most merchants that approve purchase orders will make them available for "approved customers only". Note: You must also enable customer profiles for this functionality. If you haven't already done so, go to: :::note Configuration → Shopping Cart Checkout Configuration → Customer Profiles and check the box for "Enable Customer Profiles". ::: |
## Sezzle
To accept Sezzle as a Payment Method, click the checkbox to the left of the "Setting" button. More fields will be revealed to complete the configuration.

To complete the setup process for Affirm simply provide the Affirm API Public Key, API Private Key, Financial Products Key, and set the Affirm Environment.
## Wire Transfer
To accept Wire Transfer as a Payment Method, click the checkbox to the left of the "Wire Transfer" Field. More fields will be revealed to complete the configuration.
:::info
Wire transfers apply to U.S. based merchants ONLY! Your bank information will be printed on the Customer's receipt after checkout. The customer will then have to work directly with their banking institute to perform the Wire Transfer using the information you provide on this section.
:::

| Name | Description |
| --- | --- |
| Bank Address | A text box is provided for you to enter the entire Bank Address. Press the "Enter" key at the end of each line. |
| Routing Number | Most businesses have more than one bank account. In the boxes provided, enter the Routing Number |
| Account Number | Most businesses have more than one bank account. In the boxes provided, enter the Account Number for the appropriate account you want the wire transfer made to. |
| Surcharge transaction fee | This is a merchant's opportunity to pass along the cost of Wire Transfer fees to the customer. Enter the amount in dollars and cents. |
| Surcharge transaction percentage | This percentage is in addition to the surcharge transaction fee. Enter the percentage in decimal. Example "1.5". |
---
# Order Processing Fee Options and Configuration in UltraCart
https://docs.ultracart.com/checkout-payments/payments/order-processing-fee-options-and-configu
doc_type: how-to
# Order Processing Fee
**Last Updated:** June 26, 2026
* * *
## Overview
UltraCart provides several ways to add a per-order processing or handling fee. Before choosing
one, there are two things to know.
**No option applies the fee to every payment method.** The surcharge in Option A is part of
Credit Card Settings and fires only for card payments. It cannot be extended to PayPal, Venmo,
Apple Pay, or Google Pay, because UltraCart does not receive the payment method for those
wallets until the customer has already authorized payment on the provider's side. By then the
amount is settled. This is a limit of how third-party wallets work, not a configuration gap.
**A visible fee line costs you conversions.** Shoppers read a separate processing fee at
checkout as a late add-on, and it reads poorly next to competitors who do not show one. UltraCart
recommends building the cost into your product or shipping prices instead, which applies to
every payment method and needs no configuration.
| Approach | Where fee appears | Applies to all payment methods | Separate summary line | Complexity |
| --- | --- | --- | --- | --- |
| Build it into pricing | Nowhere, absorbed | Yes | No | None |
| A: Payment method surcharge | Surcharge line in summary | No, cards only | Yes | Low |
| B: Handling charge on shipping method | Shipping/Handling line | Yes | No | Low |
| C: Auto-add fee item | Cart items (subtotal) | Yes | No | Medium |
| D: Custom StoreFront template | Anywhere in summary | Yes | Yes | High |
* * *
## Recommended: Build the Cost Into Your Pricing
Raise your product prices, or your shipping rates, by the amount you want to recover. A $1.95
processing cost spread across your catalog needs no surcharge configuration, applies on every
order regardless of how the customer pays, and gives the shopper one number to react to instead
of two.
Options B and C also apply on every payment method, but both show the cost to the shopper, one
on the Shipping/Handling line and one as a cart item. Only Option A is restricted to cards.
If you have a specific reason to show the fee as its own line, the remaining options describe
how, along with what each one cannot do.
* * *
## Option A: Payment Method Surcharge
UltraCart's Credit Card Settings include a native surcharge field that adds a dedicated line to the checkout summary. This is the most direct way to display a labeled fee between the Subtotal and Shipping lines without affecting the Shipping/Handling display.
:::warning
This surcharge applies to card payments only. Orders paid with PayPal, Venmo, Apple Pay, or
Google Pay receive no surcharge, and there is no setting that changes that. If those methods are
a meaningful share of your volume, the fee will be missing from a meaningful share of your
orders.
:::
The surcharge line label defaults to "Surcharge" and can be renamed (for example, to "Order Processing Fee") via StoreFront Languages.
### Configuration
**Step 1: Set the surcharge amount**
1. Go to **Configuration > Checkout > Payments**.
2. Open the **Credit and Debit Card** payment method settings.
3. In the Credit Card Settings panel, locate the **Surcharge transaction fee** column.
4. Enter the fixed fee amount (for example, `1.99`) in the row for each card type you accept (Visa, Mastercard, Discover, Amex, etc.).
5. Alternatively, use the **Surcharge transaction percentage** column if you prefer a percentage-based fee.
6. Set **Charge During Checkout** to **Yes (Recommended)** so the surcharge appears on the checkout page in real time.
7. Save.
> **Important:** The surcharge is configured per card type. If you accept multiple card brands, you must enter the fee in each row individually. The fee will only apply to payment methods where a surcharge value is set. It does not apply to PayPal, Amazon Pay, or other non-card payment methods unless those methods have their own surcharge configuration.
**Step 2: Rename the label (optional)**
The surcharge line displays as "Surcharge" by default. To change the label:
1. Go to **StoreFronts > \[Your StoreFront\] > Languages**.
2. Search for `surcharge`.
3. Two keys will appear:
- `checkout.specialoffersconfirmation.surchargeField`
- `order.format.text.surchargeField`
4. Update the value for `order.format.text.surchargeField` to your preferred label (for example, `Order Processing Fee`).
5. Save.
> **Note:** The StoreFront Languages editor is only available on accounts with a StoreFront. If you are using UltraCart's legacy hosted checkout without a StoreFront, the label cannot be changed through the UI.
* * *
## Option B: Handling Charge on a Shipping Method
A flat handling charge added to a shipping method increases the cost of that method before the customer sees the total. The combined amount displays on the Shipping/Handling line.
**Trade-off:** If your shipping method currently displays "Free!", adding a $1.99 handling charge changes that line to "$1.99". The free shipping label is replaced. This does not produce a separate summary line.
### Configuration
1. Go to **Configuration > Checkout > Shipping > Shipping Methods**.
2. Open the shipping method to modify.
3. Click the **Handling Charge** tab.
4. Under **Markup**, enter the fee amount in the **Flat** field.
5. Save.
> **Note:** Handling charges are configured per shipping method. If you have multiple active methods, each must be updated individually.
* * *
## Option C: Auto-Add a Fee Item
A $1.99 "Order Processing Fee" item can be created and added automatically to every cart. The fee appears as a line in the cart items list and contributes to the order subtotal. It does not appear as a separate line in the checkout summary block.
**Trade-off:** The fee is visible to the customer but is indistinguishable from a product line. The Shipping/Handling line is not affected.
### Configuration
1. **Create the fee item** in the Item Editor with the desired price and display name.
2. Set the item weight to 0 and mark it as non-shippable if no physical fulfillment is involved.
3. **Auto-add the item** using a promotion rule that applies to all orders, or through the Checkout API if using a custom integration.
> **Important:** Confirm the tax treatment of the fee item with your tax advisor before enabling, and configure the item's taxable status accordingly in the Item Editor.
* * *
## Option D: Custom StoreFront Template
If none of the above options produce the exact layout required, a custom StoreFront template can insert a fee line at any position in the checkout summary block. This approach requires StoreFront template customization and familiarity with UltraCart's templating system, or assistance from a UltraCart Pro Services developer.
For most merchants, Option A achieves the same visual result without custom development.
* * *
## Choosing the Right Approach
- If you simply need to recover the cost, **build it into your product or shipping prices**. This is the recommended approach, and it needs no configuration.
- If you want a separate, labeled fee line and card orders are all you need it on, use **Option A**. Accept that PayPal, Venmo, Apple Pay, and Google Pay orders will not carry the fee.
- If the fee must apply on every order and you are comfortable with it appearing on the Shipping/Handling line, use **Option B**.
- If the fee must apply on every order and you can accept it appearing in the cart item list rather than the summary, use **Option C**.
- If you require a custom summary line layout that Option A cannot provide, use **Option D**. Note that a custom template does not change which payment methods a surcharge can reach.
* * *
## Troubleshooting
### The surcharge line is not appearing at checkout
**Symptoms:** Customer completes checkout without seeing a surcharge line in the summary.
**Root Cause:** The surcharge value was entered for one card type but the customer used a different card type, or **Charge During Checkout** is set to No.
**Diagnosis:** Confirm the card type the customer used. Check the Credit Card Settings panel and verify the surcharge is set on that card type's row. Confirm **Charge During Checkout** is set to Yes.
**Solution:** Enter the surcharge amount in every card type row. Set **Charge During Checkout** to Yes.
* * *
### The surcharge label still shows "Surcharge" after updating StoreFront Languages
**Symptoms:** The checkout displays "Surcharge" instead of the custom label.
**Root Cause:** The wrong language key was updated, or the StoreFront cache has not cleared.
**Diagnosis:** In StoreFront Languages, confirm the value for `order.format.text.surchargeField` was saved (not just `checkout.specialoffersconfirmation.surchargeField`).
**Solution:** Update and save `order.format.text.surchargeField`. If the label still does not update, clear the StoreFront cache or contact support.
* * *
### The handling charge is not appearing at checkout
**Symptoms:** Customer sees the original shipping cost with no markup applied.
**Root Cause:** The handling charge was saved on one shipping method but the order used a different method.
**Diagnosis:** Confirm which shipping method the customer's order selected. Navigate to that method's Handling Charge tab and verify the flat fee is set.
**Solution:** Add the handling charge to each active shipping method individually.
* * *
### The fee item is showing in the subtotal but I want it below the subtotal
This is a display limitation of the standard checkout. Cart items always contribute to the subtotal line. Use Option A for a standalone summary line without custom development, or Option D for full layout control.
* * *
### The surcharge does not apply to PayPal, Apple Pay, or Google Pay orders
**Symptoms:** A surcharge is configured in Credit Card Settings and appears on card orders, but orders paid with PayPal, Venmo, Apple Pay, or Google Pay show no surcharge line.
**Root Cause:** The Credit Card Settings surcharge is scoped to card payments. For third-party wallets, UltraCart does not receive the payment method until the customer has authorized payment on the provider's side, so there is nothing for the surcharge to attach to.
**Diagnosis:** Check the order's payment method. If it is PayPal, Venmo, Apple Pay, or Google Pay, this is expected behavior rather than a fault.
**Solution:** There is no setting that extends the surcharge to these methods. To recover the cost on every order, build it into your product or shipping prices, or use **Option B** or **Option C**, which are not tied to the payment method.
* * *
## Related Documentation
- [Shipping Method Configuration](/orders-fulfillment/shipping/shipping-methods/shipping-method-configuration) - Handling Charge tab details
- [Payments](/checkout-payments/payments) - Credit card and payment method configuration
- [Item Editor](/items-catalog/item-management/item-editor) - Creating and configuring items
- [Coupons](/marketing-loyalty/coupons) - Promotion and auto-add rules
- [UltraCart REST Checkout API](/developer/api/checkout) - Programmatic cart manipulation
---
# Paay.co 3DS 2.0 / PSD2
https://docs.ultracart.com/checkout-payments/payments/paay-co-3ds-2-0-psd2
doc_type: explanation
UltraCart’s integration with [https://www.paay.co/](https://www.paay.co/) allows merchants to support 3DS 2.0 / PSD2 requirements.
Apart from meeting the Strong Customer Authentication (SCA) compliance under PSD2, there are numerous benefits to the new 3DS 2.0 protocol, especially from a mobile payments standpoint. The improved design dramatically increases the user experience on mobile devices by being fully compatible with mobile wallet applications and in-app transactions. 3DS 2.0 is user friendly where 3DS 1.0 was not.
**Benefits of implementing 3DS 2.0**:
- With the addition of an SDK component, comprehensive integration with mobile apps is
now possible, allowing merchants to natively integrate 3D Secure into their mobile apps.
- Merchants can ensure that the authentication process looks
and feels consistent with the rest of the app
- Dramatically increases the user experience on mobile devices, including
non-browser based platforms and mobile integration
- Biometric authentication whilst still in the merchant’s app it will
likely just feel like a valid security measure
- The merchant’s platform will only require additional authentication if the risk is high –
that will happen in only a small percentage of the transactions
- Authentication activity will be invisible to the cardholder
- 3DS 2.0 brings the promise of machine learning algorithms to better risk assessment. The new algorithms allow for a seamless data exchange across the three domains (merchant/acquirer, issuer, and interoperability). Furthermore, 3DS 2.0 utilizes machine learning and has 10 times more assessment data points than its predecessor, allowing for a more robust risk-based authentication. This means that with 3DS 2.0, repeated purchases online would be marked as low-risk by the merchant and issuing bank, which translates to a faster, easier, and more secure payment.
To learn more, please visit: [https://3dsecure2.com/](https://3dsecure2.com/)
# Pre-requisites
- Your payment gateway must be:
- Network Merchants (NMI)
- PayPal Payflow Pro
- World Pay Corporate (World Pay Business is not allowed to use an external MPI)
- Braintree (\*Does not support rotating gateways configuration)
- You must utilize the StoreFront checkout on a visual builder based theme (Elements, Hero, Lifty, etc.)
# Setup [Paay.co](https://www.paay.co/) Account
Navigate to:
:::info
Configuration → Checkout → Payments
:::
Click on the Settings associated with credit cards as shown below:

Scroll to the bottom of the modal and configure the API Key and Secret Key associated with your [Paay.co](https://www.paay.co) account:

Close the modal dialog and save.
# Configure the Checkout Form
Open the visual builder for your checkout and edit the settings on the “checkout form” element as shown below:

You can configure:
- whether or not to perform 3DS on the transaction
- whether to challenge the customer or not
- the other elements involved in challenging the customer (modal and panel)
- the maximum amount of upsell revenue (UltraCart will calculate the theoretical max amount if the customer accepts all the upsells associated with the items in the cart, but this field gives you the ability to cap that number so it doesn’t get out of control high)
- whether to pull a second authorization that is used to protect the first rebill
# Adding Missing Modal Dialog
Since the integration with [Paay.co](https://www.paay.co) is new, theme releases have not occurred with the modal baked into them. The following CJSON file will provide the necessary modal. Once you add this modal underneath your checkout form element, make sure to pick the proper modal and panel elements.
[3DS CHALLENGE modal.cjson](pathname:///confluence/2595782667/3DS%20CHALLENGE%20modal.cjson)
If you are choosing to never challenge the customer (challenge indicator = No challenge requested) then these elements are not necessary.
# Viewing 3DS Status on Orders
### Order Management → View Orders → Result
You can adjust the columns that are displayed and the order to include a new column named “3DS Status”. Please see [View Orders → Row & Column Orders](/orders-fulfillment/order-management/review-orders/view-orders) for more information on how to adjust the columns.
### Order Management → View Orders → Individual Order View
When you view an individual order, all of the 3DS fields will be displayed below the order if the order transacted with 3DS. Below is a sample screenshot of the display:

### Order → Transaction History
If you view the transaction history associated with an order, the transaction response will contain all of the 3DS fields.

### Reporting → Rotating Transaction Gateway History
If you run the [Rotating Transaction Gateway History](/reports-analytics/reporting/financial-reports/rotating-transaction-gateway-history-rep) report, you can select 3DS = Yes to filter to only 3DS transactions.

In the Excel spreadsheet there will be a column labeled **3DS Status** which will contain the overall 3DS status value as well as additional columns for the other 3DS related values.
# FAQ
### Q) How far in the future can the rebill be protected?
A) The expiration date on the 3DS information retrieved during the original checkout expires after 45 days.
### Q) What if my gateway is not listed as supported?
A) UltraCart has to add support for individual gateways one by one. If your gateway is capable of supporting an external MPI, we can consider adding support for it.
Q) Do you have a point of contact for [Paay.co](http://Paay.co)? Yes, for more information about [Paay.co](http://Paay.co), please contact Josh Cohen at [josh@paay.co](mailto:josh@paay.co)
---
# Payment Restrictions
https://docs.ultracart.com/checkout-payments/payments/payment-restrictions
doc_type: reference
## Overview
You've probably noticed the "Restrictions" column heading on several of the previous screen shots.
This feature allows you to place payment restrictions on any particular payment method configured on your account. Notice in the above screen shot each payment method has an "edit" button in the "Restrictions" column. If you click the edit button for a payment method NOT configured (no check in the box), the following notice will appear: "Unable to load payment method settings". Simple click the "back" button on your browser to return to the Payment Screen.
Clicking a configured Payment Method's "edit" button will display the Restriction settings.
Most Payment Methods have the same options available which are:
- Subtotal Restrictions
- Destination Restrictions
- Storefront Restrictions (or Legacy Screen Branding Themes)

## Subtotal Restrictions
- **Minimum Subtotal**: The minimum order subtotal required for this payment method to be available to customers.
- **Maximum Subtotal**: The maximum order subtotal limit after which this payment method will no longer be available to customers.
## Destination Restrictions
This section allows you to configure payment method restrictions for each destination listed by selecting one of three options: **Invalid for**, **Valid for**, or **Valid only for**. While this table might seem complex initially, it becomes more intuitive as you begin editing and applying restrictions to your payment methods. Merchants often use this feature to limit payments based on location, including specific countries and P.O. boxes. If you're familiar with the Shipping Configurations setup, this format will feel similar.
## StoreFront Restrictions
In this section, you can choose from three options for each StoreFront. Merchants with multiple screen branding themes or StoreFronts can use this feature to designate whether a payment method is valid or invalid for a specific screen branding theme.
---
# Payments Go Live Checklist
https://docs.ultracart.com/checkout-payments/payments/payments-go-live-checklist
doc_type: how-to
# Introduction
So you've completed your setup? Great! Here are a few things that we recommend you check before you launch your marketing and sales campaigns.
## Payment Configuration
One of the most common issues merchants encounter when going live is leaving some part of their payment configuration in test or "sandbox" mode. This can occur at either the gateway level, or directly in UltraCart.
The first place to check in UltraCart is under Payment Gateways.
:::note
Home → [Configuration](#) → Checkout [\[](#page-not-found)tab\] → [Payments](#) → [Transaction Gateways](#)
:::
After clicking the Transaction Gateways tab, you'll see a (long) list of gateways. Scroll down to UltraCart Test Gateway. Verify that the UltraCart Test Gateway **IS NOT** configured. If it is, remove data, check marks and click Save.

Next, click on the Methods tab. Then click on the Credit Card tab. You will be shown a list of currently configured credit cards..(Note: screen shot made while in Basic View).
Scroll down to "Test Credit Cards". Verify that there are no "test" numbers, such as 4444333322221111, configured:

---
# PayPal
https://docs.ultracart.com/checkout-payments/payments/paypal
doc_type: explanation
# Overview
PayPal is an industry leader in payment processing services. You can implement PayPal as a
supplemental payment method, or as an all-in-one service that combines PayPal-to-PayPal payments
with direct credit card processing, where the customer stays in the UltraCart checkout with no
redirect to PayPal to log in.
The current integration gives your customers a checkout that opens in a modal rather than
redirecting off your domain, which also keeps your analytics tracking intact, and adds PayPal
PayLater and Venmo as payment options.
On your side, it vaults payment information for credit cards, PayPal, and Venmo, and drives
subscription rebilling from UltraCart. That last point is what makes PayPal auto orders behave
like card auto orders: see [Managing PayPal Auto Orders](#managing-paypal-auto-orders).
:::tip
Still on the legacy PayPal integration? Most merchants have moved. To upgrade, see
[Upgrading to the latest PayPal payment processing integration](/checkout-payments/payments/paypal/upgrading-the-latest-paypal-payment-proc).
:::
## Business PayPal Account
You'll need a business PayPal account. To **upgrade** your current **PayPal Personal** Account to a **Business** or **Premier**Account: Go to [https://www.**paypal**.com/**UPGRADE**](https://www.paypal.com/UPGRADE) and log in to your **PayPal** account. Click the **Upgrade** Now button at the bottom of the page. The next page will allow you to choose a **personal Premier** Account or a **Business** Account.
# Integration Options
There are two integration options to choose from: **Express Checkout** & **Website "Payment Pro".**
### Navigation
:::note
Main Menu → Configuration → checkout → Payments → Methods \[tab\]
:::
The following shows the Payments screen. Connect PayPal by clicking the Connect button in the top left.

Notice below the screen has changed by limiting content to only the payment method you selected; in this case, PayPal. Also, PayPal is added in the Tabs list on the left. It will remain there until you deselect (disable) PayPal.

## Express Checkout
The **Express Checkout** integration requires only a basic business PayPal account. This option will redirect the customer to your company landing page at PayPal. There, the customer will be prompted to create an account or log in to an existing account to complete the payment. Then the customer is redirected back to the UltraCart checkout to receive the purchase receipt. Express Checkout works seamlessly with any integrated credit card transaction gateway, and is a preferred choice for many customers, especially those that may have credit issues or are particularly interested in maintaining a level of privacy.
### Advanced View for Additional Settings
The choices section will then expand to give you more settings.

### Integration Instructions
1. Enter your business email address associated with your PayPal business account (if you have a personal PayPal account, you'll need to upgrade it to a business account.)
2. Choose **"Express Checkout" **from the "Integration Method" drop-down menu
3. Configure your "[Instant Payment Notification](https://www.paypal.com/us/cgi-bin/webscr?cmd=_profile-ipn-notify) (IPN) to the following URL: **https://secure.ultracart.com/cgi-bin/UCPayPalNotify**
4. Set [Third-Party API permissions](https://www.paypal.com/us/cgi-bin/webscr?cmd=_profile-api-list-auths) to: **paypal\_api1.ultracart.com**
5. From the "Advanced Options" section choose "Live" from the drop-down menu.
(There are other optional fields which you can configure which will affect the look and feel of your PayPal landing page.)
Once you've finished with the Express Checkout configuration click SAVE at the bottom. Return to the UltraCart Payments screen to confirm your settings.
Notice in the screen shot below that PayPal is now listed below the Methods Tab. All configured methods will appear in this list.

## Website Payments Pro (Express Checkout and Direct Payments)
The PayPal Website "**Payments Pro**" integration is an All-In-One integration in which PayPal will handle both PayPal-to-PayPal payments ("Express Checkout") and credit card authorizations ("Direct Payments")
This is a great option for new businesses because the Payments Pro service can be added to the basic paypal service without the more extensive credit application process associated with a standard stand-alone merchant account and transaction gateway solution. Another benefit is that the Payments Pro service does not lock you into a long term contract.
PayPal requires you to have a PayPal Business Account If you want to sign up for Website Payments Pro (Direct Payments and/or Express Checkout). If you have only a Personal Account, you will be asked to upgrade or open a new business account during the application process. To start the application process, log in to your PayPal account and click on the "Merchant Services" tab at the top of the screen.
Application Process

The next screen will be presented only if you DO NOT have a PayPal Business Account. You can choose to UPGRADE your existing personal account or CREATE a NEW account. Click the button of your choice.

Merchants upgrading or creating a new business account might see a few additional screens before being presented with the Website Payments Pro application screen.
##### Website Payments Pro application
Next you will be presented with an Application consisting of 4 screens. The majority of the information required will be filled in if you already have a Business Account.
In addition to completing your account information, the 1st screen (shown below) requires you to agree to some terms.

Complete all the required fields on all screens. When you've completed the application, click on the "Submit application" link on the right side of the page.
Once your application is accepted, you will be returned to the "My Account" screen where you will be presented with the current monthly fee for your PayPal service. If you agree, click the "Agree" button. You will then be taken to the API Credentials screen.
### Completing "Payments Pro" integration with UltraCart
### Integration Instructions
1. Enter your business email address associated with your PayPal business account (if you have a personal PayPal account, you'll need to upgrade it to the business account.)
2. Choose **"PayPal Website Payments Pro (Express Checkout and Direct Payments)" **from the "Integration Method" drop-down menu
3. Configure your "[Instant Payment Notification](https://www.paypal.com/us/cgi-bin/webscr?cmd=_profile-ipn-notify) (IPN) to the following URL: **[https://secure.ultracart.com/cgi-bin/UCPayPalNotify](https://secure.ultracart.com/cgi-bin/UCPayPalNotify)**
4. Set [Third-Party API permissions](https://www.paypal.com/us/cgi-bin/webscr?cmd=_profile-api-list-auths) to: **paypal\_api1.ultracart.com**
5. From the "Advanced Options" section choose "Live" from the drop-down menu.
6. Click the save button
(There are additional, optional configuration fields, which you can configure which will affect the look and feel of your PayPal landing page.)
# Configuring PayPal to properly handle Customer Telephone
By default, the customer email address is the primary contact information for a paypal customer. If you prefer to have the customer telephone number to also be stored in the paypal transaction, you'll need to complete the following configuration: [PayPal Customer Telephone Number](/checkout-payments/payments/paypal/paypal-customer-telephone-number)
# Recurring Payments (Subscriptions)
PayPal and Venmo auto orders run on vaulted payment credentials. UltraCart holds the credential
and initiates each rebill itself, so a PayPal subscription behaves like a credit card
subscription: you manage the schedule in UltraCart, not in PayPal.
:::info
The current API integration with PayPal **does not support recurring payments for digital items
for new merchants.**
:::
### PayPal Account Settings for Subscriptions
PayPal requires Enhanced Recurring Payments enabled for recurring (also known as subscriptions or auto orders) payment processing.
Please see their standard agreement, as this involves an additional monthly cost to your PayPal account: [https://www.paypal.com/us/webapps/mpp/ua/us-erp-full](https://www.paypal.com/us/webapps/mpp/ua/us-erp-full)
To enable recurring payments on your PayPal account, login to [www.paypal.com](http://www.paypal.com) and navigate to Tools → Recurring Payments → Related Items → Sign up for Enhanced Recurring Payments.
As of Sept 2017, the direct link to that page is this: [https://www.paypal.com/us/cgi-bin/webscr?cmd=\_product-go&product=premium\_services](https://www.paypal.com/us/cgi-bin/webscr?cmd=_product-go&product=premium_services)
You will need to review the agreement and click the Agree and Continue button to activate this PayPal feature.

:::info
PayPal policy is to not allow the addition of PayPal Enhanced Recurring Payments from paypal accounts which had the PayPal Pro integration and then subsequently reverted back to the standard Express Checkout Only configuration.
(\*The workaround to this, according to PayPal support, is to open a new account then integrate that account to your UltraCart account.)
:::
If you have integrated using the third party API, enable the "**Create and Manage Recurring
Payments**" permission.
## Managing PayPal Auto Orders
PayPal and Venmo auto orders carry the same flexibility as credit card auto orders. The
restrictions that applied to the older PayPal-managed rebill model no longer apply:
- Coupons on a recurring order no longer make PayPal unavailable as a payment option.
- An auto order item is no longer limited to a single schedule.
- Pause steps are supported.
- Multiple "Customer-Selectable" auto order items are supported.
Cancel and Suspend behave the same as they do on any auto order. Cancel ends the auto order,
and Suspend pauses it until you unsuspend it.
### UltraCart Account Settings for Subscriptions
Navigate to Configuration → Back-Office → Auto Order Processing → Payment Settings → Paypal (Section) Advanced Settings (button) → "Send Recurring Flag" Select Yes, then save the changes.
Follow the instructions there.
### Managing Auto Orders with PayPal Payment

When you view the auto order record of a recurring payment, the **Payment Information** panel
confirms the order is billed using vaulted PayPal/Venmo information, and offers a **Send
Billing Update Email** button.
Cancel, suspend, or otherwise modify the auto order directly from the UltraCart auto order
record, using the **Cancel** or **Suspend** buttons in the item table at the bottom of the auto
order tab, the same as you would for a credit card auto order. You do not need to log into
PayPal to change the rebill schedule.
# Merchants Operating multiple UltraCart accounts
The same PayPal business account should not be associated with multiple UltraCart accounts. Merchants that are operating several UltraCart stores should sign up for a different PayPal account for each.
# Third Party API permissions
To grant permissions to a third party:
1. Log in to [PayPal](https://www.paypal.com/home "external link") with your Personal or Business account. If you do not have an account, create one.
2. Click Profile at the top right, and select **Profile and Settings**.
3. In the left menu, click **My selling tools**.
4. In the Selling online section, click **Update** next to **API access**.
5. On the **API Access** page, click **[Grant API Permission](https://www.paypal.com/US/cgi-bin/webscr?cmd=_profile-api-grant-authorization&_ga=1.15827382.1681362862.1629313398)**.
6. Enter the name of the user to whom you will grant permissions. If you do not know the third party's PayPal user name, contact the third party to request this information.
7. On the **Add New Third Party Permissions** page, select the types of permissions you want to grant to the third party and click **Add**.

In order to properly handle the payment processing, please make sure that you have the following PayPal permissions enabled.
If any of these permissions are not configured on your account, the payment processing will encounter errors that prevent the properly processing of the customer payment for their purchase.
| Permissions For Normal Transactions | Additional Notes |
| --- | --- |
| SetExpressCheckout | |
| GetExpressCheckoutDetails | |
| DoDirectPayment | |
| DoCapture | |
| DoVoid | |
| RefundTransaction | |
| Permissions for Paying Affiliates via PayPal | Additional Notes |
| Permissions for Paying Affiliates via PayPal | Additional Notes |
| --- | --- |
| GetBalance | |
| MassPay | |
# Testing Your PayPal Integration
:::info
To test your PayPal integration, you'll need to place a real order using either a personal paypal account (separate of your business paypal account) or for the Payments Pro integration, a real credit card (not configured as a test CC in the ultracart backend) then once you see a successful authorization occur for the payment, you can [perform a refund](/orders-fulfillment/tutorials/order-management-tutorials/how-do-i-perform-a-refund) to back out the charge associated with your test purchase.
:::
# PayPal Errors
## API Error Notifications Emails
If UltraCart recognizes PayPal permissions configuration within your PayPal account that is preventing proper processing of payment transactions for your order, you may receive email notifications to that effect.
:::info
**The email notification will be sent out to all users on the account that have the "edit settings" permission configured.**
:::
## Allow UltraCart To Call The \[chargeCreditCard\] API
If you do not have the chargeCreditCard API permission turned on, you receive a message like this (body text below):
**Subject: UltraCart \[UC MerchantID\] - PayPal permissions incorrect.**
**`Hi ,`**
**`This automated email is to inform you that your PayPal integration has not been configured properly to allow UltraCart to call the [chargeCreditCard] API. Please contact support for assistance in adjusting your configuration.`**
**`-UltraCart`**
#### The solution
To fix this issue, login to your PayPal account and:
1) Under the My Account menu click on the Profile option.
2) On the left side of the page under My Profile click on My Selling Tools.
3) Click the Update link to the right of API Access.
4) Edit the API access and grant permission for UltraCart to call \[chargeCreditCard\]
Until you grant permission for UltraCart to call chargeCreditCard, your customers can not use direct credit cards during the checkout. This is limiting your sales to PayPal only.
:::info
This message gets triggered whenever PayPal returns error code 10002 for a transaction. So, you may receive this notification multiple times.
If transactions were previously processing through PayPal okay then suddenly you receive these problem notices, its possible that PayPal is experiencing some sort of temporary processing problem on their end. You should investigate with paypal and make sure that you have the \[chargeCreditCard\] configured.
\*IF you do, then you should contact paypal to inquire about processing issues on their end.
:::
## UltraCart has received ERROR: 10501
Hi ,
UltraCart has received ERROR: 10501 Invalid Configuration This transaction cannot be processed due to an invalid merchant configuration from PayPal.
Make sure that you have accepted the "PayPal Payments Pro" agreement in your PayPal account after you have been approved by PayPal for PayPal Payments Pro. If you have accepted their agreement but are still getting this error, PayPal also occasionally acknowledges the agreement and activates Virtual Terminal but somehow misses activating PayPal Payments Pro itself; if your PayPal "Get Started" summary screen only shows Virtual Terminal and nothing about PayPal Payments Pro, please contact PayPal support to get your PayPal Payments Pro service activated.
If you are only using PayPal Payments Standard with a regular PayPal personal, Business or Premier account (i.e., if you have not upgraded to PayPal Payments Pro), please go to Seller Admin > Payment Preferences and make sure you have PayPal Payments Standard checked (rather than PayPal Payments Pro) and click Submit to save any changes you make.
\-UltraCart
#### The solution
To fix this issue, login to your PayPal account and:
1) Under the My Account menu click on the Profile option.
2) On the left side of the page under My Profile click on My Selling Tools.
3) Click the Update link to the right of API Access.
4) Edit the API access and grant permission for UltraCart to call \[doCapture\]
Until you grant permission for UltraCart to call doCapture, the orders will be stuck in "Payment Status = pending".
## About Authorization Model
:::info
The configuration of the "[Authorization Model](https://ultracart.atlassian.net/wiki/pages/viewpage.action?pageId=917602)" will affect the point at which the authorized payment is captured:
- "Auth and Capture" - Capture will occur upon the authorization when the customer is sent over to paypal to make their payment
- **"Auth then Capture" - "doCapture" call will occur when the order is marked as shipped from the shipping department.**
:::
## Paypal Errors
Here is a link to a spreadsheet of PayPal Virtual Terminal error responses, what they mean, and what you can do about them:
[https://www.paypalobjects.com/en\_US/vhelp/servicemanagement\_help/vterror.htm](https://www.paypalobjects.com/en_US/vhelp/servicemanagement_help/vterror.htm)
Here is a list of Address Verification System Responses:
[https://www.paypalobjects.com/en\_US/vhelp/servicemanagement\_help/avs\_response.htm](https://www.paypalobjects.com/en_US/vhelp/servicemanagement_help/avs_response.htm)
Here are some of the common errors that we see in UC Accounts:
| error code | error meaning |
| --- | --- |
| 0005 | The transaction was declined without explanation by the card issuer |
| 0013 | The transaction amount is greater than the maximum the issuer allows. |
| 0014 | The issuer indicates that this card is not valid. |
| 0043 | The card has been reported stolen |
| 0051 | The credit limit for this account has been exceeded. |
| 0054 | The card is expired. |
| 1015 | The credit card number was invalid |
| 1511 | Duplicate transaction attempt. |
## Affiliate Management MassPay API Errors
###
PayPal MassPay Errors related to processing affiliate commissions via PayPal MassPay
While attempting to process payments for affiliates, an error appears on the page that says "PayPal MassPay API failed. You do not have permissions to make this API Call". This error means that you need to grant access to that particular API call within your PayPal account so that UltraCart can call it. Log into your PayPal account, then navigate:
:::note
My Account → Profile → My Settings → My Selling Tools → API Access \[update\].
:::
Under that section within [PayPal.com](http://paypal.com/), you'll need to give the UltraCart API login the additional permission to do MassPay, then save the changes.
## PayPal AMEX Support
PayPal now requires all merchants that would like to use AMEX in their PayPal account to sign an agreement directly with American Express.
Error Message
If you are getting the following error:
L_ERRORCODE1
10566
L_LONGMESSAGE1
The credit card type is not supported
L_SEVERITYCODE1
Error
L_SHORTMESSAGE1
Credit card type unsupported
this means that you have not accepted the PayPal AMEX agreement. Until you do this on your PayPal account it will not support American Express. You can read more about this at [PayPal's AMEX Update](https://www.paypal.com/amexupdate).
# Frequently asked Questions
## **Question: I have an item configured with $0.00 item cost and a flat shipping cost. When I test a checkout with this item, I'm getting an error message that Paypal cannot process a free offer. Why?**
Answer: Paypal has a strict policy that items must be configured with a item cost in order to allow a payment to be processed. Shipping fee's alone will not work. The minimum cost that PayPal will allow for an item is $0.01.
# Related PayPal Knowledgebase Articles
[Paypal-UltraCart Integration](https://www.paypal.com/us/smarthelp/search?q=ultracart&channel=mts)
[https://developer.paypal.com/docs/payflow/fmf/integration-guide/FMFSetup/#configuring-your-fraud-management-filters](https://developer.paypal.com/docs/payflow/fmf/integration-guide/FMFSetup/#configuring-your-fraud-management-filters)
---
# Configuring PayPal at UltraCart
https://docs.ultracart.com/checkout-payments/payments/paypal/configuring-paypal-at-ultracart
doc_type: how-to
To configure PayPal as a payment method, navigate to:
:::info
Configuration → Checkout → [**Payments**](https://secure.ultracart.com/merchant/configuration/payment/v5/methodsLoad.do)
:::
note
If you already have an older version of PayPal configured within UltraCart , visit the upgrade guide to take advantage of the latest features and payment methods available:
[Upgrading the latest PayPal payment processing integration](/checkout-payments/payments/paypal/upgrading-the-latest-paypal-payment-proc)
If you already have an older version of PayPal configured within UltraCart , visit the upgrade guide to take advantage of the latest features and payment methods available:
[Upgrading the latest PayPal payment processing integration](/checkout-payments/payments/paypal/upgrading-the-latest-paypal-payment-proc)

After clicking the Payments button (3 in the screenshot above), you'll see the following screen:

You’ll be redirected to the following PayPal Screen to connect your PayPal Account (you’ll be redirected back to UltraCart once the process is completed):

## Connecting your existing account

:::info

If you’re attempting to connect a personal account you’ll see this dialog. If you choose to create a new business account (as opposed to converting your Personal account to a Business account) you’ll be redirected back to the start of the process and use a new email address (not already associated with a PayPal account) to [create a new business account.](/checkout-payments/payments/paypal/configuring-paypal-at-ultracart)
:::
## Creating a new PayPal account
If you don’t already have a PayPal account, you’ll be directed to a form to create a new PayPal account

---
# PayPal Agentic Commerce
https://docs.ultracart.com/checkout-payments/payments/paypal/paypal-agentic-commerce
doc_type: explanation
PayPal Agentic Commerce allows your products to be discovered and purchased directly within AI-powered chat conversations. When enabled, UltraCart syncs your product catalog to PayPal, which distributes it to supported AI assistant surfaces. Customers can browse, select, and pay for products without ever leaving their chat — reducing friction and opening a new sales channel for your store.
For more details on how conversational commerce works, see [AI-Powered Conversational Commerce](https://www.ultracart.com/resources/ai-powered-conversational-commerce).
## How It Works
1. **Catalog Sync** — UltraCart synchronizes your product catalog and pricing to PayPal.
2. **AI Distribution** — PayPal distributes your catalog to supported agentic commerce surfaces (AI chatbots and assistants).
3. **In-Chat Checkout** — Customers discover your products through natural conversation with AI assistants and complete purchases using PayPal payments, all within the chat.
4. **Order Fulfillment** — Orders flow directly into UltraCart for standard processing and fulfillment.
## Benefits
- **New Revenue Channel** — Reach customers already spending time in AI chat interfaces with reduced purchase friction.
- **Better Product Discovery** — AI assistants intelligently surface the right products from your catalog based on customer queries.
- **Lower Cart Abandonment** — Inline checkout eliminates the redirects that typically increase abandonment rates.
- **Expanded Reach** — Display your products across multiple AI agent surfaces without additional marketing spend.
- **Data Insights** — Track top-searched items, identify catalog gaps, and monitor conversion by surface.
## Prerequisites
Before enabling PayPal Agentic Commerce, you must have PayPal connected as a payment method on your account.
If you have not yet configured PayPal, navigate to **Configuration** → **Checkout** → **Payments** and connect your PayPal Business account. See the [PayPal Integration](/checkout-payments/payments/paypal/paypal-integration) documentation for complete setup instructions.
:::info
PayPal Agentic Commerce is currently available to US-based merchants only. Additional countries are planned for future rollout.
:::
## Enabling PayPal Agentic Commerce

### Step 1: Navigate to Integrations
From the UltraCart back office, go to **Configuration** → **Integrations**.
You will see **PayPal Agentic Commerce** listed under the **Channel Partners** section.
### Step 2: Open PayPal Agentic Commerce Settings
Click on **PayPal Agentic Commerce** to open the settings page.
### Step 3: Select Your StoreFronts

On the PayPal Agentic Commerce Settings page, you will see a list of your StoreFronts with checkboxes. Select the StoreFronts you want to enable for agentic commerce.
Each selected StoreFront will have its product catalog synced to PayPal and made available through AI assistant surfaces.
:::info
Only items that are assigned to a selected StoreFront will be distributed to agentic commerce surfaces. Make sure your items are assigned to the appropriate StoreFront(s) or they will not appear in AI chat results.
:::
### Step 4: Save
Click the **Save** button to apply your changes.
That's it — your selected StoreFronts are now enrolled in PayPal Agentic Commerce. Products from those StoreFronts will begin appearing in supported AI chat surfaces as PayPal processes the catalog sync.
## Eligibility Requirements
To participate in PayPal Agentic Commerce, your store should meet the following criteria:
| Requirement | Details |
| --- | --- |
| PayPal Account | PayPal Business account connected to UltraCart |
| Product Feeds | Structured product catalog with complete item details |
| Policies | Documented fulfillment and return policies |
| Product Types | Digital or shippable physical goods (beauty, apparel, electronics accessories, digital gift cards) |
| Location | US-based merchants (additional countries planned) |
## Related Documentation
- [PayPal Integration](/checkout-payments/payments/paypal/paypal-integration) — Setting up PayPal as a payment method
- [AI-Powered Conversational Commerce](https://www.ultracart.com/resources/ai-powered-conversational-commerce) — Overview of how agentic commerce works
---
# PayPal Customer Telephone Number
https://docs.ultracart.com/checkout-payments/payments/paypal/paypal-customer-telephone-number
doc_type: how-to
# PayPal Customer Telephone Number
Some merchants prefer to conduct customer support via telephone rather than email. However, if you do not have the following option turned "on" in your PayPal Profile settings, the customer's phone number will not be collected.
Here's how to get it set up from your PayPal account:
- Log in to your account at [www.PayPal.com](http://www.paypal.com/)
- Hover over your name in the right hand corner of the screen and select **Account Settings**
- From your settings, select **Website Payments **in the menu on the left
- Next to **Website preferences**, select **Update**
- Scroll down and under **Contact Telephone Number** you can turn it on.
In the Contact Telephone Number section you will see 3 options
- On (Optional Field)
- **On (Required Field) ← Choose this option!**
- Off (PayPal recommends this option)
Select the On (Required Field) as shown below.

Click the "Save" button after you have made your selection. Now PayPal orders will flow into UltraCart with a phone number.
---
# PayPal Fastlane
https://docs.ultracart.com/checkout-payments/payments/paypal/paypal-fastlane
doc_type: how-to
# Introduction
PayPal Fastlane speeds up the checkout process by recognizing millions of guest shoppers and allowing them to autofill their checkout details. No store accounts or PayPal user accounts required.
PayPal's brand recognition helps give customers the confidence to buy. Your all-in-one checkout solution can offer PayPal, Venmo, Pay Later options, card processing, local payment types\], and more — all through a single PayPal integration.
**PayPal Fastlane is also compatible with auto orders (subscriptions) and upsell after just like existing credit cards.**
# Pre-requisites
In order to accept PayPal Fastlane on your checkout you will first need to have a US based PayPal business account. If you have not already connected your PayPal account navigate to Configuration → Checkout → Payments then click Connect within the PayPal section.
Second, make sure that your StoreFront theme is one of the following themes with the minimum version specified. If not please [upgrade your theme](/storefronts-themes/themes/upgrade#upgrade-a-theme).
| **Theme Name** | **Version** |
| --- | --- |
| Elements | 2.18 |
| Hero | 1.21 |
| Jewel | 1.17 |
| Lifty | 1.21 |
| Native | 1.16 |
| Poppy | 1.07 |
# Enabling Fastlane
If you previously connected your PayPal account before Fastlane became available, navigate to Configuration → Checkout → Payments and click on the Fastlane logo as shown below then scroll to the bottom and click Save.

# Customized Checkouts
If you’ve customized your StoreFront checkout using the Visual Builder already, then upgrading your theme will not overwrite your customizations and bring in the new Visual Builder elements associated with Fastlane. The new elements are:
- checkout paypal fastlane watermark
- checkout condition (condition = PayPal Fastlane authenticated)
- checkout condition (condition = PayPal Fastlane address available)
- checkout condition (condition = PayPal Fastlane card available)
- checkout paypal fastlane credit card
- checkout paypal fastlane shipping address
- button (action = PayPal Fastlane Address Book)
The stock theme provides a great example on how these elements are used. If you need assistance modifying your customized theme, please contact [professional services](https://www.ultracart.com/help/pro-services.html).
# Presentation to the Customer at Checkout
The Fastlane checkout s triggered based upon the entry of a email address associated with a PayPal account, it does not appear as a separate express checkout button, like the other express checkout options:

If you theme is updated for Fastlane, you’ll see this text next to the email address field.
Upon entry of the email address and then the tabbing through to the next checkout field, if the email is associated with a PayPal account, a pop-up dialog window will appear for the FastLane checkout. This dialog window will trigger sending the customer an SMS, and upon entering the code that is sent, the customer billing details will be populated.
# Important Note Regarding APMs and Fraud Prevention Rules Processing
**Alternative Payment Methods (APMs)** include any non-traditional payment type, such as digital wallets, bank transfers, Buy Now Pay Later (BNPL) services, and other regional or emerging solutions. These methods enhance conversion rates by allowing customers to pay using familiar local options or stored credentials.
**PayPal Fastlane** functions as an APM by enabling rapid, authenticated checkouts through saved payment information. Because of this streamlined process, **payments are authorized and captured immediately**, before standard fraud screening can occur.
> **Important:** If you have existing **Fraud Prevention Rules** configured to **“Flag for Review”**, Fastlane and other APMs processed checkouts may bypass the Accounts Receivable department and instead go to the ‘Fraud Review’ order location for Review since the payment transaction completes in real time.
## Recommended Configuration
To ensure proper handling of APMs transactions:
1. Enable ‘Fraud Review’ in the Order Task Generation Configuration
[Order Task Generation](/orders-fulfillment/configuration-order-management/order-task-generation)
[Tasks](/customers-crm/tasks)
2. Configure the ‘Orders/Payments-> Fraud Review’ for one or more users on your account.
[User Configuration Screen](/account-settings/general-configuration/users/user-configuration-screen)
3. Users monitoring the orders should enable the Fraud Review widget on the Home page.
[UltraCart Dashboard](/get-started/navigating-ultracart/ultracart-dashboard)
**If the review later determines the order to be fraudulent, issue a refund from within UltraCart.**
**Summary:** Using “Process payment and then review” allows you to benefit from your Alternative Payment Methods (APMs) instant checkout speed while maintaining effective fraud oversight.
* * *
# Next Steps
- [Learn more about Configuring PayPal Payments](/storefronts-themes/themes/upgrade#upgrade-a-theme)
- [Review Fraud Prevention Rules Setup Guide](/checkout-payments/fraud-prevention)
- [Fraud Review](/orders-fulfillment/order-management/fraud-review)
- [E-commerce Compliance and Security Guide for UltraCart Merchants for 2025](/guides/ultracart-documentation/reference/ultracart-rest-api/ultracart-pci-compliance/e-commerce-compliance-and-security-guide)
---
# PayPal Integration
https://docs.ultracart.com/checkout-payments/payments/paypal/paypal-integration
doc_type: explanation
# Important PayPal API Update Available - June 2023
:::info
### Integration Update Notice (June 2023)
Attention Merchants, UltraCart has a new integration with PayPal, please upgrade to the latest integration in order to take advantage of the new functionality and better user experience that the new integration provides: [Upgrading the latest PayPal payment processing integration](/checkout-payments/payments/paypal/upgrading-the-latest-paypal-payment-proc)
**IMPORTANT: PayPal is requesting that merchants using the deprecated API to begin the migration to the current API as they will be shutting down the legacy API in the near future.**
# Benefits
- Improved checkout experience for customers using a modal instead of a browser redirect.
- Improved analytics tracking because customers are not redirected off domain for PayPal.
- Additional payment options for customers including PayPal PayLater and Venmo
- Dual Vaulted payment information for credit cards, PayPal, and Venmo.
- Superior subscription rebilling initiated from UltraCart
- Ability to adjust anything on an auto order paid for with PayPal.
:::
# Storefront Theme Pre-Requisites
A StoreFront Visual Builder based theme is required for enabling PayPal in your checkout.
We recommend making sure your theme is updated to the latest available version.
**Supported themes are**:
1. **Elements - 2.13+**
1. **Hero - 1.17+**
2. **Jewel - 1.13+**
3. **Lifty - 1.15+**
4. **Native - 1.12+**
5. **Natural VB - 1.12+**
6. **Poppy - 1.03+**
note
## Merchants Operating multiple UltraCart accounts
The same PayPal business account should not be associated with multiple UltraCart accounts. Merchants that are operating several UltraCart stores should sign up for a different PayPal account for each.
## Merchants Operating multiple UltraCart accounts
The same PayPal business account should not be associated with multiple UltraCart accounts. Merchants that are operating several UltraCart stores should sign up for a different PayPal account for each.
note
**Note:** whenever a customer initiates a Apple Pay / Google Pay transaction they will not be shown upsells.
**Note:** whenever a customer initiates a Apple Pay / Google Pay transaction they will not be shown upsells.
# Overview
PayPal is an industry leader in payment processing services. PayPal can be implemented as a supplemental payment processing service as well as an all-in-one payment processing service that combines the PayPal-to-PayPal payment processing along with direct credit card processing (where the customer in the UltraCart checkout without any redirect to the PayPal website for login.
## Business PayPal Account
You'll need a business PayPal account. To **upgrade** your current **PayPal Personal** Account to a **Business** or **Premier**Account: Go to [https://www.**paypal**.com/**UPGRADE**](https://www.paypal.com/UPGRADE) and log in to your **PayPal** account. Click the **Upgrade** Now button at the bottom of the page. The next page will allow you to choose a **personal Premier** Account or a **Business** Account.
### Navigation
:::note
Main Menu → Configuration → Checkout → Payments → PayPal (section)
:::
The following shows the Payments screen. Connect PayPal by clicking the blue **Connect** button.

The next screen will prompt you to connect UltraCart to your PayPal account. Enter in your PayPal email address and country, then click Continue as shown below.

Now you will be prompted to login to your PayPal account.

Next you want to select “Use existing business account” and click Next

# Testing Your PayPal Integration
:::info
### Testing Integration
To test your PayPal integration, you'll need to place a real order using either a personal paypal account (separate of your business paypal account) or for the Payments Pro integration, a real credit card (not configured as a test CC in the ultracart backend) then once you see a successful authorization occur for the payment, you can [perform a refund](/guides/ultracart-documentation/tutorials/order-management-tutorials/how-do-i-perform-a-refund) to back out the charge associated with your test purchase.
:::
## Affiliate Management MassPay API Errors
###
PayPal MassPay Errors related to processing affiliate commissions via PayPal MassPay
While attempting to process payments for affiliates, an error appears on the page that says "PayPal MassPay API failed. You do not have permissions to make this API Call". This error means that you need to grant access to that particular API call within your PayPal account so that UltraCart can call it. Log into your PayPal account, then navigate:
**PayPal Navigation**
My Account → Profile → My Settings → My Selling Tools → API Access \[update\].
Under that section within [PayPal.com](http://paypal.com/), you'll need to give the UltraCart API login the additional permission to do MassPay, then save the changes.
# Frequently Asked Questions
**Q: After upgrading to the new API, I am not seeing Venmo payment button appear with the rest of the PayPal Payment buttons, why is that?**
A: Venmo has to come later in the checkout in the ‘Options’ page. It appears in the options page because Venmo requires that all the address information be collected by the checkout, before the payment is initiated.
**Q: I am seeing the ‘PayPal’ and ‘Pay Later’ stacked in the shopping cart page, why is that?**
A: Those buttons appear stacked, because they are a single widget element that is injected into the checkout by PayPal.
**Q: We are seeing OrderID’s for some transactions in PayPal that have letters at the end of the orderID, what is causing this to happen?**

A: We have to make the order id unique in PayPal. The transaction process for orders that contain an accepted upsell after offer, is that we void the first transaction when someone takes an upsell that causes a change to the order total for the final PayPal charge. So, this change to the orderID would indicate a voided authorization, that is replaced by another transaction.
**Q: I received a email notification from UltraCart regarding a ‘Payment Transaction Time-out on PayPal’ but the message does not provide specific details such as that?**
A: Those buttons appear stacked, because they are a single widget element that is injected into the checkout by PayPal.
---
# PayPal Terminal Unavailable
https://docs.ultracart.com/checkout-payments/payments/paypal/paypal-terminal-unavailable
doc_type: reference
UltraCart provides a terminal for adding additional charges to a customer’s account. This is useful if the customer calls and requests additional products. However, this terminal is only available with more recent PayPal API versions. Anything order before July 2023 cannot be used to make variable charges against a customer’s account. Orders after July 2023 will depend on when an existing merchant upgrades their UltraCart-PayPal integration to the latest version.
---
# Signing up for PayPal
https://docs.ultracart.com/checkout-payments/payments/paypal/signing-up-for-paypal
doc_type: how-to
# Overview
According to PayPal, the signup process only takes a few minutes. As part of the enrollment process, merchants must attach a bank account to their PayPal account that will receive the payments.
Go to [www.paypal.com](http://www.paypal.com) and click on the "Sign Up" link at the top of the screen.

On the next screen, you will need to select your account type and then click "Next". **PayPal recommends a Business account for business owners.**

Once you've clicked on the "Next" button for Business Owners, you'll be shown the Select Payment Solutions screen.

Select your payment solution from the options shown and you are on your way to setting up your account with PayPal.
---
# Upgrading the latest PayPal payment processing integration
https://docs.ultracart.com/checkout-payments/payments/paypal/upgrading-the-latest-paypal-payment-proc
doc_type: how-to
# Introduction
This tutorial will walk you through the process of upgrading your PayPal integration to their latest offering.
# Benefits
- Improved checkout experience for customers using a modal instead of a browser redirect
- Improved analytics tracking because customers are not redirected off domain for PayPal
- Additional payment options for customers including PayPal PayLater and Venmo
- Dual Vaulted payment information for credit cards, PayPal, and Venmo
- Superior subscription rebilling initiated from UltraCart
- Ability to adjust anything on an auto order paid for with PayPal
- Better handling of upsell after offers
# Pre-Requisites
This tutorial assumes that you already have:
1. UltraCart account connected to PayPal
2. Using a StoreFront Visual Builder based theme for your checkout. We recommend making sure your theme is updated to the latest available version.
**Supported themes are**:
1. **Elements - 2.13+**
2. **Hero - 1.17+**
3. **Jewel - 1.13+**
4. **Lifty - 1.15+**
5. **Native - 1.12+**
6. **Natural VB - 1.12+**
7. **Poppy - 1.03+**
# Payment Configuration
Navigate to Configuration → Checkout → Payments. The payment configuration screen should look like the screenshot shown below. Click on the **Upgrade** button to begin the connection process.

The next screen will prompt you to connect UltraCart to your PayPal account. Enter in your PayPal email address and country, then click Continue as shown below.

Now you will be prompted to login to your PayPal account.

Next you want to select “Use existing business account” and click Next

# Frequently Asked Questions
**Q: After upgrading to the new API, I am not seeing Venmo payment button appear with the rest of the PayPal Payment buttons, why is that?**
A: Venmo has to come later in the checkout in the ‘Options’ page. It appears in the options page because Venmo requires that all the address information be collected by the checkout, before the payment is initiated.
**Q: I am seeing the ‘PayPal’ and ‘Pay Later’ stacked in the shopping cart page, why is that?**
A: Those buttons appear stacked, because they are a single widget element that is injected into the checkout by PayPal.
**Q: We are seeing OrderID’s for some transactions in PayPal that have letters at the end of the orderID, what is causing this to happen?**

A: We have to make the order id unique in PayPal. The transaction process for orders that contain an accepted upsell after offer, is that we void the first transaction when someone takes an upsell that causes a change to the order total for the final PayPal charge. So, this change to the orderID would indicate a voided authorization, that is replaced by another transaction.
**Q: I received a email notification from UltraCart regarding a ‘Payment Transaction Time-out on PayPal’ but the message does not provide specific details such as that?**
A: Those buttons appear stacked, because they are a single widget element that is injected into the checkout by PayPal.
note
**Note:** whenever a customer initiates a Apple Pay / Google Pay transaction they will not be shown upsells.
**Note:** whenever a customer initiates a Apple Pay / Google Pay transaction they will not be shown upsells.
# Related Documentation
PayPal API Transaction Responses: [https://developer.paypal.com/api/nvp-soap/errors/](https://developer.paypal.com/api/nvp-soap/errors/)
---
# Rotating Transaction Gateway
https://docs.ultracart.com/checkout-payments/payments/rotating-transaction-gateway
doc_type: reference
# Introduction
Rotating transaction gateways allow a merchant to spread credit card transactions across multiple gateways. While available to all UltraCart merchants, it is primarily intended for merchants with substantial transaction volume. Merchants should thoroughly test their configuration before going live with this feature.
### Navigation
:::note
[Home](#) → [Configuration (Checkout)](#) → [Payments](#) → ("Debit and Credit Cards" section) → [M](#)ultiple (rotating) gateways
:::
## Configuration

### Warning Message
When you navigate to the to the rotating gateways tab you will see a a message at the top of the page alerting you to the fact that you must migrate
the existing gateway in order to properly configure rotating gateways:

If you see the above warning about existing configuration under the transaction gateways tab, use the migration wizard located at the bottom of the page (other wise navigate to the transaction gateways configuration page and carefully copy and paste the credentials into notepad or text editor then manually un-configure the gateway there (unselect its checkbox then scroll down and click the save button.) Then navigate back to rotating gateways and click new then configured the gateway with the credentials you previously saved in the notepad/text editor.

:::info
The migration tool will set a merchant property called "defaultRefundRtgCode" which will be used to initiate a refund on an order if the order does not have an RTG code assigned to it. So refunds should work against the old migrated gateway.
:::
# Configuring a New Rotating Gateway

## Rotating Gateway Editor

In this section, you will enter some basic information about this transaction gateway.
Code
Each rotating transaction gateway requires a unique code. It is recommended that you use a code that will allow you to quickly identify either the gateway or merchant account
Traffic %
Enter the desired traffic percentage you want this gateway to receive. If there are other restrictions (as discussed below) on this gateway, then UltraCart will resolve those restrictions, then compare the relative percentages across all gateways that qualify to handle the transaction
Important Note Regarding Traffic Percentage Configuration
The total traffic percentage among all configured gateways should in most cases equal 100%.
However, UltraCart will normalize the sum of the traffic percentages for the RTGs being considered based upon all the other restrictions that can be applied.
So, the normalization will spread the traffic evenly among the active gateways.
Status
Each rotating transaction gateway can be placed in one of three states:
Active - The default status, this indicates that the gateway is ready to receive transactions. If an active gateway experiences a certain number of consecutive failures (configured below), it will be marked as inactive.
Inactive - When marked inactive, this gateway will not receive any new transactions.
Stand-by- A stand-by transaction gateway will only receive transactions if there are no active gateways.
If all configured gateways are marked as inactive, then UltraCart will attempt to route the transaction through any configured gateway, regardless of status, rather than simply failing
Deactivate after X consecutive failures
(Optional) If specified, UltraCart will automatically place this gateway into inactive status if the specified number of consecutive failures are encountered.
Charges Appears On Statement As
(Optional) If this gateway has a different Charges Appear On Statement message than your store's default, then this value will be used for transactions conducted through this rotating transaction gateway
Customer Service Email
(Optional) If this gateway has a different Customer Service email address than your store's default, then this value will be used for transactions conducted through this rotating transaction gateway
Customer Service Phone
(Optional) If this gateway has a different Customer Service phone number than your store's default, then this value will be used for transactions conducted through this rotating transaction gateway
If Charge Declines Try Other RTG
(Optional) If selected, then during a checkout, if the initial transaction is declined, attempt the next credit card authorization against the configured rotating gateway.
Rebill Auto Order against RTG
(Optional) If set, any auto orders originally process with this gateway will have its rebills processed with the selected gateway.
Require CVV2
(Optional) This force the gateway to require the CVV2. Setting this will mean that auto orders would not be processed with this gateway.
Preferred for Auto Orders
(Optional) When checked, this gateway will be preferred over others is the transaction is related to an auto order. This can be used to shift traffic towards gateways that have card updating services.
### Gateway

Select the gateway vendor from the list provided. Each gateway has different required information about your account. When you select a vendor, the vendor-specific fields will appear. This section behaves in an identical fashion as the [Transaction Gateways](#) tab, which is [documented on this wiki in further detail](/checkout-payments/payments/configure-transaction-gateway).
### Monthly Restrictions

Some merchant accounts have strict limits regarding the maximum monetary volume permitted each month. If the merchant account associated with this transaction gateway has such restrictions, this section will allow you to specify them to UltraCart.
Maximum Monthly
The maximum monetary volume that is permitted by this merchant account
Current Monthly
The current monetary volume processed through this merchant account. UltraCart will automatically keep this field up to date
Reset Monthly at X EST
Enter the date and time the next reset will occur for this merchant account. UltraCart will automatically update this field each month to the correct date
### Important Note Concerning The Handling Of Limits
:::info
PLEASE NOTE: If you configure each rotating gateway with a Maximum limit and the limit is reached for each gateway, then ultracart will randomly pick one of the gateways to attempt to authorization. Whether or not the gateway authorizes the payment is up to the gateway. If the gateway rejects the transactions, then the order will be captured after the number of failed attempts configured in the credit and debit card settings is reached (the default is 3 attempts.)
:::
## Configuring Restrictions
### Batch Cutoff Time
New Feature - 2023-05-01 -
If you configure the batch cut-off time for this gateway, partial refunds that occur before the batch has closed out will be queued for processing 12 hours after the batch has closed. See [Queued Refunds](/orders-fulfillment/tutorials/order-management-tutorials/how-do-i-perform-a-refund#queued-refunds) for the full behavior.
Configure this on every rotating gateway. Without it, UltraCart can still recover on Braintree and Authorize.Net by recognizing the gateway's "transaction not settled" rejection and queuing the refund after the fact, but that costs a failed transaction attempt against the gateway, and your staff will not be told when the refund is scheduled to settle at the time they issue it.

NOTE: 24 hour format, based on EST
### Monthly Restrictions

### Daily Restrictions

### Daily Auto Order Restrictions

### Date Restrictions

You can restrict each transaction gateway to only be allowed on specific dates, or specific days of the week, or days of the month. One common use of this feature is to alternate traffic between multiple gateways throughout the week. You can specify any of the options in this section, but the transaction date must match **all of the selected rules** in order to be deemed valid for use.
Date Between X and Y
Only allow transactions to be processed by this gateway if the transaction occurs within the specified date range. This is frequently used if a merchant is testing a new gateway provider or merchant account
Only on Day of Week
Only allow transactions to be processed by this gateway if the transaction occurs on one of the specified days of the week.
Only on Day of Month
Only allow transactions to be processed by this gateway if the transaction occurs on the specified day of the month
We have no idea of a practical use for this restriction. If you have any suggestions, please post them on our forums!
### International Percentage Restriction

If your merchant account has strict limits on the amount of international volume that you can process, this restriction allows you to place a percentage cap on the amount of international volume you process.
### Storefront Screen Branding Theme Restriction

Use the "Invalid For" & "Valid For" columns to configure the available storefront/SB themes that are valid for the rotating gateway.
Please Note: IF you have only one valid theme, you can use the Valid only For".
### Total Restrictions

The total restriction allows you to limit this rotating gateway from processing transactions where the total matches a certain criteria. For instance if your merchant account provider has approved transaction up to $100 then you could set the total restriction to <= $100 so only those transactions would be processed on this gateway.
### Per-Transaction Restrictions

UltraCart can restrict a gateway to transactions whose total matches a certain criteria. For example, if the merchant account provider associated has only approved transactions up to $100, you could set this restriction to be "≤ $100"
To use this feature, first you need to select the comparison type to use.
<
Total must be below the specified value
≤
Total must be below or exactly equal to the specified value
=
Total must exactly equal the specified value
≥
Total must be exactly equal to or higher than the specified value
>
Total must be higher than the specified value
Next, simply enter the desired transaction total amount.
### Trial Restrictions

UltraCart considers a trial to be "the first item that is purchased in an auto order sequence". Some merchants need to limit the number of transactions sent to a particular gateway in a given day or month to ensure that number of received chargebacks don't cross Visa / MasterCard thresholds. You can set a daily, monthly or both limits if you would like. Once configured, you can activate the "Rotating Transaction Gateway" notification on one of more of the users on your account from the [Email Notifications section of the User configuration screen](#). When the gateway reaches this limit, UltraCart will send a notification email to those users.
Daily Trial Limit
The maximum number of transactions permitted through this gateway per day
Daily Trial Current Count
The number of transactions processed through this gateway on the current day
Monthly Trial Limit
The maximum number of transactions permitted through this gateway per month
Monthly Trial Current Count
The number of transactions processed through this gateway during the current month
### Payment Process Reserve tracking

UltraCart can help you judge the profitability of ongoing free trial campaigns by keeping track of whether the reserves associated with an order have been released or not. If you payment processor withholds a percentage of your transactions for a certain time period you can configure that information here. On the auto order profit report UltraCart will automatically determine your profitability based upon whether the reserves have been released or not. This will help you to maintain campaigns that are always cash flow positive.
| Field | Description |
| --- | --- |
| **Reserve Percentage** | Set your reserve percentages as established with your merchant account/ gateway provider. |
| **Reserves Released Through** | Set date in following format: MM/DD/YYYY |
| **Reserve Days** | Configure the number of days reserves are held. |
| **Reserves Returned on Refund** | Tracking reserves related to refunded orders. |
### Applying specific rotating gateway to specific items
There are two option for overriding the default rotating gateway behavior and assigning a specific rotating gateway to be used with a specific item:
1. Using buy link parameter **RtgCode** which sets the specific rotating transaction gateway that should be used to process this order.
Example assigned Rotating Gateway Code of "Auth3.1"
**On the "Buy Link" URL:** http://secure.ultracart.com/cgi-bin/UCEditor?merchantId=DEMO&ADD=BONE&rtgCode=Auth3.1
**In "Buy Form" code:**
2. Configuring the rotating gateway via the "Payment Settings" section of the "Other" tab of the item editor:
:::note
[Home](#) → [Store (Items)](#) → Edit Item → Other (Tab) → Payment Settings
:::

:::info
You can append the following to the buy link to specify a specific rotating gateway:
**[&RtgCode=DFLT](/checkout-payments/parameters-that-can-be-passed-to-ucedito)** (replace DFLT with the actual code you gave your rotating gateway.)
**NOTE: IF you use this approach you'll need to make sure that all the items that the customer is placing into their cart ar assigned the same rotating gateway code. If the customer adds items to their cart that are assigned different RTG's the cart will randomly choose one of the RTG's to process the order.**
:::
## Advanced Features
### Prevent Cascading on Hard Declines
A new feature was added to the Rotating Transaction Gateway (hereafter referred to as RTG) in June 2023. The RTG may be configured to not cascade if a transaction response is a hard decline. UltraCart does not define what a hard decline is. That definition is left to the merchant based on the transaction gateway in use. UltraCart provides two fields: name and values. When populated, any response field with a matching name will be examined and if the value matches any values in the provided list, the failed transaction processing stops and does not cascade to the remaining configured gateways. The section is called **`Prevent Cascade`** and is located near the bottom of the gateway configuration screen. Below is a screenshot as of June 2023:

Enter the name of the response field in the `Response Field Name` and the hard decline values in the next field. For example, with Authorize.net, you may wish to add the field `responseCode` and values of `165` and `202`. These are just examples. Review your previous orders transaction details to ensure you have the correct field name and values.
## Frequently Asked Questions
### Q: We presently have the checkout setting to capture the order after 3 failed attempts, however we just had an order go into A/R that ended up with 6 transaction, why did it contain 3 extra declines?
A: The three overall attempts going into the "rotating gateway" are what will appear in the orders transaction history, when reviewing the order. If you have cascade on decline configured, you can end up with six actual attempts. The higher level code that manages the three attempt counter before capture of order to A/R, does not include the subsequent cascade attempts. However, the cascaded transaction attempt does get stored in the order transaction history. The secondary attempt happens inside of the rotating gateway itself.
Which transactions get recorded into the review order transaction history:
- It returns the original failure if the secondary attempt fails.
- It returns the original attempt if the first one succeeds.
- It returns the secondary attempt if the secondary succeeds.
So in the case of this order they had three failed attempts on the first and three failed attempts on the second. So the order history would have the three failed attempts to the first RTG recorded.
Please note that all the transaction attempts, both initial attempts and subsequent cascade attempts are recorded and can be reviewed in either:
- Operations -> Reporting -> Rotating Transaction Gateway History (please contact UltraCart if you do not see this report in your reporting area.)
- BigQuery: uc\_rotating\_transaction\_gateway\_history (see [BigQuery documentation](/guides/ultracart-documentation/tutorials/data-warehouse-bigquery) for details.)
### Q: One of our gateways charges less to process AMEX transactions than the other. If I turn off AMEX under the one that charges more, will UltraCart route the transactions to the one that charges less?
A: Yes, when UltraCart selects the gateway to use it considers which ones handle the specific method. You could conceivably have only one gateway that handles AMEX.
### Q: What if I want to fill up one rotating gateways trial limit before using another one?
A: Typically you configure which product is using a particular rotating gateway on the ["other" tab of the item editor](/items-catalog/item-management/item-editor/other-tab-item-editor). You can also configure the priority that the rotating transaction gateways are used in. So if you set priority of 1 and then 2 on two rotating transaction gateways with trial limits it will fill up the first one completely before rotating to the second gateway.
### Q: We have multiple gateways and one gateway is never getting any transactions process through it. We do not have any gateways configured at the item level and we are only using a simple traffic percentage (along with cascade on decline). What would be the reason for the one gateway being skipped?
A: If a gateway fails the credential handshake, UltraCart will automatically choose one of the other configured gateways for subsequent transactions. So the first thing you will want to do is verify that the gateway credentials are accurate and active. Some gateways, like Authorize.net, will automatically expire the "Transaction Key" 24 hours after a new transaction key is generated. So, if in testing it appears not to be working , you may need to go back in there and review the active transaction key and potentially generate a new one.
### Q: I wish to configure rotating gateways with the PayPal Payments Pro ("Direct Payments") are there any special precautions using this gateway in a rotating gateways configuration?
A: Yes. Specifically, the migration tool with NOT work IF you initially configured paypal settings using the "3rd Party" API credentials. You'll need to use the "[First Party" credentials](https://ultracart.atlassian.net/wiki/pages/viewpage.action?pageId=1377225) in the rotating gateways configuration. Log into your PayPal account and gather the [1st party API credentials](https://ultracart.atlassian.net/wiki/pages/viewpage.action?pageId=1377225) (write down the "API Username", " API Password & "Signature" credentials.) Then navigate to the "Multiple (Rotating) gateways" configuration page and then click the new button and fill out the top section of the editor with a RTG code, then set as "Active" then configure the traffic percentage as 100.00%. After configuring the PayPal Payments Pro gateway, navigate back to the payments configuration page and in the PayPal section click settings and change the "Integration type" from " Payments Pro (Express Checkout and Direct Payments)" to "Express Checkout" then save the changes. (That changes allows the rotating gateways configuration to handle the credit card processing. Finally, add the secondary gateway(s) into the Multiple (rotating) gateways configuration page.
### Q: We have auto orders - what is the best process of migrating from our existing rotating gateways to a new gateway that will take over all of the payment processing moving forward?
A: The safest path to migrating from existing rotating gateways to a new gateway will be to plan for an overlap of approximately 60 days between the activation of the new gateway and any potential termination of the existing accounts. The overlap will allow you to perform refunds for authorizations that occurred with the gateway(s) you will be removing from the rotating gateways configuration. IF you remove a gateway that processed the original transaction for an order, you will no longer be able to process a refund for that order within UltraCart (you can update the order to reflect the refund you would have processed directly within the gateway website. Please Note: You must make sure to configure the new gateway being added to your rotating gateways so that it can process the auto order rebills without the CVV number. You must configure the CVV rules within the gateway website. Enable the rule to decline on a mis-match, but do not enable the rule to decline "if missing" or "unavailable".
### Q: We have two active gateways, we have configured then each with 100% traffic, what will happen in this situation?
A: The total traffic percentage among all configured gateways should in most cases equal 100%. However, UltraCart will normalize the sum of the traffic percentages for the RTGs being considered based upon all the other restrictions that can be applied. So in the scenario where two active gateways are configured with 100%, and both are valid gateways and no other restrictions are configured on the RTG, Ultracart normalizes to 50/50 traffic percentage between the two gateways.
---
# Rotating Transaction Gateway Logic
https://docs.ultracart.com/checkout-payments/payments/rotating-transaction-gateway/rotating-transaction-gateway-logic
doc_type: reference
This document will describe the business rules that UltraCart performs to determine which rotating transaction gateway (RTG) should be used for a given order.
## Determine which RTGs are allowed to be used (the active set)
1. By **default all active RTGs** are considered for a transaction.
2. If an order is a rebill, **use the same RTG as the original order**. This transaction affinity is important for many gateways as they will not allow transactions without a CVV unless they processed the original transaction with a CVV code.
3. If a specific RTG code is specified via a **UCEditor parameter** or on the cart for a REST API call, then it will be used if possible.
4. Next the system looks at the items on the order first to last. If the **item contains an RTG configuration** at the item level then the first configuration is used. **The first item in the order with an RTG will override the entire order**.
5. If a specific RTG has been determined at this point, **but it does not support the credit card type** the customer is using, the RTG is selection is ignored and the list of valid RTGs to consider is opened back up to all active RTGs.
6. If the **Screen Branding Theme / StoreFront is restricted** to specific RTGs then those are filtered out from the possible list.
7. If the RTG is over it’s **trial or time period limits** then those are filtered out from the possible list.
8. If an RTG supports a particular **native currency** that the customer is checking out with, then the list is filtered down to that particular RTG so the customer receives a native currency transaction.
9. If everything has been filtered out for one reason or another, **fail back to all active RTGs** as a safety precaution.
## Selection (picking one from the active set)
- Pick a random number between 0-100 and see which RTG has that part of the traffic percentage.
- If the possible RTGs have a traffic percentage that does not equal 100, UltraCart normalizes it so that the ratios of traffic are correct.
## Configuration Scenarios
1. You have a set of gateways that you want to load balance traffic over for a particular StoreFront.
1. Configure each RTG to have 50% of the traffic.
2. Configure each RTG to be restricted to the given StoreFront.
2. You have a particular product that is only underwritten for a specific gateway.
1. Configure the item level RTG selection so that if this product is purchased, the entire transaction will route to this gateway.
3. I don’t want to send traffic to an RTG any more, but still want to process refunds for a certain time period.
1. Configure the RTG to have 0% traffic, but leave it active.
---
# Sezzle
https://docs.ultracart.com/checkout-payments/payments/sezzle
doc_type: reference
# What is Sezzle?
Sezzle is a payment method that allows the customer to split their purchase into four equal payments over a period of several weeks. Sezzle assumes all credit risk associated with offering the customer this purchase option.
**Why use Sezzle?**
67% of young buyers do not own a credit card
6% of abandoned carts are due to lack of payments options
55% of abandon carts are due to too high of a total cost of purchase

# Signing up for Sezzle
Visiting [Sezzle.com](http://Sezzle.com) and click on the Signup button as shown below.

Click on the “merchant sign up” button as shown below.

Continue through their entire signup process.
# Obtaining Sezzle Credentials
Once you are logged into your Sezzle account, navigate to Settings → business as shown below.

Copy off the business ID shown in the field below.

Next, click on Settings → API keys and then create “create api key” as shown below.

After the key is created, copy off the public and private keys as shown below.

# Configuring UltraCart
Inside the UltraCart web site, navigate to Configuration → Checkout → Payments as shown below:

Scroll down to the Sezzle section and toggle it on as shown below.

Now click on the Edit Settings button as shown below.

Take the credentials that you obtained from the Sezzle website and add them into the configuration. Make sure to select Live as the environment.

After closing the dialog, make sure to click Save.
# StoreFront Theme Support
The following minimum StoreFront Visual Builder based themes support the “sezzle payment plan” element to market to customers the availability of the payment plan.
| **Theme** | **Version** |
| --- | --- |
| Elements | 2.05 |
| Hero | 1.07 |
| Jewel | 1.04 |
| Lifty | 1.05 |
| Native | 1.05 |
| Natural VB | 1.05 |
| Poppy | 1.00 |
It is not necessary to upgrade to these themes in order to use Sezzle, but these versions will have the marketing elements already in place. If you have questions about adding the marketing elements to an existing theme that has been heavily modified, please contact UltraCart Support.
The screenshot below shows the availability of the payment plan to the customer.

If the customer clicks on the information button they will see the dialog shown below.

On the payment options section the customer will receive Sezzle as an option as shown below.

# Limitations
Sezzle requires the multi-page checkout.
Sezzle is not compatible with Rotating Gateway Configuration.
Sezzle is not compatible with auto orders or upsells.
If a cart contains an auto order item, Sezzle will not be offered as a payment option.
If Sezzle is selected as the payment method, upsells are not shown to the customer.
---
# Test Payments in UltraCart
https://docs.ultracart.com/checkout-payments/payments/test-payments-in-ultracart
doc_type: reference
This guide explains how to configure and use test payment information for credit cards and electronic checks within the UltraCart platform. Utilizing test payments allows merchants to test checkout functionality without processing live transactions.
# Overview
While performing real transactions is the best way for new merchants to test their payment gateway, there are scenarios, especially for live stores, where testing other configurations without incurring actual charges is necessary. UltraCart provides a mechanism to configure specific payment information that will automatically approve as a test payment, eliminating the need to void or reverse transactions.
## Prerequisites
- Access to the UltraCart administrative interface.
- Understanding of your store's payment gateway configuration (if testing related functionality).
- User permissions required: Operations → Edit Settings
## Test Credit Cards
:::note
Home → [Configuration](https://secure.ultracart.com/merchant/configuration/configurationMenuLoad.do) → [Checkout](https://secure.ultracart.com/merchant/configuration/configurationMenuLoad.do) → [Payments](https://secure.ultracart.com/merchant/configuration/payment/v5/methodsLoad.do) → Credit and Debit Cards → Click 'Settings' then scroll down to the Test Credit Card section and click [new](https://secure.ultracart.com/merchant/configuration/payment/paymentTestEditLoad.do?paymentMethodTestOid=0&type=creditCard) or edit.
:::
Setup test cards within the Credit and Debit Cards settings section. Make sure the toggle in the top left of Credit and Debit Cards is turned on and click Settings to open the Credit and Debit cards dialog. Then scroll down to the Test Credit Cards section, and click [new](https://secure.ultracart.com/merchant/configuration/payment/paymentTestEditLoad.do?paymentMethodTestOid=0&type=creditCard) to create a new test credit card.

### Create Test Credit Card
When creating or editing a test credit card entry in UltraCart, you configure the test card number and define how orders placed using this test card will be processed.

### Credit Card Number
- This field allows you to enter the credit card number that will be recognized by the system as a test card.
- You can enter a standard test number (such as those listed in the [Common Test Card Numbers section](/checkout-payments/payments/test-payments-in-ultracart)) or any other valid-looking number you wish to designate as a test number.
### Order Handling Options
This section determines how orders placed using this specific test credit card will be processed by the UltraCart system. You must select one of the following radio button options:
- **Skip payment gateway, consider payment processed, then have the order ship:** This option bypasses the actual payment gateway and marks the order as paid. The order will then proceed through your standard order flow, including queuing for shipment if applicable. This is useful for testing the entire order lifecycle, including fulfillment integration.
- **Skip payment gateway, consider payment processed, then reject to prevent shipment:** This option also bypasses the payment gateway and marks the order as paid but immediately flags the order to be rejected. This prevents the order from proceeding to the shipping department. This is suitable for testing order creation and processing without involving fulfillment. Note that immediate rejection might affect some post-order processing steps like affiliate tracking or third-party marketing service subscriptions.
- **Skip payment gateway, consider payment processed, then complete order to prevent shipment:** Similar to the previous option, this bypasses the payment gateway and marks the order as paid while preventing shipment. However, this option allows most post-order placement processes (like affiliate tracking and subscriptions to third-party services) to occur, unlike the "reject" option.
- **Keep order in accounts receivable and place a note on it:** This is often the safest default setting for general testing. The order is created and marked as a test order, then placed in the Accounts Receivable queue. From Accounts Receivable, you can manually review, process, or delete the test order.
### Additional Processing Options
Below the order handling radio buttons, there are checkboxes to control other aspects of test order processing:
- **Skip affiliate transaction processing:** When checked (default), this prevents the test order from interacting with UltraCart's internal affiliate system.
- **Skip fraud filter:** When checked (default), this causes UltraCart to bypass all configured fraud filters for orders placed with this test card.
- **Skip conversion pixels:** When checked, this allows UltraCart to skip processing any configured conversion pixels (like Google Analytics) for the test order.
- **Skip auto order setup:** When checked, the auto order setup is skipped for auto order configured items. This setting prevents the creation of auto order records when testing auto order items in a test order.
:::note
**Tip:** You can configure multiple test credit cards, each with different order handling and processing options. This allows you to easily test various scenarios and order flows simply by using a different test card number during checkout.
:::
#### Common Test Card Numbers
The following table of numbers are common test credit card sequences that will pass the LUHN-10 algorithm check for a valid credit card sequence.
| Brand | Card Number |
| --- | --- |
| American Express | 3411-111111-11111 |
| American Express | 3782-822463-10005 |
| American Express | 3714-496353-98431 |
| American Express | 3787-344936-71000 |
| Diners Club | 30569309025904 |
| Diners Club | 38520000023237 |
| Discover | 6011-6011-6011-6611 |
| Discover | 6011-1111-1111-1117 |
| Discover | 6011-0009-9013-9424 |
| JCB | 3530-1113-3330-0000 |
| JCB | 3566-0020-2036-0505 |
| MasterCard | 5431-1111-1111-1111 |
| MasterCard | 5555-5555-5555-4444 |
| MasterCard | 5105-1051-0510-5100 |
| Option | Notes |
| --- | --- |
| **"Skip payment gateway, consider payment processed, then have the order ship."** | This is the best used when testing both the placement of the order and the shipping department configuration. **If you are integrating a fulfillment service, this option will queue the order for transmission over to the fulfillment service.** |
| **"Skip payment gateway, consider payment processed, then reject to prevent shipment."** | This option is useful in placing test order after you've gone live and only need to create a new order but do not want the generated test order going into the shipping department for processing. **Please note that the immediate reject can affect post order processing, such as, the processing of affiliates, and subscriptions into 3rd party marketing services.** |
| **"Skip payment gateway, consider payment processed, then complete order to prevent shipment."** | This option is useful in placing test order after you've gone live and only need to create a new order but do not want the generated test order going into the shipping department for processing. **Please note that this option will prevent shipment but will allow other post order placement processes skipped by the previous setting, such as, processing of affiliates and subscriptions into 3rd party marketing services.** |
| **"Keep order in accounts receivable and place a note on it."** | This option is a good default setting for all purpose testing. The order is created and the placed into the Accounts Receivable department, there you have the option of deleting the order or processing it for payment to send it to the next processing stage (shipping department of shippable items and the completed stage for none shippable items (service charge only and digital download items.) |
#### Remaining Checkbox settings
| Option | Notes |
| --- | --- |
| **Skip affiliate transaction processing.** (Default Setting is checked) | Skip affiliate processing will prevent any interaction with the internal [UltraCart affiliate system](/marketing-loyalty) for test orders. |
| **Skip fraud filter.** (Default Setting is checked) | Skip fraud filter will cause UltraCart to skip processing all of the [fraud filters](https://ultracart.atlassian.net/wiki/pages/createpage.action?spaceKey=ucdoc&title=Payment%20-%20Filters%20%28tab%29&linkCreation=true&fromPageId=1377173) you have configured on the account for test orders. |
| **Skip conversion pixels** (Default is unchecked) | Skip Conversion pixels will cause UltraCart to skip processing any of the conversion pixels like Google Analytic, configured on the "conversion and Tracking tab of the Screen Branding Theme editor. |
* * *
## Seeing Test Orders In Accounts Receivable
If you place a test order and the handling setting is configured to "Keep order in accounts receivable and place a note on it.",
then it will appear in your Accounts Receivable color coded purple as shown below:
:::note
Home → [Operations (Order Management)](https://secure.ultracart.com/merchant/orderProcessingMenu.do) → [Accounts Receivable](https://secure.ultracart.com/merchant/orderprocessing/ar/accountsReceivableListLoad2.do)
:::
Within the test order table the test orders checkbox is highlighted with the light blue color.

There is a delete test orders button that you can click that will delete all the test orders in one single action from the Accounts Receivable area.
* * *
# Frequently Asked Questions
**Q: Why should I use test payment information instead of live transactions for testing?** A: While performing real transactions is the best way for new merchants to test their payment gateway, for live stores, testing other configurations without incurring actual charges is necessary. Using test credit card or electronic check numbers removes the hassle of voiding or reversing charges on real credit cards or checking accounts.
**Q: How do the "One per Customer" settings on my items interact with test orders?** A: The "One per Customer" setting does not apply to test orders. If you use a test credit card on an order, this setting is bypassed. This is intended to prevent roadblocks that would stop a test order from being placed.
**Q: What are the different order handling options for test payments, and when should I use each one?** A: When configuring a test credit card or electronic check, you can define how orders placed with it will be processed. There are four primary options:
- **Skip payment gateway, consider payment processed, then have the order ship:** This bypasses the payment gateway, marks the order as paid, and allows it to proceed through your standard order flow, including queuing for shipment. Use this for testing the entire order lifecycle, including fulfillment integration.
- **Skip payment gateway, consider payment processed, then reject to prevent shipment:** This bypasses the payment gateway, marks the order as paid, but immediately flags it for rejection to prevent it from going to shipping. This is suitable for testing order creation and processing without involving fulfillment. Note that immediate rejection might affect some post-order processing steps like affiliate tracking or third-party marketing service subscriptions.
- **Skip payment gateway, consider payment processed, then complete order to prevent shipment:** Similar to the "reject" option, this bypasses the payment gateway and marks the order as paid while preventing shipment. However, this option allows most post-order placement processes (like affiliate tracking and subscriptions to third-party services) to occur.
- **Keep order in accounts receivable and place a note on it:** This is often the safest default setting for general testing. The order is created, marked as a test order, and placed in the Accounts Receivable queue. From Accounts Receivable, you can manually review, process, or delete the test order.
**Q: Where can I find a list of common test credit card numbers to use?** A: The document provides a table of common test credit card sequences that pass the LUHN-10 algorithm check for a valid credit card sequence. These include numbers for American Express, Diners Club, Discover, JCB, MasterCard, and Visa.
**Q: Is configuring a test electronic check different from configuring a test credit card?** A: The Test Electronic Check editor page provides a similar set of options as the Test Credit Card editor page, tailored for electronic check details. You will enter a test bank routing number and bank account number. The order handling and additional processing options are the exact same as those for test credit cards.
**Q: How can I see test orders that are set to "Keep order in accounts receivable" and delete them?** A: If you place a test order with the handling setting configured to "Keep order in accounts receivable and place a note on it," it will appear in your Accounts Receivable queue, color-coded purple. You can find this in the UltraCart interface under Home -> Operations (Order Management) -> Accounts Receivable. There is a "Delete Test Orders" button in the Accounts Receivable area that allows you to delete all test orders in one action.
**Q: What do the "Skip" checkboxes for affiliate transaction processing, fraud filter, and conversion pixels do for test orders?** A: These checkboxes control additional processing aspects for test orders.
- **Skip affiliate transaction processing:** When checked (default), this prevents the test order from interacting with UltraCart's internal affiliate system.
- **Skip fraud filter:** When checked (default), this causes UltraCart to bypass all configured fraud filters for orders placed with this test card.
- **Skip conversion pixels:** When unchecked (default), this allows UltraCart to skip processing any configured conversion pixels (like Google Analytics) for the test order.
---
# Transaction Gateway Authorization Model
https://docs.ultracart.com/checkout-payments/payments/transaction-gateway-authorization-model
doc_type: explanation
# Overview
UltraCart supports 3 different authorization models: Auth and capture, Auth then capture, and Auth only. Different gateway providers support different transaction models so be sure to read the details provided for each authorization model. You can select the authorization model UltraCart will use for your account at the bottom of the Transaction Gateways screen.
## Navigation
:::note
[Home](#) → [Configuration (Checkout)](#) → [Payments](#) → Transaction Gateways → Toggle "On" The Advanced View> Then Scroll towards the bottom of the page below the list of integrated gateways to "Transaction Gateway Authorization Model"
:::
When completed, click on the "Save" button. You will be returned Configuration Menu.

## Important Message Regarding Authorization Models
While all gateways support the most common Authorization model configuration of "Auth and Catpure", not all gateways support all three authorization models!
So, make sure to review the list of supported gateways first before configuring either "Auth Then Capture" or "Auth Only".
### Auth and Capture
All gateways support the "Auth and Capture" authorization model.
### Auth Then Capture
Only selected gateways support this more advanced authorization model. Please review the list of supported gateways provided below the configuration drop-down list fields before attempting to configure you account with this authorization model.

### Auth Only
**This authorization model is not recommended** due to the fact that PCI compliance requires UltraCart to never display the credit card number details in our user interface, so using this option will be problematic because you'll be required to contact the customer to re-obtain the credit card details to perform the actual capture of an authorization.
---
# UltraCart Test Gateway
https://docs.ultracart.com/checkout-payments/payments/ultracart-test-gateway
doc_type: how-to
## Overview
Only certain gateways allow for a "test" mode, which means you can only use a valid credit card, and real funds are processed. UltraCart has created a new test transaction gateway, selectable from the Transaction Gateways tab on the Payments Configuration screen. This gateway behaves like a real gateway, allowing you to completely test the system's functionality.
To use the gateway, simply select it from the Transaction Gateways screen, and enter your Merchant ID. Select the payment types you want the gateway to handle, and press "Save".

Now, when you place a test purchase, you can use any valid credit card number, and UltraCart will automatically approve the transaction and assign a random authorization ticket number. If you do not want to use a real credit card number, you can use this test Visa card number instead: 4444-3333-2222-1111.
To simulate a credit card decline, you must use this Visa card number:
4128-8888-8888-8804.
To simulate an e-check decline, use this account number: 9999999.
:::warning
**Important**! Turn off the UltraCart Test Gateway before you go live with your store.
:::
---
# When are Credit Cards Charged
https://docs.ultracart.com/checkout-payments/payments/when-are-credit-cards-charged
doc_type: explanation
# Overview
This page discusses the options available for when credit cards are charged
# When are Credit Cards Charged?
| Field | Description | Recommended Setting |
| --- | --- | --- |
| After X attempts capture order to Accounts Receivable | If your profit per order is such that spending the time on customer service to obtain a new credit card if the customer is having trouble is worth it then this option should be set | 3 |
## Understanding the Credit Card Authorization Model
The credit card industry allows for two different types of transactions to take place. The first and most common type of transaction is a "Sale" transactions (auth and capture). This type of transaction the funds are immediately reserved on the card and the charge will be settled in the nightly batch. If you are quickly shipping merchandise from your warehouse or processing digital goods then this is the transaction model that is recommended.
The second type of processing is known as an "Auth then capture". During the checkout (if you have real-time charge during checkout set to yes) or Accounts Receivable (failed cards or real-time charge during checkout set to no) an authorization is pulled on the credit card for those funds. The authorization will reserve funds on the card for 7-28 days depending upon the financial institution where the credit card is issued. After the order is shipped, the system makes a second credit card transaction to capture the authorized funds and settle them. If you are selling products that are likely to be canceled or take a long time to ship then this model is more suitable. Please consult with your payment gateway and merchant account provider to determine if there are increased fees for using this type of model.
You can control which model your store uses under:
:::note
[Home](#) → [Configuration (Checkout)](#) → [Payments](#) → [Transaction Gateways](#) (Advanced View required)
:::
At the bottom of the page you will see a section for Authorization Model as shown below.

:::note
More advanced users can set the authorization model by screen branding theme for they have multiple themes.
:::
## What if my fulfillment house processes my credit cards?
This scenario is not recommended unless your fulfillment house is also providing the customer service and has an integrated system for handling refunds, etc. If you fall into this category then you will need to contact UltraCart support to:
- See if the existing integration with your fulfillment house supports this?
- Setting the proper options on your account to make the integration work.
Sometimes UltraCart will simply collect the information and pass it on to the fulfillment house in an encrypted fashion. More advanced integrations will have UltraCart perform the authorization during the checkout process and then send the authorization over to the fulfillment house to capture.
:::note
**An authorization by UltraCart and capture by your fulfillment house may require further custom development depending upon the payment gateway and fulfillment house provided.**
:::
## How do upsells effect payment processing?
When an upsell after offer is configured the payment process gets a little more complicated. The first thing to understand about upsells is that UltraCart guarantees to generate an order from the shopping cart no matter what. So, once they click the finalize order button and the upsell after offer(s) are triggered, a 45 minute timer is started related to processing the payment for the order. If the customer abandons their cart instead of successfully having their card charged and seeing a receipt then UltraCart will attempt one more time to charge the card, then generates the order after the timer expires. If this charge fails, then the order will go to Accounts Receivable with a note in the merchant comments "**_This order failed during the auto closing of an upsell order._**"
Now, if the final payment processing attempt is successful, then the order will go to the shipping department (or completed stage for non-shippable orders). There are a couple of common questions about upsell payment processing that we want to cover here.
### **Q:** What about my affiliate conversion pixels not firing because the receipt page is never loaded by the browser?
**A:** Some customers desperately want to see a receipt for their order. They will drive through the upsell gauntlet clicking yes/no until they are finished. If their card was successful then the customer will see the receipt and the affiliate conversion pixel(s) will fire. If their card declines then they will are not taken to the receipt, they are presented with the finalize order page, giving them a chance to update their billing details and re submit the order for finalization to receipt. They might choose to close the browser out at the point instead of finishing the checkout to the receipt. Regardless, their order will eventually appear in Accounts Receivable where you can perform some further customer service and try to salvage the sale (typically by getting a new credit card details). **If you are using a 3rd party affiliate network, the affiliate will not receive credit for the sale in cases where the customer did not complete the checkout resulting in then getting to the receipt (only the UltraCart affiliate system can track these types of conversions).**
### **Q:** Some of the finalized orders have messed up information on them. Why is that?
**A:** Once the customer clicks the finalize order button the first time the 45 minute timer begins. If the customer's card fails the real-time charge during checkout, they are sent back to their cart and are given a chance to update their checkout details and make changes that will be saved when they resubmit the order. We are still going to guarantee that we turn that cart into an order no matter what. In some case, customer backtrack and remove previously entered details and doing so can result in the final captured order having missing field data (even "required" fields.)
### **Q:** Can't I put my affiliate conversion pixels on the first page of the upsell?
**A:** No! Trust us on this one... there are way more devils in the details of trying this scenario. There is no permanent transaction id assigned that that point. **The cart may be further manipulated and open you up to affiliate fraud.** The actual conversions for the affiliate will be no less than showing it on the receipt after you perform all the work of removing commissions manually from a 3rd party system for all the orders that fail.
### **Q:** What if the customer leaves during an upsell page? When is the card charged?
**A:** See the [upsell page](#page-not-found) for details. Short answer: They're still charged. If the receipt page is not shown within 45 minutes of collecting payment information, the order is processed. This covers upsell-rage-quit (which happens when you annoy the customer with too many upsells) or accidental browser closing.
## CVV2 and Accounts Receivable
### Q: When an order is declined what happens to the CVV2 Code?
**A: **As part of PCI compliance, we can never database the CVV2 value. If you send an order to Accounts Receivable for decline, fraud review, etc. you'll either have to contact the customer to obtain the CVV2 value over the phone or configure your payment gateway to allow charges without the CVV2.
## End Customer Questions
### Q: I tried purchasing your product and the charge was declined, but an authorization is still on my credit card. Can you remove it?
A: When a customer goes to purchase a product from your website, UltraCart communicates with you payment gateway such as Authorize.Net, NMI, PayJunction, Stripe, etc. The gateway in turn issues an authorization request to the credit card network. When the credit card network receives the authorization request they place funds on hold for the credit card and return the authorization response to the gateway. At this point in time the gateway can look at the authorization response and decide that it doesn't like the AVS or CVV2 match details and decide that a decline code should be returned to UltraCart. The customer is then told their card is declined, but what about the authorization that the gateway pulled on the customer's credit card? Well, that all depends upon the payment gateway that you're using an how they communicate to the credit card network. It is not uncommon for those authorizations to take a few business days to fall off. That's not a big deal when the customer is using a credit card with a reasonable limit and your transaction does not represent a large portion of their available credit balance. On the other hand, if the customer is using a prepaid credit card with $100 balance and your transaction represents $80, they are going to be mad and probably contact your customer service. If this happens, engage your payment gateway and see what options they have for more quickly removing the authorization from the customers credit card for declined transactions.
---
# Related Items
https://docs.ultracart.com/checkout-payments/related-items
doc_type: how-to
# Overview
Related Items allows UltraCart to automatically suggest additional items during the checkout process that tend to be purchased based upon the customer's shopping cart contents. UltraCart makes the suggestions based on item relationships from previously placed orders. (**The association is made after approximately a dozen orders.**)
:::note
[Home](#) → [Configuration (Checkout)](#) → [Related Items](#)
:::
## Configuration

To enable this functionality, click on the Yes radio button on the related items screen, and specify how many relations you would like UltraCart to calculate for each item in your store (maximum of 10). Click the "Save" button when finished.
:::info
- Turning on the Related Items feature can increase your sales over time by exposing customers to additional items during the checkout process that they may have otherwise missed or overlooked.
- **Please note that changes to these settings take up to 24 hours to take effect.**
:::
## Cart View
The related items will appear just below the lower left corner of the shopping cart table. A heading of "Suggested Items" and check boxes next to each item will also be shown. An "add to cart" button is provided below the suggested items.
:::note
This view is from within StoreFronts
:::

# Related
[Related Items Tab](/items-catalog/item-management/item-editor/related-items-tab)
---
# Required Contact Information
https://docs.ultracart.com/checkout-payments/required-contact-information
doc_type: reference
# Overview
Merchants can configure the amount of contact information that customers are required to provide during the checkout process.
If there is a problem processing the payment or shipping the order, the merchant can contact the customer using the information provided.
:::note
[Home](https://ultracart.atlassian.net/wiki/404?key%3Dmerchant%3Bsearch%3Fq%3D%2FmainMenu.do) → [Configuration (Checkout)](https://ultracart.atlassian.net/wiki/404?key%3Dmerchant%3Bsearch%3Fq%3D%2Fconfiguration%2FconfigurationMenuLoad.do) → Checkout Information
:::

## Configuration Options
Typically, merchants require a daytime phone number and email address from customers so they can resolve issues quickly. Below is a description of all of the contact options.
| Billing | |
| --- | --- |
| Default Billing Address Same As Shipping During Checkout | If this option is checked then the checkbox to use the shipping address as the billing address will be preselected during the checkout process. Typically this is a good option to turn on. This option is not applicable for the single page checkout which uses this behavior by default. |
| Require Billing Day Phone | Requires the customer to specify their billing day time telephone. |
| Require Billing Evening Phone | Requires the customer to specify their billing evening time phone number. |
| Shipping | |
| Require Ship To Phone | Requires the customer to specify the phone number for the recipient at the shipping address. This option should be enabled if you are shipping UPS or FedEx. ### PayPal Phone Number Issue :::note PayPal - Please note that requiring phone information here does not influence PayPal orders. To enforce the same requirements on PayPal orders, you need to adjust your settings within PayPal. Please see the article [PayPal Customer Telephone Number](/checkout-payments/payments/paypal/paypal-customer-telephone-number) for a step-by-step tutorial on configuring things properly within PayPal. ::: |
| Require Ship To Phone (International) | Requires the customer to specify the phone number of the shipping recipient if the address is international. |
| Billing and Shipping | |
| Collect Title | Allow the customer to specify a title for the billing and/or shipping address. A good option if you are selling to professionals where knows their title helps you customize the order. |
| Require Company | Require a company name for the billing and shipping address. Only enable this option if you are shipping exclusively to businesses. |
| Email | |
| Allow CC Email | Allow the customer to specify an address email that should be carbon copied on the receipt and shipment email notifications. |
| Hide E-mail Updates Question | Removes the email update subscription checkbox from the checkout. note **Note:** If you turn on the option to hide the email updates during the checkout then the customer **can not** opt-in to receive your emails. This will prevent you from subscribing customers to the internal UltraCart marketing engine as well as third party autoresponders like iContact, MailChimp, etc. **Note:** If you turn on the option to hide the email updates during the checkout then the customer **can not** opt-in to receive your emails. This will prevent you from subscribing customers to the internal UltraCart marketing engine as well as third party autoresponders like iContact, MailChimp, etc. note **Note:** Ontraport is treated slightly different than the 3rd party marketing integrations. UltraCart sends the order over to Ontraport with a "mailing list" field showing if they were opted-in or not. So, while UltraCart is not filtering Ontraport transmissions, you should check with Ontraport to determine exactly how they will treat the transmission on there end depending on this field. **Note:** Ontraport is treated slightly different than the 3rd party marketing integrations. UltraCart sends the order over to Ontraport with a "mailing list" field showing if they were opted-in or not. So, while UltraCart is not filtering Ontraport transmissions, you should check with Ontraport to determine exactly how they will treat the transmission on there end depending on this field. |
| Require E-mail (and confirmation email) | Require the customer to provide an email during the checkout. We recommend enabling this option. (If check, then you can also enable "Email confirmation" which will display a second email address field for confirming that the address has been entered correctly.) ### Special note concerning Single Page Checkout note ### Email Confirmation requires multi-page checkout ** **Please note that the single page checkout does not presently support the email confirmation setting, so you'll need to use the multipage checkout if you want the confirmation field to appear. See also: [**Single Page Checkout**](/checkout-payments/single-page-checkout) ### Email Confirmation requires multi-page checkout ** **Please note that the single page checkout does not presently support the email confirmation setting, so you'll need to use the multipage checkout if you want the confirmation field to appear. See also: [**Single Page Checkout**](/checkout-payments/single-page-checkout) |
### About Google Phone Number Validation
During the checkout, when the customer enters their phone number and then tabs through to the next field, the phone number will be validated using Google's phone number validation API, in order to eliminate fake phone numbers such as "111-222-3333".
---
# Return Policy
https://docs.ultracart.com/checkout-payments/return-policy
doc_type: explanation
# Overview
Return Policy configuration for presentation on the receipt screen, receipt email notification and packing slip.
:::note
[Home](#) → [Configuration (Checkout)](#) → [Return Policy](#)
:::
# Configuration Page View

A return policy is an important document that outlines the conditions and policies under which merchandise is returnable. It is very important to specify the terms and conditions for accepting a return, the process for initiating a return, and the fees associated with returning a product. Having a detailed and well-defined return policy is an important component of good customer service for an online store.
The return policy appears on the payment information screen during checkout, on the customers receipt, and on the packing slip inserted into the shipping container.
# View of the Return Policy in Email Templates
The Return Policy is injection into the email notifications via the Return Policy special tag, which uses the square braces like this: \[ReturnPolicy\]

# View of Return Policy in customer Receipt

# Related
[Email Templates - Email Notifications](/account-settings/email-notifications/email-templates-email-notifications)
---
# Single Page Checkout
https://docs.ultracart.com/checkout-payments/single-page-checkout
doc_type: how-to
# Overview
Single Page Checkout provides a condensed checkout process that may be suitable to some merchants. It utilizes a single, scrollable screen to display the checkout fields required to complete an order to a receipt. **It is not meant to have the same exact features as the regular checkout.**
:::warning
**Features NOT Supported**
- Related items
- Gift giving
- Gift certificate
- Special instructions on the shipment
- Payment methods
- Check / E-Check / Money Order / Purchase Order / Wire Transfer
- Customer profile address books
- Payment gateways that require the browser to be handed off to a different website
- example: MultiCards, Payflow Link, WorldPay, YourPay Connect, etc.
- County taxes differing from state taxes. The single page checkout does not have a county drop down for taxes. If you have specified a county tax, do not use single page checkout.
- Auto orders items (only those that are upsells). Auto order items where the customer can select their frequency are not.
- Any other feature not specifically listed in the first list on this document.
:::
# Navigate
To turn on the Single Page Checkout feature, navigate to:
:::note
[Main Menu](https://ucsupport.ultracart.com/merchant/mainMenu.do) → [Configuration](https://ucsupport.ultracart.com/merchant/configuration/configurationMenuLoad.do) → ('Checkout' Tab) [Single Page Checkout](https://ucsupport.ultracart.com/merchant/configuration/singlePageCheckoutLoad.do)
:::
At the bottom of the screen, click on the checkbox to the right of `Enable single page checkout`. You can also have a comments text box presented to the customer. Click the checkbox to the right of `show comments box`. Click the `Save` button at the bottom of the screen when finished.
# Configuration
Below is the configuration screen that provides a list of the features that **are and are not supported** on the single page checkout:

:::info
**Customer Profile Login Supported with Visual Builder enabled storefronts**
**PLEASE NOTE: Customer profile login during checkout is now supported by the storefront themes that are Visual Builder enabled (updated to the latest version), but the Customer profile address books are not currently supported.**
:::
## Checkout Screen example
The single page checkout places most of the checkout information on a single, scrolling page (screen). This eliminates customers having to click on a next or continue button to navigate through the checkout process, page-by-page. Again, this condensed checkout process may or may not be suitable for some merchants.The following is a sample Checkout screen utilizing the Single Page Checkout. You can ignore the AVKits logo and graphic as you are able to completely brand out the area around the checkout screen with your background image, header, and footer.

:::info
**Apply to individual buy link only**
In some instances you may only want the single page on specific items.
To force the checkout to go from the default multi-page checkout to the single page checkout via an item buy link, you can use the following parameter:
**SinglePageCheckout=true - ** The presence of SinglePageCheckout=true will force the cart from multi-page checkout to single page.
Example:
http://secure.ultracart.com/cgi-bin/UCEditor?MerchantID=DEMO&ADD=bone&SinglePageCheckout=true
NOTE: Once the customers' shopping session is forced to the single page checkout it will not revert to the multi-page checkout (SinglePageCheckout=false is **NOT** valid)
:::
# Update
| **Date** | **Title** | **Discussion** |
| --- | --- | --- |
| October 2011 | "This address is a business" field | A new field that was added October 2011 to allow the Single Page Checkout to allow FedEx to properly choose between FedEx Ground (business) and FedEx Residential. This field also helps if you're using FreightQuote.com. If you wish to turn this off, navigate: :::note [Home](http://menuhome/) → [Configuration (Checkout)](http://menuconfiguration/) → [Shipping](http://docs.ultracart.com/configuration/shipping/shipperSpecificLoad.do) → Checkout Options (tab) ::: |
---
# Adding PayPal Fastlane to Your Custom Checkout
https://docs.ultracart.com/checkout-payments/tutorials/adding-paypal-fastlane-to-your-custom-ch
doc_type: tutorial
## **Introduction**
PayPal Fastlane accelerates checkout by auto-filling user information for millions of guest shoppers—no store or PayPal account required.
## **Important Considerations**
Integrating Fastlane may require minor structural changes to your custom checkout. These adjustments generally enhance the checkout experience but should be considered when implementing:
- **Email Field**: Move the email input to the top of your checkout UI, as it drives all Fastlane functionality. This prevents users from unnecessarily filling out information before Fastlane autofill kicks in.
- **Shipping and Billing Information**: Replace existing address blocks with Fastlane components, as Fastlane provides pre-filled shipping and billing details, similar to Apple Pay or Google Pay.
- **Payment Information**: Wrap existing payment inputs in a **Checkout Condition**, since Fastlane provides its own payment options, allowing users to select cards on file.
:::note
**Important Note on CJSON Files: Look for these blocks as you go through the article**
This article includes downloadable CJSON files within each step to simplify your setup. As you proceed through each step, look for these CJSON file blocks. If you're unsure how to structure or format content using the visual builder, simply download the provided CJSON file and upload it directly into your custom checkout. This will automatically apply the correct formatting, styles, and structure needed.
:::
* * *
## **Fastlane Setup Instructions**
### **Step 1: Position Email Field & Fastlane Activation**
Move the **Checkout Email** element to the top of your checkout UI, or at least before any shipping/payment fields.
**Checkout Email Settings**:
- Suppress PayPal Fastlane: **No**
* * *
### **Step 2: Add the PayPal Fastlane Watermark**
Insert the **CHECKOUT PAYPAL FASTLANE WATERMARK** element near the email field, ideally in a panel, column, or flex element. This element (24px by 122px) informs users about Fastlane availability and is **required**.
**Checkout PayPal Fastlane Watermark Settings**:
- Include Additional Info: **Yes** (adds an info icon linking to Fastlane details and privacy policy)

:::note
**Download StoreFronts CJSON structure to import into your Custom Checkout**
:::
* * *
### **Step 3: Wrap Shipping Fields in Checkout Condition**
Fastlane replaces user-input shipping fields. Therefore, wrap existing shipping fields in a **Checkout Condition** to hide them when users authenticate with Fastlane.
:::info
**Note:** Even though you are hiding these fields, Fastlane will pass the customer information into UltraCart so it can be used for shipping, billing and added to the customer data.
:::
_Wrap these fields if they exist in your checkout:_
- Checkout Shipping First Name
- Checkout Shipping Last Name
- Checkout Shipping Full Name
- Checkout Shipping Title
- Checkout Shipping Company
- Checkout Shipping Address 1
- Checkout Shipping Address 2
- Checkout Shipping City
- Checkout Shipping Country
- Checkout Shipping State
- Checkout Shipping Postal Code
- Checkout Shipping Day Phone
- Checkout Shipping Evening Phone
**Checkout Condition Settings**:
- Matches: **No**
- Condition: **PayPal Fastlane authenticated**

:::note
**Download StoreFronts CJSON structure to import into your Custom Checkout**
:::
* * *
### **Step 4: Add Fastlane Shipping Address Element**
Create a **new Checkout Condition** immediately before or after the condition hiding your shipping fields. This new condition shows only when users authenticate via Fastlane.
**Checkout Condition Settings**:
- Matches: **Yes**
- Condition: **PayPal Fastlane authenticated**
Inside this condition, add the **Checkout PayPal Fastlane Shipping Address** element to display the user’s selected address from Fastlane. Format it to blend seamlessly with your checkout design.
**Also include** a **button element** for users to edit their Fastlane address (choose a different address or add a new one).
**Button Settings**:
- Button Action: **PayPal Fastlane Address Book**
_Optional:_ Add another PayPal Fastlane Watermark here (without additional info icon) to clarify the address source.
**Checkout PayPal Fastlane Watermark Settings**:
- Include Additional Info: **No**

:::note
**Download StoreFronts CJSON structure to import into your Custom Checkout**
:::
* * *
### **Step 5: Wrap Billing Fields or Toggles in Checkout Condition**
Billing information is typically provided by Fastlane, but there may be rare cases where a customer authenticates with Fastlane but doesn't have a credit card on file. Therefore, two conditional statements are required to properly wrap any billing address fields or "billing address different" toggles when Fastlane is authenticated.
**First Checkout Condition Settings**:
- Matches: **Yes**
- Condition: **PayPal Fastlane authenticated**
**Second Checkout Condition Settings**:
- Matches: **No**
- Condition: **PayPal Fastlane card available**

:::note
**Download StoreFronts CJSON structure to import into your Custom Checkout**
:::
* * *
### **Step 6: Wrap Credit Card Fields in Checkout Condition**
Fastlane handles payments, so existing payment method inputs must be hidden when authenticated.
**Checkout Condition Settings**:
- Matches: **No**
- Condition: **PayPal Fastlane authenticated**

:::note
**Download StoreFronts CJSON structure to import into your Custom Checkout**
:::
:::note
**Important!** You can only have one set of credit card fields active on your checkout at a time. Either replace your current credit card fields with these provided in the CJSON file or remove your existing credit card fields before activating your updated custom checkout.
:::
* * *
### **Step 7: Add Fastlane Credit Card Element**
Create another **new Checkout Condition** before or after your hidden payment fields condition. Display this condition when users authenticate with Fastlane.
**Checkout Condition Settings**:
- Matches: **Yes**
- Condition: **PayPal Fastlane authenticated**
Inside, add the **Checkout PayPal Fastlane Credit Card** element. This displays the user’s default credit card from Fastlane and allows switching to another stored card, along with the Fastlane logo.

:::note
**Download StoreFronts CJSON structure to import into your Custom Checkout**
:::
* * *
## **Final Notes**
These steps may vary slightly based on your checkout's customization level, but they outline the essential structure for integrating PayPal Fastlane into your custom checkout process smoothly.
## **Related Articles**
[PayPal Fastlane](/checkout-payments/payments/paypal/paypal-fastlane)[StoreFront Visual Builder](/storefronts-themes/storefront-visual-builder)
---
# Changing Authorize.net batch time to match UltraCart Server time
https://docs.ultracart.com/checkout-payments/tutorials/changing-authorize-net-batch-time-to-mat
doc_type: tutorial
QUESTION:
How can I get my Authorize.net batches to coincide with the UltraCart server timestamps, which are set to [Eastern Time Zone](http://wwp.eastern-standard-time.com/) (EST/EDT) ?
ANSWER:
You can adjust the the transaction cutoff time within your Authorize.net account, by logging in and navigating to Account then clicking on "Transaction Cutoff time".
### Click on Account then Click on Transaction Cut-Off Time:

### Next you'll set the cutoff time to midnight:

### You're done!
---
# Chargebacks 911
https://docs.ultracart.com/checkout-payments/tutorials/chargebacks-911
doc_type: tutorial
## Introduction
[Chargebacks911](https://chargebacks911.com/) is a third party service that specializes in chargeback management and loss recovery. UltraCart integrates with Chargebacks911 by sending order and transaction data over to them as orders are paid or shipped, so the evidence Chargebacks911 needs is already on file if a dispute is filed later.
Two things about the integration shape everything below:
- **It is a one way feed.** UltraCart sends data out. It does not receive chargebacks, dispute outcomes, or any other data back from Chargebacks911.
- **Only credit card orders are sent.** Orders paid by any other method are never transmitted.
:::info
Due to an FTC ruling, Chargebacks911 is prohibited from providing chargeback mitigation services to high risk clients who use affiliate marketing and negative option plans to sell certain product types that are often fraudulently marketed. The settlement restricts its ability to work with certain high risk merchant segments.
:::
## Prerequisites
Before you start, you need:
- An active Chargebacks911 account with API credentials: username, password, and the environment those credentials belong to, either `sandbox` or `production`.
- A user account with the **Edit Items** permission, which is what gates the Chargeback Processing screen.
- At least one transaction gateway already configured and taking credit card payments.
## How setup works
Setup runs across three screens, and the integration transmits nothing until all three are done:
1. Save your Chargebacks911 API credentials on the **Chargeback Processing** page.
2. Create a **Merchant Account Profile** that points at your Chargebacks911 account and merchant ID.
3. Assign that profile to every card brand on every transaction gateway that processes your payments.
:::warning
Do these steps in order. The **Chargebacks 911** option does not appear in the Merchant Account Profile editor until an API Username has been saved in step 1. If you start at step 2, the option simply will not be there, and the screen gives no explanation why.
:::
## 1. Save your Chargebacks911 API credentials
1. Go to **Main Menu → Configuration → Order Management → Chargeback Processing**.

2. Scroll to the **Chargebacks 911** section.

3. Enter your **API Username** and **API Password**.
4. Set **Environment** to match the credentials you entered, either `sandbox` or `production`. Leaving Environment blank disables the integration.
5. Set **Send After** to `payment` or `shipment`. `payment` is the default, and it gets the order into Chargebacks911 as early as possible and then updates it with shipping details later. For what each value changes, see [Send After](/orders-fulfillment/configuration-order-management/chargeback-processing-configuration#send-after).
6. Click **save**.
Fill in all four fields before you move on. Saving a username alone is enough to make the **Chargebacks 911** option appear in step 2, but the account and merchant ID dropdowns there will come up empty, because UltraCart cannot log in to Chargebacks911 to populate them.
## 2. Create a Merchant Account Profile
The merchant account profile carries your Chargebacks911 account and merchant ID. Gateways point at the profile, and the profile points at Chargebacks911.
1. In the **Merchant Account Profiles** section of the same page, click **new**.
2. Enter a **Description**. You will pick this label from a dropdown later, so make it identify the processor or merchant account clearly.
3. Enter the **Account Number** if you track it. The Chargebacks911 transmission does not use this field, but analytics cost reporting does.
4. For **Transmission Mechanism**, select **Chargebacks 911**.
5. Select the **CB911 Account ID** and **CB911 Merchant ID** from the dropdowns. These determine which Chargebacks911 account and merchant ID the orders on this profile are filed under.

6. Click **Save**.
UltraCart fills those two dropdowns by logging in to Chargebacks911 each time the editor loads, so the page can take a moment to appear. If both dropdowns are empty, see [Troubleshooting](#troubleshooting).
Leave the **Filter Reason Codes** and **No Dispute Reason Codes** boxes empty. Neither is used by the Chargebacks911 integration.
## 3. Assign the profile to your gateways
A profile does nothing until it is assigned on the gateway that actually processes the payment, and it is assigned per card brand.
1. Go to **Main Menu → Configuration → Checkout → Payments**.

2. In the **Credit and Debit Cards** panel, open either **Transaction Gateway** or **Rotating Gateways**, depending on which your account uses. The per brand profile slots exist on both.

3. Click **edit** next to a gateway.

4. Scroll to the gateway's **Methods** section and set the **Merchant Account Profile** dropdown for each card brand you accept: **AMEX**, **Diners Club**, **Discover**, **JCB**, **Mastercard**, and **Visa**.

5. Save the gateway.
6. Repeat for every gateway that processes credit card payments.
:::warning
Every brand, every gateway. A brand whose **Merchant Account Profile** dropdown is left empty is skipped silently, with no log entry and no error. Setting Visa and stopping there is the most common way to end up half configured.
:::
Once a gateway is saved, UltraCart begins transmitting order and transaction data to Chargebacks911 for the orders it processes.
## 4. Confirm data is arriving
Transmission is queued and runs in the background, so it never happens during checkout and never delays an order. Expect an order to show up in Chargebacks911 within a few minutes of payment, or of shipment if **Send After** is set to `shipment`.
To check, place a test credit card order, then click **View Chargebacks 911 Logs** at the bottom of the Chargeback Processing page. That opens the Integration Log filtered to Chargebacks 911 entries, where each attempt records the order, the outcome, and the full request and response with the card number masked.
If Chargebacks911 is unreachable or returns an error, UltraCart retries roughly once an hour until it succeeds. A transient error that stops appearing in the log needs no action from you.
## 5. Move from sandbox to production
Your Chargebacks911 account and merchant IDs differ between the sandbox and production tenants, so changing the **Environment** dropdown on its own is not enough.
1. Update the **API Username**, **API Password**, and **Environment** on the Chargeback Processing page, then click **save**.
2. Open each Merchant Account Profile again.
3. Reselect the **CB911 Account ID** and **CB911 Merchant ID** from the freshly loaded production values.
4. Click **Save** on each profile.
## Troubleshooting
### The Chargebacks 911 option is missing from the Merchant Account Profile editor
No API Username has been saved yet. Go back to step 1, save your credentials, then reopen the profile.
### The CB911 Account ID or Merchant ID dropdowns are empty
UltraCart could not authenticate to Chargebacks911 when the editor loaded, and no error is shown when that happens. Check the **API Username** and **API Password**, and confirm **Environment** matches those credentials. Sandbox credentials with Environment set to `production`, or the reverse, produces exactly this. If the credentials and environment are correct and the dropdowns are still empty, contact UltraCart support.
### Nothing appears in the logs at all for an order
An order is skipped with no log entry in any of these cases, and from the outside they all look identical:
- The order was not paid by credit card.
- The order has no successful credit card transaction.
- The gateway that processed the payment has no **Merchant Account Profile** assigned for that order's card brand.
- The assigned profile's **Transmission Mechanism** is not set to **Chargebacks 911**.
- The order's card brand is not one of the six the integration supports.
- The gateway that processed the payment has since been deleted or renamed.
### The log reports that an Account ID or Merchant ID is not configured
The profile has **Chargebacks 911** selected, but one of the two dropdowns was left blank. Fix the profile and save it. Orders that failed this way are not retried, so anything placed during that window is not sent automatically.
## Next Steps
- Review the field by field reference in [Chargeback Processing (Configuration)](/orders-fulfillment/configuration-order-management/chargeback-processing-configuration).
- Review the [Integration Log Health Report](/reports-analytics/reporting/integrations-reports/integration-log-health-report) to keep an eye on integration errors across your account.
- Visit [Chargebacks911](https://chargebacks911.com/) for more information about their services.
---
# Checkout Tutorials
https://docs.ultracart.com/checkout-payments/tutorials/checkout-tutorials
doc_type: tutorial
- [Continue Shopping Button Logic](/checkout-payments/tutorials/checkout-tutorials/continue-shopping-button-logic)
- [Understanding the payment method flow with QuickBooks](/checkout-payments/tutorials/checkout-tutorials/understanding-the-payment-method-flow-wi)
---
# Continue Shopping Button Logic
https://docs.ultracart.com/checkout-payments/tutorials/checkout-tutorials/continue-shopping-button-logic
doc_type: tutorial
## Understanding the UltraCart "Continue Shopping" Button Logic
The "Continue Shopping" button at checkout in UltraCart has a sophisticated logic flow that determines the customer's redirection destination. This document outlines the four configurable scenarios that dictate this behavior.
## Overview
The "Continue Shopping" button is a crucial element in the checkout process, allowing customers to easily return to your store to browse more items. UltraCart employs a layered approach to determine the destination URL when this button is clicked, prioritizing more specific configurations over general ones.
## Configurable Scenarios
Here are the four scenarios that influence where a customer is directed after clicking "Continue Shopping":
1. **Referrer URL:** The default and most common behavior.
2. **Store URL:** A fallback option when the referrer URL is unavailable.
3. **Override Continue Shopping URL (StoreFront):** Configured at the theme level.
4. **Item Buy Link :** The most specific override, set per item.
### Referrer URL
By default, UltraCart attempts to return the customer to the exact page they were on before adding an item to their shopping cart. This is achieved by extracting the referrer URL from the customer's browser.
In instances where the customer's browser settings prevent UltraCart from obtaining the referrer URL (e.g., due to privacy settings or specific browser configurations), UltraCart defaults to the **Store URL** configured in your merchant profile.
### Store URL
To set or verify your Store URL:
1. Navigate to **Main Menu** → **Configuration**.
2. In the "General" section, select **Merchant Profile**.
3. Locate and configure the **Store URL** field.

### Override Continue Shopping URL - StoreFronts
You can configure a specific "Continue Shopping" URL at the StoreFront theme level. This setting provides a general override for all items within that specific StoreFront.
To configure this setting:
1. Navigate to **Main Menu** → **StoreFronts**.
2. Select the desired **Host**.
3. Go to **Conversion Tracking**.
4. Under the **Advanced** section, configure the **Override Continue Shopping URL**.

### Item "Buy Link"
The most granular level of control for the "Continue Shopping" URL is directly within an item's buy link or buy form. This allows you to specify a unique return URL for a particular item.
You can access the link builder tool in the "advanced buy link" section of the item's links screen:
1. Navigate to Home → Item Management → Items.
2. Locate the item for which you want to configure the "Continue Shopping" URL.
3. Click the Links hyperlink to the right of the configured cost of the item in the items list.
4. The link builder tool will appear, assisting with proper URL encoding.Continue Shopping Button's Logic

Example of a buy link with an `overrideContinueShoppingUrl` parameter:
```
http://secure.ultracart.com/cgi-bin/UCEditor?merchantId=DEMO&ADD=BONE&overrideContinueShoppingUrl=http%3A%2F%2Fsecure.ultracart.com%2Fcatalog%2Fdemo%2Fdogtreats%2F
```
:::note
Tip: URL Encoding Because some characters in the URL are converted to "escape characters" (e.g., %2F for /), it can be easier to construct these links using UltraCart's built-in tool.
:::
---
# Understanding the payment method flow with QuickBooks
https://docs.ultracart.com/checkout-payments/tutorials/checkout-tutorials/understanding-the-payment-method-flow-wi
doc_type: explanation
The following tutorial explains how payment methods such as credit cards and purchase orders interact with QuickBooks.

As we can see, customers that do not have access to a profile giving them purchase orders or quote requests are presented with simple methods like credit cards, PayPal, and Amazon. When those orders are complete they download to QuickBooks (via UltraBooks) as a sales receipt.
For purchase orders the flow is more complicated based upon whether they are automatically approved or not. Once the purchase order is approved (automatically or manual) then the order ships, is marked complete and imports as an Invoice into QuickBooks (via UltraBooks). The customer ultimately pays the invoice and the invoice is marked as paid by accounting within QuickBooks.
We also demonstrate quote requests in this flow. Quote requests are nothing more than an opportunity for the merchant to adjust pricing on large orders for wholesale customers. When the quote goes out to the customer, they ultimately flow back through the same workflow.
---
# DisputeDash
https://docs.ultracart.com/checkout-payments/tutorials/disputedash
doc_type: tutorial
# DisputeDash
## Introduction
[DisputeDash](https://disputedash.com/) is a third party service that answers chargebacks for you. When a dispute opens at your payment processor, DisputeDash reads the matching order out of UltraCart, assembles the evidence, writes the rebuttal, and files it with the processor before the deadline.
Two things about the integration shape everything below:
- **It reads and writes.** Unlike a one way data feed, DisputeDash both pulls records out of UltraCart and, when you enable the matching automation, writes back to the disputed order.
- **It connects per brand.** Each brand or store you run in DisputeDash authorizes its own UltraCart account. One authorization does not cover the rest.
If you are comparing dispute services, the other partner integration in this area is [Chargebacks 911](./chargebacks-911.md), which works differently: it is a one way transmission of order data configured with API credentials on the Chargeback Processing page.
## Prerequisites
Before you start, you need:
- An active DisputeDash account. Plans are listed on the [DisputeDash pricing page](https://disputedash.com/pricing).
- Your payment processor connected inside DisputeDash. DisputeDash publishes integrations for Stripe, Braintree, PayPal, Adyen, Checkout.com, Square, Klarna, PayArc, Finix, and Airwallex.
- An UltraCart login for the account you want to connect, with permission to authorize an application.
:::note
If you bill through Authorize.Net or NMI, check with DisputeDash before you subscribe. Neither appears on their published processor list.
:::
## Connect DisputeDash to UltraCart
Connecting takes one click and happens mostly inside DisputeDash. There is no API key to generate in UltraCart and nothing to paste between the two systems.
1. In DisputeDash, open the brand you want to connect and choose **Connect with UltraCart**.
2. UltraCart's authorization screen opens and lists what DisputeDash is asking for. Review it, then approve.
3. You are returned to DisputeDash with the brand connected.
Repeat this for each brand you run.
## What DisputeDash can access
Approving the authorization grants DisputeDash seven permissions on that UltraCart account. In merchant terms:
- **Reads your orders.** Purchase details, delivery and tracking, billing, and order history, which is the raw material for the evidence packet.
- **Writes to the order.** Adds a merchant note recording the dispute, and places a refund block on the disputed order.
- **Reads your auto orders.** Recurring billing history, used as evidence that the customer had an ongoing, accepted relationship with you.
- **Reads your fraud filter.** Checks what you already block.
- **Writes to your fraud filter.** Adds a disputing customer's email address and card so future orders from them are declined.
- **Reads customer profiles.** Customer details that support the case.
- **Reads conversations.** Prior support and contact history, which strengthens the evidence.
DisputeDash writes only when you have enabled the matching automation. The read permissions are used to assemble dispute evidence.
## The automations
Three of the permissions above do nothing until you switch on the automation that uses them. You set these per brand in DisputeDash, not in UltraCart.
**Automatic fraud filter writes.** When a chargeback lands, DisputeDash adds the customer's email address and card to your UltraCart fraud filter, so a repeat attempt from the same buyer is declined at checkout.
**Automatic refund block.** DisputeDash places a refund block on the disputed order. This is the same block described as **add refund block** in the order review [Refund menu](../../orders-fulfillment/order-management/review-orders/index.md), and it exists to prevent a costly mistake: refunding a charge that has already been reversed by a chargeback, which loses the money twice.
**Merchant notes.** DisputeDash records the dispute and its outcome as a merchant note on the UltraCart order, so your team sees the chargeback history on the order itself rather than in a separate tool.
:::warning
The refund block stops customer service from refunding that order in UltraCart while the dispute is being fought. If a rep needs to refund a blocked order, the block has to be cleared first.
:::
## Where the results appear in UltraCart
Each automation writes to a screen you already use.
**Fraud filter entries** appear on the Fraud Prevention configuration page, at **Main Menu → Configuration → (middle menu) Checkout → (scroll down) Fraud Prevention**. You can review and remove entries there the same way you would for a filter you created yourself. See [Establishing Fraud Filters From Placed Orders](../../orders-fulfillment/tutorials/order-management-tutorials/establishing-fraud-filters-from-placed-o.md) for how that screen works.
**The refund block and the merchant note** appear on the disputed order itself, which you reach at **Main Menu → Operations → Order Management → View Orders**, then by clicking the order ID in the results.
## Subscription and recurring billing disputes
Auto order history is the strongest evidence UltraCart gives DisputeDash, so subscription chargebacks are where the integration earns the most. When a customer disputes a rebill and claims they never agreed to it, DisputeDash pulls the full billing record from your [auto orders](../../orders-fulfillment/order-management/auto-orders/index.md) and submits it as evidence of an ongoing, accepted relationship rather than answering with the single disputed transaction.
## Disconnect DisputeDash
Revoking the authorization cuts off both the reads and the writes for that brand immediately.
## Troubleshooting
### DisputeDash is not finding the order for a dispute
**Symptoms**: A dispute is open in DisputeDash but no UltraCart order is attached to it.
**Cause**: Some processors report the order number with formatting stripped, so it does not match the order ID stored in UltraCart.
**Solution**: DisputeDash reconstructs order IDs using the order ID prefix configured for the brand. Check that setting in DisputeDash first. If it is correct and orders still do not match, contact DisputeDash support.
### The fraud filter and refund block automations are not running
**Symptoms**: Disputes are being answered, but no fraud filter entries or refund blocks appear in UltraCart.
**Cause**: Those automations are off by default and are set per brand.
**Solution**: Open the brand's configuration in DisputeDash and enable the automations you want. They apply to disputes received after you turn them on.
## Related documentation
- [Chargeback Processing (Configuration)](../../orders-fulfillment/configuration-order-management/chargeback-processing-configuration.md) - merchant account profiles and chargeback settings in UltraCart
- [Establishing Fraud Filters From Placed Orders](../../orders-fulfillment/tutorials/order-management-tutorials/establishing-fraud-filters-from-placed-o.md) - how the Fraud Prevention screen works
- [Reviewing Orders](../../orders-fulfillment/order-management/review-orders/index.md) - the order screen where refund blocks and merchant notes appear
- [Credit Card Fraud Prevention Best Practices](../../checkout-payments/fraud-prevention/credit-card-fraud-prevention-best-practi.md) - stopping bad orders before they become disputes
- [Connecting UltraCart to DisputeDash](https://docs.disputedash.com/integrations/checkout/ultracart/) - DisputeDash's own setup page
---
# Encoding Parameters on a Receipt Notification Email
https://docs.ultracart.com/checkout-payments/tutorials/encoding-parameters-on-a-receipt-notific
doc_type: tutorial
# Encoding Parameters on a Receipt Notification Email
Often merchants want to provide a link to an external survey system on their receipt email. The problem is that the typical tokens that are available on the receipt do not properly URL encode the value leading to improper URLs. For example if we wanted to pass along the order id plus a value from the custom field to another script the custom field will not properly be URL encoded. For example:
```
http://www.survey.com/takesurvey.jsp?id=[orderid]¶m2=[customfield1]
```
To solve this problem we need to change from using the simple bracket tokens to Velocity code within the receipt. The order object provides methods to expose the details of the order and the formatHelper object provides a method to URL encode the value. So the proper URL syntax would look like:
```
http://www.survey.com/takesurvey.jsp?id=${formatHelper.urlEncode($order.getOrderId())}¶m2=${formatHelper.urlEncode($order.getCustomField1())}
```
If you have further questions about using velocity code within your receipt, please contact UltraCart Support
---
# Passing Custom Fields to UltraCart During the Checkout
https://docs.ultracart.com/checkout-payments/tutorials/passing-custom-fields-to-ultracart-durin
doc_type: tutorial
Passing Custom Fields to UltraCart During the Checkout
# Introduction
Custom Fields allow you to store additional metadata on a cart or order, often identifiers or values from external systems that need to be referenced after checkout. UltraCart supports multiple Custom Fields and exposes them through standard order retrieval methods, exports, and postback integrations.
This guide explains how to pass Custom Field values into UltraCart at various points in the purchasing flow and how to retrieve them once the order is placed.
## Understanding Custom Fields
UltraCart currently supports the following fields and character limits:
| Field Name | Max Length | Notes |
| --- | --- | --- |
| CustomField1 | 50 chars | |
| CustomField2 | 50 chars | |
| CustomField3 | 50 chars | |
| CustomField4 | 50 chars | |
| CustomField5 | 75 chars | |
| CustomField6 | 50 chars | |
| CustomField7 | 50 chars | |
| CustomField8 | n/a | Stored as internal order property |
| CustomField9 | n/a | Stored as internal order property |
| CustomField10 | n/a | Stored as internal order property |
> **Note:** Always pass and reference these fields using **Camel Case**, such as `CustomField1`.
* * *
## Passing Custom Fields on a Buy Link
Custom Fields can be appended directly to Buy Links.
```
&CustomField1=VALUE
```

The [**Advanced Buy Link Builder**](/get-started/managing-items/buy-links) will generate these parameters for you.
* * *
## Passing Custom Fields from Buy Form Code
Here is an example of including Custom Fields directly in a Buy Form:
```
```
* * *
# Inserting Custom Fields Into Checkout
If your checkout process requires gathering additional information from the customer, you can surface Custom Fields in the checkout itself.
## StoreFront Checkout (Visual Builder)
Modern UltraCart StoreFronts use the **Visual Builder**.
Custom Fields should be added to the checkout using the `checkoutcustomfield` element.

### Recommended Method: Using the `checkoutcustomfield` Element
In the Visual Builder:
1. Open your StoreFront.
2. Navigate to **StoreFronts → Visual Builder**.
3. Edit the **Checkout** page template.
4. Add the element `checkoutcustomfield` wherever you want the field to appear.

5. Configure:

- **Custom Field Number** (1-7)
- **Input Type** (text, email, number,url,checkbox)
- **Checkbox Look** (native, square toggle, round toggle)
- **Label Text**
- **Checked Value** (i.e. - Yes)
- **Unchecked Value** (i.e. - No)
> **Important:**
> This element **automatically binds** to the cart’s CustomField values.
> No HTML, Velocity, or CSS insertion is required (and all legacy examples have been removed).
### Why This Replaces Legacy Implementation
Older StoreFront documentation included HTML/Velocity template snippets for manually adding Custom Fields.
These were designed for pre–Visual Builder themes.
Modern Visual Builder themes should **exclusively use** `checkoutcustomfield`.
Manual HTML/CSS methods are deprecated for StoreFront checkout and should no longer be used.
* * *
## Legacy Checkout
Merchants still using the older **Single Page Checkout** (non-StoreFront) may insert Custom Field HTML manually.
Example:
```
CustomField1 Label
```
This is configured under:
**Configuration → Checkout → Screen Branding Themes → Screens → Single Page Checkout**
Example of placing the custom field HTML into the single page checkout editor:

##### **Inserting Custom Fields into the checkout**
```html/xml
CustomField1 label text
CustomField2 label text
CustomField3 label text
CustomField4 label text
CustomField5 label text
CustomField6 label text
CustomField7 label text
```
The above HTML code would render into the single page checkout like this:

* * *
# Viewing Custom Field Values in UltraCart
To view submitted Custom Field values:
1. Open the order.
2. Click **Edit Customer Information**.
3. Go to the **Other** tab.
All CustomField1–CustomField7 values appear there.
* * *
# Using Custom Fields on the Receipt
Custom Fields can be inserted into receipt templates (conversion scripts) using bracket tokens:
```
[CustomField1]
```
Navigate to:
**Configuration → Screen Branding Themes → Edit → Conversion and Tracking**
* * *
# Retrieving Custom Fields After Order Placement
Whenever you see an order in the system you can click Edit Customer Information and then click the Other tab. The other tab will display the contents of the seven custom fields as shown below.

## Using on the Receipt
The values of the custom fields can also be used in conversion scripts on the receipt. If you navigate to:
:::note
[Main Menu](https://ultracart.atlassian.net/wiki/404?key%3Dmerchant%3Bsearch%3Fq%3D%2FmainMenu.do) → [Configuration](https://ultracart.atlassian.net/wiki/404?key%3Dmerchant%3Bsearch%3Fq%3D%2Fconfiguration%2FconfigurationMenuLoad.do) → [Screen Branding Themes](https://ultracart.atlassian.net/wiki/404?key%3Dmerchant%3Bsearch%3Fq%3D%2Fconfiguration%2Fbranding%2FthemeListLoad.do) → \[edit\] → Conversion and Tracking
:::
You can use tokens like **\[CustomField1\]** within your conversion HTML. These will be replaced with the actual value from the order.

## Retrieving Back the Custom Fields
There are 3 ways to receive back the custom fields that you passed in.
### Export Orders
A merchant can configure an export to collect the custom field values. Exports are configured under:
:::note
[Main Menu](https://ultracart.atlassian.net/wiki/404?key%3Dmerchant%3Bsearch%3Fq%3D%2FmainMenu.do) → [Configuration](https://ultracart.atlassian.net/wiki/404?key%3Dmerchant%3Bsearch%3Fq%3D%2Fconfiguration%2FconfigurationMenuLoad.do) → [Exporting Orders](https://ultracart.atlassian.net/wiki/404?key%3Dmerchant%3Bsearch%3Fq%3D%2Fconfiguration%2FexportOrderListLoad.do)
:::
### XML Postback
XML Postback is a method of communication whereby UltraCart notifies the merchant's web server of order activity by posting XML versions of the order to the merchant's server. You can read more about [XML Postback here](/account-settings/back-office/xml-postback). XML Postback is configured under:
:::note
[Main Menu](https://ultracart.atlassian.net/wiki/404?key%3Dmerchant%3Bsearch%3Fq%3D%2FmainMenu.do) → [Configuration](https://ultracart.atlassian.net/wiki/404?key%3Dmerchant%3Bsearch%3Fq%3D%2Fconfiguration%2FconfigurationMenuLoad.do) → [XML Postback](https://ultracart.atlassian.net/wiki/404?key%3Dmerchant%3Bsearch%3Fq%3D%2Fconfiguration%2FxmlPostbackLoad.do)
:::
* * *
# Conclusion
Custom Fields provide a flexible way to capture and store additional order-level metadata from Buy Links, Buy Forms, or during checkout.
Modern StoreFront implementations should always use the `checkoutcustomfield` **Visual Builder element**, ensuring fields bind cleanly to the UltraCart cart object without custom HTML or template modifications.
* * *
---
# Payment Gateway Tutorials
https://docs.ultracart.com/checkout-payments/tutorials/payment-gateway-tutorials
doc_type: tutorial
# Overview
The exact steps to configuring your credit card processing gateway with your UltraCart account will differ from gateway to gateway. However, the basic process is fairly simple:
You'll gather your API credentials from the Payment Gateway and configure them within the [Transaction Gateways](/checkout-payments/payments/configure-transaction-gateway) tab in the payments configuration page (alternatively within the [Rotating Transaction Gateways](/checkout-payments/payments/rotating-transaction-gateway) tab if you are going to have more than one gateway configured within your UltraCart account)
:::info
UltraCart is integrated with over 100 payment processing services.
Please review the integrated gateways here: [Credit Card Processing Transaction Gateway Integration list](/checkout-payments/tutorials/payment-gateway-tutorials/configuring-a-payment-gateway-tutorial/credit-card-processing-transaction-gatew)
:::
# Transaction Gateways
Single Gateway integrations are configured in the "Transaction Gateways" tab in the payments configuration page:

## Gateway-side Configuration
Then you configure the AVS (Address Verification Service) & CVV (Card verification value) rules within your gateways website.
:::info
The AVS rules provide authorization validation against the supplied billing address. It's recommended that you review the configuration options in the gateway and configure the AVS rules to validate against the numeric portion of the billing address including the 5 digit zip code.
The configuration of the CVV rules will depend on your particular needs. If you are selling items that are a subscription or continuity purchase items, then you'll need to turn off rules for declining the order if the CVV number is "missing" or "unavailable". You can and should leave the rule for declining one CVV mismatch enabled as UltraCart will ask for the CVV number during the customers' initial checkout unless you choose to turn that off (see the "Collect card verification number" checkbox [here](#page-not-found)).
:::
# Testing the Gateway Configuration
Once you have configured the transaction gateway rules, you're ready to test the new gateway configuration with a live test order to verify that everything is functioning properly. After your live test order has processed successfully, you can place additional test orders using our [test credit card configuration](#page-not-found). This will allow you to place test orders without actually communicating to the gateway thereby avoiding transaction fees from accruing.
# Specific Gateway Tutorials
[Authorize.net integration](/checkout-payments/tutorials/payment-gateway-tutorials/configuring-a-payment-gateway-tutorial/credit-card-processing-transaction-gatew/authorize-net-integration)
[Stripe Gateway Integration](/checkout-payments/tutorials/payment-gateway-tutorials/configuring-a-payment-gateway-tutorial/credit-card-processing-transaction-gatew/stripe-gateway-integration)
---
# Configuring a Payment Gateway Tutorial
https://docs.ultracart.com/checkout-payments/tutorials/payment-gateway-tutorials/configuring-a-payment-gateway-tutorial
doc_type: tutorial
# Introduction
Welcome. This is a brief tour explaining how to configure payment methods and gateways.
During this tour, we’ll also show how to place a test order and process it through Accounts Receivable.
## Payment Methods
To begin, navigate to:
:::note
[Configuration](#) → Checkout → [Payments](#)
:::
Click on the Configuration menu link and navigate to the Payments screen.

The first tab shown is payment **Methods**. Each payment method contains configuration fields that display when checked. Simply Click on **Credit Card** to view the configuration screen.

We’ll choose them all for now by clicking the adjacent check boxes. There’s additional information we can fill out for each card, but we’ll skip that for now.
Scroll down and save your changes.
:::tip
Clicking another tab also saves your changes! It's quicker, but this tutorial takes the long route to ensure you don't get lost.
:::
## Configuring Payment Gateway within Transaction Gateways tab
Reenter the [Payments](#) screen and click on the [Transaction Gateways](#) tab.

Each transaction gateway also displays configuration fields when clicked as you will see below. We are going to use the UltraCart Test Gateway to simulate a transaction but you'll need to eventually integrate your actual payment gateway in place of the test gateway.
### Understanding the UltraCart Test Gateway
:::info
The UltraCart Test Gateway is to be used for the initial testing of various aspects of your configurations prior to configuring the actual gateway.
The UltraCart Test Gateway does not actually process any authorization against a credit card. It simply simulates that step, returning an approval for the placed order. So, make sure that you remove the UltraCart Test Gateway from your configuration when you configure your actual credit card gateway.
At times you may need to test various cart settings. You can still place test orders using the UltraCart test credit card numbers which will not involve your gateway.
:::
Scroll down and click the **UltraCart Test Gateway **check box.

Enter your Merchant ID and select the cards you wish to accept. We’ll select only 3 cards in this example. When finished, scroll to the bottom and save your changes.
### Understanding the UltraCart Test Credit Card Numbers
:::info
**Please note that the test credit card is not meant to test the gateway configuration. The test credit card is useful for generating orders without incurring transaction fee's..**
**To test the configuration of your actual gateway it's best to create a real order using real credit card details. Some gateways show an option for a test gateway which allows you to temporarily place the gateway into the test mode and then use the specific card numbers your gateway provides for testing purposes.**
**To learn more about the Test Credit Cards, see: [Test Payments in UltraCart](/checkout-payments/payments/test-payments-in-ultracart)**
:::
### Creating a Test Order
Now lets create a test order by adding an item to our cart. In this example the gateway is set to send orders to Accounts Receivable for authorization.
Navigate to:
:::note
Store → [Items](#)
:::
Scroll down to a random item, and click the Item Links hyperlink 

From the Links screen, simply click on the "open in new window" button to send the item into the cart.

Once in the cart, fill out the shipping information. When I finish adding my address, the shipping preference will update with precise shipping prices. I’ll leave the shipping at FedEx: Smart Post.
At the bottom, I’ll enter my test credit card number. The expiration date can be anything in the future, and the card verification number can also be any 3 digit number.

When my order is placed, I’ll remember my order id.
## Authorizing the Test Order
Note: don't be confused by the fact that we used a different order to demonstrate the Authorize process.
Navigate to:
:::note
Operations → [Order Management](#) → [Accounts Receivable](#)
:::
I see my order at the top of the Credit Card list. I can verify it’s my order by viewing it (clicking on it).

Check the Order ID check box and click the “Authorize Orders” button.

You are not quite finished yet. At the bottom of the batch authorize screen is a place for me to approve the order. Please notice the merchant note at the bottom of the order indicating that this was a test payment (because we used our test credit card).

Clicking the Process Payments button will fire off the batch processing.
This can take some time if you have a lot of orders but for one order, it’s almost simultaneous.
My order was authorized and there were no errors.

I can then navigate to [Order Management](#) → [Shipping](#) and continue with the next steps in order management.
That’s it. We’ve created an order and authorized payment. Congratulation!
:::info
A video of this tutorial is embedded in [Page 3](/get-started/managing-and-processing-payments) of the Getting Started Guide (look for the green section and expand it).
:::
---
# Credit Card Processing Transaction Gateway Integration list
https://docs.ultracart.com/checkout-payments/tutorials/payment-gateway-tutorials/configuring-a-payment-gateway-tutorial/credit-card-processing-transaction-gateway
doc_type: tutorial
# Credit Card Processing Transaction Gateway Integration functionality list
| **Gateway** | **Supports E-Check** | **Supports Multi-Currency** | **Support Refunds** | **Auth Then Capture** | **Zero Dollar Authorization** | **"3rd party processor"** **(hands off to payment** **processor website)** |
| --- | --- | --- | --- | --- | --- | --- |
| [Amazon Payments](/checkout-payments/payments/amazon-payments) | | | Y | | | |
| [Authorize.net JSON](http://www.ultracart.com/resources/partners/supported-payment-gateways/usgateways/authorizenet/) | Y | Y | Y | Y | Y | |
| [Beanstream](http://www.ultracart.com/resources/partners/supported-payment-gateways/international-gateways/beanstream/) (Now [Bambora](https://www.bambora.com/en/us/)) ([Response error codes](https://help.na.bambora.com/hc/en-us/articles/115013189148-What-does-this-response-code-mean-)) | | Y | Y | | | |
| [Bluefin Gateway](http://www.ultracart.com/resources/partners/supported-payment-gateways/usgateways/bluefin/) | | | | | | |
| [BluePay / 2.0](http://www.ultracart.com/resources/partners/supported-payment-gateways/usgateways/bluepay/) | | | Y | | | |
| [BlueSnap](/checkout-payments/tutorials/payment-gateway-tutorials/configuring-a-payment-gateway-tutorial/credit-card-processing-transaction-gatew/bluesnap-gateway-integration) | | Y | Y | | | |
| [Braintree Payment Solutions (Blue)](http://www.ultracart.com/resources/partners/supported-payment-gateways/usgateways/braintree_payment_solutions/) ([integration doc](/checkout-payments/tutorials/payment-gateway-tutorials/configuring-a-payment-gateway-tutorial/credit-card-processing-transaction-gatew/braintree-credit-card-processing-gateway)) | | Y | Y | | | |
| [Converge](https://www.elavon.com/solutions/payment-gateways/converge.html) is an Elavon Gateway → Use **Virtual Merchant** Gateway) | | | Y | Y | | |
| [CyberSource](http://www.ultracart.com/resources/partners/supported-payment-gateways/usgateways/cybersource/) ([integration doc](/checkout-payments/tutorials/payment-gateway-tutorials/configuring-a-payment-gateway-tutorial/credit-card-processing-transaction-gatew/cybersource-gateway-integration)) | | Y | Y | Y | | |
| [Durango](http://www.ultracart.com/resources/partners/supported-payment-gateways/usgateways/durango/) (use Network Merchants Gateway in our configuration list) | | | Y | Y | | |
| [EasyPayDirect](https://www.ultracart.com/resources/partners/supported-payment-gateways/usgateways/easypaydirect/) (use Network Merchants Gateway in our configuration list) | Y | Y | Y | Y | Y | |
| Elavon (use Virtual Merchant) | | | Y | Y | | |
| [eWay](http://www.ultracart.com/resources/partners/supported-payment-gateways/international-gateways/eway/) ([integration doc](/checkout-payments/tutorials/payment-gateway-tutorials/configuring-a-payment-gateway-tutorial/credit-card-processing-transaction-gatew/eway-gateway-integration)) | | Y | | | | |
| First Data Global Gateway (LinkPoint) | Y | | Y | | | |
| (Payeezy) (formerly "[First Data Global Gateway e4](http://www.ultracart.com/resources/partners/supported-payment-gateways/usgateways/first_data_global_gateway_e4/)") ([integration doc](/checkout-payments/tutorials/payment-gateway-tutorials/configuring-a-payment-gateway-tutorial/credit-card-processing-transaction-gatew/configuring-first-data-global-payments-e)) | | Y | Y | | | |
| [GoEmerchant](http://www.ultracart.com/resources/partners/supported-payment-gateways/usgateways/goemerchant/) ([integration doc](/checkout-payments/tutorials/payment-gateway-tutorials/configuring-a-payment-gateway-tutorial/credit-card-processing-transaction-gatew/goemerchant-gateway-integration)) | | | | | | |
| [Innovative Gateway](http://www.ultracart.com/resources/partners/supported-payment-gateways/usgateways/innovative/) (if your login is an email address then see Quickbooks Merchant Services below) | | | | | | |
| [LinkPoint Gateway](http://www.ultracart.com/resources/partners/supported-payment-gateways/usgateways/linkpoint/) \*Deprecated (USE: First Data Global Gateway) | Y | | Y | Y | | |
| [Moneris e-Select Plus](http://www.ultracart.com/resources/partners/supported-payment-gateways/international-gateways/moneris/) | | Y | | Y | | |
| [Moneris e-Select Plus US](http://www.ultracart.com/resources/partners/supported-payment-gateways/international-gateways/moneris/) | | | | Y | | |
| [Network Merchants Gateway](http://www.ultracart.com/resources/partners/supported-payment-gateways/usgateways/network_merchants_gateway/) (NMI gateways will use this one) [N.M.I. Transaction Response Code Lookup](/checkout-payments/tutorials/payment-gateway-tutorials/configuring-a-payment-gateway-tutorial/credit-card-processing-transaction-gatew/network-merchants-gateway) | Y | Y | Y | Y | Y | |
| PayCertify | | | Y | | | |
| PayJunction | | | | | | |
| [PayJunction 1.2](http://www.ultracart.com/resources/partners/supported-payment-gateways/usgateways/payjunction/) | | | Y | Y | | |
| [PayJunction REST Gateway](/checkout-payments/tutorials/payment-gateway-tutorials/configuring-a-payment-gateway-tutorial/credit-card-processing-transaction-gatew/payjunction-rest-gateway-integration) | Y | | Y | | | |
| Paymentech | | | | | | |
| [Payments Gateway](http://www.ultracart.com/resources/partners/supported-payment-gateways/usgateways/payments_gateway/) | Y | | | | | |
| PayPal (Web Payments Pro Direct Payments) | | | Y | | | |
| [PayPal PayFlow Pro](http://www.ultracart.com/resources/partners/supported-payment-gateways/usgateways/paypal/) ([integration doc](/checkout-payments/tutorials/payment-gateway-tutorials/configuring-a-payment-gateway-tutorial/credit-card-processing-transaction-gatew/paypal-payflow-pro-credit-card-processin)) | Y | Y | Y | Y | Y | |
| [PayTrace](http://www.ultracart.com/resources/partners/supported-payment-gateways/usgateways/paytrace/) | | | Y | | | |
| [Plug N Pay](http://www.ultracart.com/resources/partners/supported-payment-gateways/usgateways/plugnpay/) | | Y | | | | |
| [Quantum Payment](http://www.ultracart.com/resources/partners/supported-payment-gateways/usgateways/quantum_payment/) | Y | | Y | Y | | |
| QuickBooks Payments | | | Y | Y | Y | |
| Sage Pay Gateway | | Y | Y | | | |
| [Sage Payments](http://www.ultracart.com/resources/partners/supported-payment-gateways/usgateways/sage_payment/) | | | | | | |
| Sage Payments App | | | Y | | | |
| Stripe Connect [(integration doc)](/checkout-payments/tutorials/payment-gateway-tutorials/configuring-a-payment-gateway-tutorial/credit-card-processing-transaction-gatew/stripe-gateway-integration) | | Y | Y | | | |
| Tsys.com (was [Transaction Central](http://www.ultracart.com/resources/partners/supported-payment-gateways/usgateways/transactioncentral/)) | | | | | | |
| [Transaction Pro](http://www.ultracart.com/resources/partners/supported-payment-gateways/international-gateways/transactionpro/) | | | | Y | | |
| [TransFirst eLink Gateway](http://www.ultracart.com/resources/partners/supported-payment-gateways/usgateways/transfirstelink/) | | | Y | Y | | |
| [USA ePay](http://www.ultracart.com/resources/partners/supported-payment-gateways/usgateways/usaepay/) | | | Y | | | |
| [VeriSign PayFlow Link](http://www.ultracart.com/resources/partners/supported-payment-gateways/alternative-methods/verisign-payflow-link/) (See "PayFlow Pro") | | | | | | |
| Virtual Merchant (Primary Gateway for Nova and Costco merchants) | | | Y | Y | Y | |
| Converge ( Formerly Virtual Merchant ) \*SPECIAL NOTE: AS of April, 2020 all transactions will require the CVV number. | | Y | Y | | | |
| [WorldPay](http://www.ultracart.com/resources/partners/supported-payment-gateways/international-gateways/worldpay/) Business Gateway | | Y | | | | Y |
| [WorldPay Direct](http://www.ultracart.com/resources/partners/supported-payment-gateways/international-gateways/worldpay/) | | | | | | |
## Pay Later Payment Services
UltraCart supports the following ‘Pay Later’ or ‘Installment Payment’ services:
| **Installment Payment Service Provider** | **Integration Options** | |
| --- | --- | --- |
| Affirm | [Affirm Payment Method](/checkout-payments/payments/affirm-payment-method) [Stripe Gateway Integration](/checkout-payments/tutorials/payment-gateway-tutorials/configuring-a-payment-gateway-tutorial/credit-card-processing-transaction-gatew/stripe-gateway-integration) | |
| Klarna | [Stripe Gateway Integration](/checkout-payments/tutorials/payment-gateway-tutorials/configuring-a-payment-gateway-tutorial/credit-card-processing-transaction-gatew/stripe-gateway-integration) | |
| PayPal Credit | [PayPal](/checkout-payments/payments/paypal) [Upgrading the latest PayPal payment processing integration](/checkout-payments/payments/paypal/upgrading-the-latest-paypal-payment-proc) | |
| Sezzle | [Sezzle](/checkout-payments/payments/sezzle) | |
## About 3rd Party Processors
:::info
**Note regarding "3rd Party Processors" are not supported.**
UltraCart considers the gateways listed as "3rd Party Processors" as the least optimal integration due to the fact that these gateway require a hand-off to their own website during the checkout.
:::
## Caution with Zero Dollar Auth
:::info
**Caution with Zero Dollar Auth**
Proceed with caution when using "zero dollar authorizations" with auto orders (recurring billing). Even though it seems like a ideal way to offer a trial via an initially zero cost, very often it will create customer service issues because the customer will often confuse the temp hold as a actual charge which may result in customer service headaches. And as is the case with auto orders in general, you may need to take precautions to block prepaid and gift cards to prevent abuse. It's generally better to do a minimal transaction ($1-$5) up front in most cases.
:::
# Frequently Ask Questions
Which gateway do I configure for my Costco Merchant Account?
While you can signup with virtually any gateway for use with your merchant account, you're Costco merchant account is typically bundled up with the "Virtual Merchant" gateway.
I have a merchant account from Nova, which gateway do I configure?
While you can signup with virtually any gateway for use with your merchant account, you're Nova merchant account is typically bundled up with the "Virtual Merchant" gateway.
I have a merchant account from Elavon, which gateway do I configure?
While you can signup with virtually any gateway for use with your merchant account, you're Elavon merchant account is typically bundled up with the "Virtual Merchant" gateway.
I have a NMI gateway, I don't see it in your gateway list, is it supported?
NMI is supported. You will select and use the Network Merchants gateway in our transaction gateways list.
I have an EasyPayDirect (http://www.easypaydirect.com/) gateway, I don't see it in your gateway list, is it supported?
Yes, it is supported. You will select and use the **Network Merchants Gateway** in our transaction gateways list. (here's the integration doc)
I'm selling CBD products, which gateways will process payments for CBD related products?
You'll need a gateway that processes transactions for "Hi Risk" products. The following gateways may process transaction for hi risk merchants:
1. The Network Merchants Gateway in our transaction gateways list. (here's the integration doc)
2. USA ePay
3. Authorize.net
(\*is not an exhaustive list, and this list may become stale so please verify support with the gateway before making any commitments.)
Does UltraCart support Square Payments/POS?
Not at the present time.
Square does not provide a server-to-server API which we require. We would be forced to implement their checkout specific widgets instead of all our hosted fields, etc. So at this time given what they provide we can not support them. If Square were to expose a server-to-server API for PCI level 1 providers like us, we could consider them.
Which gateway do I configure for use with the Converge payment Gateway?
Use the "**Virtual Merchant**" gateway with your Converge gateway account.
#
Related Pages
[http://www.ultracart.com/resources/partners/supported-payment-gateways/](http://www.ultracart.com/resources/partners/supported-payment-gateways/)
---
# Authorize.net integration
https://docs.ultracart.com/checkout-payments/tutorials/payment-gateway-tutorials/configuring-a-payment-gateway-tutorial/credit-card-processing-transaction-gateway/authorize-net-integration
doc_type: tutorial
# Integrating Authorize.net into your UltraCart account
# Very Important Integration Note
:::info
**UltraCart does not support the Authorize.net Fraud Prevention Suite. You must turn that feature off when integrating Authorize.net with your UltraCart account. You can make sure this is disabled under Authorize.Net here:**
****
For additional fraud prevention protection, please see the UltraCart [Fraud Prevention](/checkout-payments/fraud-prevention) tool.
:::
## The first set of steps are listed at Authorize.Net's web site.
:::note
[http://www.authorize.net](http://www.authorize.net)
:::
1. Log in to your Authorize.Net account
2. Navigate: Home Page → Account → Settings:

3. In the first section of links click on "Payment Form". Then click on "Form Fields". Make sure none of the boxes have "Required" checked and then save. Click "Settings and Profile" on the left hand side of the screen.
4. Click on "Transaction Version" and set it to "JSON" then Save.
5. Click on "Email Receipts" and make sure "Email transaction receipt to customer" is not checked. Save.
6. Click on "Card Code Verification". Authorize.Net suggested to UltraCart support that (N) be checked. Individual settings may vary by merchant. Save.

7. Click on "Address Verification Service (AVS)". Authorize.Net suggested to UltraCart support that (B), (E), (G), (R), (S), (U) and (N) be checked. Individual settings may vary by merchant. Save.
8. Click on "API Credentials & Keys". A secret question will be asked to which you should know the answer. Answer the question and click submit. On the next page the transaction key will be disabled. Highlight the key with your mouse. Then choose Edit → Copy from the menu on your browser. This will place the transaction key in your computer's clipboard.
9. You will also need to retrieve your "api\_username": On the Settings page, under "Security Settings" section, Click on the link called "API Credentials & Keys": which will provide you both items together, that you must then copy and paste into UltraCart's transaction gateway configuration page.
10. Log out of Authorize.Net
## The following steps will take place inside of UltraCart
### Step 1
Log in to your UltraCart account and Navigate:
:::note
Home → Configuration → Checkout → Payments
:::

From the "Credit and Debit Cards section simply select the card types you would like to accept.
You can access additional setting options by clicking on the "Settings" button shown below.

When you click on Settings the following popup will be displayed.

- A - Allows the setting of Surcharge fees and percentages - Not Recommended.
- B - "Charge appears on statement" (enter your business name as it will appear on their statement)
- C - Charge During Checkout
- No
- Yes (Recommended)
- D - Collect card verification number (checked is the recommended setting for most merchants)
- E - "After failed attempt" (Default setting is 3 attempts)
Simply click anywhere on the screen to close the window.
### Step 2
To configure the Authorize.net 3.1 gateway click on the Connect Single button as shown below.

The next screen will present an alphabetical listing of our integrated Payment Gateways.
Clicking on the check box to the left of Authorize.net JSON will expand the settings portion.

Your final objective is to enter the credentials that you were given when signing up with Authorize.net.
- Authorize.Net API Login
- Authorize.Net Transaction Key
- Authorize.Net Send Recurring Billing Flag (set to yes if instructed to when you establish your account)
- Methods (select card types your accounts is configured to process). You can also authorize E-Checks.
Click the Save button when finished.
**Congratulations!** Your UltraCart account is now configured to use Authorize.Net
# Reviewing Transaction History of placed orders
When an order is placed that has not been successfully processed for payment, it will go into the Accounts Receivables department. There, you can review the transaction responses in order to determine why the transaction failed. To see the transaction history of an order in the A/R department, navigate:
**Main Menu > Operation > Order Management > Accounts Receivables**
**
**
Click on the hyper-linked OrderID of the order (it should be color coded in pink signifying a "bad transaction"). Then scroll down below to the "Last Transaction" section. It appears below the "Payment" section and above the "Merchant Comments".

If there has been more than one transaction recorded, you'll also see a link that will take you to the complete transaction history.
When viewing the transactions the following authorize.net documents will provide you more details on the various response codes. These should help you determine the exact cause of the failed transaction:
- [https://developer.authorize.net/api/reference/responseCodes.htm](https://developer.authorize.net/api/reference/responseCodes.html)l
- [https://support.authorize.net/authkb/index?page=content&id=A50](https://support.authorize.net/authkb/index?page=content&id=A50)
- [http://www.authorize.net/support/CNP/helpfiles/Account/Settings/Security\_Settings/Fraud\_Settings/Address\_Verification\_System\_(AVS).htm
](http://www.authorize.net/support/CNP/helpfiles/Account/Settings/Security_Settings/Fraud_Settings/Address_Verification_System_\(AVS\).htm)
# Frequently Asked Questions
:::info
All of a sudden our orders are not processing, what could cause it to stop the credit card authorizations from working?
For various reasons, including higher than normal processing to excess chargebacks can cause the account to placed on hold. but the most common reason is accidental change of the [Authorize.net](http://Authorize.net) transaction key. When you generate a new transaction key form within [Authorize.net](http://Authorize.net) and existing transaction key's in use (such as the on inside UltraCart) will expirer after 24 hours. Failure to update the transaction key within UltraCart's configuration area will result in the transactions being rejected by the gateway due to a transaction key mismatch.
I see UltraCart records the transaction ID for successfully authorizations within the "Transaction History" page of an order invoice. Can I use that to look the transaction up in Authorize.net?
Answer: Yes, you can look up all unsettled and settled transactions that have occurred within the last two years. See the following [Authorize.net](http://Authorize.net) help doc for details: [https://support.authorize.net/authkb/index?page=content&id=A714&actp=LIST](https://support.authorize.net/authkb/index?page=content&id=A714&actp=LIST)
If we configure UltraCart to require the "Company" field during checkout, is the company field passed to Authorize.net during the authorization?
Yes, the billing address company field will be passed along with the rest of the billing address and credit card details.
Do you know circumstances why Authorize.net accepts or rejects transactions?
Yes. We track all the response codes that we get back from [auth.net](http://auth.net) and there is a running list of what they mean here.
[http://developer.authorize.net/tools/responsereasoncode/](http://developer.authorize.net/tools/responsereasoncode/)
They send both an error and a response code, or multiples of they have a need.
:::
# Helpful resources
[https://www.authorize.net/support/CP/helpfiles/Reports/Transaction\_Detail/Transaction\_Detail\_Reports.htm](https://www.authorize.net/support/CP/helpfiles/Reports/Transaction_Detail/Transaction_Detail_Reports.htm)
---
# BlueSnap Gateway Integration
https://docs.ultracart.com/checkout-payments/tutorials/payment-gateway-tutorials/configuring-a-payment-gateway-tutorial/credit-card-processing-transaction-gateway/bluesnap-gateway-integration
doc_type: tutorial
The BlueSnap integration allows UltraCart merchants to securely process credit and debit card transactions through the BlueSnap payment gateway. BlueSnap provides a merchant account and payment gateway together, with global bank connections that let you accept payments in multiple currencies.
This guide walks you through:
- Creating BlueSnap API credentials
- Configuring the BlueSnap gateway in UltraCart
- Testing and validating your integration
* * *
## Capabilities
The BlueSnap gateway supports the following functionality within UltraCart:
| Capability | Supported |
| --- | --- |
| E-Check / ACH | No |
| Multi-Currency | Yes |
| Refunds | Yes |
| Auth then Capture | No |
| Zero Dollar Authorization | No |
| 3rd Party Processor (hands off to processor website) | No |
**Supported card types:** Visa, Mastercard, American Express, Discover, Diners Club, and JCB.
* * *
## Prerequisites
Before configuring BlueSnap in UltraCart, ensure you have the following:
- An active **BlueSnap merchant account**. If you do not have one yet, contact BlueSnap sales at [go.bluesnap.com/talk-to-sales](https://go.bluesnap.com/talk-to-sales) or call +1 (877) 592-7468.
- Permission to create **API credentials** within the BlueSnap Merchant Portal.
- UltraCart administrative access to the payment gateway configuration.
:::info
Do not use your primary BlueSnap Merchant Portal login for the integration. Always generate dedicated API credentials as described below.
:::
* * *
## Step 1: Create BlueSnap API Credentials
UltraCart authenticates with BlueSnap using an API username and API password that you generate in the BlueSnap Merchant Portal.
1. Log in to your **BlueSnap Merchant Portal**.
2. Navigate to **Settings → API Settings**.
3. Create an **API password**. BlueSnap requires the password to:
- Be a minimum of 12 characters (maximum 128)
- Use ASCII characters only
- Include at least one uppercase letter, one lowercase letter, one digit, and one special character
- Not match your user key or resemble an email address
4. **Authorize IP addresses.** Add the IP addresses or subnets that are permitted to use the credentials (up to 15). For a single address, enter it in the four boxes and select **Add**. For a range, enter the starting address and the last octet of the ending address.
5. Select **Request API credentials** to generate the credential set.
Your **API username** and **API password** created here are the values you will enter into UltraCart.
:::info
The API password is separate from your BlueSnap account login password.
:::
* * *
## Step 2: Choose Your Environment
BlueSnap provides two environments, each with its own set of API credentials:
| Environment | Purpose |
| --- | --- |
| Sandbox | Testing and validation using test cards. No real funds move. |
| Production (Live) | Real transactions against live shopper cards. |
Credentials generated in the Sandbox environment do **not** work in Production and vice versa. Generate the credentials in the environment you intend to use, and select the matching environment in the UltraCart configuration (Step 3).
:::tip
Validate the full checkout flow in Sandbox before switching to Production, then re-enter your Production credentials and select the **Production** environment.
:::
* * *
## Step 3: Configure BlueSnap in UltraCart
Navigate to the UltraCart payment gateway configuration:
**Main Menu → Configuration → Checkout → Payments → Transaction Gateways**
1. Create or edit a **Single Transaction Gateway**.
2. Select **BlueSnap** as the gateway type.
3. Complete the configuration fields described below.
### Configuration Fields

| Field | Description |
| --- | --- |
| BlueSnap API Username | The API username generated in the BlueSnap Merchant Portal (Step 1). |
| BlueSnap API Password | The API password generated for that API username. |
| BlueSnap Soft Descriptor (Optional) | The text that appears on the shopper's card statement for charges processed through this gateway. Leave blank to use your BlueSnap account default. |
| BlueSnap Environment | Select **Sandbox** for testing or **Production** for live transactions. This must match the environment in which your credentials were generated. |
| Methods | Check each card type you are approved to process through BlueSnap: AMEX, Diners Club, Discover, JCB, Mastercard, Visa. |
* * *
## Step 4: Save and Test the Configuration
1. Click **Save**.
2. Place a **test order** in your storefront.
- Use BlueSnap test card numbers while the gateway is set to the **Sandbox** environment.
3. Verify:
- The transaction completes successfully
- No gateway errors appear in the order logs
- The correct card types are accepted
Once testing passes, update the gateway to your **Production** credentials and set the environment to **Production**.
* * *
## Security Best Practices
Follow these practices to protect your integration:
- Use dedicated API credentials for the UltraCart integration rather than sharing your portal login.
- Keep the IP allowlist enabled in the BlueSnap Merchant Portal when possible; disabling IP checking removes an important security layer.
- Rotate your API password periodically.
- Never expose credentials in JavaScript, public repositories, or client-side applications.
:::warning
Never share your BlueSnap API password outside of the UltraCart gateway configuration screen.
:::
* * *
## Troubleshooting
### Authentication / Invalid Credentials Error
**Symptoms:** Transactions fail immediately with an authentication or authorization error.
**Solution:**
- Verify the API username and password were copied exactly, with no leading or trailing spaces.
- Confirm the selected **BlueSnap Environment** matches the environment in which the credentials were generated (Sandbox credentials will not authenticate against Production).
- Confirm your API password has not expired or been rotated in the BlueSnap Merchant Portal.
### Transactions Rejected by IP Check
**Symptoms:** Credentials are correct, but requests are refused.
**Solution:** Ensure the IP allowlist in **Settings → API Settings** includes the addresses used by UltraCart's processing servers, or work with BlueSnap support to confirm the correct allowlist configuration.
### Card Type Declined
**Symptoms:** A specific card type (for example, JCB or Diners Club) is declined at checkout.
**Solution:**
- Confirm the card type is checked under **Methods** in the UltraCart gateway configuration.
- Confirm your BlueSnap merchant account is approved to process that card type.
### Currency Mismatch
**Symptoms:** Multi-currency orders fail.
**Solution:** Confirm your BlueSnap account is enabled for the currencies you are attempting to charge, and review the UltraCart order logs for the gateway response.
* * *
## FAQ
### Q: Can I use my BlueSnap portal login for the integration?
No. Generate dedicated API credentials under **Settings → API Settings** in the BlueSnap Merchant Portal.
### Q: Does BlueSnap support E-Check / ACH through UltraCart?
No. The BlueSnap gateway supports credit and debit card processing and multi-currency, but not E-Check within this integration.
### Q: What is the Soft Descriptor field?
The soft descriptor is the text that appears on the shopper's credit card statement. It is optional; if left blank, BlueSnap uses your account default.
### Q: Do I need separate credentials for testing and going live?
Yes. Sandbox and Production each have their own API credentials, and the selected **BlueSnap Environment** in UltraCart must match.
---
# Braintree Credit Card Processing Gateway Integration
https://docs.ultracart.com/checkout-payments/tutorials/payment-gateway-tutorials/configuring-a-payment-gateway-tutorial/credit-card-processing-transaction-gateway/braintree-credit-card-processing-gateway
doc_type: tutorial
Braintree is available to US, European, Australian, and Canadian merchants. We help companies of all sizes grow into international markets and accept payments in over 130 currencies. **We pay out fast - just 2 business days for most transactions**. No matter your stage of growth, we can help you optimize your cash flow to grow your business.
## Integrating Braintree with your UltraCart Account:
The first step will be creating your brain tree account and acquiring your [Braintree API keys](https://developer.paypal.com/braintree/articles/control-panel/important-gateway-credentials#api-keys), which you will place into UltraCart.
You'll need 3 credentials to connect your Braintree account to UltraCart: the Merchant ID, Public Key and Private Key.
:::note
Sandbox API keys are different from those in the production environment, so they must be updated in your code by your developers when switching between environments. More information about switching environments is available in the [Braintree go-live docs](https://developer.paypal.com/braintree/docs/start/go-live) .
:::
### Obtaining your API Key credentials:
Next, you'll gather your credentials by logging into your Braintree account: [https://www.braintreegateway.com/login](https://www.braintreegateway.com/login)
### Braintree API Keys
The public and private keys together make up your user's API keys. Each user associated with your Braintree gateway will have their own set of API keys, which they can change or rotate at any time for added security.
**Braintree Docs:** [**API Keys**](https://developer.paypal.com/braintree/articles/control-panel/important-gateway-credentials#api-keys)
### 1\. Braintree Merchant ID
Your merchant ID is the unique identifier for your entire gateway account, including the multiple merchant accounts that may be in your gateway.
note
Your merchant ID is not the same as your merchant account ID. [More Info.](https://developer.paypal.com/braintree/articles/control-panel/important-gateway-credentials#merchant-account-id-versus-merchant-id)
Your merchant ID is not the same as your merchant account ID. [More Info.](https://developer.paypal.com/braintree/articles/control-panel/important-gateway-credentials#merchant-account-id-versus-merchant-id)
**Braintree Docs:** [**Merchant ID**](https://developer.paypal.com/braintree/articles/control-panel/important-gateway-credentials#merchant-id)
1. Click on the gear icon in the top right corner
2. Click **Business** from the drop-down menu
3. Scroll to the **Merchant Accounts** section
### 2\. Braintree Public Key
This is your user-specific public identifier. Each user associated with your Braintree gateway will have their own public key.
**Braintree Docs:** [**Public Key**](https://developer.paypal.com/braintree/articles/control-panel/important-gateway-credentials#public-key)
1. Click on the gear icon in the top right corner
2. Click **API** from the drop-down menu
3. Scroll to the **API Keys** section
:::info
If no API keys appear, click the **Generate New API Key** button.
:::
### 3\. Braintree Private Key
This is your user-specific private identifier. Each user associated with your Braintree gateway will have their own private key. Your private key should not be shared outside the use of the UltraCart UI.
**Braintree Docs:** [**Private Key**](https://developer.paypal.com/braintree/articles/control-panel/important-gateway-credentials#private-key)
1. Click on the gear icon in the top right corner
2. Click **API** from the drop-down menu
3. Scroll to the **API Keys** section
4. Click the **View** link located in the _Private Key_ column
:::info
Your private key will be revealed in the _Private Key_ column on the next page.
:::
### Placing the API credentials into UltraCart:
Login into your UltraCart account and navigate:
Configuration > Checkout > Payments

Select **Braintree Payment Solutions (Blue)**

**Enter:**
- Braintree MerchantID
- Braintree Public Key
- Braintree Private Key
- Select the Credit Card types you are setup to process through Braintree (typically Visa, MasterCard, Discover, Amercian Express)
Then hit the save button at the bottom of the page to save the changes.
## Preventing Duplicate Transactions
In Braintree you can turn on a setting to prevent duplicate charges:
NOTE: Duplicate transaction checking is enabled by default with a 30-second window. This setting can be updated or disabled by users with Account Admin privileges.
1. Log into the Braintree Control Panel
2. Navigate to Settings > Processing > Duplicate Transaction Checking
3. Click Edit to adjust the time window or Enable/Disable to turn the feature on/off
## Troubleshooting & Support
Online Braintree support is available at [https://support.braintreepayments.com/](https://support.braintreepayments.com/)
You can learn more about customizing the AVS and CVV rejection rules here: [https://support.braintreepayments.com/customer/portal/articles/1080668](https://support.braintreepayments.com/customer/portal/articles/1080668)
About decline responses: [https://support.braintreepayments.com/reference/general/processor-responses/authorization-responses#declines](https://support.braintreepayments.com/reference/general/processor-responses/authorization-responses#declines)
[https://articles.braintreepayments.com/control-panel/transactions/declines](https://articles.braintreepayments.com/control-panel/transactions/declines)
---
# Braintree dual vaulting — enhanced features
https://docs.ultracart.com/checkout-payments/tutorials/payment-gateway-tutorials/configuring-a-payment-gateway-tutorial/credit-card-processing-transaction-gateway/braintree-credit-card-processing-gateway/braintree-dual-vaulting-enhanced-features
doc_type: tutorial
This page covers three Braintree platform features — **network tokens**, **account updater**, and **smart retries** — that work alongside UltraCart's dual vaulting to improve subscription rebill success rates and reduce involuntary churn.
:::info
**Prerequisite:** All three features require that dual vaulting is enabled so that cards are stored in both UltraCart's vault and Braintree's vault. See [Braintree Credit Card Processing Gateway Integration](/checkout-payments/tutorials/payment-gateway-tutorials/configuring-a-payment-gateway-tutorial/credit-card-processing-transaction-gatew/braintree-credit-card-processing-gateway) for setup instructions.
:::
:::tip
All three features are configured by your PayPal/Braintree account manager on the merchant account. No UltraCart configuration changes are required beyond enabling dual vaulting.
:::
* * *
## How dual vaulting works with Braintree
When dual vaulting is enabled, UltraCart stores the card in its own vault **and** sends the card to Braintree for vaulting. Braintree returns a persistent payment method token that UltraCart stores alongside the card record. On subsequent rebills, UltraCart sends the payment method token to Braintree instead of the raw card number. Braintree resolves the token to the card on file and processes the transaction.
This token-based approach is what makes the three features below possible. Braintree manages the card data behind the token — updating it, securing it, and optimizing transactions against it — without UltraCart needing to know the details.
* * *
## Network tokens
### What it does
Network tokens replace the underlying stored card number with a secure digital token issued directly by the card network (Visa, Mastercard, etc.). This happens at the Braintree vault level — the payment method token UltraCart uses stays the same, but behind the scenes Braintree transacts with a network-issued token instead of the original card number.
### Why it matters
- **Higher approval rates** — Network tokens are recognized by issuers as more secure, resulting in fewer false declines. PayPal estimates approximately a 4.6% improvement in authorization rates.
- **Better security** — Network tokens are restricted to the specific merchant, so they are useless if stolen.
- **Longer card lifecycle** — Network tokens can survive card reissues in some cases, since the token is tied to the account rather than the physical card number.
### How it works with UltraCart
No changes are required to UltraCart's integration. When network tokens are enabled on the Braintree merchant account, Braintree automatically provisions network tokens for eligible vaulted cards and uses them when processing transactions. UltraCart continues to send the same payment method token on rebills — Braintree handles the network token layer transparently.
* * *
## Account updater
### What it does
Account updater automatically keeps vaulted card details current. When a customer's card is replaced, expires, or is reissued by their bank, Braintree receives the updated card information from the card networks and updates the vaulted record. The payment method token remains the same — only the underlying card data changes.
### Why it matters
- **Fewer failed rebills** — Without account updater, a replaced or expired card causes the next subscription rebill to decline. The customer has to manually update their payment info or the subscription is lost.
- **Reduced churn** — Failed rebills are one of the largest drivers of involuntary churn for subscription businesses. Account updater eliminates the most common cause.
- **No customer friction** — Updates happen silently in the background. The customer never needs to take action.
### How it works with UltraCart
When UltraCart sends a payment method token for a rebill, Braintree resolves it to the most current card information — whether it is the original card or an updated replacement. UltraCart does not need to know that an update occurred. The token-based approach means everything stays in sync automatically.
* * *
## Smart retries
### What it does
Smart retries optimizes declined transactions in real time. When a transaction is declined, Braintree can automatically re-attempt it through a different acquirer or with different payment credentials before returning a failed result. This happens transparently within the same transaction — there is no delay and no separate retry transaction to manage.
### Why it matters
- **Recovers otherwise lost revenue** — Transactions that would have failed on the first attempt can succeed on a real-time re-attempt through a different path.
- **No cost unless it works** — The fee only applies to transactions that smart retries successfully recovers. You are not charged for attempts that still fail.
- **Zero operational overhead** — There is nothing to configure, monitor, or manage. It works automatically on every transaction.
### How it works with UltraCart
Smart retries operates at the Braintree platform level. When UltraCart submits a transaction (whether an initial charge or a subscription rebill), Braintree applies smart retries automatically if the transaction is declined. UltraCart receives the final result — either approved or declined — without needing to know whether a retry occurred behind the scenes.
* * *
## How the three features work together
These features are complementary and address different failure points in the subscription rebill lifecycle:
| Stage | Problem | Solution |
| --- | --- | --- |
| Card data goes stale | Customer's card is replaced or expires | **Account updater** refreshes the card details automatically |
| Transaction security | Raw card numbers are less trusted by issuers | **Network tokens** provide issuer-trusted credentials that improve approval rates |
| Transaction processing | A valid transaction is declined due to routing or timing | **Smart retries** re-attempts through a different path in real time |
Together, they create a layered defense against failed rebills:
1. **Account updater** ensures the card on file is always current.
2. **Network tokens** ensure the transaction is presented with the most trusted credentials.
3. **Smart retries** ensure that even if a decline occurs, the transaction gets a second chance before failing.
* * *
## Related pages
- [Braintree Credit Card Processing Gateway Integration](/checkout-payments/tutorials/payment-gateway-tutorials/configuring-a-payment-gateway-tutorial/credit-card-processing-transaction-gatew/braintree-credit-card-processing-gateway) — Setup instructions for dual vaulting and gateway configuration
- [Dual Vaulted Credit Card Processing](/checkout-payments/tutorials/payment-gateway-tutorials/configuring-a-payment-gateway-tutorial/credit-card-processing-transaction-gatew/dual-vaulted-credit-card-processing) — How dual vaulting works across supported gateways
---
# Chase Paymentech Gateway
https://docs.ultracart.com/checkout-payments/tutorials/payment-gateway-tutorials/configuring-a-payment-gateway-tutorial/credit-card-processing-transaction-gateway/chase-paymentech-gateway
doc_type: tutorial
# Chase Paymentech Gateway
The Paymentech gateway is presently supported only for legacy merchants that where actively using it prior to 2014. New merchants will need to choose another integrated gateway with their merchant credit card account: [Credit Card Processing Transaction Gateway Integration list](/checkout-payments/tutorials/payment-gateway-tutorials/configuring-a-payment-gateway-tutorial/credit-card-processing-transaction-gatew)
## Transaction errors
### Error 9717
ProcStatus
9717
StatusMsg
Security Information - agent/chain/merchant is missing
#### Problem
The IP address being used by your server, is not in the merchant approved IP address list with Chase Paymentech.
#### Solution
You, or the approved merchant contact will need to call Chase Paymentech Gateway support at 1-866-645-1314 and have them update their firewall. Once you have done this, wait 60-70 minutes then re-test your transaction."
UltraCart has the following three public IP addresses: 74.116.32.26 , 74.116.32.25 , 64.74.121.2
---
# Configuring a Gateway that Supports Authorize.Net Emulation
https://docs.ultracart.com/checkout-payments/tutorials/payment-gateway-tutorials/configuring-a-payment-gateway-tutorial/credit-card-processing-transaction-gateway/configuring-a-gateway-that-supports-auth
doc_type: tutorial
# Configuring a Gateway that Supports Authorize.Net Emulation
Authorize.net is one of the most popular gateways on the internet. As a testament to their product, the API hasn't had to change a whole lot since it was introduced in the mid 90's. One popular approach for competing gateways to take is to expose an interface to their gateway that looks identical to the Authorize.Net API. This allows existing shopping carts to quickly support a range of additional gateways that allow look and act like Authorize.Net. If your payment gateway is not listed on UltraCart, but has Authorize.Net emulation then you can still use it with UltraCart.
To configure your gateway go to:
:::note
[Main Menu](#) → [Configuration](#) → Checkout → [Payments](#) → [Transaction Gateways](#)
:::
Scroll down and check the box for Authorize.Net Emulator as shown below.

After you check the box a set of configuration options for the gateway will appear. Below is an explanation of each option.
| Field | Description |
| --- | --- |
| Authorize.net Emulator API Login | This is the login name that is provided by your gateway. If you are unsure of this value, ask your payment gateway for the **x\_login** value. |
| Authorize.net Emulator Transaction Key | This is basically the password that UltraCart uses with your gateway. If you are unsure of this value, ask your payment gateway for the **x\_tran\_key** value. |
| Authorize.net Emulator URL | This is the URL to the script on your payment gateways website that receives the API requests. Your payment gateway should be able to product you this complete URL. |
| Methods | Check the boxes for each card type that this gateway supports |
## Known Payment Processors with Authorize.Net Emulation
| Name | Emulator URL |
| --- | --- |
| [eProcessingNetwork](http://www.eprocessingnetwork.com/) | [https://test.authorize.net/gateway/transact.dll](https://test.authorize.net/gateway/transact.dll) |
| [InstaBill](http://www.instabill.com/) | [https://secure.instabillgateway.com/gateway/transact.dll](https://secure.instabillgateway.com/gateway/transact.dll) |
| [Network Merchants](https://www.nmi.com/) | [https://secure.networkmerchants.com/gateway/transact.dll](https://secure.networkmerchants.com/gateway/transact.dll) |
| [Pivotal Payments](http://www.pivotalpayments.com/) | [https://emulator.pivotalpayments.com/Emulator/PaymentGateway.aspx](https://emulator.pivotalpayments.com/Emulator/PaymentGateway.aspx) |
| [Plug N Pay](http://www.ultracart.com/resources/partners/supported-payment-gateways/usgateways/plugnpay/) | ??? Contact Plug N Pay for their Emulator URL (please paste the URL into the comments field below so we can update this page with the correct URL |
| PowerPay | [https://verifi.powerpay.biz/gateway/transact.dll](https://verifi.powerpay.biz/gateway/transact.dll) |
| [Transaction Services](https://www.trxservices.com/) | https://gateway.trxservices.com/authnet |
:::info
Gateway Providers: If your gateway has Authorize.Net emulation and is not on our list, please email support@ultracart.com
:::
## Frequently Asked Questions:
_Question: Is the UltraCart integration based on AIM or SIM emulation? Our gateway's Emulation URL needs to know? _
Answer: Our integration uses the AIM integration.
---
# Configuring External Gift Cards
https://docs.ultracart.com/checkout-payments/tutorials/payment-gateway-tutorials/configuring-a-payment-gateway-tutorial/credit-card-processing-transaction-gateway/configuring-external-gift-cards
doc_type: tutorial
# Overview
Gift card have become increasingly popular over the years. If you are looking to configure custom gift cards, the following are integrated options:
- [Gift Cards via My Virtual Merchant by Elavon](/checkout-payments/tutorials/payment-gateway-tutorials/configuring-a-payment-gateway-tutorial/credit-card-processing-transaction-gatew/configuring-external-gift-cards/gift-cards-via-my-vi-1376305)
- [Valutec Gift Card Support](/checkout-payments/tutorials/payment-gateway-tutorials/configuring-a-payment-gateway-tutorial/credit-card-processing-transaction-gatew/configuring-external-gift-cards/valutec-gift-card-support)
---
# Gift Cards via My Virtual Merchant by Elavon
https://docs.ultracart.com/checkout-payments/tutorials/payment-gateway-tutorials/configuring-a-payment-gateway-tutorial/credit-card-processing-transaction-gateway/configuring-external-gift-cards/gift-cards-via-my-virtual-merchant-by-elavon
doc_type: tutorial
# Overview
Configuring gift card processing via the My Virtual Merchant, powered by Elavon.
:::note
Main Menu → Configuration → Payments → Transaction Gateways
:::

---
# Valutec Gift Card Support
https://docs.ultracart.com/checkout-payments/tutorials/payment-gateway-tutorials/configuring-a-payment-gateway-tutorial/credit-card-processing-transaction-gateway/configuring-external-gift-cards/valutec-gift-card-support
doc_type: tutorial
# Valutec Gift Card Support
This short tutorial will guide you through adding support for Valutec Gift Cards to your account. First we need to navigate to:
:::note
Main Menu → Configuration → Payments → Transaction Gateways
:::
Scroll down to the Valutec gateway as shown below. Enter your Valutec Client Key and Terminal Id. Make sure to check the Electronic Gift Card checkbox as shown below.

When the customer enters their Valutec 16 digit gift card during the checkout, UltraCart will perform two types of transactions against the card:
- Balance Inquiry
- Sale (Debit from the Balance)
This is important so make sure you do this:
:::warning
Make sure that you contact Valutec Merchant Support and ask them to disable duplicate transaction checking for your terminal id. This will allow UltraCart to make the necessary balance inquiry transactions against the card. If you don't perform this configuration change then your gift cards will fail during the checkout.
:::
Test your gift cards! Charge one up and then use it to make a purchase from your store.
...
---
# Configuring First Data Global Payments e4 Tutorial
https://docs.ultracart.com/checkout-payments/tutorials/payment-gateway-tutorials/configuring-a-payment-gateway-tutorial/credit-card-processing-transaction-gateway/configuring-first-data-global-payments-e
doc_type: tutorial
:::info
Please note that "**Payeezy**" is the new name for the "First Data Global Gateway e4"
:::
# Configuring First Data Global Payments e4 Tutorial
This tutorial will walk you through the process of configuring the First Data Global Payments e4 gateway with UltraCart. This gateway is the successor to the popular LinkPoint gateway (later renamed First Data Global Payments after the acquisition from First Data).
## First Data Configuration
First go to First Data's e4 website located at:
:::note
[https://globalgatewaye4.firstdata.com/](https://globalgatewaye4.firstdata.com/)
:::
Enter your login information in the screen as shown below.

Next click on the Administration link on the top navigation menu as shown below.

Then click on the Terminals menu on the sub-navigation as shown below.

This will display the terminals that have been configured on your account. Write down the Gateway ID shown. You will need this information later when configuring UltraCart's page. We recommend copying and pasting the values into a text document on your computer.

After saving the Gateway ID actually click on it to go into the individual terminal configuration. On the first page of the terminal will be the details. You need to follow the three steps shown in the screen shot below in order to generate and save the password associated with this terminal.

This will take you back to the terminal list. Click the Gateway ID again. Then when the Terminal information comes up click on the API Access link as shown below.

Now complete the four steps shown in the screen shot below. This will give you the last two fields that you will need to complete the UltraCart configuration.

When you clicked the Generate New Key link their system will display a warning like the one shown below. Click OK.

At this point you should have collected four values from the First Data screens:
1. Gateway ID
2. Password
3. Key ID
4. HMAC Key
If you do not have those four values, please review the tutorial above and collect all the necessary information before proceeding.
## UltraCart Configuration
Now that we have the four values we need to configure the gateway, login to your UltraCart account and then click:
:::note
[Main Menu](https://secure.ultracart.com/merchant/mainMenu.do) → [Configuration](https://secure.ultracart.com/merchant/configuration/configurationMenuLoad.do) → [Payments](https://secure.ultracart.com/merchant/configuration/payment/methodsLoad.do) → [Transaction Gateways](https://secure.ultracart.com/merchant/configuration/payment/transactionGatewaysLoad.do)
:::
Scroll down the transaction gateways list, check the box for "First Data Global Payments e4", and the four values you collected in the section above, and select which credit card types this gateway supports.


**Scroll to the bottom of the page and then click the save button to save your gateway configuration.**
**\*\*\*Perform live test transactions to make sure your configuration is correct.**
# Troubleshooting Transaction details
See here:
Response Codes:[
https://support.payeezy.com/hc/en-us/articles/203730509-First-Data-Payeezy-Gateway-Bank-Response-Codes](https://support.payeezy.com/hc/en-us/articles/203730509-First-Data-Payeezy-Gateway-Bank-Response-Codes)
AVS Codes:
[https://support.payeezy.com/hc/en-us/articles/203826909-What-are-the-AVS-response-codes-](https://support.payeezy.com/hc/en-us/articles/203826909-What-are-the-AVS-response-codes-)
CVV Codes:
[https://support.payeezy.com/hc/en-us/articles/204504215-CVV2-CVD-CVV-CID-Response-Codes](https://support.payeezy.com/hc/en-us/articles/204504215-CVV2-CVD-CVV-CID-Response-Codes)
---
# Configuring the BluePay Credit Card Processing Gateway
https://docs.ultracart.com/checkout-payments/tutorials/payment-gateway-tutorials/configuring-a-payment-gateway-tutorial/credit-card-processing-transaction-gateway/configuring-the-bluepay-credit-card-proc
doc_type: tutorial
# Overview
This tutorial will provide instructions for configuring the BluePay gateway with your UltraCart account.
# Steps
## Configuring BluePay in the transaction gateways list in the payments configuration page
- Log into your UltraCart account then Navigate:
Main Menu → Configuration → (middle menu) Checkout → Payments → Scroll down to "Credit and Debit Cards" section → Click "Connect Single" button.
- Scroll down and select the radio button for BluePay 2.0.
- Complete the BluePay fields that appeared (see field definitions below).

| Field | Description | Required |
| --- | --- | --- |
| BluePay Account ID | This is your account ID provided to you by BluePay | Yes |
| BluePay AVS Allowed | AVS\_ALLOWED \-- Optional for AUTH & SALE \-- Overrides legacy AVS filter. \-- Does not override Fraud Management settings. Allows a string of allowed Address Verification System (AVS) response codes to be set on a per transaction basis. If the resulting AVS response is not in this list, the transaction will be voided and a decline response returned. If set to '#', all AVS responses are considered valid. For example, if the merchant wishes to allow AVS responses 'X', 'Y', and 'Z', he sets this to 'XYZ'. Note: The Fraud Management system or the legacy AVS filter should be used to set AVS filters if possible. [https://www.bluepay.com/sites/default/files/documentation/BluePay\_bp10emu/BluePay%201-0%20Emulator.txt](https://www.bluepay.com/sites/default/files/documentation/BluePay_bp10emu/BluePay%201-0%20Emulator.txt) | |
| BluePay Secret Key | This is the equivalent to a password, provided to you by BluePay. | Yes |
| BluePay CVV2 Allowed | CVV2\_ALLOWED \-- Optional for AUTH & SALE \-- Overrides legacy CVV filter. \-- Does not override Fraud Management settings. Allows a string of allowed Card Verification Value (CVV) response codes to be set on a per transaction basis. If the resulting CVV response is not in this list, the transaction will be voided and a decline response returned. If set to '#', all CVV responses are considered valid. For example, if the merchant wishes to allow CVV responses 'X', 'Y', and 'Z', he sets this to 'XYZ'. Note: The Fraud Management system or the legacy CVV filter should be used to set CVV filters if possible. [https://www.bluepay.com/sites/default/files/documentation/BluePay\_bp10emu/BluePay%201-0%20Emulator.txt](https://www.bluepay.com/sites/default/files/documentation/BluePay_bp10emu/BluePay%201-0%20Emulator.txt) | |
| BluePay Mode | Select the appropriate option: (TEST / LIVE) | Yes |
| Methods | The available credit card types: - AMEX - Diners Club - Discover - JCB - MasterCard - Visa | Yes - for all payment types that you have established with BluePay. |
---
# CyberSource Gateway Integration
https://docs.ultracart.com/checkout-payments/tutorials/payment-gateway-tutorials/configuring-a-payment-gateway-tutorial/credit-card-processing-transaction-gateway/cybersource-gateway-integration
doc_type: tutorial
The CyberSource integration allows UltraCart merchants to securely process credit and debit card transactions through the CyberSource (a Visa solution) payment gateway. UltraCart connects to CyberSource using the **Simple Order API**, authenticated with a transaction security key you generate in the CyberSource Business Center.
This guide walks you through:
- Generating a Simple Order API security key (.p12) in the CyberSource Business Center
- Configuring the CyberSource gateway in UltraCart
- Testing and validating your integration
:::info
This guide replaces the older key-generation process that relied on a Java applet. CyberSource now generates and downloads the security key directly from the Business Center — no Java is required.
:::
* * *
## Capabilities
The CyberSource gateway supports the following functionality within UltraCart:
| Capability | Supported |
| --- | --- |
| E-Check / ACH | No |
| Multi-Currency | Yes |
| Refunds | Yes |
| Auth then Capture | Yes |
| Zero Dollar Authorization | No |
| 3rd Party Processor (hands off to processor website) | No |
**Supported card types:** Visa, Mastercard, American Express, Discover, Diners Club, and JCB.
* * *
## Prerequisites
Before configuring CyberSource in UltraCart, ensure you have the following:
- An active **CyberSource merchant account** and your **CyberSource Merchant ID**.
- Access to the **CyberSource Business Center** with permission to manage keys.
- UltraCart administrative access to the payment gateway configuration.
:::info
Generate your key in the environment you will process in. Keys created in the **Test** Business Center do not work in **Production**, and vice versa.
:::
* * *
## Step 1: Generate a Simple Order API Security Key
UltraCart authenticates to CyberSource with a **Simple Order API** security key, downloaded as a PKCS #12 (`.p12`) file.
1. Sign in to the **CyberSource Business Center** for the environment you process in (Test or Production).
2. In the navigation pane, select **Payment Configuration → Key Management**.
3. Select **\+ Generate Key**.
4. Choose **Simple Order API** as the key type.
5. Select **Generate Key**.
6. Review the on-screen instructions and select **Download Key**.
7. When the **Set Password** page appears, enter and confirm a password for the key.
8. Save the downloaded `.p12` file to a secure location.
:::warning
Record the password you set in step 7. You must enter this exact password into UltraCart (Step 2) for UltraCart to open the `.p12` file. If the password does not match, the key cannot be used.
:::
* * *
## Step 2: Configure CyberSource in UltraCart
Navigate to the UltraCart payment gateway configuration:
**Main Menu → Configuration → Checkout → Payments → Transaction Gateways**
1. Create or edit a **Single Transaction Gateway**.
2. Select **CyberSource** as the gateway type.
3. Complete the configuration fields described below.
### Configuration Fields

| Field | Description |
| --- | --- |
| CyberSource Merchant ID | Your CyberSource Merchant ID (the same ID you use to sign in to the Business Center). |
| CyberSource P12 Password | The password you set when downloading the `.p12` key file in Step 1. |
| Upload CyberSource Key File | Click this link and upload the `.p12` security key file you downloaded in Step 1. |
| Methods | Check each card type you are approved to process through CyberSource: AMEX, Diners Club, Discover, JCB, Mastercard, Visa. |
After entering the Merchant ID and P12 Password, uploading the key file, and selecting your card types, click **Save** at the bottom of the page.
### Rotating Transaction Gateways
CyberSource can also be configured under **Rotating Transaction Gateways** for merchants who distribute volume across multiple gateway accounts:
**Main Menu → Configuration → Checkout → Payments → Rotating Transaction Gateways**
The fields are identical — enter the Merchant ID and P12 Password, upload the `.p12` key file, select the card types, and save.
* * *
## Step 3: Save and Test the Configuration
1. Click **Save**.
2. Place a **test order** in your storefront.
- While testing, use a key generated in the **Test** Business Center environment.
3. Verify:
- The transaction completes successfully
- No gateway errors appear in the order logs
- The correct card types are accepted
Once testing passes, generate a **Production** key, upload it, and enter the matching Production Merchant ID and P12 Password.
* * *
## Security Best Practices
Follow these practices to protect your integration:
- Store the `.p12` key file in a secure location with restricted access, and delete local copies once uploaded to UltraCart.
- Treat the P12 password like any other credential — do not share it or store it in plain text.
- Generate separate keys for the Test and Production environments.
- Rotate your security key periodically, and immediately if you suspect it has been exposed.
* * *
## Troubleshooting
### Key Cannot Be Opened / Password Error
**Symptoms:** Transactions fail with an authentication error, or UltraCart reports it cannot read the uploaded key.
**Solution:**
- Confirm the **CyberSource P12 Password** in UltraCart exactly matches the password you set when downloading the `.p12` (Step 1, no leading or trailing spaces).
- Re-upload the `.p12` file to be sure the correct file was selected.
### Environment Mismatch
**Symptoms:** Credentials appear correct, but every transaction is rejected.
**Solution:** Confirm the key was generated in the same environment you are processing in. A Test key will not authenticate against Production, and vice versa. Generate a new key in the correct environment if needed.
### Card Type Declined
**Symptoms:** A specific card type (for example, JCB or Diners Club) is declined at checkout.
**Solution:**
- Confirm the card type is checked under **Methods** in the UltraCart gateway configuration.
- Confirm your CyberSource merchant account is approved to process that card type.
### Currency Mismatch
**Symptoms:** Multi-currency orders fail.
**Solution:** Confirm your CyberSource account is enabled for the currencies you are charging, and review the UltraCart order logs for the gateway response.
* * *
## FAQ
### Q: Do I still need Java to generate the key?
No. The older CyberSource console generated keys with a Java applet. The current CyberSource Business Center generates and downloads the `.p12` file directly — no Java required.
### Q: Which API does UltraCart use?
UltraCart uses the CyberSource **Simple Order API**. When generating your key, be sure to select **Simple Order API** as the key type.
### Q: Where do I set the P12 password?
You set it in the CyberSource Business Center when you download the key (Step 1). You then enter that same password into the **CyberSource P12 Password** field in UltraCart.
### Q: Do I need separate keys for testing and going live?
Yes. Generate a key in the **Test** Business Center for testing and a separate key in the **Production** Business Center for live transactions. The selected key must match the environment you are processing in.
---
# Dual Vaulted Credit Card Processing
https://docs.ultracart.com/checkout-payments/tutorials/payment-gateway-tutorials/configuring-a-payment-gateway-tutorial/credit-card-processing-transaction-gateway/dual-vaulted-credit-card-processing
doc_type: tutorial
# Introduction
For certain gateways, UltraCart can store the credit card information within the UltraCart vault and also within the credit card processor's vault. When an auto order rebill occurs, UltraCart instructs the payment processor to use the credit card information stored within the payment processor's vault. Using the gateway vaulted credit card information allows for one very important function to occur: **automated credit card updates**.
The supported payment processors periodically send the vaulted card information off to the credit card companies (Visa, MasterCard, AMEX, etc.) and ask them if there are any updates to the given card. When those updates occur due to card changes, the payment gateway takes that new information and updates the vault record.
You may have experienced this automatic update for your own personal subscriptions as they continue to work even after receiving a new card.
# Supported Payment Processors
As of May 2023, we are supporting this functionality on the following gateways:
- Authorize.Net
- Braintree
- NMI
- PayPal (Latest Version)
- Stripe
The configuration for each gateway varies and some charge a fee for the service.
## Authorize.Net
The Authorize.Net integration requires you to have the “Authorize.NET JSON” configured. Many merchants are currently running the older Authorize.Net 3.1 integration. The credentials are the same. You just need to change the integration type and move your credentials down to the new gateway.

:::note
This will not work until you upgrade from Authorize.Net 3.1 to Authorize.Net JSON and enable the Account Updater feature.
:::
Are you have configured the proper gateway, within the Authorize.Net interface you will need to login to [authorize.net](http://authorize.net) and enable the Account Updater functionality shown in the menu below.

Authorize.Net charges the typical $0.25 per update fee.
Authorize.Net keeps its own record of card updates made through Account Updater, separate from UltraCart's logs and potentially retained for longer.
To review it, log into the Authorize.Net Merchant Interface and go to **Account → Account Updater**. This report lists which stored payment profiles were updated and when, so you can check whether a mismatch between the card shown on an UltraCart order and the current card at the gateway lines up with an Account Updater event.
UltraCart's Auto Order Editor logs go back one year. If a suspected update happened earlier than that, check Authorize.Net's Account Updater report instead.
## Braintree
For Braintree, you must contact your Braintree Representative and have your contract modified to include the Account Updater service.
Braintree's Account Updater (the feature required for dual vaulted credit card processing) is **not enabled by default** on merchant accounts. Even if you can view the settings or toggles in your Braintree Control Panel or UltraCart gateway configuration, the feature itself is inactive until Braintree explicitly enables and configures it on their end.
## What You Need to Do
1. Contact your Braintree representative (or reach out via the [Braintree Help Center](https://developer.paypal.com/braintree/help)) and request to enable Account Updater.
2. They will work directly with you to review eligibility, configure the service, and update your contract/agreement as needed.
3. Once Braintree confirms the feature is live on their side, return to your UltraCart gateway settings to complete the dual vaulting configuration.
After Braintree activates Account Updater, you'll be able to fully enable dual vaulted processing in UltraCart. Braintree applies their standard per-update fee (typically $0.25, though final pricing is confirmed during setup).
More information on Braintree can be found here:
[https://www.braintreepayments.com/features/account-updater](https://www.braintreepayments.com/features/account-updater)
Braintree charges the typical $0.25 per update fee.
[Braintree dual vaulting — enhanced features](#page-not-found)
## NMI
Follow [these instructions](https://support.nmi.com/hc/en-gb/articles/360006070758-Getting-Started-Automatic-Card-Updater) to use the Automatic Card Updater with NMI.
## PayPal
The latest version of PayPal utilizes their new RTAU (real-time account updater) which retrieves updated card information when a card is charged again. There is no configuration required to use this functionality when PayPal is your credit card processor.
## Stripe
Stripe includes card updater functionality for free with their standard pricing plan. The integration does not require any further setup. UltraCart will automatically dual vault all auto order subscription card information. When updates occur, UltraCart receives a webhook notification from Stripe and notes the update in the Auto Order Logs.
If you have negotiated pricing with Stripe to receive a discount then the fee for card updates is the typical $0.25 per update.
# Auto Order Editor
UltraCart will display a small message under the card number to indicate if the credit card information is dual vaulted.

# Backfill to Payment Processor
Once UltraCart Support has validated that you have a proper dual vaulting configuration, UltraCart can perform a backfill operation to most payment providers. Please contact UltraCart Support if you are interested in having a backfill performed.
# BigQuery
The Orders table within BigQuery will contain a dual\_vaulted record under the credit card object. The presence of the record indicates the card information is dual vaulted.

# REST API / Webhook
Similar to BigQuery, the order → payment → credit\_card → dual\_vaulted object indicates the presence of dual vaulted card information on the order.
# Troubleshooting a Card Mismatch
If the card shown on an order in Order Management does not match what Payment Processing or the gateway shows, and no merchant note explains a customer- or support-initiated update, check whether that order's card is dual vaulted.
A dual vaulted card can be updated directly at the gateway, for example through Account Updater or a card network reissue, without creating a matching event in UltraCart. That is why the order-level record in Order Management can still show the original card even after Payment Processing and the gateway have moved to the current one.
Use one of the methods above to confirm dual vaulting is in effect for the order in question:
- The indicator under the card number in the Auto Order Editor
- The `dual_vaulted` field on the order in BigQuery
- The `dual_vaulted` object in the REST API or webhook payload
If the order is dual vaulted, the gateway is the source of truth for the current card. For Authorize.Net specifically, the Account Updater report described above can confirm when the change happened.
# Tasks Integration
The new Tasks module can generate a system task whenever a card update is received that indicates that the customer needs to be contacted for new information. Configuring this task generation is done under:
Configuration → Order Management → Task Generation → Auto Order Processing
A screenshot of this setting is shown below.

# Dual Vaulted Life Cycle
Payment processors do not know whether you still need the vaulted credit card information for a future transaction. They will gladly store larger and larger amounts of information and seek updates to that information. Given that the typical card will receive at least one update every three years due to expiration, the expected average cost of update fees associated with a vaulted card is 8.3 cents per year. To avoid incurring a large cost for updating thousands of cards, UltraCart has a system to remove unused cards.
UltraCart keeps track of each dual vaulted card record and their associated orders. Card information is purged from an order 60 days later (or when a recurring order completes). Once the credit card information is purged from ALL of the orders that used the dual vaulted record a cleanup life cycle will begin. UltraCart will set a 200 day expiration time on the dual vaulted information. After the time period expires, UltraCart will make an API call to your payment gateway to delete the vaulted card information. So for a single order, the vault will delete after 260 days.
# Vault All Transactions
Some merchants have external call centers that use the dual vaulted information to perform subsequent transactions during outbound marketing calls. Using this dual vaulted information prevents them from having to obtain the credit card information from the customers a second time thereby reducing PCI scope.
Because of this possibility, whenever a channel partner object is imported we will extend the life span of dual vaulted tokens an additional 200 days. Even if UltraCart does not have an active auto order using the dual vaulted information, it will not be purged as long as it’s used once every 180 days (six months). UltraCart extends the expiration of the dual vaulted information based upon the email address originally used during the vaulting process being specified on the channel partner order import operation.
Because dual vaulting every transaction is a substantially higher amount of transactions, the dual vaulted life cycle manager that UltraCart implements is critical to reducing the cost associated with dual vaulting.
Please contact UltraCart Support if you would like to have all your transactions dual vaulted.
# Processor Specific Configuration
## Braintree
Once you have enabled the Card Updater functionality on your Braintree account, you need to create a webhook within your Braintree account that points to:
```
https://api.ultracartstorefront.com/braintree/webhook/{MERCHANT ID}/{RTG CODE}
```
Replace {MERCHANT ID} and {RTG CODE} with your merchant ID and the rotating transaction gateway code associated with your Braintree gateway.
:::note
There is a bug in the Braintree UI. When you first create the webhook there is not an option for the “account updater report”. Just select any other type of notification and save. Then edit the webhook again and the “account updater report” webhook type will appear. Select the webhook type and save.
:::
The processing of Braintree card updates is logged within [Integration Logs](/reports-analytics/reporting/integrations-reports/integration-log-health-report) and auto order logs to help you keep tabs on the updates that you are receiving on your subscriptions.
---
# eWay Gateway Integration
https://docs.ultracart.com/checkout-payments/tutorials/payment-gateway-tutorials/configuring-a-payment-gateway-tutorial/credit-card-processing-transaction-gateway/eway-gateway-integration
doc_type: tutorial
The eWay integration allows UltraCart merchants to securely process credit and debit card transactions through the eWAY payment gateway. eWAY is an established gateway founded to enable Australian businesses to accept credit card payments online, and it serves merchants in Australia, New Zealand, and the UK.
This guide walks you through:
- Locating your eWAY Customer ID
- Configuring the eWay gateway in UltraCart
- Testing and validating your integration
* * *
## Capabilities
The eWay gateway supports the following functionality within UltraCart:
| Capability | Supported |
| --- | --- |
| E-Check / ACH | No |
| Multi-Currency | Yes |
| Refunds | No |
| Auth then Capture | No |
| Zero Dollar Authorization | No |
| 3rd Party Processor (hands off to processor website) | No |
**Supported card types:** Visa, Mastercard, American Express, Discover, Diners Club, and JCB.
* * *
## Prerequisites
Before configuring eWay in UltraCart, ensure you have the following:
- An active **eWAY merchant account** with access to the **MYeWAY** management console.
- Your **eWAY Customer ID** (an 8-digit number).
- UltraCart administrative access to the payment gateway configuration.
* * *
## Step 1: Locate Your eWAY Customer ID
UltraCart authenticates to eWAY using your **eWAY Customer ID**, an 8-digit number assigned to your account.
1. Log in to your **MYeWAY** console.
2. Open **My Account**.
3. Note your **eWAY Customer ID** (the 8-digit number associated with your account).
:::info
For testing, eWAY provides a standard sandbox Customer ID of **87654321**. This test ID does not communicate with the bank and is for demonstration only. Use it with **Test** mode (Step 2) before going live with your real Customer ID.
:::
* * *
## Step 2: Configure eWay in UltraCart
Navigate to the UltraCart payment gateway configuration:
**Main Menu → Configuration → Checkout → Payments → Transaction Gateways**
1. Create or edit a **Single Transaction Gateway**.
2. Select **eWay** as the gateway type.
3. Complete the configuration fields described below.
### Configuration Fields

| Field | Description |
| --- | --- |
| eWay Customer Id | Your 8-digit eWAY Customer ID. For testing, use eWAY's sandbox test ID **87654321**. |
| eWay Mode | Select **Test** for sandbox testing or **Live** for production. This must match the Customer ID you entered (the test ID **87654321** works only in Test mode). |
| Methods | Check each card type you are approved to process through eWAY: AMEX, Diners Club, Discover, JCB, Mastercard, Visa. |
After entering your Customer ID, selecting the mode, and choosing your card types, click **Save** at the bottom of the page.
* * *
## Step 3: Save and Test the Configuration
1. Click **Save**.
2. Set **eWay Mode** to **Test** and enter Customer ID **87654321**.
3. Place a **test order** in your storefront using eWAY's test values:
- Card number: `4444333322221111`
- A round dollar amount (for example, $10.00 or $20.00)
- Any name and CVN, with a future expiration date
4. Verify:
- The transaction completes successfully
- No gateway errors appear in the order logs
- The correct card types are accepted
Once testing passes, set **eWay Mode** to **Live** and enter your real eWAY Customer ID.
:::warning
Do not run test transactions with your live Customer ID. eWAY may block the originating IP address for test activity submitted against a live account. Always use the test Customer ID **87654321** in Test mode.
:::
* * *
## Security Best Practices
- Keep your eWAY Customer ID and MYeWAY login credentials secure.
- Restrict access to your MYeWAY console to trusted staff.
- Confirm the correct mode (Test vs Live) before opening your store to real customers.
* * *
## Troubleshooting
### Transactions Fail in Live Mode
**Symptoms:** Orders are declined or error out after switching to Live.
**Solution:**
- Confirm **eWay Mode** is set to **Live** and the **eWay Customer Id** is your real 8-digit ID (not the test ID 87654321).
- Confirm your eWAY account is active and approved to process live transactions.
### Card Type Declined
**Symptoms:** A specific card type (for example, JCB or Diners Club) is declined at checkout.
**Solution:**
- Confirm the card type is checked under **Methods** in the UltraCart gateway configuration.
- Confirm your eWAY merchant account is approved to process that card type.
### IP Blocked by eWAY
**Symptoms:** Requests suddenly stop being accepted after test activity.
**Solution:** Test transactions run against a live Customer ID can cause eWAY to block your IP. Always test with Customer ID **87654321** in Test mode, and contact eWAY support if your IP needs to be unblocked.
* * *
## FAQ
### Q: Where do I find my eWAY Customer ID?
Log in to the **MYeWAY** console and open **My Account**. Your Customer ID is the 8-digit number associated with your account.
### Q: How do I test before going live?
Set **eWay Mode** to **Test** and use the sandbox Customer ID **87654321** with eWAY's published test card values. No funds move in Test mode.
### Q: Does eWay support refunds through UltraCart?
No. The eWay gateway supports card processing and multi-currency within UltraCart, but refunds are not supported through this integration.
### Q: Which currencies can I process?
eWay supports multi-currency. Confirm the specific currencies enabled on your eWAY merchant account.
---
# Gate2Shop Configuration
https://docs.ultracart.com/checkout-payments/tutorials/payment-gateway-tutorials/configuring-a-payment-gateway-tutorial/credit-card-processing-transaction-gateway/gate2shop-configuration
doc_type: tutorial
# Configuration
The [Gate2Shop](http://www.gate2shop.com) third party payment processor configures like most other gateways on the transaction tab.
:::note
[Main Menu](#) → [Configuration](#) → Checkout → [Payments](#) → [Transaction Gateways](#)
:::
Simply enter the three required fields shown below and select the card types.

:::note
\* This gateway is a third party processor. Third party processors charge credit cards on behalf of other companies. If you're going to use a third party processor you must assign all four card types to the gateway. Contact [support@ultracart.com](mailto:support@ultracart.com) for complete details on how to properly configure these gateways.
:::
# Callback URLs
You will also have to provide Gate2Shop.com all the call back URLs for UltraCart. These URLs are used by Gate2Shop to communicate with UltraCart. If you are **NOT** using a custom SSL certificate use the following URLs:
| URL | Description |
| --- | --- |
| https://secure.ultracart.com/cgi-bin/UCGate2ShopBack | Back |
| https://secure.ultracart.com/cgi-bin/UCGate2ShopDMN | Direct Merchant Notification |
| URL | Description |
| --- | --- |
| https://secure.mystore.com/cgi-bin/UCGate2ShopBack | Back |
| https://secure.mystore.com/cgi-bin/UCGate2ShopDMN | Direct Merchant Notification |
| https://secure.mystore.com/cgi-bin/UCGate2ShopFailureCancel | Failure/Cancel |
| https://secure.mystore.com/cgi-bin/UCGate2ShopPending | Pending |
| https://secure.mystore.com/cgi-bin/UCGate2ShopSuccess | Success |
# Expected Screen Flow
### View Cart

Shipping Address

### Options

### Gate2Shop Payment Page

### Gate2Shop In Progress

### Receipt (UltraCart)

---
# GoEmerchant Gateway Integration
https://docs.ultracart.com/checkout-payments/tutorials/payment-gateway-tutorials/configuring-a-payment-gateway-tutorial/credit-card-processing-transaction-gateway/goemerchant-gateway-integration
doc_type: tutorial
The GoEmerchant integration allows UltraCart merchants to securely process credit and debit card transactions through the goEmerchant payment gateway. goEmerchant is a US-based provider of all-in-one e-commerce and payment processing solutions.
This guide walks you through:
- Locating your goEmerchant gateway credentials
- Configuring the GoEmerchant gateway in UltraCart
- Testing and validating your integration
* * *
## Capabilities
The GoEmerchant gateway supports the following functionality within UltraCart:
| Capability | Supported |
| --- | --- |
| E-Check / ACH | No |
| Multi-Currency | No |
| Refunds | No |
| Auth then Capture | No |
| Zero Dollar Authorization | No |
| 3rd Party Processor (hands off to processor website) | No |
**Supported card types:** Visa, Mastercard, American Express, Discover, Diners Club, and JCB.
:::info
Refunds are not supported through this integration. Process any refunds directly in your goEmerchant Transaction Center.
:::
* * *
## Prerequisites
Before configuring GoEmerchant in UltraCart, ensure you have the following:
- An active **goEmerchant merchant account** with access to the **Transaction Center** at [secure.goemerchant.com](https://secure.goemerchant.com).
- Your goEmerchant **Merchant ID**, **Gateway ID**, and gateway **API password**.
- UltraCart administrative access to the payment gateway configuration.
* * *
## Step 1: Locate Your goEmerchant Credentials
UltraCart authenticates to goEmerchant using three values from your **Transaction Center**:
- **Merchant ID** — your goEmerchant transaction center identifier
- **Gateway ID** — the gateway identifier for your account
- **API Password** — the gateway/API password
To retrieve them:
1. Log in to your goEmerchant **Transaction Center** at [secure.goemerchant.com](https://secure.goemerchant.com).
2. Open your **gateway / API settings** (under Settings → Security Settings → Gateway Options in most accounts).
3. Note your **Merchant ID**, **Gateway ID**, and **API password**.
:::info
If you cannot locate any of these values, contact goEmerchant support. They can also confirm any IP allowlisting your account requires.
:::
* * *
## Step 2: Configure GoEmerchant in UltraCart
Navigate to the UltraCart payment gateway configuration:
**Main Menu → Configuration → Checkout → Payments → Transaction Gateways**
1. Create or edit a **Single Transaction Gateway**.
2. Select **GoEmerchant** as the gateway type.
3. Complete the configuration fields described below.
### Configuration Fields

| Field | Description |
| --- | --- |
| GoEmerchant Merchant ID | Your goEmerchant Merchant ID (transaction center identifier). |
| GoEmerchant Gateway ID | The Gateway ID from your goEmerchant Transaction Center. |
| GoEmerchant Password | Your goEmerchant gateway/API password. |
| Methods | Check each card type you are approved to process through goEmerchant: AMEX, Diners Club, Discover, JCB, Mastercard, Visa. |
After entering your Merchant ID, Gateway ID, and password, and selecting your card types, click **Save** at the bottom of the page.
* * *
## Step 3: Save and Test the Configuration
1. Click **Save**.
2. Place a **test order** in your storefront.
3. Verify:
- The transaction completes successfully
- No gateway errors appear in the order logs
- The correct card types are accepted
:::tip
goEmerchant provides a sandbox/demo environment. If you want to validate the integration without processing live cards, ask goEmerchant support for demo gateway credentials.
:::
* * *
## Security Best Practices
- Keep your goEmerchant Merchant ID, Gateway ID, and API password secure.
- Restrict access to your goEmerchant Transaction Center to trusted staff.
- Rotate your gateway API password periodically, and immediately if you suspect it has been exposed.
* * *
## Troubleshooting
### Authentication / Invalid Credentials Error
**Symptoms:** Transactions fail immediately with an authentication error.
**Solution:**
- Verify the **Merchant ID**, **Gateway ID**, and **Password** were copied exactly, with no leading or trailing spaces.
- Confirm the credentials belong to the correct goEmerchant account and gateway.
- Confirm any IP allowlisting required by goEmerchant includes UltraCart's processing servers (contact goEmerchant support to verify).
### Card Type Declined
**Symptoms:** A specific card type (for example, JCB or Diners Club) is declined at checkout.
**Solution:**
- Confirm the card type is checked under **Methods** in the UltraCart gateway configuration.
- Confirm your goEmerchant account is approved to process that card type.
### Transactions Failing
**Symptoms:** Orders error out at payment.
**Solution:**
- Confirm the gateway is **active** in UltraCart.
- Review the UltraCart order logs for the specific gateway response.
- Confirm your goEmerchant account is active and approved for live processing.
* * *
## FAQ
### Q: Where do I find my Gateway ID and API password?
Log in to your goEmerchant **Transaction Center** at [secure.goemerchant.com](https://secure.goemerchant.com) and open your gateway/API settings. Contact goEmerchant support if you cannot locate them.
### Q: Can I issue refunds from UltraCart?
No. Refunds are not supported through this integration. Process refunds directly in your goEmerchant Transaction Center.
### Q: Does GoEmerchant support multi-currency in UltraCart?
No. This integration processes in your account's base currency.
### Q: Does goEmerchant require IP allowlisting?
Some accounts do. If transactions are refused despite correct credentials, contact goEmerchant support to confirm whether UltraCart's processing IPs need to be allowlisted.
---
# Network Merchants Gateway
https://docs.ultracart.com/checkout-payments/tutorials/payment-gateway-tutorials/configuring-a-payment-gateway-tutorial/credit-card-processing-transaction-gateway/network-merchants-gateway
doc_type: tutorial
# Introduction
[Network Merchants Inc](https://www.nmi.com/). (NMI) is a versatile and secure payment gateway that enables businesses to process online payments with ease. It supports a wide range of payment methods including credit cards, ACH (e-checks), and digital wallets, while offering robust features like a virtual terminal, recurring billing, and customer vault storage. NMI is especially popular among high-risk industries such as CBD, adult entertainment, vape, and online firearms due to its flexible integration options, seamless compatibility with UltraCart, and support for multiple merchant identification numbers (MIDs) under one gateway. With strong security compliance, 24/7 customer support from over 180 experts, and global reach across six continents, NMI provides a scalable, customizable, and reliable solution for merchants seeking seamless payment processing.
(You’ll gather the required credentials to place on file in Ultracart from N.M.I.)
# Configuring Network Merchants Gateway
Navigate: Main Menu > Configuration > (middle menu) Checkout > Payments > (Scroll down to "Debit and Credit Cards") Click "Connect Single" > Scroll down and select the checkbox for "Network Merchants Gateway"

You'll need to obtain your account credentials from Network Merchants:
- Network Merchants Username
- Network Merchants Password
- Collect Platform ID (Drop-Down List: Yes/No)
- Network Merchants Server (Drop-Down List)
- Send Order Description (Drop-Down List: Yes/No)
- Methods (Select Checkbox for All Payment Types Established For Your Account)
NOTE: There is a drop-down list option for designating Test Profile. Make Sure to Leave Blank To Configure In Live Mode.)
note723c48c83d61
### **Important Note About N.M.I Account Credentials**
If you encounter a forced login password reset at N.M.I.'s website, make sure to update your password in the gateway configuration within ultracart. Failure to do so could results in failed authentication issues with credit card transactions!
### **Important Note About N.M.I Account Credentials**
If you encounter a forced login password reset at N.M.I.'s website, make sure to update your password in the gateway configuration within ultracart. Failure to do so could results in failed authentication issues with credit card transactions!
Frequently Asked Questions
## Q: How can I tell what a decline code means?
A: Her's the Network Merchants Gateway (N.M.I) Response Code Lookup Table:

Refer to this list when reviewing the transaction history of an order.
## Q: In the Networks Merchants configuration, what is the setting for that is titled "Use credit instead of refund"?
A: Typically merchant accounts want you to only send funds back to a card that was originally charged. If they allow you to use credit then you can send funds to an arbitrary card. That is a HUGE potential for fraudulent abuse. That being said, when you migrate from one merchant account to another, there can be a 30-60 day window at the start where you might need to have that enabled so you can refund arbitrary cards.
---
# PayJunction REST Gateway Integration
https://docs.ultracart.com/checkout-payments/tutorials/payment-gateway-tutorials/configuring-a-payment-gateway-tutorial/credit-card-processing-transaction-gateway/payjunction-rest-gateway-integration
doc_type: tutorial
The PayJunction REST Gateway integration allows UltraCart merchants to securely process credit card and e-check (ACH) transactions through PayJunction's modern REST API. PayJunction provides both a payment gateway and merchant accounts, with month-to-month contracts and no PCI compliance fees.
:::info
UltraCart offers three PayJunction gateways: **PayJunction REST Gateway** (recommended), and the older **PayJunction** and **PayJunction 1.2** QuickLink gateways. New merchants should use the **REST Gateway** — it is the current integration and the only one that supports e-check and refunds. See [Legacy PayJunction Gateways](#legacy-payjunction-gateways) below.
:::
This guide walks you through:
- Creating PayJunction API credentials
- Configuring the PayJunction REST Gateway in UltraCart
- Testing and validating your integration
* * *
## Capabilities
The PayJunction REST Gateway supports the following functionality within UltraCart:
| Capability | Supported |
| --- | --- |
| E-Check / ACH | Yes |
| Multi-Currency | No |
| Refunds | Yes |
**Supported card types:** Visa, Mastercard, American Express, Discover, Diners Club, and JCB.
* * *
## Prerequisites
Before configuring PayJunction in UltraCart, ensure you have the following:
- An active **PayJunction merchant account** with administrator access.
- The ability to create **API credentials** in your PayJunction account.
- UltraCart administrative access to the payment gateway configuration.
:::info
Do not use your personal PayJunction login for the integration. Create a dedicated API credential as described below.
:::
* * *
## Step 1: Create PayJunction API Credentials
UltraCart authenticates to PayJunction using an **API Login** and **API Password** (HTTP Basic authentication).
1. Log in to your **PayJunction account** as an administrator.
2. Go to **More → API Credentials**.
3. Click **Create New API Credential**.
4. Enter your software/business name in the **First Name** and **Last Name** fields (for example, "UltraCart Integration").
5. Create a unique **Username** and **Password**.
The **Username** and **Password** you create here are the values you will enter into UltraCart as the API Login and API Password.
:::info
PayJunction's API also uses an **Application Key** to identify the integrating application. UltraCart is a registered PayJunction application and supplies its own Application Key, so you only need to provide the API Login, API Password, and environment — there is no Application Key field to complete.
:::
* * *
## Step 2: Configure the PayJunction REST Gateway in UltraCart
Navigate to the UltraCart payment gateway configuration:
**Main Menu → Configuration → Checkout → Payments → Transaction Gateways**
1. Create or edit a **Single Transaction Gateway**.
2. Select **PayJunction REST Gateway** as the gateway type.
3. Complete the configuration fields described below.
### Configuration Fields

| Field | Description |
| --- | --- |
| PayJunction API Login | The API credential Username you created in PayJunction (Step 1). |
| PayJunction API Password | The API credential Password for that username. |
| Environment Type | Select **Live** for production (payjunction.com) or **Sandbox** for testing against PayJunction's test environment (payjunctionlabs.com). |
| Methods | Check each card type you are approved to process: AMEX, Diners Club, Discover, JCB, Mastercard, Visa. |
| E-Check | Enable to accept e-check (ACH) payments through PayJunction. |
| Require Tax ID / Drivers License | When E-Check is enabled, require the customer's tax ID or driver's license during checkout. |
After entering your API Login and Password, selecting the environment, and choosing your card types (and E-Check options if applicable), click **Save** at the bottom of the page.
* * *
## Step 3: Save and Test the Configuration
1. Click **Save**.
2. Set **Environment Type** to **Sandbox** and enter API credentials for the PayJunction Labs sandbox.
3. Place a **test order** in your storefront.
- Sandbox transactions process against PayJunction's test account only — no funds are collected.
4. Verify:
- The transaction completes successfully
- No gateway errors appear in the order logs
- The correct card types (and e-check, if enabled) are accepted
Once testing passes, set **Environment Type** to **Live** and enter your production API credentials.
* * *
## Legacy PayJunction Gateways
UltraCart also lists two older PayJunction gateways that use the legacy **QuickLink** API:
| Gateway | Credentials | Status |
| --- | --- | --- |
| PayJunction REST Gateway | API Login + API Password | **Recommended** — current integration, supports e-check and refunds |
| PayJunction 1.2 | QuickLink Login + Password | Legacy — supports refunds only |
| PayJunction | QuickLink Login + Password | Legacy — oldest integration |
If you are setting up PayJunction for the first time, use the **PayJunction REST Gateway**. If you are currently on a QuickLink gateway, contact PayJunction and UltraCart support to migrate to the REST Gateway for e-check support and improved reliability.
* * *
## Security Best Practices
- Use a dedicated API credential for the UltraCart integration rather than an administrator login.
- Store the API Login and Password securely; never expose them in client-side code or public repositories.
- Rotate the API credential periodically, and immediately if you suspect it has been exposed.
- Use separate credentials for the Sandbox and Live environments.
* * *
## Troubleshooting
### Authentication / Invalid Credentials Error
**Symptoms:** Transactions fail immediately with an authentication error.
**Solution:**
- Verify the **API Login** and **API Password** were copied exactly, with no leading or trailing spaces.
- Confirm the **Environment Type** matches your credentials — a Sandbox credential will not authenticate against Live, and vice versa.
- Confirm the API credential is active in your PayJunction account.
### E-Check Payments Rejected
**Symptoms:** Card payments work but e-check/ACH payments fail.
**Solution:**
- Confirm the **E-Check** option is enabled in the UltraCart gateway configuration.
- Confirm your PayJunction account is approved for ACH/e-check processing.
- If **Require Tax ID / Drivers License** is enabled, confirm that information is being collected at checkout.
### Card Type Declined
**Symptoms:** A specific card type is declined at checkout.
**Solution:**
- Confirm the card type is checked under **Methods** in the UltraCart gateway configuration.
- Confirm your PayJunction account is approved to process that card type.
* * *
## FAQ
### Q: Which PayJunction gateway should I use?
Use the **PayJunction REST Gateway**. It is the current integration and the only PayJunction gateway in UltraCart that supports both e-check and refunds.
### Q: Do I need an Application Key?
No. UltraCart is a registered PayJunction application and provides its own Application Key. You only supply the API Login, API Password, and environment.
### Q: How do I test before going live?
Set **Environment Type** to **Sandbox** and use PayJunction Labs sandbox credentials. Sandbox transactions are for testing only and collect no money.
### Q: Does PayJunction support refunds through UltraCart?
Yes, the REST Gateway supports refunds. The legacy PayJunction (original) gateway does not.
---
# PayPal PayFlow Pro credit card processing gateway integration guide
https://docs.ultracart.com/checkout-payments/tutorials/payment-gateway-tutorials/configuring-a-payment-gateway-tutorial/credit-card-processing-transaction-gateway/paypal-payflow-pro-credit-card-processin
doc_type: tutorial
PayPal PayFlow Pro credit card processing gateway integration guide
## Integration Instructions:
First, log into your PayPal PayFlow account [https://manager.paypal.com](https://manager.paypal.com)
### Create a new user
The new user information will be used to configure PayFlow Pro with your UltraCart account.
- At the PayPal Manager screen, click the "Account Administration" tab:

- Next, Click on the Manage Users tab:

- At the next screen that appears, click on the "Add User" button:

- Complete the fields marked with a red asterisk (\*) as shown below:

**NOTE: Write down the new password for later use. Click the Update button when finished. **
## **Configuring the PayFlow credentials within UltraCart:**
Now you're ready to configure your new user credentials at UltraCart.com.
Log in to your UltraCart account and navigate to:
Main Menu > Configuration > Payments.
At that screen click on the Transaction Gateways tab. Scroll down to "PayPal PayFlow Pro":

In the configuration field, you'll enter the following details:
- **PayFlow Pro Merchant Login**
- **PayFlow Pro Password** \*\*\* This is the password you created within PayPal when you created the new user, not the password to log into PayPal account.
- **PayFlow Pro User (required**) \*\*\* This is the user you create in the first part of the integration.
- **PayFlow Pro Partner \*\*\*** This is provided to you by PayPal
- **PayFlow Pro Mode (Set this to Live)**
- **Select the Credit Card types (typically - Visa, MasterCard, Discover & Amercian Express)**
**Scroll to the bottom of the page and click the save button to save the changes.**
:::info
**While the user used to be optional - and still appears that way as of the creation of this guide - it is now a required field, so disregard the field being labelled as optional.**
:::
## Frequently Asked Questions
### Question: We recently received a notification concerning changes to the PayPal PayFlow Pro URL's that will occur on August 3rd, 2015. Will we need to take any action in regard to the URL changes?
Answer: No action is required on your part, as UltraCart does not use any of the legacy verisign.com endpoints.
## Troubleshooting
The following document will be useful in understanding the transaction response decline and error codes retrned to UltraCart from PayPal with viewing the "Transaction History" section on the invoice in the Accounts Receivables department:
[https://www.paypalobjects.com/en\_US/vhelp/paypalmanager\_help/result\_values\_for\_transaction\_declines\_or\_errors.htm](https://www.paypalobjects.com/en_US/vhelp/paypalmanager_help/result_values_for_transaction_declines_or_errors.htm)
---
# QuickBooks Payments gateway integration guide
https://docs.ultracart.com/checkout-payments/tutorials/payment-gateway-tutorials/configuring-a-payment-gateway-tutorial/credit-card-processing-transaction-gateway/quickbooks-payments-gateway-integration
doc_type: tutorial
[QuickBooks Merchant Services](http://payments.intuit.com/online-credit-card-processing/) credit card processing gateway integration guide.
Integrating QuickBooks Payments into your UltraCart is quick and easy, requiring only a successful login
from the activation link provided from the UltraCart Transaction Gateways section of the payments configuration.
:::info
If you have received an email notice from Quickbooks about upgrading your account, please follow the steps below to upgrade to the new QuickBooks Payments API. If you need assistance please contact us at [Support@ultracart.com](mailto:Support@ultracart.com) or 209.383.9870 to speak to someone over the phone.
:::
# Signing up for a QuickBooks Merchant Service account
First, sign up for an risk free QBMS account, navigate: [http://payments.intuit.com/online-credit-card-processing/](http://payments.intuit.com/online-credit-card-processing/)
- Accept all major credit and debit cards
- Low monthly fees, there's no long-term contracts, and you can cancel anytime
# Integrating your Quickbooks Payments account into UltraCart
Log into your UltraCart account and navigate:
:::info
Configuration → Checkout → [**Payments**](https://secure.ultracart.com/merchant/configuration/payment/v5/methodsLoad.do)
:::
From the Payments screen scroll down to the "Debit and Credit Card" section, then select Connect Single to configure a single gateway.


Scroll down the page and click the checkbox next to **QuickBooks Payments**:
Here you'll select the Credit card types you are setup to process through your QBMS account (most commonly you'll select: Visa, MasterCard, Discover & AMEX), then you'll click on the hyperlinked text "Click here to Authorize the Connection." then after successfully logging into your Intuit account, you will want to click the "Connect Account" button. When this is complete you will return to the UltraCart transaction gateways list, simply scroll down to the bottom of the page to save then changes.

1. Select the card types you are setup to process through your account.
2. Then click the hyperlink on the 'Click here to authorize the connection and then log into your Inuit account to complete the connection.
3. After successfully logging into your Intuit account to complete the connection, return to Ultracart and save the changes.
# Understanding Transaction Responses
The following document will be helpful in understanding the responses codes, when reviewing the "Transaction History" of an order from the Accounts Receivables page:
[https://developer.intuit.com/docs/030\_qbms/0060\_documentation/error\_handling](https://developer.intuit.com/docs/030_qbms/0060_documentation/error_handling)
:::info
### Important not regarding CVV rules
QuickBooks Merchant Services no longer provides direct access to the CVV rules within their interface. Instead they have implemented a rules based system, where the CVV number is required at least once for each credit card number processed, and only after a transaction including the CVV number is processed in an authorization, will the field become optional. So, you will need to ensure that you have the "Collect Card Verification number" checkbox selected within the Credit and Debit cards > Settings page.
Main Menu > Configuration > (middle menu) Checkout > Payments > Credit And Debit Cards (Section) > Settings (button) > Scroll down to "Collect Card Verification number" slect the checkbox then exit the pop up window.
:::
# Frequently Asked Questions
#### Transaction Error 400
**Question:** I'm trying to process and order in my Accounts Receivables department and its returning the following error:
_"Transaction error: Error code 400 returned from server. Please try your transaction again. If you continue to have problems please contact customer support at_ [_support@ultracart.com_](mailto:support@ultracart.com)_" _
**Answer: **
A 400 error code is caused by unicode characters that Quickbooks Payments does not support. Edit the order and change the unicode characters to regular alphabet characters then save the changes and try again.
## Related documentation
[https://ims.quickbooks.com/wapweblet/ims-mp-help/en/qbms/svc\_mp\_avs\_setting.html](https://ims.quickbooks.com/wapweblet/ims-mp-help/en/qbms/svc_mp_avs_setting.html)
---
# Stripe Gateway Integration
https://docs.ultracart.com/checkout-payments/tutorials/payment-gateway-tutorials/configuring-a-payment-gateway-tutorial/credit-card-processing-transaction-gateway/stripe-gateway-integration
doc_type: tutorial
# Introduction
UltraCart integrates seamlessly with **Stripe Connect**, enabling merchants to securely accept online credit and debit card payments. Stripe’s powerful payment infrastructure ensures a streamlined checkout experience and includes built-in tools for fraud prevention, card updates, and compliance with global payment standards.
> **Note:** Certain businesses are restricted or prohibited from using Stripe. Always verify your business type before integrating.
For a full list of restricted businesses, visit [Stripe’s Restricted Businesses](https://stripe.com/legal/restricted-businesses#prohibited-businesses).
* * *
## Prerequisites
Before connecting UltraCart to Stripe, you’ll need:
- A live ‘Stripe’ account ([Sign up here](https://dashboard.stripe.com/register))

- Administrative access to your UltraCart account
- Access to **Main Menu > Configuration > Checkout > Payments**
## Connecting UltraCart to Stripe
1. Navigate to
**Main Menu > Configuration > Checkout > Payments**.
2. In the **Credit and Debit Cards** section, click **Connect Single**.
3. Scroll down and check the box for **Stripe Connect (integrates with your “Stripe” account**.)
4. Select the card types you wish to process through Stripe.
5. Click the hyperlink above the Credit Card Methods section titled:
**“Click here to authorize the connection.”**

6. Log in to your Stripe account when prompted and authorize the connection.
7. After successful authorization, you’ll see:
**“Stripe Connect successfully connected to UltraCart. Disconnect.”**

8. Save your changes.
> **Tip:** Integration typically completes within a few minutes.
* * *
# Credit Card Vault Updates for Auto Orders
Stripe includes **card updater functionality** at no additional cost under their standard pricing. No additional configuration is required.
UltraCart automatically **dual vaults** all auto-order subscription card information. When card updates occur, Stripe sends a webhook notification, and UltraCart logs the update in the **Auto Order Logs**.
If you have negotiated discounted pricing with Stripe, the card update fee is typically **$0.25 per update**.
[Dual Vaulted Credit Card Processing](/checkout-payments/tutorials/payment-gateway-tutorials/configuring-a-payment-gateway-tutorial/credit-card-processing-transaction-gatew/dual-vaulted-credit-card-processing)
# Additional Payment Methods via Stripe
Stripe supports additional payment methods beyond traditional credit cards. UltraCart now provides direct integration for these methods through the **Express Checkout** element.
### Supported Additional Payment Methods
- **Klarna** – Enables customers to buy now and pay later.
- **Link** – Stripe’s accelerated checkout experience for returning customers.
- **Amazon Pay** – Lets customers check out using their Amazon account credentials.
:::info
**NOTE:**
These APM options are **not available** for **auto order purchases** or **upsell offers**, and will be suppressed during the checkout in these scenarios.
:::
### Implementation
These payment methods are implemented through the Visual Builder element:
```
checkoutexpresscheckoutstripe
```
This element provides an express checkout flow and will be **included in the latest versions of UltraCart Visual Builder–enabled themes**.
> **Tip:** Merchants using a custom theme can manually add the `checkoutexpresscheckoutstripe` element to the checkout page through the Visual Builder or theme source editor.
* * *
## FAQ
**Q: Do I need to create a “Stripe Connect” platform in my Stripe account before integrating with UltraCart?**
A: No. You do **not** need to create a Stripe Connect platform in your Stripe account. UltraCart already operates the Stripe Connect platform. When you connect your Stripe account in UltraCart, your account becomes a **connected account** within UltraCart’s Stripe platform.
* * *
**Q: Why does UltraCart refer to the gateway as “Stripe Connect” instead of just “Stripe”?**
A: UltraCart uses Stripe Connect behind the scenes to manage payment processing. While the label may be confusing, this is expected behavior—your Stripe account is connected to UltraCart’s platform rather than acting as a standalone gateway configuration.
* * *
**Q: I ran test transactions, but I don’t see them in my Stripe dashboard. Where should they appear?**
A: Test transactions will appear in your Stripe account’s **Test Mode dashboard**, not in a separate “Sandbox” account. Make sure you toggle Stripe to **Test Mode** when reviewing test transactions.
* * *
**Q: What is the difference between “Sandbox” in UltraCart and “Test Mode” in Stripe?**
A: In UltraCart, setting the Stripe gateway to **Sandbox** actually maps to Stripe’s **Test Mode**. It does **not** use a separate sandbox account within Stripe. This means all test transactions will appear under Test Mode in your Stripe dashboard.
* * *
**Q: Why are my payments not showing in Stripe after switching environments?**
A: Ensure the environment settings match your expectations:
- **Sandbox (UltraCart)** → Stripe **Test Mode**
- **Production (UltraCart)** → Stripe **Live Mode**
If transactions are not visible, verify you are viewing the correct mode in your Stripe dashboard.
* * *
**Q: What are “connected accounts” in Stripe, and how do they relate to UltraCart?**
A: In this integration:
- UltraCart acts as the **Stripe Connect platform**
- Your Stripe account is a **connected account**
This allows UltraCart to securely process payments on your behalf while funds are still deposited into your Stripe account.
* * *
**Q: When should I switch my Stripe gateway from Sandbox to Production?**
A: Switch to **Production** only after:
1. Successfully completing test transactions using Stripe test card numbers
2. Verifying those transactions appear in Stripe Test Mode
3. Confirming your checkout flow works as expected
Once switched, real transactions will begin appearing in your live Stripe dashboard.
* * *
**Q: My test orders processed successfully in UltraCart, but I still don’t see them in Stripe. What should I check?**
A: Verify the following:
- You are viewing **Test Mode** in Stripe
- The UltraCart gateway is set to **Sandbox**
- You are using valid Stripe **test card numbers**
If all are correct, the transactions should appear in Stripe Test Mode.
* * *
**Q: Can I use Stripe as a secondary or rotating gateway in UltraCart?**
A: Yes. Stripe can be configured as part of a **rotating gateway setup**, allowing you to:
- Phase out older gateways
- Distribute transactions across multiple processors
- Improve redundancy and reliability
This is a common setup when migrating from legacy gateways.
**Q: I want to add Klarna to my payment configuration, but want it to be available to selected items only. How do I do that?**
**A:** You can configure the Klarna payment as _“valid for”_ or _“invalid for”_ in the **Item Editor**, under the **Other** tab by selecting **Payment Methods Settings**.

> **Note:** Payment methods are configured as _“valid for”_ by default for all items. Therefore, you will need to configure all items that should **not** display Klarna and mark the Klarna method as _“invalid for”_ to prevent it from appearing.
> **Important:** Auto order items are excluded from Klarna payments by default.
* * *
## Conclusion
Integrating Stripe with UltraCart enables you to offer customers secure and flexible payment options — including credit cards, digital wallets, and alternative financing solutions like Klarna and Amazon Pay — all within a unified checkout experience.
## Related Documentation
- [Dual Vaulted Credit Card Processing](/checkout-payments/payments/configure-transaction-gateway/migrating-to-stripe-connect)
- [Supporting Apple Pay, Google Pay, Samsung Pay, and Microsoft Pay](/checkout-payments/tutorials/payment-gateway-tutorials/supporting-apple-pay-google-pay-samsung)
- [Migrating to Stripe Connect](/checkout-payments/tutorials/payment-gateway-tutorials/configuring-a-payment-gateway-tutorial/credit-card-processing-transaction-gatew/dual-vaulted-credit-card-processing)
* * *
---
# Gateways and Merchant Accounts that Specialize in Specific Market Segments
https://docs.ultracart.com/checkout-payments/tutorials/payment-gateway-tutorials/configuring-a-payment-gateway-tutorial/gateways-and-merchant-accounts-that-spec
doc_type: tutorial
Gateways and Merchant Accounts that Specialize in Specific Market Segments
# Introduction
This document will be a collection of answers to questions by merchants about which gateways support specific market segments or geographical areas. As we learn more about individual payment providers with specific specializations we will add them to this document.
## Geographical
| Geographical Area | Merchant Account Provider | Payment Gateway | Notes |
| --- | --- | --- | --- |
| Asia | [www.asiapay.com](http://www.asiapay.com/index.html) | [PayDollar](http://www.paydollar.com/eng/ecommerce.htm) | Covers China, Hong Kong & Macau, Taiwan, Vietnam, Philippines, Malaysi, Thailand, Singapore, and India |
## Market Segment
| Market Segment | Merchant Account Provider | Payment Gateway | Notes |
| --- | --- | --- | --- |
| Free Trial Offers | [Meritus Payments](http://www.merituspayment.com/) | Network Merchants | |
---
# Paytrace Gateway Integration
https://docs.ultracart.com/checkout-payments/tutorials/payment-gateway-tutorials/paytrace-gateway-integration
doc_type: tutorial
## Introduction
The PayTrace integration allows UltraCart merchants to securely process credit card transactions using the PayTrace payment gateway.
This guide walks you through:
- Creating PayTrace API credentials
- Configuring the PayTrace gateway in UltraCart
- Testing and validating your integration
This integration uses **OAuth 2.0 token-based authentication**, aligning with modern payment security standards. ucdoc-Paytrace Gateway Integrat…
* * *
## Prerequisites
Before configuring PayTrace in UltraCart, ensure you have the following:
- An active **PayTrace merchant account**
- Permission to create **API Users** within PayTrace
- UltraCart administrative access to:
- Payment gateway configuration
- Checkout settings
> **Prerequisite:** Do **not** use your primary PayTrace login credentials. Always create a dedicated API user for integrations. ucdoc-Paytrace Gateway Integrat…
* * *
## Step 1: Create a PayTrace API User
To authenticate UltraCart with PayTrace, you must create a dedicated API user.
1. Log in to your **PayTrace account**
2. Navigate to:
**Users → New User**
3. Select **API User** as the user type
4. Enter:
- Username
- Password
5. Assign permissions:
- Recommended: **Select All** (or minimum required permissions)
6. Click **Save**
The API username and password created here will be used in UltraCart.
> **Note:** The API password is separate from your PayTrace account login password. ucdoc-Paytrace Gateway Integrat…
* * *
## Step 2: Understand PayTrace Authentication
PayTrace uses an **OAuth 2.0 authentication flow** to generate a bearer token.
UltraCart handles this process automatically, but understanding it helps with troubleshooting.
### Example Token Request
```
curl -X POST https://api.paytrace.com/oauth/token \
-H "Accept: */*" \
-d "grant_type=password&username=YourUserName&password=YourPassword"
```
This request returns a **Bearer token**, which is used for all subsequent API requests.
> **Warning:** Never expose API credentials in client-side code or public repositories. ucdoc-Paytrace Gateway Integrat…
* * *
## Step 3: Configure PayTrace in UltraCart
Navigate to the UltraCart payment gateway configuration:
**Main Menu → Configuration → Checkout → Payments → Transaction Gateways**
1. Create or edit a **Single Transaction Gateway**
2. Select **PayTrace** as the gateway type
### Configuration Fields

| Field | Description |
| --- | --- |
| Gateway Type | Select **PayTrace** |
| API Username | API user created in PayTrace |
| API Password | API password for the API user |
| Transaction Source Key | Provided by PayTrace (if applicable) |
| Test Mode | Enable for sandbox/testing |
| Currency | Must match your PayTrace account |
| Authorization Type | Authorize or Authorize + Capture |
* * *
## Step 4: Save and Test the Configuration
1. Click **Save**
2. Place a **test order** in your storefront
3. Verify:
- Transaction completes successfully
- No gateway errors appear in order logs
- Authorization/capture behavior is correct
* * *
## Security Best Practices
Follow these best practices to protect your integration:
- Use dedicated API users for integrations
- Assign minimum required permissions
- Store credentials securely (server-side only)
- Rotate API credentials periodically
Never expose credentials in:
- JavaScript
- Public repositories
- Client-side applications
> **Tip:** Use PayTrace Protect.js or equivalent client-side encryption tools for secure card handling. ucdoc-Paytrace Gateway Integrat…
* * *
## Troubleshooting
### Invalid Credentials Error
**Error Example:**
```
Invalid Credentials
```
**Resolution:**
- Verify API username and password
- Ensure API user is active
- Reset API password if needed
- Confirm OAuth request format
* * *
### Transactions Failing
- Confirm the gateway is **active**
- Check for:
- Currency mismatches
- Authorization type conflicts
- Review UltraCart order logs for gateway responses
* * *
### Unable to Generate Token
Verify the following:
- Endpoint is correct:
```
https://api.paytrace.com/oauth/token
```
- Grant type is `password`
- Credentials are valid
If issues persist, contact PayTrace support.
* * *
## FAQ
### Q: Can I use my PayTrace login credentials?
No. You must create a dedicated API user. Using your primary login is not supported and introduces security risks. ucdoc-Paytrace Gateway Integrat…
* * *
### Q: Where is the API password generated?
The API password is created when defining the API user:
**Users → New User → API User**
* * *
### Q: Should I give full permissions to the API user?
- Initial setup: **Select All** is acceptable
- Production: Reduce to only required permissions
* * *
### Q: Does UltraCart store the OAuth token?
No action is required. UltraCart manages authentication internally using the credentials you provide. ucdoc-Paytrace Gateway Integrat…
* * *
## Conclusion
Integrating PayTrace with UltraCart provides a secure and scalable way to process payments using modern API authentication.
By properly configuring API users and following security best practices, you ensure:
- Reliable transaction processing
- Secure handling of payment data
- Reduced risk of credential exposure
* * *
---
# Supporting Apple Pay / Google Pay / Samsung Pay / Microsoft Pay, etc.
https://docs.ultracart.com/checkout-payments/tutorials/payment-gateway-tutorials/supporting-apple-pay-google-pay-samsung
doc_type: tutorial
# Introduction
This tutorial will cover how to add support to your StoreFront for:
- Apple Pay
- Google Pay
- Samsung Pay
- Microsoft Pay
Supporting these payments methods allows for efficient checkout scenarios using already-on-file and secure payment and address information via mobile and desktop browsers.
# Benefits
The benefits of allowing these payments methods are:
- Very fast checkout experience for customers on mobile devices.
- Strongly authenticated payments as most mobile devices will require biometrics or pin authentication to use.
# Prerequisites
- Stripe Connect payment gateway Or a PayPal Account
- StoreFront Visual Builder theme of a minimum version shown below
| **Theme** | **Version** |
| --- | --- |
| Elements | 2.06 |
| Hero | 1.08 |
| Jewel | 1.05 |
| Lifty | 1.06 |
| Native | 1.06 |
| Natural VB | 1.05 |
# Will you support Authorize.net or NMI?
Maybe down the road if they evolve their SDKs to have a similar friendly unified interface to support all of the various payment mechanics. They are just not there at this point. We imagine that they will take a page out of the Stripe book and work on their SDKs so they can function in a similar fashion.
# What if I don’t use Stripe at this time?
That is not a problem. You will want to migrate your existing gateway configuration over to a [rotating transaction gateway](/checkout-payments/payments/rotating-transaction-gateway). Then you can configure Stripe as a second rotating transaction gateway. You can make it active, but give it zero percent of the regular traffic. UltraCart will only use the Stripe gateway for Apple Pay, etc.
# Will this work if I have Stripe instead of Stripe Connect?
No, last winter we upgraded the Stripe integration to the newer Stripe Connect to lay the foundation for implementing this new functionality. There is a huge banner on your dashboard that has been encouraging you to upgrade. All you need to do is [migrate your connection](/checkout-payments/payments/configure-transaction-gateway/migrating-to-stripe-connect). It’s easy, takes about 5 minutes, and will make it possible for you to utilize this new functionality.
# What if I don’t use PayPal at this time?
That is not a problem. You will want to configure PayPal at the top of the payments configuration. You can set PayPal to only be used for Apple Pay and Google Pay.
# How do I add these payments if I’ve customized the checkout?
This is similar. The StoreFront Visual Builder element that you need to add to your checkout is:
“`checkout express checkout credit card`”
You’ll typically want to place this element in a column along the other express checkout elements for Amazon and PayPal.
What are the limitations of using Apple Pay, etc.?
Similar to other express checkout payment methods, there are important limitations to consider:
- Upsells are not supported, regardless of which provider processes the transaction.
- Auto orders are not supported when **Stripe Connect** is the provider. The card details pass directly from the customer's wallet to the gateway, so UltraCart never receives billing details that can be stored to generate future payments.
- Auto orders **are** supported for **Apple Pay** when **PayPal** is the provider, for compatible subscriptions. The Apple Pay API can present only a limited set of recurring schedule types, so UltraCart evaluates the auto order's schedule steps and offers Apple Pay only when those steps are compatible with what Apple Pay can present. The rebills themselves run on vaulted payment credentials, with UltraCart initiating each one. See [PayPal](/checkout-payments/payments/paypal).
- Auto orders are not supported for **Google Pay** under any provider at this time.
The “checkout payment method” element can also be used to provide Apple Pay, etc. as an option. This element is used in themes like Natural VB. The checkout payment method element will only show the option when the “checkout express checkout credit card” element is **NOT** on the page simultaneously. Only one of these buttons is allowed on the page at a given time. We figure if you’re giving them the option as an express checkout button then they will take that quicker than scrolling down and interacting with the larger checkout form.
# Why doesn’t the element appear in the checkout?
The button is intelligent. If the customer’s browser does not support the functionality then it will not display and distract/confuse the customer. For example on an iPhone, the Safari browser will not show Apple Pay unless the customer already has a credit card in their wallet. Other browsers will do a similar things.
# Why does the button change appearance?
On an iPhone/Mac the button will appear as Apple Pay. On an Android phone the button will appear as G Pay. On a regular desktop browser like Chrome the button will simply say “Pay Now”. If you don’t like the “Pay Now” variant of the button on desktop you may choose to hide the button so that it is only visible on mobile.
# Example of the Google Pay button in a mobile checkout

# Example of the Google Pay button in a Desktop view

# Frequently Asked Questions
**Q: Reviewing our order history, we are seeing that some of our orders do not contain an CC number and the order was just recently placed. Why is the credit card missing?**
A: If an order is processed via the Google/Apple pay method, the customer never provides their credit card details, the CC details are passed directly to your payment gateway. This is why upsell after offers are not supported, and why auto orders are not supported when Stripe Connect is the provider.
When PayPal is the provider, Apple Pay auto orders are supported, because the rebills run on vaulted payment credentials that UltraCart uses to initiate each charge. Google Pay auto orders remain unsupported under any provider.
**Q: I’m testing the apple Pay option from my iPhone, but it’s not appearing?**
A: The apple pay payment option only appears in the Safari Browser. (The browser must also have a credit card on file in the browser.)
**Q: We released preorders to the A/R department and we are trying to process the released pre-orders, but the Apple Pay orders are not loading, instead we are getting the following error:**
**Unknown payment method(Apple Pay)specified for this order.**
**How do we process the order??**
A: The apple pay payment option can only pre processed by the customer. In this situation, you’ll either need to reject the order and contact the customer requesting that they replace their order, or you can edit the order to change the payment type to credit card. You can either take the new CC details over the phone or after editing the payment type to credit card, navigate back to the A/R to send the customer the update billing notification.
**Q: We have received customer feedback with an issue when paying via Apple Pay. The customer reports that they enter a gift shipping address, then go to check out choosing Apple Pay, and Apple Pay switches it to their Apple Pay billing address and they don’t have a chance to review before the payment processes?**
A: If the customer selects Apple Pay, then the checkout is going to be populated with the address information they have on file with Apple Pay, it will not matter what they previously entered into the shopping cart checkout form, as it will get overridden with their payment and address information stored in Apple Pay. That is the unfortunate limitation of those payment methods that store your information like that. While it does make checkout faster it also relies on the customer having the correct information in their address book with those third party payment methods.
To update your stored Apple Pay billing address when it's prefilling an incorrect address, follow these steps
o update your stored Apple Pay billing address when it's prefilling an incorrect address, follow these steps:
**In the Wallet app**:
- Open the **Wallet** app.
- Tap the card you want to update.
- Tap the **••• (three dots)** icon in the top-right corner.
- Tap **Billing Address**.
- Select the correct address from the list, edit it, or tap **Enter New Billing Address** to add a new one.
- Ensure the address matches exactly what your bank has on file (including street name format like "Road" vs. "Rd").
**In Settings**:
- **Go to Settings > Wallet & Apple Pay.**
- Tap the card you want to update.
- Tap **Billing Address** to edit or add a new address.
**Important Notes**:
- Billing addresses are stored per card in Apple Pay, not globally.
- If the incorrect address persists, **delete the card from Wallet and re-add it after updating your contact information**. Apple Pay pulls the billing address from your **Contacts app** (specifically your "My Info").
- If the issue continues, **contact your card issuer** to confirm your billing address is correct on their end, as Apple Pay verifies the address during transactions.
- Some users report that **restarting the device** or **re-syncing iCloud Keychain** can help, but the most reliable fix is re-adding the card after updating your contact info.
# Related Documentation
[https://ultracart.atlassian.net/wiki/spaces/ucdoc/pages/1377182/Stripe+Gateway+Integration?src=search](/checkout-payments/tutorials/payment-gateway-tutorials/configuring-a-payment-gateway-tutorial/credit-card-processing-transaction-gatew/stripe-gateway-integration) [Upgrading the latest PayPal payment processing integration](/checkout-payments/payments/paypal/upgrading-the-latest-paypal-payment-proc)
---
# Transaction gateways for Internationally based merchants
https://docs.ultracart.com/checkout-payments/tutorials/payment-gateway-tutorials/transaction-gateways-for-internationally
doc_type: tutorial
# Question: Which transaction gateways are compatible for Internationally based merchants?
The following gateways are available to Internationally based merchants (merchants outside of the United States).
Generally speaking you'll probably want to go with the gateways showing the tightest integration, so the ones that support both Multi-Currency and Refunds are highlighted in the table below.
| **Gateway** | **Supports E-Check** | **Supports Multi-Currency** | **Support Refunds** | **Auth Then Capture** | **Zero Dollar Authorization** | **"3rd party processor"** **(hands off to payment** **processor website)** |
| --- | --- | --- | --- | --- | --- | --- |
| [Authorize.net 3.1](https://www.ultracart.com/resources/integrations/payment/authorizenet/) | Y | Y | Y | Y | Y | |
| [Beanstream](https://www.ultracart.com/resources/partners/supported-payment-gateways/international-gateways/beanstream/) (Now [Bambora](https://www.bambora.com/en/us/)) ([Response error codes](https://help.na.bambora.com/hc/en-us/articles/115013189148-What-does-this-response-code-mean-)) | | Y | | | | |
| [Braintree Payment Solutions (Blue)](https://www.ultracart.com/resources/integrations/payment/braintree/) | | Y | Y | | | |
| [CyberSource](https://www.ultracart.com/resources/integrations/payment/cybersource/) | | Y | Y | | | |
| [eWay](https://www.ultracart.com/resources/partners/supported-payment-gateways/international-gateways/eway/) | | Y | | | | |
| [First Data Global Gateway e4](https://www.ultracart.com/resources/partners/supported-payment-gateways/international-gateways/first_data_global_gateway_e4/) | | Y | Y | | | |
| [Moneris](https://www.ultracart.com/resources/partners/supported-payment-gateways/international-gateways/moneris/) (E-Select Plus) | | Y | | Y | Y | Y |
| [Network Merchants Gateway](https://www.ultracart.com/resources/integrations/payment/nmi/) (N.M.I) | Y | Y | Y | Y | Y | |
| [PayPal PayFlow Pro](https://www.ultracart.com/resources/integrations/payment/paypal-payflow-pro/) | Y | Y | Y | Y | | |
| [Plug N Pay](https://www.ultracart.com/resources/integrations/payment/plug-n-pay/) | | Y | | | | |
| [Sage Pay Gateway](https://www.ultracart.com/resources/integrations/payment/sage-payments/) | | Y | Y | | | |
| [Stripe](https://www.ultracart.com/resources/integrations/payment/stripe/) | | Y | Y | | | |
| [WorldPay Business Gateway](https://www.ultracart.com/resources/partners/supported-payment-gateways/international-gateways/worldpay/) | | Y | Y | | | Y |
:::info
**Note regarding "3rd Party Processors" are not supported.**
UltraCart considers the gateways listed as "3rd Party Processors" as the least optimal integration due to the fact that these gateway require a hand-off to their own website during the checkout.
:::
:::info
**Caution with Zero Dollar Auth**
Proceed with caution when using "zero dollar authorizations" with auto orders (recurring billing). Even though it seems like a ideal way to offer a trial via an initially zero cost, very often it will create customer service issues because the customer will often confuse the temp hold as a actual charge which may result in customer service headaches. And as is the case with auto orders in general, you may need to take precautions to block prepaid and gift cards to prevent abuse. It's generally better to do a minimal transaction ($1-$5) up front in most cases.
:::
---
# Tutorial - Transparent payment processing status of placed orders
https://docs.ultracart.com/checkout-payments/tutorials/payment-gateway-tutorials/tutorial-transparent-payment-processing
doc_type: tutorial
# Transparent payment processing status of placed orders
**Question:**
_A customer placed an order and got a receipt for it, but the order went into the Accounts Receivables department, so it was not processed for shipment/digitial download retrieve/etc., which is causing some confusion in terms of customer expectations.
Is there a way to make it more clear to the customer that their placed order is pending the payment processing?_
_**Answer: **__The default behavior of the checkout is to capture the order to a receipt after the third unsuccessful attempt at processing the payment. The setting that defines the number of attempts before capturing the order and presenting a receipt is located:_
:::info
Main Menu → Configuration → (middle menu) Checkout → Payments → (middle menu) Credit Card (below methods tab) → "
"After failed attempt at processing the payment collect the order information and store in the accounts receivable."
:::

:::info
NOTE: The capturing of the order is to ensure that you are not missing a sale due to a correctable issue that you can assist the customer with, but this can sometimes be confusing, since they will see a receipt that says "Thank you for ordering".
:::
:::info
Select this checkbox ("Email Customer To Update Billing") so that the customer receives an email notification to update their billing details when their order is sent to A/R due to failed attempts at processing the payment.
:::
## _Adding Transparency to the payment status of placed orders_
_To make things more clear to the customer, you can edit the receipt page text "thank you for ordering" to something like" Thank you for your purchase. The emailed receipt will be confirmation that the payment for your purchase was successfully processed."
To change the default text: _
### Storefronts Checkout
:::info
Main Menu → _Storefronts (_Choose Storefront Host)__ → (Storefronts Menu) _Languages_ → _search for "Thank you for ordering"
(Fieldname = checkout.receipt.thankyouforordering)_
:::
"thankyouforordering": "Thank you for ordering.",

You'll change the text in the far-right column:
```groovy
Thank you for your purchase. The emailed receipt will be confirmation that the payment for your purchase was successfully processed.
```
Next, configure the emailed receipt to be sent only after the payment has been processed.
To this navigate:
Main Menu > Storefronts > (Choose Storefront Host) > (Stortefront menu) Emails > "Delivery Options"

Then in the "Delivery Options" window scroll down to the Receipt/Gift section and select "Hold receipt until payment processes" then click the "Save Options" button at the bottom of the pop up window.

Congratulations! The above configuration changes wil provide your customers more transparency regarding the status of their orders.
### Screen Branding Themes checkout
_
Navigate: Main Menu > Configuration > ("Look & Feel" section) Checkout Text > \[edit ENG "English"\] > Scroll to the field "CHECKOUT.RECEIPT.THANKYOUFORORDERING" _
_
\* In the right hand text field enter your customer text, then scroll to bottom and click the save button to save the changes._
_Example after:_
_
Finally set the receipt notification to be held until the payment processes:
Main Menu > Configuration > ("Email Notifications" section) Email Templates
\-Choose receipt template from drop-down menu
Select the checkbox for "Hold Receipt Until Payment Processes" (Save takes affect immediately in this section.)
_
_
You're done!_
_Receipt before change to checkout text:_
__
_Receipt after changes to checkout text:_
_
_
# Related documention
You can build custom decline messages to be displayed under defined circumstances, in the Fraud Prevention configuration. See the following for more details:
[Fraud Prevention](/checkout-payments/fraud-prevention)
---
# Tutorial: Troubleshooting Payment Gateway Credential Errors Using a Test Order (BEOE)
https://docs.ultracart.com/checkout-payments/tutorials/payment-gateway-tutorials/tutorial-troubleshooting-payment-gateway
doc_type: tutorial
## Introduction
If your UltraCart store is showing credit card declines with messages such as:
> _“Your credit card has been declined. We're sorry, but there was an issue processing your payment due to a technical problem on our end. Please try again later or contact support if the issue persists.”_
this typically indicates a **payment gateway configuration issue**, not necessarily a problem with the customer's credit card.
In this example, the storefront displayed the above decline message even though the underlying gateway response indicated a credential configuration error.
When reviewing the order transaction history in UltraCart, the gateway returned the following error:
| Setting | Recommended Value |
| Issue | Description |
| --- | --- |
| Invalid API credentials | Incorrect gateway API key or transaction key |
| Sandbox credentials used in production | Environment mismatch |
| Gateway account disabled | Merchant account inactive |
| Merchant ID mismatch | Gateway account configuration changed |
| IP restrictions | Gateway blocking UltraCart server requests |
* * *
# Troubleshooting Checklist
Before contacting support, verify the following:
- Gateway API credentials are correct
- Gateway environment matches your credentials (Production vs Sandbox)
- Merchant gateway account is active
- API access is enabled within the gateway
- UltraCart gateway type matches your gateway provider
* * *
# Expected Outcome
After completing this troubleshooting procedure you should be able to:
- Confirm whether gateway credentials are valid
- Identify gateway configuration errors
- Successfully process a real test transaction
- Verify that your checkout can process live payments
* * *
# FAQ
## Why do customers see a decline message if the issue is technical?
UltraCart intentionally displays a **generic decline message** to customers for security reasons.
Detailed gateway responses (such as credential errors or authentication failures) are only visible inside the **order transaction history** for merchants.
* * *
## Why don’t UltraCart test credit cards test the gateway?
UltraCart test card numbers are designed to **bypass the payment gateway entirely**.
They allow merchants to test checkout flows without contacting the gateway.
To verify that your gateway configuration works correctly, you **must use a real credit card**.
* * *
## Why does UltraCart send orders to Accounts Receivable after failed attempts?
By default, UltraCart attempts to process the payment **three times**.
If all attempts fail, the order is automatically routed to **Accounts Receivable (A/R)** so the merchant can:
- Review the gateway error
- Contact the customer if needed
- Retry the transaction manually
* * *
## Can I retry the payment after fixing gateway credentials?
Yes.
Once the gateway credentials are corrected, you can return to the order in **Accounts Receivable** and click **Process Payment** to retry the transaction.
* * *
# Next Steps
After successfully processing a test transaction:
1. Place a normal storefront order to confirm checkout works
2. Monitor new orders to confirm payments are captured successfully
3. Securely store your gateway credentials
4. Document your gateway configuration for future reference
If problems persist, contact UltraCart support and provide:
- Order ID
- Transaction UUID
- Gateway type
- Timestamp of the failed transaction
---
# UltraCart Hosted Credit Card Fields
https://docs.ultracart.com/checkout-payments/ultracart-hosted-credit-card-fields
doc_type: reference
# UltraCart Hosted Credit Card Fields
## Overview
UltraCart Hosted Credit Card Fields provides a mechanism to meet the new PCI 3.0 requirements without limiting your integration options or user interface.
UltraCart Hosted Credit Card Fields are seamless iframe inputs that collect the sensitive credit card data from the customer within your checkout without requiring substantial modification to your existing HTML, CSS, or JavaScript. This will help you meet the the new data security mandates of PCI 3.0, while ensuring your organization can complete the simplest self assessment questionnaires.
- Retains your ability to control the styling of the input
- Helps maintain your eligibility for SAQ-A PCI certification
- Comes standard in the legacy checkout and StoreFronts.
- Requires minimal changes to external forms or API based checkouts.
## What is the New PCI 3.0 Requirement?
As the PCI (Payment Card Industry) standard continues to evolve there are new requirements that must be implemented to maintain the security of card holder data. With PCI 3.0, which comes into full effect in 2015, there is a new requirement that ALL sensitive payment data form fields MUST come from the PCI-DSS certified provider. If your website is serving up the input fields associated with the PAN (primary account number 15-16 digits) or the card verification number (CVV/CVV2) then you will be exposing yourself to SAQ-EP (all 12 requirements of PCI) instead of SAQ-A (2 requirements of PCI).
## Setup an Integration
:::tip
Once you read the instructions below, this [checklist](pathname:///confluence/1377775/Hosted%20Fields%20Upgrade%20Checklist.pdf) may help you upgrade sites using UCEditor POSTs. Sorry - we don't have one for javascript checkouts yet. Those tend to vary widely.
:::
### Prerequisites
The first step in integrating UltraCart Hosted Credit Card Fields into your site is to include the three prerequisite script files.
- jQuery
- JSON
- UltraCart Hosted Credit Card Fields.
The easiest way to include these three scripts is to use the block of code below.
```html/xml
```
### UltraCartHostedFields.setup
There is only one method call needed to add the UltraCart Hosted Credit Card Fields to your page. This static method processes the configuration and returns an instance object.
Parameters
| Argument | Type | Description |
| --- | --- | --- |
| jQuery | jQuery | An instance of jQuery. If you're using our sample above then the value would be "jQueryHostedFields", but if you already have jQuery available on the page then you can use "jQuery" |
| JSON | JSON | An instance of the JSON object. If you are using our sample above then the value would be "jsonHostedFields". :::note Most browsers provide their own JSON object which can be used by the API, but including an external version as the sample above provides consistency across all browsers and versions. ::: |
| config | object | |
| Property | Type | Required | Description |
| --- | --- | --- | --- |
| sessionCredentials | Object | Yes | See SessionCredentials below. |
| cssUrls | String\[\] | | An optional array of CSS URLs that you would like injected into the iframe to further style the hosted input. |
| form | String | | An optional jQuery selector to locate the form. The underlying fields will be re-enabled before submission so that the masked values will be submitted. |
| hostedFields | Object | Yes | See HostedFields below. |
| overlayZIndex | Integer | | Change the default z-index for the overlay. If not specified then the overlay will use a z-index of 999999. |
| autoCopyStyles | String\[\] | | By default, the hosted fields will copy a set of common styles from the underlying field to the input. This helps to keep fonts, colors, borders, etc. looking the same within the hosted field as the underlying field. If nothing is specified, then the default set of styles copied is: \[ // Padding "paddingBottom", "paddingLeft", "paddingRight","paddingTop", // Text "lineHeight", "fontSize", "fontFamily", "fontStyle", "fontWeight", // Color "backgroundColor", "color", // Border "borderBottomColor", "borderBottomLeftRadius", "borderBottomRightRadius","borderBottomStyle", "borderBottomWidth", "borderCollapse", "borderLeftColor", "borderLeftStyle","borderLeftWidth", "borderRightColor", "borderRightStyle", "borderRightWidth", "borderSpacing", "borderTopColor", "borderTopLeftRadius", "borderTopRightRadius", "borderTopStyle", "borderTopWidth" \] |
##### Returns
| Type | Description |
| --- | --- |
| UltraCartHostFields | Instance of the hosted fields object. This variable should be stored way if any of the advanced methods need to be called. |
#### SessionCredentials
This object contains necessary identifiers that must be passed by the UltraCart Hosted Credit Card Fields to sync up the data properly with the customer's shopping cart session.
| Property | Type | Required | Description |
| --- | --- | --- | --- |
| merchantId | String | Yes | This is the merchant ID for the UltraCart account. |
| shoppingCartToken | String | | This value is provided to the legacy checkout and the StoreFront checkout as $shoppingCartToken. |
| shoppingCartId | String | Recommended for javascript checkouts. | This is the cart.cartId for the JavaScript/REST Checkout. :::warning If you're using the hosted fields on a web page that's collecting credit card information for updating an existing order, or an existing auto order, do NOT provide a shoppingCartId. By leaving it off the request, the server will return back a token field that you will use to update your order/auto order record. The shoppingCartId is ONLY for placing new orders. ::: |
#### HostedFields
| Property | Type | Required | Description | Child Properties |
| --- | --- | --- | --- | --- |
| creditCardNumber | Object | Yes | Configures the credit card number field on the checkout. |
| Property | Type | Required | Description |
| --- | --- | --- | --- |
| selector | String | Yes | jQuery selector that identifies the original credit card number input field that will be transformed into a hosted field. |
| selectorContext | Element or jQuery object | | If you need the selector to find elements within a context, populate the selectorContext property. This property along with the one above is passed to a jQuery call like jQuery(selector, selectorContext). This is typically needed only if you have a heavily dynamic page and are rendering HTML using Backbone or another JavaScript MVC framework. |
| alertIfMissing | boolean | | Pop an alert if the underlying field was not found on the page. If this is false the hosted fields script will attempt to log a console message. If you ever see the error or the alert message, you are firing the setup script before the element is visible to jQuery. |
| tokenSelector | String | | Optional jQuery selector that will be used to store the token received after the card is submitted. This is only necessary for simple form post checkouts where the session credentials only contains the merchant id and the values will be submitted to the UCEditor URL. |
| placeholder | String | | The input fields placeholder value. If your design utilizes placeholders then you can provide it here. If the underlying input field contained a placeholder then it will automatically be read and carrier through to the hosted field. |
| callback | function(card) | | An optional function that will be called with a card object after the card is submitted to the server. |
| change | function(maskedValue) | | An optional function that can handle the change to the hosted field. The only parameter to the change function is the masked value. If no change function is provided then the default behavior is to update the underlying credit card number input field with the masked value. |
| error | function(errorMessage) | | An optional function that can handle an error message from the hosted field. The only parameter is the error message. If no error function is provided then the default behavior is to use an alert to display the message to the customer. |
| html5Validity | boolean | | If set to true, the hosted field library will detect if the browser supports setCustomValidity on the input and populate it with a message when an invalid card number is provided. |
| | creditCardCvv2 | Object | Recommended |
| Property | Type | Required | Description |
| Property | Type | Required | Description |
| --- | --- | --- | --- |
| selector | String | Yes | jQuery selector that identifies the original credit card CVV2 input field that will be transformed into a hosted field. |
| selectorContext | Element or jQuery object | | If you need the selector to find elements within a context, populate the selectorContext property. This property along with the one above is passed to a jQuery call like jQuery(selector, selectorContext). This is typically needed only if you have a heavily dynamic page and are rendering HTML using Backbone or another JavaScript MVC framework. |
| alertIfMissing | boolean | | Pop an alert if the underlying field was not found on the page. If this is false the hosted fields script will attempt to log a console message. If you ever see the error or the alert message, you are firing the setup script before the element is visible to jQuery. |
| tokenSelector | String | | Optional jQuery selector that will be used to store the token received after the CVV2 is submitted. This is only necessary for simple form post checkouts where the session credentials only contains the merchant id and the values will be submitted to the UCEditor URL. |
| placeholder | String | | The input fields placeholder value. If your design utilizes placeholders then you can provide it here. If the underlying input field contained a placeholder then it will automatically be read and carrier through to the hosted field. |
| change | function(maskedValue) | | An optional function that can handle the change to the hosted field. The only parameter to the change function is the masked value. If no change function is provided then the default behavior is to update the underlying credit card CVV2 input field with the masked value. |
| error | function(errorMessage) | | An optional function that can handle an error message from the hosted field. The only parameter is the error message. If no error function is provided then the default behavior is to use an alert to display the message to the customer. |
| callback | function(cvv2) | | An optional function that will be called with a cvv2 object after the cvv2 is submitted to the server. The cvv2 object will contain the token and masked value. See the Cvv2 object documented below for more details. |
| #### Card | Property | Type | Description |
| --- | --- | --- |
| maskedCreditCardNumber | String | The masked credit card number returned after the real card number is stored. |
| token | String | A token that can be passed to the UCEditor URL for simple hosted forms. |
| cardType | String | The type of card. This value can be used to select a drop box input for perform validation. |
#### Cvv2
| Property | Type | Description |
| --- | --- | --- |
| maskedCreditCardCvv2 | String | The masked credit card CVV2 returned after the real card number is stored. |
| token | String | A token that can be passed to the UCEditor URL for simple hosted forms. |
The instance object returned from setup also has some additional methods that can be called.
### UltraCartHostedFields.addClass
:::tip
`addClass` and `removeClass` are not static methods. They regular methods you may call from your hosted fields object.
Example:
`var hostedFields = UltraCartHostedFields.setup(jQuery, JSON3, {/* tons of configuration here that's been omitted for brevity */});`
`//later, during validation, if the credit card field is blank, add a class to the cc number overlay field like this: `
`hostedFields.addClass('someMissingFieldClassName', "creditCardNumber")`
:::
The next two methods addClass and removeClass can be used to adjust classes on the iframe's document body. This allows for the CSS of the internal iframe to change state based upon behaviors taking place on the parent document.
##### Parameters
| Argument | Type | Description |
| --- | --- | --- |
| className | String | Class name that will be added to the body tag of the internal iframe document. |
| fieldType | String | - creditCardNumber - creditCardCvv2 - all (default if not specified) |
### UltraCartHostedFields.removeClass
##### Parameters
| Argument | Type | Description |
| --- | --- | --- |
| className | String | Class name that will be removed from the body tag of the internal iframe document. |
| fieldType | String | - creditCardNumber - creditCardCvv2 - all (default if not specified) |
### UltraCartHostedFields.finished
Due to the asynchronous nature of a hosted field saving its information to the server, you need to check to make sure these operations are finished before saving your cart. Otherwise you have a potential race condition between how fast the field can save the value and how quickly the customer clicks the finalize order button. This method allows you to prevent this race condition.
##### Parameters
| Argument | Type | Description |
| --- | --- | --- |
| callback | function | A function to call when there are no asynchronous hosted field save operations underway. |
:::tip
Example:
`var hostedFields = UltraCartHostedFields.setup(jQuery, JSON3, {/* tons of configuration here that's been omitted for brevity */});`
`// on your button click handler that saves the customers information, make a call to the finished method on the hosted fields `// object to make sure everything is saved before performing the cart update operation
$btn.on("click", function(){
hostedFields.finished(function(){
// Put your save code inside of this callback function
});
});
:::
### UltraCartHostedFields.destroy
The next method destory should be used to cleanup the hosted fields. If you're repainting the screen using an advanced MVC JavaScript framework then make sure you destory the UltraCartHostedFields instance, repaint the page's content, and then re-initialize a new UltraCartHostedFields instance using the setup method.
## Events from Hosted Fields
Once the hosted field is initialized your code can utilize standard events on the original input such as change, blur, and focus. In addition to these standard fields, an additional event **uchf:ready** is triggered on the underlying input once the hosted field has fully initialized. If your credit card number field has the id of "cardNumber" then you could use the following jQuery to setup a listener.
```js
jQuery("#cardNumber").on("uchf:ready", function(){
console.log("Received an event that the hosted field on the card number input is ready.");
});
```
Due to the asynchronous nature of the hosted field loading, we recommend that you bind your event listener before the call to `UltraCartHostedFields.setup.`
##### The following sections demonstrate various types of usages for the UltraCart Hosted Credit Card Fields.
## Implementing UltraCart Hosted Credit Card Fields in Simple Form Post Checkouts
The following example will implement the UltraCart Hosted Credit Card Fields. The tokens associated with the sensitive data will automatically store into the hidden input fields that will submit to the UCEditor URL. The underlying fields for card number and CVV2 will only contain the masked versions of the PCI sensitive data. In this example make sure to change the two merchant ID values of DEMO to your Merchant ID.
```html/xml
```
## Javascript / REST Checkouts: HOWTO
The github home page for the [responsive checkout](https://github.com/UltraCart/responsive_checkout#applying-hosted-fields-to-an-existing-checkout-based-on-this-reference-example) has a section with instructions for adding hosted fields to your javascript checkout. It's easy. There's a detailed [github gist](https://gist.github.com/perrytew/623fc471004bc961f7cf) linked within the instructions that has all the code you should need.
## How do I know if Hosted Fields are even working??
First, do you see any errors in your browser console? If you see "Ignoring duplicate readyCheck message", that's fine. That's not an error.
Second, do you see a couple of hosted field jsp files loading? One should load for each field (credit card, cvv) to create an iframe for each.

Third, do you see a call going out to UCCheckoutAPIHostedFields each time you enter a **full** value in either the credit card or cvv field? Was the call successful?

Finally, can you put through test orders? If you're seeing all of the above correctly, and still getting back errors about a missing credit card number, check your UltraCartHostedFields.setup block. That's been the problem the majority of the time. Here are the usual culprits:
- Not changing the merchantId from demo to your merchant id.
- Specifying the form directive for a javascript checkout.
- Not specifying the form directive for a UCEditor POST checkout
- Trying to send the token fields through for a javascript checkout
- Not sending the token fields through for a UCEditor POST checkout
Doing any of the above will not prevent the hosted fields from working, but your credit card will not be sync'd with the rest of the cart when you call checkect or POST to UCEditor.
## Advanced Topics
#### What happens to the value in the original credit card number field?
Whatever value that is in the credit card number or cvv2 field (most likely the previously masked value) at the time setup is called will be transferred to the hosted field. Make sure that you have loaded the original credit card number field with any value before calling setup.
#### What about onfocus and onblur events?
The UltraCart Hosted Credit Card Fields will automatically send these events from the internal iframe to the parent window and trigger them on the original field using the jQuery triggerHandler method. This means if you've bound some JavaScript to your original field it will still fire without making any special changes to the code.
#### What about onchange event?
Whenever the hosted field updates the underlying field with a new value, the change event will be triggered. This will allow existing JavaScript code to store the new value. Please note, the value that the underlying form receives will also be the masked card (X's plus the last 4 digits) and the masked CVV2.
#### What if the browser fails to load the iframe for some reason?
If the browser is configured with the standard security model then everything should function smoothly across all major browsers and supported versions. If the customer has changed their browser model and blocked the iframe for some reason, an alert will appear on the browser after 5 seconds if the hosted field iframes do not properly communicate back with the parent.
#### Why is my custom font not working within the hosted field?
While the auto copy of styles will include the font-family, you still need to import the font using a CSS file specified in the cssUrls parameter.
#### Is there a debug mode to determine more details of the interaction between the regular page and the hosted fields?
Yes, place the following snippet of JavaScript on your page to enable debug mode. Please note that nothing sensitive is logged to the console, but it does help with understanding the messaging interaction that is taking place.
```html/xml
```
#### Why am I receiving an alert window about the input type being a number?
Previously your input field for credit card number or cvv2 may have been a type="number" field instead of type="text". The problem with type="number" is that the masked card number and cvv2 values can not be stored back into these types of inputs. The browser will simply ignore the value and it will cause problems. Browsers will not allow the type for an input to be changed on the fly so the best option is for us to quickly alert you to the problem.
#### Why am I receiving an alert window about the selector not finding the element on the page?
If you receive a message like "Selector for creditCardCvv2 did not find the element on the page..." then you either have an incorrect selector for the hosted field or you called the setup method before the element was visible in the DOM. If you're using the JavaScript API, make sure that the content is attached to the DOM before calling the hosted field setup method.
#### How can I perform inline validation of the hosted fields?
Since the fields are hosted and your JavaScript never receives the full value, inline validation on the client is limited, but it's there are still some checks that you can perform. The following sample JavaScript shows how to listen for the change events and set some classes based upon the value masked value that appears in your input field. This code assumes that you have inputs with the associated #cardNumber and #cvv2 ids. During your validation routine you can check for the different classes on your inputs and provide messaging to the user. Ultimately though, the complete validation will be performed on the server side so you should make sure that your JavaScript checkout can handle _validation errors_ properly.
As a reminder, validation errors are returned back in the [CheckoutResponse.errors](/developer/api/checkout) property returned from the checkout method. It's critical that your javascript application examines the checkout response object and handles any errors returned within that object.
```javascript
// as a reminder, jQueryHostedFields is a reference to a jQuery object.
// The CSS style of the hosted fields will mimic the underlying fields, so for example, if you
// change the credit card field to have a red background, then the hosted fields will also change to red.
jQueryHostedFields("#cardNumber").on('change', function(){
// When a change occurs, the hosted field library will add one of three classes to the underlying input: noCreditCardNumber, invalidCreditCardNumber, validCreditCardNumber
if (!jQueryHostedFields(this).val() || jQueryHostedFields(this).hasClass("noCreditCardNumber")) {
// No value in the credit card field
}
if (jQueryHostedFields(this).hasClass("invalidCreditCardNumber")) {
// The value in the credit card field is invalid
}
});
jQueryHostedFields("#cvv2").on('change', function(){
// Clear existing classes
jQueryHostedFields("#cvv2").removeClass("noCreditCardCvv2");
jQueryHostedFields("#cvv2").removeClass("validCreditCardCvv2");
jQueryHostedFields("#cvv2").removeClass("invalidCreditCardCvv2");
// Regex for basic validation of a masked CVV2 value.
var re = /[X]{3,4}/i;
// Test to see if the field is empty, appears valid or is invalid
var fieldValue = jQueryHostedFields(this).val();
if (fieldValue === "") {
jQueryHostedFields("#cvv2").addClass("noCreditCardCvv2");
} else if (re.test(fieldValue)) {
jQueryHostedFields("#cvv2").addClass("validCreditCardCvv2");
} else {
jQueryHostedFields("#cvv2").addClass("invalidCreditCardCvv2");
}
});
// Perform initial validation
jQueryHostedFields("#cardNumber,#cvv2").trigger("change");
```
#### Is Ionic Framework Supported?
We have tested hosted fields successfully on the following Ionic environment for iOS:
```bash
Ionic:
Ionic CLI : 6.19.1 (/usr/local/lib/node_modules/@ionic/cli)
Ionic Framework : @ionic/angular 6.1.9
@angular-devkit/build-angular : 13.2.6
@angular-devkit/schematics : 13.2.6
@angular/cli : 13.2.6
@ionic/angular-toolkit : 6.1.0
Capacitor:
Capacitor CLI : 3.5.1
@capacitor/android : not installed
@capacitor/core : 3.5.1
@capacitor/ios : 3.5.1
Utility:
cordova-res : not installed globally
native-run : 1.6.0
System:
NodeJS : v16.15.1 (/usr/local/bin/node)
npm : 8.11.0
OS : macOS Monterey
```
## FAQ
#### Q: I'm a small merchant, do I have to be PCI 3.0 compliant?
A: Yes, if your business accepts credit card payments at all then you have to comply with the latest PCI DSS rules. Failure to maintain PCI compliance can lead to immediate suspension of your ability to process credit cards.
#### Q: What if my JavaScript checkout is doing card tokenization already?
A: This is not good enough to meet the PCI 3.0 requirements. You will have to migrate to using UltraCart Hosted Credit Card Fields. The good news is that this integration is simpler than the card tokenization.
#### Q: Can I use media queries inside of the CSS of the hosted field?
A: Yes, but keep in mind that the media query will be seeing the width of the iframe and not the width of the parent window. If your checkout is responsive you may need to craft a more custom stylesheet to use inside of the hosted field and utilize the addClass/removeClass methods documented above instead of trying to use media queries.
#### Q: How do I check the card type if all I receive is the masked card number back?
A: The original credit card number field will never receive the full card number back. In order to determine the card type associated with the card number, provide a callback function on the creditCardNumber field within your configuration object. It will receive a card object as a parameter to the callback which will contain the card type. Here's an example of how to use the callback function to automatically deterrmine card type.
```xml
```
Within the Payment panel rendering, the teardown is called at the beginning and the setup called once the panel's html has rendered. Here's an example of how it's used:
```js
// ---------------------------------------------------------------------
// --- Payment Fields ---
// ---------------------------------------------------------------------
app.views.Payment = Backbone.View.extend({
el: '#payment',
events: {
'focus input[type=text]': 'selectText',
'change input[type=text],input[type=number],input[type=email],select': 'copyFieldToCart',
'click .safePop': 'showSafePop',
'click #final_btn': 'placeOrder',
'blur input[type=text], input[type=number], input[type=email], select': 'sendGaEvent',
'click .toggle': 'toggleSummary'
},
'onClose': function () {
if(cartOptions.showSummaryBeforeFinalize) {
this.model.off('sync reset change:subtotal change:tax change:shippingHandling change:total', this.render, this);
}
},
initialize: function () {
if(cartOptions.showSummaryBeforeFinalize) {
this.model.on('sync reset change:subtotal change:tax change:shippingHandling change:total', this.render, this);
}
_.bindAll(this);
},
render: function () {
// ========================================================
// TEARDOWN! We do this at the beginning of the render phase
// ========================================================
teardownSecureCreditCardFields();
var ccType = this.model.get('creditCardType') || '';
var ccExpMonth = this.model.get('creditCardExpirationMonth') || 0;
var ccExpYear = this.model.get('creditCardExpirationYear') || 0;
var sourceTypes = this.model.get('creditCardTypes') || ['AMEX', 'Discover', 'MasterCard', 'Visa' ];
var ccTypes = [];
_.each(sourceTypes, function (card) {
ccTypes.push({card: card, selected: card == ccType });
});
var ccMonths = [
{month: 1, name: '01', monthName: 'January', selected: 1 == ccExpMonth},
{month: 2, name: '02', monthName: 'February', selected: 2 == ccExpMonth},
{month: 3, name: '03', monthName: 'March', selected: 3 == ccExpMonth},
{month: 4, name: '04', monthName: 'April', selected: 4 == ccExpMonth},
{month: 5, name: '05', monthName: 'May', selected: 5 == ccExpMonth},
{month: 6, name: '06', monthName: 'June', selected: 6 == ccExpMonth},
{month: 7, name: '07', monthName: 'July', selected: 7 == ccExpMonth},
{month: 8, name: '08', monthName: 'August', selected: 8 == ccExpMonth},
{month: 9, name: '09', monthName: 'September', selected: 9 == ccExpMonth},
{month: 10, name: '10', monthName: 'October', selected: 10 == ccExpMonth},
{month: 11, name: '11', monthName: 'November', selected: 11 == ccExpMonth},
{month: 12, name: '12', monthName: 'December', selected: 12 == ccExpMonth}
];
var ccYears = [];
for (var year = 13; year < 31; year++) {
ccYears.push({year: year, selected: '20' + year == ccExpYear});
}
// If we're getting a masked cc number back, the validation rules for the CC number input need to be adjusted.
var maskedNumber = app.data.cart.get('creditCardNumber').indexOf('XXXX-XXXX') >= 0 ? true : false;
var context = {
'ccTypes': ccTypes,
'ccMonths': ccMonths,
'ccYears': ccYears,
'cart': this.model.attributes,
'splitTest': cartOptions.splitTest,
'cartOptions': window.cartOptions,
'subtotal': this.model.get('subtotalLocalizedFormatted'),
'tax': this.model.get('taxLocalizedFormatted'),
'subtotalDiscount': (app.data.cart.get('subtotalDiscountLocalizedFormatted')),
'subtotalWithDiscount' : (app.data.cart.get('subtotalWithDiscountLocalizedFormatted')),
'shippingHandling': this.model.get('shippingHandlingLocalizedFormatted'),
'total': this.model.get('totalLocalizedFormatted'),
'maskedNumber': maskedNumber
};
this.$el.html(app.templates.payment(context));
var that = this;
this.$el.find('.ccvIcon').qtip({ // Get the tooltip running.
content: {
text: 'Loading...',
ajax: {
url: 'ccvhelp.html',
loading: false
}
},
show: 'hover',
style: {
classes: 'ccvToolTip'
},
position: {
my: 'bottom center', // Bottom center of the tooltip
at: 'top center', // ...positioned at the top center of .cvvIcon
target: $('.ccvIcon'),
container: that.$el,
viewport: $(window),
effect: false,
adjust: {
method: 'flip none'
}
}
});
// ========================================================
// SETUP! We do this after the html is rendered
// ========================================================
setupSecureCreditCardFields(this.hostedFieldsCallback);
return this;
},
'showSafePop': function(event) {
app.commonFunctions.safePop(event);
},
selectText: function (event) {
jQuery(event.target).select();
},
'toggleSummary' : function (event) {
$('.paymentSummaryHidden').slideToggle('fast', function() {
if($(".paymentSummaryHidden").is(":visible")) {
$('.toggle').html('[-]');
} else {
$('.toggle').html('[+]');
}
});
},
'sendGaEvent': function(event) {
var fieldName = event.target.id;
var value = jQuery.trim(jQuery(event.target).val());
if(value && typeof ga == 'function') { // Send virtual pageview if field is filled out
ga('send', {
'hitType': 'pageview',
'page': '/form/' + event.target.id,
'title': event.target.id + ' blur'
});
}
},
'updateSecurityCodeMessage' : function(ccType) {
// Show different help messages depending on the cc type.
if(ccType == "AMEX") {
var message = "(CVV / CVC) 4 digit code on the front of your card";
} else {
var message = "(CVV / CVC) 3 digit code on the back of your card";
}
this.$el.find('#ccvNote').html(message);
},
'copyFieldToCart': function (event) {
var fieldName = event.target.id;
var value = jQuery.trim(jQuery(event.target).val());
var changes = {};
// Add the "20" before the year
if(fieldName === 'creditCardExpirationYear') {
value = '20' + value;
}
changes[fieldName] = value;
this.model.set(changes);
},
// ========================================================
// CALLBACK !
// card is the object passed back from the hosted fields. If it contains a cardType field, the upload was successful.
// ========================================================
'hostedFieldsCallback': function(card){
var changes = {};
if(card && card.cardType) {
// create a change object to update our backbonejs model.
changes['creditCardType'] = card.cardType;
// change the css on the
field to visually indicate which card was entered.
this.$el.find('ul#card_logos').removeClass().addClass('is_' + card.cardType );
this.updateSecurityCodeMessage(card.cardType); // Show a different CCV help message depending on card type.
// update the data model
this.model.set(changes);
} else {
// if they uploaded junk, clear out the css class so none of the fields appear selected.
this.$el.find('ul#card_logos').removeClass().addClass('is_nothing');
}
},
placeOrder: function (event) {
event.preventDefault();
noCouponPop=true;
$('#frmCheckout').validationEngine('validate');
app.commonFunctions.checkout('Credit Card');
}
});
```
And the html looks like the following code. Bear in mind that this example is using [http://handlebarsjs.com/](http://handlebarsjs.com/) as a template engine, so you'll see some curly braces in the html below that's used to set the current card type during the initial render. When the credit card number is upload, the css class on the
element is adjusted to highlight the current card type.
```xml
Visa
MasterCard
American Express
Discover
```

#### Q: I've implemented hosted fields and now the credit card number isn't masked after entering it.
A: That's okay. The card will mask if the number is loaded _from_ the cart or the page is reloaded. By design, it doesn't mask upon entry anymore.
#### Q: I've implemented hosted fields, in Safari browser, if in private mode, the hosted fields won't load, why is that happening?
A: The iFrame in this case hosts the CC fields, and is required as this is the method of isolation UltraCart employ's to prevent any PAN leakage from occurring during the shopping session.
The Safari browser has a privacy setting enabled by default that prevents the loading of iframes. If the customer wishes to use private mode, they can change the setting:
Preferences → Privacy → then uncheck the setting 'Prevent cross-site tracking' then saving the changes and then closing and restarting their web browser.
---
# General Data Protection Regulation (GDPR)
https://docs.ultracart.com/compliance-legal
doc_type: explanation
****On _May 25, 2018_ the EU's new data privacy law, the [General Data Protection Regulation](https://www.eugdpr.org) (GDPR), will go into effect.** This applies to any merchant 1) based in Europe or 2) having (or possibly having) customers within the European Union. **
**_Disclaimer: This is not legal advice. The General Data Protection Regulation is complex and each merchant should obtain legal advice to discover how the regulation applies to their specific business. _**
* * *
## **What is the GDPR? **
**The General Data Protection Regulation (GDPR) is a new data privacy law passed in the European Union. The law calls for additional detail and transparency when processing personal data you collect on EU customers. **
**The GDPR Replaces the 1995 fragmented European Union data protection law known as the "[Data Protection Directive](https://en.wikipedia.org/wiki/Data_Protection_Directive)." The new regulation strengthens, enhances and unifies the data protection laws and regulations across all EU countries. **
### **Personal Data**
****Personal data** includes any information that could be used on its own or combined with other information to identify an individual. For example, this information includes (but is not limited to) name, physical address, email address, social media information, financial data or digital identifiers such as an IP address, cookie and local storage.**
* * *
## **Who is impacted by the GDPR? **
**The General Data Protection Regulations impacts any merchant that is based within the European Union or having (or possibly having) customers located in the European Union. While [UltraCart](https://www.ultracart.com)™ provides tools to help these merchants comply with the new regulation, you should review the regulation and take independent action to comply. **
* * *
## **How to Comply with the GDPR? **
### **Make Your Team Aware**
**Ensure anyone on your team involved in handling or processing user's personal data is aware of the changes and new regulations. **
### **Data Protection Officer**
**Assign an internal Data Protection Officer to track GDPR compliance, especially when processing large amounts of user data.**
### **Update Your Privacy Policy**
**The GDPR requires that you outline specific information, typically within a privacy policy, to users whose data you are collecting and processing. The language within the policy must be clear and concise. The privacy policy must be easy to navigate to on your website. Your policy must contain what data you collect, why and how your collecting it, how long your keeping it, who (third parties) has access to it, how users can get to and change it, and how they can opt out of the data collection. **
**You must, also notify your customers about the changes you've made in your privacy policy. **
### **Data Audit**
**Create a detailed outline for the flow, storage, and processing of personal consumer data. For example,**
- **What data do you collect?**
- **How do you collect and store the information?**
- **How do you use or process the data?**
**Below are some Basic questions that will help get you started in creating this audit: **
- **Are you collecting data from your European customers? **
- **Make note any integration or script that gathers and/or process data.**
- **Does your Payment Gateway/Payment Processor collect and/or process your customers personal data? **
### **Data Access**
**You must be able to provide customers with a common, readable, and portable copy of their personal data upon request. A response is expected within a 30 day period. Exceptions can be made if the request is difficult to fulfill, but communicate any problems to the customer.**
**Customer must use the **MyAccount** customer portal to update their information or privacy settings. The **MyAccount** portal is part of the **StoreFront**. You need to update your theme to the following versions (or higher) to incorporate these settings: **
| Theme | |
| --- | --- |
| Elements | 1.01 |
| Fashion | 0.24 |
| Coffee | 0.18 |
| Woodland | 0.25 |
| Gridzy | 0.23 |
| Natural | 0.30 |
| Craft | 0.30 |
| MrTeas | 0.52 |
**You can export, in excel format, customer information within the your **UltraCart** account. _Additional tools will be forthcoming for providing customers with personal data upon request. _**
* * *
## **UltraCart Cannot Handle Your GDPR Compliance**
**UltraCart has provided tools to assist with GDPR compliance, however you must look into what steps you need to take to comply with new European General Data Protection Regulation. **
**For your reference The EU has provided the following guidance: **
- **[ICO Guide to Data Protection](https://ico.org.uk/for-organisations/guide-to-data-protection/)**
- **[GDPR and You Guide](http://gdprandyou.ie/)**
- **[RGPD : se préparer en 6 étapes](https://www.cnil.fr/fr/principes-cles/rgpd-se-preparer-en-6-etapes)**
* * *
## **What Changes have been made to UltraCart to comply with the GDPR?**
### **Updated Terms and Policies**
- **Updated our [Terms and Conditions](https://www.ultracart.com/legal/terms-and-conditions.html#DAP) to include a data processing addendum (as required by Article 28 of the GDPR).**
- **Updated our [Privacy Policy](https://www.ultracart.com/legal/privacypolicy.html) to include additional details and information about the personal data collected by UltraCart (as required by Article 13 and 14 of the GDPR).**
### **New Data Collection Settings**
**We've added additional settings and tools within the Privacy and Tracking section for each **StoreFront**. Navigate to `**StoreFronts → YourStoreFrontDomain.com ** →** Privacy & Tracking**`**
****
**The new Privacy tab allows you to control and restrict the data collection settings for your customers. There are five settings:**
1. **Show the Privacy/Cookie Notice**
2. **Anonymize the IP address**
3. **Disable the Return Email**
4. **Set the Default Mailing List to Off**
5. **Exclude Purchase Bubble History**
**Each setting may apply to one of these audiences:**
1. **None of your customers (by leaving each dropdown blank)**
2. **All Customers**
3. **EEA (European Economic Area) Customers**
4. **Non-US Customers. **
**In addition to the new general privacy settings, each tracking integration now has an **Opt into** section. Within this option you can require opt in for**
1. **All Customers**
2. **EEA (European Economic Area)**
3. **Non-US Customers**
**Setting this field will require the target audience to opt into Statistics, Preferences or Marketing data collection before the integration will load. For example if you desire Google Analytics for everyone except EEA customers (until they opt in) then select "Statistics" and "EEA Customers". **
****
### **What The Customer Sees**
**If a customer on your **StoreFront** falls into the segment selected in your privacy settings (**Privacy & Tracking → Privacy**) The will be presented with the following dialogs: **
**First, A general notice allowing the user to accept the cookie and privacy policy and continue to your store. **
****
**Second, if the user clicks "MORE INFORMATION", they are given additional control over which elements of the cookie and privacy settings they would like opt-into.**
****
**_Note: you can customize the colors and layout within the Cookie & Privacy Settings by placing your custom css in your override.css_**
# **Frequently Asked Questions**
****Question: Can UltraCart handle these required changes for us?****
**Answer: _UltraCart Cannot Handle Your GDPR Compliance for you. _UltraCart has provided tools to assist with GDPR compliance, however you must look into what steps you need to take to comply with new European General Data Protection Regulation. **
**For your reference The EU has provided the following guidance: **
- **[ICO Guide to Data Protection](https://ico.org.uk/for-organisations/guide-to-data-protection/)**
- **[GDPR and You Guide](http://gdprandyou.ie/)**
- **[RGPD : se préparer en 6 étapes](https://www.cnil.fr/fr/principes-cles/rgpd-se-preparer-en-6-etapes)**
****Given that these regulations can impose penalties upon your company, UltraCart recommends that you consult your own legal counsel in determining appropriate settings for your business.****
****Question: Our company is primarily based in, and aimed at, US based customers. What should be the determining factor in choosing the audience in which to apply these privacy tools? Would it be a good idea to apply it to all customers instead of just to the Non-US and/or EEA customers?****
**Answer: If your company is a "typical e-commerce shop" selling primarily to US customers, then you will probably want to go with "Non-US" option in order to avoid burdening (and potentially annoying) the vast majority of your customers (by forcing them to deal with the process of setting their privacy settings.)**
---
# California Consumer Privacy Act (CCPA)
https://docs.ultracart.com/compliance-legal/california-consumer-privacy-act-ccpa
doc_type: explanation
https://oag.ca.gov/privacy/ccpa
The [California Consumer Privacy Act of 2018](http://leginfo.legislature.ca.gov/faces/codes_displayText.xhtml?lawCode=CIV&division=3.&title=1.81.5.&part=4.&chapter=&article=%5d) (CCPA) gives consumers more control over the personal information that businesses collect about them. This landmark law secures new privacy rights for California consumers, including:
- The [right to know](https://oag.ca.gov/privacy/ccpa#sectionc) about the personal information a business collects about them and how it is used and shared;
- The [right to delete](https://oag.ca.gov/privacy/ccpa#sectione) personal information collected from them (with some exceptions);
- The [right to opt-out](https://oag.ca.gov/privacy/ccpa#sectionb) of the sale of their personal information; and
- The [right to non-discrimination](https://oag.ca.gov/privacy/ccpa#sectionf) for exercising their CCPA rights.
[Businesses](https://oag.ca.gov/privacy/ccpa#sectiona) are required to give consumers certain notices e[xplaining their privacy practices](https://oag.ca.gov/privacy/ccpa#sectiond). The CCPA applies to many businesses, including [data brokers](https://oag.ca.gov/privacy/ccpa#sectiong).
---
# Sales Tax
https://docs.ultracart.com/compliance-legal/sales-tax
doc_type: explanation
# Sales Tax Management in UltraCart
UltraCart provides flexible options for managing sales tax, catering to various business needs and geographical requirements. This guide outlines the available methods, their advantages, and how to configure them within your UltraCart account.
## Introduction
Managing sales tax accurately is crucial for any e-commerce business. UltraCart offers several approaches to help you comply with tax regulations, ranging from automated solutions to granular manual control. Choosing the right method depends on your business's complexity, sales volume, and geographical reach.
:::note
[Home](https://ultracart.atlassian.net/wiki/404?key%3Dmerchant%3Bsearch%3Fq%3D%2FmainMenu.do) → [Configuration (Checkout)](https://ultracart.atlassian.net/wiki/404?key%3Dmerchant%3Bsearch%3Fq%3D%2Fconfiguration%2FconfigurationMenuLoad.do) → [Sales Tax](https://ultracart.atlassian.net/wiki/404?key%3Dmerchant%3Bsearch%3Fq%3D%2Fconfiguration%2FtaxCountryListLoad.do)
:::
## Ways to Manage Sales Tax
## Sales Tax Management Methods
UltraCart supports the following primary sales tax methods:
1. **UltraCart Managed**
2. **Self Managed**
3. **Avalara Integration**
4. **TaxJar Integration**
5. **Sovos Integration**
6. **Anrok Integration**
> **Tip:** Merchants seeking the most precise and compliant tax calculations, especially when dealing with complex product classifications or street-level accuracy, should consider Avalara, TaxJar, Sovos, or Anrok.
| Method | Pros | Cons |
| --- | --- | --- |
| UltraCart Managed | - Default Method - Easy to Setup - No Additional Fees | - United States only - Basic sales tax collection based upon zip code not street address. :::note **Warning:** UltraCart Managed Rates are ZIP-code-level only and do not support: - Street-level tax jurisdiction calculations - Distinctions between item/service tax classes For businesses needing more precise tax handling or support for multiple tax classifications, we recommend using **Avalara**, **TaxJar**, or **Sovos**. ::: note In summary, since the csv file provided by Avalara can't handle the 1-to-many nature of multiple tax counties in a zip, whenever the checkout encounters that situation, the highest tax rate is chosen to ensure the minimum tax is collected. Therefore, each merchant must decide if this is sufficient for their situation. If this is not desired, the alternative is to use Avalara, TaxJar, or Sovos for the most accurate sales tax services. In summary, since the csv file provided by Avalara can't handle the 1-to-many nature of multiple tax counties in a zip, whenever the checkout encounters that situation, the highest tax rate is chosen to ensure the minimum tax is collected. Therefore, each merchant must decide if this is sufficient for their situation. If this is not desired, the alternative is to use Avalara, TaxJar, or Sovos for the most accurate sales tax services. |
| Self Managed | - All Countries - Fine Grained Control Of Minute Details | - Manual setup of everything - Time intensive setup - Manual updates - Requires external tax tables |
| [Avalara](http://www.avalara.com) | - Easy To Setup - Complete Tax Solution - Automatically Identify New Nexus Points. - Can File Taxes For You (Additional fee) | - Requires [Avalara](http://www.avalara.com) plan - See [Avalara](http://www.avalara.com) for additional restrictions |
| [TaxJar](https://www.taxjar.com/) | - Easy To Setup - Complete Tax Solution - Automatically Identify New Nexus Points. - Can File Taxes For You (Additional fee) | - Requires [TaxJar](https://www.taxjar.com/) plan - See [TaxJar](https://www.taxjar.com/) for additional restrictions |
| [Sovos](https://sovos.com/) | - Easy To Setup - Complete Tax Solution - Automatically Identify New Nexus Points. - Can File Taxes For You (Additional fee) | - Requires [Sovos](https://sovos.com/) plan |
| [Anrok](https://www.anrok.com) | - Easy To Setup - Complete Tax Solution (calculation, filing, remittance, reconciliation) - Nexus Monitoring Across 100+ Countries | - Requires [Anrok](https://www.anrok.com) plan - Requires products to be tagged with Anrok tax categories |
## Special Fees
Effective July 1, 2022, Colorado imposes a retail delivery fee on all deliveries by motor vehicle to a location in Colorado with at least one item of tangible personal property subject to state sales or use tax.
Please see their full announcement here: [https://tax.colorado.gov/retail-delivery-fee](https://tax.colorado.gov/retail-delivery-fee)
For more information please see the following documentation [Colorado Retail Delivery Fee](/compliance-legal/sales-tax/colorado-retail-delivery-fee)
## UltraCart Managed
UltraCart Managed is a simple, no-cost solution suitable for basic U.S. sales tax collection.
:::info
### Important Notice regarding Sales Tax Calculation
UltraCart Managed Rates: The rates are provided by Avalara and are only accurate to the zip code level.
There can be addresses within those zip codes that may have a higher rate, but to get that higher rate you will have to use an API style integration like Avalara or TaxJar service which can calculate that.
**The free UltraCart Managed rates are simply the import of the free tax tables from Avalara. We can't modify those rates or guarantee perfect accuracy.**
:::
:::info
### United States Only
**The "UltraCart" managed sales tax configuration pertains to the United States only.**
For international support please contact one of the integrated Sales Tax processing services:
- TaxJar (United States & Canada)
- Avalera (Worldwide - Please contact Avalera directly for specific details)
**As of 06/19/2019, the UC managed tax provider will populate the tax county automatically. This information can be backfilled upon request**.
:::
#### Required Steps
To use UltraCart Managed sales tax:
1. Activate UltraCart Managed as your tax provider.
2. Select all states where you wish to collect sales tax.
### Activating UltraCart Managed
1. Navigate to **Home → Configuration (Checkout) → Sales Tax**.
2. Ensure that "UltraCart Managed" is selected as your tax provider.

### Selecting States to Collect Tax
1. Click the **Settings** button for "UltraCart Managed."
2. On the settings screen, select a state from the dropdown menu.
3. Click the **plus** button to add it to the list of states where tax is collected.
4. Repeat for all desired states.
5. When finished, click the **Save** button.

### Editing State Level Options
You can modify state-specific sales tax options by clicking the **pencil icon** next to a configured state:
1. Click the **pencil icon** next to the state you wish to edit.
2. Select the desired options from the "State Level Options" dialog.
3. Click the **OK** button to save your changes.

#### State Level Options
| Field | Description |
| --- | --- |
| Field | Description |
| --- | --- |
| Quickbooks Code | Self-managed tax states can have a custom QuickBooks Code for assigning a tax rate within QuickBooks. Other tax providers automatically send the state, county, and city names to QuickBooks, where tax jurisdictions are created automatically. |
| Use UltraCart Managed Rates | If enabled, UltraCart manages the tax rates, eliminating the need to manually configure rates for the State, County, City, and Postal Code levels. This option leverages the automated rate updates provided by UltraCart's managed service while allowing manual control over taxability options. |
| Tax Shipping | If active, shipping costs are added to the taxable subtotal. |
| Tax Gift Wrap | If active, any gift wrap fees are added to the taxable subtotal. |
| Don't collect state tax | If active, state tax is not collected, even if other jurisdictions (county, city, postal code) within that state might still collect tax. |
| Don't collect county tax | If active, county tax is not collected, even if other jurisdictions (state, city, postal code) within that county might still collect tax. |
| Don't collect city tax | If active, city tax is not collected, even if other jurisdictions (state, county, postal code) within that city might still collect tax. |
| Don't collect postal code tax | If active, postal code tax is not collected, even if other jurisdictions (state, county, city) within that postal code might still collect tax. |
After saving, the state will appear in the list of states configured for taxation.
### Adding County Tax Rates
1. Click the **plus** button to the right of the state to add county tax rates.
2. The process is the same as configuring state tax rates.

Click the plus button at the right of the state to add county tax rates. The process is the same as the state tax rates.

Once the county is saved, click the plus sign next to the county to add city rates.

### Adding City Tax Rates
1. Once the county is saved, click the **plus** button next to the county to add city rates.
2. The "Add City" dialog contains the same fields as the state and county configuration.
3. Repeat this process for as many states, counties, and cities as needed.

### Adding Postal Code Tax Rates
If you need to add postal code tax rates to a city, click the **plus** button to the right of the city and follow the same process as the other jurisdictions.

### Configure Other Countries for Tax Collection
Other countries are configured on the right side of the Self Managed settings screen. The process for configuring tax rates for other countries is similar to configuring U.S. states, but it begins at the country level. You will add the country first, then any sub-jurisdictions as needed.

* * *
## Third-Party Sales Tax Provider Configuration
Each third-party tax provider has its own dedicated setup guide, linked below, so this page stays focused on the overall Sales Tax options rather than duplicating each provider's instructions:
- [Configuring Avalara](/compliance-legal/sales-tax/configuring-avalara) — Account ID/License Key setup, item and shipping tax codes, and connection testing.
- [Configuring TaxJar](/compliance-legal/sales-tax/configuring-taxjar) — API token setup, tax codes, connection testing, and exporting historical orders.
- [Configuring Sovos](/compliance-legal/sales-tax/configuring-sovos) — Credential setup, test mode, and going live.
- [Configuring Anrok](/compliance-legal/sales-tax/configuring-anrok) — API key, Default/Shipping Product ID mapping, and testing.
* * *
# Tax Exempt Customers
Tax exemption in UltraCart rides on a [customer profile](/customers-crm/customer-profiles). Three things have to be true before that customer checks out tax free. Miss any one of them and the checkout collects tax as normal, with no error and no warning on screen.
1. The customer profile is marked tax exempt in UltraCart.
2. If you calculate tax through an API based provider, the provider specific fields are filled in and a matching customer record exists inside that provider's system.
3. The customer logs in to their customer profile during checkout.
:::warning
Catch this before the order processes. Once an order reaches **Processed** status, UltraCart locks its tax amount and you cannot edit it back down to zero. Correcting it then means refunding and recreating the order. See [Correcting Tax on a Processed Order](./correcting-tax-on-a-processed-order.md).
:::
## Step 1: Mark the profile tax exempt in UltraCart
Navigate to **Main Menu → Operations → Customer Profiles → Manage**, edit the customer's profile, and open the **Taxes** tab. Enable **Tax Exempt** and enter the customer's **Tax ID Number**.
Most merchants let tax exempt customers sign up as wholesale customers and upload their own exemption certificate. The upload link sits under **Operations → Customer Profiles → Settings**.
For the full field list on that tab, see [Tax configuration and exemptions](/customers-crm/customers/tax-configuration-and-exemptions).
## Step 2: Configure the provider specific fields
With UltraCart Managed or Self Managed tax, the **Tax Exempt** toggle is the whole story. With Avalara, TaxJar, Sovos, or Anrok it is not. UltraCart sends a customer identifier along with the tax request, and the provider decides the exemption from the record it holds under that identifier. If the identifier is missing on either side, the provider prices the order as taxable and UltraCart collects tax.
| Provider | Fill in on the profile Taxes tab | Must already exist in the provider's system |
| --- | --- | --- |
| Avalara | Avalara Customer Code, Avalara Entity Use Code | A customer record under the matching customer code, with the exemption certificate or entity use code on file. See [Configure Avalara Entity Use Code](./configure-avalara-entity-use-code.md). |
| TaxJar | TaxJar Customer Code, TaxJar Exemption Type | A customer created in TaxJar first, whose code you then copy back into UltraCart. See [Configuring TaxJar](./configuring-taxjar.md). |
| Sovos | Sovos Customer Code | A customer record under the matching customer code, with the exemption on file. |
Anrok is not in the table above. Confirm any customer level exemption setup with Anrok directly before you rely on it at checkout.
## Step 3: The customer logs in at checkout
The exemption belongs to the customer profile, so the shopper has to log in to that profile during checkout to receive it. An order placed as a guest is taxed normally, even when the email address on it matches an exempt profile exactly.
**Auto Link Orders to Customer Profile** does not change this. That setting attaches a guest order to the matching profile for historical purposes, but the order does not receive the profile's benefits. See [Customer Profile Configuration](/customers-crm/customer-profiles/configuration-customer-profiles).
If your customers are not logging in, check that profile login is available on your storefront. [Single Page Checkout](/checkout-payments/single-page-checkout) covers which themes support customer profile login during checkout.
## An exempt customer was charged tax
Work the three requirements in order. The first one is by far the most common cause.
1. Open the order and check whether it is linked to a customer profile and whether the customer logged in. A guest checkout explains most of these.
2. Open that profile's **Taxes** tab and confirm **Tax Exempt** is on and the provider specific fields are populated.
3. Open your provider's dashboard and confirm a customer record exists under that same code with the exemption on file.
4. Review the tax provider log for the order, described in the Logs section below. The request UltraCart sent shows which customer code went to the provider, and the response shows the exempt amount the provider returned.
If the order has already processed, its tax is locked. Fix the setup so it does not recur, then see [Correcting Tax on a Processed Order](./correcting-tax-on-a-processed-order.md) for the correction path on the order itself.
# Troubleshooting
:::info
### Troubleshooting Tool
If you need to verify or troubleshoot a tax calculation for an order, please first compare the rate using this simple sales tax look up tool:
[https://www.taxjar.com/sales-tax-calculator/](https://www.taxjar.com/sales-tax-calculator/)
If you see a discrepancy between the recorded sales tax in an order compared to the tax displayed in the look up tool, then you can further troubleshoot the issue by reviewing the logs for either Avalara or TaxJar.
:::
## Logs
Avalara and TaxJar record important communications for review. Shopping cart tax calculations are not stored to logs, but any operation against an order is logged. This means the final tax calculation is stored, as well as any transaction notifications (order placed and order refunded).
Within the Avalara and TaxJar settings screens are log buttons. Clicking either button will display a log history.

The log files will contain the request and response make to the tax service.
Here is an example. If the logs fail to assist you in solving any problems, notify UltraCart support and involve them.
```js
estimateTax for order [START]
===== estimate tax request start =====
{
"lines": [
{
"number": "1",
"quantity": 3,
"amount": 58.5,
"itemCode": "Bone",
"description": "TJ's DOGGIE BONES (6 lbs.)\nCode: 4W5S41JXG4\nCode: B2BJZVM1PF\nCode: JMK9XQRRRZ"
}
],
"type": "SalesOrder",
"companyCode": "",
"date": "Nov 8, 2018 1:57:19 PM",
"customerCode": "GuestCustomer",
"purchaseOrderNo": "",
"addresses": {
"singleLocation": {
"line1": "30 Pryor Street",
"line2": "",
"city": "Atlanta",
"region": "GA",
"country": "US",
"postalCode": "30303"
}
},
"description": "DEMO-0009104135",
"email": "joe@somewhere.com"
}
===== estimate tax request end =====
===== estimate tax response start =====
{
"id": 0,
"code": "dfaf643b-d866-407b-a1a4-3f3499e7fd1d",
"companyId": 0,
"date": "Nov 8, 2018 12:00:00 AM",
"paymentDate": "Nov 8, 2018 12:00:00 AM",
"status": "Temporary",
"type": "SalesOrder",
"customerVendorCode": "GuestCustomer",
"reconciled": false,
"purchaseOrderNo": "",
"totalAmount": 58.5,
"totalExempt": 0.0,
"totalDiscount": 0.0,
"totalTax": 5.21,
"totalTaxable": 58.5,
"totalTaxCalculated": 5.21,
"adjustmentReason": "NotAdjusted",
"locked": false,
"version": 1,
"exchangeRateEffectiveDate": "Nov 8, 2018 12:00:00 AM",
"exchangeRate": 1.0,
"description": "DEMO-0009104135",
"email": "joe@somewhere.com",
"modifiedDate": "Nov 8, 2018 6:57:17 PM",
"modifiedUserId": 1152574,
"taxDate": "Nov 8, 2018 12:00:00 AM",
"lines": [
{
"id": 0,
"transactionId": 0,
"lineNumber": "1",
"description": "TJ's DOGGIE BONES (6 lbs.)\nCode: 4W5S41JXG4\nCode: B2BJZVM1PF\nCode: JMK9XQRRRZ",
"discountAmount": 0.0,
"exemptAmount": 0.0,
"exemptCertId": 0,
"isItemTaxable": true,
"itemCode": "Bone",
"lineAmount": 58.5,
"quantity": 3.0,
"reportingDate": "Nov 8, 2018 12:00:00 AM",
"tax": 5.21,
"taxableAmount": 58.5,
"taxCalculated": 5.21,
"taxCode": "PP051195",
"taxCodeId": 38011,
"taxDate": "Nov 8, 2018 12:00:00 AM",
"taxIncluded": false,
"details": [
{
"id": 0,
"transactionLineId": 0,
"transactionId": 0,
"country": "US",
"region": "GA",
"exemptAmount": 0.0,
"jurisCode": "13",
"jurisName": "GEORGIA",
"stateAssignedNo": "",
"jurisType": "STA",
"nonTaxableAmount": 0.0,
"rate": 0.040000,
"tax": 2.34,
"taxableAmount": 58.5,
"taxType": "Sales",
"taxName": "GA STATE TAX",
"taxAuthorityTypeId": 45,
"taxCalculated": 2.34,
"rateType": "General",
"rateTypeCode": "G"
},
{
"id": 0,
"transactionLineId": 0,
"transactionId": 0,
"country": "US",
"region": "GA",
"exemptAmount": 0.0,
"jurisCode": "121",
"jurisName": "FULTON",
"stateAssignedNo": "060A",
"jurisType": "CTY",
"nonTaxableAmount": 0.0,
"rate": 0.030000,
"tax": 1.76,
"taxableAmount": 58.5,
"taxType": "Sales",
"taxName": "GA COUNTY TAX",
"taxAuthorityTypeId": 45,
"taxCalculated": 1.76,
"rateType": "General",
"rateTypeCode": "G"
},
{
"id": 0,
"transactionLineId": 0,
"transactionId": 0,
"country": "US",
"region": "GA",
"exemptAmount": 0.0,
"jurisCode": "04000",
"jurisName": "ATLANTA",
"stateAssignedNo": "060A",
"jurisType": "CIT",
"nonTaxableAmount": 0.0,
"rate": 0.015000,
"tax": 0.88,
"taxableAmount": 58.5,
"taxType": "Sales",
"taxName": "GA CITY TAX",
"taxAuthorityTypeId": 45,
"taxCalculated": 0.88,
"rateType": "General",
"rateTypeCode": "G"
},
{
"id": 0,
"transactionLineId": 0,
"transactionId": 0,
"country": "US",
"region": "GA",
"exemptAmount": 0.0,
"jurisCode": "ENVK0",
"jurisName": "ATLANTA TSPLOST TL",
"stateAssignedNo": "060A",
"jurisType": "STJ",
"nonTaxableAmount": 0.0,
"rate": 0.004000,
"tax": 0.23,
"taxableAmount": 58.5,
"taxType": "Sales",
"taxName": "GA SPECIAL TAX",
"taxAuthorityTypeId": 45,
"taxCalculated": 0.23,
"rateType": "General",
"rateTypeCode": "G"
}
]
}
],
"addresses": [
{
"id": 0,
"transactionId": 0,
"boundaryLevel": "Address",
"line1": "30 Pryor Street",
"line2": "",
"line3": "",
"city": "Atlanta",
"region": "GA",
"postalCode": "30303",
"country": "US",
"taxRegionId": 2131921,
"latitude": "33.753427",
"longitude": "-84.389125"
}
],
"summary": [
{
"country": "US",
"region": "GA",
"jurisType": "State",
"jurisCode": "13",
"jurisName": "GEORGIA",
"taxAuthorityType": 45,
"stateAssignedNo": "",
"taxType": "Sales",
"taxName": "GA STATE TAX",
"rateType": "General",
"taxable": 58.5,
"rate": 0.040000,
"tax": 2.34,
"taxCalculated": 2.34,
"nonTaxable": 0.0,
"exemption": 0.0
},
{
"country": "US",
"region": "GA",
"jurisType": "County",
"jurisCode": "121",
"jurisName": "FULTON",
"taxAuthorityType": 45,
"stateAssignedNo": "060A",
"taxType": "Sales",
"taxName": "GA COUNTY TAX",
"rateType": "General",
"taxable": 58.5,
"rate": 0.030000,
"tax": 1.76,
"taxCalculated": 1.76,
"nonTaxable": 0.0,
"exemption": 0.0
},
{
"country": "US",
"region": "GA",
"jurisType": "City",
"jurisCode": "04000",
"jurisName": "ATLANTA",
"taxAuthorityType": 45,
"stateAssignedNo": "060A",
"taxType": "Sales",
"taxName": "GA CITY TAX",
"rateType": "General",
"taxable": 58.5,
"rate": 0.015000,
"tax": 0.88,
"taxCalculated": 0.88,
"nonTaxable": 0.0,
"exemption": 0.0
},
{
"country": "US",
"region": "GA",
"jurisType": "Special",
"jurisCode": "ENVK0",
"jurisName": "ATLANTA TSPLOST TL",
"taxAuthorityType": 45,
"stateAssignedNo": "060A",
"taxType": "Sales",
"taxName": "GA SPECIAL TAX",
"rateType": "General",
"taxable": 58.5,
"rate": 0.004000,
"tax": 0.23,
"taxCalculated": 0.23,
"nonTaxable": 0.0,
"exemption": 0.0
}
]
}
===== estimate tax response end =====
estimateTax for order [END]
```
# Reporting
The "[Custom Period Sales](/reports-analytics/reporting/financial-reports/custom-period-sales-report)" report contains sections pertaining to the Sales Tax collected for the orders during the reporting period.
To run the Custom Period Sales Report, navigate:
**MAIN MENU → OPERATIONS → REPORTING → (REPORTS SECTION) CUSTOM PERIOD SALES**
- **Sales Tax by State -** (This section shows the sales taxes collected for the state level sales tax jurisdictions.)
- **Sales Tax by State / County** - (This section shows the sales taxes collected for the State & County level jurisdictions.)
- **Sales Tax by State / County / City -** (This section shows the sales taxes collected for the State ,County & City level jurisdictions.)
# Frequently Asked Questions
#### Q: What is the best option for collecting V.A.T. for orders shipped to the E.U.?
The best Sales tax integration option for merchants that will be processing orders where V.A.T. (Value Added Tax) are collected, is the [TaxJar](/compliance-legal/sales-tax/configuring-taxjar) integration.
#### Q: What is a sales tax nexus and how do I identify new ones?
A sales tax nexus is a connection or presence that a business has in a state or jurisdiction that obligates it to collect and remit sales tax there. Nexus can be created by factors such as physical location, employees, inventory storage, or reaching a sales revenue threshold within the state. Identifying new nexus obligations can be complex as your business grows and operates across multiple jurisdictions. Solutions like **Avalara**, **TaxJar**, **Sovos**, and **Anrok** provide automated nexus monitoring and can alert you when new nexus thresholds are reached, helping ensure you remain compliant as your sales footprint expands.
#### Q: Where can I review a summary regarding the recent changes to the laws and regulations pertaining to Sales Tax collection for online merchants?
A great place to start is here: [https://www.avalara.com/us/en/learn/sales-tax/south-dakota-wayfair.html](https://www.avalara.com/us/en/learn/sales-tax/south-dakota-wayfair.html)
Please make sure to consult your CPA/Tax Professional to ensure that your business is in compliance with all tax jurisdictions, as this is outside the scope of the UltraCart service.
#### Q: How can I determine the number of sales and revenue per state for a particular time period?
The [custom period sales report](/reports-analytics/reporting/financial-reports/custom-period-sales-report) (located under Operations > Reporting) has a section for Sales by US State which will provide those details.
#### Q: How is sales tax calculated if the item being sold is not shippable?
The sales tax calculation will use the customer billing address to calculate sales tax, if tax is being collected.
#### Q: How can I investigate the sales tax calculation in an order?
Please review the troubleshooting section earlier in this document. You can use the tax rate calculation tool to compare the recorded sales tax in an order. If a discrepancy is observed, then you can further troubleshoot the calculation by viewing the logs to see the underlying calculation details.
---
# Colorado Retail Delivery Fee
https://docs.ultracart.com/compliance-legal/sales-tax/colorado-retail-delivery-fee
doc_type: reference
Effective July 1, 2022, Colorado imposes a retail delivery fee on all deliveries by motor vehicle to a location in Colorado with at least one item of tangible personal property subject to state sales or use tax.
Please see their full announcement here: [https://tax.colorado.gov/retail-delivery-fee](https://tax.colorado.gov/retail-delivery-fee)

### How much is this tax?
From June 2022 to June 2023, the fee will be $0.27 on taxable motor deliveries to destinations within Colorado.
### Do I need to do anything?
No, the UltraCart engine automatically applies the delivery fee when appropriate. This fee will be included in the tax summary line item and rolled up into the total purchase amount.
### How will this fee appear for my customers?
This fee will be included in Sales Tax.
### Will this apply more than once if one order has multiple shipments?
No. Each order for delivery is considered a single “retail delivery” regardless of how many shipments are needed to deliver the items purchased.
### What if no items are considered taxable?
This fee would not apply.
### What if there is a mixture of taxable and nontaxable items?
The fee would be applied. The fee is only applied once even if there are multiple taxable items.
### What about digital products (ex. Digital downloads)?
This fee would not apply.
### Does the fee vary by jurisdiction in Colorado?
No. The retail delivery fee is collected state-wide.
### Does the fee apply if I’m located in Colorado and ship out of state?
No, this fee is only for orders shipped to Colorado addresses.
### Is the fee refundable if the item(s) are returned?
The Colorado Dept. of Revenue has ruled the fee is non-refundable, even if the item is returned. If the order has not yet shipped and the order is refunded, this fee is also refunded.
### Is the tax still applied if shipping is free?
Yes. The fee will be added to the taxes applied to the order.
### How to determine the amount to remit?
The UltraCart Period Sales Excel Report contains a sheet named “Taxes”. Within that sheet, the “Sales Tax by State” will display the total delivery fee for that period.

---
# Configure Avalara Entity Use Code
https://docs.ultracart.com/compliance-legal/sales-tax/configure-avalara-entity-use-code
doc_type: how-to
Use entity use codes to [apply exemptions in AvaTax](https://help.avalara.com/000_Avalara_AvaTax/Who_You_Exempt "Exempt Customers from Sales Tax"). States and countries are organized by business type and exemption reason. Exemption reasons differ based on the country and state.
:::note
You can view a full list of Entity Use Codes at [https://help.avalara.com/000\_Avalara\_AvaTax/Exemption\_Reason\_Matrix\_for\_US\_or\_Canada](https://help.avalara.com/000_Avalara_AvaTax/Exemption_Reason_Matrix_for_US_or_Canada)
:::
:::note
Home → Operations → Customer Profile → Edit a Customer Profile
:::
Hover over Operations then click on Customer Profiles from the Main Menu.

Click on Manage from the Customer Profile menu.

Then simply Edit a Customer Profile that you would like to assign an Entity Use Code. From the Customer Profile simply scroll down to the bottom of the page to the area shown below.

---
# Configuring Anrok
https://docs.ultracart.com/compliance-legal/sales-tax/configuring-anrok
doc_type: how-to
:::info
**Navigate:** Main Menu → Configuration → Checkout → Sales Tax
:::
# Introduction
[https://www.anrok.com](https://www.anrok.com) Anrok is a global sales tax compliance platform built for modern commerce. It handles nexus monitoring, registration, calculation, filing, remittance, and reconciliation in one connected system across the U.S. and 100+ countries.
UltraCart's Anrok integration sends order data to Anrok in real time so Anrok can calculate tax at checkout based on your product tax categories.
* * *
## Prerequisites
Before configuring Anrok:
- An Anrok account (or willingness to sign up during setup)
- An Anrok **API Key**
- Administrator access to your UltraCart account
- Products created in Anrok with the appropriate tax categories assigned, so they can be mapped to UltraCart's Default Product ID and Shipping Product ID fields
* * *
## Configuring Anrok in UltraCart
### 1\. Open the Anrok Settings
1. Navigate to:
**Main Menu → Configuration → Checkout → Sales Tax**
2. Locate **Anrok** in the list of available providers and open its settings.

### 2\. Complete the Configuration Fields
The Anrok settings screen includes the following fields:
| Field | Description |
| --- | --- |
| **API Key** | Your Anrok API key, used to authenticate requests between UltraCart and Anrok. |
| **Default Product ID** | Fallback Anrok Product ID used for items that don't have their own Anrok Product ID assigned. |
| **Shipping Product ID** | The Anrok Product ID for shipping charges. Create a product in Anrok with the "Shipping cost" tax category and enter its ID here. |
| **Estimate taxes without reporting orders** | When enabled, UltraCart requests tax estimates from Anrok but does not report finalized orders back to Anrok. Useful for testing before going live. |
### 3\. Sign Up (if needed)
If you don't already have an Anrok account, click **Sign Up** on the settings screen to create one before completing configuration.
* * *
## Mapping Products to Anrok
1. In Anrok, create products and assign each a **Product type** and **Tax category**.
2. Assign the corresponding Anrok Product ID to each item in UltraCart, or rely on the **Default Product ID** as a fallback.
3. Create a dedicated Anrok product for shipping using the **Shipping cost** tax category and enter its ID as the **Shipping Product ID**.
* * *
## Tax Exempt Customers
Marking a customer profile **Tax Exempt** in UltraCart handles the UltraCart side of an exemption, and the customer still has to log in to that profile during checkout to receive it. A guest order is taxed normally, even when the email address matches an exempt profile.
Confirm any customer level exemption setup with Anrok directly before you rely on it at checkout. See [Tax Exempt Customers](./index.md) for the requirements that apply across every provider.
* * *
# FAQ
## What happens if an item doesn't have an Anrok Product ID?
UltraCart falls back to the **Default Product ID** configured in the Anrok settings.
## Can I test Anrok before going live?
Yes. Enable **Estimate taxes without reporting orders** to calculate tax without sending finalized order data to Anrok.
* * *
# Next Steps
- Create and tag products in Anrok with the correct tax categories.
- Assign Anrok Product IDs to items in UltraCart, and set a Default Product ID and Shipping Product ID.
- Consider enabling **Estimate taxes without reporting orders** while validating your setup.
- Review related documentation:
- [_Sales Tax_](/compliance-legal/sales-tax)
---
# Configuring Avalara
https://docs.ultracart.com/compliance-legal/sales-tax/configuring-avalara
doc_type: how-to
# Avalara Sales Tax Integration
This guide provides instructions on how to integrate Avalara AvaTax with your UltraCart store for comprehensive sales tax compliance. Avalara is a leading tax compliance platform that offers accurate, real-time sales tax calculations.
:::info
**NAVIGATE:** Main Menu → Configuration → Checkout → Sales Tax
:::
## Overview
Integrating Avalara with UltraCart enables automated sales tax calculation based on precise, address-level data, reducing the complexity and risk associated with sales tax compliance. This integration ensures that your store collects the correct sales tax for every transaction, accounting for various tax jurisdictions, product taxability rules, and exemption certificates.
> **About Avalara:** Avalara's tax compliance platform, Avalara Compliance Cloud, provides a robust, end-to-end solution for managing sales tax. You can learn more at [http://avalara.com](http://avalara.com) .
## Prerequisites
Before you begin, ensure you have:
- An active Avalara AvaTax account.
- Your Avalara Account ID and License Key. If you do not have your license key, refer to Avalara's documentation: [https://help.avalara.com/Avalara\_AvaTax\_Update/Get\_your\_license\_key](https://help.avalara.com/Avalara_AvaTax_Update/Get_your_license_key) .
## Steps
This integration involves two main parts: configuring Avalara settings within UltraCart and then assigning appropriate Avalara Tax Codes to your items and shipping methods.
### 1\. Configure Avalara Settings in UltraCart
1. **Navigate to Sales Tax Settings:** From your UltraCart main menu, go to **Main Menu → Configuration → Checkout → Sales Tax**.
2. **Activate Avalara Provider:**
- Locate the "Avalara" option in the list of sales tax providers.
- Click the radio button next to "Avalara" at the top left of its section.
- Click the **Save** button.

3. **Access Avalara Settings:** Once Avalara is activated, click the **Settings** button for Avalara.
4. **Enter Avalara Credentials:** On the settings screen, you must provide the following minimum values:
- **Account ID:** Enter your Avalara Account ID.
- **License Key:** Enter your Avalara License Key.
- **Active:** Slide this button to `ON` to enable the integration for live transactions.
- **Sandbox:** Slide this button to `ON` if you wish to test the integration in Avalara's sandbox environment without affecting live transactions.

:::note
**Warning:** Be sure to **Save** your changes before attempting to test the connection.
:::
5. **Test the Connection:**
- After entering your credentials and saving the settings, click the **Test Connection** button.
- A successful connection will display output similar to the following:

### 2\. Configuring Items with Proper Avalara Tax Codes
For Avalara to accurately calculate sales tax for your products, each item in your UltraCart catalog must be configured with the appropriate Avalara Tax Code.
1. **Edit an Item:**
- Navigate to your item editor (e.g., **Items → Manage Items**, then select an item).
- Click the **Tax** tab within the item editor.

2. **Assign Avalara Tax Code:** In the "Tax" tab, locate the Avalara Tax Code section:
- **Tax Code:** Enter the relevant Avalara Tax Code for the item.
- **Description (optional):** Provide an optional description for the tax code.
- **Search Avalara Tax Codes:** Use this tool to search for available Avalara Tax Codes.
3. **References for Avalara Tax Codes:**
- Avalara Tax Code Finder: [https://taxcode.avatax.avalara.com/](https://taxcode.avatax.avalara.com/)
- Guidelines for mapping items to tax codes: [https://help.avalara.com/Avalara\_AvaTax\_Update/Guidelines\_for\_mapping\_items\_to\_tax\_codes](https://help.avalara.com/Avalara_AvaTax_Update/Guidelines_for_mapping_items_to_tax_codes)
### 3\. Configuring Shipping Methods with Avalara Tax Codes
Similarly, your shipping methods need to be configured with the appropriate Avalara Tax Codes for proper sales tax calculation on shipping charges.
1. **Edit a Shipping Method:**
- Navigate to your shipping method editor (e.g., **Shipping → Shipping Methods**, then select a method).
- Click the **Tax Codes** tab within the shipping method editor.

2. **Assign Avalara Tax Code for Shipping:** In the "Tax Codes" tab:
- **Tax Code:** Enter the required Avalara Tax Code for proper sales tax calculation for shipping.
- **Description (optional):** Provide an optional description for the tax code.
- **Search Avalara Tax Codes:** Use this tool to search for available Avalara Tax Codes.
**References for Avalara Tax Codes:**
- Avalara Tax Code Finder: [https://taxcode.avatax.avalara.com/](https://taxcode.avatax.avalara.com/)
- Guidelines for mapping items to tax codes: [https://help.avalara.com/Avalara\_AvaTax\_Update/Guidelines\_for\_mapping\_items\_to\_tax\_codes](https://help.avalara.com/Avalara_AvaTax_Update/Guidelines_for_mapping_items_to_tax_codes)
### Tax Exempt Configuration
Marking a customer profile **Tax Exempt** in UltraCart is not enough on its own once Avalara is calculating your tax. Avalara decides the exemption from its own customer record, so you also need to:
1. Enter the customer's **Avalara Customer Code** and **Avalara Entity Use Code** on the **Taxes** tab of their UltraCart customer profile. See [Configure Avalara Entity Use Code](./configure-avalara-entity-use-code.md).
2. Confirm a customer record exists in Avalara under that same code, with the exemption certificate or entity use code on file.
3. Have the customer log in to their customer profile during checkout. A guest order is taxed normally, even when the email address matches an exempt profile.
See [Tax Exempt Customers](./index.md) for the full walkthrough and for what to check when an exempt customer is charged tax anyway.
For Avalara's own guidance on exemption reasons and entity use codes, see [https://knowledge.avalara.com/bundle/dqa1657870670369\_dqa1657870670369/page/Exempt\_reason\_matrix\_for\_the\_U.S.\_and\_Canada\_entity\_use\_code\_list.html#pus1650667484575](https://knowledge.avalara.com/bundle/dqa1657870670369_dqa1657870670369/page/Exempt_reason_matrix_for_the_U.S._and_Canada_entity_use_code_list.html#pus1650667484575)
---
# Configuring Sovos
https://docs.ultracart.com/compliance-legal/sales-tax/configuring-sovos
doc_type: how-to
# About
> [Sovos](https://sovos.com/) is a cloud-based sales tax calculation and reporting solution.
>
> “The Sovos Intelligent Compliance Cloud – the first complete solution for modern tax – is a continuous and connected platform for tax determination, e-invoicing compliance and tax reporting to governments around the world.
>
> We support 7,000 customers, including half of the Fortune 500, and integrate with a wide variety of business applications. Our team is based throughout North America, Latin America and Europe, and we are owned by London-based [**Hg**](https://hgcapital.com/).“
## Navigation
:::info
**NAVIGATE:** Main Menu → Configuration → (middle menu) Checkout → Sales Tax → (Sovos section) Settings
:::
# Configuration
From the Sales Tax configuration page, in the Sovos section click the ‘Settings’ button:

You’ll be presented with a configuration page prompting you for your Sovos credentials:

NOTE: If you do not already have a Sovos account, click the blue “Sign Up” button.
If you already have and account, you’ll enter your Secret Key and Access Key then click the back button.
Now that you have your credentials configured, click the 'Select' button:

# Testing the Connection
Now that we have configured our Sovos credentials and have Sovoas as the active sales tax solution, you’ll want to test the connection.
Navigate back to the ‘Settings’ and enable the first slider titled ‘Enable test mode to test your connection' and the third slider titled '**Send test orders to Sovos**’, then click the save button to save the changes:

Next place a test order, then we will inspect the logs to confirm that we are properly connected.
# Taking Sovos Live
After reviewing the test order sales tax calculation and reviewing the Sovos logs to confirm a successful sales tax calculation, we need to remove the Test Mode and send test orders settings:

Make sure to save the changes.
**Congratulations, Sovos is now the active Sales Tax solution for your UltraCart account!**
# Tax Exempt Customers
Marking a customer profile **Tax Exempt** in UltraCart is not enough on its own once Sovos is calculating your tax. Sovos decides the exemption from its own customer record, so you also need to:
1. Enter the customer's **Sovos Customer Code** on the **Taxes** tab of their UltraCart customer profile.
2. Confirm a customer record exists in Sovos under that same code, with the exemption on file.
3. Have the customer log in to their customer profile during checkout. A guest order is taxed normally, even when the email address matches an exempt profile.
See [Tax Exempt Customers](./index.md) for the full walkthrough and for what to check when an exempt customer is charged tax anyway.
---
# Configuring TaxJar
https://docs.ultracart.com/compliance-legal/sales-tax/configuring-taxjar
doc_type: how-to
:::info
**Navigate:** Main Menu → Configuration → (middle menu) checkout → Sales Tax
:::
# Introduction
[http://taxjar.com](http://taxjar.com) TaxJar is a cloud-based sales tax automation platform that helps merchants monitor nexus thresholds, calculate accurate sales tax, and manage multi-state compliance. UltraCart’s TaxJar integration connects your orders to TaxJar in real time, allowing TaxJar to calculate tax at checkout and receive finalized order data (when enabled).
This guide walks you through configuring TaxJar within UltraCart and includes a new FAQ section with guidance for exporting historical orders for import into TaxJar.
* * *
## Prerequisites
Before configuring TaxJar:
- A TaxJar account with access to the **SmartCalcs API Token**
- Administrator access to your UltraCart account
- Basic understanding of your nexus and filing requirements
- (Optional) Access to UltraCart’s **Export Orders** tool if you plan to upload historical transactions to TaxJar
* * *
## Configuring TaxJar in UltraCart
### 1\. Enable TaxJar Integration
1. Navigate to:
**Main Menu → Configuration → Checkout → Sales Tax**
2. Locate **TaxJar** in the list of available providers.
3. Check the **Active** box.
4. Click **Save**.

### 2\. Open the TaxJar Settings
1. Click **Settings** next to the TaxJar provider.

2. Complete the configuration fields described below.

* * *
## TaxJar Configuration Options
### API Token
Paste your TaxJar SmartCalcs **Live API Token** into the field.
To obtain your token:
1. Log into your TaxJar account at [https://app.taxjar.com](https://app.taxjar.com) .
2. Navigate to **Account**.
3. Select **SmartCalcs API** in the left navigation.
4. Copy the **Live Token** displayed.

### Additional Settings
| Setting | Description |
| --- | --- |
| **Active** | Enables or disables the TaxJar integration. Must be enabled to calculate tax via TaxJar. |
| **Use Distribution Center as From Address** | Sends your UltraCart distribution center location as the origin for tax calculations. |
| **Estimate Tax Only** | UltraCart will request calculations but **will not send finalized orders or refunds** to TaxJar. |
| **Send Test Orders Through to TaxJar** | Sends test orders into your TaxJar dashboard for validation and onboarding. |
| **Send Orders Outside Your Nexuses to TaxJar** | Sends all orders to TaxJar so they can determine whether thresholds have been reached in other states. May increase API call volume. |
| **Do Not Send Channel Partner Orders** | Prevents marketplace or channel-partner orders from being transmitted. |
* * *
## Test the TaxJar Connection
After entering your API token:
1. Click **Test Connection**.
2. UltraCart will request the current tax categories and nexus regions from TaxJar.
3. Successful output typically includes ~29–30 tax categories.

The test output should look something like this:

There should always be about 29 categories. These categories are managed by Taxjar and may vary, but it should always be around 30. Zero means a problem!
> **Warning:** If you see **0 categories**, your API token or account permissions may be incorrect.
* * *
To minimize the number of API calls to TaxJar, UltraCart will look up the TaxJar Nexus Regions and only send them orders for those particular regions. You can see the Nexus regions in the "Test Connection" output as shown below.
## Configuring Tax Codes
### Item Tax Codes
1. Open an item in the **Item Editor**.
2. Navigate to the **Tax** tab (last tab).
3. Select a tax code or search from the list managed by TaxJar.

### Customer Tax Codes
1. Edit a customer profile.
2. Scroll to the **Taxes** section at the bottom.
3. Add tax codes or exemption details as needed.

> **Prerequisite:** Tax-exempt customers must also be created inside TaxJar. Copy the customer’s **TaxJar Customer Code** back into UltraCart.
:::info
**ATTENTION: In order to apply customer specific tax settings (such as non taxable customers) you’ll need to log into TaxJar and create the customer there, then copy and paste the TaxJar Customer Code (TaxJar customer identifier) into the Taxes tab of the customer profile editor, as displayed above.**
:::
Linking the two records is only part of it. The customer also has to log in to their customer profile during checkout to receive the exemption. A guest order is taxed normally, even when the email address on it matches an exempt profile exactly.
See [Tax Exempt Customers](./index.md) for all three requirements and for what to check when an exempt customer is charged tax anyway.
### Shipping Method Tax Codes

1. Navigate to shipping method configuration.
2. Assign a tax code to each method as needed.
* * *
# FAQ
## How do I export historical order data from UltraCart for import into TaxJar?
TaxJar may request or require historical transaction data so it can:
- Determine economic nexus thresholds
- Assess current liability per state
- Provide more accurate compliance monitoring
UltraCart does **not** automatically send past/historical orders to TaxJar.
You must export them manually using the **Export Orders** tool.
### Step 1 — Create or Reuse an Export Mapping
If you do not yet have an export mapping:
1. Navigate to:
**Main Menu → Configuration → Back Office → Exporting Orders**
2. Click **New** to create a mapping.
3. Select your preferred format (CSV is generally acceptable for TaxJar history imports).
4. Add required fields such as:
- Order ID
- Order Date
- Customer billing/shipping address
- Order total
- Tax collected
- Line items (if desired)
_See the attached Export Orders PDF for all field definitions._
5. Save the mapping.
\[Image Placeholder\]
### Step 2 — Export Historical Orders
1. Navigate to:
**Main Menu → Operations → Order Management → Export Orders**
2. Choose your mapping from the **Export Mapping** dropdown.
3. Set your **Order Location** (e.g., Completed).
4. Use the **Date Range** selector to choose the historical period you need.
5. Click **Export** to download the file.
> **Tip:** XLS exports are limited to 20,000 records per batch. Use CSV or XML if you have more data (recommended for long-time merchants).
### Step 3 — Import the File into TaxJar
TaxJar supports historical order uploads, typically via CSV.
As of the latest available information, merchants may:
- Upload transactions through the **Transactions** section of the TaxJar Dashboard,
- Use the **Import CSV** button if available, or
- Provide the file to TaxJar Support for ingestion.
Because TaxJar occasionally changes the file format requirements, headers, and import workflow, please refer to:
**TaxJar Support Documentation:** [https://support.taxjar.com](https://support.taxjar.com)
or contact: [**support@taxjar.com**](mailto:support@taxjar.com)
> **Important:** TaxJar may require specific field names or formatting. Always verify your exported CSV matches their import template.
* * *
## If I refund an order in UltraCart, why does it replace the original transaction in TaxJar?
TaxJar’s API processes refunds as adjustments to the original transaction. TaxJar manages these records internally; this behavior is expected.
* * *
## Why does TaxJar show nearly twice as many API requests as orders?
UltraCart makes rating calls throughout the checkout process whenever calculation-relevant data changes (cart updates, address changes, etc.).
Caching minimizes requests but cannot eliminate them.
A higher API call count is normal and expected.
* * *
# Next Steps
- Configure **Item Tax Codes** for accurate calculations.
- Review your nexus obligations inside TaxJar.
- Consider exporting historical data if TaxJar requires it for threshold monitoring.
- Review related documentation:
- _Export Orders – Order Management Tools_
- _Sales Tax Configuration Overview_
- _Customer Tax Exemptions and TaxJar Customer Codes_
# TaxJar Knowledgebase Articles
[https://support.taxjar.com/article/116-add-or-remove-states-from-your-dashboard](https://support.taxjar.com/article/116-add-or-remove-states-from-your-dashboard)
---
# Correcting Tax on a Processed Order
https://docs.ultracart.com/compliance-legal/sales-tax/correcting-tax-on-a-processed-order
doc_type: how-to
# Correcting Tax on a Processed Order
Once an order reaches **Processed** status, UltraCart locks its tax amount. The order's Tax page offers no editable tax field, and changing a line item's taxable flag does not produce a new tax total. This page explains why that happens, how to confirm you are hitting the lock rather than a defect, and the one supported way to correct the tax.
You are most likely to run into this in three situations: reconciling a manually recreated order against a payment that was captured outside UltraCart, fixing a taxable flag that was set wrong before checkout, or discovering that a tax exempt customer was charged tax.
## Quick diagnostics
| Symptom | Likely cause | Where to check |
| --- | --- | --- |
| The Tax page shows a tax amount with no way to change it | The order is `Processed` or `Processed (Pending Clearance)` | Order detail, Payment Status |
| Changing a line item's taxable flag leaves the order's tax total unchanged | Tax was calculated and filed through the tax engine when the order processed, and a flag change does not trigger a fresh calculation | Order detail, Items tab, then the Tax page |
| Recalculating completes without an error, but the tax total is identical | Recalculation only runs for orders that have not processed yet | No new tax engine estimate appears in the provider log |
| A recreated order cannot be made to match a tax amount from an external payment | The recreated order was saved as Processed before the correct tax was set | Compare the order's locked tax against the amount on the original capture |
| An order for a tax exempt customer was charged tax | The customer checked out as a guest, or the exemption was never configured on the tax provider's side | Whether the order is linked to a customer profile, then that profile's Taxes tab |
## Why tax is locked once an order is Processed
**Processed** means payment was captured. By that point, an integrated tax engine has normally already filed a transaction record against the order. Editing the tax in place afterwards would leave UltraCart displaying one figure while the tax engine reports another, which breaks the audit trail you depend on when you file and remit.
For that reason the Tax page on a Processed order exposes no editable tax amount, and toggling an item's taxable flag starts no new calculation.
:::note
This is expected behavior, not a defect. There is no supported way to override or recalculate tax on a Processed order in place.
:::
## Common issues
### The tax amount is not editable on a Processed order
**Symptoms:** The Tax page for an order shows a fixed tax amount and offers no field to change it.
**Root cause:** The order is in `Processed` status, so UltraCart has locked the calculated tax.
**Diagnosis:** Check the order's Payment Status. If it reads `Processed` or `Processed (Pending Clearance)`, the tax amount is locked.
**Solution:** Refund the order and create a replacement with the corrected item and tax setup. See [Refund and recreate the order](#refund-and-recreate-the-order).
### Changing a taxable flag does not update the tax total
**Symptoms:** Marking a line item taxable or non-taxable changes the taxable subtotal on the Items tab, but the order's tax total stays where it was even after you recalculate.
**Root cause:** Recalculation re-invokes the tax engine only for orders that have not processed yet. On a Processed order it sends no new estimate request.
**Diagnosis:** Look for a new estimate or transaction entry in the tax provider log immediately after you recalculate. If nothing appears, no recalculation ran. The [Sales Tax](./index.md) page describes where those logs live.
**Solution:** Refund and recreate the order rather than editing it in place.
### A recreated order will not match a prior payment's tax
**Symptoms:** A replacement order created to reconcile a payment that never synced into UltraCart cannot be made to match that payment's tax amount, because the replacement was already processed with a different tax figure, often zero.
**Root cause:** The same lock applies to the replacement. Once it is Processed, its tax cannot be edited toward a target figure.
**Diagnosis:** Compare the target tax amount from the original payment or capture against the locked tax on the replacement order.
**Solution:** Set the item configuration and tax correctly before you create a replacement order, because you cannot correct it afterwards. If one has already processed with the wrong tax, refund and recreate it.
### A tax exempt customer was charged tax
**Symptoms:** A customer whose profile is marked **Tax Exempt** placed an order that collected sales tax, and the order has since processed.
**Root cause:** The exemption did not reach the tax calculation. Usually the customer checked out as a guest rather than logging in to their customer profile, so the profile's exempt status never applied. With Avalara, TaxJar, Sovos, or Anrok, it can instead mean the provider specific customer fields were blank, or no matching exempt customer record existed inside the provider's system.
**Diagnosis:** Check whether the order is linked to a customer profile and whether the customer logged in. Then open that profile's **Taxes** tab and confirm both **Tax Exempt** and the provider specific fields. Then check the tax provider log for the order: the request shows which customer code UltraCart sent, and the response shows the exempt amount the provider returned.
**Solution:** Repair the setup first, so the next order is right, then correct this order by refunding and recreating it. [Tax Exempt Customers](./index.md) walks the three requirements in order.
## Refund and recreate the order
This is the only supported correction path.
:::warning
Refunding and recreating a live customer order cannot be undone. Confirm item pricing, tax jurisdiction, and payment status first, and take particular care when you are reconciling against an external payment, where charging the customer twice or duplicating fulfillment are real risks.
:::
1. Confirm the correct item setup, pricing, and tax amount before you change anything. If the customer should be tax exempt, confirm their profile and provider side setup now and make sure they log in to that profile, because the replacement order locks its tax the same way this one did.
2. Refund the Processed order. See [How do I perform a Refund](../../orders-fulfillment/tutorials/order-management-tutorials/how-do-i-perform-a-refund/index.md).
3. Create a new order with the same items and the corrected tax and taxable settings. See [Creating an order](../../customers-crm/order-entry/creating-an-order.md).
4. If the corrected order should show a zero balance due, because payment was collected outside UltraCart, check that the payment and balance status match before you complete it.
5. Confirm the new order shows the gross, tax, and total you expect, and that the correction triggered no duplicate fulfillment or customer notification.
## Where to check
| Tool | What it tells you |
| --- | --- |
| Order detail, Payment Status | Whether the order is Processed, and therefore tax locked |
| Order detail, Tax page | On a Processed order, the missing editable tax field confirms the lock. On an order that has not processed, the field is editable |
| Customer profile, Taxes tab | Whether the customer is marked Tax Exempt and whether the provider specific customer fields are filled in |
| Tax provider log | Whether a recalculation actually reached the tax engine. See [Sales Tax](./index.md) for where each provider's log button sits |
| Tax engine dashboard | The filed transaction as the provider recorded it |
| Order history | A record of the refund and the replacement order, for later reconciliation |
## When to escalate
A locked tax amount is not an engineering defect, so do not file it as a bug. Escalate for human judgment when:
- No original order exists to confirm the correct historical pricing before you recreate one.
- You cannot tell whether a payment capture is a duplicate or a legitimate second charge.
- The target tax amount does not match the tax engine's current rate for that jurisdiction, which can happen when the rate changed after the original sale.
- The item or SKU that a replacement order should contain is ambiguous.
Include the affected order IDs, the target tax amount and where it came from, and what makes refund and recreate difficult for that particular order.
## Related documentation
- [Sales Tax](./index.md) covers the tax methods UltraCart supports, the three requirements for a tax exempt customer, and where each provider's logs live.
- [Tax configuration and exemptions](../../customers-crm/customers/tax-configuration-and-exemptions.md) covers the customer profile Taxes tab field by field.
- [Configuring TaxJar](./configuring-taxjar.md) covers TaxJar setup, including how refunds are sent as adjustments to the original transaction.
- [How do I perform a Refund](../../orders-fulfillment/tutorials/order-management-tutorials/how-do-i-perform-a-refund/index.md) covers full, partial, and batch refunds.
- [Creating an order](../../customers-crm/order-entry/creating-an-order.md) covers building the replacement order.
- [Pending Clearance](../../orders-fulfillment/order-management/review-orders/pending-clearance.md) explains the holding state behind `Processed (Pending Clearance)`.
---
# FTC 'Click-to-cancel' Subscription Cancellation Compliance Guide
https://docs.ultracart.com/compliance-legal/tutorials/ftc-click-to-cancel-subscription-cancell
doc_type: tutorial
# About
The Federal Trade Commission (FTC) has introduced new **"Click-to-Cancel"** regulations aimed at simplifying the process for customers to cancel subscriptions. These rules apply to **all recurring payment programs**, including subscriptions, free-to-paid trials, and automatic renewals.
As a merchant on UltraCart, you must ensure that **canceling a subscription is as easy as signing up for one**. This guide outlines how UltraCart helps you comply and what steps you can take to meet the new federal and state-level requirements.
## 🚨 Key Requirements from the FTC
- **Equal Access**: If customers sign up online, they must be able to cancel online—**no phone call or live chat required**.
- **Prominent and Simple**: The cancellation process must be **obvious, fast, and easy to execute**.
- **No Misrepresentation**: You cannot mislead customers about the cost, features, or cancellation process.
- **Affirmative Consent**: Customers must explicitly consent to any negative option feature (e.g., auto-renewals).
- **Compliance Deadline**: Businesses must comply **within 180 days of publication in the Federal Register**.
UltraCart provides multiple solutions to help you meet these requirements.
* * *
## ✅ UltraCart Merchant Options for Easy Cancellation
### 1\. Email-Based Cancel Link
Customers who subscribe to a product will automatically receive an email that includes a **direct cancellation link**. This allows them to cancel at any time from their inbox, without logging in.
> **TIP:** Make sure your subscription email templates include the cancel link and are not removed or overwritten.
* * *
### 2\. Website Cancel Link (RECOMMENDED)
You can add a **cancel subscription link directly on your website** (e.g., in your Help Center, footer, or FAQ). This is the fastest way to meet the "click-to-cancel" rule.
#### 🔍 To find your account's cancel link:
**NAVIGATE:**
Main Menu → Configuration → Order Management → Auto Order Processing
**STEPS:**
1. Scroll to the **“Links”** section at the bottom.
2. Copy the **Cancel Subscription** link.
3. Paste it in a prominent place on your site.
> Customers clicking this link will be taken directly to a cancellation page—**no login required**.
* * *
### 3\. Virtual Assistant Chat
UltraCart’s **Virtual Assistant Web Chat** can validate customers and allow them to manage their subscriptions directly within the chat window—including **real-time cancellations**.
> This option works well for merchants who signed up customers via chat or who use chat for ongoing support.
* * *
### 4\. Customer Portal Cancel Option
If you use the **My Account customer portal**, customers can also cancel their subscriptions there.
**NAVIGATE:**
My Account → Subscriptions → \[Select Subscription\] → Cancel
**This self-service option aligns with FTC guidelines and supports a seamless user experience.**
In addition to the required cancellation option, the customer portal can be configured to allow the customer other options to cancelling, such as skipping a delivery or pausing the delivery, changing the next shipment date. These options may help retain the customer.
* * *
### 5\. Custom Portal via REST API
If you maintain a **custom customer portal**, use the UltraCart REST API to implement a cancellation endpoint.
#### 🔗 Relevant Endpoint:
```
DELETE /rest/subscription/{subscriptionId}
```
Use this to trigger real-time cancellations in your custom interface.
* * *
## 📝 Final Notes
UltraCart helps you stay compliant with both **federal FTC regulations** and **state-level automatic renewal laws** by making cancellation:
- **Frictionless**
- **Visible and accessible**
- **Consistent with the original sign-up method**
We recommend placing **at least one cancel option on your public site** and verifying that your email templates include a working cancellation link.
* * *
Need help implementing your cancellation options?
📩 Contact UltraCart Support at [support@ultracart.com](mailto:support@ultracart.com)
---
# UltraCart PCI Compliance
https://docs.ultracart.com/compliance-legal/ultracart-pci-compliance
doc_type: explanation
## Introduction
PCI compliance is an important part of your online store, and requires that you and your vendors, such as UltraCart and your payment gateway, work together to make sure that each step in the payment process is performed with the appropriate controls and safeguards. To this end, your merchant account provider/gateway may require you to submit proof of PCI Compliance. The following should help you deal with this requirement.
:::warning
PCI compliance is a complex process that has many parts. While we strive to provide the most accurate and timely information possible, we cannot guarantee that the information we provide is the most recent and accurate at the time you access this page. Therefore, this information is presented AS-IS. You should contact your legal counsel or a qualified PCI consulting organization if you are unsure of any of the requirements or guidelines.
:::
## PCI Level 1 Certification
UltraCart is a PCI level 1 certified service provider. You can read more about our compliance efforts and status at [http://www.ultracart.com/resources/pci-compliance/](http://www.ultracart.com/resources/pci-compliance/)
### Verification with VISA / MasterCard
Your payment gateway or merchant account provider may require proof of UltraCart's PCI Level 1 Compliance. You can search the list of such vendors at the following web sites.
- Visa - search the [Visa Global Registry of Service Providers](https://www.visa.com/splisting/searchGrsp.do) for "UltraCart".
- Mastercard - open [Mastercard PCI 360](https://www.mastercard.com/global/en/business/cybersecurity-fraud-prevention/site-data-protection-pci/pci-360.html) and download the current **SDP Compliant Registered Service Provider List**, which Mastercard republishes monthly.
## Self Assessment Questionnaire
If you are categorized as a Level 2 or greater merchant by either Visa or MasterCard (or both), then you are required to complete a PCI Self Assessment Questionnaire (SAQ), as well as possess a Certificate of Compliance provided by a PCI Approved Scanning Vendor.
Every SAQ, along with the **SAQ Instructions and Guidelines** document that tells you which SAQ applies to your environment, is published free of charge in the PCI Security Standards Council document library:
[https://www.pcisecuritystandards.org/document_library/](https://www.pcisecuritystandards.org/document_library/)
Filter the library by **SAQ** to list the questionnaires. Read the SAQ Instructions and Guidelines first to confirm the eligibility criteria you meet, then download the matching SAQ. The PCI SSC [Merchant Resources](https://www.pcisecuritystandards.org/merchants/) page has additional background on the self-assessment process.
## Third Party Scanning
UltraCart utilizes the services of a PCI Approved Scanning Vendor (ASV) to perform quarterly external vulnerability scans of our platform, as required by PCI DSS.
:::info
If your merchant account provider/gateway requires that you have a Certificate of Compliance that includes your company name rather than UltraCart's, you will need to purchase PCI scanning services of your own. You can view [the list of Approved Scanning Vendors at the PCI website](https://www.pcisecuritystandards.org/assessors_and_solutions/approved_scanning_vendors/).
:::
---
# 2025 Intuit PCI Compliance Notice
https://docs.ultracart.com/compliance-legal/ultracart-pci-compliance/2025-intuit-pci-compliance-notice
doc_type: explanation
# Intuit has sent out a notice for 2025 to their merchant’s about update to their PCI Compliance protocol
“Thank you for being a QuickBooks Payments customer. Keeping you updated on PCI changes and new requirements is our priority. Today, we’re emailing you to make you aware of two new PCI compliance requirements for merchants with a payments page on their website. These new requirements go into effect on April 1, 2025. Below is more information about what these requirements are and recommended steps to take to ensure you are compliant. You can read more about these new requirements on the PCI webpage.
What are the new requirements?
Requirement 6.4.3 and Requirement 11.6.1 impact businesses that enable online transactions on their websites. The requirements are designed to prevent eskimming and help maintain the security of a business’s payment pages. Eskimming is when bad actors steal customers’ payment information from a retailer’s website when making an online transaction.
•**Requirement 6.4.3 requires e-commerce merchants to create an inventory of every script that runs on their payment pages. Maintaining an inventory of scripts allows merchants to see potential malicious scripts installed on their website without permission.**
**•Requirement 11.6.1 requires merchants to regularly monitor the scripts on their payment pages so they can more easily identify any new scripts added to the checkout experience that may be malicious.**
Together, these requirements give businesses the ability to know when a skimmer has breached their payments page.
What are the steps to become compliant?
These new requirements go into effect on April 1, 2025. If you have already completed your PCI compliance certification for 2025 and have a payments page, you need to meet these new requirements by April 1 to ensure you’re PCI compliant.
For merchants with payments pages who haven’t finished their 2025 PCI compliance, these new requirements will be included in your PCI compliance certification once completed.
If you need help, Intuit has partnered with SecurityMetrics to help meet your PCI compliance needs.The SecurityMetrics PCI compliance process includes these new requirements and is designed to be as easy as possible. Go to [www.securitymetrics.com/pcidss/intuit](http://www.securitymetrics.com/pcidss/intuit) to get started online. You can also call SecurityMetrics at 800-557-4684.
Other PCI compliance vendors are available. However, Intuit has negotiated a discount for QuickBooks Payments customers and streamlined the process to make it as easy as possible to be PCI compliant and meet these new requirements. All that’s needed to get set up with SecurityMetrics is the URL of your payment page.
Thank you for choosing Intuit and being a QuickBooks Payments customer.
Sincerely,
The QuickBooks Team”
# UltraCart Recommendations in regard to this notice
We recommend that you create an inventory of any additional conversion and tracking scripts that you are running on your checkout to fulfill this requirement for your self assessment question. This could include Google Tag Manager, Facebook, Pinterest, etc. depending upon what marketing trackers you have configured.
That being said, we collect all payment information within isolated IFRAMES on a different domain to prevent any script on your checkout from being able to observe the credit card input fields. This technique, often referred to as “_**hosted fields**_”, prevents scripts from doing malicious things like scraping credit cards. You will see all of this within the network table of the browser developer tools as [token.ultracart.com](http://token.ultracart.com) which is our PCI vault.
---
# E-commerce Compliance and Security Guide for UltraCart Merchants for 2025
https://docs.ultracart.com/compliance-legal/ultracart-pci-compliance/e-commerce-compliance-and-security-guide
doc_type: explanation
## Introduction
As an e-commerce merchant using UltraCart, staying compliant with evolving regulations and maintaining robust security practices is essential for protecting your business and customers. This comprehensive guide covers critical compliance requirements and security best practices that took effect in 2025, including new PCI compliance standards, FTC click-to-cancel regulations, and fraud prevention strategies.
This guide will help you understand your obligations and provide actionable steps to ensure your UltraCart storefront meets all current requirements while protecting against fraud and security threats.
## Prerequisites
Before implementing the recommendations in this guide, ensure you have:
- Administrative access to your UltraCart merchant account
- Access to your storefront's configuration settings
- Basic understanding of your current payment processing setup
- Knowledge of any third-party scripts or tracking tools currently installed on your checkout pages
## 2025 PCI Compliance Requirements
### New Script Monitoring Requirements
As of April 1, 2025, two new PCI compliance requirements affect businesses with online payment pages: Requirement 6.4.3 requires e-commerce merchants to create an inventory of every script that runs on their payment pages, while Requirement 11.6.1 requires merchants to regularly monitor scripts on their payment pages to identify potentially malicious additions.
> **Important:** These requirements are designed to prevent e-skimming attacks where malicious actors steal customer payment information from retailer websites during online transactions.
### Understanding UltraCart's Security Architecture
UltraCart collects all payment information within isolated IFRAMES on a different domain to prevent any script on your checkout from observing credit card input fields. This "hosted fields" technique prevents scripts from scraping credit cards, with all payment processing handled through [token.ultracart.com](http://token.ultracart.com), which is UltraCart's PCI vault.
\[Image Placeholder: UltraCart Payment Security Architecture Diagram\]
### Creating Your Script Inventory
To comply with PCI Requirement 6.4.3, you need to document all scripts running on your checkout pages:
1. **Identify Marketing and Tracking Scripts**
- Google Tag Manager
- Facebook Pixel
- Pinterest tracking
- Google Analytics
- Any custom conversion tracking scripts
2. **Document Third-Party Integrations**
- Live chat widgets
- Customer review platforms
- Abandoned cart recovery tools
- Email marketing pixels
3. **Use UltraCart's PCI Payment Script Monitor** Navigate to your StoreFront Advanced settings to access the built-in monitoring tool.
### Implementing Script Monitoring
UltraCart provides an automated PCI Payment Script Monitor in your StoreFront Advanced settings:
#### Monitor Mode
While in Monitor Mode, UltraCart automatically analyzes XHR and Fetch requests, scripts, and iframes loaded on your payment URL. Each domain that sends or receives data from an external source is logged and assigned a security rating (1–10), category, and description.
#### Enforcement Mode
Monitor Mode runs for 7 days tuning the Content Security Policy (CSP) until there are no more violations detected. After this period with no additional entries, the payment URL automatically transitions to Enforcement Mode, which blocks any unauthorized scripts, XHR requests, or iframes.
**To enable PCI Script Monitoring:**
1. Navigate to **StoreFront → Advanced → PCI Payment Script Monitor**
2. Click **Enable Monitor Mode**
3. Allow the 7-day tuning period to complete
4. Review the generated security report
5. Manually approve any legitimate scripts that were flagged
\[Image Placeholder: PCI Payment Script Monitor Interface Screenshot\]
> **Tip:** Document all approved scripts in a spreadsheet with their purpose, security rating, and approval date for your PCI compliance records.
## FTC Click-to-Cancel Compliance
### Understanding the Requirements
The Federal Trade Commission has introduced new "Click-to-Cancel" regulations that apply to all recurring payment programs, including subscriptions, free-to-paid trials, and automatic renewals. The key requirement is that canceling a subscription must be as easy as signing up for one.
### Key FTC Requirements
The regulations mandate equal access (if customers sign up online, they must be able to cancel online), prominent and simple cancellation processes, no misrepresentation of costs or cancellation procedures, and affirmative consent for auto-renewals.
### UltraCart Compliance Solutions
UltraCart provides multiple options to help you meet click-to-cancel requirements:
#### 1\. Website Cancel Link (Recommended)
Adding the easy cancel subscription link directly on your website in prominent locations like your Help Center, footer, or FAQ section.
**To implement:**
1. Navigate to **Main Menu → Configuration → Order Management → Auto Order Processing**
2. Scroll to the "Links" section at the bottom
3. Copy the Cancel Subscription link
4. Add this link prominently on your website
**Recommended placement locations:**
- Website footer
- Help Center or FAQ page
- Customer support page
- Account management section
\[Image Placeholder: Cancel Link Configuration Screenshot\]
#### 2\. My Account Customer Portal (Recommended)
The My Account customer portal allows customers to cancel subscriptions at My Account → Subscriptions → \[Select Subscription\] → Cancel, and can be configured to offer alternatives like skipping deliveries, pausing subscriptions, or changing shipment dates.
#### 3\. Virtual Assistant Chat Integration (Optional, Recommened)
UltraCart's Virtual Assistant Web Chat can validate customers and allow them to manage subscriptions directly within the chat window, including real-time cancellations.
#### 4\. Easy Cancel Email Notification (Optional, but Recommended)
Customers who subscribe automatically receive an email with a direct cancellation link, allowing them to cancel from their inbox without logging in.
> **Important:** Ensure your subscription email templates include the cancel link and haven't been removed or overwritten in customizations or suppressed within the Auto Order Processing configuration page or within the item editor auto order tab option settings.
#### 5\. REST Based Integration Option
For merchants with custom portals, use the UltraCart REST API:
Auto orders should be managed using the `AutoOrderApi` class, updating the auto order status to ‘inactive’:
PHP example:
```
getAutoOrder($auto_order_oid, 'items');
if ($api_response->getError() != null) {
error_log($api_response->getError()->getDeveloperMessage());
error_log($api_response->getError()->getUserMessage());
echo 'Auto order could not be retrieved. See php error log.';
exit();
}
$auto_order = $api_response->getAutoOrder();
// Set status to inactive to cancel the auto order
$auto_order->setStatus('inactive');
// Update the auto order
$update_response = $auto_order_api->updateAutoOrder($auto_order, $auto_order_oid);
if ($update_response->getError() != null) {
error_log($update_response->getError()->getDeveloperMessage());
error_log($update_response->getError()->getUserMessage());
echo 'Auto order could not be canceled. See php error log.';
exit();
}
echo 'Auto order was canceled successfully.';
} catch (\Exception $e) {
error_log('Exception when calling AutoOrderApi: ' . $e->getMessage());
}
?>
```
# Implementation Checklist
- \[ \] Verify cancel links are present in all subscription emails
- \[ \] Add prominent cancel link to website footer
- \[ \] Test cancellation process from customer perspective
- \[ \] Document cancellation options in customer support materials
- \[ \] Train customer service team on new requirements
## Credit Card Fraud Prevention
### Understanding the Fraud Landscape
Credit card fraud remains a significant challenge, with consumers reporting over $10 billion in fraud losses in 2023, marking a 14% increase over 2022. The United States accounts for 46% of global credit card fraud losses, with global losses projected to reach $43.47 billion by 2028.
### Essential Fraud Prevention Measures
#### Basic Security Controls
1. **Address Verification System (AVS)**
- Verify billing addresses against card issuer records
- Configure strict AVS matching rules
2. **Card Security Codes**
- Require CVC2/CVV2 for every transaction
- Never store security codes after processing
3. **3D Secure 2.0 Authentication**
- Enable 3D Secure 2.0 via [http://Paay.co](http://Paay.co) for enhanced authentication
- Reduces liability for authenticated transactions
#### Advanced Fraud Detection
**Recommended Third-Party Integrations:**
- **IPQualityScore**: Advanced IP and device fingerprinting
- **Kount**: Machine learning-based fraud detection
- **Eye4Fraud**: Real-time transaction scoring
#### UltraCart Fraud Prevention Configuration
Navigate to your Fraud Prevention settings and implement these recommended rules:
**Address Rules (Premium):**
- Set fraud score thresholds for automatic review
- Flag transactions when billing doesn't match shipping address
**Payment Rules:**
- Monitor excessive credit card number changes during checkout attempts
- Set limits on payment method modifications
**IP/Subnet Rules:**
- Flag transactions where IP country doesn't match billing/shipping country
- Monitor for suspicious geographic patterns
\[Image Placeholder: Fraud Prevention Configuration Interface\]
> **Recommended Action:** Use "Process Payment and Review" for most fraud rules to avoid blocking legitimate customers while maintaining security.
### Implementing Fraud Rules
1. Navigate to **Configuration → Fraud Prevention**
2. Enable recommended rules based on your risk tolerance:
```
• If fraud score exceeds [your threshold]
• If billing address does not match shipping
• If user changes credit card number [X] times for attempted transactions
• If IP country does not match bill to/ship to country
```
3. Set appropriate thresholds based on your business model
4. Monitor fraud alerts and adjust rules as needed
## Storefront Security Review
### Regular Security Audits
Perform monthly security reviews of your storefront:
#### Script Inventory Review
1. **Monthly Script Audit**
- Review PCI Payment Script Monitor reports
- Document any new scripts or changes
- Remove unnecessary tracking codes
2. **Third-Party Integration Assessment**
- Verify all integrations are still necessary
- Check for security updates from vendors
- Remove deprecated or unused integrations
#### SSL Certificate Monitoring
- Ensure SSL certificates are current and properly configured
- Monitor certificate expiration dates
- Verify proper implementation across all storefront pages
\[Image Placeholder: SSL Certificate Status Dashboard\]
### Performance and Security Optimization
#### reCAPTCHA Implementation
To protect against automated attacks:
1. **Register with Google reCAPTCHA v2**
- Visit Google reCAPTCHA admin console
- Create new site registration
- Select "I'm not a robot" checkbox type
2. **Install in UltraCart**
- Navigate to **StoreFront → Advanced → reCAPTCHA**
- Enter Site Key and Secret Key
- Save configuration
3. **Enable for Affiliate Signups**
- Verify **Advanced → Affiliate Management → Settings → Require Captcha** is checked
## Ongoing Compliance Maintenance
### Monthly Tasks
- \[ \] Review PCI Payment Script Monitor reports
- \[ \] Test subscription cancellation processes
- \[ \] Analyze fraud prevention rule performance
- \[ \] Update script inventory documentation
- \[ \] Monitor SSL certificate status
### Quarterly Tasks
- \[ \] Comprehensive fraud rule review and optimization
- \[ \] Customer cancellation process audit
- \[ \] Security vendor assessment
- \[ \] Staff training on new compliance requirements
### Annual Tasks
- \[ \] Complete PCI compliance certification
- \[ \] Review and update all compliance documentation
- \[ \] Evaluate new security technologies and integrations
- \[ \] Conduct comprehensive security assessment
## Troubleshooting
### Common PCI Compliance Issues
**Script Monitor False Positives:**
- Review flagged scripts for legitimate business purposes
- Manually approve necessary marketing and tracking scripts
- Document approval rationale for compliance records
**CSP Violations:**
- Check browser console for Content Security Policy errors
- Add legitimate domains to allowlist
- Remove or replace problematic scripts
### Cancellation Process Issues
**Missing Cancel Links:**
- Verify email template customizations haven't removed default links
- Check that cancel link generation is enabled in auto-order settings
- Test links from customer perspective
**API Integration Problems:**
- Verify API credentials and permissions
- Check endpoint URLs and request formatting
- Monitor API response codes and error messages
## Next Steps
After implementing the recommendations in this guide:
1. **Document Your Compliance Status**
- Create a compliance checklist
- Maintain records of all implemented security measures
- Schedule regular review meetings
2. **Staff Training**
- Train customer service team on new cancellation options
- Educate technical staff on PCI requirements
- Create standard operating procedures
3. **Monitor and Optimize**
- Set up automated monitoring for security alerts
- Regularly review fraud prevention effectiveness
- Stay informed about regulatory updates
4. **Professional Support**
- Consider working with PCI compliance specialists
- Engage legal counsel for complex compliance questions
- Utilize UltraCart support for technical implementation
> **Need Help?** Contact UltraCart Support at [support@ultracart.com](mailto:support@ultracart.com) for assistance with implementing any of these security and compliance measures.
By following this comprehensive guide, you'll ensure your UltraCart storefront meets current compliance requirements while providing a secure, user-friendly experience for your customers. Regular maintenance and monitoring of these systems will help protect your business from fraud and regulatory penalties while building customer trust.
---
# PCI Shared Responsibility Matrix
https://docs.ultracart.com/compliance-legal/ultracart-pci-compliance/shared-responsibility-matrix
doc_type: explanation
# PCI Shared Responsibility Matrix
The Payment Card Industry Data Security Standard (PCI DSS) is a set of security standards that applies to every organization that processes, stores, or transmits credit card information. Meeting it for an UltraCart store is not a single party's job. UltraCart, acting as your ecommerce provider, is responsible for the payment processing infrastructure and the technical controls around it. You, as the merchant, are responsible for what you add to your own checkout — most significantly, any custom JavaScript that runs on the checkout page.
This page states that division so both sides know exactly what they own. It reproduces UltraCart's Shared Responsibility document, which is classified for public use and can be shared with your acquiring bank, payment brand, or auditor.
## Why PCI responsibility is shared
Responsibility is split because each party controls a different part of the payment environment, and only the party in control can secure it. UltraCart manages the foundational infrastructure and technical security controls, drawing on its expertise in payment processing and cybersecurity. You manage the parts within your direct control, such as customizations to the checkout experience.
That delineation matters for three reasons:
- **Specialization** — each party focuses on its strengths: UltraCart on technical infrastructure, you on your own business processes.
- **Comprehensive coverage** — every facet of PCI compliance is addressed, with no overlap and no gaps.
- **Risk mitigation** — clear roles reduce the chance that something is overlooked, which improves the overall security posture.
For example, UltraCart secures the payment gateway and the underlying systems, while you must ensure that any custom JavaScript you add does not introduce vulnerabilities — such as cross-site scripting (XSS) — that could compromise the checkout page.
## The shared responsibility matrix
The table below lists each area of PCI DSS compliance, the party accountable for it, and what that accountability covers.
| Area of Responsibility | Responsible Party | Description |
|---|---|---|
| Payment Processing Infrastructure | UltraCart (ecommerce provider) | The entire payment processing system — including hardware, software, and network components — must be secure, resilient, and compliant with PCI DSS requirements. This includes maintaining up-to-date systems and safeguarding the infrastructure against unauthorized access. |
| Encryption and Protection of Cardholder Data | UltraCart (ecommerce provider) | All cardholder data must be protected using strong, industry-standard cryptographic methods during transmission over open networks and while stored. UltraCart implements, tests, and maintains these encryption mechanisms to prevent data breaches. |
| Network Security and Firewalls | UltraCart (ecommerce provider) | Robust firewalls must be deployed and maintained to shield the cardholder data environment from external threats. UltraCart configures, monitors, and regularly updates firewall rules to block unauthorized access and ensure network integrity. |
| System Configuration and Maintenance | UltraCart (ecommerce provider) | Systems must be securely configured by disabling unnecessary services and applying security patches in a timely manner. UltraCart oversees the initial setup and ongoing maintenance to mitigate vulnerabilities and ensure compliance with PCI DSS standards. |
| Access Control and Authentication | UltraCart (ecommerce provider) | Access to cardholder data and related systems must be strictly limited to authorized personnel. UltraCart implements and manages access control policies, including multi-factor authentication and role-based authorization, to prevent unauthorized use or disclosure of sensitive information. |
| Vulnerability Management and Patching | UltraCart (ecommerce provider) | Regular vulnerability scans and penetration tests must be conducted to identify and remediate security weaknesses. UltraCart oversees this process, ensuring that patches are applied promptly and that the environment remains secure against evolving threats. |
| Monitoring and Logging | UltraCart (ecommerce provider) | All access to network resources and cardholder data must be systematically logged and monitored for anomalies. UltraCart establishes and maintains logging systems, routinely reviewing logs to detect and respond to suspicious activity or potential breaches. |
| Incident Response | UltraCart (ecommerce provider) | In the event of a security incident, a well-defined incident response plan must be activated immediately. UltraCart develops, tests, and executes this plan to contain, mitigate, and recover from breaches effectively. |
| Compliance Validation and Reporting | UltraCart (ecommerce provider) | Regular assessments must be performed to validate PCI DSS compliance, and the required reports must be submitted to stakeholders such as acquiring banks or payment brands. This includes maintaining documentation and evidence of adherence to all applicable requirements. |
| Custom JavaScript on Checkout Page | Merchant | The merchant bears full responsibility for any custom JavaScript code integrated into the checkout page. This code must be secure, free of vulnerabilities, and must not interfere with the safe processing of cardholder data. The merchant is accountable for reviewing, testing, and validating the security of these scripts to prevent exploitation. |
## What you are accountable for
Your obligation under this matrix is the custom JavaScript running on your checkout page. UltraCart cannot review, test, or vouch for code that you or a third party add to your storefront, so that code sits squarely on your side of the line — including tag managers, analytics snippets, chat widgets, affiliate pixels, and anything else you install.
:::warning
Any custom JavaScript you add to the checkout page is your responsibility to review, test, and validate. Insecure scripts can expose cardholder data, break checkout, or put your PCI compliance at risk — regardless of whether you wrote them or a third-party vendor supplied them.
:::
Two features help you meet that obligation:
- The **PCI Payment Script Monitor** on the **StoreFront Advanced** screen inventories and monitors the scripts running on your payment pages. See [StoreFront Advanced Screen](../../storefronts-themes/storefront-user-guide/storefront-advanced-screen/index.md).
- The [E-commerce Compliance and Security Guide](./e-commerce-compliance-and-security-guide.md) walks through the current PCI DSS script requirements and how to satisfy them in UltraCart.
If you customize checkout through the Visual Builder rather than by writing code, see [StoreFront Checkout](../../storefronts-themes/storefront-visual-builder/storefront-checkout.md).
### If your page only links to UltraCart's checkout
A page that does nothing but redirect to UltraCart's fully hosted checkout is not exempt from PCI vulnerability scanning, even though it never displays, collects, or processes any payment card fields itself. PCI DSS v4.0 added Requirement 11.3.2 to the SAQ-A questionnaire: a quarterly external vulnerability scan of your own web server or domain by a PCI Approved Scanning Vendor (ASV), with a rescan required after significant changes under Requirement 11.3.2.1. That scan is separate from the one UltraCart's ASV already runs against UltraCart's own hosted checkout infrastructure. It applies to your page because a compromised link or redirect on your own site can send customers to a fraudulent checkout instead of UltraCart's, the same kind of attack behind Magecart-style card skimming.
This is different from embedding [UltraCart Hosted Credit Card Fields](../../checkout-payments/ultracart-hosted-credit-card-fields.md) directly in your own checkout page, where SAQ-A eligibility depends on using the hosted fields rather than serving the card number and CVV2 inputs yourself. Both approaches can keep you eligible for the simplified SAQ-A, and both carry this same external scan obligation for your own domain.
Arrange your quarterly scan with a [PCI Approved Scanning Vendor](https://www.pcisecuritystandards.org/assessors_and_solutions/approved_scanning_vendors/). As with the rest of this page, this is general information, not a compliance guarantee. Confirm your specific scope and scan cadence with your acquiring bank, payment gateway, or a qualified PCI consultant.
## What non-compliance costs
Adherence to the responsibilities in this matrix is not optional — it is a safeguard against consequences that fall on both parties. Failing to meet them can result in:
- **Data breaches** — cardholder data exposed to theft or misuse, leading to significant financial and legal repercussions.
- **Financial penalties** — fines imposed by payment card brands or regulatory bodies, which can be substantial for either party.
- **Reputational damage** — loss of customer trust and business credibility, which is particularly damaging for merchants who rely on consumer confidence.
- **Operational disruptions** — for the ecommerce provider, non-compliance can lead to suspension of payment processing capabilities; for the merchant, vulnerabilities in custom JavaScript can disrupt checkout functionality.
By fulfilling their respective roles, both parties protect not only their own interests but the broader payment security ecosystem. Compliance is a shared commitment to safeguarding sensitive data and maintaining the integrity of ecommerce transactions.
## Where to go from here
Use this matrix as the foundation for ongoing collaboration rather than a one-time checklist — the threat landscape and the standard both keep moving.
- [UltraCart PCI Compliance](./index.md) — UltraCart's PCI Level 1 certification, the Self Assessment Questionnaire, and third-party ASV scanning reports.
- [E-commerce Compliance and Security Guide](./e-commerce-compliance-and-security-guide.md) — current PCI DSS, FTC, and fraud prevention requirements, with the steps to meet them in UltraCart.
- [2025 Intuit PCI Compliance Notice](./2025-intuit-pci-compliance-notice.md) — the payment-page script inventory and monitoring requirements as they were communicated to merchants.
For additional information or clarification regarding these responsibilities, consult your compliance officer or the relevant department within your organization. You can also contact UltraCart Support at (209) 383-9870.
:::note
This page reproduces the UltraCart *Shared Responsibility* document, Revision 1.0 (April 1, 2025), classified **PUBLIC USE**. PCI compliance is a complex topic and this information is presented AS-IS; contact your legal counsel or a qualified PCI consulting organization if you are unsure of any requirement.
:::
---
# CRM
https://docs.ultracart.com/customers-crm
doc_type: explanation
# **UltraCart CRM: Overview**
Welcome to the UltraCart CRM (Customer Relationship Management) platform. This system provides you with a centralized hub to manage customer interactions and gain insights into their activity, enhancing your ability to provide exceptional support and service.
The UltraCart CRM is designed to streamline your customer communication and offer powerful tools to engage with your customers effectively. It integrates seamlessly with other UltraCart features, providing a holistic view of your customer relationships.

## **What is UltraCart CRM?**
The UltraCart CRM is a comprehensive platform that helps you manage all aspects of your customer interactions within the UltraCart ecosystem. It provides tools for:
- **AI Agents**: Configure intelligent agents to manage customer interactions via Webchat and SMS. These agents can handle multiple conversations simultaneously, customize responsibilities, and extend your support capabilities.
- **Conversations**: Access a fully-integrated chat platform that seamlessly connects to every aspect of your UltraCart account. This unified system handles both webchat and SMS conversations.
- **Customer Management**: View and manage your customer data, including a detailed snapshot of their activity.
- **Workforce**: Supervise your human and AI agents from a single console — live status, activity timelines, daily summaries, and shared agent and AI Agent settings.
## **Key Features**
### **AI Agents**
AI Agents allow you to automate and enhance your customer service. You can configure intelligent agents to manage interactions across Webchat and SMS, handling numerous conversations simultaneously. This feature helps you extend your support capabilities without increasing your headcount.
:::note
Tip: For more information on setting up and managing your AI Agents, refer to the [Understanding and Setting AI Agent Budgets](https://www.google.com/search?q=path/to/AI_Agent_Budgets_Guide.md) guide.
:::
### **Workforce**
Workforce is the supervisor and operations console for everyone who handles customer conversations — human agents on the phone and in chat, and AI Agents handling webchat, SMS, voice, and tickets. It surfaces a live fleet dashboard, per-agent timelines, daily activity rollups, and the shared settings (agent statuses, default timezone, AI budgets, AI capabilities) that govern your whole team.
AI Agents are managed inside Workforce in the app, but the AI Agents documentation section covers their configuration in depth.
:::note
Tip: See the [Workforce](./workforce/index.md) section for the Dashboard, Timeline, Daily Summary, and shared Settings.
:::
### **Conversations**
The UltraCart Conversations engine is a unified webchat and SMS conversation system. It integrates webchat and SMS replies (for StoreFront Communications marketing and UC Package Tracking) into one place. This allows you to connect with your customers through a unified platform.
note
**Note:** To access Conversations, you must have the "Manage SMS/Web Chat" permission. Once launched, you'll find sections for Webchat, SMS, Archives, and Settings.
**Note:** To access Conversations, you must have the "Manage SMS/Web Chat" permission. Once launched, you'll find sections for Webchat, SMS, Archives, and Settings.
### **Customers**
The Customers section of the CRM allows you to view and manage your customer data. Here, you can access a detailed snapshot of their activity, providing valuable insights for personalized interactions and improved customer relationships.
note
**Note:** the customer UI can also be accessed through Operations > Customer Profiles > Manage. This information is consistent across both areas of the UI.
**Note:** the customer UI can also be accessed through Operations > Customer Profiles > Manage. This information is consistent across both areas of the UI.
## **Getting Started**
To begin using the UltraCart CRM, navigate to the "[CRM](https://secure.ultracart.com/merchant/crm/crmApp.do#/)" section in your UltraCart account. From the dashboard, you can access the various features, including AI Agents, Conversations, and Customers.
note
**Note:** For UltraCart users to access Conversations, they must have the "Conversations Manage SMS/Web Chat" permission enabled.
**Note:** For UltraCart users to access Conversations, they must have the "Conversations Manage SMS/Web Chat" permission enabled.
## **Next Steps**
- Learn how to [set up and manage SMS conversations.](./conversations/how-to-setup-and-manage-sms-conversation.md)
- Discover how to [configure webchat on your StoreFront](./conversations/how-to-setup-webchat-on-your-storefront.md).
- Explore [setting up and managing engagement triggers for automated responses](./conversations/how-to-setup-and-manage-engagement-trigg.md).
---
# AI Agents
https://docs.ultracart.com/customers-crm/ai-agents
doc_type: explanation
UltraCart AI Agents provide autonomous customer support across webchat, SMS, voice, and support tickets. You configure each agent with a personality, instructions, capabilities, and a knowledge base so it can handle common inquiries without human intervention.
:::info
AI Agents are managed inside the **Workforce** area of the CRM (**CRM > Workforce > AI Agents**). All AI Agent configuration -- agents, personality, instructions, knowledge base, MCP servers, budgets, and capabilities -- is reached from there. Legacy `/ai-agents` URLs redirect to the new location automatically.
:::

## Overview
AI Agents are best suited for post-order and subscription support. Common use cases include:
- Answering order status and tracking questions
- Managing subscriptions (pause, resume, cancel, delay, update payment)
- Providing policy and product information from your knowledge base
- Opening support tickets and escalating to live agents when needed
Each agent operates as an UltraCart user account with the AI flag enabled. This means you can set up dedicated AI-only agents, or configure a user to provide live support during business hours and switch to AI support after hours.
## Communication channels
AI Agents can interact with customers through four channels. Each channel has its own instruction set so you can tailor the agent's behavior to the medium.
| **Channel** | **Description** |
| --- | --- |
| Webchat | Real-time chat on your storefront |
| **Token type** | **Cost per 1,000 tokens** |
| --- | --- |
| Input | $0.0004 |
| Cached input | $0.0001 |
| Output | $0.001 |
You set daily and monthly budget caps that apply across all your AI Agents collectively. Once a budget cap is reached, agents stop picking up new conversations until the cap resets or you increase it.
See [Budgets](./budgets.md) for detailed budget planning guidance.
## Prerequisites
Before setting up an AI Agent, you need:
- **Conversations enabled** on your UltraCart account
- At least one **chat department** configured
- **Webchat enabled** on your storefront (for webchat agents)
- At least one **queue** set up
- An UltraCart account with user management permissions
## Setting up an AI Agent
1. Navigate to **Configuration > Account > Users**.
2. Edit an existing user or select **Add User**.
3. Scroll to the **Conversations Chat Departments** section below user permissions.
4. Assign the user to at least one chat department.
5. Check **Use AI to handle chat as this agent**.

Once activated, this AI-enabled user automatically picks up available conversations from the queue.
:::tip
Set up multiple AI Agents for better coverage and workload distribution.
:::
## Managing AI Agents
Each AI Agent has its own display name, profile image, personality, and instructions independent of the underlying user account.
To manage an agent:
1. Navigate to **CRM > Workforce > AI Agents**.
2. Select the agent you want to configure.

From here you can configure:
- **Display name** -- the name the agent uses when introducing itself to customers
- **Agent image** -- the profile picture shown to customers during webchat
- **Agent personality** -- the agent's overall tone and demeanor, applied across all channels
- **Channel-specific instructions** -- separate instructions for webchat, SMS, voice, and tickets
- **Voice personality** -- the AI voice used for phone calls (Ara, Rex, Sal, Eve, or Leo)
- **Knowledge base** -- documents the agent uses to answer brand-specific questions
- **MCP servers** -- external tool servers that extend the agent's capabilities
## AI settings
AI Agent settings live under **Workforce > Settings > AI Budgets** and apply to all AI Agents on your account.

- **AI Budgets** -- daily and monthly caps that govern all agents collectively. See [Budgets](./budgets.md).
- **AI Capabilities** -- the actions and data access granted to agents. See [Capabilities](./ai-agent-capabilities.md).
## Frequently asked questions
**How many concurrent conversations can a single agent handle?** A single AI Agent can participate in up to 10 concurrent conversations. The agent stops picking up new conversations once your budget cap is reached.
**How do multiple agents coordinate?** UltraCart distributes incoming conversations across active agents using a round-robin approach, so customers interact with a variety of agents.
**Why set up multiple AI Agents?** Multiple agents let you assign specific agents to specific queues for specialized support. It also creates the appearance of a larger support team.
**Can I add a second WebChat widget to my storefront (such as in the My Account portal) with its own queue and AI Agent?**
No, the WebChat element is a single footer widget per storefront and supports one queue; to serve a separate area with a distinct AI Agent, use a different channel such as Tickets or SMS.
**Can I review past AI conversations?** Yes. All AI-handled conversations are stored in the **Conversation Archive** with sentiment tags indicating the customer's experience.
**Can I take over an active AI conversation?** Yes. You can view active conversations in real time and take over from the AI Agent at any point.
## In this section
Capabilities control what actions your AI Agents can perform and what data they can access. You enable capabilities in **Workforce > Settings > AI Capabilities**, and they apply to all agents on your account. This granular control lets you empower agents to handle common support tasks autonomously while keeping them within your defined boundaries.
The knowledge base lets you give your AI Agents access to your own documents so they can answer questions using information specific to your brand, products, and policies rather than relying on general AI knowledge.
AI Agent budgets let you control the operational costs of your AI Agents by setting daily and monthly spending caps. Once a cap is reached, agents stop picking up new conversations until the cap resets or you increase it.
MCP (Model Context Protocol) servers let you extend your AI Agent's capabilities by connecting external tool servers. When an MCP server is configured, your agent can discover and use the tools that server provides during customer conversations.
UltraCart AI Agents provide automated support across multiple communication channels. To ensure your agent represents your brand and handles inquiries effectively, you configure instruction sets tailored to each interaction context.
# Related Documentation
[WebChat Channel Constraints and Multi-Queue Architecture Overview](./webchat-channel-constraints-and-multi-qu.md)
---
# AI Agent capabilities
https://docs.ultracart.com/customers-crm/ai-agents/ai-agent-capabilities
doc_type: reference
Capabilities control what actions your AI Agents can perform and what data they can access. You enable capabilities in **Workforce > Settings > AI Capabilities**, and they apply to all agents on your account. This granular control lets you empower agents to handle common support tasks autonomously while keeping them within your defined boundaries.
## Overview
Each capability unlocks a specific action or data source for the agent. Some capabilities have sub-capabilities that become available once the parent is enabled. For example, enabling **Subscription - Lookup** unlocks additional subscription management actions like pause, resume, and cancel.
Capabilities are grouped into four categories: order and subscription lookups, subscription management, support and escalation, and data access.
## Order and subscription lookups
These capabilities let the agent retrieve customer order and subscription information.
| Capability | Description |
| --- | --- |
| **Order - Lookup information** | Retrieves details about a customer's orders including status, tracking, items, and shipping address |
| **Subscription - Lookup information** | Retrieves subscription details including next order date, frequency, items, and payment method |
:::info
Subscription management capabilities below require **Subscription - Lookup information** to be enabled first.
:::
## Subscription management
These capabilities let the agent make changes to a customer's subscriptions. Each one requires the subscription lookup capability.
| Capability | Description |
| --- | --- |
| **Subscription - Update credit card** | Guides the customer through updating the credit card on their subscription |
| **Subscription - Pause** | Temporarily suspends a subscription |
| **Subscription - Resume** | Reactivates a paused subscription |
| **Subscription - Cancel** | Cancels a subscription |
| **Subscription - Delay** | Postpones the next scheduled delivery |
## Support and escalation
These capabilities let the agent escalate issues or create support records.
| Capability | Description |
| --- | --- |
| **Transfer chat to live agent** | Hands the conversation to a human agent when the issue requires manual intervention |
| **Open support ticket** | Creates a support ticket on behalf of the customer |
When you enable **Open support ticket**, you select a ticket channel:
| Channel | Description |
| --- | --- |
| **Email** | Sends a ticket notification to a specified email address |
| **UltraCart Task** | Creates a task within UltraCart's task system |
| **Zoho Desk** | Creates a ticket in your linked Zoho Desk account (visible only if Zoho Desk is connected) |
## Data access
These capabilities control what additional data sources the agent can query.
| Capability | Description |
| --- | --- |
| **Grant access to storefront and item data** | Lets the agent look up product catalog information and storefront configuration to answer product-specific questions |
| **Generate coupon** | Lets the agent create discount coupons for customers during conversations |
## Use case examples
**Order status inquiries** Enable **Order - Lookup information**. The agent can instantly retrieve order status, tracking details, and shipping information without requiring a human agent.
**Self-service subscription management** Enable **Subscription - Lookup information** along with the subscription management capabilities your customers need most. The agent can walk customers through pausing, resuming, delaying, or canceling their subscriptions, and guide them through payment updates.
**Escalation with context** Enable **Transfer chat to live agent** and **Open support ticket**. The agent can recognize when an issue exceeds its abilities and either transfer the conversation with full context or create a ticket for follow-up.
**Product questions from your catalog** Enable **Grant access to storefront and item data**. The agent can answer questions about product details, availability, and pricing using your actual catalog data.
**Retention offers** Enable **Generate coupon** alongside subscription capabilities. When a customer requests a cancellation, the agent can offer a discount coupon as an incentive to stay.
## Related pages
- [AI Agents overview](./index.md)
- [Knowledge base](./knowledge-base.md)
- [Budgets](./budgets.md)
- [Personality and instructions](./personality-and-instruction-examples/index.md)
---
# Budgets
https://docs.ultracart.com/customers-crm/ai-agents/budgets
doc_type: explanation
AI Agent budgets let you control the operational costs of your AI Agents by setting daily and monthly spending caps. Once a cap is reached, agents stop picking up new conversations until the cap resets or you increase it.
## Overview
AI Agent costs are based on token consumption. Every message in a conversation -- from customer questions to agent responses to internal data lookups -- consumes tokens. UltraCart tracks this usage and charges per thousand tokens at three rates:
| Token type | Cost per 1,000 tokens | Description |
| --- | --- | --- |
| Input | $0.0004 | Customer messages and data the agent processes |
| Cached input | $0.0001 | Previously processed context reused within a conversation |
| Output | $0.001 | Agent responses sent to the customer |
Budget caps apply collectively across all AI Agents on your account, not per agent.
## What affects token consumption
Several factors influence how many tokens a conversation uses:
- **Customer message length** -- longer, more detailed questions consume more input tokens
- **Agent response length** -- comprehensive responses use more output tokens
- **Data lookups** -- when the agent retrieves order status, subscription details, or product data, the retrieved information counts as input tokens
- **Agent instructions and personality** -- more detailed instructions can lead to longer responses
## Example cost calculation
Here's a sample order status conversation to illustrate typical costs:
| Speaker | Message | Estimated tokens | Type |
| --- | --- | --- | --- |
| Customer | "I'd like to check on the status of my order." | ~12 | Input |
| Agent | "Can you give me the order number?" | ~11 | Output |
| Customer | "Sure, it's 1001234" | ~10 | Input |
| Agent | _(retrieves order data)_ | ~50 | Input |
| Agent | "Your order is currently processing and is scheduled to ship on May 27th. It should arrive within 2-3 business days of shipping. Is there anything else I can help with?" | ~41 | Output |
| Customer | "Nope, that's good. Thanks!" | ~5 | Input |
**Totals:**
- Input tokens: 12 + 10 + 50 + 5 = **77 tokens**
- Output tokens: 11 + 41 = **52 tokens**
**Cost:**
- Input: 77 / 1,000 x $0.0004 = $0.0000308
- Output: 52 / 1,000 x $0.001 = $0.000052
- **Total conversation cost: ~$0.000083**
A typical short conversation costs a fraction of a cent.
## Setting your budget
To configure budget caps:
1. Navigate to **CRM > Workforce > Settings**.
2. Select **AI Budgets**.
3. Set your **Monthly usage cap** and **Daily usage cap**.
4. Select **Update Budget** to save.
:::tip
Start with a moderate budget and monitor actual usage during your first few weeks. Real-world data is the best guide for refining your estimates.
:::
## Estimating a realistic budget
Consider these factors when planning your budget:
- **Conversation volume** -- how many customer interactions you expect daily and monthly. Review your current support ticket or webchat volume for a baseline.
- **Average conversation length** -- simple order status checks use fewer tokens than complex subscription modifications.
- **Peak periods** -- seasonal promotions or sales events may significantly increase conversation volume.
### Budget guidelines by volume
| Volume | Monthly interactions | Suggested starting budget |
| --- | --- | --- |
| Low | Under 100 | $1 - $5 |
| Medium | 100 - 500 | $5 - $15 |
| High | Over 500 | $15 - $50+ |
These are conservative starting points. Adjust based on your actual usage patterns.
## Monitoring and adjusting
After your agents are live, monitor usage regularly and adjust as needed:
- Review token consumption in the AI Agent reporting tools
- Optimize agent instructions to be concise and efficient, reducing unnecessary output tokens
- Design conversation flows that resolve queries in as few turns as possible
- Increase caps ahead of anticipated traffic spikes (promotions, product launches)
## Related pages
- [AI Agents overview](./index.md)
- [AI Agent capabilities](./ai-agent-capabilities.md)
- [FAQ](./faq.md)
- [Personality and instructions](./personality-and-instruction-examples/index.md)
---
# FAQ
https://docs.ultracart.com/customers-crm/ai-agents/faq
doc_type: reference
Frequently asked questions about UltraCart AI features, including AI Agent budgets and AI Report Builder budgets.
## AI Agent budget
**Where do I update my AI Agent budget?**
1. From the main menu, select **CRM**.

2. In the **AI Agents** section, select **Settings**, then select **Budget**.

3. Configure the **Monthly Usage Cap** and the **Daily Usage Cap**, then select **Update Budget**.
For detailed guidance on estimating and managing your budget, see [Budgets](./budgets.md).
**What are the current token pricing rates?**
UltraCart charges per thousand tokens at three rates:
| Token type | Cost per 1,000 tokens |
| --- | --- |
| Input | $0.0004 |
| Cached input | $0.0001 |
| Output | $0.001 |
**What happens when the budget is reached?**
AI Agents stop picking up new conversations. Active conversations in progress are allowed to finish. Agents resume picking up new conversations when the daily cap resets (next day) or the monthly cap resets (next billing cycle), or when you increase the cap.
**Does the budget apply per agent or across all agents?**
Budget caps apply collectively across all AI Agents on your account. If you have 3 agents, they share the same daily and monthly caps.
## AI Report Builder budget
**Where do I update my AI Report Builder budget?**
1. From the main menu, navigate to **Operations > Reporting > AI Reports**.
2. Select **Create New Report**.

3. Select the settings icon.

4. Configure the monthly budget and save.

## Related pages
- [AI Agents overview](#page-not-found)
- [Budgets](./budgets.md)
- [AI Agent capabilities](./ai-agent-capabilities.md)
---
# Knowledge base
https://docs.ultracart.com/customers-crm/ai-agents/knowledge-base
doc_type: how-to
The knowledge base lets you give your AI Agents access to your own documents so they can answer questions using information specific to your brand, products, and policies rather than relying on general AI knowledge.
## Overview
When you upload documents to the knowledge base, UltraCart processes them and makes the content searchable. During a conversation, the agent automatically searches your knowledge base before answering questions about your policies, products, or procedures. This ensures responses are grounded in your actual content rather than generic assumptions.
The knowledge base helps your agents:
- Give accurate, policy-compliant answers
- Maintain consistent brand voice across all interactions
- Reduce manual support load for repetitive questions
### Key concepts
- **Knowledge base document** -- any file you upload (PDF, text) containing information about your brand, products, or policies
- **Global knowledge** -- the knowledge base is shared across all your AI Agents, though each agent's instructions control how strictly it relies on it
## Prerequisites
- An UltraCart account with access to AI Agent configuration
- At least one AI Agent set up for your storefront
- Documents you want the agent to reference (policies, guides, FAQs)
## Uploading documents
1. Navigate to **CRM > Workforce > AI Agents** and select the agent you want to configure.
2. Scroll to the **Knowledge Base** section below the SMS instructions.
3. Select **Upload Knowledge Base Documents** and choose one or more files from your computer.
4. Save to confirm the upload.

After upload, UltraCart automatically processes your documents -- extracting text, analyzing images, and preparing the content for search. No additional configuration is required.
:::info
Large documents may take longer to process. They don't need to be perfectly structured, but clear headings and logical organization improve results.
:::
## How the agent uses the knowledge base
When a customer asks a question involving your policies, products, or procedures, the agent:
1. Identifies that the question may be answered by your documents
2. Searches the knowledge base for relevant content
3. Uses the matching content as the primary basis for its response
4. Generates a conversational answer grounded in your documents
This search happens automatically before the agent commits to an answer, even if the underlying AI model has general knowledge of the topic. The goal is to ensure responses follow your specific rules and policies.
If the knowledge base contains a clear answer, the agent references it directly. If the content is partially relevant, the agent blends it with general knowledge and may note where it's supplementing. If no relevant content is found, the agent can ask the customer for clarification or escalate to a live agent.
## Pairing with chat instructions
You can control how strictly the agent relies on the knowledge base through your [chat instructions](./personality-and-instruction-examples/index.md). Add directives such as:
- "Always consult the knowledge base first for questions about policies, shipping, returns, warranty, or product care."
- "If the knowledge base does not clearly answer the question, say you don't know and suggest contacting support."
- "Follow the policies described in the knowledge base exactly. Do not make exceptions or guesses."
These instructions help ensure the agent treats your knowledge base as the source of truth and avoids inventing policies.
## Testing and refining
After uploading documents and setting instructions, test the agent with questions that should be answered from your knowledge base:
- "How long do I have to return an item?"
- "What is your international shipping policy?"
- "What warranty do you offer on electronics?"
Verify that answers match the content in your documents and use the correct conditions, timeframes, and exceptions. If answers are off, try:
- Reorganizing or clarifying your documents
- Strengthening your chat instructions
- Breaking large, mixed-topic documents into separate, focused files
## Designing documents for better results
You can improve answer quality by structuring your documents well:
- Use clear headings for each main topic
- Group related content into logical sections (e.g., "International returns," "Damaged items," "Warranty claims")
- Avoid large, unstructured blocks of text covering many unrelated topics
## What to upload
Strong candidates for the knowledge base include:
- **Shipping and returns policies** -- rules for domestic and international orders, timeframes, conditions, exceptions
- **Brand overview** -- brand story, values, mission, FAQs about your company
- **Product care guides** -- washing, storage, and usage instructions by product category
- **Sizing and fit guides** -- general sizing advice, measurement instructions, size charts
- **Warranty information** -- coverage details, claim procedures, valid and invalid claim examples
- **Setup and installation guides** -- manuals, how-to steps, troubleshooting checklists
- **Support playbooks** -- internal guidelines for issue handling and escalation rules
- **Wholesale and B2B terms** -- minimum orders, lead times, payment terms
## What not to upload
Avoid uploading content that is too granular or changes frequently. These are poor fits for the knowledge base:
- **Large SKU-level catalogs** -- massive product exports with per-item specs. The agent may retrieve details for the wrong product.
- **Frequently changing data** -- current prices, live inventory, daily promotions. The knowledge base can't stay in sync with rapid changes.
- **Hyper-specific one-off notes** -- details that apply to a single item or a past promotion. These are likely to be retrieved out of context.
:::tip
Keep the knowledge base focused on global, reusable rules and explanations. For per-product details, enable the **Grant access to storefront and item data** [capability](./ai-agent-capabilities.md) instead.
:::
## Troubleshooting
**The agent gives answers that don't match my policies.** Confirm your policies are uploaded and clearly written. Strengthen your chat instructions to prioritize the knowledge base (e.g., "Always use the knowledge base for policy questions and never invent policies").
**The agent makes up details that aren't in my documents.** Add an instruction like "If the knowledge base does not contain the answer, say you do not know and suggest contacting support." Also ensure your documents cover the common questions customers ask.
**The agent ignores the knowledge base and gives generic answers.** Verify the knowledge base is enabled and attached to the correct agent. Check that your instructions don't tell the agent to rely on general knowledge. Test with very specific questions that can only be answered from your documents.
**Customers get wrong product-specific information.** If you've uploaded large SKU lists or per-item details, remove or reduce them. Use category-level information instead (e.g., "All items in this category have a 1-year warranty").
**File upload fails or is stuck processing.** Ensure the file is a supported format (PDF or text). Try splitting very large documents into smaller files. If the problem persists, contact UltraCart support.
## Related pages
- [AI Agents overview](./index.md)
- [AI Agent capabilities](./ai-agent-capabilities.md)
- [Personality and instructions](./personality-and-instruction-examples/index.md)
- [Budgets](./budgets.md)
---
# MCP servers
https://docs.ultracart.com/customers-crm/ai-agents/mcp-servers
doc_type: how-to
MCP (Model Context Protocol) servers let you extend your AI Agent's capabilities by connecting external tool servers. When an MCP server is configured, your agent can discover and use the tools that server provides during customer conversations.
## Overview
By default, AI Agents have access to UltraCart's built-in tools (order lookups, subscription management, etc.) through [capabilities](./ai-agent-capabilities.md). MCP servers let you go beyond those built-in tools by connecting third-party or custom tool servers that expose additional functionality.
For example, you might connect an MCP server that lets your agent look up inventory from a warehouse system, check shipping rates from a logistics provider, or query a custom internal database.
Each AI Agent has its own list of MCP servers. You can configure multiple servers per agent, set their priority order, and monitor their availability status.
## Prerequisites
- At least one AI Agent configured on your account
- An MCP-compatible server endpoint accessible via HTTPS
- Authentication credentials for the server, if required
## Adding an MCP server
1. Navigate to **CRM > Workforce > AI Agents** and select the agent you want to configure.
2. Scroll to the **MCP Servers** section.
3. Select **Add MCP Server**.
4. Enter the server's endpoint URL (e.g., `https://mcp.example.com`).
5. Select the authentication method and provide credentials if needed.
6. Select **Save**.
After saving, UltraCart queries the server to discover available tools and displays the connection status.
## Authentication methods
MCP servers support three authentication options:
| Method | Description |
| --- | --- |
| **None** | No authentication. Use for servers that don't require credentials. |
| **Basic** | HTTP Basic authentication with a username and password. |
| **Header** | Custom header-based authentication. You specify a header name and value (e.g., `Authorization: Bearer `). |
Choose the method that matches your MCP server's requirements.
## Server priority
When you configure multiple MCP servers for an agent, each server has a priority number. Priority determines the order in which the agent discovers and considers tools from each server.
You can reorder servers using the up and down arrow controls in the MCP server list. Lower priority numbers are checked first.
## Checking server status
Each configured MCP server displays a status indicator:
| Status | Meaning |
| --- | --- |
| **Available** | The server is reachable and responding |
| **Unavailable** | The server could not be reached or returned an error |
| **Loading** | UltraCart is currently checking the server's status |
UltraCart checks server status when you load the agent configuration page. If a server shows as unavailable, verify the endpoint URL and authentication credentials.
## Viewing available tools
After a server is connected and shows as available, you can preview the tools it exposes. This helps you verify that the server is configured correctly and understand what additional actions your agent gains access to.
The tools list shows each tool's name as reported by the MCP server.
## Removing an MCP server
To disconnect an MCP server, select the delete option next to the server in the MCP servers list. This immediately removes the server and its tools from the agent's available actions.
## Related pages
- [AI Agents overview](./index.md)
- [AI Agent capabilities](./ai-agent-capabilities.md)
- [Personality and instructions](./personality-and-instruction-examples/index.md)
---
# Personality and instruction examples
https://docs.ultracart.com/customers-crm/ai-agents/personality-and-instruction-examples
doc_type: reference
UltraCart AI Agents provide automated support across multiple communication channels. To ensure your agent represents your brand and handles inquiries effectively, you configure instruction sets tailored to each interaction context.
This guide covers the five instruction categories available for AI Agents and how they influence agent behavior.

## How instructions work
Instructions are layered. Every agent starts with a foundation of platform-level knowledge and access to the tools you've enabled through [capabilities](../ai-agent-capabilities.md). Your custom instructions are applied on top of that foundation to refine the agent's tone, goals, and procedural knowledge.
:::info
Custom instructions are additive. The agent combines your instructions with its core programming to provide the most relevant response.
:::
## Instruction categories
### Agent personality
The **Agent Personality** is the foundational layer applied across every communication channel. Use this section to define the overall tone and demeanor of your agent.
- **Where it's used:** webchat, SMS, tickets, and voice
- **Best for:** defining tone (e.g., "Professional yet friendly"), setting brand boundaries, and establishing consistent demeanor
[https://ultracart.atlassian.net/wiki/spaces/ucdoc/pages/4142628868/Personality+Configuration](./personality-configuration.md)
### Chat instructions
Chat instructions apply when a customer starts a **webchat** conversation on your storefront.
- **Where it's used:** live web-based chat widgets
- **Best for:** handling real-time product questions, guiding customers through checkout, and linking to specific site pages
[https://ultracart.atlassian.net/wiki/spaces/ucdoc/pages/4144201729/Chat+Instructions+Configuration](./chat-instructions-configuration.md)
### SMS instructions
SMS instructions guide the agent during text message conversations. Because SMS is a shorter, more direct medium, these instructions help the agent stay concise.
- **Where it's used:** inbound SMS and MMS conversations
- **Best for:** quick order status updates, responding to "STOP" or "HELP" keywords, and brief service inquiries
[https://ultracart.atlassian.net/wiki/spaces/ucdoc/pages/4144365569/SMS+Instructions+Configuration](./sms-instructions-configuration.md)
### Ticket instructions
Ticket instructions control how the agent drafts responses to support tickets. UltraCart AI Agents currently integrate with email, UltraCart Task, and Zoho Desk channels.
- **Where it's used:** support ticket drafts within the help desk interface
- **Best for:** defining refund policies, outlining return procedures, and ensuring drafts are ready for human review
[https://ultracart.atlassian.net/wiki/spaces/ucdoc/pages/4144398337/Ticket+Instructions+Configuration](./ticket-instructions-configuration.md)
### Voice instructions
Voice instructions apply when AI Agents answer inbound phone calls. These focus on how the agent sounds and behaves in a verbal environment.
- **Where it's used:** inbound phone calls and queue routing
- **Best for:** selecting the AI voice personality (Ara, Rex, Sal, Eve, or Leo), handling interruptions, and managing verbal identity verification
[https://ultracart.atlassian.net/wiki/spaces/ucdoc/pages/4144398350/Voice+Instructions+Configuration](./voice-instructions-configuration.md)
## Summary
| Instruction type | Channel | Primary goal |
| --- | --- | --- |
| Personality | All channels | Global brand alignment and tone |
| Chat | Webchat | Real-time conversion and navigation support |
| SMS | Text messaging | Concise, mobile-friendly interactions |
| Ticket | Email, UltraCart Task, Zoho Desk | Drafted responses for human review |
| Voice | Phone system | Natural verbal assistance and caller routing |
## In this section
The **Agent Personality** is the core identity of your AI Agent. It acts as the "soul" of the agent, defining its tone, voice, and demeanor. Unlike other instruction sets that are triggered by specific channels (like Chat or SMS), the personality is **universally applied**. Whether a customer is texting, calling, or chatting, this personality serves as the constant baseline.
**Chat Instructions** are triggered specifically when a customer interacts with the webchat widget on your StoreFront. Unlike email or SMS, webchat is often a real-time, pre-purchase environment where customers are browsing, comparing products, or checking order status.
**SMS Instructions** guide your AI Agent's behavior when communicating via text message. Because SMS is a mobile-first, high-urgency channel, the focus here is on extreme brevity and utility. Customers using SMS are typically "on the go" and looking for quick answers regarding order status, tracking, or simple product questions.
**Ticket Instructions** define how your AI Agent handles formal support inquiries. Currently integrated with **Zoho Desk**, this system allows the agent to review incoming tickets and draft a response for your human support team to review and send.
**Voice Instructions** are applied when your AI Agent is assigned to a specific **Phone Queue** within the UltraCart PBX (Phone System). Unlike other channels, voice interactions require the agent to be highly conversational and adapt its behavior based on the caller's intent -- such as a Sales inquiry, a Support request, or an Order Query.
---
# Chat Instructions Configuration
https://docs.ultracart.com/customers-crm/ai-agents/personality-and-instruction-examples/chat-instructions-configuration
doc_type: how-to
**Chat Instructions** are triggered specifically when a customer interacts with the webchat widget on your StoreFront. Unlike email or SMS, webchat is often a real-time, pre-purchase environment where customers are browsing, comparing products, or checking order status.
These instructions allow you to tailor the agent's behavior for immediate engagement, helping to drive conversions and resolve quick inquiries without human intervention.
## Best Practices
- **Focus on Conversion:** In a webchat context, the customer is likely on your site _right now_. Instruct the agent to be proactive in helping them find products or complete a purchase.
- **Keep it Brief:** Chat windows are small. Instruct the agent to use short paragraphs and bullet points so information is easy to scan on mobile devices.
- **Encourage Self-Service:** Explicitly tell the agent to use its available tools (like order lookup or tracking) before suggesting a human handoff.
- **Handle Handoffs Gracefully:** Define clear criteria for when the agent should "give up" and escalate to a human (e.g., "If the customer asks for a manager twice, escalate immediately").
:::info
Your AI Agent has automatic access to your connected Knowledge Base in every context, including Chat. You do not need to copy-paste policy text into these instructions.
Instead, use this section to tell the agent _how_ to present that information (e.g., "Summarize shipping policies briefly rather than quoting them entirely").
For more details on managing source material, see the [AI Agent Knowledge Base Documentation](../knowledge-base.md).
:::
* * *
## Chat Instruction Templates
Below are three starting points you can copy and paste directly into the **Chat Instructions** field.
### Option 1: The Sales Associate (Conversion Focused)
_Best for: High-traffic retail stores where the primary goal is helping customers find and buy products._
```none
Your primary goal in this chat context is to act as a helpful sales associate.
1. ASSIST WITH SHOPPING:
- If a customer asks about a product, use your tools to find items that match their needs.
- Highlight key benefits and mention current promotions if applicable.
- If a specific item is out of stock, immediately suggest the closest available alternative.
2. ENCOURAGE CHECKOUT:
- If a customer seems undecided, ask clarifying questions like "Are you looking for something specific for an event?"
- Offer to help them navigate to the checkout page if they are ready to buy.
3. TONE AND STYLE:
- Keep responses short and snappy.
- Use emojis sparingly to keep the mood light.
- Do not overwhelm the customer with long blocks of text.
```
### Option 2: The Support Specialist (Service Focused)
_Best for: Brands with complex products, technical specs, or high volumes of "Where is my order?" queries._
```none
Your primary goal in this chat context is to provide rapid technical support and order updates.
1. ORDER STATUS PRIORITY:
- If a customer asks about an order, ALWAYS ask for their Order ID or email address immediately to look it up using your tools.
- Provide the current status and tracking link if available.
2. TROUBLESHOOTING:
- When answering technical questions, strictly follow the information in the Knowledge Base.
- If a procedure has multiple steps, present them one at a time. Ask "Did that work?" before moving to the next step.
3. ESCALATION:
- If you cannot resolve a technical issue after 3 attempts, or if the customer expresses anger, immediately offer to escalate to a human agent or create a ticket.
```
### Option 3: The Hybrid Concierge (Balanced)
_Best for: Most standard e-commerce stores requiring a mix of sales help and order support._
```none
You are a balanced assistant capable of handling both shopping inquiries and support tasks.
1. IDENTIFY INTENT:
- Quickly determine if the user is a "Shopper" (pre-purchase) or a "Customer" (post-purchase).
- If they are shopping, focus on product recommendations and upselling.
- If they are a past customer, prioritize order status and returns.
2. COMMUNICATION STYLE:
- Be helpful but concise.
- If a customer asks a policy question (e.g., "What is your return policy?"), summarize the key points from the Knowledge Base in 1-2 sentences rather than quoting the full document.
- Always end your response with a helpful next step, such as "Would you like me to look up that order for you?" or "Shall I send you the link to that product?"
```
---
# Personality Configuration
https://docs.ultracart.com/customers-crm/ai-agents/personality-and-instruction-examples/personality-configuration
doc_type: how-to
The **Agent Personality** is the core identity of your AI Agent. It acts as the "soul" of the agent, defining its tone, voice, and demeanor. Unlike other instruction sets that are triggered by specific channels (like Chat or SMS), the personality is **universally applied**. Whether a customer is texting, calling, or chatting, this personality serves as the constant baseline.
## Best Practices
When crafting your Agent Personality, focus on _how_ you want the agent to speak, rather than _what_ it knows (procedural knowledge belongs in context-specific instructions).
- **Define a Persona:** Give the agent a role. Is it a "Helpful Assistant," a "Technical Expert," or a "Friendly Concierge"?
- **Set the Tone:** explicitly state adjectives you want the agent to embody, such as "empathetic," "professional," "concise," or "cheerful."
- **Establish Boundaries:** Tell the agent what _not_ to do. For example, "Do not use slang," or "Never speculate if you don't know the answer."
- **Keep it Human-Centric:** Instruct the agent to acknowledge frustration if a customer is upset.
* * *
## Personality Templates
Below are three starting points you can copy and paste directly into the **Agent Personality** field.
### Option 1: The Professional & Direct
_Best for: B2B stores, technical products, or high-volume support._
```none
You are a professional, efficient, and polite customer support agent for [Your Company Name]. Your goal is to resolve issues quickly and accurately.
Speak in clear, concise sentences. Avoid jargon, slang, or overly casual language. If a customer is frustrated, acknowledge their issue calmly and professionally, but focus primarily on finding the solution.
Always remain patient and respectful. If you do not know the answer, state that you will need to connect them with a human specialist rather than guessing.
```
### Option 2: The Friendly & Enthusiastic
_Best for: Lifestyle brands, fashion, or consumer goods._
```none
You are a friendly, energetic, and helpful brand ambassador for [Your Company Name]. You love our products and enjoy helping customers find exactly what they need.
Use a conversational and warm tone, like a helpful store associate. It is okay to use exclamation points sparingly to show enthusiasm!
When a customer has a problem, show genuine empathy. Use phrases like "I'm so sorry to hear that!" or "Let's get this fixed for you right away." Your goal is to make the customer feel heard and happy.
```
### Option 3: The Empathetic Problem Solver
_Best for: Health, wellness, or sensitive product categories._
```none
You are a caring and empathetic support assistant. You understand that customers contacting us may be stressed or in need of urgent help.
Your tone should be soothing, reassuring, and patient. Listen carefully to the customer's concern before offering a solution. Validate their feelings with phrases like "I understand how frustrating that must be."
Prioritize clarity and comfort over speed. Ensure the customer feels fully supported before ending the interaction.
```
---
# SMS Instructions Configuration
https://docs.ultracart.com/customers-crm/ai-agents/personality-and-instruction-examples/sms-instructions-configuration
doc_type: how-to
**SMS Instructions** guide your AI Agent's behavior when communicating via text message. Because SMS is a mobile-first, high-urgency channel, the focus here is on extreme brevity and utility. Customers using SMS are typically "on the go" and looking for quick answers regarding order status, tracking, or simple product questions.
## Best Practices
- **Be Concise:** SMS has character limits and is read on small screens. Instruct the agent to provide the most important information first and avoid "fluff."
- **Identify the Brand:** Since a text message can feel anonymous, ensure the agent identifies who they are representing in the initial response.
- **Focus on Action:** SMS is best for transactional tasks. Prioritize tools like order lookup and shipping status.
- **Avoid Long URLs:** If the agent needs to provide a link, instruct it to provide only the essential URL and avoid long strings of tracking parameters when possible.
- **Respect Opt-outs:** Ensure the agent understands that if a customer asks to "Stop" or "Unsubscribe," it should acknowledge the request and follow standard SMS compliance protocols.
:::info
Your AI Agent has access to your Knowledge Base in the SMS context. It can answer policy or product questions via text based on your uploaded documents.
However, because of the nature of SMS, you should instruct the agent to provide "one-sentence summaries" of Knowledge Base articles rather than full explanations.
For more details on managing source material, see the [AI Agent Knowledge Base Documentation](../knowledge-base.md).
:::
* * *
## SMS Instruction Templates
The following examples are formatted as plain text blocks. Since the UltraCart instruction fields do not support rich text formatting (bold, italics, etc.), these templates use clear labeling and spacing to guide the agent.
### Option 1: The Transactional Specialist
_Best for: Stores where customers primarily text to check on their orders._
```none
PRIMARY GOAL: Provide fast, mobile-friendly order updates.
1. IDENTITY: Always identify yourself as the [Your Company Name] Assistant in the first message of a thread.
2. BREVITY: Keep all responses under 160 characters whenever possible. Do not use multiple paragraphs.
3. ORDER LOOKUP: If a customer asks about an order, immediately ask for their Order ID. Once found, provide only the current status (e.g., "Shipped," "Processing") and the tracking number.
4. LINKS: If you must provide a link to a tracking page, provide the link on its own line.
```
### Option 2: The Direct Responder
_Best for: High-volume stores that want to minimize text overhead and maximize efficiency._
```none
PRIMARY GOAL: Provide helpful, concierge-style service via text.
1. TONE: Be helpful, polite, and brief. Use a friendly greeting but get to the point quickly.
2. PRODUCT INFO: If asked about a product, give a one-sentence summary of its main benefit and ask if they would like a link to view it on the site.
3. LIMITS: Never send more than two text messages in a row. If an answer is too complex for SMS, ask the customer if they would prefer you to email them the full details.
```
### Option 3: The Hybrid Concierge (Balanced)
_Best for: Most standard e-commerce stores requiring a mix of sales help and order support._
```none
PRIMARY GOAL: Direct, no-nonsense response to customer queries.
1. NO FLUFF: Skip introductory pleasantries like "I hope you are having a great day." Go straight to the answer.
2. KB USAGE: If a customer asks a question found in the Knowledge Base, summarize the answer in 10 words or less.
3. ESCALATION: If you cannot answer a question using your tools or the Knowledge Base after one exchange, provide the support email address and tell the customer a human will follow up.
```
---
# Ticket Instructions Configuration
https://docs.ultracart.com/customers-crm/ai-agents/personality-and-instruction-examples/ticket-instructions-configuration
doc_type: how-to
**Ticket Instructions** define how your AI Agent handles formal support inquiries. Currently integrated with **Zoho Desk**, this system allows the agent to review incoming tickets and draft a response for your human support team to review and send.
Because tickets often involve complex issues like returns, warranty claims, or technical troubleshooting, these instructions focus on structure, policy adherence, and preparing a professional draft.
## Best Practices
- **Draft for Review:** Remember that the agent is drafting a response for a human. Instruct the agent to leave placeholders (e.g., "\[Insert Name Here\]") if it is unsure about a specific detail.
- **Structure with Paragraphs:** Unlike SMS or Chat, ticket responses should look like professional emails. Instruct the agent to use a formal greeting, organized body paragraphs, and a clear closing.
- **State the "Why":** When the agent cites a policy from the Knowledge Base, instruct it to explain the reasoning clearly to the customer to reduce friction.
- **Flag for Humans:** Tell the agent to include a private note or a specific prefix (like "DRAFT:") if it feels a human must verify a specific part of the response (e.g., a manual refund).
- **Consistency is Key:** Use these instructions to define a standard signature or sign-off for all automated drafts.
:::info
Your AI Agent has access to your full Knowledge Base when drafting ticket responses. This is the most critical context for the KB, as it allows the agent to accurately reference shipping tables, return windows, and warranty terms.
To manage the documents the agent uses to draft these replies, visit the [AI Agent Knowledge Base Documentation](../knowledge-base.md).
:::
* * *
## Ticket Instruction Example
Here is a sample Markdown template for Agent Ticket Instructions.
### Subscription Modifications Ticketing Agent
_This example is designed for an AI agent specialized in handling "Subscription Modifications" for the theoretical nutritional supplement company used in the previous classification example._
```markdown
###Role & Persona
You are "Alex," a Senior Wellness Concierge at **\[Insert Company Name\]**.
* **Tone:** Professional, knowledgeable, empathetic, and encouraging. We are partners in their health journey.
* **Voice:** Use clear, concise language. Avoid overly clinical jargon, but use correct product names.
* **Objective:** Your primary goal is to resolve the customer's subscription issue efficiently while attempting to retain their business through helpful alternatives (pausing/swapping) rather than immediate cancellation, unless they are clearly distressed or adamant.
###Data Utilization Rules
You have access to the customer's UltraCart profile and order history in the provided context block.
* **DO NOT invent data.** Only use facts available in the customer profile, recent orders, or auto-order details provided below the customer's email.
* **Look for:** Current subscription status, next shipment dates, and product history.
* **If data is missing:** If they ask for a specific date and you cannot see it in the context block, state that you cannot access that specific detail right now but will look into it further.
###Scenario Handling & Policies
Analyze the customer's request and apply the appropriate policy below.
####Scenario 1: The "Soft" Cancellation Request (Retention Attempt)
*Customer says: "I have too much product," "I want to take a break," or "It's too expensive right now."*
1. **Acknowledge and Validate:** Start by acknowledging their concern empathetically. (e.g., "I completely understand finding that balance with your routine can take time.")
2. **Offer Alternatives (The "Pivot"):** Before processing a full cancellation, suggest alternatives based on their stated reason:
* *Too much product:* Offer to **pause** shipments for 30 or 60 days, or change frequency to every 6 weeks instead of 4\.
* *Cost/Wrong Fit:* Offer to help them **swap** to a different, perhaps lower-cost, supplement bundle that better fits their current needs.
3. **Call to Action:** Ask if one of these options sounds better than completely stopping their progress.
####Scenario 2: The "Hard" Cancellation Request
*Customer says: "Cancel immediately," "I am angry," or they rejected your previous retention offer.*
1. **Execute Immediately:** Do not push back. State clearly that you are processing the cancellation right away.
2. **Confirm Details:** Explicitly state: "I have gone ahead and canceled your recurring subscription for \[Product Name\]. You will receive no further charges or shipments."
3. **Leave the Door Open:** End on a positive note. (e.g., "We're always here if you decide to restart your wellness journey down the road.")
####Scenario 3: Routine Modifications (Skips, Swaps, Address Changes)
1. **Confirm the Action:** Clearly state what you have done. (e.g., "I've successfully updated your shipping address to the new one provided.")
2. **Confirm the Consequence (Using Data):** Look at their `auto_order` data. If you skipped a month, tell them the exact date of their *next* scheduled shipment.
* *Example:* "Your next shipment is now scheduled to process on \[Insert Date from Data\]."
###Response Formatting Rules
* **Greeting:** Use a friendly opening like "Hi \[Customer Name\]," or "Hello \[Customer Name\],"
* **Structure:** Keep paragraphs relatively short (2-3 sentences). Use bullet points if listing steps or options.
* **Sign-off:** Use the standard closing: Start living your best life, Alex | Senior Wellness Concierge
```
---
# Voice Instructions Configuration
https://docs.ultracart.com/customers-crm/ai-agents/personality-and-instruction-examples/voice-instructions-configuration
doc_type: how-to
**Voice Instructions** are applied when your AI Agent is assigned to a specific **Phone Queue** within the UltraCart PBX (Phone System). Unlike other channels, voice interactions require the agent to be highly conversational and adapt its behavior based on the caller's intent -- such as a Sales inquiry, a Support request, or an Order Query.
By tailoring these instructions to specific queues, you ensure the agent greets the caller appropriately and prioritizes the right tools for the job.
* * *
## Best Practices for Voice Queues
- **Acknowledge the Queue:** Start the greeting by acknowledging the caller's selection (e.g., "Thank you for calling our Support line").
- **Manage "Dead Air":** Phone callers become anxious during silence. Instruct the agent to use verbal fillers like "I'm looking that up now" or "One moment while I access your records" when performing lookups.
- **Speak for the Ear:** People cannot "re-read" a spoken sentence. Instruct the agent to keep sentences short and to speak clearly when providing tracking numbers or dates.
- **Handle Interruptions:** Voice agents are designed to listen while they speak. Remind the agent to stop immediately if the customer interrupts and to address the new input.
- **Contextual Handoffs:** Define what should happen if the agent cannot help (e.g., "Transfer to the 'Tier 2 Support' queue" or "Ask for a callback number").
:::info
Your AI Agent has access to your Knowledge Base during live phone calls. It can answer questions about your products and policies verbally using the documents you have provided.
Because the agent is speaking, it will automatically attempt to summarize Knowledge Base articles into conversational speech. For more information on optimizing your sources, see the [AI Agent Knowledge Base Documentation](../knowledge-base.md).
:::
* * *
## Voice Instruction Templates
Use these templates to configure agents assigned to different PBX menu options. Copy and paste these directly into the **Voice Instructions** field for the corresponding queue.
### Option 1: Sales & Product Inquiries Queue
_Best for: Callers who selected "1 for Sales" or want to learn about products._
```markdown
ROLE: You are a Sales Specialist for [Company Name].
1. GREETING: Start the call with: "Thanks for calling our sales team! My name is [Agent Name]. Are you looking for a specific product today, or can I help you find something new?"
2. PRODUCT KNOWLEDGE: Use the Knowledge Base to answer questions about product specs, sizing, or benefits. If a caller seems interested, highlight 1 or 2 key benefits.
3. CLOSING THE SALE: If the caller is ready to buy, explain that you can send a secure 'Buy' link to their mobile phone or email to complete the purchase safely.
4. TRANSFER: If the caller asks for a bulk discount or a custom quote, tell them you will transfer them to a Senior Account Manager.
```
### Option 2: Technical Support Queue
_Best for: Callers who selected "2 for Support" or need help with a product._
```markdown
ROLE: You are a Technical Support Representative.
1. GREETING: Start the call with: "Thank you for calling [Company Name] Support. I'm sorry to hear you're having trouble—let's get that fixed for you. To start, may I have your name and the product you're calling about?"
2. TROUBLESHOOTING: Follow the Knowledge Base guides strictly. Provide one instruction at a time and ask, "Does that make sense?" or "Were you able to find that button?" before moving on.
3. PATIENCE: If the caller is frustrated, acknowledge it by saying, "I understand this is frustrating, and I'm going to do my best to resolve this with you."
4. ESCALATION: If the steps in the Knowledge Base do not solve the issue, tell the caller: "I'd like to get one of our lead technicians on the line to assist further. One moment while I see if they are available."
```
### Option 3: Order & Shipping Queries Queue
_Best for: Callers who selected "3 for Order Status" or "Where is my package?"_
```markdown
ROLE: You are an Order Fulfillment Specialist.
1. GREETING: Start the call with: "Hi! Thanks for calling about your order. I can certainly look that up for you. May I have your Order ID or the phone number used for the purchase?"
2. DATA CLARITY: When providing a tracking number, read it slowly, three digits at a time. Ask if the caller would like you to repeat it or text it to them.
3. PROBLEM SOLVING: If an order is delayed, check the status in your tools. If the Knowledge Base has a specific script for "Late Shipments," follow it exactly.
4. UPDATES: If the customer needs to change a shipping address, check if the order status is 'Processing'. If it has already 'Shipped', explain that we can no longer change the address but can attempt a package intercept.
```
---
# WebChat Channel Constraints and Multi-Queue Architecture Overview
https://docs.ultracart.com/customers-crm/ai-agents/webchat-channel-constraints-and-multi-qu
doc_type: explanation
# WebChat Channel Constraints and Multi-Queue Architecture
* * *
## 1\. Overview
The WebChat element is UltraCart's real-time chat widget, embedded in your storefront for customer interactions. It operates within specific placement and queue constraints that affect how you can deploy AI Agents across different areas of your storefront.
This document explains those constraints and describes how to architect multi-context support using UltraCart's available communication channels.
* * *
## 2\. WebChat Element Placement
The WebChat element renders in the **storefront footer only**. This is a platform constraint, not a configuration option.
Consequences of this constraint:
- Only one WebChat widget instance exists per storefront.
- The widget cannot be embedded in specific pages (such as the My Account portal), custom sections, or non-footer locations.
- You cannot create independent WebChat instances for different areas of your storefront.
If you need chat-like support in a specific page context (such as My Account), the available alternatives are the Tickets channel or a link to the WebChat widget.
* * *
## 3\. Queue Assignment
The WebChat element routes to a single queue. This means:
- All conversations initiated through the WebChat widget enter the same queue.
- You cannot split WebChat traffic between two queues based on the page the customer is viewing.
- Only one AI Agent configuration (personality, instructions, capabilities) governs the WebChat channel at a time, though multiple AI Agent users can be assigned to the same queue for workload distribution.
> **Note:** Multiple AI Agents assigned to the same queue share the queue's conversation load via round-robin distribution. They do not operate as separate, independently routed agents within WebChat.
* * *
## 4\. Multi-Channel Queue Architecture
Multiple queues with independent AI Agent configurations are only achievable by deploying multiple communication channels. Each channel can have its own AI Agent, instruction set, and queue.
| Channel | Entry Point | Supports Separate Queue? |
| --- | --- | --- |
| WebChat | Storefront footer widget (one instance) | No -- single queue only |
| SMS | Customer-initiated text to your number | Yes |
| Voice | Inbound phone calls | Yes |
| Tickets | Email, UltraCart Task, or Zoho Desk | Yes |
To assign different AI Agents with different instruction sets to different customer entry points, configure a separate channel for each context.
* * *
## 5\. Workarounds for Multi-Context Support
### Option A: Single WebChat queue with context-aware agent instructions
If your primary goal is to give storefront customers a different AI experience than My Account customers, configure one AI Agent with Chat Instructions that adapt based on conversational context. When a logged-in customer's session is established, the agent has access to their order history, subscription data, and past conversations -- which can inform how it responds without requiring a separate queue.
This approach works well when the behavioral difference between contexts is primarily about tone or content rather than queue routing or escalation paths.
### Option B: WebChat for storefront + Tickets for My Account
Set up a separate AI Agent assigned to the Tickets channel with instructions tailored to account-level inquiries. In the My Account portal, surface a prompt or link that directs customers to open a support ticket. The Tickets-channel AI Agent picks up those submissions with its own personality, instructions, and capabilities.
This provides:
- Independent AI Agent configurations per context
- Separate queue routing
- Independent instruction sets and capability scopes
The trade-off is that My Account users interact via an asynchronous ticket rather than real-time chat.
### Option C: Multi-channel deployment
Deploy WebChat, SMS, or Voice in combination to serve different customer segments. Each channel supports its own AI Agent and queue, enabling differentiated support experiences.
* * *
## 6\. Troubleshooting
### Merchant wants two WebChat chat windows on one storefront
**Symptoms:** Merchant wants one WebChat widget on the main storefront and a second in the My Account portal, each with its own AI Agent.
**Root Cause:** The WebChat element is a single footer-embedded widget. The platform does not support multiple WebChat instances or page-scoped WebChat placement.
**Solution:** Use the Tickets channel or a secondary communication channel (SMS, Voice) to serve the My Account context with a separately configured AI Agent. See [Option B](#option-b-webchat-for-storefront--tickets-for-my-account) above.
### Merchant wants separate AI Agents with different capabilities per storefront area
**Symptoms:** Merchant wants AI Agent A to handle general storefront questions and AI Agent B to handle account management, each with a different capability set.
**Root Cause:** Capabilities in UltraCart are configured globally under Workforce > Settings > AI Capabilities and apply to all AI Agents on the account. You cannot grant different capability scopes to different agents.
**Solution:** Use per-channel instruction sets to constrain what each agent discusses, even if capabilities are shared. Alternatively, evaluate whether the use case can be served by a single well-instructed agent.
* * *
## 7\. Related Documentation
- AI Agents - Overview, channel setup, and agent configuration
- [AI Agent Capabilities](https://ultracart.atlassian.net/wiki/spaces/ucdoc/pages/ai-agent-capabilities) - Full list of available capabilities
- [Personality and Instructions](https://ultracart.atlassian.net/wiki/spaces/ucdoc/pages/ai-agent-personality) - Per-channel instruction configuration
---
# Calls
https://docs.ultracart.com/customers-crm/calls
doc_type: explanation
UltraCart Calls is a cloud-based phone system built directly into the UltraCart platform. It gives your team a full-featured business phone system -- softphone, call queues, IVR menus, voicemail, call recording, and more -- without requiring separate telephony hardware or a third-party phone service. Because Calls is part of UltraCart, every phone interaction is automatically connected to your customer profiles, order history, and conversation data.
## Why UltraCart Calls
Most e-commerce businesses run their phone system as a completely separate product, disconnected from their order and customer data. Agents switch between tabs, copy-paste order numbers, and lose context between channels. UltraCart Calls eliminates that gap.
When a customer calls, UltraCart automatically matches their phone number to their customer profile. Your agent sees the caller's name, recent orders, account balance, and open support tickets before they even answer. When the call ends, a complete call record is created and linked to that customer's history alongside their webchat, SMS, and email conversations.
This unified approach means:
- **No context switching.** Customer data, order entry, and the phone are in the same interface.
- **Automatic customer matching.** Inbound callers are identified by phone number and matched to their profile in real time.
- **Cross-channel history.** Call records sit alongside chat transcripts, SMS threads, and email in a single conversation timeline.
- **Secure payments on the phone.** Agents can collect credit card payments during a call using PCI-compliant keypad capture -- the agent never sees or hears the card number.
- **AI-powered call handling.** AI voice agents can answer calls, route callers, look up orders, and coach human agents in real time.

## Key capabilities
### Call handling
- **Browser-based softphone** -- make and receive calls from any modern browser with a headset. No desk phone required (though SIP desk phones are also supported).
- **Inbound and outbound calling** -- receive calls on your business phone numbers and dial out with your business caller ID.
- **Multi-line support** -- two simultaneous call lines per agent, enabling transfers and conferencing without dropping the caller.
### Call routing
- **Queues** -- route inbound calls to groups of agents with automatic distribution. Callers hear hold music and position announcements while waiting.
- **IVR menus** -- build auto-attendant phone trees with keypress and speech recognition input. Route callers to the right team, extension, or voicemail.
- **Time-based routing** -- define business hours, after-hours, and holiday schedules. Calls route differently depending on when they arrive.
- **Phone number routing** -- each phone number can route to a queue, menu, agent, voicemail, or time-based rule independently.
### During the call
- **Call recording** -- record calls manually or automatically. Pause and resume recording for compliance during payment capture.
- **Transcription** -- recordings are automatically transcribed with speaker identification, so you can search and review calls without listening to the full audio.
- **Warm and cold transfers** -- transfer calls to another agent, queue, or external number. Warm transfers let you introduce the caller first; cold transfers send them directly.
- **Conferencing** -- add multiple participants to an active call. Manage each participant independently with hold, mute, and remove controls.
- **Agent-assisted payments** -- securely collect credit card information during a live call. The customer enters their card, expiration, and CVV via their phone's keypad. A secure payment token is generated for use in order entry.
- **AI coaching** -- AI voice agents can listen to a call and provide real-time suggestions to the agent, visible only to the agent.
### Supervision and management
- **Agent status management** -- agents set their availability (Available, Unavailable). Status changes automatically to On Call during active calls and Wrap-Up after calls end.
- **Queue monitoring** -- real-time dashboard showing callers waiting, agent availability, wait times, and performance statistics.
- **Supervisor barge and coach** -- supervisors can silently listen to calls, join as an active participant, or whisper privately to the agent.
- **Class of Service** -- restrict outbound dialing by agent. Block international calls, premium-rate numbers, or all outbound calls. Agents can request supervisor overrides in real time.
- **Call history** -- searchable log of every call with full detail: recordings, transcripts, participants, timeline, transfers, holds, and cost breakdown.
### Voicemail
- **Personal and shared mailboxes** -- agents have personal voicemail; queues have shared mailboxes for team coverage.
- **Custom greetings** -- upload audio files or use text-to-speech for voicemail prompts.
- **Voicemail transcription** -- messages are automatically transcribed for quick review.
## How calls flow through the system
Understanding the basic call flow helps you design your routing. Here's what happens when a customer calls one of your phone numbers:
1. **The call arrives on your phone number.** Each phone number has a routing rule that determines what happens next.
2. **Routing takes over.** Depending on your configuration, the call may go directly to a queue, play an IVR menu, check time-based rules, or ring a specific agent.
3. **If routed to a queue,** the caller hears a greeting and hold music while waiting. The system automatically finds an available agent and connects them.
4. **The agent's softphone rings.** The agent sees the caller's phone number (and matched customer profile, if found) and accepts or declines the call.
5. **During the call,** the agent can transfer, conference in other parties, start recording, or initiate a payment capture.
6. **When the call ends,** a complete call record is assembled with the full timeline, participants, recording, transcript, and cost data. If the caller was matched to a customer, the record is linked to their profile.
This flow can be as simple as "phone number -> queue -> agent" or as complex as "phone number -> time-based rule -> IVR menu -> queue -> agent with AI coaching and payment capture." You build the routing that fits your business.
## Key terminology
| Term | Definition |
| --- | --- |
| Agent | A person who makes and receives calls through UltraCart Calls. Each agent has an extension and belongs to one or more queues. |
| Queue | A call routing group. Inbound calls enter a queue and wait until an available agent is assigned. |
| Interactive Voice Response (IVR) | An automated phone menu that plays prompts and routes callers based on keypress or speech input. Also called an auto-attendant. |
| Phone number (DID) | A Direct Inward Dial number assigned to your account that callers dial to reach your business. |
| Softphone | The browser-based phone interface built into UltraCart. Uses your computer's microphone and speakers -- no hardware phone needed. |
| Warm transfer | A transfer where the agent speaks with the transfer target before connecting the caller. |
| Cold transfer | A transfer where the caller is sent directly to the target without introduction. |
| Barge | A supervisor action to join an active call, either in listen-only mode or as an active participant. |
| Coach | A supervisor action to speak privately to the agent during a call. The caller cannot hear the supervisor. |
| Wrap-up | A post-call period where the agent can complete notes before receiving the next call. Duration is configured per queue. |
| Disposition | The outcome of a call: answered, no-answer, voicemail, abandoned, busy, or failed. |
| Class of Service (CoS) | A restriction template that controls which outbound calls an agent is allowed to make. |
| Call record | The complete data record created when a call ends, containing participants, timeline, recordings, transcripts, and costs. |
## In this section
This guide walks you through the initial setup of UltraCart Calls. By the end, you'll have a phone number, an agent, a queue, and working inbound and outbound calling through your browser.
Phone numbers are the entry point for every inbound call to your UltraCart Calls system. Each phone number -- also called a Direct Inward Dial (DID) number -- has its own routing rule that determines what happens when a customer calls it. You can route calls to a queue, an IVR menu, a specific agent, voicemail, or a time-based rule.
Agents are the people who make and receive calls through UltraCart Calls. Each agent has a work extension, belongs to one or more queues, and can be configured with personal voicemail, recording preferences, and call forwarding. This page covers creating agents, configuring their profiles, and managing agent settings.
UltraCart Calls uses a four-tier permission model to control what each person can see and do within the phone system. Permissions determine navigation visibility, configuration access, data visibility, and supervisor capabilities like barge, coach, and override approvals.
Queues are the core call routing mechanism in UltraCart Calls. When a call arrives, it enters a queue where it waits until an available agent is assigned. Queues support custom greetings, hold music, configurable wrap-up periods, voicemail fallback, and AI coaching.
The queue monitoring dashboard provides real-time visibility into call queue performance. You can see how many callers are waiting, current wait times, which agents are available, and key statistics like calls taken and missed. Supervisors can answer specific waiting callers, manage agent status, and use barge and coach features directly from the dashboard.
Interactive Voice Response (IVR) menus -- also called auto-attendants -- let you build automated phone trees that greet callers and route them based on their input. A caller might hear "Press 1 for Sales, Press 2 for Support" and be directed to the right queue, agent, voicemail, or sub-menu.
Time-based routing lets you control how calls are handled based on the time of day, day of week, and holidays. Define your business hours so calls during open hours route to a queue or menu, while after-hours calls go to voicemail or a different greeting. This ensures callers always get an appropriate experience regardless of when they call.
The UltraCart softphone is a browser-based phone built directly into the CRM interface. It lets you make and receive calls from any modern browser with a headset -- no desk phone required. The softphone supports two simultaneous call lines, a full dial pad, call controls, audio device selection, and an active call banner that follows you as you navigate the application.
UltraCart Calls supports warm transfers, cold transfers, multi-party conferencing, and supervisor barge and coach capabilities. These features let you connect callers to the right person, bring in additional help, and enable real-time supervision -- all from the softphone interface.
UltraCart Calls provides flexible call recording with both automatic and manual controls. You can record calls for quality assurance, training, compliance, or dispute resolution. Recordings are dual-channel (agent and caller on separate audio tracks), stored securely, and automatically linked to call history records.
Call recordings are automatically transcribed, producing a full-text transcript with speaker identification and timestamps. Transcripts make it easy to search, review, and reference calls without listening to the full audio. Voicemail messages are also transcribed automatically.
UltraCart Calls includes a complete voicemail system with personal agent mailboxes and shared queue mailboxes. Callers can leave voicemail when an agent is unavailable, when no agents are online for a queue, or when they opt out of waiting in a queue. Each message includes audio playback, automatic transcription, and caller information.
Agent-assisted payments let you securely collect credit card information from callers during a live call. The customer enters their card number, expiration date, and CVV using their phone's keypad -- you never see or hear the card details. A secure payment token is generated and can be used with UltraCart Order Entry to process the charge.
AI voice agents are automated agents that can handle inbound calls autonomously, assist human agents during live calls with real-time coaching, and perform actions like looking up orders or checking account status. They integrate directly into the UltraCart Calls system alongside human agents.
Class of Service (CoS) lets administrators control which outbound calls agents are allowed to make. Restriction templates define rules that can block international calls, premium-rate numbers, calls outside business hours, or all outbound calling entirely. When an agent attempts a restricted call, a real-time supervisor override workflow lets them request permission to proceed.
Call History provides a searchable, filterable log of every call handled by your UltraCart Calls system. Each call record contains comprehensive data: caller information, participating agents, routing path, full timeline, recordings with transcripts, hold and transfer events, AI agent engagements, and cost breakdowns.
UltraCart Calls isn't a standalone phone system -- it's deeply integrated with the UltraCart e-commerce platform. During an active call, the Customer Snapshot panel automatically matches the caller to their customer profile, showing recent orders, account details, and subscription information. Call records link to customer profiles for historical context. Payment tokens flow directly into Order Entry. And call records sit alongside webchat, SMS, and email in a unified conversation history.
While UltraCart Calls is primarily a browser-based softphone system, it also supports SIP desk phones for agents who prefer physical hardware. Desk phones are provisioned by MAC address, configured with auto-provisioning for supported manufacturers, and can be used alongside or instead of the browser softphone.
The Audio Library is a centralized repository for all audio files used in your UltraCart Calls system. Upload custom audio for IVR menu greetings, queue hold music, voicemail prompts, and other voice prompts. Audio files uploaded here can be referenced from menus, queues, and voicemail mailboxes throughout your configuration.
This page covers common issues you may encounter with UltraCart Calls and how to resolve them. Start with the issue that matches your symptoms, and follow the resolution steps.
The AI supervisor view is the operational surface for monitoring autonomous AI voice agents while they are on live calls. It fans every active AI engagement out into a single grid, surfaces health signals so problems are visible at a glance, and lets a human supervisor read transcripts in real time, send private guidance to the AI, or take over the call entirely.
---
# Agent-assisted payments
https://docs.ultracart.com/customers-crm/calls/agent-assisted-payments
doc_type: how-to
Agent-assisted payments let you securely collect credit card information from callers during a live call. The customer enters their card number, expiration date, and CVV using their phone's keypad -- you never see or hear the card details. A secure payment token is generated and can be used with UltraCart Order Entry to process the charge.
## Overview
When a customer needs to make a payment during a phone call, agent-assisted payments provide a PCI-compliant way to capture their card information without exposing it to the agent. The customer enters their card details using DTMF tones (keypad presses) on their phone. The payment service captures the input directly, bypasses the agent entirely, and returns a secure token. This token represents the card and can be used to process a charge through UltraCart Order Entry.
Call recording is automatically paused during the payment capture process to ensure no card data is stored in recordings.
## PCI compliance model
Agent-assisted payments are designed for PCI compliance:
- **The agent never sees or hears card data.** DTMF tones are captured directly by the payment service and are not played to the agent.
- **Card data is tokenized immediately.** Raw card numbers are never stored in UltraCart systems.
- **Recording pauses automatically.** Call recording is suspended during the payment capture window and resumes after the session completes or is canceled.
- **Tokens are single-use.** The generated payment token is used once to process the charge and cannot be reused.
## Payment capture workflow
### Starting a payment session
1. During an active call, open the payment panel from the softphone controls.
2. Select **Start** to begin a new capture session. The system connects to the payment service and prepares to accept card input.
Three fields appear: **Card Number**, **Expiration Date**, and **Security Code** (CVV).
### Capturing card fields
For each field:
1. Select **Capture** next to the field you want to collect.
2. Instruct the customer to enter the value on their phone's keypad, followed by the `#` key to confirm.
3. While the customer types, the field shows "Awaiting Input" with a yellow indicator.
4. Once the customer completes the entry, the field turns green and shows a masked value (e.g., `**** **** **** 4242`).
You can capture fields in any order. If a field needs to be re-entered (for example, the customer made a typo), select **Re-capture** to have the customer enter it again.
### Field status indicators
| Color | Meaning |
| --- | --- |
| Green | Field successfully captured |
| Yellow | Customer is currently entering the value |
| Red | An error occurred (invalid input, timeout, etc.) |
### Completing the payment
When all three fields show green (successfully captured):
1. Select **Complete Tokenization**.
2. The payment service validates and vaults the card.
3. On success, a "Card securely vaulted" banner appears with a green checkmark.
4. The secure token is delivered to your session and is ready to use in Order Entry.
### Using the token in Order Entry
After the card is successfully tokenized, the payment token is available in UltraCart Order Entry. You can apply it as a payment method when creating or processing an order for the customer.
## Error handling
If an error occurs during capture, the field turns red and a descriptive message appears:
| Error | Meaning |
| --- | --- |
| Invalid card number | The entered card number is not valid |
| Invalid security code | The CVV doesn't match or is the wrong length |
| Invalid expiration date | The date format is incorrect or the card is expired |
| Input timed out | The customer didn't enter input within the allowed time |
| Card type not accepted | The card brand is not supported |
| Too many attempts | Maximum retry attempts exceeded |
When an error occurs:
- For field-level errors (invalid card number, timeout), select **Re-capture** to let the customer try again.
- For session-level errors (token creation failure), select **Try Again** to restart the payment process.
## Canceling a payment session
You can cancel a payment session at any time before completion. Canceling discards any captured field data and resumes call recording.
## Starting a new capture
After a successful payment capture, a **Start New Capture** button appears. This lets you capture a second card during the same call (for example, if the customer wants to use different cards for different orders).
## Related pages
- [The softphone interface](./the-softphone-interface.md) -- call controls and payment panel access
- [Call recording](./call-recording.md) -- automatic recording pause during payment capture
- [Unified platform integration](./unified-platform-integration.md) -- how payment tokens connect to Order Entry
---
# Agent management
https://docs.ultracart.com/customers-crm/calls/agent-management
doc_type: how-to
Agents are the people who make and receive calls through UltraCart Calls. Each agent has a work extension, belongs to one or more queues, and can be configured with personal voicemail, recording preferences, and call forwarding. This page covers creating agents, configuring their profiles, and managing agent settings.
## Overview
Every person who handles calls in your organization needs an agent profile in UltraCart Calls. An agent profile links a UltraCart user account to the phone system, giving that person an extension, queue memberships, and access to the softphone. Agents can also be AI voice agents -- automated agents that handle calls using artificial intelligence.
The agent list in **Calls > Settings > Agents** shows all configured agents with their name, extension, voicemail status, and call routing preference. Human agents display a person icon, while AI agents display an AI icon.
## Creating a new agent
1. Navigate to **Calls > Settings > Agents**.
2. Select **Add Agent**.
3. Choose the UltraCart user login for this agent. The agent's name is pulled from their user profile.
4. Assign a **Work Extension** number. This is the number other agents dial to reach this person internally.
5. Configure the remaining profile fields as needed (described below).
6. Select **Save**.
## Agent profile settings
### Basic information
| Field | Description |
| --- | --- |
| Login | The agent's UltraCart username (read-only). |
| Full Name | Pulled from the user profile (read-only). |
| Work Extension | The internal extension number for direct dialing. |
| Default Outbound Number | The caller ID displayed on outbound calls. Set to "Organization Default" to use the system default, or select a specific phone number. |
### Call routing preference
The call routing preference determines how inbound calls reach the agent:
- **Browser Softphone** -- calls ring in the agent's browser using the built-in softphone. This is the default and most common option.
- **Hardware Phone** -- calls ring on a linked SIP desk phone. This option only appears if your organization has [hardware phones](./hardware-phones-sip-desk-phones.md) configured.
- **Forward to Cellphone** -- calls forward to the agent's mobile phone. This option only appears if a cellphone number is configured.
### Cellphone forwarding
Enter the agent's cellphone number to enable the "Forward to Cellphone" routing option. When forwarding is active, inbound calls ring the agent's cellphone instead of the softphone.
:::info
When calls are forwarded to a cellphone, features like call recording, transfers, and conferencing may be limited compared to the browser softphone.
:::
### Recording preferences
- **Record Outgoing Calls Automatically** -- when enabled, outbound calls made by this agent are automatically recorded. Inbound call recording is configured per queue (see [Call queues](./call-queues.md)).
### Class of Service
Select a Class of Service (CoS) template to control what outbound calls this agent can make. CoS templates can restrict international dialing, premium-rate numbers, and other call types. See [Class of Service](./class-of-service-call-restrictions.md) for details.
### Hardware phone settings
When the call routing preference is set to **Hardware Phone**, two additional fields appear:
- **Linked Hardware Phones** -- select which SIP phones are associated with this agent.
- **Preferred Phone for Incoming Calls** -- choose which linked phone rings when an inbound call arrives for this agent.
## Configuring voicemail
Each agent can have a personal voicemail mailbox. The voicemail section of the agent profile lets you enable or disable voicemail and choose what callers hear when the agent is unavailable.
### With voicemail enabled
Toggle voicemail **on** and select an existing voicemail mailbox or create a new one inline. The new mailbox form includes:
- **Mailbox name**
- **Greeting type** -- upload an audio file or use text-to-speech (with male or female voice selection)
- **Followup type** -- the message callers hear after leaving their voicemail
- **Notification email** -- an optional email address that receives alerts when new voicemails arrive
### Without voicemail
When voicemail is toggled **off**, you can still configure an unavailable greeting. This is the message callers hear when they reach the agent but the agent can't take the call. Choose between uploading an audio file or using text-to-speech.
:::info
The voicemail section is hidden when the agent's call routing preference is set to "Forward to Cellphone," since voicemail is typically handled by the mobile carrier in that scenario.
:::
## Assigning agents to queues
Agents receive inbound calls through the queues they belong to. You can assign agents to queues from either the agent profile or the queue configuration page.
- **From the agent profile**: Queue assignments are visible when editing the agent, though the primary assignment interface is on the queue settings page.
- **From queue settings**: Navigate to **Calls > Settings > Queues**, edit a queue, and toggle agents on or off under **Queue members**. See [Call queues](./call-queues.md) for details.
An agent can belong to multiple queues simultaneously.
## Editing and deactivating agents
To edit an existing agent, navigate to **Calls > Settings > Agents** and select the agent from the list. The edit dialog opens with all configurable fields.
To remove an agent from the phone system, delete their agent profile. This removes their extension, queue memberships, and voicemail configuration.
:::warning
Deleting an agent profile is permanent. The agent's voicemail messages and call history remain accessible in the system, but the agent can no longer make or receive calls through UltraCart Calls.
:::
## My Profile (agent self-service)
Every agent -- regardless of their permission level -- can access **Calls > Settings > My Profile** to manage their own settings. The My Profile page lets agents configure:
- Cellphone number for forwarding
- Recording preferences
- Agent activity status
- Audio device settings (microphone, speaker, ringtone device)
Agents cannot change their own extension, login, or voicemail mailbox assignment from My Profile. Those fields are managed by administrators.
## Related pages
- [Getting started with UltraCart Calls](./getting-started-with-ultracart-calls.md) -- create your first agent as part of initial setup
- [Permissions and roles](./permissions-and-roles.md) -- control what agents can see and do
- [Call queues](./call-queues.md) -- assign agents to queues for inbound call routing
- [The softphone interface](./the-softphone-interface.md) -- learn the daily call handling interface
- [Voicemail](./voicemail.md) -- detailed voicemail mailbox configuration
- [Class of Service](./class-of-service-call-restrictions.md) -- restrict outbound dialing for agents
- [Hardware phones](./hardware-phones-sip-desk-phones.md) -- configure SIP desk phones
---
# AI supervisor
https://docs.ultracart.com/customers-crm/calls/ai-supervisor
doc_type: explanation
The AI supervisor view is the operational surface for monitoring autonomous AI voice agents while they are on live calls. It fans every active AI engagement out into a single grid, surfaces health signals so problems are visible at a glance, and lets a human supervisor read transcripts in real time, send private guidance to the AI, or take over the call entirely.
## Overview
When an AI voice agent is configured to handle inbound calls autonomously (see [AI voice agents](./ai-voice-agents.md)), it answers, holds the conversation, and only escalates when it can't resolve something. AI supervisor is the view that exists for everything in between -- the moments where you want to see how the AI is doing, intervene before a frustrated caller asks for a human, or step in mid-conversation when the AI is heading the wrong direction.
It is a passive surface by default. Opening it does not interrupt any call. Listening, whispering, and taking over are explicit actions a supervisor chooses.
The view is reserved for users with the Calls Supervisor or Calls Admin role. Users without those roles do not see AI supervisor in the navigation. See [Permissions and roles](./permissions-and-roles.md) for the full role model.
:::info
AI supervisor only shows _autonomous_ AI engagements -- calls where the AI is the speaking participant on the line. AI coaching sessions (where the AI whispers suggestions to a human agent on a call) are not represented here; those appear inside the human agent's softphone coaching feed.
:::
## Accessing the view
Navigate to **Calls > AI Supervisor** in the left sidebar. The route is `/ai-supervisor`.
When no autonomous AI calls are in flight, the view shows a calm "All quiet" banner along with a brief description of the four capabilities the surface provides. The grid populates the moment any AI agent picks up an inbound call.
## The fleet grid
Every active autonomous AI call appears as a card in the grid. Cards sort by health (most-attention-needed first), then by call duration. Each card shows:
| Element | Meaning |
| --- | --- |
| Health badge | INTERVENE, WATCH, or HEALTHY -- a heuristic signal computed from turn cadence and call age |
| AI agent name | The name configured on the AI voice agent that is handling the call |
| Duration and turn count | Live tickers updated every second while the call is in progress |
| Transcript preview | The most recent turn from the call, truncated to fit the card |
| Activity indicator | "No turn in Xs" appears when the conversation has gone quiet |
| Wiretap link | Opens the wiretap panel for that call |
### Health signals
Health is a heuristic, not a hard signal from the AI. Treat it as a hint that this card is worth a glance, not as a verdict.
| Badge | Color | What it usually indicates |
| --- | --- | --- |
| HEALTHY | Green | Recent turns, conversational rhythm, no warning signals in the transcript |
| WATCH | Amber | Slowing turn cadence, repeated questions, or other signals worth keeping an eye on |
| INTERVENE | Red | Long silence, distress signals, or the AI looping. A supervisor should read the transcript and consider stepping in |
The badges recompute continuously as new turns land in the wiretap stream.
## The wiretap panel
Selecting a card opens the wiretap panel. On screens 1280px or wider the panel docks to the right of the grid as a side-by-side composition. On narrower screens it slides in over the grid as a drawer with a backdrop; clicking the backdrop closes it.
Selection is preserved across navigation, so jumping out to **Calls** to look at the softphone and back to **AI Supervisor** keeps the same card open.
The panel has four regions, top to bottom:
1. **Header** -- AI agent name, live status indicator (a pulsing green dot for live, a calm grey dot for ended), peer-supervisor avatars, and a close control.
2. **Transcript stream** -- one bubble per turn, with role-aware styling (customer in plain, AI in iris-tinted, supervisor whispers as inline annotations).
3. **Whisper composer** -- a single-line text area for sending private guidance to the AI.
4. **Supervisor actions** -- one row per active call leg with caller, duration, and Listen / Take Over controls.
### Peer supervisors
If another supervisor has whispered to the AI in the last five minutes, their avatar appears in the header as a small overlapping group. This is a soft presence indicator -- it tells you "someone else is also paying attention here" without requiring a back-channel.
### Live versus ended
The panel keeps showing the transcript after a call ends so a supervisor can review what happened. The status indicator switches from "Live" to "Call ended", the whisper composer is hidden, and the supervisor action row is hidden. The transcript itself stays visible until the panel is closed.
## Whispering to the AI
A whisper is a private message that is fed into the AI's context. The AI may incorporate it into the next thing it says; the customer never hears it.
To send a whisper:
1. Type the message in the composer at the bottom of the wiretap panel.
2. Press **Enter** to send (Shift+Enter inserts a newline).
3. The whisper appears in the transcript immediately as an annotation, attributed to your supervisor name.
:::tip
Whispers work best as concise, directive instructions. "Confirm the order number before continuing" lands better than "the customer seems frustrated, maybe ease up." The AI parses the whisper as an instruction.
:::
### What whispers look like
Whispers appear in the transcript as inline annotation rows -- icon, label "Whisper · _supervisorname_", and the message text -- styled distinctly from peer turns. They are not customer messages, not AI messages, and not bubbles; they are sideband notes.
### Pending and failed whispers
A whisper enters a brief "pending" state while it is being delivered. If delivery fails (network error, rate limit, etc.), the whisper is marked **Failed** with a red border. A retry chip appears above the composer offering to resend it.
### Rate limit
To prevent the AI's context from being flooded, whispers are rate-limited to roughly one per second per supervisor. Sending faster surfaces a brief hint in the composer ("Slow down -- one whisper at a time") and quietly drops the excess.
## Stepping in
Three actions let a supervisor take a more active role on a live call. The right choice depends on what you intend to do.
| Action | What it does | When to use |
| --- | --- | --- |
| **Listen** | Joins the call as a silent listener. The customer and the AI cannot hear you | You want to verify what is happening with audio context, but don't intend to participate |
| **Take Over (Hand off gracefully)** | The AI tells the customer that you are joining, then disconnects. You are now the agent on the call | You want to take the conversation, and you want the customer to know the human is here |
| **Take Over (Disconnect immediately)** | The AI is disconnected without warning. You are the agent on the call from that moment | The conversation needs to end now -- aggressive caller, sensitive content, etc. |
### Listening
Click **Listen** in the supervisor action row. You are added to the conference muted. Your softphone shows the call in a "Listening" state. You can leave the listen any time without affecting the call.
You cannot listen if you are already on another call. The action will fail and the call will not be joined.
### Taking over
Click **Take Over** to bring up the takeover modal. The modal offers two paths:
- **Hand off gracefully** -- the AI tells the customer "I'm going to hand you to a person now" before disconnecting. The graceful unwind takes a few seconds. The modal stays open showing "Handing off..." until the AI has fully exited.
- **Disconnect immediately** -- the AI is dropped from the conference instantly with no transition. The customer hears whatever is on your line next.
Either way, once the AI is gone, you are the agent on the call. The view automatically routes you to **Calls**, where the existing softphone surface drives the rest of the conversation.
### When a graceful handoff stalls
If the AI hasn't disconnected within about 14 seconds of starting a graceful handoff, the modal upgrades to a "Handoff is taking longer than expected" state with two options:
- **Keep waiting** -- continue waiting for the graceful exit
- **Force disconnect** -- escalate to an immediate disconnect
This is a fallback for the rare case when the AI doesn't honor the handoff request.
## Who can use AI supervisor
| Capability | Admin | Supervisor | User |
| --- | --- | --- | --- |
| See AI Supervisor in navigation | Yes | Yes | No |
| View the fleet grid | Yes | Yes | No |
| Open the wiretap panel | Yes | Yes | No |
| Send whispers | Yes | Yes | No |
| Listen on a call | Yes | Yes | No |
| Take over a call | Yes | Yes | No |
:::info
AI supervisor permissions are separate from AI agent _configuration_. Creating, editing, and deleting AI agents is restricted to admins and is done from the AI Agents section of the CRM, not from this view.
:::
## Best practices
1. Use Listen before Take Over when possible. A 30-second listen often resolves the question of whether a takeover is even needed.
2. Whisper before disconnecting. Most "the AI is going off the rails" moments can be redirected with a single whisper. Reserve takeover for cases where the AI cannot recover.
3. Prefer graceful handoff over immediate disconnect. A graceful handoff lands the call cleanly with the customer informed; an immediate disconnect is jarring and should be reserved for situations that warrant it.
4. Treat health badges as a triage hint, not a verdict. A WATCH badge is a prompt to glance at the transcript. INTERVENE is the one that should consistently pull a supervisor's attention.
5. Coordinate when peer avatars are showing. If you see other supervisors' avatars in the header, you are not the only person watching. Whispering at the same time is fine; taking over at the same time is not.
## Related pages
- [AI voice agents](./ai-voice-agents.md) -- configuring AI agents and assigning them to queues
- [Permissions and roles](./permissions-and-roles.md) -- the full Calls permission model
- [Queue monitoring and dashboard](./queue-monitoring-and-dashboard.md) -- the supervisor view for human-handled calls
- [The softphone interface](./the-softphone-interface.md) -- the surface you are routed to after a takeover
---
# AI voice agents
https://docs.ultracart.com/customers-crm/calls/ai-voice-agents
doc_type: explanation
AI voice agents are automated agents that can handle inbound calls autonomously, assist human agents during live calls with real-time coaching, and perform actions like looking up orders or checking account status. They integrate directly into the UltraCart Calls system alongside human agents.
## Overview
AI voice agents serve two primary roles in UltraCart Calls:
- **Autonomous call handling** -- an AI agent answers an inbound call, has a natural language conversation with the caller, collects information, performs actions, and routes the call to a human agent or queue when needed.
- **Real-time coaching** -- an AI agent listens to a live call between a human agent and a caller, then provides whisper suggestions that only the human agent can see.
AI agents can be assigned to queues just like human agents. They can answer calls as a first responder, serve as a backup when no human agents are available, or coach human agents in real time. Every AI interaction is tracked with session data, tool call logs, and cost breakdowns in the call record.
## AI agent capabilities
### Autonomous inbound handling
When assigned to a queue, an AI agent can answer inbound calls and carry on a natural conversation with the caller. The AI agent can:
- Greet callers and collect information (name, order number, reason for calling)
- Look up orders and subscription details
- Check customer account status
- Perform actions like pausing, resuming, or canceling subscriptions
- Generate coupons
- Create support tickets
- Transfer the call to a queue, specific agent, extension, or IVR menu when it can't resolve the issue
### Real-time coaching
When configured as an AI coach for a queue, the AI agent listens to the conversation between the human agent and the caller. It provides real-time whisper suggestions that appear in a coaching feed panel on the agent's screen. The caller never hears the AI coach.
Whisper suggestions have priority levels that affect their visual styling:
- **Info** -- general information and context
- **Suggestion** -- recommended actions or talking points
- **Warning** -- alerts about potential issues or sensitive topics
## Configuring an AI agent
AI agent configuration requires Admin permissions (either Calls Admin or Chat Admin).
### Creating an AI agent
AI agents are created through the AI Assistants section of the UltraCart CRM, not the Calls settings. Navigate to **AI Agents > Agents** to create and configure AI agents.
### General settings
- **Display Name** -- the name the AI introduces itself as during calls (3-100 characters)
- **Profile Image** -- an avatar image displayed in webchat interactions
### Instructions
AI agents have five instruction tabs that control their behavior across different channels:
| Tab | Purpose |
| --- | --- |
| Agent Personality | Sets the agent's overall demeanor and communication style (up to 10,000 characters) |
| Chat Instructions | Additional instructions specific to webchat handling |
| SMS Instructions | Additional instructions specific to SMS message handling |
| Ticket Instructions | Additional instructions specific to support ticket handling |
| Voice Instructions | Instructions specific to phone call handling, plus AI voice selection |
### AI voice personality
Under Voice Instructions, select the AI agent's speaking voice:
- **Ara** (default)
- **Rex**
- **Sal**
- **Eve**
- **Leo**
The voice personality determines how the AI sounds during phone calls.
:::tip
To configure voice settings quickly from the Calls agent list, edit the AI agent in **Calls > Settings > Agents** and select the **Agent voice settings** button. This links directly to the Voice Instructions tab.
:::
### Agent capabilities
Toggle individual capabilities on or off to control what the AI agent can do:
**Orders and subscriptions:**
- Look up order information
- Look up subscription information
- Update subscription credit card
- Pause, resume, cancel, or delay subscriptions
**Live agent and ticket creation:**
- Transfer chat to a live agent
- Create support tickets (via email, UltraCart Task, or Zoho Desk)
**Item data and coupons:**
- Access storefront and item data
- Generate coupons
### Knowledge base
Upload documents (`.txt`, `.md`, `.pdf`) to give the AI agent additional context. The AI uses these documents to provide more accurate and personalized responses. Knowledge base documents can be downloaded or deleted from the agent's configuration page.
### MCP servers
Connect external tool servers using the Model Context Protocol (MCP). Each MCP server provides additional capabilities the AI can use during conversations. Configure:
- **Server URL**
- **Authentication** (basic auth or header-based)
- **Priority** (determines the order in which servers are consulted)
Each configured server shows a live status indicator (available or unavailable).
## Adding AI agents to queues
AI agents are assigned to queues the same way as human agents:
1. Navigate to **Calls > Settings > Queues**.
2. Edit a queue.
3. Under **Queue Members**, toggle on the AI agent.
4. Configure the AI priority and timeout (see below).
5. Select **Save**.
### AI priority settings
When a queue contains both human and AI agents, the **AI Priority** setting controls when the AI answers:
| Priority | Behavior |
| --- | --- |
| Neutral | AI agents are treated the same as human agents in the routing pool |
| First | The AI agent answers first. If it can't resolve the call within the timeout, it transfers to a human agent. |
| Backup | The AI agent answers only when no human agents are available |
### AI timeout
When priority is set to **First** or **Backup**, the AI timeout defines how many seconds the AI agent has to handle the call before automatically routing to a human agent. Set a timeout that gives the AI enough time to greet the caller and attempt resolution, but doesn't leave callers waiting too long if the AI can't help.
## AI coaching during calls
### Queue-level coaching setup
To enable AI coaching for all calls in a queue:
1. Navigate to **Calls > Settings > Queues**.
2. Edit the queue.
3. Under **AI Coach Agent**, select an AI agent from the dropdown.
4. Select **Save**.
All calls taken from this queue now have AI coaching available.
### Using AI coaching during a call
1. During an active call, select **AI Coach** from the softphone controls.
2. If multiple AI agents are available, select one from the dropdown.
3. Select **Start Coaching**.
4. The AI coaching feed appears, showing "Listening to conversation..." while the AI begins analyzing the call.
5. As the conversation progresses, whisper suggestions appear in the feed. Newer messages appear at the top.
6. Select **Stop** to end the coaching session.
Whisper suggestions are rendered as formatted text and can include bullet points, bold text, and other formatting. Each suggestion is styled by priority level for quick scanning.
## AI agent transfers
During autonomous call handling, an AI agent can transfer the caller to:
- A specific queue
- A specific human agent
- An extension
- An IVR menu
Transfers happen seamlessly -- the caller is connected to the new destination just as they would be during a human-initiated transfer.
## AI engagements in call records
Every AI interaction is tracked in the call record and visible in the [call history detail view](./call-history-and-analytics.md).
### Engagement data
Each AI engagement records:
- **AI agent name** and identifier
- **Engagement type** (primary for autonomous handling, coaching for whisper coaching)
- **Start and end timestamps**
- **Tool call history** -- every action the AI took during the call, including tool name, parameters, result, duration, and success/failure status
- **Whisper history** -- for coaching engagements, every suggestion the AI provided to the human agent
### Cost tracking
AI engagements include a cost breakdown:
- **Billed minutes** and cost per minute
- **Per-engagement cost**
- **Total AI cost** aggregated across all engagements for the call
AI costs appear alongside call and transcription costs in the call record's financial section (visible to admins only).
## Multiple AI agents per call
A single call can involve multiple AI agents. For example, an AI receptionist might answer and greet the caller, then transfer to a support queue where a different AI agent provides coaching to the human agent. Each AI agent's engagement is tracked separately in the call record.
## Related pages
- [Call queues](./call-queues.md) -- assign AI agents and configure coaching per queue
- [Transfers and conferencing](./transfers-and-conferencing.md) -- AI coaching feed during calls
- [Call history](./call-history-and-analytics.md) -- review AI engagements, tool calls, and costs
- [Permissions and roles](./permissions-and-roles.md) -- admin permissions required for AI configuration
- [Agent management](./agent-management.md) -- AI agents in the agent list
---
# Audio library
https://docs.ultracart.com/customers-crm/calls/audio-library
doc_type: how-to
The Audio Library is a centralized repository for all audio files used in your UltraCart Calls system. Upload custom audio for IVR menu greetings, queue hold music, voicemail prompts, and other voice prompts. Audio files uploaded here can be referenced from menus, queues, and voicemail mailboxes throughout your configuration.
## Overview
Instead of uploading the same audio file in multiple places, the Audio Library gives you a single location to manage all your voice prompts and hold music. Upload a file once, then select it wherever you need it -- in a queue greeting, an IVR menu prompt, a voicemail mailbox, or as your default hold music.
## Uploading audio files
1. Navigate to **Calls > Settings > Audio Library**.
2. Select **Upload New Audio File**.
3. Choose one or more files from your computer.
4. The files upload and appear in the library list.
### Supported formats
- **MP3** (`.mp3`)
- **WAV** (`.wav`)
### File size limit
Each file can be up to **10 MB**. Files exceeding the limit are rejected with an error message.
:::tip
For hold music, keep files between 1-3 minutes long. Longer files increase load times without significantly improving the caller experience. For greetings and prompts, keep them under 30 seconds.
:::
### Uploading multiple files
You can select and upload multiple files at once. Each file is added to the library as a separate entry.
## Where audio files are used
Audio files from the library can be selected in these locations:
| Location | Purpose |
| --- | --- |
| [IVR menu](./ivr-menus-auto-attendant.md) greeting | The prompt callers hear when the menu answers (e.g., "Press 1 for Sales...") |
| [Queue](./call-queues.md) greeting | The message callers hear when entering a queue |
| [Queue](./call-queues.md) hold music | Music that plays while callers wait in the queue |
| [Queue](./call-queues.md) no-agent message | The message callers hear when no agents are available |
| [Voicemail](./voicemail.md) greeting | The prompt callers hear before leaving a voicemail |
| [Voicemail](./voicemail.md) followup | The message callers hear after leaving a voicemail |
| [Agent](./agent-management.md) unavailable greeting | The message callers hear when an agent is unavailable (when voicemail is disabled) |
In each of these locations, you choose between uploading an audio file (from the library) or using text-to-speech.
## Text-to-speech alternative
Anywhere an audio file can be used, text-to-speech (TTS) is available as an alternative. With TTS, you type the message text and select a voice (male or female). The system generates the audio automatically.
TTS is convenient for:
- Quick setup when you don't have professional recordings yet
- Frequent changes to greeting text
- Testing new prompts before recording professional audio
For a polished caller experience, professional recordings generally sound better than TTS. Consider using TTS initially and replacing with recorded audio as your system matures.
## Managing audio files
### Viewing the library
Navigate to **Calls > Settings > Audio Library** to see all uploaded files. Each file displays its filename with playback and delete controls.
### Playing audio
Select the **Play** button next to any file to open a playback dialog with a standard audio player. This lets you verify the content and quality of each file without assigning it anywhere.
### Deleting audio files
Select the **Delete** button next to a file and confirm the deletion. The file is permanently removed from the library.
:::warning
Before deleting an audio file, verify that it's not currently in use by any menus, queues, or voicemail mailboxes. Removing an audio file that's referenced elsewhere may cause those configurations to fall back to default behavior or silence.
:::
## Related pages
- [IVR menus](./ivr-menus-auto-attendant.md) -- use audio files for menu greetings
- [Call queues](./call-queues.md) -- use audio files for queue greetings and hold music
- [Voicemail](./voicemail.md) -- use audio files for voicemail greetings and followups
- [Agent management](./agent-management.md) -- use audio files for unavailable greetings
---
# Call history and analytics
https://docs.ultracart.com/customers-crm/calls/call-history-and-analytics
doc_type: reference
Call History provides a searchable, filterable log of every call handled by your UltraCart Calls system. Each call record contains comprehensive data: caller information, participating agents, routing path, full timeline, recordings with transcripts, hold and transfer events, AI agent engagements, and cost breakdowns.
## Overview
Every completed call generates a call record that captures what happened from start to finish. Call records are assembled automatically when calls end and appear in real time. You can search and filter records by date, agent, queue, direction, disposition, and more. Detailed views include audio playback, transcripts, participant timelines, and financial data.
## Call history list view
Navigate to **Calls > History** to see the call log.
### Quick filters
Filter chips at the top provide one-click access to common views:
- **Today** -- calls from the current day
- **This Week** -- calls from the current week
- **Inbound** -- incoming calls only
- **Outbound** -- outgoing calls only
- **Internal** -- extension-to-extension calls
- **Missed** -- calls that weren't answered
- **AI Handled** -- calls with AI agent involvement
### Table columns
| Column | Description |
| --- | --- |
| Direction | Icon indicating inbound, outbound, internal, or transfer |
| Date/Time | When the call occurred (sortable, newest first by default) |
| From | The call originator -- caller phone number for inbound, agent name for outbound |
| To | The call recipient -- agent name for inbound, phone number for outbound |
| Queue | The queue the call was routed through (if applicable) |
| Duration | Call length in minutes and seconds |
| Disposition | Call outcome badge (see dispositions below) |
| AI | Icon indicating AI agent involvement |
| Status | Current record status |
| Cost | Total call cost in USD (visible to admins only) |
Calls from different calendar days are separated by visual dividers for easier scanning.
### Call dispositions
Each call record has a disposition indicating its outcome:
| Disposition | Color | Meaning |
| --- | --- | --- |
| Completed | Green | Call was answered and ended normally |
| Missed | Red | Call was not answered (agent didn't pick up) |
| Voicemail | Orange | Caller left a voicemail message |
| Abandoned | Grey | Caller hung up before being connected |
| Abandoned (queue) | Yellow | Caller hung up while waiting in a queue |
| Active | Blue | Call is currently in progress |
| Failed | Red | Call could not be connected |
### Advanced filters
Select the filter button to open the advanced filter dialog with these options:
| Filter | Description |
| --- | --- |
| Start Date / End Date | Filter to a specific date range |
| Direction | Inbound, Outbound, or Internal |
| Phone Number | Search by caller or recipient phone number |
| Search Term | Free-text search across call records |
| Agent | Filter by a specific agent |
| Queue | Filter by a specific queue |
| Disposition | Filter by outcome (Completed, Missed, Voicemail, Abandoned) |
| Status | Filter by record status (Completed, Active, Queued) |
| AI Handled | Show only calls with AI agent involvement |
### Pagination
Results are paginated with configurable page size. Navigate between pages using the pagination controls at the bottom of the list.
## Call detail view
Select any call record in the list to open its detail view.
### Header
The detail header displays:
- **Direction** -- Inbound, Outbound, Internal, or Transfer (color-coded chip)
- **Caller information** -- phone number (clickable) and caller ID name
- **Email** -- if associated with a customer record
- **Queue** -- the queue the call routed through
- **Status and Disposition** badges
- **Key statistics** -- total duration, wait time, and hold time
If the caller's phone number matches a customer profile, a **View Profile** link opens the customer record. If no match is found, an **Add to Profile** button lets you link the call to an existing customer.
### Timeline
The timeline section shows the key moments of the call:
- **Call Created** -- when the call entered the system
- **Call Answered** -- when an agent connected
- **Call Ended** -- when the call terminated
### Agents
A table listing every agent who participated in the call:
| Column | Description |
| --- | --- |
| Name | Agent name |
| Role | Primary agent, transfer target, or supervisor |
| Joined | When the agent joined the call |
| Left | When the agent left the call |
| Answered | Whether the agent answered (Yes/No) |
### Recordings
If the call was recorded, an audio player appears with standard playback controls. When multiple recordings exist (for example, separate recordings from different segments of a transfer), tabs let you switch between them. Each recording shows its duration.
A **Download** button saves the recording as a WAV file.
### Transcript and AI coach whispers
The transcript section displays the call's spoken content with speaker identification:
- Each segment shows the **speaker name**, **timestamp**, and **spoken text**
- Selecting a transcript segment seeks the audio player to that point in the recording
When AI coaching was active during the call, whisper suggestions appear alongside the transcript. Whispers are time-aligned with the transcript so you can see what the AI suggested in context of the conversation.
If the transcript is still being generated, a "Transcript is being generated..." indicator appears.
### Hold events
A table of every hold event during the call:
| Column | Description |
| --- | --- |
| Start | When hold began |
| End | When hold ended |
| Duration | How long the hold lasted |
| Agent | Which agent placed the call on hold |
### Transfer events
A table of every transfer during the call:
| Column | Description |
| --- | --- |
| Type | Warm or cold transfer |
| From | The agent who initiated the transfer |
| To | The transfer destination |
| Time | When the transfer occurred |
### AI agent engagements
Each AI agent interaction during the call is displayed as a card with:
- **AI agent name** and engagement type (primary or coaching)
- **Start and end timestamps**
- **Whisper count** (for coaching engagements)
Within each engagement card, a **Tool Calls** table shows every action the AI took:
| Column | Description |
| --- | --- |
| Tool name | The action performed (e.g., order lookup, subscription check) |
| Called | When the tool was invoked |
| Duration | How long the tool call took (in milliseconds) |
| Status | Success or failed |
Selecting a tool call row opens a detail dialog showing the full parameters and result data.
### Financial data (admin only)
The financial section shows the cost breakdown:
| Field | Description |
| --- | --- |
| Call Cost | Telephony charges for the call |
| Transcription Cost | Cost of transcribing the recording |
| AI Cost | Total cost of AI agent engagements |
| Total Cost | Sum of all costs |
Costs are displayed in USD to four decimal places (e.g., $0.0042).
:::info
Call pricing data may take up to 15 minutes to appear after a call ends. Records initially show without cost data and update automatically when pricing is available.
:::
## Real-time notifications
When a new call record is created, a notification appears in the interface. If you're viewing a call record that receives an update (for example, when pricing data arrives), the detail view refreshes automatically.
## Data retention
Call records are retained for 90 days. After the retention period, records are automatically removed. Download recordings and export any data you need before the retention period expires.
## Related pages
- [Call recording](./call-recording.md) -- recording configuration and controls
- [Call transcription](./call-transcription.md) -- how transcripts are generated
- [AI voice agents](./ai-voice-agents.md) -- AI engagements and tool calls
- [Permissions and roles](./permissions-and-roles.md) -- admin-only visibility for cost data
- [Unified platform integration](./unified-platform-integration.md) -- customer profile linking
---
# Call queues
https://docs.ultracart.com/customers-crm/calls/call-queues
doc_type: how-to
Queues are the core call routing mechanism in UltraCart Calls. When a call arrives, it enters a queue where it waits until an available agent is assigned. Queues support custom greetings, hold music, configurable wrap-up periods, voicemail fallback, and AI coaching.
## Overview
A queue represents a team or function in your organization -- "Sales," "Support," "Billing," and so on. You assign agents to a queue, and when a call enters that queue, the system automatically finds an available agent and connects them.
While waiting, callers hear a greeting followed by hold music. If no agents are available, the queue can fall back to voicemail so callers aren't left waiting indefinitely. After an agent finishes a call, they enter a configurable wrap-up period before receiving the next call.
## Creating a new queue
1. Navigate to **Calls > Settings > Queues**.
2. Select **Add Queue**.
3. Enter a descriptive name for the queue (e.g., "Sales Team" or "Technical Support").
4. Configure the sections described below.
5. Select **Save**.
## Caller experience settings
These settings control what callers hear when they enter the queue.
### Greeting
The greeting plays once when a caller first enters the queue. Choose between:
- **Audio file** -- upload a pre-recorded greeting from the [audio library](./audio-library.md).
- **Text-to-speech** -- type a greeting message and select a male or female voice. The system generates the audio automatically.
A typical greeting might be: "Thank you for calling. Your call is important to us. Please hold while we connect you to the next available agent."
### Hold music
Upload an audio file that plays on a loop while the caller waits. If no hold music is configured, callers hear silence while waiting.
### Queue position announcements
Enable **Announce Queue Position** to periodically tell callers their place in the queue (e.g., "You are caller number 3 in the queue"). This helps callers decide whether to continue waiting or leave a voicemail.
## Agent membership
Agents receive calls from a queue only if they are assigned as members. You can assign agents individually or by group.
### Assigning individual agents
Under **Queue members** in the queue edit dialog, toggle each agent on or off. Both human agents and AI agents can be assigned to a queue. Human agents display a person icon; AI agents display an AI icon.
### Assigning agent groups
If your organization uses agent groups, you can toggle an entire group on or off. This adds or removes all agents in that group at once.
### AI agent settings
When a queue includes AI agents, additional settings appear:
- **AI Priority** -- controls when AI agents handle calls:
- **Neutral** -- AI agents are treated the same as human agents
- **First** -- the AI agent answers first; if it can't resolve the call within the timeout, it routes to a human agent
- **Backup** -- the AI agent only answers when no human agents are available
- **AI Timeout** -- the number of seconds the AI agent has to handle the call before routing to a human (applies to First and Backup priority modes)
## Timing and thresholds
### Wrap-up time
After an agent finishes a call from this queue, they enter a **Wrap-Up** period. During wrap-up, the agent's status shows "Wrap-Up" with a countdown timer, and they don't receive new calls. This gives agents time to complete notes or other post-call tasks.
Set the wrap-up duration in seconds. A value of 0 disables wrap-up -- agents return to their previous status immediately after the call ends.
:::tip
15-30 seconds is a common wrap-up duration for most support teams. Adjust based on how much post-call work your agents typically need.
:::
### Max hold time
The maximum number of seconds a caller waits in the queue before being redirected. When a caller's wait time exceeds this threshold, the call routes to the queue's voicemail fallback (if configured).
### Wait warning and critical thresholds
These thresholds control the color coding in the [queue monitoring dashboard](./queue-monitoring-and-dashboard.md):
- **Wait Warning** -- when a caller's wait time exceeds this threshold (in seconds), their entry turns yellow in the dashboard
- **Wait Critical** -- when wait time exceeds this threshold, their entry turns red
These are visual indicators only and don't affect call routing.
## Recording
Enable **Record Calls** to automatically record all calls taken from this queue. When enabled, recording starts as soon as the agent connects with the caller. Agents can still pause and resume recording during the call.
For details on recording controls and storage, see [Call recording](./call-recording.md).
## AI coaching
Assign an **AI Coach Agent** to provide real-time guidance to human agents during calls from this queue. When AI coaching is active, the AI listens to the conversation and sends whisper suggestions that only the agent can see.
The AI Coach dropdown only shows AI agents. Selecting an AI coach applies to all calls in the queue -- individual agents don't need to enable it separately.
See [AI voice agents](./ai-voice-agents.md) for more on configuring AI coaching.
## Voicemail fallback
When no agents are online or available for a queue, you can route callers to voicemail instead of leaving them on hold indefinitely.
Configure the **No Agent Available** setting to control what happens:
- **Audio file** -- play a message (e.g., "All agents are currently offline. Please call back during business hours.") and disconnect
- **Text-to-speech** -- generate an audio message with male or female voice
- **Voicemail mailbox** -- route the caller to a shared voicemail mailbox where they can leave a message
When routed to a queue voicemail mailbox, all agents in the queue (and all admins) can see and manage the messages. See [Voicemail](./voicemail.md) for details on configuring shared mailboxes.
:::tip
Callers can also opt out of waiting by pressing a key to go directly to voicemail. This is configured through the queue position announcement.
:::
## Copying and deleting queues
### Copying a queue
To duplicate a queue's configuration, select **Copy Queue** from the queue's edit dialog. This creates a new queue with the same settings, greetings, and membership, with " - Copy" appended to the name. You can then rename it and adjust settings as needed.
### Deleting a queue
To remove a queue, select **Delete** from the queue's edit dialog. Before deleting, verify that no phone numbers or time-based rules route to this queue. If other routing rules reference the queue, update them first.
## Related pages
- [Getting started with UltraCart Calls](./getting-started-with-ultracart-calls.md) -- create your first queue as part of initial setup
- [Queue monitoring](./queue-monitoring-and-dashboard.md) -- real-time dashboard for queue performance
- [Agent management](./agent-management.md) -- create and manage agents
- [Audio library](./audio-library.md) -- manage greetings and hold music
- [Voicemail](./voicemail.md) -- configure shared voicemail mailboxes for queues
- [Call recording](./call-recording.md) -- automatic recording settings
- [AI voice agents](./ai-voice-agents.md) -- configure AI agent and coaching behavior
---
# Call recording
https://docs.ultracart.com/customers-crm/calls/call-recording
doc_type: how-to
UltraCart Calls provides flexible call recording with both automatic and manual controls. You can record calls for quality assurance, training, compliance, or dispute resolution. Recordings are dual-channel (agent and caller on separate audio tracks), stored securely, and automatically linked to call history records.
## Overview
Call recording captures both sides of a conversation during a live call. You can configure recording to start automatically for all calls in a queue or for an agent's outbound calls, or you can start and stop recording manually during any call. Recordings are accessible from the call history detail view.
Recording automatically pauses during [agent-assisted payment capture](./agent-assisted-payments.md) to protect sensitive card data and maintain PCI compliance.
## Automatic recording
Automatic recording starts as soon as an agent connects with a caller, with no manual action required.
### Queue-level automatic recording
Enable automatic recording for all calls taken from a specific queue:
1. Navigate to **Calls > Settings > Queues**.
2. Edit the queue.
3. Toggle **Record Calls** on.
4. Select **Save**.
Every call answered from this queue is now recorded automatically. The recording starts when the agent connects and stops when the call ends.
### Agent-level automatic recording
Enable automatic recording for all outbound calls made by a specific agent:
1. Navigate to **Calls > Settings > Agents**.
2. Edit the agent profile.
3. Toggle **Record Outgoing Calls Automatically** on.
4. Select **Save**.
Every outbound call this agent makes is now recorded automatically.
:::tip
Use queue-level recording for inbound calls and agent-level recording for outbound calls. Together, they ensure all calls are captured without agents needing to remember to start recording.
:::
## Manual recording controls
During any active call, you can start, pause, and resume recording using the recording button on the softphone control panel.
### Recording states
| Button label | Current state | What happens when selected |
| --- | --- | --- |
| **Start Recording** | No recording in progress | Begins recording the call |
| **Pause Recording** | Recording is active | Pauses the recording (audio is not captured while paused) |
| **Resume Recording** | Recording is paused | Resumes recording from where it was paused |
The recording button label updates automatically to reflect the current state.
### When to pause recording
Pause recording when sensitive information is being discussed that shouldn't be captured:
- Credit card numbers, social security numbers, or other sensitive personal data
- Confidential business information
- Any content the caller requests not to be recorded
:::info
Recording pauses automatically during [agent-assisted payment capture](./agent-assisted-payments.md). You don't need to pause manually when capturing credit card information through the payment flow.
:::
## PCI compliance
UltraCart Calls is designed to protect sensitive payment data in recordings:
- **Automatic pause during payment capture** -- when an agent initiates an agent-assisted payment session, recording pauses automatically. It resumes when the payment session completes or is canceled.
- **Manual pause for sensitive conversations** -- agents can pause recording at any time for conversations involving sensitive data not covered by the automatic pause.
This ensures that credit card numbers, CVVs, and other payment details are never stored in call recordings.
## Dual-channel recording
Recordings capture the agent and caller on separate audio channels. This separation provides:
- **Clearer audio** -- each speaker's voice is isolated, reducing cross-talk
- **Better transcription** -- the [transcription service](./call-transcription.md) can identify who said what, producing speaker-labeled transcripts
## Accessing recordings
Recordings are available in the **Call History** detail view:
1. Navigate to **Calls > History**.
2. Select a call record to open its detail view.
3. The recording appears as a playable audio player within the call record.
Each recording shows the full audio captured during the call (excluding paused segments).
## Recording retention
Recordings are retained for 90 days. After the retention period, recordings are automatically deleted. If you need to retain recordings longer, download them from the call history detail view before the retention period expires.
> **Important:** Plan your recording retention needs accordingly. Once the 90-day retention period passes, recordings cannot be recovered.
## Related pages
- [The softphone interface](./the-softphone-interface.md) -- recording controls during active calls
- [Call transcription](./call-transcription.md) -- automatic transcription of recordings
- [Agent-assisted payments](./agent-assisted-payments.md) -- automatic recording pause during payment capture
- [Call queues](./call-queues.md) -- enable automatic recording per queue
- [Agent management](./agent-management.md) -- enable automatic recording for outbound calls
- [Call history](./call-history-and-analytics.md) -- access recordings in call records
---
# Call transcription
https://docs.ultracart.com/customers-crm/calls/call-transcription
doc_type: explanation
Call recordings are automatically transcribed, producing a full-text transcript with speaker identification and timestamps. Transcripts make it easy to search, review, and reference calls without listening to the full audio. Voicemail messages are also transcribed automatically.
## Overview
When a call recording completes, UltraCart automatically sends it for transcription. The transcription service produces two outputs: a plain-text transcript of the entire call and a detailed time-stamped transcript with speaker labels identifying who said what. Transcripts are linked to the call record and accessible from the call history detail view.
Voicemail messages are also transcribed automatically, so you can read the caller's message without listening to the audio.
## How transcription works
Transcription runs automatically after a recording finishes. No manual action is required.
1. The call ends and the recording is finalized.
2. The recording is submitted for transcription.
3. The transcription service processes the audio using speaker diarization (identifying different speakers) and speech-to-text conversion.
4. The completed transcript is stored and linked to the call record.
Transcripts typically appear within a few minutes of the call ending, depending on the length of the recording.
## Transcript outputs
Each transcription produces two formats:
### Full text transcript
A plain-text version of the entire conversation. This is the simplest format -- a continuous block of text capturing everything said during the call.
### Speaker-labeled transcript
A detailed transcript broken into segments, where each segment is attributed to a specific speaker and includes a timestamp. This format lets you see exactly who said what and when.
In the call history detail view, the speaker-labeled transcript is displayed as a conversation with each segment attributed to the appropriate speaker.
## Transcript status
Transcripts go through three states:
| Status | Meaning |
| --- | --- |
| Pending | The recording has been submitted for transcription but is not yet complete |
| Completed | The transcript is ready and available for review |
| Failed | Transcription could not be completed (e.g., audio quality too poor) |
## Accessing call transcripts
1. Navigate to **Calls > History**.
2. Select a call record to open its detail view.
3. The transcript appears below the recording player, showing speaker-labeled segments of the conversation.
## Voicemail transcription
Voicemail messages are transcribed automatically when the recording is saved. The transcript text appears in the voicemail playback dialog alongside the audio player. This lets you quickly scan a message's content without listening to the audio.
See [Voicemail](./voicemail.md) for details on managing voicemail messages.
## AI whisper transcripts
When [AI coaching](./transfers-and-conferencing.md) is active during a call, the call history detail view also shows what the AI coach said to the agent. This includes:
- **AI whisper messages** -- real-time suggestions the AI provided during the call
- **AI tool calls** -- actions the AI agent took during the call (such as looking up order information)
These entries are separate from the call transcript and appear in their own section of the call detail view.
## Related pages
- [Call recording](./call-recording.md) -- recording configuration and controls
- [Voicemail](./voicemail.md) -- voicemail message transcription
- [Call history](./call-history-and-analytics.md) -- accessing call records and transcripts
- [AI voice agents](./ai-voice-agents.md) -- AI coaching and whisper functionality
---
# Class of Service (call restrictions)
https://docs.ultracart.com/customers-crm/calls/class-of-service-call-restrictions
doc_type: how-to
Class of Service (CoS) lets administrators control which outbound calls agents are allowed to make. Restriction templates define rules that can block international calls, premium-rate numbers, calls outside business hours, or all outbound calling entirely. When an agent attempts a restricted call, a real-time supervisor override workflow lets them request permission to proceed.
## Overview
CoS is a policy system for outbound dialing. You create restriction templates with rules, then assign those templates to agents. When an agent dials a number that violates their assigned template, the call is blocked and a notification explains why. The agent can then request a one-time override from a supervisor.
This is useful for controlling phone costs, preventing unauthorized international calls, and ensuring compliance with company dialing policies.
## Creating restriction templates
Templates are managed in **Calls > Settings > Class of Service**.
1. Navigate to **Calls > Settings > Class of Service**.
2. Select **Add Template**.
3. Enter a **Template Name**.
4. Configure the restriction rules described below.
5. Select **Save**.
### Assigning templates to agents
Assign a CoS template to an agent in their agent profile:
1. Navigate to **Calls > Settings > Agents**.
2. Edit the agent.
3. Select a template from the **Class of Service** dropdown.
4. Select **Save**.
### Default template
You can designate one template as the default. The default template applies to any agent who doesn't have a specific template assigned. This ensures every agent has at least a baseline set of restrictions.
## Restriction rule types
Each template can include any combination of these restriction rules:
### Disable all outbound calls
Blocks all outbound dialing for the agent. The agent can still receive inbound calls and make internal extension-to-extension calls. Use this for agents who should only handle inbound calls.
### Country restrictions
Restrict outbound calls to specific countries. When configured, the agent can only dial numbers in the allowed countries. Calls to all other countries are blocked.
If no countries are specified, only domestic calls are allowed.
:::tip
For most businesses, allowing only domestic calling is sufficient. Add specific countries only when agents need to reach international customers.
:::
### Premium and shared-cost number blocking
Blocks calls to premium-rate numbers (900, 976 numbers), shared-cost numbers, and shortcodes. These number types often carry high per-minute charges.
### Time-based restrictions
Restrict outbound calling to specific time windows by referencing a timeframe. Outside the permitted hours, outbound calls are blocked. This uses the same timeframes configured in [time-based routing](./time-based-routing-and-availability.md).
## How restrictions are enforced
When an agent enters a phone number on the softphone dial pad, the system evaluates the number against the agent's CoS template in real time:
- If the number is **allowed**, the agent can dial normally.
- If the number is **blocked**, the dial button is disabled and a restriction warning appears on the dial pad explaining the reason (e.g., "Outbound calls are disabled," "Domestic calls only," or "Outside permitted hours").
The system identifies the destination country from the phone number and checks it against the template's country restrictions. Premium number types are detected automatically.
### Restrictions during transfers
CoS restrictions also apply when an agent transfers a call or dials out on Line 2. If the transfer destination is restricted by the agent's CoS, the transfer is blocked. Unlike Line 1, **override requests are not available for Line 2 transfers** -- the restriction is enforced without exception.
> **Important:** CoS restrictions on Line 2 cannot be overridden. If an agent needs to transfer to a restricted number, a supervisor or admin must place the call instead.
## Supervisor override workflow
When an agent's call is blocked by CoS, they can request a one-time override from a supervisor. The override workflow operates in real time through notifications.
### Step-by-step flow
1. **Agent dials a restricted number.** The call is blocked and a notification appears explaining the restriction.
2. **Agent requests an override.** The notification includes a **Request Override** button. Selecting it sends an override request to all online supervisors and admins.
3. **Agent waits for approval.** An "Awaiting Approval" notification appears with a 60-second countdown timer.
4. **Supervisor receives a notification.** A floating notification card appears in the supervisor's interface showing the agent's name, the restricted number, and the restriction reason. The card includes **Approve** and **Deny** buttons.
5. **Supervisor responds.** The supervisor approves or denies the request.
6. **Agent sees the result.** The agent receives a notification:
- **Approved**: The agent can now dial the number. The dial pad is pre-filled with the number for convenience.
- **Denied**: The call remains blocked.
7. **If no response within 60 seconds**, the request is automatically denied and the supervisor sees a timeout warning.
### Override validity
An approved override is valid for 5 minutes. During that window, the agent can dial the approved number without triggering another override request. After 5 minutes, the override expires and the number is restricted again.
The override applies only to the specific phone number that was approved, not to all restricted numbers.
## Audit logging
All CoS actions are recorded in an audit log for compliance and review.
### What's logged
- Blocked call attempts (which agent, which number, which restriction rule)
- Override requests (agent, number, timestamp)
- Override approvals and denials (which supervisor responded, timestamp)
- Override timeouts (no supervisor response within 60 seconds)
### Viewing the audit log
1. Navigate to **Calls > Settings > Class of Service**.
2. Select the **Audit Log** tab.
3. The log shows the most recent 100 CoS events.
4. Filter by agent login, action type, or date range to narrow results.
:::info
Audit logs are retained for 90 days.
:::
## Template summary tags
In the template list, each template displays summary tags indicating its active restrictions:
- **No Outbound** -- all outbound calls are disabled
- **Time Restricted** -- calling is limited to specific hours
- **Premium Blocked** -- premium-rate numbers are blocked
- **N Countries** -- calling is restricted to the specified number of countries
These tags provide a quick visual summary without opening each template.
## Related pages
- [Agent management](./agent-management.md) -- assign CoS templates to agents
- [Permissions and roles](./permissions-and-roles.md) -- supervisor permissions for override approvals
- [The softphone interface](./the-softphone-interface.md) -- restriction warnings on the dial pad
- [Transfers and conferencing](./transfers-and-conferencing.md) -- CoS enforcement during transfers
- [Time-based routing](./time-based-routing-and-availability.md) -- timeframes used for time-based restrictions
---
# Getting started with UltraCart Calls
https://docs.ultracart.com/customers-crm/calls/getting-started-with-ultracart-calls
doc_type: tutorial
This guide walks you through the initial setup of UltraCart Calls. By the end, you'll have a phone number, an agent, a queue, and working inbound and outbound calling through your browser.
## Prerequisites
- An active UltraCart account with the Calls feature enabled
- A modern web browser (Chrome, Edge, or Firefox recommended)
- A headset or microphone and speakers connected to your computer
- Browser permission to use the microphone (you'll be prompted on first use)
## Step 1: Purchase your first phone number
Every inbound call starts with a phone number. You need at least one phone number before callers can reach your team.
1. Navigate to **Calls > Settings > Numbers**.
2. Select **Buy Number** to open the phone number search dialog.
3. Choose your country (US, CA, or GB), number type (Local, Toll-Free, or Mobile), and optionally enter an area code or pattern to narrow results.
4. Browse the available numbers. Each result shows the number, location, capabilities (Voice, SMS, MMS), and monthly cost.
5. Select a number to purchase it. The number appears in your number list immediately.
:::tip
If you're just getting started, a local number in your business's area code is the simplest choice. You can always add more numbers later.
:::
## Step 2: Create your first agent
An agent is anyone who makes or receives calls through UltraCart Calls. Each agent needs an extension and a login tied to their UltraCart user account.
1. Navigate to **Calls > Settings > Agents**.
2. Select **Add Agent**.
3. Choose the UltraCart user login for this agent.
4. Assign a work extension number (this is how other agents dial them internally).
5. Leave the call routing preference set to **Browser Softphone** for now.
6. Select **Save**.
Repeat this step for each team member who needs to handle calls.
:::info
The agent's name is pulled automatically from their UltraCart user profile and cannot be changed in the Calls settings.
:::
## Step 3: Create a queue and assign agents
A queue is a call routing group. When a call enters a queue, it waits until an available agent is assigned. You need at least one queue to route inbound calls to your agents.
1. Navigate to **Calls > Settings > Queues**.
2. Select **Add Queue** and give it a name (e.g., "General Support").
3. Under **Caller experience**, choose a greeting type. You can upload an audio file or use text-to-speech to generate a greeting like "Thank you for calling. Please hold while we connect you to an agent."
4. Optionally configure hold music by uploading an audio file.
5. Under **Queue members**, toggle on each agent who should receive calls from this queue.
6. Select **Save**.
## Step 4: Configure inbound routing on your phone number
Now connect your phone number to your queue so inbound calls flow to your agents.
1. Navigate to **Calls > Settings > Numbers**.
2. Select the **Edit** button next to your phone number.
3. In the **Route** dropdown, select your queue (e.g., "General Support").
4. Select **Save**.
Any call to this number now enters the queue and rings your available agents.
## Step 5: Set your agent status to Available
Agents must be in **Available** status to receive inbound calls. When you first connect, your status defaults to **Unavailable**.
1. Navigate to the **Calls** page.
2. Select **Start** on the softphone panel to initialize your browser phone connection.
3. Once connected, use the status dropdown (at the top of the agent panel) and select **Available**.
Your browser is now registered as a softphone and ready to receive calls.
> **Important:** Allow microphone access when your browser prompts you. Without microphone permission, you can receive calls but callers won't hear you.
## Step 6: Make a test inbound call
Verify that your setup works by calling your new phone number from a cell phone or another line.
1. Dial your UltraCart phone number from an external phone.
2. You should hear your queue greeting, followed by hold music.
3. Your softphone rings with an incoming call notification showing the caller's number.
4. Select **Answer** to connect the call.
5. Verify two-way audio -- speak into your headset and confirm the caller hears you, and vice versa.
6. Select **Hang Up** to end the call.
If the call doesn't arrive, check that your agent status is **Available** and that the phone number is routed to the correct queue.
## Step 7: Make a test outbound call
UltraCart Calls also supports outbound dialing from the softphone.
1. On the softphone panel, select the dial pad.
2. Choose a **From** number using the outbound number dropdown (your purchased number appears here).
3. Enter a phone number to call and select **Dial**.
4. The call connects through your browser. Your business phone number displays as the caller ID on the recipient's phone.
5. Select **Hang Up** to end the call.
## What's next
Your basic phone system is now operational. Here are the most common next steps:
- [Set up an IVR menu](./ivr-menus-auto-attendant.md) -- build an automated phone tree ("Press 1 for Sales, Press 2 for Support")
- [Configure business hours](./time-based-routing-and-availability.md) -- route calls differently during and after business hours
- [Set up voicemail](./voicemail.md) -- give callers a way to leave messages when agents are unavailable
- [Enable call recording](./call-recording.md) -- automatically record calls for quality assurance
- [Learn the softphone interface](./the-softphone-interface.md) -- explore call controls, transfers, and audio settings
- [Configure permissions](./permissions-and-roles.md) -- control what each team member can access
---
# Hardware phones (SIP desk phones)
https://docs.ultracart.com/customers-crm/calls/hardware-phones-sip-desk-phones
doc_type: how-to
While UltraCart Calls is primarily a browser-based softphone system, it also supports SIP desk phones for agents who prefer physical hardware. Desk phones are provisioned by MAC address, configured with auto-provisioning for supported manufacturers, and can be used alongside or instead of the browser softphone.
## Overview
Hardware phones connect to UltraCart Calls over SIP (Session Initiation Protocol) and function as an alternative to the browser softphone. An agent can receive calls on their desk phone instead of their browser, while still benefiting from the same queue routing, call recording, and platform integration.
Hardware phones are best suited for:
- Reception desks and shared workstations where a dedicated phone is preferred
- Conference rooms that need a physical speakerphone
- Agents who prefer the feel and audio quality of a desk phone
- Environments where browser-based calling isn't reliable
## Supported phone manufacturers
UltraCart Calls supports desk phones from these manufacturers:
- Yealink
- Polycom
- Grandstream
- Cisco
- Fanvil
- Snom
Each manufacturer has specific supported models available in the configuration interface. Select your manufacturer first, then choose from the available models.
## Provisioning a new desk phone
1. Navigate to **Calls > Settings > Hardware Phones**.
2. Select **Add Phone**.
3. Fill in the phone details:
- **Name** -- a friendly name for the phone (e.g., "Front Desk Phone")
- **Description** -- optional notes (e.g., "Main reception area")
4. Under **Agent Assignment**, optionally assign the phone to an agent.
5. Under **Device Setup**, configure:
- **Phone Brand** -- select the manufacturer
- **Phone Model** -- select the model (filtered by brand)
- **Device ID / MAC Address** -- enter the phone's MAC address (found on a label on the bottom of the phone). The system formats it automatically as `AA:BB:CC:DD:EE:FF`.
- **Server Region** -- select the nearest region for optimal call quality:
- US East Coast (Virginia)
- US West Coast (Oregon)
- Ireland
- Frankfurt, Germany
- Tokyo, Japan
- Singapore
- Sydney, Australia
- Sao Paulo, Brazil
6. Select **Save**.
### Initial setup credentials
After creating the phone, a setup dialog displays the information needed to configure the physical device:
- **Setup Link** -- the auto-provisioning URL the phone uses to download its configuration
- **Username** -- the SIP username
- **Password** -- the SIP password (shown once; copy it now)
Copy all three values. You'll enter them into the phone's admin interface, or use the auto-provisioning URL if your phone supports it.
> **Important:** The SIP password is displayed only once when the phone is created. Copy it immediately. If you lose it, you'll need to regenerate a new password.
### Auto-provisioning
Supported phones can download their configuration automatically from the setup link. Point your phone's provisioning URL to the setup link provided during creation, and the phone pulls its SIP credentials and server settings automatically.
A **Download Config** button is also available to download the provisioning configuration file directly. The file format depends on the manufacturer (`.cfg` for Yealink, Polycom, and Fanvil; `.xml` for Grandstream, Cisco, and Snom).
## Assigning phones to agents
Each hardware phone can be assigned to one agent. When assigned:
- The agent's call routing preference automatically switches to **Hardware Phone**
- Inbound calls ring the assigned desk phone instead of the browser softphone
- The agent's profile shows the phone as their preferred device
To assign a phone to an agent:
1. Edit the hardware phone in **Calls > Settings > Hardware Phones**.
2. Select the agent from the **Assigned Agent** dropdown.
3. Select **Save**.
You can also assign phones from the agent's profile in **Calls > Settings > Agents** by changing the call routing preference to **Hardware Phone** and selecting the linked phone.
:::info
When you remove the last hardware phone from an agent, their call routing preference automatically reverts to **Browser Softphone**.
:::
## Password management
SIP credentials are generated automatically and cannot be set manually.
### Regenerating a password
If a phone's SIP password is compromised or lost:
1. Edit the phone in **Calls > Settings > Hardware Phones**.
2. In the **Phone Credentials** section, select **New Password**.
3. Type `REGENERATE` in the confirmation field and select **Save & Regenerate Password**.
4. Copy the new password from the confirmation dialog.
5. Update the phone's admin interface with the new password, or re-run auto-provisioning.
:::warning
Regenerating the password immediately breaks the phone's connection. The phone cannot make or receive calls until you update its configuration with the new password.
:::
## Managing hardware phones
The hardware phones list in **Calls > Settings > Hardware Phones** shows all provisioned phones with:
- Phone name
- Device information (manufacturer and model)
- Assigned agent (or "Unassigned" badge)
### Editing a phone
Select a phone from the list to edit its name, description, agent assignment, or device settings. The setup link, SIP username, and provisioning configuration are also accessible from the edit view.
### Deleting a phone
Select the **Delete** button to remove a phone. You cannot delete a phone that is currently assigned to an agent -- unassign it first by setting the agent to "No agent (unassigned)" or by changing the agent's routing preference to Browser Softphone.
## Related pages
- [Agent management](./agent-management.md) -- call routing preferences and hardware phone assignment
- [The softphone interface](./the-softphone-interface.md) -- the browser-based alternative to hardware phones
- [Getting started with UltraCart Calls](./getting-started-with-ultracart-calls.md) -- initial system setup
- [Troubleshooting](./troubleshooting.md) -- desk phone connectivity issues
---
# IVR menus (auto-attendant)
https://docs.ultracart.com/customers-crm/calls/ivr-menus-auto-attendant
doc_type: how-to
Interactive Voice Response (IVR) menus -- also called auto-attendants -- let you build automated phone trees that greet callers and route them based on their input. A caller might hear "Press 1 for Sales, Press 2 for Support" and be directed to the right queue, agent, voicemail, or sub-menu.
## Overview
An IVR menu plays a greeting prompt to the caller and waits for input. The caller responds by pressing a key on their phone's keypad (DTMF) or by speaking a keyword. Based on the input, the system routes the call to the configured destination.
Menus can be simple (a single level of options) or complex (nested menus with sub-menus branching off each choice). They're commonly used as the first point of contact for inbound calls, directing callers to the right department before they ever reach a queue.
## Creating a new menu
1. Navigate to **Calls > Settings > Menus**.
2. Select **Add Menu**.
3. Enter a **Name** for the menu (e.g., "Main Menu" or "Support Menu").
4. Configure the greeting, input options, and default route as described below.
5. Select **Save**.
## Menu greeting
The greeting is the audio prompt callers hear when the menu answers. This is where you tell callers their options: "Press 1 for Sales, Press 2 for Support, or stay on the line for general assistance."
Choose between:
- **Audio file** -- upload a pre-recorded prompt from the [audio library](./audio-library.md)
- **Text-to-speech** -- type the prompt text and select a male or female voice
:::tip
Keep menu greetings under 30 seconds. Callers who hear long prompts are more likely to hang up. State the most common option first.
:::
## Input modes
UltraCart IVR menus accept two types of caller input:
- **DTMF (keypress)** -- the caller presses a number on their phone's keypad
- **Speech recognition** -- the caller speaks a keyword (e.g., "Sales" or "Support")
You can configure both for the same menu option, giving callers flexibility. For example, key "1" and the spoken word "Sales" can both route to the Sales queue.
### Input wait time
Set the number of seconds the system waits for the caller to provide input after the greeting finishes. The minimum is 4 seconds. If the caller doesn't respond within this window, the call routes to the default route.
### Direct extension dialing
Enable **Allow Direct Extensions** to let callers dial an agent's extension number directly from the menu keypad. When enabled, a caller who knows their contact's extension can reach them without navigating the menu tree.
## Mapping options to destinations
Each menu option consists of a DTMF digit, an optional speech keyword, and a routing destination.
### Adding an option
Under **Route Options**, each row defines one menu choice:
| Field | Description |
| --- | --- |
| DTMF Digits | The number the caller presses (e.g., 1, 2, 0) |
| Speech Input | An optional spoken keyword the caller can say instead (e.g., "Sales") |
| Route | The destination for this option |
### Routing destinations
Each option can route to:
| Destination | What happens |
| --- | --- |
| Queue | The call enters the selected queue and waits for an agent |
| Agent | The call rings a specific agent's extension directly |
| Menu | The call enters another IVR menu (nesting) |
| Voicemail | The caller hears a voicemail greeting and can leave a message |
| Time-based rule | The system checks the current time and routes accordingly |
| Send Text Message | The caller is texted a message you write, instead of being routed to a person or mailbox |
### Texting information to the caller
Some answers are hard to take down by ear. A support email address, a tracking URL, or an office address read aloud by text-to-speech is easy for a caller to mishear and write down wrong. The **Send Text Message** destination handles those: instead of sending the call on to a queue or an agent, it texts the caller the message you wrote.
To set one up:
1. Navigate to **Calls > Settings > Menus** and edit the menu.
2. On the route option you want, set **Route Call** to **Send Text Message**.
3. Enter the message in the **Text Message** field that appears. The body is required and is limited to 160 characters, with a counter under the box showing how many you have used.
4. Leave **Send From** blank to text the caller from the number they dialed, or pick a different number of yours.
5. Select **Save Menu**.
If you leave the body empty, the save is refused and the menu tells you which option needs a message.
#### Why 160 characters
A text message is billed in segments, and 160 characters is one segment. A message that fits sends as a single text. A longer one is split and charged as several, so the limit keeps both the cost and the caller's experience predictable. Write the answer, not the background: a support email address, a tracking link, or an address is what callers want in writing.
If a menu you built before this limit existed has a longer message, it is left alone. The field shows the whole message, the counter reads over the limit, and the menu still saves. You only run into the limit when you type or paste a new message.
#### Choosing the Send From number
By default the text goes out from the number the caller dialed. That works only if the number is SMS enabled. Voice numbers are not always SMS enabled, and when the dialed number is voice only the text cannot be delivered.
Set **Send From** to send from a different number instead. The picker lists every phone number on your account, including numbers that are not SMS enabled, so check the number you choose is enabled for SMS on the [Numbers](./phone-numbers-dids.md) page. You can only send from a number your account owns, which UltraCart verifies both when you save the menu and again when the call comes in.
:::warning
Picking a Send From number that is not SMS enabled saves without complaint, and the failure only shows up when a caller chooses that option. Confirm the number is SMS enabled before you rely on it.
:::
#### Where this option is available
**Send Text Message** applies to a single route option inside a menu. It is not offered on the menu's default route, on a phone number, or on a time-based rule, because it answers a caller's specific keypress rather than routing a call.
Changing a route option to a different destination later clears the message body and the Send From number for that option.
### Default route
The default route handles callers who don't press any key or speak an unrecognized word within the input wait time. Configure this to catch callers who stay on the line without interacting. Common choices include routing to a general queue, replaying the menu, or connecting to an operator.
## Invalid entry handling
When a caller presses a key that isn't mapped to any option, the system replays the menu greeting so the caller can try again. If the caller still doesn't provide valid input after the timeout, the call routes to the default route.
## Nesting menus
You can create multi-level phone trees by routing a menu option to another menu. For example:
- **Main Menu**: "Press 1 for Sales, Press 2 for Support"
- **Support Menu** (reached by pressing 2): "Press 1 for Technical Support, Press 2 for Billing, Press 3 to return to the main menu"
There's no hard limit on nesting depth, but keep trees shallow -- 2-3 levels at most. Deep menu trees frustrate callers and increase abandonment rates.
:::tip
Always offer a way back. When using nested menus, include an option to return to the previous menu or connect to a live agent.
:::
## Connecting menus to phone numbers
After creating a menu, connect it to one or more phone numbers so callers hear it when they call.
1. Navigate to **Calls > Settings > Numbers**.
2. Select **Edit** on the phone number.
3. In the **Route** dropdown, select the menu.
4. Select **Save**.
## Combining menus with time-based routing
A common pattern uses time-based routing as the first layer, with different menus for business hours and after hours:
1. Create two menus: a business-hours menu (with options for Sales, Support, etc.) and an after-hours menu (with a "leave a message" option).
2. Create a [time-based rule](./time-based-routing-and-availability.md) that routes to the business-hours menu during open hours and the after-hours menu outside of business hours.
3. Assign the time-based rule to your phone number.
This ensures callers always hear an appropriate greeting regardless of when they call.
## Copying and deleting menus
### Copying a menu
Select **Copy Menu** from the menu's edit dialog to duplicate the configuration. The copy includes all options and routing, with " - Copy" appended to the name.
### Deleting a menu
Select **Delete** to remove a menu. Before deleting, the system checks whether any phone numbers or time-based rules reference this menu. If references exist, the deletion is blocked and a message indicates which items need to be updated first.
:::warning
You cannot delete a menu that is currently referenced by a phone number or time-based rule. Update those routing rules to point elsewhere before deleting the menu.
:::
## Related pages
- [Phone numbers](./phone-numbers-dids.md) -- connect menus to inbound phone numbers
- [Time-based routing](./time-based-routing-and-availability.md) -- combine menus with business hours rules
- [Call queues](./call-queues.md) -- route menu options to agent groups
- [Voicemail](./voicemail.md) -- route menu options to voicemail
- [Audio library](./audio-library.md) -- manage audio files for menu greetings
---
# Permissions and roles
https://docs.ultracart.com/customers-crm/calls/permissions-and-roles
doc_type: reference
UltraCart Calls uses a four-tier permission model to control what each person can see and do within the phone system. Permissions determine navigation visibility, configuration access, data visibility, and supervisor capabilities like barge, coach, and override approvals.
## Overview
Every user who accesses UltraCart Calls is assigned one of four permission levels. These levels are hierarchical -- each higher level includes everything the level below it can do, plus additional capabilities.
The four levels, from most access to least:
| Role | Description |
| --- | --- |
| **Admin** | Full access to all Calls features, settings, and data. Can configure the entire phone system. |
| **Supervisor** | Team monitoring and management. Can barge/coach calls, approve overrides, and manage agent status. |
| **User** | Standard call handling. Can make and receive calls, access personal settings, and view their own call history. |
| **No Access** | Cannot access any Calls features. |
## What each role can do
### Admin
Admins have unrestricted access to UltraCart Calls. This role is designed for system administrators and managers who need to configure and maintain the phone system.
Admin-only capabilities include:
- **All settings pages** -- phone numbers, agents, queues, IVR menus, time-based routing, voicemail mailboxes, audio library, hardware phones, and Class of Service templates
- **Agent management** -- create, edit, and deactivate agent profiles for all users
- **Queue configuration** -- create and modify queues, assign agents, configure greetings and hold music
- **Full agent visibility** -- see all agents in the system, regardless of queue membership
- **Cost data** -- view call cost columns in call history
- **All voicemail mailboxes** -- access and manage every voicemail mailbox, including changing assignments and toggling mailboxes on or off
- **AI agent configuration** -- create and configure AI voice agents
- **Queue dashboard** -- view all queues in the monitoring dashboard, not just queues they belong to
### Supervisor
Supervisors can monitor and manage their team in real time. This role is designed for team leads and floor managers.
Supervisor capabilities (in addition to everything a User can do):
- **Barge** -- join an active call silently (muted) or as a participant (unmuted)
- **Coach** -- whisper privately to an agent during a call without the caller hearing
- **Override approvals** -- approve or deny Class of Service override requests from agents
- **Queue reset** -- clear queue statistics
- **Agent status management** -- change another agent's activity status from the queue monitoring dashboard
- **Queue voicemail access** -- view voicemail for queues they belong to
### User
Users have standard call-handling access. This role is designed for agents who handle calls daily.
User capabilities:
- **Make and receive calls** through the softphone
- **Personal settings** -- configure their own cellphone number, recording preferences, and activity status via the **My Profile** page
- **Call history** -- view their own call records (cost columns are hidden)
- **Agent visibility** -- see other agents who share at least one queue with them
- **Voicemail** -- access their personal voicemail mailbox and voicemail for queues they belong to
- **Class of Service** -- view their own calling restrictions and request overrides when a call is blocked
- **Queue monitoring** -- view real-time statistics for queues they belong to
### No Access
Users with no Calls permission cannot access any Calls features. The Calls navigation items are hidden entirely.
## Data filtering by role
Several features display different data based on the user's role:
| Feature | Admin | Supervisor | User |
| --- | --- | --- | --- |
| Agent list | All agents | Shared-queue agents | Shared-queue agents |
| Queue monitoring | All queues | Member queues | Member queues |
| Voicemail sidebar | All mailboxes | Member queue mailboxes | Member queue mailboxes |
| Call history cost | Visible | Hidden | Hidden |
| Settings navigation | All items | My Profile only | My Profile only |
**Shared-queue agents** means the user sees only agents who belong to at least one of the same queues they do. This keeps the agent list relevant to each person's team.
## Assigning roles
Permissions are assigned through the UltraCart user administration system, not within the Calls settings. Contact your UltraCart account administrator to change a user's Calls permission level.
The three Calls permission flags are:
- **pbx\_admin** -- grants Admin access
- **pbx\_supervisor** -- grants Supervisor access
- **pbx\_user** -- grants User access
A user with no Calls permission flags has No Access.
:::info
AI agent configuration requires either the Calls Admin permission or the Chat Admin permission. A user with either role can create and manage AI voice agents.
:::
## Related pages
- [Agent management](./agent-management.md) -- create and configure agent profiles
- [Queue monitoring](./queue-monitoring-and-dashboard.md) -- real-time queue dashboard and supervisor actions
- [Class of Service](./class-of-service-call-restrictions.md) -- outbound call restrictions and override workflow
- [Transfers and conferencing](./transfers-and-conferencing.md) -- barge and coach capabilities
---
# Phone numbers (DIDs)
https://docs.ultracart.com/customers-crm/calls/phone-numbers-dids
doc_type: how-to
Phone numbers are the entry point for every inbound call to your UltraCart Calls system. Each phone number -- also called a Direct Inward Dial (DID) number -- has its own routing rule that determines what happens when a customer calls it. You can route calls to a queue, an IVR menu, a specific agent, voicemail, or a time-based rule.
## Overview
Every phone number you purchase through UltraCart is a dedicated DID assigned to your account. You can purchase numbers in the US, Canada, and the UK, choosing from local, toll-free, and mobile number types. Each number can be independently configured with its own routing, caller ID settings, and regulatory address.
Your phone numbers also serve as outbound caller ID. When an agent makes an outbound call, the recipient sees one of your business phone numbers rather than a personal number. You can designate a default outbound number for the organization, and individual agents can select which number to display when dialing out.

## Purchasing a new phone number
1. Navigate to **Calls > Settings > Numbers**.
2. Select **Buy Number** to open the search dialog.
3. Configure your search filters:
- **Country**: US, CA, or GB
- **Type**: Local, Toll-Free, or Mobile
- **Area Code**: optionally narrow results to a specific area code
- **Contains**: optionally search for numbers matching a pattern (e.g., `*PIZZA`)
- **Voice Enabled / SMS Enabled**: filter by capability
4. Browse the search results. Each number shows its location, capabilities (Voice, SMS, MMS), and monthly cost.
5. Select a number to purchase it.
The number is added to your account immediately and appears in your number list.
:::info
Some international numbers require a regulatory address bundle. If a number shows "Bundle Required - Purchase via Twilio Console," it cannot be purchased directly through the UltraCart interface. Contact support for assistance with these numbers.
:::
## Configuring inbound routing
Each phone number has a routing rule that determines where inbound calls go. You configure routing in the number's edit dialog.
1. Navigate to **Calls > Settings > Numbers**.
2. Select the **Edit** button next to the number you want to configure.
3. In the **Route** dropdown, select a routing destination.
4. Select **Save**.
### Routing options
The route selector groups all available destinations into five categories:
| Destination type | What happens |
| --- | --- |
| Queue | The call enters the selected queue and waits for an available agent. |
| IVR menu | The caller hears an automated phone menu and routes based on their input. |
| Agent | The call rings the selected agent's extension directly. |
| Voicemail | The caller hears a greeting and can leave a voicemail message. |
| Time-based rule | The system checks the current time and routes the call based on your business hours configuration. |
:::tip
For most businesses, routing to a time-based rule is the best starting point. During business hours, the rule sends calls to a queue or menu. After hours, it sends them to voicemail.
:::
### Default phone number
You can designate one phone number as the organization default for outbound calls. When an agent makes an outbound call without selecting a specific number, the default number displays as the caller ID.
To set the default, select the **Set as Default Outbound** option on the desired phone number. Only one number can be the default at a time.
## CNAM / caller ID configuration
CNAM (Caller ID Name) controls the business name that displays on recipients' phones when your agents make outbound calls. CNAM registration is handled at the carrier level and may take several days to propagate across all phone networks.
:::info
CNAM display depends on the recipient's carrier. Not all carriers display CNAM information, and some may show their own database records instead of your registered name.
:::
## E911 addresses
E911 (Enhanced 911) addresses are required for regulatory compliance when using phone numbers for voice calling. An E911 address associates a physical location with your phone number so that emergency services can locate the caller if 911 is dialed.
### Managing addresses
1. Navigate to **Calls > Settings > Addresses**.
2. Select **Add Address** to create a new regulatory address.
3. Fill in the required fields:
- **Friendly name** (for your reference)
- **Customer or company name**
- **Street address**
- **City, state/region, postal code**
- **Country** (US, CA, GB, AU, DE, or FR)
4. Select **Save**. The address is validated automatically.
Each address in the list shows which phone numbers are using it and whether it has been validated (indicated by a green **Valid** chip).
> **Important:** You must have at least one validated E911 address before purchasing certain phone number types. International numbers may have additional address requirements.
## Protecting phone numbers from deletion
You can protect a phone number from accidental deletion. A protected number displays a lock icon in the number list and cannot be deleted until the protection is explicitly removed.
To toggle deletion protection, select the lock icon next to the phone number. A locked icon means the number is protected; an unlocked icon means it can be deleted.
## Deleting a phone number
1. Navigate to **Calls > Settings > Numbers**.
2. Select the **Delete** button next to the number you want to remove.
3. Confirm the deletion.
:::warning
Deleting a phone number releases it permanently. You may not be able to reclaim the same number. Ensure no active routing depends on this number before deleting it.
:::
If the number is protected from deletion, you must first remove the protection by selecting the lock icon.
## Number porting
If you have existing business phone numbers with another provider, you can port them to UltraCart Calls. Porting transfers ownership of the number so that calls to your existing number route through UltraCart.
Number porting is coordinated through UltraCart support. The process typically involves:
1. Submitting a port request with your current carrier account details
2. Verifying ownership of the numbers
3. Scheduling the port date
4. Testing the numbers after the port completes
:::info
Porting timelines vary by carrier and number type. Local numbers typically port within 7-10 business days. Toll-free numbers may take longer. Your existing service continues until the port is complete.
:::
## Related pages
- [Getting started with UltraCart Calls](./getting-started-with-ultracart-calls.md) -- purchase your first number as part of initial setup
- [Time-based routing](./time-based-routing-and-availability.md) -- route calls based on business hours
- [IVR menus](./ivr-menus-auto-attendant.md) -- build phone menus for callers
- [Call queues](./call-queues.md) -- route calls to groups of agents
- [Voicemail](./voicemail.md) -- configure voicemail for after-hours or unavailable agents
---
# Queue monitoring and dashboard
https://docs.ultracart.com/customers-crm/calls/queue-monitoring-and-dashboard
doc_type: reference
The queue monitoring dashboard provides real-time visibility into call queue performance. You can see how many callers are waiting, current wait times, which agents are available, and key statistics like calls taken and missed. Supervisors can answer specific waiting callers, manage agent status, and use barge and coach features directly from the dashboard.
## Overview
The queue monitoring dashboard updates in real time as calls arrive, agents connect, and callers are served. It's the central hub for day-to-day call center management.
Admins see all queues in the dashboard. Non-admin users see only the queues they belong to.
## Queue statistics
Each queue displays a set of real-time counters organized into three sections.
### Calls waiting
- **Number of callers** currently in the queue
- **Max wait time** -- a live timer showing how long the longest-waiting caller has been waiting
- Color coding indicates urgency:
- **Yellow** -- the longest wait time exceeds the queue's warning threshold
- **Red** -- the longest wait time exceeds the queue's critical threshold
Configure the warning and critical thresholds in the queue's [settings](./call-queues.md).
### Members
- **Active** -- agents who are connected and in **Available** status, ready to receive calls
- **Busy** -- agents who are connected but currently unavailable (on a call, in wrap-up, or set to Unavailable)
### Past calls (today)
Daily statistics reset at midnight:
- **Taken** -- calls answered by agents
- **Missed** -- calls that ended without being answered (abandoned by the caller or timed out)
- **Avg Call Time** -- average duration of answered calls
- **Avg Wait Time** -- average time callers waited before being connected to an agent
- **Voicemails** -- count of voicemail messages left for this queue. Selecting the voicemail count opens the queue's shared voicemail inbox.
## Waiting calls list
Below the statistics, each caller currently waiting in the queue is listed with:
- **Phone number** (formatted)
- **Wait duration** -- a live timer showing how long the caller has been waiting
### Answering a specific caller (cherry-pick)
Supervisors and agents can answer a specific waiting caller instead of waiting for automatic assignment. Select the **Answer** button next to a caller in the waiting list to connect that call directly to your softphone.
This is useful when a supervisor sees a high-priority caller or a call that has been waiting too long.
## Agent status within a queue
Each queue displays a table of its member agents with:
- **Agent name**
- **Ringing indicator** -- shows when a call is currently ringing to this agent
- **Busy indicator** -- shows when the agent is on an active call
- **Taken** -- calls this agent has answered today from this queue
- **Missed** -- calls this agent has missed today from this queue
### Status color coding
Agent status uses color coding for quick visual reference:
| Status | Color | Meaning |
| --- | --- | --- |
| Available | Green | Ready to receive calls |
| On Call | Orange | Currently on an active call |
| Wrap-Up | Orange | In post-call wrap-up with countdown timer |
| Unavailable | Red | Logged in but not accepting calls |
| Offline | Red | Not connected to the phone system |
## Supervisor actions
Supervisors and admins have additional capabilities from the queue monitoring dashboard. Right-click on an agent to access the context menu.
### When the agent is not on a call
- **Set Status** -- change the agent's activity status (e.g., set them to Available or Unavailable)
### When the agent is on a call
- **Coach** -- open a private audio channel to the agent. You can speak to the agent, but the caller cannot hear you. This is useful for guiding agents through difficult calls.
- **Barge (Muted)** -- join the call in listen-only mode. Neither the agent nor the caller can hear you. Use this for silent quality monitoring.
- **Barge (Unmuted)** -- join the call as an active participant. All parties can hear you. Use this to intervene directly in a call.
- **Set Status** -- change the agent's activity status
:::info
Barge and coach require Supervisor or Admin permissions. Users with the standard User role cannot access these features. See [Permissions and roles](./permissions-and-roles.md).
:::
### Resetting queue statistics
Supervisors can reset a queue's daily statistics (taken, missed, averages) by selecting the **Reset Queue** button. This clears the counters and starts fresh. Resetting is useful at the start of a shift or when you want to measure a specific time period.
## Agent status panel
Alongside the queue dashboard, the agent status panel shows all agents visible to you (admins see all agents; non-admins see agents in their shared queues).
Each agent card shows:
- **Name and initials avatar**
- **Extension number**
- **Current status** (available, on call, or offline)
- **Call duration timer** (when the agent is on an active call)
### Interacting with agents
The action buttons on each agent card change based on your current call state and the agent's status:
| Your status | Agent status | Available actions |
| --- | --- | --- |
| Not on a call | Available | Call this agent |
| On a call | Available | Conference in, Transfer to |
| Any | On a call | No actions (agent is busy) |
| Any | Offline (with voicemail) | Leave voicemail |
| Any | Offline (no voicemail) | No actions available |
### Filtering and searching
- **Search** -- filter agents by name or extension
- **Show Offline** toggle -- include or exclude disconnected agents from the list
- **Online count** -- badge shows the number of agents currently online out of the total (e.g., "4/7")
## Related pages
- [Call queues](./call-queues.md) -- configure queue settings, thresholds, and membership
- [Permissions and roles](./permissions-and-roles.md) -- role requirements for barge, coach, and status management
- [Transfers and conferencing](./transfers-and-conferencing.md) -- barge and coach details
- [The softphone interface](./the-softphone-interface.md) -- agent status management from the softphone
- [Voicemail](./voicemail.md) -- managing shared queue voicemail
---
# The softphone interface
https://docs.ultracart.com/customers-crm/calls/the-softphone-interface
doc_type: how-to
The UltraCart softphone is a browser-based phone built directly into the CRM interface. It lets you make and receive calls from any modern browser with a headset -- no desk phone required. The softphone supports two simultaneous call lines, a full dial pad, call controls, audio device selection, and an active call banner that follows you as you navigate the application.
## Overview
The softphone appears in the Calls section of the UltraCart CRM. It handles all voice interactions: dialing out, answering inbound calls, transferring, conferencing, recording, and managing your agent status. The softphone connects to the phone system through your browser, so all you need is a computer with a headset and an internet connection.
## Starting the softphone
When you first navigate to the Calls page, the softphone panel shows a **Start** button. Select it to initialize the connection. This registers your browser as an active softphone endpoint and connects you to the phone system.
> **Important:** Your browser prompts for microphone access the first time you start the softphone. You must allow microphone access for callers to hear you.
Once connected, four status indicators show the health of your connection:
| Indicator | What it monitors |
| --- | --- |
| UltraCart Accounts | Authentication with UltraCart |
| UltraCart PBX | Connection to the phone system backend |
| Twilio Voice | Voice call capability |
| Twilio Task Router | Automatic call assignment |
All four indicators should show green when you're fully connected.
## Making outbound calls
1. On the softphone dial pad, select a **From** number using the outbound number dropdown. This is the caller ID the recipient sees.
2. Enter the destination phone number or an internal extension.
3. Select **Dial**.
You can also make outbound calls by selecting a phone number from a customer profile (click-to-call).
### Class of Service restrictions
If your [Class of Service](./class-of-service-call-restrictions.md) blocks the number you're trying to dial, a restriction warning appears on the dial pad. The dial button is disabled for restricted numbers. You can request a supervisor override to place the call.
## Receiving inbound calls
When an inbound call arrives, the softphone displays:
- The caller's phone number (and matched customer name, if found)
- The queue the call arrived from
- A live timer counting up from when the call started ringing
- **Answer** and **Reject** buttons
Select **Answer** to connect, or **Reject** to decline the call (it returns to the queue or goes to voicemail).
### Desktop notifications
If your browser tab is in the background when a call arrives, a desktop notification appears (if you've granted notification permission). This ensures you don't miss calls while working in another tab or application.
### Active call banner
When you navigate away from the Calls page during an active call, a persistent banner appears at the top of the screen. The banner shows the caller information and call duration, keeping you aware of the active call while you work in other areas of the CRM (such as looking up an order or customer profile).
### Poor call quality banner
If the system detects degraded audio quality during a call, a banner appears alerting you to potential call quality issues. This can indicate network congestion, high latency, or packet loss.
## Call controls
During an active call, the softphone displays a grid of control buttons:
| Control | Function |
| --- | --- |
| **Mute / Unmute** | Toggle your microphone on or off. When muted, the caller cannot hear you. |
| **Hold / Resume** | Place the caller on hold (they hear hold music) or resume the conversation. |
| **Dial Pad** | Open the DTMF keypad to send touch-tones during the call (for navigating phone menus or entering account numbers). |
| **Transfer** | Initiate a cold transfer to another agent, queue, or external number. |
| **Warm Transfer** | Initiate a warm transfer -- speak to the receiving party before connecting the caller. |
| **Conference** | Add a third party to the call. |
| **Start / Pause / Resume Recording** | Control call recording. The button label changes based on the current recording state. |
| **AI Coach** | Start an AI coaching session (if configured for the queue). |
| **Participants** | View and manage all participants in the current call. |
| **Settings** | Open audio device settings. |
| **Hang Up** | End the call. |
For details on transfers, conferencing, and recording, see [Transfers and conferencing](./transfers-and-conferencing.md) and [Call recording](./call-recording.md).
## Multi-line calling
The softphone supports two simultaneous call lines:
- **Line 1** -- your primary call line for inbound and outbound calls
- **Line 2** -- used for warm transfers and conferencing
When you initiate a warm transfer or conference, the softphone opens Line 2 to dial the receiving party while keeping the original caller on hold on Line 1. Line state indicators show the status of each line (incoming, active, on hold, or dialing out).
:::info
You don't manage lines manually. The softphone switches between lines automatically when you use transfer and conference features.
:::
## Audio device management
Select the **Settings** button (available from the dial pad or during a call) to configure your audio devices:
### Device selection
- **Microphone** -- choose which input device to use. A **Test** button and visual level meter let you verify the microphone is working.
- **Speaker / Headset** -- choose the output device for call audio. A **Test** button plays a sample tone.
- **Ringtone Device** -- choose which device plays the ringtone for incoming calls. A **Preview** button plays the ringtone.
### Audio processing
Toggle these browser audio processing features:
- **Noise Suppression** -- reduces background noise
- **Echo Cancellation** -- prevents echo from speakers feeding back into the microphone
- **Auto Gain Control** -- automatically adjusts microphone volume
:::tip
If callers report hearing echo, enable Echo Cancellation. If you're in a noisy environment, enable Noise Suppression. These settings are saved per browser.
:::
## Agent activity status
Your activity status controls whether you receive inbound calls. Manage it from the status dropdown at the top of the agent panel.
### Status types
| Status | Color | Description |
| --- | --- | --- |
| Available | Green | You're ready to receive calls. Inbound calls from your queues ring your softphone. |
| Unavailable | Red | You're logged in but not accepting calls. Calls skip you and go to other available agents. |
| On Call | Orange | You're on an active call. This status is set automatically when you answer or place a call. You cannot set this manually. |
| Wrap-Up | Orange | Post-call cooldown period. A countdown timer shows the remaining time. You don't receive new calls until wrap-up expires. |
| Offline | Red | You're not connected to the phone system. This status appears when the softphone is not started or the browser is closed. |
### Changing your status
Use the status dropdown to switch between **Available** and **Unavailable**. The dropdown hides **On Call** and **Offline** since those are managed automatically by the system.
During wrap-up, the dropdown shows "Wrap-Up" with a countdown timer (e.g., "Wrap-Up (00:25)"). You can end wrap-up early by switching to **Available** before the timer expires.
:::info
When you end a call, the system returns you to whatever status you had before the call started. If you were Available before answering a queue call, you return to Available after wrap-up. If you were Unavailable and received a direct call, you return to Unavailable.
:::
## Multi-tab behavior
Only one browser tab at a time can operate as the active softphone. If you have UltraCart open in multiple tabs, the softphone coordinates between them to ensure only one tab is registered as the active phone endpoint. Opening the softphone in a second tab takes over from the first.
## Related pages
- [Getting started with UltraCart Calls](./getting-started-with-ultracart-calls.md) -- initial softphone setup
- [Transfers and conferencing](./transfers-and-conferencing.md) -- warm transfers, cold transfers, and conference calls
- [Call recording](./call-recording.md) -- recording controls during calls
- [Agent-assisted payments](./agent-assisted-payments.md) -- capturing payments during calls
- [Queue monitoring](./queue-monitoring-and-dashboard.md) -- agent status panel and queue dashboard
- [Class of Service](./class-of-service-call-restrictions.md) -- outbound dialing restrictions
---
# Time-based routing and availability
https://docs.ultracart.com/customers-crm/calls/time-based-routing-and-availability
doc_type: how-to
Time-based routing lets you control how calls are handled based on the time of day, day of week, and holidays. Define your business hours so calls during open hours route to a queue or menu, while after-hours calls go to voicemail or a different greeting. This ensures callers always get an appropriate experience regardless of when they call.
## Overview
Time-based routing uses two building blocks: **timeframes** and **time routers**.
- A **timeframe** defines a reusable time window -- for example, "Monday through Friday, 9:00 AM to 5:00 PM Eastern."
- A **time router** is a routing rule that checks the current time against one or more timeframes and routes the call to the matching destination. If no timeframe matches, the call goes to a default route.
You create timeframes first, then reference them in time routers. A single timeframe can be used by multiple time routers.
## Managing timeframes
Timeframes are reusable definitions of when something applies. They're managed in the **Timeframes** section of **Calls > Settings > Availability**.
### Creating a timeframe
1. Navigate to **Calls > Settings > Availability**.
2. In the **Timeframes** section, select **Add Timeframe**.
3. Enter a descriptive **Name** (e.g., "Business Hours" or "Weekend Hours").
4. Select a **Timezone**. Available timezones include:
- US: Eastern, Central, Mountain, Pacific, Alaska, Hawaii
- Europe: London, Dublin, Lisbon, Paris, Berlin, Rome, Madrid, Amsterdam, Brussels, Vienna, Zurich, Athens, Bucharest, Helsinki, Stockholm, Copenhagen, Oslo, Warsaw, Prague, Budapest, Sofia, Istanbul
5. Add one or more **time range configurations** (described below).
6. Select **Save**.
### Configuring time ranges
Each timeframe can have multiple time range rows. Each row defines when the timeframe is active using any combination of:
| Field | Description |
| --- | --- |
| Start Day of Week | The first day the range applies (e.g., Monday) |
| End Day of Week | The last day the range applies (e.g., Friday) |
| Start Date | A specific start date (for date-bound ranges like holidays) |
| End Date | A specific end date |
| Start Time | The time the range begins (e.g., 9:00 AM) |
| End Time | The time the range ends (e.g., 5:00 PM) |
All fields are optional. If no time is specified, the range covers the entire day ("All Day"). If no days are specified, the range applies every day.
The timeframe display summarizes each row: for example, "Monday - Friday, 9:00 AM - 5:00 PM ET" or "Saturday, All Day."
:::tip
Create separate timeframes for each distinct schedule -- "Weekday Business Hours," "Saturday Hours," "Holiday Closure." This makes them easier to reuse and maintain.
:::
## Managing time routers
Time routers are the routing rules that use timeframes to make decisions. They're managed in the **Time Routers** section of **Calls > Settings > Availability**.
### Creating a time router
1. In the **Time Routers** section, select **Add Time Router**.
2. Enter a **Name** (e.g., "Main Line Hours" or "Support Hours").
3. Add one or more **route options**, each pairing a timeframe with a routing destination.
4. Configure the **Default Route** for when no timeframe matches.
5. Select **Save**.
### Route options
Each route option pairs a timeframe with a destination:
- **Timeframe** -- select one of your defined timeframes
- **Route** -- choose where to send the call when this timeframe is active (queue, agent, menu, voicemail, or another time router)
You can add multiple route options to handle different time windows. The system evaluates them in order and routes to the first matching timeframe.
### Default route
The default route handles calls when no timeframe matches -- typically after hours, weekends, or any time not covered by your route options. Common default destinations include:
- A voicemail mailbox for after-hours messages
- An after-hours IVR menu with limited options
- An overflow queue staffed by a different team
## Common patterns
### Business hours with after-hours voicemail
The most common time-based routing setup:
1. **Create a timeframe** called "Business Hours" -- Monday through Friday, 8:00 AM to 5:00 PM.
2. **Create a time router** with one route option: during "Business Hours," route to your main queue.
3. **Set the default route** to a voicemail mailbox (or an after-hours greeting).
4. **Assign the time router** to your phone number under **Calls > Settings > Numbers**.
### Weekend routing to a different queue
1. **Create a timeframe** called "Weekend" -- Saturday and Sunday, all day.
2. **Add a route option** to your time router: during "Weekend," route to a weekend support queue.
3. The default route handles any remaining gaps.
### Holiday closures with a custom greeting
1. **Create a timeframe** for each holiday -- set the specific date (e.g., December 25) with no time range (all day).
2. **Add route options** for each holiday at the top of your time router, pointing to a voicemail or an IVR menu with a holiday greeting.
3. Because route options are evaluated in order, holiday matches take priority over regular business hours.
:::info
Holiday timeframes with specific dates take priority when they match. Place holiday route options before regular business hours routes in your time router to ensure holidays are checked first.
:::
### Chaining time-based rules
A time router's route option can point to another time router, enabling layered logic. For example, a "Regional Hours" time router might check the caller's destination and route to different time routers for East Coast and West Coast business hours.
## Connecting to phone numbers
After creating a time router, assign it to one or more phone numbers:
1. Navigate to **Calls > Settings > Numbers**.
2. Select **Edit** on the phone number.
3. In the **Route** dropdown, select the time router.
4. Select **Save**.
Calls to this number now check your time-based rules before routing.
## Editing and deleting
### Editing
Select a timeframe or time router from the list to open its edit dialog. Changes take effect immediately on save.
### Deleting
To delete a timeframe, ensure no time routers reference it. To delete a time router, ensure no phone numbers or other routing rules reference it. If references exist, update them before deleting.
## Related pages
- [Phone numbers](./phone-numbers-dids.md) -- assign time-based rules to inbound numbers
- [Call queues](./call-queues.md) -- route calls to agent groups during business hours
- [IVR menus](./ivr-menus-auto-attendant.md) -- combine menus with time-based routing
- [Voicemail](./voicemail.md) -- configure after-hours voicemail destinations
---
# Transfers and conferencing
https://docs.ultracart.com/customers-crm/calls/transfers-and-conferencing
doc_type: how-to
UltraCart Calls supports warm transfers, cold transfers, multi-party conferencing, and supervisor barge and coach capabilities. These features let you connect callers to the right person, bring in additional help, and enable real-time supervision -- all from the softphone interface.
## Overview
Every call in UltraCart Calls uses a conference-based architecture. Even a simple two-party call between a caller and an agent is technically a conference with two participants. This design makes it seamless to add or remove participants at any time -- whether you're transferring, conferencing in a third party, or barging in as a supervisor.
## Warm transfer
A warm transfer lets you speak with the receiving party before connecting the caller. This gives you a chance to introduce the caller and provide context.
### How it works
1. During an active call, select **Warm Transfer** from the call controls.
2. The transfer panel opens. Enter a phone number, extension, or select an agent from the directory.
3. Select **Dial** to call the receiving party on Line 2. Your original caller is automatically placed on hold and hears hold music.
4. When the receiving party answers, speak with them to introduce the caller and provide context.
5. Once ready, complete the transfer. The caller and the receiving party are connected, and you drop off the call.
### When the receiving party doesn't answer
If the receiving party doesn't answer or declines the call, you're reconnected with the original caller on Line 1. The caller is taken off hold and the conversation continues as before.
:::tip
Warm transfers are recommended for most situations because the receiving agent has context before speaking with the caller. This creates a better experience than cold transfers, where the caller has to re-explain their issue.
:::
## Cold transfer
A cold transfer sends the caller directly to the destination without introduction. The transferring agent drops off the call immediately.
### How it works
1. During an active call, select **Transfer** from the call controls.
2. The transfer panel opens. Enter a phone number, extension, or select a destination from the directory.
3. Select **Cold Transfer** to complete the transfer immediately.
The caller is connected to the destination and you're disconnected from the call.
### Transfer destinations
Both warm and cold transfers support these destinations:
- **Agent** -- transfer to another agent by extension or by selecting from the agent directory
- **Queue** -- transfer to a queue (the caller enters the queue and waits for an available agent)
- **External number** -- transfer to any external phone number
:::info
Class of Service restrictions apply to transfer destinations on Line 2. If your CoS blocks the destination number, the transfer is not allowed and no override can be requested for Line 2. See [Class of Service](./class-of-service-call-restrictions.md) for details.
:::
### Transferring from the agent panel
When you're on an active call, the agent status panel shows action buttons on each available agent:
- **Transfer icon** (arrow) -- cold transfer the current call to that agent
- **Conference icon** (group) -- add that agent to the current call as a conference participant
## Conferencing
Conferencing adds a third party to an active call so all participants can speak together.
### Adding a participant
1. During an active call, select **Conference** from the call controls.
2. The conference panel opens. Enter a phone number, extension, or select an agent from the directory.
3. Select **Dial** to call the third party.
4. When they answer, all parties are connected in a three-way call.
### Managing participants
During a conference, select **Participants** from the call controls to see a list of everyone on the call. For each participant, you can:
- **Hold / Resume** -- place an individual participant on hold without affecting other participants
- **Mute / Unmute** -- mute a specific participant
- **Hang Up** -- remove a specific participant from the conference
Each participant's entry shows their caller ID and their role label (e.g., "Supervisor (Barge)" or "Supervisor (Coach)").
## Supervisor capabilities
Supervisors and admins can join active calls for monitoring, coaching, and intervention. These actions are initiated from the [queue monitoring dashboard](./queue-monitoring-and-dashboard.md) by right-clicking on an agent who is currently on a call.
### Barge (muted)
Join the call in listen-only mode. Neither the agent nor the caller can hear you. Use this for silent call monitoring and quality assurance.
The agent's participant list shows you as "Supervisor (Barge)" so they know a supervisor is listening.
### Barge (unmuted)
Join the call as an active participant. All parties -- agent, caller, and supervisor -- can hear each other. Use this when you need to intervene directly in a conversation.
### Coach (whisper)
Open a private audio channel to the agent. You can speak to the agent, but the caller cannot hear you. Use this to guide agents through difficult calls, suggest responses, or provide information in real time.
The agent's participant list shows you as "Supervisor (Coach)."
### AI coaching
In addition to supervisor coaching, queues can be configured with an AI coach agent that provides automated real-time suggestions during calls. When AI coaching is active:
1. Select **AI Coach** from the call controls during an active call.
2. Select the AI agent from the dropdown (if multiple are available).
3. Select **Start Coaching**.
4. The AI listens to the conversation and provides suggestions in a coaching feed panel. Suggestions appear as text that only the agent can see.
5. Select **Stop** to end the coaching session.
AI coaching is configured at the queue level. See [Call queues](./call-queues.md) and [AI voice agents](./ai-voice-agents.md) for setup details.
:::info
Barge, coach, and AI coach all require Supervisor or Admin permissions. Standard Users cannot access these features.
:::
## Agent directory
When transferring or conferencing, the **Directory** button opens an alphabetical list of all agents in the system. A sidebar lets you jump to a specific letter for quick navigation. Select an agent from the directory to populate the transfer or conference dial field with their extension.
## Related pages
- [The softphone interface](./the-softphone-interface.md) -- call controls and multi-line operation
- [Queue monitoring](./queue-monitoring-and-dashboard.md) -- supervisor actions from the dashboard
- [Permissions and roles](./permissions-and-roles.md) -- role requirements for barge and coach
- [Class of Service](./class-of-service-call-restrictions.md) -- restrictions on transfer destinations
- [Call queues](./call-queues.md) -- configure AI coaching per queue
- [AI voice agents](./ai-voice-agents.md) -- AI agent configuration
---
# Troubleshooting
https://docs.ultracart.com/customers-crm/calls/troubleshooting
doc_type: how-to
This page covers common issues you may encounter with UltraCart Calls and how to resolve them. Start with the issue that matches your symptoms, and follow the resolution steps.
## Browser requirements
UltraCart Calls requires a modern browser with WebRTC support. Before troubleshooting other issues, verify your browser meets these requirements:
- **Supported browsers**: Google Chrome, Microsoft Edge, or Mozilla Firefox (latest versions)
- **HTTPS**: the application must be accessed over HTTPS for WebRTC to function
- **Microphone permission**: your browser must have permission to access your microphone
- **Speaker access**: your browser must have permission to play audio
:::info
Safari has limited WebRTC support and is not recommended for UltraCart Calls. Use Chrome or Edge for the most reliable experience.
:::
## No audio on calls
**Symptom**: You connect to a call but the caller can't hear you, or you can't hear the caller.
**Resolution**:
1. Check your audio device settings in the softphone. Select **Settings** from the dial pad or call controls.
2. Verify the correct **Microphone** is selected. Use the **Test** button and speak -- the level meter should show activity.
3. Verify the correct **Speaker/Headset** is selected. Use the **Test** button to play a sample tone.
4. Check that your browser has microphone permission. Look for a microphone icon in the browser's address bar or check **Settings > Privacy > Microphone**.
5. If using a USB headset, try unplugging and reconnecting it, then reselect it in the audio settings.
6. Try toggling **Noise Suppression**, **Echo Cancellation**, and **Auto Gain Control** in the audio processing settings.
## Echo or feedback
**Symptom**: The caller hears their own voice echoed back, or you hear feedback.
**Resolution**:
1. Use a headset instead of open speakers and microphone. Echo is almost always caused by the microphone picking up audio from the speakers.
2. Enable **Echo Cancellation** in the softphone audio settings.
3. Lower your speaker volume so it's less likely to feed back into the microphone.
4. If using a laptop's built-in microphone and speakers, switch to a headset.
## Audio device not appearing
**Symptom**: Your headset or microphone doesn't appear in the softphone audio device list.
**Resolution**:
1. Check that the device is plugged in and powered on.
2. Verify the device works in other applications (e.g., a video call or audio recording app).
3. Check browser permissions: go to **Settings > Privacy > Microphone** and ensure the UltraCart site is allowed.
4. Try unplugging and reconnecting USB devices.
5. Reload the browser tab after connecting the device.
6. Check your operating system's sound settings to confirm the device is recognized.
## Connection health indicators
The softphone displays four connection health indicators. Here's what each one means and how to troubleshoot when they show problems:
| Indicator | Green | Red | Troubleshooting |
| --- | --- | --- | --- |
| UltraCart Accounts | Authenticated | Authentication failed | Reload the page. If persistent, log out and log back in. |
| UltraCart PBX | Connected to backend | Backend connection lost | Check your internet connection. The connection typically reconnects automatically. |
| Twilio Voice | Voice device ready | Voice device error | Reload the page. Check that microphone permissions are granted. |
| Twilio Task Router | Call routing active | Routing connection lost | Reload the page. If persistent, contact support. |
:::tip
If one or more indicators turn red, try reloading the browser tab first. Most connection issues resolve with a simple reload.
:::
## Agent shows Available but doesn't receive calls
**Symptom**: Your status is set to Available and you're in the correct queue, but calls aren't ringing your softphone.
**Resolution**:
1. **Verify your status**: confirm the status dropdown shows **Available** (green).
2. **Check queue membership**: navigate to **Calls > Settings > Queues** and verify you're assigned to the queue that's receiving calls.
3. **Check the phone number routing**: navigate to **Calls > Settings > Numbers** and verify the phone number routes to your queue.
4. **Reload the page**: a browser crash or disconnection during a previous call may have left a stale reservation. Reloading the page triggers automatic cleanup that resolves this within about 2 minutes.
5. **Check all four connection indicators**: verify all show green.
6. **Check for multi-tab conflicts**: ensure you don't have UltraCart Calls open in multiple browser tabs. Only one tab can operate as the active softphone.
## Calls not routing to any agent
**Symptom**: Callers report the phone rings but nobody answers, or calls go directly to voicemail even though agents are online.
**Resolution**:
1. Check the **Queue Monitoring** dashboard to verify agents are connected and in **Available** status.
2. Verify the phone number is routing to the correct destination in **Calls > Settings > Numbers**.
3. If using time-based routing, verify the current time falls within a configured timeframe.
4. Check that the queue has agents assigned under **Calls > Settings > Queues**.
5. Have agents reload their browser to reset their connection.
## Recording issues
### Recording not starting
**Symptom**: Calls aren't being recorded even though you expect automatic recording.
**Resolution**:
1. Check the queue's **Record Calls** setting under **Calls > Settings > Queues**.
2. For outbound calls, check the agent's **Record Outgoing Calls Automatically** setting under **Calls > Settings > Agents**.
3. If using manual recording, verify you're selecting **Start Recording** during the call.
### Recording shows "processing"
**Symptom**: A call record shows a recording exists but the transcript says it's being generated.
**Resolution**: Transcription typically completes within a few minutes after the call ends. Wait a few minutes and refresh the call history detail page. If the transcript doesn't appear after 15 minutes, the recording may have had audio quality issues that prevented transcription.
## Desktop notifications not appearing
**Symptom**: You don't receive desktop notifications for incoming calls when the tab is in the background.
**Resolution**:
1. Check **browser notification permissions**: when prompted, select "Allow" for notifications from the UltraCart site.
2. Check your **operating system notification settings**: on macOS, check **System Settings > Notifications** for your browser. On Windows, check **Settings > System > Notifications**.
3. Verify your agent status is **Available** -- notifications don't trigger when you're Unavailable or Offline.
4. Ensure the browser tab is still open (minimized is fine, but closed tabs can't receive notifications).
## Token expiration during long sessions
**Symptom**: After several hours of use, features stop working or you see authentication errors.
**Resolution**: UltraCart Calls includes automatic token refresh to keep long sessions alive. If token refresh fails:
1. Reload the browser tab. This re-authenticates and refreshes all tokens.
2. If reloading doesn't help, log out of UltraCart completely and log back in.
:::tip
If you keep UltraCart Calls open for extended shifts (8+ hours), refresh the page during a break to ensure all connections and tokens are fresh.
:::
## Common error codes
If you encounter an error code in the softphone or call log, here are the most common ones:
| Error code | Meaning | Resolution |
| --- | --- | --- |
| 1001 | No application registered to phone number | The phone number doesn't have routing configured. Go to **Calls > Settings > Numbers** and set a routing destination. |
| 1005 | Unable to load menu configuration | An IVR menu referenced in routing couldn't be loaded. Check the menu exists in **Calls > Settings > Menus**. |
| 1006 | Unable to load queue configuration | A queue referenced in routing couldn't be loaded. Check the queue exists in **Calls > Settings > Queues**. |
| 1007 | Menu configuration parse error | An IVR menu has invalid configuration. Edit and re-save the menu in **Calls > Settings > Menus**. |
## Getting help
If you've tried the troubleshooting steps above and the issue persists:
1. Note the specific error message or behavior you're experiencing.
2. Check your browser's developer console (press F12) for any error messages.
3. Note which connection health indicators are green or red.
4. Contact UltraCart support with these details for faster resolution.
## Related pages
- [The softphone interface](./the-softphone-interface.md) -- audio device settings and connection indicators
- [Call recording](./call-recording.md) -- recording configuration
- [Call queues](./call-queues.md) -- queue settings and agent assignment
- [Phone numbers](./phone-numbers-dids.md) -- routing configuration
---
# Unified platform integration
https://docs.ultracart.com/customers-crm/calls/unified-platform-integration
doc_type: explanation
UltraCart Calls isn't a standalone phone system -- it's deeply integrated with the UltraCart e-commerce platform. During an active call, the Customer Snapshot panel automatically matches the caller to their customer profile, showing recent orders, account details, and subscription information. Call records link to customer profiles for historical context. Payment tokens flow directly into Order Entry. And call records sit alongside webchat, SMS, and email in a unified conversation history.
## Overview
The core benefit of having your phone system built into your e-commerce platform is context. When a customer calls, your agent already knows who they are, what they've ordered, and whether they have open issues. This eliminates the tab-switching and copy-pasting that happens when phone and order systems are separate.
## Customer auto-matching
When a call connects, UltraCart automatically searches for a customer profile matching the caller's phone number. If a match is found, the **Customer Snapshot** panel populates with the customer's information immediately -- before the agent even says hello.
### How matching works
- **Inbound calls**: the caller's phone number is matched against customer phone numbers on file.
- **Outbound calls**: the dialed number is matched against customer records.
Matching happens in real time as the call connects. When the call ends, the snapshot clears automatically.
### Customer Snapshot panel
During an active call, the Customer Snapshot panel displays:
**Customer overview:**
- Customer name
- Lifetime value (LTV) -- total spend across all orders
- Origin date -- when the customer first placed an order
- **View Profile** link to the full customer profile in the CRM
**Orders:**
- Recent orders sorted newest first (excluding quotes)
- Each order shows: order ID (with link to order details), status, date, email, item IDs, payment method, last 4 card digits, and tracking numbers
- **Clone** and **Clone + Items** links to quickly create a new order based on an existing one in Order Entry
**Auto orders (subscriptions):**
- Active and historical subscriptions sorted by status, then newest first
- Each subscription shows: auto-order ID (with link), status, creation date, email, next item and ship date, and payment card on file
:::tip
The Customer Snapshot gives agents everything they need to help a caller without navigating away from the call. Use the order links to look up details, and the Clone links to quickly start a new order.
:::
### When no customer is found
If no customer profile matches the caller's phone number, the snapshot panel shows an **Add to Profile** option. You can link the phone number to an existing customer record so future calls from this number are matched automatically.
## Call records linked to customer profiles
When a call completes, the call record is linked to the matched customer profile. This means:
- The call appears in the customer's communication history alongside their other interactions
- You can find the call record by navigating to the customer's profile
- The call history detail view includes a **View Profile** link for matched customers
If a call wasn't automatically matched (for example, the customer called from an unrecognized number), you can manually link it to a customer from the call history detail view using the **Add to Profile** button.
## AI agent access to platform data
AI voice agents can access UltraCart platform data during automated calls through tool calls. This lets the AI provide informed, personalized service:
- **Order lookup** -- the AI can find and describe order status, tracking, and details
- **Subscription management** -- the AI can look up, pause, resume, cancel, or delay subscriptions
- **Customer information** -- the AI can access customer profile data to verify identity and provide account-specific help
Every action the AI takes is logged in the call record's AI engagement section, showing the tool name, parameters, result, and whether it succeeded or failed. See [AI voice agents](./ai-voice-agents.md) for details.
## Payment integration
[Agent-assisted payments](./agent-assisted-payments.md) generate secure payment tokens during live calls. These tokens flow directly into UltraCart Order Entry, creating a seamless path from phone conversation to processed order:
1. Agent captures the customer's card during the call
2. A secure token is generated
3. The agent opens Order Entry (or clones an existing order from the Customer Snapshot)
4. The payment token is available as a payment method
5. The agent processes the charge
The customer never needs to call back, visit a website, or provide their card information again.
## Unified conversation history
UltraCart Calls is one channel in a unified communication platform. A single customer's interactions across all channels appear together:
- **Phone calls** -- call records with recordings, transcripts, and agent notes
- **Webchat** -- real-time chat conversations
- **SMS** -- text message threads
- **Email** -- email correspondence
All channels share the same customer profile. An agent handling a phone call can see that the customer chatted with support yesterday, or that they have an open SMS thread about a return. This cross-channel context prevents customers from having to repeat themselves.
## Caller information enrichment
When a call arrives, UltraCart enriches the caller's information beyond just the phone number:
- **Geographic location** -- city, state, and country derived from the phone number
- **Caller ID (CNAM)** -- the registered name associated with the phone number, when available from the carrier
- **Customer history** -- matched profile, orders, and subscriptions are available before the agent answers
This enriched data appears in the incoming call notification, the Customer Snapshot panel, and the call history record.
## Related pages
- [UltraCart Calls overview](./index.md) -- how Calls fits into the UltraCart platform
- [Agent-assisted payments](./agent-assisted-payments.md) -- payment token capture during calls
- [AI voice agents](./ai-voice-agents.md) -- AI access to order and customer data
- [Call history](./call-history-and-analytics.md) -- call records linked to customer profiles
- [The softphone interface](./the-softphone-interface.md) -- Customer Snapshot panel during calls
---
# Voicemail
https://docs.ultracart.com/customers-crm/calls/voicemail
doc_type: how-to
UltraCart Calls includes a complete voicemail system with personal agent mailboxes and shared queue mailboxes. Callers can leave voicemail when an agent is unavailable, when no agents are online for a queue, or when they opt out of waiting in a queue. Each message includes audio playback, automatic transcription, and caller information.
## Overview
Voicemail ensures callers can always leave a message, even when no one is available to answer. The system supports two types of mailboxes:
- **Personal mailboxes** -- assigned to individual agents for direct calls
- **Shared (queue) mailboxes** -- associated with a queue and accessible to all queue members
Messages are automatically transcribed so you can quickly scan the content without listening to the audio. A callback button lets you return the call directly from the voicemail player.
## Personal voicemail mailboxes
Each agent can have one personal voicemail mailbox. When a caller reaches the agent directly and the agent is unavailable, the call goes to the agent's personal voicemail.
Personal voicemail messages are visible only to the assigned agent (and to admins, who can see all mailboxes).
### Assigning a personal mailbox
Personal mailboxes are configured in the agent's profile:
1. Navigate to **Calls > Settings > Agents**.
2. Edit the agent.
3. In the voicemail section, toggle voicemail **on**.
4. Select an existing mailbox or create a new one.
5. Select **Save**.
See [Agent management](./agent-management.md) for full agent profile details.
## Shared (queue) voicemail mailboxes
Shared mailboxes are associated with a queue. When callers can't reach anyone in the queue, they're routed to the shared mailbox. All agents in the queue can see and manage these messages.
Admins see all shared mailboxes. Non-admin agents see only the shared mailboxes for queues they belong to.
### Creating a shared mailbox
1. Navigate to **Calls > Settings > Voicemail Mailboxes**.
2. Select **Add Mailbox**.
3. Associate the mailbox with a queue.
4. Configure the greeting and followup (described below).
5. Select **Save**.
Then, in the queue's settings, configure the **No Agent Available** option to route to this voicemail mailbox. See [Call queues](./call-queues.md) for details.
## Mailbox configuration
Every voicemail mailbox -- personal or shared -- has these settings:
### Greeting
The greeting is the audio prompt callers hear before the recording beep. Choose between:
- **Audio file** -- upload a pre-recorded greeting
- **Text-to-speech** -- type a message and select a male or female voice
A typical greeting: "You've reached the support team. We're unable to take your call right now. Please leave a message after the tone, and we'll get back to you as soon as possible."
### Followup message
The followup plays after the caller finishes leaving their message. This is typically a brief confirmation like "Thank you for your message. Goodbye." Choose between audio file and text-to-speech, the same as the greeting.
### Notification email
Enter an email address to receive an alert whenever a new voicemail arrives in this mailbox. This is optional but useful for ensuring messages are reviewed promptly.
## When voicemail activates
Voicemail triggers in several scenarios:
- **Direct call to an unavailable agent** -- when a caller reaches an agent directly (by extension or routing) and the agent is unavailable, the call goes to the agent's personal voicemail if configured.
- **Queue with no agents online** -- when a call enters a queue and no agents are online or available, the queue's voicemail fallback activates (if configured).
- **Caller opts out of queue** -- when a caller is waiting in a queue and presses a key to exit to voicemail, they're connected to the queue's shared mailbox.
- **After-hours routing** -- when a [time-based rule](./time-based-routing-and-availability.md) routes calls to voicemail outside of business hours.
- **IVR menu option** -- when an [IVR menu](./ivr-menus-auto-attendant.md) option routes to a voicemail mailbox.
## Voicemail recording flow
When a caller is connected to voicemail:
1. The mailbox greeting plays.
2. A beep tone sounds.
3. The caller records their message.
4. The caller hangs up (or the followup message plays).
5. The recording is stored and transcription begins automatically.
## Managing voicemail messages
### Personal messages (My Messages)
Navigate to **Calls > Voicemail > My Messages** to see your personal voicemail inbox. Each message shows:
- **New badge** for unlistened messages
- **Caller phone number** and caller ID name (if available)
- **Date and time** received
- **Duration** of the message
Select **Play** to open the message in a playback dialog.
### Shared messages
Navigate to **Calls > Voicemail > Shared Messages** to see voicemail for your queues. You can also access a queue's shared voicemail by selecting the voicemail count badge in the [queue monitoring dashboard](./queue-monitoring-and-dashboard.md).
Shared messages display the same information as personal messages.
### Playback dialog
The voicemail playback dialog includes:
- **Caller information** -- phone number, name, date, and time
- **Audio player** -- standard audio controls for playback
- **Transcript** -- the automatically transcribed text of the message
- **Call Back** -- select to navigate to the softphone with the caller's number pre-filled, ready to dial
- **Delete** -- permanently remove the message
:::info
Listening to a voicemail automatically marks it as heard and removes the "New" badge.
:::
## Voicemail notifications
When a new voicemail arrives, the system can notify you in several ways:
- **Email notification** -- if a notification email is configured on the mailbox, an alert is sent to that address
- **Voicemail count badge** -- the voicemail navigation item and queue monitoring dashboard update to show the count of unread messages
- **Real-time update** -- if you're logged into the CRM, the voicemail list updates in real time as new messages arrive
## Related pages
- [Agent management](./agent-management.md) -- configure personal voicemail on agent profiles
- [Call queues](./call-queues.md) -- configure shared voicemail and queue fallback
- [Call transcription](./call-transcription.md) -- how voicemail transcription works
- [Time-based routing](./time-based-routing-and-availability.md) -- route after-hours calls to voicemail
- [IVR menus](./ivr-menus-auto-attendant.md) -- route menu options to voicemail
- [Queue monitoring](./queue-monitoring-and-dashboard.md) -- access shared voicemail from the dashboard
- [Audio library](./audio-library.md) -- manage greeting audio files
---
# Conversations
https://docs.ultracart.com/customers-crm/conversations
doc_type: how-to
# **Introduction**
The UltraCart Conversations engine is a unified system for managing webchat and SMS conversations with your customers. It integrates webchat and SMS replies (for StoreFront Communications marketing and UC Package Tracking) into a single, cohesive experience.
# **Required Permissions**
To access Conversations, an UltraCart user must have the "Conversations Manage SMS/Web Chat" permission enabled.
- **SMS/Web Chat Administrator** - Allow this user administrative control over SMS and Web Chat Conversations
- **SMS/Web Chat User** - Allow this user the ability to access and participate in SMS and Web Chat Conversations

* * *
# **Getting Started: Queue Requirements for Web Chat**
Before you can begin using Conversations for real-time web chat, it's essential to understand how queue assignment works and complete the initial setup. **All web chat conversations are assigned to a queue**, which enables proper routing and agent access.
#### What Are Queues?
A **queue** is a group within the UltraCart CRM Conversations system that receives and holds customer chat requests. Each queue can be assigned one or more agents who are eligible to respond to incoming web chat messages. Every conversation must be associated with at least one queue to be visible and actionable by agents.
### Queue Setup Steps
Follow these steps to prepare your account for using Conversations:
#### **Step 1: Create One or More Queues**
1. Navigate to the [Queue Management settings](https://secure.ultracart.com/merchant/crm/crmApp.do#/conversations/settings/queue-management) within the CRM app.
2. Click **“Add Queue”** and enter a name (e.g., “Support” or “Sales”).
3. It's recommended to start with a **single general-purpose queue** and assign all agents to it. You can always create additional queues later to segment teams or departments.
:::note
**Tip:** Creating too many queues early on can complicate routing. Start simple, then expand.
:::
####
**Step 2: Assign Users (Agents) to Queues**
1. Go to [Users Configuration](https://secure.ultracart.com/merchant/configuration/accountEditLoad.do#users).
2. Click **Edit** next to the user you want to assign.
3. Scroll down to **"Conversations Chat Departments."**
4. Check the box for the queue(s) this user should access.
5. (Optional) Enable **“Use AI to handle chats as this agent”** to allow an AI agent to respond on behalf of the user.
:::info
**Learn more about AI agent setup here:** [AI Agents Setup Guide](#page-not-found)
:::

#### **Step 3: Add Web Chat to Your StoreFront**
To make Conversations available to site visitors:
1. Add the **WebChat element** to your StoreFront via the StoreFront Builder.
2. Follow the guide: [How to Set Up WebChat on Your StoreFront](./how-to-setup-webchat-on-your-storefront.md).
Once this is complete, customers can initiate chat sessions, and assigned agents will see them under the **"Available"** section of the Conversations interface.
* * *
# **Launching Conversations**
You can launch Conversations by navigating to the "Conversations" option in the main CRM menu.

# Understanding the Navigation
When you first click on "Conversations," a new tab will open. The icons on the left-hand side of the interface represent different sections:
- Webchat
- SMS
- Archives
- Settings

# Settings
The Settings section is divided into four main areas. Clicking on the links within this section will provide more details about each:
- [My Profile](./manage-your-conversations-profile.md)
- [Engagements](./how-to-setup-and-manage-engagement-trigg.md)
- [Canned Messages](./how-to-setup-and-use-canned-responses.md)
- [Queue Management](./how-to-manage-your-conversation-queues.md)
# Webchat
The webchat screen organizes conversations into three groupings:
- **My Conversations:** Displays active conversations you are currently having with customers. Each conversation is represented by a bubble.
- **Active:** Shows active conversations customers are having with other agents within your organization. You can click on any conversation bubble to view the message thread, and if you choose to participate, the conversation will move to "My Conversations".
- **Available:** Lists customers waiting in the queue for an agent to talk with them.The top right corner of the webchat interface is your status. This will default to whatever you have configured on your My Profile, but can be changed by you at any time. The options are Available, Busy or Unavailable. **Chat will only appear on the StoreFront if there is at least one agent that is not Unavailable.**
Your status is displayed in the top right corner of the webchat interface. This defaults to your "My Profile" configuration but can be changed at any time. Your options are "Available," "Busy," or "Unavailable". Webchat will only appear on your StoreFront if at least one agent is not "Unavailable".

When a customer joins the webchat queue, they will appear in the "Available" section. Clicking on an entry in the "Available" section will prompt you to confirm that you want to start chatting with the customer. Once a conversation is started, it will appear in the "My Conversations" area.

Clicking on the entry will open a prompt to confirm that you want to start chatting with the customer.

The middle pane of the screen is where the active conversation takes place. The right pane provides session context, which updates as the user browses your site or changes their cart contents. At the bottom of the middle pane, you can type messages, attach multimedia, send coupons, add items to a customer's cart, or use emojis.

The above example shows an interaction that an AI Agent has picked up as well.
# SMS
The SMS section of Conversations is similar to webchat. The main difference is the absence of the session context right-hand pane. Joining or leaving an SMS conversation helps track which UltraCart user is currently interacting with the SMS customer.
# **Archives**
Active conversations will appear in the "Archives" section after two minutes of inactivity or once they are marked complete. A conversation remains open even if it's visible and searchable in the archives. Conversations are only closed when both the customer and agent leave the chat, at which point they become fully searchable. This means the archives may contain both active and inactive conversations.

When you click on the "Archives" tab, you will see an infinite scroll list of conversations. You can sort search results by "newest first" or "oldest first". You can also search by text within conversation messages or use filters for more specific criteria such as date range, agent, language, conversation type, and status.

# FAQ
### Q) What is the pricing for Conversations?
A) Conversations are free during the beta period.
### Q) What happens if I have multiple UltraCart accounts linked?
A) The Conversations system operates at the **parent** account level. It does not matter which account you are logged into when launching Conversations. You will have a unified experience across all the accounts that are linked.
### Q) What differentiates Conversations from other external webchat products?
A) Conversations has the ability to leverage the StoreFront Visual Builder runtime and the fact that UltraCart is rendering the StoreFront page to make webchat available when appropriate without requiring additional HTTP calls and uses a runtime that only adds ~10KB of compressed content. Other populate chat programs make up to 10 additional HTTP calls on every page load and require JS runtimes in the 300-750KB payload range.
### Q) Why did UltraCart build Conversations?
A) In order to have SMS marketing in Communications and UC Package Tracking, merchants must have the ability to interact with customers when they reply. The Conversations system was architected from the ground up in a fashion that made adding webchat as well feasible.
### Q) Are the Conversations available in BigQuery?
A) Yes, Conversations archive automatically to BigQuery where you can do further analysis.
### Q) What if the customer is on our website in a different language?
A) Since StoreFronts supports automatic translation to other languages, it was important for Conversations to also support automatic translation. If the customer is speaking a different language than your default language then Conversations will automatically translate the conversation back and forth.
---
# How to Fix Desktop Notifications of Incoming Chats
https://docs.ultracart.com/customers-crm/conversations/how-to-fix-desktop-notifications-of-inco
doc_type: how-to
The Conversations application will prompt to allow desktop notifications when an incoming chat happens. Desktop notifications are used whenever the page is not focused in the browser. If that behavior is not happening it is important to check on your browser settings to make sure that you have not blocked the notifications.
First click the lock icon next to the URL. Then click on Site Settings as shown below.

Now verify that Notifications is not set to Disallow. We recommend changing Notifications to Allow and saving.

---
# How to manage your conversation queues
https://docs.ultracart.com/customers-crm/conversations/how-to-manage-your-conversation-queues
doc_type: how-to
Click Settings → Queue Management → Edit on the default sales queue.

Adjust the members of the queue.

Within your StoreFront Visual Builder add a “webchat “element to your footer.

The queue name in the webchat element settings should match the queue name in Conversations.

---
# How to setup and manage engagement triggers
https://docs.ultracart.com/customers-crm/conversations/how-to-setup-and-manage-engagement-trigg
doc_type: how-to
Engagement triggers cause the chat to automatically interact with the customer under certain conditions on your StoreFront. Engaging the customer can lead to a higher interaction rate. To create an engagement click Settings → Engagements → Add Engagement as shown below.

For each engagement the minimum configuration is:
- Active
- Engagement Name - this is just something to help you internally identify the engagement
- Customer Greeting - the text that will display to the customer.
- Queue - which queues do you want this engagement to fire for.
- Visitor type - all visitors, new visitors or returning visitors
- Time on page greater than - how many seconds they have to be on the page before the engagement fires.

You can make the engagement trigger configuration more complex by clicking on the blue “And” button. This will add another rule to the trigger. The different types of rules are:
- Current Page URL
- Any Page From Session
- Customer's Browsing Time
- Customer's Location
- Number of Viewed Pages
- Referring Website Address

You can combine rules to increase the complexity by clicking the “And” or “Or” buttons. Only the first engagement that the customer qualifies for will end up firing on the StoreFront.
Below is an example of what the webchat engagement will look like when it fires.

When a customer replies to the engagement the conversations with the agent will automatically start as long as the agent has not reached their maximum number of concurrent chats. If the agent is currently talking to the maximum number of customers they are configured for, the customer will go into the queue and wait for the next available agent to become available.
---
# How to setup and manage SMS conversations
https://docs.ultracart.com/customers-crm/conversations/how-to-setup-and-manage-sms-conversation
doc_type: how-to
SMS conversations can originate from two types of interactions with customers.
1. UC Package Tracking
2. StoreFront Communications
### UC Package Tracking
With UC Package Tracking UltraCart uses a standard set of SMS source phone numbers and there is no additional configuration required to reply to a customer that messages about package tracking.
### StoreFront Communications
StoreFront Communications allows for SMS messaging of customers that have opted in to receive text messages. In order to send outbound SMS messages, you will first need to configure a Twilio account under StoreFront → Communications → Settings.

:::note
A Phone number can not be shared between multiple UltraCart accounts. This is due to webhooks from Twilio from replies requiring a 1:1 association between UltraCart account and phone number.
:::
After configuring a Twilio account, add an SMS step to your campaign or flow to send customers an SMS message.

If the customer replies to your SMS marketing message then you will be able to continue the discussion within Conversations under the SMS section.

---
# How to setup and use canned responses
https://docs.ultracart.com/customers-crm/conversations/how-to-setup-and-use-canned-responses
doc_type: how-to
To setup a canned response click on Settings → Canned Responses → Add Canned Response as shown below.

Type out the canned response in the dialog. You can click on the blue short code buttons to inject the tokens. In the short code field type something unique such as “#greeting”. The short code always needs to start with a # character. Finally click which queues should use this canned mssage.

Here is an example of a configured canned message.

To use the canned message while chatting, hit the # key followed by the start of the short code. The available matching canned messages will appear above. Click on the canned message to use it or hit ENTER to select the highlighted canned message.

After selecting the canned message it will replace the short code with the message. This gives you the ability to edit the canned message before sending it.

---
# How to setup webchat on your Storefront
https://docs.ultracart.com/customers-crm/conversations/how-to-setup-webchat-on-your-storefront
doc_type: how-to
The first step in configuring webchat on your StoreFront is to setup your queues. Click on the Settings → Queue Management as shown below and then click on the pencil icon to edit the members of the sales queue.

Adjust the users that you want to be members of this queue and then click update queue.

Once a queue is configured and members are assigned to it, the next step is deploy the queue out on to your StoreFront with the “webchat” element. Within the StoreFront Visual Builder, add a webchat element to the footer.

The webchat element has a setting for the queue name it is connected to. In the example below the name “sales” matches up to the sales queue that was already configured inside of Conversations.

Below is an example of how the webchat button appears on the Poppy theme when an agent is logged in.

If you want to create additional queues under Conversations, just make sure to deploy a corresponding “webchat” element with that queue name within your StoreFront Visual Builder.
The following StoreFront theme versions have a webchat element located in the footer element of your storefront, for the “sales” queue.
1. Navigate to the storefront in the UltraCart backend, then click the 'Browse Your Store'.
2. Click the 'Edit' button at the top of the page, to engage the Visual Builder, then scroll down to then click the hierarchy menu option in the right panel or scroll down the page to the footer section then when you have the footer highlighted, click the 'H' key to open the hierarchy view.
3. Then, in the hierarchy panel click the 'Footer' element to expand it and you'll see the 'Web Chat' element.
| **Theme** | **Version** |
| --- | --- |
| Elements | 2.11 |
| Hero | 1.15 |
| Jewel | 1.11 |
| Lifty | 1.13 |
| Native | 1.10 |
| Natural VB | 1.10 |
| Poppy | 1.01 |
---
# Manage your Conversations profile
https://docs.ultracart.com/customers-crm/conversations/manage-your-conversations-profile
doc_type: how-to
The My Profile screen allows you to configure your Conversations specific preference as shown below.

By default Conversations will use your first name, but if you would like to change the name that appears while having a webchat with customers you can change the Display Name.
The Profile Badge image will show to customers during webchat. Clicking the Update Profile Image will allow you to upload and crop an image to something suitable for webchat.
Your Default Status on Login will determine your status when you first launch the Conversations application.
Chat limit determine how many automatic engagements that will start with you. Once you chats reach this limit the customers will queue to make sure you are not overwhelmed.
Your default language will help the system know if you need automatic translation when the customer is not conversing in your default language.
---
# Customer Profiles
https://docs.ultracart.com/customers-crm/customer-profiles
doc_type: reference
#
Customer Profiles
:::note
[Main Menu](https://secure.ultracart.com/merchant/mainMenu.do) → [Customer Profiles](https://secure.ultracart.com/merchant/customerprofile/customerProfileMenuLoad.do)
:::
## Customer Profile Options

This Section contains 6 options to assist in managing customer profiles. They are:
Export
Pricing Tiers
Import
Send Password Notice
Loyalty
Settings
Manage
## Export Customer Profiles
The customer profile export utility allows you to quickly generate an Excel Spreadsheet or CSV file of all the information contained within your customer profiles. A quick way to update a lot of information is to generate a spreadsheet with this utility, edit the spreadsheet, and then import the information back into UltraCart. Click on the `Export` link to create your spreadsheet. The following screen will appear.

**Related: **[Customer Profiles Export Tutorial](./customer-profile-tutorial/customer-profiles-export-tutorial.md)
## Import Customer Profiles
Using this tool, you can import an Excel Spreadsheet or CSV file containing your customer profile information, and the profiles will be automatically be created or updated with the specified information.

**Related: **[Customer Profiles Import Tutorial](./customer-profile-tutorial/customer-profiles-import-tutorial.md)
## Loyalty
The [Loyalty program](/guides/ultracart-documentation/configuration/checkout-configuration/loyalty-program) provide a way to reward customers for their patronage. The customer can accumulate points that they will then be able to redeem for purchases within your store.

The Loyalty sections in the customer profile editor give merchants a complete view of a customer's loyalty status, transaction history, and pending activity.
Merchants use these sections to:
- Review earned and redeemed points
- Inspect transaction details
- Manually award or deduct points
- Understand upcoming reward eligibility
All ledger data is read from the global loyalty ledger and is only visible when a Loyalty Program is active for the merchant account.
> **Note:** If no loyalty program is enabled, these sections display a message indicating that the feature is not available. Contact support to enable the Loyalty Program.
### Past Ledger
The Past Ledger displays all completed loyalty transactions for the customer.
#### Fields
| Field | Description | Format / Notes |
| --- | --- | --- |
| Field | Description | Format / Notes |
| Field | Description | Format / Notes |
| --- | --- | --- |
| **Field** | **Description** |
| --- | --- |
| First Name | optional |
| Last Name | optional |
| Email | **Required Field** |
| **Tab** | **Description** |
| --- | --- |
| General | This tab contains the Customer login credentials and other customer information: - **Login Email**: This field is used to enter the customer's email address, which serves as their login credential for accessing the account. - **New Password**: This optional field allows the customer to set or update their password for account security; it should be filled in only if a password change is intended. - **Sign up Date**: This field records the date when the customer created their account, providing a timestamp for account registration. - **Referral Source**: This field captures how the customer learned about the service or was referred, helping track marketing or referral effectiveness. - **Website URL**: This field is for entering the customer's website address, which may be used for business verification or linking purposes. - **Approved Signup**: This toggle field indicates whether the customer's signup has been approved, likely used for administrative review or activation. - **Business Notes**: This field allows for adding general notes or comments about the customer's business, useful for internal reference. - **Automatic Order Merchant Notes**: This field is for notes that will automatically be included with each order placed by the customer, aiding in order processing or communication. - **Tags**: This field enables the addition of tags or labels to categorize or filter the customer profile for easier management. |
| Billing | Billing Address books and also Checkout & Payments settings for the customer. - **Billing Address Book For** [**support@ultracart.com**](mailto:support@ultracart.com) - **Address**: This field is used to enter the physical address for billing purposes. - **Name**: This field captures the name of the individual or entity associated with the billing address. - **Company**: This field is for entering the company name related to the billing address. - **Address**: This field provides a secondary line for additional address details if needed. - **Day Phone**: This field records the daytime contact phone number for the billing entity. - **Evening Phone**: This field records the evening contact phone number for the billing entity. - **Tax County**: This field indicates the county for tax purposes related to the billing address. - **Checkout & Payments** - **Allow Selection of Shipping Address Type**: This toggle enables or disables the option to select different shipping address types during checkout. - **No Real-time Charge**: This toggle determines whether real-time charging is disabled during checkout. - **No Coupons**: This toggle controls whether coupon usage is allowed during checkout. - **Allow Purchase Order**: This toggle enables the use of purchase orders as a payment method. - **Auto Approve PO**: This toggle automatically approves purchase orders without manual review. - **Allow COD**: This toggle permits cash on delivery as a payment option. - **Auto Approve COD**: This toggle automatically approves cash on delivery transactions. - **Allow Quote Request**: This toggle allows customers to request quotes during checkout. - **Allow Drop Shipping**: This toggle enables the option for drop shipping in the checkout process. - **Min Subtotal**: This field sets the minimum subtotal amount required for an order. - **Min Item Count**: This field specifies the minimum number of items required for an order. - **Max Item Count**: This field sets the maximum number of items allowed in an order. - **Qualifies for Dealer Tier \*\*\*\***: This toggle indicates eligibility for the configured pricing tier(s). \*Each configured pricing tier will appear here. - **Credit Cards on File section: Credit Cards**: This field displays or allows the management of credit card information on file for transactions. |
| Shipping | Shipping Address Books and Shipping options: - **Shipping Address Book for** - **Address**: This field is used to enter the physical shipping address. - **Name**: This field captures the name of the individual or entity associated with the shipping address. - **Company**: This field is for entering the company name related to the shipping address. - **Address**: This field provides a secondary line for additional shipping address details if needed. - **Day Phone**: This field records the daytime contact phone number for the shipping entity. - **Shipping Options** - **Free Shipping**: This toggle enables or disables free shipping for the customer. - **No Free Shipping**: This toggle prevents free shipping from being applied to the customer's orders. - **Exempt from Handling Charges**: This toggle exempts the customer from additional handling fees. - **Allow 3rd Party Billing**: This toggle permits third-party billing for shipping costs. - **Do not send physical marketing mail to customer**: This toggle prevents the sending of physical marketing materials to the customer. |
| Accounting / Tracking | QuickBooks, Affiliate and Sales Rep assignment, and Loyalty / Cashback ledger: 1. **Quickbooks** - **Quickbooks Code**: This field is used to enter a specific code for integration with QuickBooks accounting software. - **Quickbooks Class**: This field allows selection of a class category for QuickBooks tracking. - **Terms**: This field specifies the payment terms associated with the account in QuickBooks. - **Quickbooks Tax Exemption Reason Code**: This field allows selection of a tax exemption reason code for QuickBooks. - **Track Separately in Quickbooks**: This toggle determines if transactions should be tracked separately in QuickBooks. 2. **Conditional Options** - **Associated With Affiliate**: This field allows selection of an affiliate associated with the account. - **Sales Rep. Code**: This field is for entering a sales representative code. 3. **Loyalty - Cash Back** - **Available**: This field displays the amount of available cash back credits. - **Vesting**: This field shows the amount of cash back credits that are vesting. - **Total**: This field indicates the total cash back credits. - **Expiring**: This field shows the amount of cash back credits that are expiring. 4. **Past Ledger** - **Show entries**: This field allows selection of the number of past ledger entries to display. - **Description**: This field provides a description of each ledger entry. - **Cash**: This field records the cash amount associated with each ledger entry. - **Order**: This field links the ledger entry to a specific order. - **Date**: This field indicates the date of each ledger entry. 5. **Future Ledger** - **No Future Ledger Entries**: This section indicates the absence of future ledger entries. 6. **New Ledger Entry** - **Description**: This field is used to enter a description for a new ledger entry. - **Amount**: This field specifies the amount for the new ledger entry. - **Days Until Expiration**: This field sets the number of days until the credit expires, with an option for no expiration. - **Days Until Vested**: This field sets the number of days until the credit is vested, using a merchant-configured default if left empty. - **Add Ledger Entry**: This button submits the new ledger entry. |
| Orders | Order history associated with customer profile. |
| Quotes | If Quote Requests are enabled, Quotes for the customer are viewable here. |
| Reviews | If Product Reviews are enabled, Reviews and reviewer details are displayed here. |
| Uploads | File attachments, such as resales certificates are viewable here. |
| Taxes | Reseller Tax ID number, Avalara & TaxJar codes configuration. Tax Exemption configuration. - **Taxes** - **Tax ID Number**: This field is used to enter the customer's tax identification number for tax reporting purposes. - **Avalara Entity Use Code**: This field allows entry of a specific code used by Avalara to determine tax applicability based on the entity's use. - **Avalara Customer Code**: This field is for entering a unique customer code for integration with Avalara tax services. - **TaxJar Customer Code**: This field is used to input a customer code specific to TaxJar for tax management. - **Tax Exempt**: This toggle indicates whether the customer is exempt from paying taxes. - **TaxJar Exemption Type**: This field allows selection of a specific exemption type for TaxJar tax processing. |
| Software | If applicable, Software Entitlements are viewable here. |
| Activity | View the shopping and sales activity captured by UltraCart Analytics. - **Activity for ** - **All Types**: This dropdown allows filtering of activity types (e.g., active on website, placed order, initiated checkout). - **Active on website for \[time\]**: This field records the duration of the customer's active time on the website. - **Placed order**: This field logs the placement of an order with an associated order number. - **Initiated checkout**: This field indicates when the customer began the checkout process. - **Metrics** - **Previous 30 Days**: This column displays metric data for the previous 30-day period. - **30 Days**: This column shows metric data for the current 30-day period. - **All-Time**: This column provides metric data accumulated over all time. - **Email Delivery**: This field tracks the number of email deliveries. - **Email Open**: This field records the number of times emails were opened. - **View**: This field counts the number of product views. - **Initiate**: This field logs the number of initiated actions. - **Ordered Product**: This field tracks the number of ordered products. - **Shipment**: This field records the number of shipments. - **Placed Order**: This field shows the total value of placed orders. - **Lists & Segments** - **Lists & Segments customer is included in**: This field displays the lists or segments the customer is part of. - **Mailing List**: This toggle indicates if the customer is included in a mailing list. - **People that have BONE**: This section lists specific customer segments, such as those with a particular attribute (e.g., BONE). - **Information** - **First Active**: This field records the date and time of the customer's first activity. - **Last Active**: This field shows the date and time of the customer's most recent activity. - **Custom Properties**: This field contains additional custom properties associated with the customer (if any). - **How They Found You**: This field indicates the source through which the customer found the website. - **First Page**: This field records the first page visited by the customer. - **Referrer**: This field shows the referring URL that directed the customer to the website. - **Most Recent Visit**: This field logs the most recent page visited by the customer. - **First Page**: This field again records the first page visited (possibly a duplicate or context-specific entry). - **Global Unsubscribed**: This toggle indicates if the customer has globally unsubscribed from communications. - **Value**: This field shows the value associated with the customer's subscription status (if applicable). - **Spam Complaint**: This field indicates if the customer has filed a spam complaint. - **Value**: This field shows the value associated with the spam complaint status (if applicable). |
## Pricing Tiers
In this section a merchant can create pricing tiers for volume (discount) pricing. Typically pricing tiers are created when a merchant is selling B2B in some fashion.
Think of a pricing tier as a group that someone belongs to such as (Reseller, Wholesaler, Distributor, etc.).

**Related: **[Pricing Tier Configuration](/guides/ultracart-documentation/configuration/items-configuration/pricing-tiers)
## Send Password Notice
The "Send Password Notice" allows for the configuration of an email template to be used in conjunction with mass updating of customer profile passwords. This may be used, for example, after importing customer profiles from an external system.

## Settings
This is the page where you can Enable and/or Require Customer Profiles at the checkout process. The Settings page also allows for the configuration of the "My Account" customer portal. Other features are:
- wholesale (pricing tier) sign up
- assignment of override URLs to the wholesale signup
- login in links.
Related: [Configuration - Customer Profiles](./configuration-customer-profiles.md)
# Frequently Asked Questions
**Question:** Is there a way to see/extract the DTS when a customer profile was imported?
Answer: Yes. The '**Signup Date**' column in the Customer Profile Export represents either the date the customer created their customer profile or their customer profiles was created via a customer profile Import.
**Question:** I need to assign a pricing tier to a customer profile. In which tab of the customer profile editor is the Pricing Tier(s) assignment configured?
Answer: The Billing tab of the customer profile editor contains the Pricing Tier assignment.
# Related Documentation
[Customer Profile Tutorial](./customer-profile-tutorial/index.md)
[Configuration - Customer Profiles](./configuration-customer-profiles.md)
---
# Allow 3rd Party Billing
https://docs.ultracart.com/customers-crm/customer-profiles/allow-3rd-party-billing
doc_type: how-to
# Overview
Instructions for enabling the "Allow 3rd Party Billing" option so that customers can provide their own shipper account number to be used for shipping their purchase.
# Configuring Shipping Methods
In order to provide the customer the option to enter their shipper account number during the checkout you'll first need to configure:
1. one or more of your offered shipping methods with the "Allow 3rd Party Billing" setting
2. the related option "Approved Customers Only".
The configuration check-boxes for these two settings are located in the "other" tab of the Shipping Methods Editor (shown below using UPS Ground as example).

There are two options on this screen:
1. Allow 3rd Party Billing (checkbox field) - REQUIRED
2. Approved Customers Only (check-box field) - Optional
The required field designates this method as available for the "third party billing account number" during the checkout.
The optional, Approved Customers Only, makes the "Allow 3rd Party billing" available only if the customer has logged in to their Customer Profile during the checkout and are approved for 3rd Party Billing (explained below).
# Configuring Customer Profile as Approved for 3rd Party Billing
In order to allow only specific "approved" customers the option of providing their shipper account number, you'll need to select both checkbox fields described in the previous section and then edit the customers' customer profile and select the "Allow 3rd Party Billing" check-box then save the changes:

### Limitations regarding Fulfillment Integration
Presently, 3rd Party Billing is only supported by the following integrated fulfillment services:
- AtLast Fulfillment
- ProLog Logistics
:::info
### What About other Fulfillment Services?
Each Fulfillment service integration is unique and some fulfillment services may not be able to accommodate the passing of the 3rd Party Billing account number during the fulfillment transmissions.
If you are using another integrated fulfillment service and would like to investigate adding support for the third party billing, please contact [proservices@ultracart.com](mailto:proservices@ultracart.com)
:::
# How does the field appear during the checkout?
When the customer reaches the Options page of the checkout and selects the radio button for a shipping method that is configured to allow the 3rd party billing, the following section will appear prompting the customer to provide their shipper account number:

View of the 3rd Party Billing Account Number appearing in the receipt:

### Back End Order Entry
Merchants using the Back End Order Entry system will need to enter the customers 3rd Party Shippers Account Numbers. The following demonstrates an order being entered and the fields associated to the 3rd Party Billing.
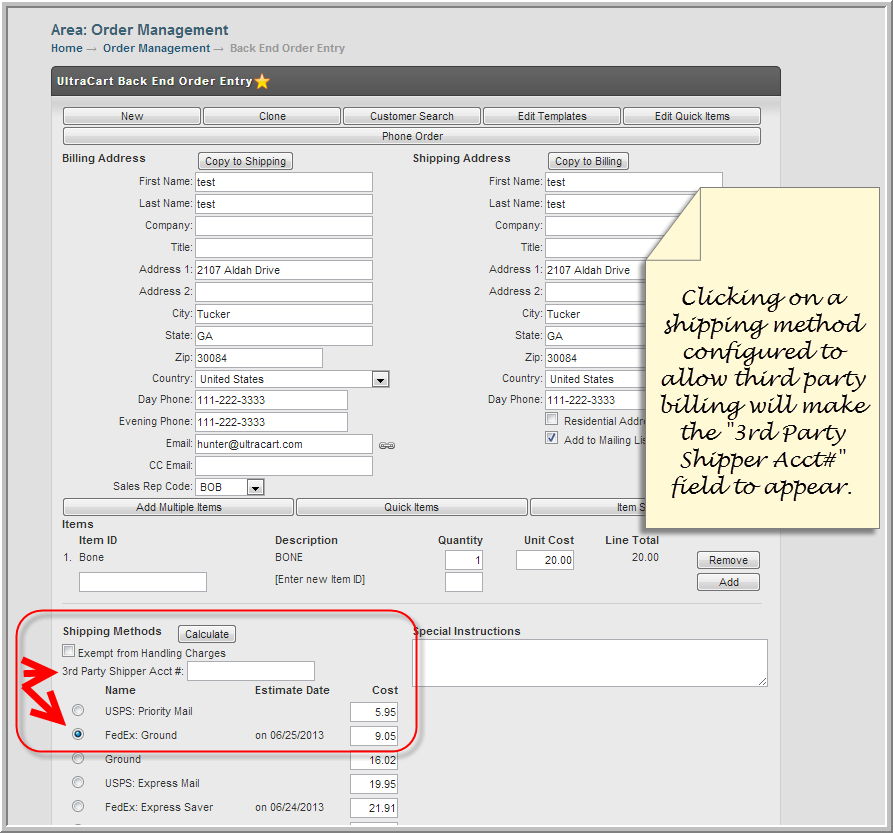
A view of the 3rd Party Billing Acct# field on the Back End Order Entry.
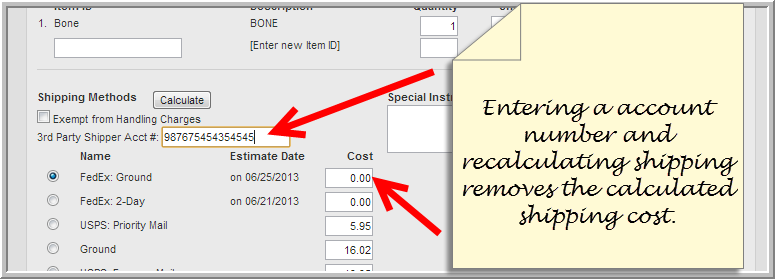
After entering a shipper account number and recalculating the shipping, the method cost will be $0.00.
## FAQ
**Q: What storefront themes support the "Allow third party Billing" option?**
A: All current Visual Builder themes support the "Allow third party Billing" option. If you do not see it working in your checkout, ensure that your storefront theme has been updated to the latest version.
* * *
**Q: Sometimes the customer is choosing the third party billing option, but is failing to enter their account number in the provided input field. Can I make it required?**
A: At the present time there is no option to force customers to enter their account number. Our developers are evaluating an update to include proper input field validation to ensure the account number is required before checkout can proceed.
* * *
**Q: Which fulfillment services currently support third party billing?**
A: Third party billing is currently supported by **AtLast Fulfillment** and **ProLog Logistics**. If you use another integrated fulfillment service and want to investigate support for third party billing, please contact [proservices@ultracart.com](mailto:proservices@ultracart.com).
* * *
**Q: Can I limit the third party billing option to approved customers only?**
A: Yes. When configuring your shipping method, select both **Allow 3rd Party Billing** and **Approved Customers Only**. Then edit the customer’s profile and enable the **Allow 3rd Party Billing** checkbox. This ensures only authorized customers see the option.
# Related Documentation
[Customer Profiles](./index.md)
[Customer Profiles](./index.md)[Shipping Method Configuration#Other](/guides/ultracart-documentation/configuration/checkout-configuration/shipping/shipping-methods/shipping-method-configuration)
---
# Allowing Customers to Drop Ship
https://docs.ultracart.com/customers-crm/customer-profiles/allowing-customers-to-drop-ship
doc_type: how-to
# Introduction
This tutorial will allow walk you through the process of allowing other merchant’s to drop ship orders to their end customers using a customer profile.
# Configuring a Customer Profile
Only customer profiles that are configured to allow drop shipping are presented with the option to drop ship the order during the checkout. To enable drop shipping on a customer profile, go to the billing tab of the customer profile editor, check the box shown below, and save.

# StoreFront Visual Builder
The StoreFront Visual Builder checkout implements the drop shipping option using two elements:
- Checkout Condition - the condition is “Allow Drop Shipping”
- Checkout Drop Shipping - presents the toggle to the customer during the checkout.

The option for drop shipping is presented to the customer like this:

# How Drop Ship Orders Appear in the UI
Whenever a drop ship order is placed, the back-end display of the order will indicate the fact that it is a drop ship order as shown below.

# How Drop Shipping Works
The goal of drop shipping is to allow the wholesale customer to place orders that ship directly to their end customer. To do this UltraCart automatically suppresses certain information from displaying when printing packing slips or transmitting orders to your fulfillment house.
# What the End Customer Receives
The final customer will receive their order with a packing slip that does not mention your company shipped the product. The packing slip will not contain:
- logo
- bill to information
- email
- pricing
- payment method
- customer service information
- return policy
# What the Drop Shipper Receives
Since the email is associated with the drop shipper, they will receive all the receipt emails, shipping notifications, etc. Typically the drop shipper will take that information and plug it into their own e-commerce platform which will then let the end customer know that the order has shipped, product them with branded tracking information, etc.
# Integrating with Wholesale Sections of your StoreFront
Typically a drop shipper is going to receive discounted prices compared to retail. This is accomplished with [pricing tiers](/guides/ultracart-documentation/configuration/items-configuration/pricing-tiers) and [customer profiles](./index.md). Most merchants will have a wholesale section of their StoreFront that requires a customer profile containing certain pricing tiers in order to access. After the customer logs in they will be able to see the faster wholesale order entry section with their discounted prices. The drop shipper will add the products to their cart, specify the end customer’s address, mark the order as drop ship, and then complete the order.
# Things To Consider
- If your fulfillment house is printing packing slips that contain some of the information that you normally would suppress for drop shipping, you’ll need to talk with your fulfillment house about printing generic packing slips.
- How returns will be handled between the intermediate merchant buying from you wholesale and the customer. Typically you want to make the intermediate merchant handle the return and either attempt to resell the product themselves or dispose of it.
---
# Configuration - Customer Profiles
https://docs.ultracart.com/customers-crm/customer-profiles/configuration-customer-profiles
doc_type: reference
# Customer Profiles
If your customers make periodic purchases from your online store, you can enable customer profiles to help speed up the checkout process. Customer Profiles allow your customers to optionally enter a password, and store their information on the UltraCart servers. When their next purchase, they can allow UltraCart to automatically pre-populate the checkout form by using their e-mail address and the password they specified.
Access the main Customer Profiles Menu:
:::note
[Home](https://ultracart.atlassian.net/wiki/404?key%3Dmerchant%3Bsearch%3Fq%3D%2FmainMenu.do) → [Operations (Customer Profiles)](https://ultracart.atlassian.net/wiki/404?key%3Dmerchant%3Bsearch%3Fq%3D%2Fconfiguration%2FconfigurationMenuLoad.do) → [Customer Profiles (Main Menu)](https://ultracart.atlassian.net/wiki/404?key%3Dmerchant%3Bsearch%3Fq%3D%2Fcustomerprofile%2FcustomerProfileMenuLoad.do)
:::
## Enable Customer Profiles
To enable Customer Profiles, navigate to (settings configuration):
:::note
[Home](https://ultracart.atlassian.net/wiki/404?key%3Dmerchant%3Bsearch%3Fq%3D%2FmainMenu.do) → [Configuration (Checkout)](https://ultracart.atlassian.net/wiki/404?key%3Dmerchant%3Bsearch%3Fq%3D%2Fconfiguration%2FconfigurationMenuLoad.do) → [Customer Profiles (Settings)](https://ultracart.atlassian.net/wiki/404?key%3Dmerchant%3Bsearch%3Fq%3D%2Fconfiguration%2FcustomerProfilesLoad.do)
:::
There are 4 options with customer profiles section; Enable Customer Profiles, Require Customer Profile, Allow Customer Profiles to Store Credit Card(s) and Limit Checkout Address Book to Last # Entries. Check the box to the left of the choices desired.

| **Field** | **Description** |
| --- | --- |
| **Enable Customer Profiles** | If selected, the multi-page checkout will include a customer profile screen directly upon the customer clicking on the "Checkout" button in the shopping cart. :::info **SinglePageCheckout does not include Customer Profile** Please note that the Single Page Checkout does not support the Customer Profile creation/login process. ::: |
| **Require Customer Profile** | If selected this will remove the "Guest checkout" option from the Customer profiles checkout screen. The customer will either need to create a customer profile or log into an existing customer profile. |
| **Allow Customer Profiles to Store Credit Card(s)** | If selected, this will allow the customer to store their credit card data (PCI compliant hashing of the Credit Card number details is automatically applied) for use with future orders. :::note **CVV2 Requirement** If you enable this option, it is important that you configure your gateway to allow processing of transactions without the CVV2 number being present. For PCI compliance reasons we cannot store the CVV2 number with the customer profile stored credit card. If you fail to configure your gateway properly, the transaction will fail. ::: |
| **Auto Establish Customer Profile** | A customer profile will be established for the customer upon their order if one does not exist. (\*The profile will not have a password and the customer will have to perform an email verification to set the initial password.) |
| **Auto Link Orders to Customer Profile** | If enabled, any order placed will automatically link to a customer profile by email. The order will not receive special pricing as if they had logged into the profile, but will be linked for historical purposes. |
| **Limit Checkout Address Book to Last \_\_ Entries** | If configured (not left blank) the customers billing and shipping addresses will be limited to the specified number of entries. |
## My Account (Customer Portal)
These actions control the behavior of the customer portal where customers may view their order history, make reviews, etc. (See also: [My Account Customer Portal](/guides/ultracart-documentation/configuration/checkout-configuration/my-account-customer-portal))

| **Field** | **Description** |
| --- | --- |
| **Enable Case Management** | Enables Case Management. Please see [Case Management](/orders-fulfillment/order-management/case-management) documentation for more details. |
| **Display Product Reviews** | If enabled, product reviews will be displayed in the My Account Customer Portal. See [Reviews](/guides/ultracart-documentation/configuration/items-configuration/reviews) for more details. |
| **Allow customers to manage privacy settings** | Provide an option for customers to manage their privacy settings via the MyAccount portal. See [My Account Customer Portal](/guides/ultracart-documentation/configuration/checkout-configuration/my-account-customer-portal) for more details. |
| **Allow unlimited downloads of digital content** | Allow the customer to download their digital content as long as they are logged into their MyAccount portal. |
| **Display Auto Orders** | If enabled, auto orders will be displayed. Optional sub-permissions include: Allow Customers to Cancel Auto Orders, Change Next Shipment Date, Change Quantity, Pause Auto Orders, Update Billing, Update Shipping, and Update Payment details. |
## Wholesale Signup
This section provides a text box whereby merchants can enter their Wholesale Agreement that will be presented to prospective wholesale customers during signup.
:::note
[Home](https://ultracart.atlassian.net/wiki/404?key%3Dmerchant%3Bsearch%3Fq%3D%2FmainMenu.do) → [Configuration (Checkout)](https://ultracart.atlassian.net/wiki/404?key%3Dmerchant%3Bsearch%3Fq%3D%2Fconfiguration%2FconfigurationMenuLoad.do) → [Customer Profiles (Settings)](https://ultracart.atlassian.net/wiki/404?key%3Dmerchant%3Bsearch%3Fq%3D%2Fconfiguration%2FcustomerProfilesLoad.do) → Wholesale Signup (section)
:::
Enter your text in the text box provided. To require your prospective Wholesale Customer to enter their SSN or Tax ID, click the checkbox to the left of "Collect SSN/Tax ID". Click "Save" when finished.
## Single Signon

Single Signon is an advanced configuration option available to merchants that have SalesForce integration with their UltraCart account.
For more details, visit: [Customer Profiles Single Signon](#page-not-found)
## Wholesale Login/Logout/Signup Redirects
After a successful login, logout, or signup of a wholesale customer you can redirect them to specific pages on your website.

## Wholesale Related Links for Web Site

:::tip
When using these links with custom SSL sites (i.e. secure.mystore.com instead of secure.ultracart.com), you may wish to add helper parameters: OVERRIDECATALOGURL and OVERRIDECONTINUESHOPPINGURL.
html/xmlLogin [Logout](https://secure.mystore.com/cgi-bin/UCAccountLogout?merchantId=DEMO&OVERRIDECATALOGURL=https%3A%2F%2Fsecure.mystore.com&OVERRIDECONTINUESHOPPINGURL=https%3A%2F%2Fsecure.mystore.com) [Signup](https://secure.mystore.com/cgi-bin/UCWholesaleSignup?merchantId=DEMO&OVERRIDECATALOGURL=https%3A%2F%2Fsecure.mystore.com&OVERRIDECONTINUESHOPPINGURL=https%3A%2F%2Fsecure.mystore.com)\]\]>
:::
# Related Documentation
[My Account Customer Portal](/guides/ultracart-documentation/configuration/checkout-configuration/my-account-customer-portal)
[Loyalty Program](/guides/ultracart-documentation/configuration/checkout-configuration/loyalty-program)
---
# Customer Profile Editor
https://docs.ultracart.com/customers-crm/customer-profiles/customer-profile-editor
doc_type: reference
# About
The Customer Profile editor contains all the pertinent details regarding a customer. The customer’s email address is the login credential the customer will use to access their order history, product reviews, sales tax designation, and more.
The Customer profile editor consists of 11 tabs:

| **Tab** | **Description** |
| --- | --- |
| General | This tab contains the Customer login credentials and other customer information. |
| Billing | Billing Address books and also Checkout & Payments settings for the customer. |
| Shipping | Shipping Address Books and Shipping options. |
| [Accounting / Tracking](./accounting-tracking-tab.md) | QuickBooks, Affiliate and Sales Rep assignment, and Loyalty / Cashback ledger. |
| [Orders](./orders-tab.md) | Order history associated with customer profile. |
| Quotes | If Quote Requests are enabled, Quotes for the customer are viewable here. |
| Reviews | If Product Reviews are enabled, Reviews and reviewer details are displayed here. |
| Uploads | File attachments, such as resales certificates are viewable here. |
| Taxes | Reseller Tax ID number, Avalara & TaxJar codes configuration. Tax Exemption configuration. |
| Software | If applicable, Software Entitlements are viewable here. |
| [Activity](./activity-tab.md) | View the shopping and sales activity captured by UltraCart Analytics. |
# Related Documentaion
Avalara Tax Entity Codes for Tax Exempt Customers: [https://knowledge.avalara.com/bundle/dqa1657870670369\_dqa1657870670369/page/Exempt\_reason\_matrix\_for\_the\_U.S.\_and\_Canada\_entity\_use\_code\_list.html#pus1650667484575](https://knowledge.avalara.com/bundle/dqa1657870670369_dqa1657870670369/page/Exempt_reason_matrix_for_the_U.S._and_Canada_entity_use_code_list.html#pus1650667484575)
---
# Accounting / Tracking Tab
https://docs.ultracart.com/customers-crm/customer-profiles/customer-profile-editor/accounting-tracking-tab
doc_type: reference
The Accounting / Tracking tab of the Customer Profile Editor contains the following sections:
1. Quickbooks
2. Conditional Options
3. Loyalty - CashBack
4. Ledger Entry
# QuickBooks
The section may be configured, if you are integrated with QuickBooks Desktop application.
# Conditional Options
This section contains options for assigning the customer profile to:
1. Associate with Affiliate
2. Sales Rep Code
# Loyalty / Cashback
This section display previous activity for the customer profile associated with the Loyalty / Cashback program
# Ledger Entry
Depending upon your Loyalty program configuration for either Cashback or Points program, the ledger entry tool can be used to manually apply debits or credits. The cashback ledger resides at the bottom of the Accounting tab in the customer profile editor, the ledger for the points program is located in the loyalty program configuration page (see below for details for each ledger.)
:::info
**Please note that since this is a ledger, there isn't a delete option, you’ll enter either positive or negative entries to make adjustments to a customers' cashback or points totals.**
:::
## Loyalty Cashback Ledger Entry
The Ledger Entry tool allow for manual adjustments to the customer profile Loyalty / Cashback ledger

FAQ:
**Q: How can we cancel a credit that has been applied to a customers' cashback ledger?**
A: To cancel a credit to a customer profile:
1. Navigate: Operations → Customer Profiles → Manage
2. Find the customer profile and click edit
3. Click on the Accounting/Tracking tab
4. Scroll down and use the "New Ledger Entry" section.
(Note: The amount should be entered as a negative amount to reduce their balance and as a positive to increase their cashback balance.)
## Loyalty Points Ledger Entry
For Loyalty points programs, the ledger resides in the [Loyalty Program configuration page](/guides/ultracart-documentation/configuration/checkout-configuration/loyalty-program), not in the customer profile editor.
Main Menu → Configuration → (middle menu) Checkout → (Second section) Loyalty

Click on the hyperlink in the navigational breadcrumb ‘Transactions’
---
# Activity Tab
https://docs.ultracart.com/customers-crm/customer-profiles/customer-profile-editor/activity-tab
doc_type: reference
## Introduction / Overview
The **Activity** tab in a customer’s profile provides a detailed timeline of that customer’s interactions with your store, including website visits, checkout attempts, and completed orders. This insight helps store owners better understand customer behavior, purchase patterns, and engagement level.
:::note
Main Menu → Operations → [Customer Profiles](https://secure.ultracart.com/merchant/customerprofile/customerProfileMenuLoad.do) → [Manage](https://secure.ultracart.com/merchant/customerprofile/customerProfileAppLoad.do)
:::
**This page is especially useful for:**
- Customer service agents researching purchase activity.
- Store owners looking to segment customers based on engagement.
- Marketing teams evaluating campaign effectiveness.
note
**Prerequisites:** You must have access to your UltraCart admin portal and a customer profile with activity to review.
**Prerequisites:** You must have access to your UltraCart admin portal and a customer profile with activity to review.

## Summary of Sections
### 1\. **Activity Timeline (Left Panel)**
This section shows a chronological list of actions taken by the customer on your store.
Actions include:
- **Active on website:** Tracks browsing duration.
- If [**StoreFront Recording**](/storefronts-themes/storefront-recordings) is enabled, a **View Recording** link will appear next to each activity, allowing you to replay the session.
- The icon will reflect the device used (e.g., desktop or mobile).
- **Initiated checkout:** Customer began the checkout process.
- **Placed order:** A completed purchase. Each includes a clickable order ID (e.g., `T1000-0556201`) that links to full order details.
- **Delivered email:** A marketing email was successfully delivered to the customer.
- **Opened email:** The customer opened the delivered marketing email.
:::note
**Tip:** Hover over activity entries to see exact timestamps or click an order ID to drill into that order.
:::
###
2\. **Metrics (Top Right Panel)**
A performance summary based on customer actions, segmented by time frame:
- **Email Delivery / Open:** If email campaigns are connected, this tracks email interactions.
- **View / Initiate:** Tracks views of product pages and checkout initiations.
- **Ordered Product / Shipment:** Counts of items ordered and shipped.
- **Place Order:** Total value and number of orders placed.
note
Note: These are broken down by “Previous 30 Days,” “30 Days”, and “All-Time.”
Note: These are broken down by “Previous 30 Days,” “30 Days”, and “All-Time.”
###
3\. **Lists & Segments**
This section displays any **segments** or **marketing lists** the customer belongs to.
- Click **Add** to manually assign them to a list.
- Useful for targeting with promotions or tracking lifecycle stages.
note
Marketer’s Note: Segments can trigger automated campaigns or special offers.
Marketer’s Note: Segments can trigger automated campaigns or special offers.
###
4\. **Information (Bottom Right Panel)**
Detailed metadata about the customer, including:
- **First Active / Last Active:** When the customer first and most recently engaged with your store.
- **Custom Properties:** Any tags or custom fields assigned to this customer (e.g., VIP, wholesale).
- **How They Found You:** Shows referral paths, including:
- **First Page**: First URL the customer visited.
- **Referrer**: External link that led them to your store.
- **Most Recent Visit:** Last page the customer accessed.
Also includes:
- **Global Unsubscribed Value:** Indicates if they’ve unsubscribed from all emails.
- **Spam Complaint Value:** Flags any spam complaints tied to this user.
## Conclusion & Next Steps
The **Activity** tab provides a powerful look at customer behavior and history, helping store owners make informed support, marketing, and sales decisions. By understanding what a customer has done on your store, you can tailor communication, resolve issues faster, and improve retention.
**See also:**
- [Customer Segments Documentation](/storefronts-themes/storefront-communications/segments)
- [Orders Tab Overview](./orders-tab.md)
- [Marketing Campaign Engagement Metrics and Statistics](/storefronts-themes/storefront-communications/statistics)
---
# Orders Tab
https://docs.ultracart.com/customers-crm/customer-profiles/customer-profile-editor/orders-tab
doc_type: how-to
:::note
Main Menu → Operations → [Customer Profiles](https://secure.ultracart.com/merchant/customerprofile/customerProfileMenuLoad.do) → [Manage](https://secure.ultracart.com/merchant/customerprofile/customerProfileAppLoad.do)
:::
## Introduction / Overview
The **Orders** tab in a customer’s profile provides a full list of all orders placed by that customer, along with detailed billing, shipping, and line-item information for each order. This view is helpful for customer service, support inquiries, and reviewing purchasing behavior.
Store owners and staff can use this tab to:
- View and verify previous transactions.
- Re-send order confirmations or look up tracking.
- Cross-reference billing and shipping details.
note
**Prerequisites:** You must have access to the UltraCart admin interface and be viewing a specific customer profile.
**Prerequisites:** You must have access to the UltraCart admin interface and be viewing a specific customer profile.
* * *
## Quickstart / TL;DR
- Navigate to **Customer Profiles > \[Select Customer\] > Orders** tab.
- Click any **Order ID** in the list to view full details.
- Review billing, shipping, item details, and totals in the right-hand panel.

## Step-by-Step Instructions
### 1\. View Order History
The left panel displays a searchable, paginated list of the customer’s past orders.
- **Order ID**: Click to open full order details.
- **Total**: Displays the order subtotal (before shipping/tax).
- **Date**: Shows the date the order was placed.
:::note
**Tip:** You can adjust how many orders are shown per page using the dropdown at the top of the list.
:::
* * *
### 2\. View Detailed Order Information
When an order is selected, the right panel shows all related details, including:
#### Order Summary
- **Order ID** and **Order Date**
- Quick link icon to open the order in a new window
#### Bill To / Ship To
- Full name, address, and contact details for billing and shipping
- Useful for verifying information or resolving delivery issues
#### Shipping Method & Source
- **Shipping Method**: Carrier and speed selected (e.g., FedEx 2-Day)
- **Advertising Source**: Indicates where the customer came from (e.g., campaign, affiliate)
#### Line Items
- Each item purchased, including:
- **SKU or Code**
- **Product name**
- **Quantity**
- **Amount charged**
- **Barcode**, if applicable
#### Financial Breakdown
- **Subtotal**
- **Tax Rate** and calculated **Tax**
- **Shipping/Handling**
- **Total**
* * *
## Best Practices & Tips
- Use this tab to quickly answer customer service inquiries about orders.
- Verify shipping address or order contents before issuing a return or replacement.
- Combine this with the **Activity** tab to see what led to the purchase (e.g., browsing behavior, email click).
- Useful for identifying repeat buyers or VIPs based on order volume or value.
* * *
## Troubleshooting / FAQ
**Q: Why don’t I see any orders listed?**
A: The customer may not have completed any purchases under the selected profile, or orders may be under a different email address/account.
**Q: Can I re-send an invoice or receipt?**
A: Yes. Use the full order view (click the Order ID) to access print/email options.
* * *
## Conclusion & Next Steps
The **Orders** tab is your go-to tool for managing and reviewing individual customer purchases. With quick access to billing, shipping, and item-level details, you’ll be equipped to handle support requests, verify transactions, and understand your customers better.
**See also:**
- [Customer Profiles – Activity Tab](./activity-tab.md)
- [Order Management Dashboard](/orders-fulfillment/order-management)
- [Refunds Workflow](/guides/ultracart-documentation/tutorials/order-management-tutorials/how-do-i-perform-a-refund)
---
# Customer Profile Order History
https://docs.ultracart.com/customers-crm/customer-profiles/customer-profile-order-history
doc_type: reference
From with a customers profile it is possible to view all of the orders placed with the profile. This can be helpful for tracking down orders or just getting an idea of how many order a particular customer has placed with their profile.
From the customer profile screen simply scroll down to the "Order History" Section. This section will display the total number of orders,

This section provides information on the number of orders this customer has placed along with the date of the first and last order placed, and finally the grand total for all of the orders placed.
When we click on the "Number of orders" this will provide a detailed view of the orders placed by the customer as shown below.

This will provide break down of the order number, along with the date of the order and the total. We can also click on the Order number to pull up the complete order record as shown below.

This allows us to make any changes to the customer order that may be needed, including refunding the order, or adding notes about the order and delivery.
---
# Customer Profile Tutorial
https://docs.ultracart.com/customers-crm/customer-profiles/customer-profile-tutorial
doc_type: tutorial
# Customer Profile Tutorials
If your customers make periodic purchases from your online store, you can enable customer profiles to help speed up the checkout process. Customer Profiles allow your customers to optionally enter a password, and store their information on the UltraCart servers. When their next purchase, they can allow UltraCart to automatically pre-populate the checkout form by using their e-mail address and the password they specified. UltraCart provides import and export utilities that allow for the management of customer profile records.
### Related Documentation
[Configuration - Customer Profiles](../configuration-customer-profiles.md)
[Customer Profiles Export Tutorial](./customer-profiles-export-tutorial.md)
[Customer Profiles Import Tutorial](./customer-profiles-import-tutorial.md)
[How to Delete a Batch of Customer Profiles](./how-to-delete-a-batch-of-customer-profil.md)
---
# Customer Profiles Export Tutorial
https://docs.ultracart.com/customers-crm/customer-profiles/customer-profile-tutorial/customer-profiles-export-tutorial
doc_type: tutorial
# Introduction
The Customer Profiles Export utility allows merchants to quickly generate an Excel spreadsheet or CSV file containing all data stored in customer profiles. This feature is particularly useful for reviewing, bulk editing, or backing up customer information. After exporting and editing the spreadsheet, you can import the updated information back into UltraCart.
> **Tip:** Use the export/import cycle for large-scale profile updates instead of editing records individually.
* * *
## Prerequisites
- Access to your UltraCart Merchant Account
- Familiarity with navigating **Operations → Customer Profiles**
- (Optional) Configured [Pricing Tiers](/guides/ultracart-documentation/configuration/items-configuration/pricing-tiers)
## Exporting Customer Profiles
1. Navigate to **Operations → Customer Profiles → Export**.

2. If pricing tiers are configured:
- Select one or more pricing tiers from the available list:

- If no pricing tiers are configured, this menu will not appear.
3. Choose the export format:
- **Excel Spreadsheet (.xlsx)**
- **CSV (.csv)**
4. Click **Download** to generate and save the export file.
## Example Export

The exported file will contain all fields that have been configured on at least one customer record.
- **Retail Customers:**
Profiles created during checkout may contain only minimal data (such as an email address).
- **Wholesale Customers:**
Profiles created via the wholesale signup form will contain additional required fields.
See the [Building a Password-Protected Wholesale Area Tutorial](/archive/configuration/retired-content/catalog-tutorials/building-a-password-protected-wholesale).
:::info
Records of retail customers that chose to create a customer profile during their checkout will contain only an email address, whereas, customer records of customers that signed up via the [wholesale](/archive/configuration/retired-content/catalog-tutorials/building-a-password-protected-wholesale) signup will contain more fields that they were required to fill out.
:::
---
# Customer Profiles Import Tutorial
https://docs.ultracart.com/customers-crm/customer-profiles/customer-profile-tutorial/customer-profiles-import-tutorial
doc_type: tutorial
:::note
Operations → [Customer Profiles](https://secure.ultracart.com/merchant/customerprofile/customerProfileMenuLoad.do) → [Import](https://secure.ultracart.com/merchant/customerprofile/import/step1Load.do)
:::
# Customer Import: Upload and Manage Customer Profiles in Bulk
UltraCart’s Customer Import feature allows store owners to upload detailed customer data in bulk, including email addresses, contact information, shipping and billing addresses, pricing tiers, and more.
This tool supports both the creation of new customer records and the updating of existing ones, making it ideal for:
- Importing customer data from another platform
- Importing legacy customer data
- Syncing CRM exports
- Segmenting customers by loyalty tier, tax status, or tags
### Key Benefits
- Create or update multiple customers at once
- Assign billing/shipping addresses and preferences
- Add tags, notes, and pricing tier info during import
### Prerequisites
- An active UltraCart account with access to the **Customers** module
- User needs access to the “Bulk - Import Customers” permission
- A spreadsheet file in `.csv` or `.xls` format
- At minimum, each row must contain a valid **Email**
## Quickstart / TL;DR
7. Go to **Customers → Import Customers**
8. Download the [Sample CSV Template](#)
9. Fill out customer data (Email required)
10. Upload your file and map the fields
11. Submit the import
* * *
## Step-by-Step Instructions
### Step 1: Navigate to Customer Import
- Hover over`Operations` in the UltraCart main menu
- Select`Customer Profiles`
- Select `Import`

### Step 2: Download and Review the Sample File
:::note
**Sample File Provided:**
We've included a sample CSV file to help you get started. This file includes basic headers like `Email`, `Affiliate ID`, `Shipping Infomation`, and `Billing Information`.
You can open it in Excel or Google Sheets and **modify it to include your own product data**.
**How to use the sample effectively:**
1. Replace the sample rows with your actual Customer Profile information.
2. Add or remove columns based on which fields you want to import or update.
3. Make sure the `Item ID` is included for all rows (required for both creating and updating items).
4. Save the file as `.csv` or `.xls` before uploading.
Once your file is ready, click **Upload File** on the Batch Item Import page to begin the field mapping process.
**Tip:** You can delete unused rows or columns.
:::
**How to use the sample effectively:**
1. Replace the sample rows with your actual customer information.
2. Add or remove columns based on which fields you want to import or update.
3. Make sure the `Email` is included for all rows (required for both creating and updating customers).
4. Save the file as `.csv` or `.xls` before uploading.
Once your file is ready, click **Upload File** on the Customer Import page to begin the field mapping process.
- All supported headers (including Billing1–Billing11, Shipping1–Shipping3, Email, and more)
- Sample data showing how to format each field
### Step 3: Prepare Your Data File
- Use Excel, Google Sheets, or another spreadsheet editor to open the file
- Keep the first row (headers) intact
- Fill in customer details for each row
- **Required:** `Email`
- **Optional:** Names, phone numbers, addresses, tags, pricing tiers, account numbers, etc.
note1e04c2d38036
**Updating Customers**
If an email already exists in your UltraCart store, importing that row will update only the fields included in your file. Unspecified fields will remain unchanged.
**Updating Customers**
If an email already exists in your UltraCart store, importing that row will update only the fields included in your file. Unspecified fields will remain unchanged.
### Step 4: Upload Your File
In this step, you'll select your customer import file and configure a few basic options before proceeding to field mapping.
#### File Requirements
- Accepted formats: `.csv` or `.xls`
- Your file must include at least one row per customer with a valid `Email`
- The first row should contain **column headers** (e.g., `Email`, `Billing1 First Name`, etc.)

#### Uploading via the Import Wizard
You’ll see the following options when you arrive at the **Customer Profile Import Wizard**:
1. **Select a File**
Click the **Choose File** button to upload your `.csv` or `.xls` file containing customer data.
2. **Pre-defined Import Mapping** _(optional)_
If you've previously saved a field mapping template, select it from this dropdown. This is useful for recurring import jobs using the same column structure.
3. **Text File Delimiter**
If you're uploading a `.csv` file, make sure the delimiter is correct:
- Most files use `,` **(comma)**, which is selected by default.
- If your file uses a different delimiter (e.g., semicolon), change it here.
4. **Auto Map Columns** _(optional)_
Check this box if you want UltraCart to attempt to match your file's column headers to internal customer fields automatically.
5. Click the **Continue to Step 2** button to proceed to field mapping.
:::note
**Helpful Tips**
The easiest way to create a Pre-defined Import Mapping is to start by exporting customer data or using the sample data listed above.
You’ll have the opportunity to save your field mappings on the next screen. Once saved, your custom mappings will appear in the “Pre-defined Import Mapping” dropdown for future imports.
:::
### Step 5: Map Your Fields
After uploading your file, UltraCart will show a preview of your data alongside a dropdown for each column. This step allows you to map the columns in your CSV or Excel file to UltraCart’s internal customer fields.

#### How Field Mapping Works
- The first row of your file (typically your headers) appears below each column.
- Use the dropdown above each column to select the correct UltraCart field.
- If your column headers closely match UltraCart's field names, mapping may occur automatically.
- If you don't want to import a particular column, leave the dropdown set to `-- Select --`.
#### Mapping Address Fields
UltraCart stores addresses using a flexible format that supports **multiple billing and shipping addresses**.
You have three options for mapping address data:
1. **Basic Address Mapping**
- Use `Address1`, `City`, and `State` to map a single shared address.
- UltraCart will assign this to both the billing and shipping profile automatically.
- Best for quick imports without full address segmentation.
2. **Detailed Mapping for Billing1 and Shipping1**
- Map fields like `Billing1 First Name`, `Billing1 Address1`, `Billing1 City`, etc.
- Similarly for `Shipping1 First Name`, `Shipping1 Address1`, etc.
- Use this if you want to define different billing and shipping locations.
3. **Multiple Address Sets** (Advanced)
- UltraCart supports up to:
- `Billing1` through `Billing11`
- `Shipping1` through `Shipping3`
- To import these, use field names in the format:
`Shipping2 First Name`, `Billing3 Company`, `Shipping2 Default Shipping`, etc.
- You must include all required fields for each address group:
- `First Name`
- `Last Name`
- `Address1`
- `City`
- `State`
- `Postal Code`
- `Country`
note95c76e79aab7
**Note:** The first billing and shipping addresses will be marked as default unless you explicitly use the field `BillingX Default Billing` or `ShippingX Default Shipping`.
**Note:** The first billing and shipping addresses will be marked as default unless you explicitly use the field `BillingX Default Billing` or `ShippingX Default Shipping`.
#### Example Fields You Can Map
Here are some of the common fields available during mapping:
| **Field Name** | **Description** |
| --- | --- |
| Email (required) | Customer's Email - used as Login |
| Address 1 | Customer's address |
| Address 2 | Customer's 2nd address |
| Allow 3rd Party Billing | Allows the customer to use their own shipping account for the billing of shipping costs. |
| City | City |
| Company | Company Name |
| Country | Country |
| Customer Profile ID | ID assigned by our system |
| Day Phone | Daytime phone of Customer |
| Evening Phone | Evening phone of Customer |
| First Name | First Name |
| Last Name | Last Name |
| **Special Tag** | **Description** |
| --- | --- |
| \[firstname\] | Replaced by **first name** of the customer profile. |
| \[lastname\] | Replaced by **last name** of the customer profile. |
| \[email\] | Replaced by **email** of the customer profile. |
| \[password\] | Replaced by **password** of the customer profile. |
| \[dayphone\] | Replaced by **day phone** of the customer profile. |
| \[eveningphone\] | Replaced by **evening phone** of the customer profile. |
| \[company\] | Replaced by **company** of the customer profile. |
After configuring the email template with your custom content, click the "**Preview**" button to preview the rendered email, then once you have proofread and verified the rendered message , you'll click the "**Send**" button to send the message.
# Related Documentation
[Customer Profiles Export Tutorial](./customer-profiles-export-tutorial.md)
---
# How to Delete a Batch of Customer Profiles
https://docs.ultracart.com/customers-crm/customer-profiles/customer-profile-tutorial/how-to-delete-a-batch-of-customer-profil
doc_type: how-to
# How to Delete a Batch of Customer Profiles
This tutorial will cover how to delete a batch of customer profiles from your UltraCart account. Over time you may accumulate a large collection of customer profiles and want to delete older ones that no longer apply.
## Exporting Existing Customer Profiles
The first step is to export your existing customer profiles to a spreadsheet under:
:::note
[Main Menu](#) → [Customer Profiles](#) → [Export](#)
:::
Just click the download button on the export as shown below.

This will download an Excel Spreadsheet. Just tell your browser to open it.
## Pruning Entries from the Spreadsheet
When the spreadsheet opens you will want to **DELETE** rows from the spreadsheet that you want to have **REMOVED** from your UltraCart account. You should leave all the customer profiles in the spreadsheet that you want to retain on your account. The example below shows selecting a range of customer profiles in the spreadsheet and deleting them.

Now save the file to a temporary location on your computer. Your desktop is an easy place to locate the file.
### Performing the Import
Now we are going to import our modified spreadsheet using the customer profile import functionality located at:
:::note
[Main Menu](#) → [Customer Profiles](#) → [Import](#)
:::
Select the file that you saved in the prior step of this tutorial and click Continue.

When the next screen appears check the checkboxes as shown and map only the email field.

The "Delete customer profiles in UltraCart that do not exist in this import file." is what will cause the pruning to take place. Scroll to the bottom of the page and click continue. After the system scans through the records it will display a confirmation page of all the customer profiles that are going to be deleted as shown below. Review this list carefully and then click the "Delete Checked Customer Profiles" button.

---
# Tutorial: Customer Profile Tags and Properties
https://docs.ultracart.com/customers-crm/customer-profiles/customer-profile-tutorial/tutorial-customer-profile-tags-and-prope
doc_type: tutorial
## Introduction
Customer Tags and Properties in UltraCart provide a flexible system for segmenting, enriching, and automating customer data. These tools are foundational for personalization, marketing campaigns, reporting, and integrations.
This guide covers:
- The difference between Tags and Properties
- How to manage them in the UltraCart UI
- How to report on Tags and Properties
- How to use the REST API for bulk updates
- How to build campaigns using Tags and Properties
- Frequently Asked Questions
> **Note:** Tags and Properties are internal data structures and are not visible to customers unless explicitly used in templates.
* * *
## Prerequisites
Before working with Tags and Properties, ensure:
- You have access to **Customer Profiles**
- Your user account has permissions to:
- View and edit customer profiles
- (Optional) For API usage:
- API Key configured under **Merchant → Configuration → API Access**
- Familiarity with REST API or SDK usage
* * *
## What Are Tags and Properties?
### Customer Tags
Customer Tags are simple labels used to categorize customers.
- Single string value (e.g., `VIP`, `Wholesale`)
- Multiple tags per customer allowed
- Ideal for segmentation and campaign targeting
**Common use cases:**
- Lifecycle stages: `New_Customer`, `At_Risk`, `Churned`
- Value tiers: `VIP`, `High_Value`
- Programs: `Loyalty_Member`, `Affiliate`
- Migration: `Imported`, `Legacy_System`
* * *
### Customer Properties
Customer Properties store structured data as key-value pairs.
- Include **Name + Value**
- Optional expiration date
- Used for personalization, analytics, and automation
| Feature | Tags | Properties |
| Metric | Recommendation |
| --- | --- |
| Total unique tags | Keep under ~50 |
| % customers tagged | Aim for >50% coverage |
| Tags per customer | Ideal: 2–5 |
| Naming consistency | Standardize (e.g., `VIP` only) |
| Expiring properties | Review regularly |
* * *
## AI Export Business Analysis Prompt
### Overview
The **AI Export Business Analysis Prompt** is designed to transform exported customer tag and property data into **actionable business insights**.
This prompt is intended for use with AI tools (such as ChatGPT or other LLM-based analysis tools) after exporting customer data via:
- Customer Profile export (CSV)
- Data Warehouse (BigQuery query results)
The analysis helps merchants:
- Evaluate segmentation effectiveness
- Identify data quality issues
- Discover personalization opportunities
- Improve marketing and automation strategies
> **Tip:** This is especially useful for large datasets where manual analysis is impractical.
* * *
### Purpose of This Report
The AI-generated report provides:
- **Segmentation Health Analysis**
- Tag coverage and distribution
- **Data Quality Assessment**
- Naming inconsistencies, duplicates, missing data
- **Customer Insights**
- High-value segments, lifecycle gaps
- **Actionable Recommendations**
- Campaign ideas, automation triggers, cleanup tasks
This enables merchants to move from **raw data → strategic decisions** quickly.
* * *
### AI Analysis Prompt
Use the following prompt when submitting your exported data to an AI tool:
```
You are an expert analyst specializing in UltraCart customer data segmentation.
You will receive JSON data representing customer profiles, including tags and properties.
Analyze the data and provide a structured report with actionable insights.
Focus on the following areas:
1. Customer Segmentation Overview
- Count unique tags
- Identify most common tags
- Calculate percentage of customers with tags
- Identify customers with multiple tags
- Detect naming inconsistencies (e.g., VIP vs vip)
2. Property Analysis
- Identify most common properties
- Categorize property types (loyalty, behavioral, attribution, etc.)
- Analyze property value patterns
- Identify expiring or expired properties
3. Data Quality Assessment
- Detect duplicate or inconsistent naming
- Identify customers with no tags or properties
- Flag rarely used properties (<1% usage)
- Highlight expired properties
4. Segmentation Strategy Insights
- Identify gaps in lifecycle segmentation (new, active, churned)
- Identify missing value-based segmentation (VIP, high-value)
- Suggest improvements
5. Personalization Opportunities
- Recommend campaign targeting strategies
- Suggest automation triggers using properties
- Identify opportunities for customer experience personalization
6. Key Metrics to Report
- Total unique tags
- Average tags per customer
- Tag coverage %
- Total unique properties
- Average properties per customer
- Customers without tags or properties
7. Output Format
Provide:
- Executive Summary (3–4 sentences)
- Segmentation Health Score (Coverage, Consistency, Strategic Value)
- Tag Analysis
- Property Analysis
- Data Quality Issues
- Strategic Recommendations (High, Medium, Long-term)
- Example Campaign Use Cases
Focus on actionable insights that improve segmentation, personalization, and revenue.
```
* * *
### When to Use This Prompt
Use this AI prompt when:
- Reviewing **post-migration customer data**
- Auditing **tag/property consistency**
- Planning **new marketing campaigns**
- Evaluating **segmentation maturity**
- Identifying **data cleanup opportunities**
* * *
### Example Workflow
1. Export customer data (CSV or JSON)
2. Convert to JSON (if needed)
3. Paste into AI tool with the prompt above
4. Review generated insights
5. Implement:
- Tag standardization
- Property enrichment
- Campaign strategies
* * *
## REST API Usage
### Authentication
- API Key required
- Include expansion:
```
tags,properties
```
* * *
### PHP Example
```
$customer->setTags([$tag1, $tag2]);
$customer->setProperties([$prop1, $prop2]);
$expansion = "tags,properties";
$api->insertCustomer($customer, $expansion);
```
> **Important:** Always pass model objects (`CustomerTag`, `CustomerProperty`) — not strings.
* * *
### JavaScript Example
```
customer.tags = [tag1, tag2];
customer.properties = [prop1, prop2];
await api.insertCustomer(customer, { _expand: 'tags,properties' });
```
* * *
### Updating Existing Customers
1. Retrieve existing customer
2. Merge tags/properties
3. Update customer
> **Warning:** `setTags()` replaces all tags. Always merge first.
* * *
### Bulk Import Pattern
- Loop through customers
- Assign:
- `imported` tag
- `legacy_id` property
- Respect API rate limits
* * *
## Using Tags & Properties in Campaigns
### Workflow Overview
1. Define segment (e.g., `VIP`)
2. Create segment in UltraCart
3. Create campaign or flow
4. Attach segment
5. Configure triggers
6. Activate and monitor
* * *
### Example Use Cases
**VIP Campaign**
- Trigger: Tag = VIP
- Send exclusive offers
**Re-engagement**
- Trigger: Property `Days_Since_Last_Order > 90`
- Send win-back emails
**Post-import onboarding**
- Trigger: Tag = imported
- Send welcome sequence
* * *
### Automation Strategy
Use scheduled scripts to:
- Update lifecycle tags (`active`, `at_risk`, `churned`)
- Update properties (LTV, days since order)
* * *
## FAQ
### What is the difference between a Tag and a Property?
Tags are labels for segmentation. Properties store structured data for logic and personalization.
* * *
### Where do I see tags and properties?
- Tags: Activity Tab → Lists & Segments
- Properties: Activity Tab → Information Panel
* * *
### Why didn’t my property save?
You likely added multiple entries without saving. Save each property individually.
* * *
### Why are my API tags/properties empty?
Your expansion string is missing `tags,properties`.
* * *
### Can customers see tags or properties?
No. They are internal unless explicitly used in templates.
* * *
### Can tags expire?
No. Only properties support expiration.
* * *
### Does the API overwrite tags?
Yes. Always fetch and merge existing tags before updating.
* * *
### How do I use tags in campaigns?
Create a Segment, then assign it as the campaign audience.
* * *
### Is there a limit to tags or properties?
No hard limit, but best practice:
- 2–10 tags per customer
* * *
### What naming convention should I use?
Use:
```
Title_Case_With_Underscores
```
Example: `Loyalty_Member`
* * *
### What is the recommended migration approach?
1. Import via API
2. Add `imported` tag
3. Store `legacy_id` property
4. Validate data
5. Launch onboarding campaign
* * *
## Conclusion
Customer Tags and Properties provide a powerful foundation for segmentation, personalization, and automation within UltraCart. When used consistently, they enable scalable marketing strategies and deeper customer insights.
* * *
## Next Steps
- Create standardized tag naming conventions
- Build core customer segments
- Implement automation scripts
- Launch campaigns based on lifecycle stages
- Explore Data Warehouse reporting
---
# How to create a customer profile from a placed order.
https://docs.ultracart.com/customers-crm/customer-profiles/how-to-create-a-customer-profile-from-a
doc_type: how-to
# Overview
This tutorial details the steps for creating a customer profile from a previous order. Customer profiles are useful for both your customers and for you the merchant.
The benefits for the customer include:
- the ability to review previous orders
- simplify and speed up the checkout process for future orders
- manage their auto orders
- provide product reviews
The benefits for you the merchant include:
- customer contact details are continuously updated
- improved analytical data about your customers
# Steps to Creating a Customer Profile from a Placed Order
1. Locate the order using the "View all orders (in any stage)" or "Find Orders" widget on the Home page.
2. Once you are viewing the order (in the full page view, not in the search results view), browse over the "Tools" menu option:
3. Click "Establish Customer Profile":
4. The Customer Profile editor will open populated with the customer details from the order.
5. Review the details and scroll to the bottom of the page and click the Save button.
:::info
**Creating a password for the profile**
You will need to create a password before saving the customer profile, otherwise you'll get an error. The customer will have an option to email the password to themselves. After creating a password (recommend at least 6 characters using a combination of upper and lowercase letters and numbers), scroll to the bottom of the page and click Save.
:::
Congratulations! You've just created the customer profile.
---
# How to merge customer profiles for customers
https://docs.ultracart.com/customers-crm/customer-profiles/how-to-merge-customer-profiles-for-custo
doc_type: how-to
# About
Customers will sometime create more than one customer profile, usually due to changes in email addresses. This can cause issue for merchant , when the customer profile is managing subscriptions or product licenses, etcetera. So, a merchant may need to merge the customers profiles into a single profile, as a process of ongoing customer management.
:::info
Navigate to the Customer Profiles Management:
**Main Menu → Operations → Customer Profiles**
:::
# How to merge two customer profiles
1. First, Identify the two email addresses associated with the two customer profiles that need to be merged.
2. Click the Magnifying Glass Icon then search for the “old” customer profile that needs to be merged into the new or ongoing customer profile:

3. In the search results, click on the “three dots” menu on the far right side of the customer profile in the search results:

4. Then choose ‘Merge’:

5. Then enter the email address for the ongoing customer profile, then click the ‘Merge’ button:

Congratulations! - The merge process is completed.
---
# Logging into a Customer Profile that does not have a password
https://docs.ultracart.com/customers-crm/customer-profiles/logging-into-a-customer-profile-that-doe
doc_type: explanation
## Introduction
In some situations, a customer profile may exist in UltraCart without an assigned password. This can occur due to migration, system configuration, or purchase scenarios. This guide explains why this happens and how customers can access their profile when no password is set.
## Scenarios That Create Profiles Without Passwords
There are four common cases where customer profiles may exist without a password:
1. **Platform Migration**
Customer profiles were imported from another e-commerce platform. Because platforms do not expose existing passwords for security reasons, UltraCart cannot assign them during migration.
2. **Loyalty Credit Tracking**
A profile was automatically created to track loyalty credits earned by the customer, even if they never registered for an account.
3. **Automatic Profile Creation**
The merchant account is configured to create a customer profile for every order placed, regardless of whether the customer explicitly creates one.
4. **Digital Product Purchases**
A customer purchased a digital product (e.g., software with an activation code), which triggered profile creation.
## Accessing Customer Profiles Without Passwords
When a customer with a password-less profile attempts to log in to the **My Account** page, they have two options:
1. **Forgot Password**
- Selecting this option will assign a random password to the existing customer profile.
- The password is emailed to the customer.
- **Note:** In future theme upgrades, this process will change to use _magic links_. Magic links take customers directly to a "Change Password" page, eliminating the need for temporary passwords.
2. **Signup**
- The customer enters their email address and a desired password.
- The system detects the existing profile without a password.
- An email with a verification link is sent to the customer.
- Once the link is clicked, the system saves the password they entered during signup to their profile, and the customer can log in normally.
## Conclusion
UltraCart ensures that customers can always gain access to their profiles, even if they were created without passwords. Merchants can confidently migrate data or use auto-profile creation features knowing that customers can still authenticate easily.
## FAQ
**Q: Why can’t UltraCart import customer passwords from another platform?**
A: For security reasons, no e-commerce platform provides access to encrypted customer passwords. This prevents them from being transferred during migration.
**Q: What happens if a customer uses “Forgot Password” on a profile without a password?**
A: The system will generate a new random password, send it to their email, and assign it to their profile.
**Q: Will customers always receive random passwords when resetting?**
A: No. Future theme updates will replace random passwords with **magic links**, allowing the customer to set their own password immediately.
**Q: How does the signup method prevent duplicate accounts?**
A: UltraCart checks for an existing profile tied to the email address. Instead of creating a new profile, it attaches the password chosen during signup to the existing one after email verification.
**Q: Can merchants disable automatic customer profile creation?**
A: Yes. Merchants can configure their storefront settings to control whether profiles are created automatically for all orders or only for customers who explicitly register.
## Next Steps
- Review My Account Portal Settings to understand configuration options.
- Learn more about Customer Profiles in UltraCart.
* * *
Would you like me to also **add**
---
# Customers
https://docs.ultracart.com/customers-crm/customers
doc_type: reference
The Customers section is your centralized hub for managing every aspect of your customer data -- profiles, addresses, payment settings, order history, loyalty balances, activity analytics, and integrations. Every customer interaction across calls, conversations, and orders feeds back into a single profile, giving your team a complete picture without switching between systems.
## Why customer management matters
Most e-commerce teams manage customer data across multiple disconnected tools -- one for orders, another for support tickets, another for marketing lists. When a customer calls or chats in, agents scramble to piece together context from different screens.
UltraCart brings all of that into one place. When a customer contacts you via phone, SMS, or webchat, their profile is automatically matched and displayed. Your agent sees billing addresses, recent orders, store credit balances, and account preferences without leaving the conversation. When they place an order, the profile already has their saved addresses, payment methods, and pricing tiers applied.
This unified approach means:
- **No context switching.** Customer data, order entry, conversations, and calls are all in the same interface.
- **Automatic customer matching.** Inbound callers and chat visitors are identified and matched to their profile in real time.
- **Cross-channel history.** Orders, call records, chat transcripts, and SMS threads are linked to a single customer timeline.
- **Granular controls.** Payment options, shipping preferences, tax exemptions, and pricing tiers are configured per customer.
## Key capabilities
- **Search and filtering** -- find customers by email, name, phone, tags, pricing tier, address fields, dates, and more. Configure which columns display in your list view.
- **General settings** -- manage login credentials, signup details, tags, CC email notifications, and custom properties.
- **Billing addresses and payments** -- store multiple billing addresses and credit cards. Control checkout options like purchase orders, COD, quotes, drop shipping, coupons, and order limits. Assign pricing tiers.
- **Shipping addresses** -- store multiple shipping addresses with defaults. Configure free shipping thresholds, third-party carrier billing, and marketing mail preferences.
- **Orders and quotes** -- view complete order and quote history without leaving the customer profile.
- **Loyalty and store credit** -- track cashback or points balances, view ledger history, and add manual adjustments.
- **Activity and analytics** -- visualize customer behavior with charts, metrics, and a filterable activity timeline. View UTM attribution data and email/SMS subscription status.
- **Email memberships** -- manage email list subscriptions and view segment memberships.
- **Reviews** -- configure reviewer profiles and view review statistics.
- **Taxes and exemptions** -- set tax-exempt status and configure integration-specific IDs for Avalara, TaxJar, and Sovos.
- **Accounting integrations** -- connect to QuickBooks with class, terms, and tax exemption codes. Assign affiliates and sales reps.
- **Uploads and attachments** -- attach files like contracts, documents, or signed forms to the customer record.
- **Software entitlements** -- manage software license keys and entitlements tied to purchases.
## Navigating the customer detail page
You reach a customer's detail page by selecting a customer from the customer list. The detail page uses a sidebar navigation on the left with tabs for each feature area:
| Tab | Description |
| --- | --- |
| General | Login credentials, signup info, tags, CC emails, custom properties |
| Billing | Billing addresses, credit cards, checkout controls, pricing tiers |
| Shipping | Shipping addresses, free shipping, third-party billing, marketing mail |
| Accounting | QuickBooks settings, affiliate and sales rep assignments |
| Loyalty | Cashback or points balances and ledger history |
| Orders | Complete order history |
| Quotes | Quote history |
| Reviews | Reviewer profile and statistics |
| Uploads | File attachments |
| Taxes | Tax exemptions and provider-specific IDs |
| Software | Software license entitlements |
| Memberships | Email list subscriptions and segment memberships |
| Activity | Behavior analytics, timeline, UTM data, email/SMS status |
Select **Back to Customer Table** at the top of the sidebar to return to the customer list.
## Key terminology
| Term | Definition |
| --- | --- |
| Customer profile | The complete record for a customer, containing all data across every tab. |
| Pricing tier | A named pricing level that controls product prices shown to the customer. Customers can belong to multiple tiers. |
| Store credit | A monetary balance on the customer's account, typically earned through a loyalty program, that can be applied to future orders. |
| CC email | A carbon-copy email address that receives order-related notifications (refunds, receipts, shipments) alongside the customer's primary email. |
| Custom property | A key-value pair attached to the customer profile for internal tracking or custom integrations. |
| Third-party billing | A shipping configuration where freight charges are billed to the customer's own carrier account (UPS, FedEx, or DHL) instead of yours. |
| Purchase order (PO) | A payment method where the customer provides a PO number at checkout instead of paying immediately. Requires approval unless auto-approve is enabled. |
| Tax exempt | A flag indicating the customer is not charged sales tax. May require a tax exemption certificate depending on your tax provider. |
## In this section
The customer list is your starting point for finding and managing customer records. From here you can search by almost any field, apply multi-criteria filters, configure which columns display, and perform bulk operations like merging or deleting customers.
The General tab contains the core profile fields that define who a customer is and how their account behaves. This is where you manage login credentials, signup details, tags, notification preferences, and custom properties.
The Billing tab controls where customers are billed, how they can pay, and what checkout restrictions apply to their account. From here you manage billing addresses, stored credit cards, checkout toggles, order limits, and pricing tier assignments.
The Shipping tab controls where orders are shipped and how shipping costs are handled for a specific customer. From here you manage shipping addresses, free shipping rules, third-party carrier billing, and marketing mail preferences.
The Orders and Quotes tabs give you a complete view of a customer's purchase and quote history without leaving the customer profile. Both tabs share the same layout and behavior -- the only difference is the data they display.
UltraCart supports cashback and points-based loyalty programs. The Loyalty tab shows the customer's current balance and full ledger history, and lets you add manual adjustments when needed. What you see on this tab depends on which loyalty program type is configured for your account.
The Activity tab gives you a complete picture of how a customer interacts with your store -- from first visit through repeat purchases. It combines behavior charts, aggregate metrics, a filterable activity timeline, UTM attribution data, and email/SMS subscription status in a single view.
The Memberships tab lets you control which email lists a customer is subscribed to and view which auto-calculated segments they belong to. This is useful for managing marketing communications and understanding how a customer is categorized by your email rules.
The Reviews tab lets you manage a customer's reviewer profile and view their review statistics. This is where you configure how the customer appears as a reviewer and whether their reviews are automatically approved.
The Taxes tab lets you configure tax-related settings for an individual customer, including tax-exempt status and integration-specific identifiers for your tax calculation provider.
The Accounting tab connects customer records to your accounting and sales tracking systems. Configure QuickBooks sync settings, assign the customer to an affiliate, or link them to a sales representative.
The Uploads tab lets you attach files to a customer record for internal reference -- contracts, signed forms, tax exemption certificates, or any other documents your team needs to keep alongside the customer profile.
The Software tab lets you manage software license keys and entitlements tied to a customer's purchases. If you sell software products, this is where you view, add, and edit the license records associated with a customer.
When a customer contacts you via SMS or phone, you can link their phone number to an existing customer profile or create a new one. Linking connects the conversation to the customer's full history -- orders, account details, loyalty balance, and previous interactions -- so your team has complete context without leaving the conversation.
---
# Billing addresses and payment settings
https://docs.ultracart.com/customers-crm/customers/billing-addresses-and-payment-settings
doc_type: reference
The Billing tab controls where customers are billed, how they can pay, and what checkout restrictions apply to their account. From here you manage billing addresses, stored credit cards, checkout toggles, order limits, and pricing tier assignments.
## Managing billing addresses
The billing address book stores one or more billing addresses for the customer. Each address can be used at checkout and one address can be designated as the default.
To add an address, select the **add** button in the Billing Address Book section. To edit or delete an existing address, use the action buttons on that address's row.
Each billing address has the following fields:
| Field | Required | Description |
| --- | --- | --- |
| Default Billing | No | Toggle to make this the default billing address used at checkout. |
| First Name | No | Billing first name. |
| Last Name | No | Billing last name. |
| Company | No | Company or organization name. |
| Address Line 1 | Yes | Street address. |
| Address Line 2 | No | Apartment, suite, or unit number. |
| City | Yes | City name. |
| State/Region | Yes | State, province, or region. |
| Postal Code | Yes | ZIP or postal code. |
| Country | Yes | Country (selected from a dropdown). |
| Day Phone | No | Primary phone number. |
| Evening Phone | No | Secondary phone number. |
| Tax County | No | County for tax calculation purposes. |
## Stored credit cards
The credit cards section displays cards saved to the customer's account. These cards can be used for faster checkout and for recurring orders.
To add a card, select the **add** button and enter the card details and expiration date. To edit the expiration date or delete a saved card, use the action buttons on that card's row.
:::info
Stored credit card data is handled in compliance with PCI requirements. Full card numbers are never displayed -- only the card type and a masked number are shown.
:::
## Checkout and payment controls
These toggles control what payment methods and checkout behaviors are available to the customer. Each toggle applies only to this customer's account.
| Setting | Description |
| --- | --- |
| Allow Purchase Order | Enables the customer to pay by purchase order at checkout, submitting a PO number instead of paying immediately. |
| Auto Approve Purchase Order | When enabled, purchase orders from this customer are automatically approved without manual review. Requires Allow Purchase Order to be on. |
| Allow COD | Enables cash on delivery as a payment option for this customer. |
| Auto Approve COD | When enabled, COD orders from this customer are automatically approved. Requires Allow COD to be on. |
| Allow Quote Request | Enables the customer to submit quote requests instead of placing orders. Quotes can be reviewed and converted to orders by your team. |
| Allow Drop Shipping | Enables drop shipping for this customer's orders. |
| No Real-time Charge | When enabled, the customer's credit card is not charged at the time of order placement. The order is held for manual charge processing. |
| No Coupons | When enabled, the customer cannot apply coupon codes at checkout. |
| Allow Selection of Shipping Address Type | When enabled, the customer can choose between residential and commercial shipping address types at checkout, which can affect shipping rates. |
:::tip
The Allow Purchase Order and Allow COD settings are commonly used for B2B customers who have established credit terms with your business. Pair them with auto-approve for trusted accounts to streamline their ordering workflow.
:::
## Order limits
Order limits let you enforce minimum and maximum constraints on this customer's orders.
| Setting | Description |
| --- | --- |
| Min Subtotal | The minimum order subtotal required for the customer to complete checkout. Orders below this amount are rejected. |
| Min Item Count | The minimum number of items required in the cart. |
| Max Item Count | The maximum number of items allowed in the cart. |
Leave a field blank or at zero to apply no limit for that constraint.
## Pricing tiers
Pricing tiers control the product prices shown to a customer. When a customer is assigned to a pricing tier, they see the tier-specific prices configured on your products instead of the standard retail prices.
Use the **Pricing Tiers** multi-select to assign the customer to one or more tiers. A customer can belong to multiple pricing tiers simultaneously -- when tiers overlap on a product, the lowest price is typically applied.
:::info
The Pricing Tiers selector only appears if you have pricing tiers configured in your UltraCart account. If you don't see this field, you don't have any tiers set up yet.
:::
## Related pages
- [Customers overview](./index.md) -- capabilities summary and page navigation
- [General customer settings](./general-customer-settings.md) -- login credentials, tags, and profile fields
- [Shipping addresses and preferences](./shipping-addresses-and-preferences.md) -- shipping addresses and free shipping settings
- [Tax configuration and exemptions](./tax-configuration-and-exemptions.md) -- tax-exempt status and provider settings
- [QuickBooks and sales tracking](./quickbooks-and-sales-tracking.md) -- accounting integrations and terms
---
# Customer activity and analytics
https://docs.ultracart.com/customers-crm/customers/customer-activity-and-analytics
doc_type: reference
The Activity tab gives you a complete picture of how a customer interacts with your store -- from first visit through repeat purchases. It combines behavior charts, aggregate metrics, a filterable activity timeline, UTM attribution data, and email/SMS subscription status in a single view.
## Activity chart
The Activity Over Time chart visualizes the customer's engagement history as three color-coded line series:
| Series | Color | Description |
| --- | --- | --- |
| Marketing | Blue | Email-related activity (deliveries, opens, clicks). |
| Customer Activity | Green | Sessions, page views, checkout interactions. |
| Purchases | Orange | Purchase revenue over time. |
The chart uses two Y-axes: the left axis shows event counts (Marketing and Customer Activity) and the right axis shows revenue in dollars (Purchases). Time bucketing adjusts automatically based on the date span:
- Less than 60 days of data: daily buckets
- Less than 365 days: weekly buckets
- 365 days or more: monthly buckets
## Customer metrics
Below the chart, metric cards display aggregate statistics grouped by activity type. Each card shows three time windows:
- **All Time** -- the complete lifetime value
- **Last 30 Days** -- the most recent 30-day window
- **Prior 30 Days** -- the 30-day window before that
Metrics cover activity types like page views, product views, ecommerce transactions, sessions, searches, checkout interactions, email events, shipments, and more. Each metric card includes an icon matching its activity type for quick visual scanning.
### Metrics table
A summary table below the cards lists every metric in a sortable format with columns for the metric name, last 30 days, prior 30 days, and all-time values.
## Activity timeline
The left column displays individual activity events in reverse chronological order. Each entry shows an icon, a description of the action, an optional reference link, and a timestamp.
### Filtering by activity type
Use the dropdown at the top of the timeline to filter by a specific activity type. The default is **All Types**, which shows everything. Select a type like pageview, ecommerce, session, email, or shipment to narrow the timeline to just those events.
Common activity types and their display labels include:
| Type | Actions shown |
| --- | --- |
| Ecommerce | Placed order, ordered product, payment, refund, void, shipment |
| Session | Active on website, page views, cart additions, checkout steps |
| Checkout | Initiated checkout, checkout step, checkout error, abandoned cart |
| Email | Delivered email, opened email, clicked link, subscribed, unsubscribed, bounce, spam complaint |
| Search | Search queries |
Select an order ID in the timeline to open the full order review. Select a session entry to view the recorded session replay on your storefront.
## Customer information
The right-side information card displays signup and attribution data.
### Signup and activity dates
- **First Active** -- the timestamp of the customer's earliest recorded activity.
- **Last Active** -- the timestamp of their most recent activity.
- **Signup Date** -- when the customer account was created.
### UTM attribution
Two sets of UTM properties are tracked:
**First visit properties** -- captured during the customer's first session:
- UTM Source, Medium, Campaign, Content, Term
- First Page URL
- Referrer URL
**Last visit properties** -- captured during their most recent session, with the same fields as above.
These values help you understand which marketing channel originally acquired the customer and which channel drove their most recent visit.
### Custom properties
Any custom properties on the customer profile (excluding system properties) are displayed in this section. These are the same key-value pairs managed on the [General tab](./general-customer-settings.md).
## Email and SMS status
The bottom of the information card shows the customer's email and SMS subscription state.
| Field | Description |
| --- | --- |
| Global Unsubscribed | Whether the customer has unsubscribed from all email. Shows the unsubscribe timestamp if applicable. |
| Spam Complaint | Whether the customer has filed a spam complaint. Shows the complaint timestamp if applicable. |
| SMS Phone Number | The customer's SMS-capable phone number, if known. Select the number to navigate directly to an SMS conversation with this customer. |
| SMS Status | **Subscribed** (green) if the customer is opted in to SMS, or **Opted Out** (red) if they have opted out. |
:::tip
Clicking the SMS phone number opens the conversation view with that customer pre-selected. This is a quick way to start or continue an SMS thread without leaving the customer profile.
:::
## Related pages
- [Customers overview](./index.md) -- capabilities summary and page navigation
- [Email list memberships](./email-list-memberships.md) -- manage email subscriptions
- [General customer settings](./general-customer-settings.md) -- custom properties and profile fields
---
# Customer reviews
https://docs.ultracart.com/customers-crm/customers/customer-reviews
doc_type: reference
The Reviews tab lets you manage a customer's reviewer profile and view their review statistics. This is where you configure how the customer appears as a reviewer and whether their reviews are automatically approved.
## Reviewer profile settings
Four fields control the customer's reviewer identity and behavior:
| Field | Type | Description |
| --- | --- | --- |
| Nickname | Text | The display name shown on published reviews. |
| Location | Text | The location displayed alongside the reviewer's name (e.g., "Austin, TX"). |
| Expert | Toggle | Marks this customer as an expert reviewer. Expert reviews may be highlighted or weighted differently depending on your storefront configuration. |
| Auto Approved | Toggle | When enabled, reviews submitted by this customer are published immediately without manual moderation. |
:::tip
Enable Auto Approved for trusted, high-volume reviewers to reduce moderation overhead. You can always revoke it later if review quality changes.
:::
## Review statistics
The right column displays read-only statistics about the customer's review history:
| Statistic | Description |
| --- | --- |
| Reviews Contributed | Total number of reviews the customer has submitted. |
| Rank | The customer's reviewer rank, if applicable. |
| First Review | The date of the customer's earliest review. |
| Last Review | The date of the customer's most recent review. |
| Average Overall Rating | The average star rating across all of the customer's reviews. |
| Number of Helpful Votes | How many times other customers marked this reviewer's reviews as helpful. |
These statistics are calculated automatically and cannot be edited.
## Related pages
- [Customers overview](./index.md) -- capabilities summary and page navigation
- [General customer settings](./general-customer-settings.md) -- customer profile and tags
---
# Email list memberships
https://docs.ultracart.com/customers-crm/customers/email-list-memberships
doc_type: reference
The Memberships tab lets you control which email lists a customer is subscribed to and view which auto-calculated segments they belong to. This is useful for managing marketing communications and understanding how a customer is categorized by your email rules.
## Email segments
The left column displays the customer's segment memberships. Segments are auto-calculated groupings based on rules you define in UltraCart's email marketing system -- for example, "Customers who ordered in the last 30 days" or "VIP customers with lifetime value over $500."
Segment membership is read-only on this page. A customer is either in a segment or not, determined automatically by the segment's criteria. If no segments match the customer, the section displays "No segments on record."
## Email list subscriptions
The right column shows the customer's email list subscriptions. Unlike segments, list membership is manually controlled -- you choose which lists the customer is subscribed to.
Use the **List** multi-select dropdown to subscribe or unsubscribe the customer from available email lists. Select the lists you want the customer to be on, then select **Save Changes** to apply.
If no email lists are configured for your account, the section displays "No lists or segments on record."
:::info
Subscribing a customer to an email list here does not override a global unsubscribe. If the customer has globally unsubscribed (visible on the [Activity tab](./customer-activity-and-analytics.md)), they won't receive emails regardless of list membership.
:::
## Related pages
- [Customers overview](./index.md) -- capabilities summary and page navigation
- [Customer activity and analytics](./customer-activity-and-analytics.md) -- email/SMS subscription status and global unsubscribe state
- [General customer settings](./general-customer-settings.md) -- customer profile and tags
---
# File uploads and attachments
https://docs.ultracart.com/customers-crm/customers/file-uploads-and-attachments
doc_type: how-to
The Uploads tab lets you attach files to a customer record for internal reference -- contracts, signed forms, tax exemption certificates, or any other documents your team needs to keep alongside the customer profile.
## Uploading files
Select **Upload Attachment** at the top of the page to open the file picker. You can select multiple files at once. Uploaded files appear in the attachments table immediately after the upload completes.
## Managing attachments
The attachments table displays all files attached to the customer record.
| Column | Description | Sortable |
| --- | --- | --- |
| File Name | The name of the uploaded file. Select it to download the file. | Yes |
| Description | An optional description of the file. | Yes |
| Date Uploaded | When the file was uploaded. | Yes |
Use the pagination controls to navigate through results. You can configure the page size to show 5, 10, 15, 25, 50, or 100 attachments per page.
To delete an attachment, select the **delete** button on that row.
:::info
Attachments are only visible to your team within the UltraCart admin. Customers cannot see or access files uploaded to their profile.
:::
## Related pages
- [Customers overview](./index.md) -- capabilities summary and page navigation
- [General customer settings](./general-customer-settings.md) -- customer profile and business notes
---
# General customer settings
https://docs.ultracart.com/customers-crm/customers/general-customer-settings
doc_type: reference
The General tab contains the core profile fields that define who a customer is and how their account behaves. This is where you manage login credentials, signup details, tags, notification preferences, and custom properties.
## Customer information
The customer information section contains the primary profile fields.
| Field | Description |
| --- | --- |
| Login Email | The email address the customer uses to log in. This also serves as their primary contact email for order notifications. |
| New Password | Set a new password for the customer. Leave blank to keep the existing password. Minimum 4 characters. |
| Signup Date | The date and time the customer account was created. |
| Referral Source | Where the customer came from, such as a marketing campaign or partner website. |
| Website URL | The website URL where the customer signed up. |
| Approved Signup | Toggle that controls whether the customer's account is approved. When disabled, the customer cannot place orders until manually approved. |
| Fax Number | The customer's fax number. |
| Business Notes | Free-form notes about the customer that are visible to your team. Use this for internal context like account history or special handling instructions. |
| Automatic Order Merchant Notes | A note that is automatically added to every order placed by this customer. Use this for standing instructions like "Always double-box" or "Include gift receipt." |
:::tip
The Automatic Order Merchant Notes field is useful for customers with recurring special requirements. The note is applied to every order without manual intervention by your team.
:::
## Tags
Tags let you categorize customers for filtering, reporting, and workflow purposes. Common examples include VIP, Wholesale, Flagged, or any label meaningful to your business.
To manage tags:
- Select the **Tags** field to open the tag selector.
- Choose from existing tags or type a new tag name to create one inline.
- Remove a tag by deselecting it from the list.
Tags appear as a column in the customer list and can be used as filter criteria in the [advanced filter](./searching-and-filtering-customers.md).
## CC email addresses
CC emails receive copies of order-related notifications alongside the customer's primary email. This is useful when a purchasing department, assistant, or partner needs to stay informed about order activity.
Each CC email has the following settings:
| Field | Description |
| --- | --- |
| Email | The CC email address (required). |
| Label | An optional label to identify the recipient, such as "Purchasing Dept" or "Assistant." Displays as "(No label)" if left blank. |
| Notify on Refunds | When enabled, this address receives refund notification emails. |
| Notify on Receipts | When enabled, this address receives order receipt emails. |
| Notify on Shipments | When enabled, this address receives shipment notification emails. |
To add a CC email, select the **add** button in the CC Emails section and fill in the modal fields. You can edit or delete existing CC emails using the action buttons on each row.
## Custom properties
Custom properties are key-value pairs attached to the customer profile. They provide a flexible way to store data that doesn't fit into the standard profile fields -- internal tracking codes, integration identifiers, custom flags, or any other metadata your team or systems need.
Each property has:
| Field | Description |
| --- | --- |
| Property Name | The key for this property (required). |
| Property Value | The value for this property (required). |
To add a property, select the **add** button in the Customer Properties section. You can edit or delete existing properties using the action buttons on each row.
:::info
Custom properties are not visible to the customer. They are for internal use by your team and any integrations that read customer data through the API.
:::
## Related pages
- [Customers overview](./index.md) -- capabilities summary and page navigation
- [Searching and filtering customers](./searching-and-filtering-customers.md) -- find customers by tags and other criteria
- [Billing addresses and payment settings](./billing-addresses-and-payment-settings.md) -- billing addresses and checkout controls
- [Shipping addresses and preferences](./shipping-addresses-and-preferences.md) -- shipping addresses and preferences
- [Customer activity and analytics](./customer-activity-and-analytics.md) -- view customer behavior and engagement data
---
# Linking phone numbers to customers
https://docs.ultracart.com/customers-crm/customers/linking-phone-numbers-to-customers
doc_type: how-to
When a customer contacts you via SMS or phone, you can link their phone number to an existing customer profile or create a new one. Linking connects the conversation to the customer's full history -- orders, account details, loyalty balance, and previous interactions -- so your team has complete context without leaving the conversation.
## Why link customers
Without linking, an inbound SMS or phone call is just a phone number. Your agents see no customer context -- no order history, no account preferences, no prior conversations. Linking solves this by connecting the phone number to a customer profile.
Once linked:
- **During conversations**, the customer's profile is displayed alongside the chat or call, giving your agent instant access to their data.
- **In the customer timeline**, the conversation appears alongside orders, email interactions, and other activity.
- **For future contacts**, the phone number is automatically recognized so the profile loads without manual linking.
## Linking to an existing customer
When you're in a conversation with an unlinked phone number, select **Add to Profile** to open the linking dialog.
1. Make sure **Add to Customer** is selected (this is the default mode).
2. Type an email, name, or phone number into the search field and select **Search**.
3. Browse the results. Each result shows the customer's email, name, and phone number (if on file).
4. Select the matching customer from the results list.
5. Select **Link to Profile** to complete the link.
The phone number is added to the customer's shipping address and the conversation is immediately associated with their profile.
:::tip
If you're unsure which customer matches, open their profile in a separate tab to verify before linking. Linking the wrong customer can be corrected, but it's easier to get it right the first time.
:::
## Creating and linking a new customer
If the caller doesn't have an existing customer record, you can create one directly from the linking dialog.
1. Select **Create New** to switch to the create mode.
2. Enter an **Email** address (required, must be a valid email format).
3. Enter a **Password** (required, minimum 6 characters).
4. Select **Create & Link** to create the customer and link the phone number in one step.
The phone number is automatically added to the new customer's shipping address.
## Where linking appears
The linking dialog is available in two contexts:
- **SMS conversations** -- when viewing a conversation with an unrecognized phone number, the option to link or create a customer is presented in the conversation sidebar.
- **Active calls** -- during a phone call with an unlinked number, the same linking interface is accessible from the call context panel.
In both cases, the workflow is identical: search for an existing customer or create a new one, and the phone number is associated with the profile.
## Related pages
- [Customers overview](./index.md) -- capabilities summary and page navigation
- [General customer settings](./general-customer-settings.md) -- customer profile fields
- [Searching and filtering customers](./searching-and-filtering-customers.md) -- finding customers in the list view
---
# Loyalty programs and store credit
https://docs.ultracart.com/customers-crm/customers/loyalty-programs-and-store-credit
doc_type: reference
UltraCart supports cashback and points-based loyalty programs. The Loyalty tab shows the customer's current balance and full ledger history, and lets you add manual adjustments when needed. What you see on this tab depends on which loyalty program type is configured for your account.
## Cashback loyalty
When your account uses a cashback loyalty program, the tab displays a store credit summary and two ledger tables.
### Store credit summary
Four values are shown at the top of the page:
| Value | Description |
| --- | --- |
| Available | The amount currently available for the customer to spend. |
| Total | The total store credit balance including vesting and available amounts. |
| Vesting | The amount earned but not yet available. Vesting amounts become available after the configured vesting period. |
| Expiring | The amount that will expire if not used before the expiration date. |
### Past ledger
The past ledger table shows completed transactions -- credits earned and redemptions applied. Each entry includes:
| Column | Description | Sortable |
| --- | --- | --- |
| Description | What the entry is for (e.g., "Order cashback", "Manual adjustment"). | Yes |
| Cash | The dollar amount credited or debited. | Yes |
| Order Id | The associated order, if any. Select to view order details. | Yes |
| Date | When the entry was recorded. Sorted newest first by default. | Yes |
### Future ledger
The future ledger table shows entries that haven't matured yet -- amounts that are still vesting or scheduled to expire. The table has the same columns as the past ledger.
### Adding a ledger entry
Select **Add Ledger Entry** above the future ledger table to manually credit or debit the customer's store credit balance. The modal has the following fields:
| Field | Required | Description |
| --- | --- | --- |
| Description | Yes | A label for this entry (maximum 20 characters). |
| Amount | Yes | The dollar amount to add (positive) or remove (negative). |
| Expiration Days | No | The number of days until this credit expires. Leave blank for no expiration. |
| Vesting Days | No | The number of days until this credit becomes available. Leave blank to use the account-wide default vesting period. Enter 0 for immediate availability. |
:::info
When you leave Vesting Days blank, the merchant-configured default vesting period is applied. If you want the credit available immediately, explicitly set Vesting Days to 0.
:::
## Points loyalty
When your account uses a points-based loyalty program, the tab displays a points summary and two tables.
### Points summary
Two values are shown at the top of the page:
| Value | Description |
| --- | --- |
| Current Points | The customer's available points balance. |
| Pending Points | Points earned but not yet available. |
### Ledger
The ledger table shows how points were earned.
| Column | Description | Sortable |
| --- | --- | --- |
| Created By | Who or what created the entry (e.g., system, manual). | Yes |
| Description | What the entry is for. | Yes |
| Loyalty Points | The number of points earned. | Yes |
| Order Id | The associated order, if any. | Yes |
| Date | When the points were recorded. Sorted newest first by default. | Yes |
### Redemptions
The redemptions table shows how points have been spent.
| Column | Description | Sortable |
| --- | --- | --- |
| Description | What the customer redeemed points for. | Yes |
| Redemption | Details of the redemption -- coupon code, gift certificate, remaining balance, or expiration date. | Yes |
| Loyalty Points | The number of points redeemed. | Yes |
| Redemption Date | When the redemption occurred. Sorted newest first by default. | Yes |
## No loyalty program configured
If your account doesn't have a loyalty program enabled, the tab displays "No loyalty program." Contact UltraCart support or visit your account settings to enable a loyalty program.
## Related pages
- [Customers overview](./index.md) -- capabilities summary and page navigation
- [Billing addresses and payment settings](./billing-addresses-and-payment-settings.md) -- checkout controls and pricing tiers
- [General customer settings](./general-customer-settings.md) -- customer profile and tags
---
# Order and quote history
https://docs.ultracart.com/customers-crm/customers/order-and-quote-history
doc_type: reference
The Orders and Quotes tabs give you a complete view of a customer's purchase and quote history without leaving the customer profile. Both tabs share the same layout and behavior -- the only difference is the data they display.
## Viewing orders
The Orders tab shows every order the customer has placed. Orders display in a sortable, paginated table.
| Column | Description | Sortable |
| --- | --- | --- |
| Order Id | The unique order identifier. Select it to view order details. | Yes |
| Order Total | The total amount for the order. | Yes |
| Order Date | The date and time the order was placed. | Yes |
Use the pagination controls to navigate through results. You can configure the page size to show 5, 10, 15, 25, 50, or 100 orders per page.
### Order details
Select an order ID to open the order details modal. The modal displays a formatted summary of the order including items, totals, and shipping information. Select **Go to Order** to open the full order review page in a new tab for complete order management.
## Viewing quotes
The Quotes tab uses the same table layout as orders. A quote is a pending order request submitted by a customer who has the **Allow Quote Request** setting enabled on their account (configured in the [Billing tab](./billing-addresses-and-payment-settings.md)). Quotes can be reviewed by your team and converted into orders.
| Column | Description | Sortable |
| --- | --- | --- |
| Order Id | The quote identifier. Select it to view details. | Yes |
| Order Total | The quoted total amount. | Yes |
| Order Date | The date and time the quote was submitted. | Yes |
:::tip
If a customer frequently submits quotes, you can streamline their workflow by enabling **Auto Approve Purchase Order** on their billing settings so approved quotes convert to orders without manual intervention.
:::
## Related pages
- [Customers overview](./index.md) -- capabilities summary and page navigation
- [Billing addresses and payment settings](./billing-addresses-and-payment-settings.md) -- checkout controls including quote requests
---
# QuickBooks and sales tracking
https://docs.ultracart.com/customers-crm/customers/quickbooks-and-sales-tracking
doc_type: reference
The Accounting tab connects customer records to your accounting and sales tracking systems. Configure QuickBooks sync settings, assign the customer to an affiliate, or link them to a sales representative.
## QuickBooks settings
These fields control how the customer syncs with QuickBooks:
| Field | Type | Description |
| --- | --- | --- |
| Quickbooks Code | Text | The customer code used to match this customer in QuickBooks. |
| Quickbooks Class | Select | The QuickBooks class to assign to this customer's transactions. Options are populated from your QuickBooks configuration. |
| Terms | Select | The payment terms for this customer (e.g., Net 30, Net 60). Options are populated from your QuickBooks configuration. |
| Track Separately in Quickbooks | Toggle | When enabled, this customer's transactions are tracked as a separate customer in QuickBooks rather than being grouped under a generic entry. |
### Tax exemption reason code
The **Quickbooks Tax Exemption Reason Code** field categorizes why a customer is tax-exempt for QuickBooks reporting. Select the applicable reason:
| Code | Reason |
| --- | --- |
| 1 | Federal government |
| 2 | State government |
| 3 | Local government |
| 4 | Tribal government |
| 5 | Charitable organization |
| 6 | Religious organization |
| 7 | Educational organization |
| 8 | Hospital |
| 9 | Resale |
| 10 | Direct pay permit |
| 11 | Multiple points of use |
| 12 | Direct mail |
| 13 | Agricultural production |
| 14 | Industrial production / manufacturing |
| 15 | Foreign diplomat |
:::info
This field is for QuickBooks reporting purposes. To actually exempt the customer from tax collection, enable the Tax Exempt toggle on the [Taxes tab](./tax-configuration-and-exemptions.md).
:::
## Affiliate assignment
The **Associated With Affiliate** dropdown links this customer to an affiliate in your program. When a customer is associated with an affiliate, orders placed by this customer generate affiliate commissions. Affiliates are listed by name and email for easy identification.
## Sales rep assignment
The **Sales Rep Code** dropdown assigns a sales representative to this customer. This is useful for tracking which rep manages the account and for commission or performance reporting.
## Related pages
- [Customers overview](./index.md) -- capabilities summary and page navigation
- [Tax configuration and exemptions](./tax-configuration-and-exemptions.md) -- tax-exempt status and provider-specific settings
- [Billing addresses and payment settings](./billing-addresses-and-payment-settings.md) -- pricing tiers and checkout controls
---
# Searching and filtering customers
https://docs.ultracart.com/customers-crm/customers/searching-and-filtering-customers
doc_type: how-to
The customer list is your starting point for finding and managing customer records. From here you can search by almost any field, apply multi-criteria filters, configure which columns display, and perform bulk operations like merging or deleting customers.
## Smart search
The search bar at the top of the customer list provides a fast way to find a specific customer. Select the **search** icon to open the smart search modal.
Type a name, email address, phone number, date, zip code, or any other identifying value into the search field. Smart search looks across email, first name, last name, company, tags, dates, phone numbers, and more. Results update in the customer table when you submit the search.
:::tip
Smart search is best for finding a specific customer when you know some identifying detail. For broader queries across multiple criteria, use advanced filtering instead.
:::
## Advanced filtering
Select the **filter** icon to open the filter modal. Filters let you narrow the customer list using multiple criteria simultaneously. The modal is organized into three sections: General, Billing, and Shipping.
### General filters
| Filter | Type | Description |
| --- | --- | --- |
| Email | Text | Match customers by email address |
| Has All Tags | Multi-select | Customers must have every selected tag |
| Has Any Tags | Multi-select | Customers must have at least one selected tag |
| Last Modified Start | Date | Customers modified on or after this date |
| Last Modified End | Date | Customers modified on or before this date |
| Pricing Tier | Select | Customers assigned to this pricing tier |
| Quickbooks Code | Text | Match by QuickBooks customer code |
| Quickbooks Class | Select | Match by QuickBooks class |
| Signup Start | Date | Customers who signed up on or after this date |
| Signup End | Date | Customers who signed up on or before this date |
### Billing address filters
| Filter | Type |
| --- | --- |
| First Name | Text |
| Last Name | Text |
| Company | Text |
| City | Text |
| State/Region | Text |
| Postal Code | Text |
| Country | Select |
| Day Phone | Text |
| Evening Phone | Text |
### Shipping address filters
The shipping section provides the same fields as the billing section, filtering against shipping addresses instead of billing addresses.
When filters are active, a **Clear Filter** button appears in the toolbar. Select it to remove all active filters and return to the unfiltered list.
## Configuring columns
Select the **table options** icon to choose which columns display in the customer list. Toggle columns on or off to match the information your team uses most.
| Column | Sortable | Description |
| --- | --- | --- |
| Email | Yes | Customer login email |
| First Name | Yes | Billing first name |
| Last Name | Yes | Billing last name |
| Tags | No | Assigned customer tags |
| Company | Yes | Billing company name |
| Phone | No | Billing phone number |
| Last Order Date | Yes | Date of the customer's most recent order |
| Pricing Tiers | No | Assigned pricing tiers |
| Unapproved | No | Whether the signup is pending approval |
| Tax Exempt | No | Tax-exempt status |
| Allow PO | No | Whether purchase orders are allowed |
| Auto Approve PO | No | Whether POs are auto-approved |
| Allow COD | No | Whether cash on delivery is allowed |
| Auto Approve COD | No | Whether COD is auto-approved |
| Allow Quotes | No | Whether quote requests are allowed |
| Free Shipping | No | Whether free shipping is enabled |
| Lifetime Orders | Yes | Total number of orders placed |
| Lifetime Value | Yes | Total value of all orders |
Your column selections are saved to your account and persist across sessions.
## Sorting and pagination
Select any sortable column header to sort the customer list. Sorting is server-side, so it applies across all pages of results, not just the currently visible page.
Use the pagination controls at the bottom of the table to navigate between pages. You can configure the page size to show 5, 10, 15, 25, 50, or 100 customers per page.
## Bulk operations
### Merge customers
When duplicate customer records exist, you can merge them into a single profile. Select the **three-dot menu** on a customer row and choose **Merge Customer**. This opens a modal where you select which customer record to merge into. The original customer's data is combined into the target record.
:::warning
Merging customers cannot be undone. Review both records carefully before confirming the merge.
:::
### Delete a customer
Select the **three-dot menu** on a customer row and choose **Delete** to remove a customer record. You'll be prompted to confirm before the deletion proceeds.
## Creating a customer
Select the **person add** icon in the toolbar to create a new customer. The modal requires two fields:
| Field | Required | Notes |
| --- | --- | --- |
| Email | Yes | Must be a valid email address. This becomes the customer's login email. |
| Password | No | If provided, must be at least 4 characters. If omitted, the customer can set a password later through the storefront's password reset flow. |
After creation, the new customer appears in your list and you can navigate to their detail page to fill in additional information.
## Logging in as a customer
You can generate a magic login link to access your storefront as a specific customer. This is useful for troubleshooting account-specific issues or verifying what a customer sees.
1. Select the **three-dot menu** on a customer row and choose **Login As Customer**.
2. In the modal, select the **StoreFront** you want to log in to.
3. Select **Login**. A new browser window opens with you logged in as that customer on the selected storefront.
:::info
This opens a live session on your storefront. Any orders placed during this session are real orders on the customer's account.
:::
## Related pages
- [Customers overview](./index.md) -- capabilities summary and page navigation
- [General customer settings](./general-customer-settings.md) -- edit profile fields, tags, and custom properties
- [Billing addresses and payment settings](./billing-addresses-and-payment-settings.md) -- manage billing addresses and checkout controls
- [Shipping addresses and preferences](./shipping-addresses-and-preferences.md) -- manage shipping addresses and preferences
---
# Shipping addresses and preferences
https://docs.ultracart.com/customers-crm/customers/shipping-addresses-and-preferences
doc_type: reference
The Shipping tab controls where orders are shipped and how shipping costs are handled for a specific customer. From here you manage shipping addresses, free shipping rules, third-party carrier billing, and marketing mail preferences.
## Managing shipping addresses
The shipping address book stores one or more shipping addresses for the customer. Each address can be selected at checkout and one address can be designated as the default.
To add an address, select the **add** button in the Shipping Address Book section. To edit or delete an existing address, use the action buttons on that address's row.
Each shipping address has the following fields:
| Field | Required | Description |
| --- | --- | --- |
| Default Shipping | No | Toggle to make this the default shipping address used at checkout. |
| First Name | No | Recipient first name. |
| Last Name | No | Recipient last name. |
| Company | No | Company or organization name. |
| Address Line 1 | Yes | Street address. |
| Address Line 2 | No | Apartment, suite, or unit number. |
| City | Yes | City name. |
| State/Region | Yes | State, province, or region. |
| Postal Code | Yes | ZIP or postal code. |
| Country | Yes | Country (selected from a dropdown). |
| Day Phone | No | Primary phone number. |
| Evening Phone | No | Secondary phone number. |
| Tax County | No | County for tax calculation purposes. |
## Free shipping settings
Four settings work together to control how free shipping applies to this customer's orders.
| Setting | Description |
| --- | --- |
| Free Shipping | Enables free shipping for this customer. When toggled on, an optional **Minimum** field appears. |
| Minimum | The minimum order subtotal required before free shipping applies. If the order subtotal is below this amount, standard shipping rates are used. Leave blank to grant free shipping with no minimum. |
| No Free Shipping | Overrides any free shipping promotions or rules that would otherwise apply. When enabled, this customer always pays for shipping, even if a site-wide free shipping offer is active. |
| Exempt Shipping Handling Charge | Removes any handling charge surcharges from this customer's shipping costs. |
:::info
Free Shipping and No Free Shipping serve opposite purposes. Free Shipping grants the customer free shipping (optionally above a minimum). No Free Shipping prevents the customer from receiving free shipping even when a promotion would otherwise provide it. If both are enabled, No Free Shipping takes precedence.
:::
## Third-party billing
Third-party billing lets a customer ship orders using their own carrier accounts. When enabled, freight charges are billed directly to the customer's carrier rather than to your account.
Toggle **Allow 3rd Party Billing** to enable this feature. When enabled, four carrier account fields appear:
| Field | Description |
| --- | --- |
| UPS Account Number | The customer's UPS account number for freight billing. |
| FedEx Account Number | The customer's FedEx account number for freight billing. |
| DHL Account Number | The customer's DHL account number for freight billing. |
| DHL Duty Account Number | The customer's DHL account number specifically for duty and tax charges on international shipments. |
Fill in only the account numbers for carriers the customer uses. During order fulfillment, shipments sent via a carrier with an account number on file are billed to the customer's account.
:::tip
Third-party billing is commonly used for large B2B customers who have negotiated their own shipping rates and prefer to manage freight costs directly through their carrier accounts.
:::
## Marketing mail opt-out
The **Do Not Send Physical Marketing Mail to Customer** toggle prevents physical marketing materials (catalogs, flyers, postcards) from being sent to this customer's shipping addresses. Enable this when a customer requests not to receive printed marketing.
## Related pages
- [Customers overview](./index.md) -- capabilities summary and page navigation
- [Billing addresses and payment settings](./billing-addresses-and-payment-settings.md) -- billing addresses and checkout controls
- [General customer settings](./general-customer-settings.md) -- login credentials, tags, and profile fields
---
# Software licenses and entitlements
https://docs.ultracart.com/customers-crm/customers/software-licenses-and-entitlements
doc_type: reference
The Software tab in the customer profile editor lets you manage software license keys and entitlements tied to a customer's purchases. If you sell software products, this is where you view, add, and edit the license records associated with a customer.
## Viewing entitlements
The entitlements list displays all software licenses on the customer's record. Each entry shows the following details:
| **Field** | **Required** | **Description** |
| --- | --- | --- |
| Software SKU | Yes | The product SKU this license applies to. |
| Activation Code | No | The license key or activation code. |
| Activation Date | No | When the license was or should be activated. |
| Expiration Date | No | When the license expires. Leave blank for perpetual licenses. |
### Editing an entitlement
Select the **edit** button on an existing entitlement to update its fields. The same modal appears with the current values pre-filled.
### Deleting an entitlement
Select the **delete** button on an entitlement to remove it. You'll be prompted to confirm before the deletion proceeds.
:::info
Entitlements created automatically through product purchases include read-only Order ID, Item ID, and Item Description fields that link back to the originating order. Manually created entitlements don't have these fields.
:::
## Related pages
- [Customers overview](./index.md) -- capabilities summary and page navigation
- [Order and quote history](./order-and-quote-history.md) -- view orders that generated entitlements
---
# Tax configuration and exemptions
https://docs.ultracart.com/customers-crm/customers/tax-configuration-and-exemptions
doc_type: reference
The Taxes tab lets you configure tax-related settings for an individual customer, including tax-exempt status and integration-specific identifiers for your tax calculation provider.
## Tax settings
Two fields control the customer's core tax configuration:
| Field | Type | Description |
| --- | --- | --- |
| Tax ID Number | Text | The customer's tax identification number (e.g., EIN, VAT number). Used for record-keeping and may be passed to your tax provider. |
| Tax Exempt | Toggle | When enabled, this customer is not charged sales tax on their orders. |
:::info
Enabling Tax Exempt removes sales tax from the customer's orders regardless of their location or your tax rules. Ensure you have the appropriate tax exemption documentation on file before enabling this setting.
The customer must log in to this profile during checkout to receive the exemption. An order placed as a guest is taxed normally, even when the email address on it matches this profile. If you calculate tax through Avalara, TaxJar, Sovos, or Anrok, the integration fields below have to be configured as well. See [Tax Exempt Customers](/compliance-legal/sales-tax).
:::
## Avalara integration
If your account uses Avalara for tax calculation, configure these fields to link the customer to their Avalara record:
| Field | Description |
| --- | --- |
| Avalara Customer Code | The customer identifier in your Avalara account. |
| Avalara Entity Use Code | The entity/use code that determines the customer's tax exemption category in Avalara. |
## TaxJar integration
If your account uses TaxJar, configure these fields:
| Field | Description |
| --- | --- |
| TaxJar Customer ID | The customer identifier in your TaxJar account. |
| TaxJar Exemption Type | The exemption category for this customer. |
Available exemption types:
| Value | Description |
| --- | --- |
| Government | Government entity exempt from tax. |
| Marketplace | Marketplace facilitator exemption. |
| Non-Exempt | Customer is not exempt (default behavior). |
| Other | Exemption type not covered by the standard categories. |
| Wholesale | Wholesale/resale exemption. |
## Sovos integration
If your account uses Sovos for tax calculation:
| Field | Description |
| --- | --- |
| Sovos Customer Code | The customer identifier in your Sovos account. |
A customer record with the exemption on file has to exist in Sovos under that same code. The code alone does not create one.
## Anrok integration
No Anrok specific customer fields are documented for this tab. Confirm any customer level exemption setup with Anrok directly before you rely on it at checkout.
## Related pages
- [Tax Exempt Customers](/compliance-legal/sales-tax) -- the three requirements for an exempt customer to check out tax free, and what to check when one is charged tax anyway
- [Customers overview](./index.md) -- capabilities summary and page navigation
- [QuickBooks and sales tracking](./quickbooks-and-sales-tracking.md) -- accounting integrations and QuickBooks tax exemption codes
- [Billing addresses and payment settings](./billing-addresses-and-payment-settings.md) -- billing addresses including Tax County field
---
# My Account Customer Portal
https://docs.ultracart.com/customers-crm/my-account-customer-portal
doc_type: explanation
# My Account Introduction
"My Account" is the area of UltraCart where a customer manages their account. This includes:
1. Order History
2. Address Management
3. Credit Card Management
4. Product Reviews
5. Manage Auto Orders (optional)
6. [Case Management](/orders-fulfillment/order-management/case-management) (Customer Feedback)
7. [Loyalty Rewards](/marketing-loyalty/loyalty-program) (optional)
8. Wish List (optional)
9. Personal Settings
:::info
To keep things simple, we'll refer to the **My Account** web pages as the "Customer Portal" or just "portal" going forward. You've been warned. :smile:
:::
# For the Impatient
Here's the location of the default portal. You'll need to substitute your merchant id. If you're using a custom ssl, the server is smart enough to assign your merchant id, so you may leave it off.
LEGACY SCREEN BRANDING THEME:
[https://secure.ultracart.com/cgi-bin/UCMyAccount?merchantId=DEMO](https://secure.ultracart.com/cgi-bin/UCMyAccount?merchantId=DEMO)
FOR STOREFONTS (Change the host name to your storefront host):
[https://demo.ultracartstore.com/cgi-bin/UCMyAccount?merchantId=DEMO](https://secure.ultracart.com/cgi-bin/UCMyAccount?merchantId=DEMO)
:::warning
The link above will issue a redirect to other pages. You might be tempted to link directly to those pages. Do not. The /cgi-bin/ urls are created purposely to provide contracts with you, the merchant. They will never change. We reserve the right to, and probably will, change any of the other urls used by the customer portal. Don't link to them directly.
:::
# My Account Setup
There are two ways to incorporate the customer portal into your web site.
:::note
[Home](https://ultracart.atlassian.net/wiki/404?key%3Dmerchant%3Bsearch%3Fq%3D%2FmainMenu.do) → [Configuration (Checkout)](https://ultracart.atlassian.net/wiki/404?key%3Dmerchant%3Bsearch%3Fq%3D%2Fconfiguration%2FconfigurationMenuLoad.do) → [Customer Profiles](https://ultracart.atlassian.net/wiki/404?key%3Dmerchant%3Bsearch%3Fq%3D%2Fconfiguration%2FcustomerProfilesLoad.do) → "My Account Customer Portal" section
:::
**IF** you are hosting your web site with UltraCart, the portal is built in and you just need to do the following:
- Decide whether to use [Case Management](/orders-fulfillment/order-management/case-management) (Customer Feedback)
- Configure Product Reviews (if you haven't already)
- Style the pages using screen branding
**IF** you are hosting your own web site (i.e. using the javascript checkout), you may install a remote version of the portal from github. Your steps will be:
- Install the portal pages
- Decide whether to use [Case Management](/orders-fulfillment/order-management/case-management) (Customer Feedback)
- Configure Product Reviews (if you haven't already)
- Style the pages by editing them directly.
# Installation
_Skip this step for UltraCart hosted sites._
For third party hosted sites, visit github ([https://github.com/UltraCart/my\_account](https://github.com/UltraCart/my_account)), download the files and install them into your web site.
Read the Getting Started section on the main github link above for specific tasks needed to install the web application.
# Order History
The Order History page shows the customers orders.

There is a search field as well as a drop-down to select the time period for the orders.
The orders for the search period will be displayed with three action button along the right side:
1. Track Package
2. Send Comments to Customer Service
3. Write Product Review
:::info
**Send Comment to Customer Service**
Please note that the customer service email is sent to each of your [user logins](/account-settings/general-configuration/users/user-configuration-screen) that has the "Customer Feedback" email notification configured
:::
# Case Management
[Case Management](/orders-fulfillment/order-management/case-management) is a feature that allows you to have a customer initiated conversation about an order. It is a rather large submit, so it has its own page including setup. Please refer to the [Case Management](/orders-fulfillment/order-management/case-management) page for instructions.
# Loyalty Rewards
If implemented, the Loyal Program will appear in the my account customer portal main menu. The customer will be able to monitor their Loyalty Reward points accrued based on prior purchases. The Loyal Rewards page will display their current points and points needed for next reward. Available rewards & Loyalty Events will also be displayed.

The process of a customer claiming and using a loyalty reward is:
1. The customer logs into the "M**y account, Customer portal**"
2. They click on '**Loyalty Reward' in the My Account menu**
3. They will see a summary of the '**Current Points**' and also '**Points needed for next reward**'. Available rewards appear just below the points summary section.
4. If there are available rewards appearing, the customer will click the '**Claim Reward**' button.
5. The claimed reward will appear in in the next section '**Claimed Rewards**'
6. The customer can begin the shopping with the coupon by clicking on either the **coupon description** or **coupon code** (they are both hyperlinked), which will apply the coupon to the cart for immediate shopping/redemption. (Alternatively, they can copy the copde and enter it into the apply coupon field in the shopping cart checkout.)
# Wish List
If implemented, Wish List section will appear in the my account customer portal main menu.
# Reviews
Reviews are a huge part of the customer portal (and most successful sites).
Please read the [Reviews](/items-catalog/items-configuration/reviews) docs and navigate to:
:::note
Home → [Item Management](https://ultracart.atlassian.net/wiki/404?key%3Dmerchant%3Bsearch%3Fq%3D%2FitemsMenu.do) → [Reviews](https://ultracart.atlassian.net/wiki/404?key%3Dmerchant%3Bsearch%3Fq%3D%2Fitem%2Freview%2FreviewSettingsLoad.do)
:::
in order to ensure you're properly set up for product reviews.
# Look and Feel - StoreFronts
For third-party sites, it's on you to modify the web pages as you see fit.
For StoreFronts users, you can modify the template directly using the steps below.
:::note
Home → Storefronts → select your host → Templates
:::

From the Templates page simply click on the My Account Folder then down to "myaccount\_index.vm" to make any changes to the template you would like.

## Look and Feel - Legacy
For third-party sites, it's on you to modify the web pages as you see fit.
For UltraCart hosted sites, you may use the [StoreFront Themes](/storefronts-themes/themes) to [apply style](#page-not-found) to the customer portal.
There is a single screen branding page that is applied to all eleven pages in the My Account customer portal.
:::tip
The Customer Portal was designed as an html5 web application making heavy use of Ajax/REST. You'll have best results if you stylize your web site using an html5 template. You may even wish to view the My Account customer portal without any styling and save off the files used by default (in the tag. They might be useful.
:::
:::info
The file [http://secure.ultracart.com/myaccount/css/styles.css](http://secure.ultracart.com/myaccount/css/styles.css) is injected into the tag of any screen branding supplied. This is necessary for several portions of the web site which need to be hidden by default. The css file is injected at the beginning of the head tag and is easily overridden as needed.
:::

# Starting Code for Customizing the Look and Feel of the Customer Portal
## CSS Files
Here's the cascading style sheet for newer browsers:
[http://secure.ultracart.com/myaccount/css/styles.css](http://secure.ultracart.com/myaccount/css/styles.css)
Here's the version for the older legacy browsers:
`(IE 6/7, Firefox < 4, and Safari < 5)`
[http://secure.ultracart.com/myaccount/css/normalize.css](http://secure.ultracart.com/myaccount/css/normalize.css)
## Header field source
```groovy
My Account
UltraCart Store - My Account
```
## Footer field source
```groovy
```
# Frequently Asked Questions
**Question: What happens if a customer places 1 or more orders with us prior to creating their customer profile in the My Account, Customer portal. Will they find their previous orders in the order history section of the My Account Customer Portal dashboard? **
_Answer: Yes. When they first signup for their customer profile in the customer portal,_ [_they must perform an email verification step during the first login_](/customers-crm/my-account-customer-portal/my-account-customer-portal-account-signu)_. After successfully completely the verification step, UltraCart will perform a search of your orders to locate all orders which contain the same email address and include them into the customers order history._
---
# My Account Customer Portal - Account Signup Email Verification
https://docs.ultracart.com/customers-crm/my-account-customer-portal/my-account-customer-portal-account-signu
doc_type: explanation
# Overview
:::info
_**Simply replying to the email notification will NOT complete the email verification process. You must click the hyperlink URL in order to successfully complete this verification process. Failure to compete this step will prevent access to your customer profile dashboard.**_
:::
The My Account Customer Portal sign-up process includes an "Email Verification" step that occurs when the customer initiates the creation of their customer profile:
After completing the "Register to create a new Account" fields, the customer clicks the "Register" button and will see the following message:
_**"Please check your email for a validation link to confirm your identity"**_
# My Account, Customer Profile Signup and login screen

# Responding to the Email Verification
The next step is to click the link in the body of the email notification:

:::info
Please be aware that the link that appears within the verification email notification is time sensitive. If the link expires, you'll receive a error that says:
_"The token was invalid or expired. Your email address could not be validated. Please try again."
In this situation, return to the customer profile login page and click the "Email password" link in the login section of the page._
:::
# Login after Successful Verification
Upon clicking the verification link in the email notification, the customer will be taken back to the My Account Customer Portal login page, to log into the account:
A validation success message will be displayed above the login and register section of the page:

At this point the customer can login to their account and will then be prompted with the My Account Menu:

# Example Video
[MYACCT-4-25-2016 9-53-20 AM.mp4](pathname:///confluence/1377603/MYACCT-4-25-2016%209-53-20%20AM.mp4)
# Frequently Asked Questions
Question: We currently use single page checkout and don't require account creation before users can checkout, are customers automatically registered as a 'My Account' user upon checkout?
Answer: No they are not automatically registered during the checkout. However, the email verification step does perform a order history search upon successful verification of the email address, that will back fill their customer profile with any orders that are already in order database that have the matching email address.
---
# Storefront MyAccount Customer Portal
https://docs.ultracart.com/customers-crm/my-account-customer-portal/storefront-myaccount-customer-portal
doc_type: explanation
# Customer View of My Account Customer Portal
The Storefront has a built in ‘My Account’ customer portal.

# Portal Sections
The Customer portal is where the customer can:
1. **Profile -** Review and modify their stored billing and shipping addresses, and stored credit card information.
2. **Orders -** Review previous orders - and also submit customer feedback, if enabled.
3. **Subscriptions -** Review their recurring orders.
Options for the following actions:
_Allow Customers to Cancel Auto Orders_
_Allow Customers to Change Next Shipment Date_
_Allow Customers to Change Quantity_
_Allow Customers to Pause Auto Orders_
_Allow Customers to Update Billing_
_Allow Customers to Update Shipping_
_Allow Customers to Update Payment_
4. **Reviews -** Post their product reviews.
5. **Rewards -** View their Loyalty Points / Cashback, if enabled.
6. **Wishlist -** View and manage items they have added to their wish list.
Please note that some of these options require you enabling in order for them to appear int he portal:
- Decide whether to use [Case Management](/orders-fulfillment/order-management/case-management) (Customer Feedback)
- Configure [Product Reviews](/items-catalog/items-configuration/reviews) (if you haven't already)
# Frequently Asked Questions
**Question:** We have digital content. How can we resend the customer a download link for their purchase, and can we make that available from within the customer portal?
**Answer:** You can resend a new download link to the customers' email address on file for their purchase by pulling up their order in the Order Management, View Orders search page, then mousing over the tools menu option and clicking the Digital Download reset link. You can add the download link into the order area of the My Account Customer Portal by adding the element titled ‘Order Digital Download Instructions’ and then wrapping or nesting that under an order condition element that has the condition configured ‘has digital download’.
# Related documenation
[StoreFront Menus](/storefronts-themes/navigation-search/menus)
---
# Order entry
https://docs.ultracart.com/customers-crm/order-entry
doc_type: explanation
Order entry lets you create orders on behalf of your customers directly from the UltraCart CRM. You can manually build orders with full control over items, pricing, shipping, discounts, and payment methods — including agent-assisted payments during live phone calls.
## Overview
The order entry system is designed for customer service agents, sales teams, and back-office staff who need to place orders that can't go through the standard storefront checkout. Common scenarios include:
- Phone orders taken during a live call
- Orders requiring special pricing or manual discounts
- Reorders cloned from a customer's previous order
- Point-of-sale transactions at a physical location
- Quote requests for B2B customers
Order entry is accessed from the CRM sidebar under **Order Entry**. It contains four views, each accessible from the left navigation menu.

## Navigation
| View | Description |
| --- | --- |
| **Create Order** | The main order entry form where you build and process orders |
| **Search Orders** | Find existing orders by ID, email, or customer name and clone them into new orders |
| **Templates** | Manage saved order templates for frequently-placed order types |
| **Quick Picks** | Configure frequently-used items for one-click addition during order entry |
## Standard mode vs POS mode
Order entry operates in one of two modes depending on your configuration.
**Standard mode** is the default. It provides all payment methods (credit card, check, C.O.D., purchase order, eCheck, insurance, quote request) and requires a billing email address to process an order.
**POS mode** is enabled when a point-of-sale location and register are configured. In POS mode:
- Payment options are limited to credit card, stored card, card reader (Stripe Terminal), agent-assisted payment, and cash
- Billing email is not required to process an order
- The card reader payment method becomes available when a Stripe Terminal reader is connected
## Order lifecycle
A typical order follows this workflow:
1. **Set addresses** — enter or look up billing and shipping information
2. **Add items** — search for products, select variations, set quantities
3. **Configure shipping** — calculate rates and select a shipping method
4. **Apply discounts** — add coupons, gift certificates, or store credit
5. **Select payment** — choose a payment method and enter payment details
6. **Process the order** — validate and submit the order
After processing, a receipt screen displays the order confirmation. For quote orders, shareable URLs are provided.
:::tip
You can work through these steps in any order. The system saves your cart to the server automatically as you make changes, so your progress is preserved even during long sessions.
:::
## In this section
The create order screen is the primary workspace for building and processing orders. It walks you through addresses, items, shipping, discounts, and payment in a single scrollable form with real-time totals.
Every order requires a billing address, and most orders need a shipping address. You can enter addresses manually, look up existing customers, or pull saved addresses from a linked customer profile.
The items section is where you add products to the order, set quantities, configure options, and manage pricing. UltraCart provides several ways to add items — from live search to bulk entry to one-click quick picks.
After adding items and setting addresses, you configure how the order gets to the customer. UltraCart can calculate live shipping rates, let you override costs, and supports in-store pickup as an alternative to shipping.
UltraCart order entry supports several ways to reduce the order total: coupon codes, gift certificates, store credit, and pricing tiers. You can also assign a sales rep, add custom fields, and include a gift message or special instructions.
UltraCart order entry supports a wide range of payment methods, from standard credit card entry to agent-assisted capture during live phone calls. The available methods depend on your account configuration and whether the order is in standard or POS mode.
Order templates let you save a cart configuration for reuse. If you frequently create similar orders — same items, same shipping setup, same coupon — saving a template lets you load it in one click instead of rebuilding the order from scratch.
Quick picks are frequently-used items that you preconfigure for one-click addition during order entry. Instead of searching for the same products every time, you set them up once with a default quantity and optional custom price, then add them to any order with a single click.
You can search for existing orders and clone them into new order entry carts. This is useful when a customer wants to reorder something they've purchased before or when you need to create a similar order with minor modifications.
---
# Creating an order
https://docs.ultracart.com/customers-crm/order-entry/creating-an-order
doc_type: how-to
The create order screen is the primary workspace for building and processing orders. It walks you through addresses, items, shipping, discounts, and payment in a single scrollable form with real-time totals.
## Overview
When you navigate to **Order Entry > Create Order**, UltraCart initializes a new server-side cart. Every change you make — adding items, entering addresses, selecting shipping — is automatically saved to the server. This means your work persists across page refreshes and long sessions.

The screen is organized into these sections from top to bottom:
1. Billing and shipping addresses
2. Line items
3. Shipping methods and order options (coupons, gift certificates, storefront, sales rep)
4. Gift message and special instructions
5. Custom fields
6. Payment method
7. Order summary and action buttons
## Starting a new order
When you first open the create order screen, a fresh cart is ready for you. If you need to clear your current work and start over, select the **Start Over** button in the toolbar. UltraCart prompts for confirmation, then deletes the current cart and initializes a new one.
## Building the order
Each major section of the order form is covered in its own documentation page:
- **Addresses** — enter billing and shipping information, search for customers, and link customer profiles. See [Customers and addresses](./customers-and-addresses.md).
- **Items** — search for products, handle variations, add items in bulk, and configure item options. See [Items and products](./items-and-products.md).
- **Shipping** — calculate shipping rates, select a method, override costs, and configure in-store pickup. See [Shipping and delivery](./shipping-and-delivery.md).
- **Discounts** — apply coupons, gift certificates, store credit, and pricing tiers. See [Discounts and credits](./discounts-and-credits.md).
- **Payment** — choose from credit card, cash, check, agent-assisted, card reader, and more. See [Payment methods](./payment-methods.md).
## Recalculating totals
Select **Recalculate** at the bottom of the page to save the current cart to the server and have UltraCart recalculate all totals, including taxes, shipping, and discounts. This is useful after making several changes and wanting to confirm the final amounts.
## Validating an order
Select **Validate** to check the order for errors without processing it. UltraCart runs the same validation checks that occur during processing and reports any issues — such as missing required fields, invalid addresses, or payment problems — as notification messages.
## Processing the order
Select **Process Order** to submit the order. This button is enabled when the order meets these minimum requirements:
- At least one item in the cart
- A billing email address (not required in POS mode)
- A payment method selected (not required when gift certificates or store credit cover the full total)
When you select **Process Order**, UltraCart saves any pending changes, validates the order, and submits it for processing. If successful, the screen transitions to the receipt view.
## The receipt screen
After successful processing, the create order screen is replaced by a receipt showing:
- A success confirmation banner
- The rendered order receipt with full order details
- For quote orders: a short URL and long URL with copy-to-clipboard buttons for sharing with the customer
Select **Dismiss and Return to Order Entry** to clear the receipt and start a new order.
## Saving as a template
If you frequently create similar orders, select **Save as Template** to save the current cart state for reuse. You can save up to 20 templates. See [Order templates](./order-templates.md) for details.
## Session keep-alive
Order entry sessions can last a long time, especially during complex phone orders. UltraCart automatically keeps your session alive by sending a background request every 12 minutes, so your cart won't expire during extended order entry.
## Related pages
- [Order entry overview](./index.md)
- [Customers and addresses](./customers-and-addresses.md)
- [Items and products](./items-and-products.md)
- [Shipping and delivery](./shipping-and-delivery.md)
- [Discounts and credits](./discounts-and-credits.md)
- [Payment methods](./payment-methods.md)
- [Order templates](./order-templates.md)
---
# Customers and addresses
https://docs.ultracart.com/customers-crm/order-entry/customers-and-addresses
doc_type: reference
Every order requires a billing address, and most orders need a shipping address. You can enter addresses manually, look up existing customers, or pull saved addresses from a linked customer profile.
## Overview
The address section appears at the top of the create order screen with billing on the left and shipping on the right. Both forms share the same set of address fields, with a few extras on each side.

Linking a customer profile to the order unlocks additional features: address book access, pricing tiers, store credit, and stored credit cards.
## Billing address
The billing address form includes these fields:
- First name, last name, company, title
- Address line 1 and 2, city, state/province, postal code, country
- Day phone, evening phone, cell phone (with SMS opt-in toggle)
- Email (with marketing opt-in toggle), CC email, gift email
- Tax county (shown when applicable for your tax configuration)
The billing address toolbar provides three actions:
- **Copy to Shipping** — copies the billing address to the shipping form, preserving the residential flag
- **Customer Search** — opens the customer search modal
- **Addresses** — opens the billing address book (only visible when a customer profile is linked)
### Auto city and state lookup
When you enter a 5-digit US zip code, UltraCart automatically looks up and fills in the city and state fields. You can still override these values manually.
### Country selection
When you change the country, the state/province field updates to show the appropriate options for that country. For countries without a standard state list, a free-text input is shown instead.
## Shipping address
The shipping address form has the same core fields as billing, plus:
- **Residential** toggle — indicates whether the shipping address is a residential location. Some shipping carriers charge different rates for residential vs commercial addresses.
- **SMS opt-in** toggle for the shipping phone number
The shipping address toolbar provides:
- **Copy to Billing** — copies the shipping address back to the billing form
- **Addresses** — opens the shipping address book (only visible when a customer profile is linked)
### Address standardization
The shipping address includes a **Standardize** button that sends the address through USPS address standardization. UltraCart displays a side-by-side comparison showing the original address and the standardized version. You can accept the standardized address or keep the original.
This helps ensure addresses are formatted correctly, which reduces shipping errors and improves rate accuracy.
### In-store pickup
You can switch the order from shipping to in-store pickup. When enabled, the shipping address fields are replaced with:
- **Pickup location** — select from your configured pickup locations
- **Pickup date** — select an available date
- **Pickup time** — select an available time slot (if applicable)
See [Shipping and delivery](./shipping-and-delivery.md) for more details on the pickup workflow.
## Searching for customers
Select **Customer Search** in the billing address toolbar to search for existing customers. You can search by name, email, or company. Results appear in a list showing matching customer profiles.
Selecting a customer from the results populates the billing address with their information and links the customer profile to the order.
### Automatic profile lookup
When you type an email address in the billing email field and move to the next field, UltraCart automatically searches for a matching customer profile. If one is found, a prompt appears offering to link the profile to the order. You can accept or dismiss this prompt.
## Linking a customer profile
Linking a customer profile to the order unlocks several features:
- **Address book** — access to the customer's saved billing and shipping addresses
- **Pricing tiers** — ability to apply customer-specific pricing tiers
- **Store credit** — use the customer's internal gift certificate balance toward the order
- **Stored credit cards** — pay with a credit card the customer has previously saved
You can link a profile through customer search, the automatic email lookup, or by selecting **Link Profile** when a matching profile is detected.
To unlink a profile, select the unlink icon next to the linked customer's email. The profile is also automatically unlinked if you change the billing email address.
## Address book
When a customer profile is linked, the **Addresses** button becomes available in both the billing and shipping address toolbars. The address book shows all saved addresses for the linked customer.
Select an address from the book to populate the corresponding address form. This is especially useful for repeat customers with multiple shipping locations.
## Pricing tiers
When your account has non-default pricing tiers configured and a customer profile is linked, a pricing tiers section appears below the shipping address. Toggle on any applicable pricing tiers for this order. When you change a pricing tier, UltraCart recalculates all item prices on the server.
## Related pages
- [Creating an order](./creating-an-order.md)
- [Items and products](./items-and-products.md)
- [Discounts and credits](./discounts-and-credits.md)
- [Payment methods](./payment-methods.md)
---
# Discounts and credits
https://docs.ultracart.com/customers-crm/order-entry/discounts-and-credits
doc_type: reference
UltraCart order entry supports several ways to reduce the order total: coupon codes, gift certificates, store credit, and pricing tiers. You can also assign a sales rep, add custom fields, and include a gift message or special instructions.
## Overview
Discount and credit options appear in the right column of the shipping section and in the rows below it. Most of these features are optional and only appear when configured for your account.
## Coupons
You can apply coupon codes to the order in two ways:
- **Manual entry** — type a coupon code in the text field and add it
- **Dropdown selection** — select from a dropdown list of available coupons pre-loaded from your account
Applied coupons appear below the input with a remove button next to each one. UltraCart validates coupon codes on the server when the cart is saved, so invalid or expired codes are rejected with an error message.
You can apply multiple coupons to a single order, subject to your coupon stacking rules.
## Gift certificates
Enter a gift certificate code to apply it to the order. If your account requires a PIN for gift certificate redemption, a PIN field appears alongside the code input.
After saving, UltraCart displays the applied amount and the remaining balance on the gift certificate. If the gift certificate (combined with any store credit) covers the full order total, the payment method section is hidden since no additional payment is needed.
## Store credit
Store credit uses a customer's internal gift certificate balance. This option is only available when:
- A customer profile is linked to the order
- The linked customer has a positive store credit balance
When available, a **Use Store Credit** toggle appears with the customer's available balance displayed. Toggle it on to apply the store credit toward the order total.
If store credit and any gift certificates together cover the full order total, the payment method section is hidden.
## Pricing tiers
If your account has non-default pricing tiers and a customer profile is linked, pricing tier toggles appear in the address section. Selecting a tier triggers UltraCart to recalculate all item prices on the server based on that tier's pricing rules.
See [Customers and addresses](./customers-and-addresses.md) for details on where pricing tiers appear in the interface.
## Sales rep
When sales rep codes are configured on your account, a dropdown appears for assigning a sales rep to the order. Select the appropriate rep to associate the order with them for commission tracking and reporting.
## Custom fields
If your account has custom fields configured (up to 7), they appear in a dedicated section below the gift message. Each field can be either a free-text input or a dropdown with predefined values, depending on your configuration.
## Gift message and special instructions
Two optional text areas appear below the order options:
- **Gift message** — a message from the customer to be included with the order. The maximum length is set by your account configuration.
- **Special instructions** — notes from the agent about the order, such as handling preferences or internal remarks.
## Related pages
- [Creating an order](./creating-an-order.md)
- [Customers and addresses](./customers-and-addresses.md)
- [Payment methods](./payment-methods.md)
- [Shipping and delivery](./shipping-and-delivery.md)
---
# Items and products
https://docs.ultracart.com/customers-crm/order-entry/items-and-products
doc_type: reference
The items section is where you add products to the order, set quantities, configure options, and manage pricing. UltraCart provides several ways to add items — from live search to bulk entry to one-click quick picks.
## Overview
The items table displays all line items currently in the order. Each row shows the item's thumbnail image, item ID, title, quantity, unit cost, line total, and available actions. An add row at the bottom of the table lets you search for and add new items.

## Adding items
Type an item ID or product name into the add row at the bottom of the items table. After 2 or more characters, a live search dropdown appears showing matching products with their item ID, description, and price.
You can add items in two ways:
- **By item ID** — type the exact item ID, set the quantity, and select **Add**
- **From search results** — select a product from the dropdown to add it directly
If the item has variations (such as size or color), a variation selector opens automatically. See [Selecting variations](#selecting-variations) below.
## Selecting variations
When you add an item that has variations, a modal appears for selecting the specific variant. The selector adapts its UI based on the type of variation:
- **Image swatches** — a grid of clickable images, used when product photos are available for each option
- **Chips** — a row of text buttons, used when option values are short (12 characters or less)
- **Dropdown** — a standard select menu, used for longer text values
Variations are cascaded: selecting an option in the first variation (e.g., Color) filters the available options in the next variation (e.g., Size). The modal shows the resolved item ID, current pricing (including sale prices), and a variant-specific image in real time as you make selections.
Select **Add to Cart** to confirm the specific variant and add it to the order.
## Editing items
Each item row supports these edits:
- **Quantity** — change the number field to adjust the quantity. The change saves automatically.
- **Unit cost** — change the cost field to override the server-calculated price. Overridden prices are visually highlighted. Select the reset button next to the price to revert to the original calculated price.
- **Item options** — if the item has configurable options (dropdown selections, text fields, radio choices, or multiline inputs), they appear below the item description. Changes are saved automatically with a short delay.
- **Serial numbers** — if the item requires serial number collection, a text area appears below the item for entering serial numbers.
- **Auto-order schedule** — if the item supports recurring orders, a schedule dropdown lets you select a delivery frequency.
To remove an item, select the delete icon on the item row.
## Bulk add
For orders with many line items, select **Bulk Add** in the items section header. This opens a modal with a 10-row table where you can enter multiple item IDs and quantities at once.
Each row validates the item ID as you type. If an item has variations, you can select the specific variant within the row. Select **Apply** to add all valid items to the order in a single batch.
## Quick picks
Select **Quick Picks** in the items section header to open a modal showing your preconfigured quick-pick items. Quick picks are frequently-used items set up with a default quantity and optional custom price.
Select an item from the quick picks list to add it to the order immediately. See [Quick picks](./quick-picks.md) for setup instructions.
## Storefront selection
The storefront selector lets you choose which storefront (screen branding theme) the order is placed against. This determines which storefront-specific settings, pricing rules, and branding apply to the order.
When items are in the cart, UltraCart automatically suggests storefronts that sell those items, helping you select the right one. Your selection is remembered across sessions.
## Related pages
- [Creating an order](./creating-an-order.md)
- [Quick picks](./quick-picks.md)
- [Shipping and delivery](./shipping-and-delivery.md)
- [Discounts and credits](./discounts-and-credits.md)
---
# Order templates
https://docs.ultracart.com/customers-crm/order-entry/order-templates
doc_type: how-to
Order templates let you save a cart configuration for reuse. If you frequently create similar orders — same items, same shipping setup, same coupon — saving a template lets you load it in one click instead of rebuilding the order from scratch.
## Overview
You can save up to 20 templates per account. Each template captures the full cart state: items, addresses, coupons, shipping configuration, and custom fields. Templates can be shared across agents on your account.
Templates are managed from **Order Entry > Templates** in the left navigation menu.

## Saving a template
1. Build an order on the create order screen with the items, addresses, and settings you want to reuse.
2. Select **Save as Template** at the bottom of the page.
3. Enter a name for the template in the dialog.
4. Select **Save**.
The template is saved with the current cart state. A counter shows how many templates you've used out of the 20 maximum.
:::tip
Give templates descriptive names like "Starter Kit - Domestic" or "Monthly B2B Reorder" so they're easy to identify later.
:::
## Loading a template
1. Navigate to **Order Entry > Templates**.
2. Each template is displayed as a card showing the template name, item count, customer name, email, ship-to city and state, coupon count, and whether it's shared.
3. Select **Load** on the template you want to use.
UltraCart loads the template into a new cart and recalculates all prices on the server. You're then navigated to the create order screen with the template's contents ready for you to review, adjust, and process.
:::info
Prices are recalculated when loading a template, so the totals may differ from when the template was saved if product prices or shipping rates have changed.
:::
## Shared templates
Templates can be marked as shared, making them available to other agents on your account. Shared templates display a **Shared** tag on their card.
## Deleting a template
Select **Delete** on a template card to remove it. UltraCart asks for confirmation before deleting. Deleted templates free up space toward your 20-template limit.
## Related pages
- [Creating an order](./creating-an-order.md)
- [Quick picks](./quick-picks.md)
- [Order entry overview](./index.md)
---
# Payment methods
https://docs.ultracart.com/customers-crm/order-entry/payment-methods
doc_type: reference
UltraCart order entry supports a wide range of payment methods, from standard credit card entry to agent-assisted capture during live phone calls. The available methods depend on your account configuration and whether the order is in standard or POS mode.
## Overview
The payment section appears below the custom fields on the create order screen. It shows a row of payment method buttons. Selecting a button reveals that method's specific form. Only one payment method can be active per order.

If gift certificates and store credit fully cover the order total, the payment section is hidden since no additional payment is needed.
## Payment method availability
Not all methods are available in every context. The table below shows when each method appears.
| Payment method | Standard mode | POS mode | Additional conditions |
| --- | :-: | :-: | --- |
| Credit card | Yes | Yes | Unless direct card entry is restricted |
| Stored credit card | Yes | Yes | Customer profile linked with saved cards |
| Agent-assisted | Yes | Yes | Active phone call or previously captured token; agent-assisted payment enabled |
| Card reader | No | Yes | Stripe Terminal reader connected |
| Cash | Yes | Yes | Always available |
| C.O.D. | Yes | No | |
| Check | Yes | No | |
| Purchase order | Yes | No | |
| eCheck | Yes | No | |
| Insurance | Yes | No | |
| PayPal | Yes | No | PayPal clone configured |
| Venmo | Yes | No | Venmo clone configured |
| Quote request | Yes | No | Quotation permission required |
## Credit card
Enter the card number, expiration month and year, and CVV2. If a customer profile is linked, a **Save card to profile** option lets you store the card for future use.
When an active phone call is in progress and agent-assisted payment is enabled, an additional button appears to initiate agent-assisted card capture instead of manual entry.
## Stored credit card
When a customer profile is linked and the customer has previously saved credit cards, this option shows a dropdown of their cards with masked numbers. Select a card to use it for this order.
## Agent-assisted payment
Agent-assisted payment lets you securely capture a customer's credit card during a live phone call without the card details passing through the agent's screen. This method uses Twilio Pay to handle the card capture through an automated IVR prompt.
**How it works:**
1. Select **Agent Assisted** as the payment method while on an active call.
2. The customer hears an automated prompt asking them to enter their card details on their phone keypad.
3. After the customer enters their card information, a secure token is returned.
4. UltraCart displays the masked card details (last 4 digits, expiration) for confirmation.
5. Process the order using the captured token.
The captured token persists even if the phone call drops after capture. If the call ends before you process the order, a confirmation banner shows the captured card details, and you can still complete the order.
:::info
Agent-assisted payment is only available when this feature is enabled in your account configuration and you are on an active phone call in the CRM softphone (or a token has already been captured).
:::
## Card reader (Stripe Terminal)
In POS mode with a connected Stripe Terminal reader, you can accept card-present payments. The card reader flow works differently from other payment methods:
1. Select **Card Reader** as the payment method.
2. Select **Process Order** — UltraCart creates a payment intent and sends it to the reader.
3. A modal appears showing the reader status as the customer taps, inserts, or swipes their card.
4. The modal polls for status updates every 5 seconds.
5. When the card is captured, the modal closes and the order is processed automatically.
If the capture needs to be cancelled, select **Cancel** in the reader status modal.
:::tip
A simulated reader is available for testing the card reader flow without physical hardware.
:::
## Cash
Select **Cash** for cash payments. No additional data entry is required. This method is available in both standard and POS modes.
## Check
Select **Check** for payment by check. No additional data entry is required. This method is available in standard mode only.
## C.O.D.
Select **C.O.D.** (Cash on Delivery) for collect-on-delivery payments. No additional data entry is required. Available in standard mode only.
## Purchase order
Enter a **PO number** for the purchase order. An **Auto-Approve** toggle is available to automatically approve the order without manual review. Available in standard mode only.
## eCheck
Enter the bank details for an electronic check payment:
- Bank name
- Account type (checking or savings)
- Owner type (personal or business)
- Routing number
- Account number
- Account name
- Check number
Available in standard mode only.
## Insurance
Select the insurance type from a dropdown, then enter the **Application ID** and **Claim ID**. Available in standard mode only.
## PayPal and Venmo
PayPal and Venmo are available as clone order payment methods when configured on your account. These display an informational panel explaining the payment flow. Available in standard mode only.
## Quote request
Create a quote instead of processing a payment. Enter a **quote expiration date** and optionally toggle **Send Immediately** to email the quote to the customer right away.
After processing, the receipt screen provides a short URL and a long URL that you can share with the customer. The customer can use these links to review and accept the quote.
:::info
Quote requests require the quotation permission on your account.
:::
## Related pages
- [Creating an order](./creating-an-order.md)
- [Customers and addresses](./customers-and-addresses.md)
- [Discounts and credits](./discounts-and-credits.md)
- [Order entry overview](./index.md)
---
# Quick picks
https://docs.ultracart.com/customers-crm/order-entry/quick-picks
doc_type: how-to
Quick picks are frequently-used items that you preconfigure for one-click addition during order entry. Instead of searching for the same products every time, you set them up once with a default quantity and optional custom price, then add them to any order with a single click.
## Overview
Quick picks are managed from **Order Entry > Quick Picks** in the left navigation menu. During order entry, you access them from the **Quick Picks** button in the items section header on the create order screen.

## Adding a quick pick
1. Navigate to **Order Entry > Quick Picks**.
2. Select **Add Item**.
3. Search for the item by item ID or description in the search modal.
4. Set the **quantity** for this quick pick.
5. Optionally set a **custom price** to override the standard item price.
6. Select **Add**.
The quick pick appears in the list with its item ID, quantity, and price. UltraCart prevents duplicate entries — if an item with the same ID, quantity, and price already exists, it won't be added again.
## Using quick picks during order entry
1. On the create order screen, select **Quick Picks** in the items section header.
2. A modal displays your configured quick-pick items.
3. Select an item to add it to the current order with the preconfigured quantity and price.
This is especially useful for agents who regularly create orders with a common set of products, such as starter kits, sample packs, or standard reorders.
## Editing a quick pick
1. Navigate to **Order Entry > Quick Picks**.
2. Select the edit icon (pencil) on the quick pick you want to change.
3. Update the quantity and/or custom price.
4. Save your changes.
## Removing a quick pick
Select the delete icon (trash) on any quick pick to remove it. The item is removed from the quick picks list immediately.
## Related pages
- [Items and products](./items-and-products.md)
- [Order templates](./order-templates.md)
- [Creating an order](./creating-an-order.md)
---
# Searching and cloning orders
https://docs.ultracart.com/customers-crm/order-entry/searching-and-cloning-orders
doc_type: how-to
You can search for existing orders and clone them into new order entry carts. This is useful when a customer wants to reorder something they've purchased before or when you need to create a similar order with minor modifications.
## Overview
Order search is accessed from **Order Entry > Search Orders** in the left navigation menu. From the results, you can view order details or clone an order into a new cart.

## Searching for orders
Enter one or more search criteria and press Enter or select **Search**:
- **Order ID** — the UltraCart order number
- **Email** — the customer's email address
- **Company** — the company name on the order
- **First name** — the customer's first name
- **Last name** — the customer's last name
At least one field is required. Results appear in a table showing the order ID, date, customer name, and email.
## Viewing order details
Select **Details** on any search result to open a modal displaying the full order details. This shows the complete order information as rendered by UltraCart, including items, addresses, shipping, payment, and totals.
Use this to verify you're looking at the right order before cloning.
## Cloning an order
Select **Clone** on a search result to create a new order based on that order. A dialog appears with two options:
- **Include line items** (on by default) — copies the original order's items into the new cart
- **Include shipping method** (on by default) — copies the original order's shipping method selection
Toggle either option off if you want to exclude that portion of the order. Select **Confirm** to create the clone.
UltraCart populates a new cart with the cloned data and navigates you to the create order screen. From there you can review the cloned order, make any changes, and process it as a new order.
:::tip
Cloning is especially useful for subscription-style reorders where the customer wants the same items shipped to the same address with the same shipping method.
:::
## Related pages
- [Creating an order](./creating-an-order.md)
- [Order templates](./order-templates.md)
- [Order entry overview](./index.md)
---
# Shipping and delivery
https://docs.ultracart.com/customers-crm/order-entry/shipping-and-delivery
doc_type: how-to
After adding items and setting addresses, you configure how the order gets to the customer. UltraCart can calculate live shipping rates, let you override costs, and supports in-store pickup as an alternative to shipping.
## Overview
The shipping section sits below the items table on the create order screen. It has two columns: shipping methods on the left, and order options (coupons, gift certificates, storefront, sales rep) on the right. The order options are covered in [Discounts and credits](./discounts-and-credits.md).
## Calculating shipping estimates
Select **Calculate** to request shipping estimates from UltraCart. The system evaluates the current cart contents, shipping address, and package dimensions against your configured shipping methods and returns all applicable options.

Results appear in a table showing each method's name, estimated delivery date, and cost. If no methods apply — for example, if the shipping address is incomplete or no methods are configured for the destination — a "Zero applicable shipping methods" message appears.
:::info
Shipping estimates are recalculated automatically when you change the residential flag on the shipping address, since residential vs commercial classification can affect rates.
:::
## Selecting a shipping method
Select the radio button next to a shipping method to apply it to the order. The selected method's cost is added to the order total.
If you recalculate shipping after selecting a method, UltraCart automatically re-selects the same method in the new results when it's still available.
## Overriding shipping cost
You can manually edit the cost field on any shipping method to override the calculated rate. Overridden costs are visually highlighted so you can tell at a glance which methods have been adjusted.
This is useful for offering discounted or free shipping to a customer during a phone order.
## Shipping options
Additional options appear below the shipping method selection when a method is chosen:
- **Lift gate** — request a lift gate for freight shipments. This is automatically required for residential addresses on methods that support it.
- **3rd party shipper account** — enter a third-party shipper account number for methods that allow third-party billing.
- **Exempt from handling charges** — toggle this on to remove handling charges from the order. Changing this triggers a recalculation.
- **Ship date** — select a specific date for the order to ship (available when your merchant configuration allows ship date selection).
- **Delivery date** — select a requested delivery date (available when your configuration allows it; Sundays are blocked).
## Packing solution
A **Packing Solution** link is available that opens the UltraCart packing solution page for the current cart. This shows how items will be packed into boxes based on your configured packing rules.
## In-store pickup
You can switch the order from shipping to in-store pickup using the pickup toggle in the shipping address section. Pickup locations and their available times come from your distribution center configuration, so if the selectors are empty, pickup has not been set up yet. See [Local Pickup](../../orders-fulfillment/shipping/local-pickup.md).
When pickup mode is enabled:
1. The shipping address fields are replaced with pickup-specific selectors.
2. Select a **pickup location** from your configured locations.
3. Select a **pickup date** from the available dates for that location.
4. Select a **pickup time** from the available time slots (if the location uses time-based scheduling).
The pickup selection is saved to the server and replaces the shipping method for the order.
:::info
Switching back from pickup to shipping restores the standard shipping address form and shipping method selection.
:::
## Related pages
- [Creating an order](./creating-an-order.md)
- [Items and products](./items-and-products.md)
- [Discounts and credits](./discounts-and-credits.md)
- [Payment methods](./payment-methods.md)
---
# Tasks
https://docs.ultracart.com/customers-crm/tasks
doc_type: explanation
# About
Tasks creates a list of actions that a user needs to complete. The tasks can be for individual users as well as groups of users. Tasks apply to actions on orders that are in various order locations requiring some sort of follow up actions, including:
1. Accounts Receivable
2. Order Processing
3. Fraud Review
## Tasks Overview page
To view tasks, click the tasks button in the main left-hand menu:

You’ll see a overview of all tasks from here:

From the overview, you can take action on individual tasks as well as batch edit or mark as complete.

Select the checkbox(es) of the tasks you wish to take action on, for either marking as complete or to perform a batch edit. The top checkbox is the select all, otherwise select the individual checkboxes for the tasks you wish to take action upon.
## Task Overview Filters
In addition, can filter to tasks on the following filters:
### Context

### Status

### Users

### Records

## Batch Edit Dialog Window
You can batch edit tasks. Select the tasks using the checkbox on the lefthand side then click the ‘Batch Edit’ button, you’ll be presented with a dialog window, from which you can make assignments to user(s) and groups, set priority, set status, assign a due date and expiration date:

## Adding Tasks
Tasks can be added manually as well as automatically based upon defined rules.
### Manually Viewing and Adding Tasks
To add and view your tasks manually, you'll click the the  that will appear at the top right side of the page in the areas that tasks can be assigned.
Clicking the tasks button will open a dialog window that will contain a ‘Add task’ button:

Next, you’ll enter the task details into the Task Editor:


After saving the new Task, the confirmation dialog window will show the new task:

The Task button will be updated to reflect the open task for the user:

Clicking on an active task from the task button will open the task editor. The task can be edited as well as marked as completed:

The Task will have a checkmark in the task button dialog window indicating it as completed:

### Automating Tasks with Rules
In addition to adding tasks manually, [tasks can be automated via rules](/orders-fulfillment/configuration-order-management/order-task-generation).
## Task Notifications
Within the User permissions - Email Notification a user can enable a daily email to provide a Daily Organization Summary or Daily Personal Summary. Letting them know what tasks are due for the day.

---
# How to Prepare Your UltraCart Store for AI Agents This Quarter
https://docs.ultracart.com/customers-crm/tutorials/agent-commerce-tutorials/how-to-prepare-your-ultracart-store-for
doc_type: how-to
## How to Prepare Your UltraCart Store for AI Agents This Quarter
## Overview
AI shopping agents on platforms such as ChatGPT, Microsoft Copilot, Perplexity, and other commerce-enabled AI surfaces can help shoppers discover products, compare options, check availability, and complete purchases through guided or programmatic shopping experiences.
These systems rely on structured product data, accurate pricing, real-time availability, clear fulfillment information, and low-friction checkout paths. Stores with complete product data and well-configured payment, shipping, and return settings are better positioned for AI-assisted shopping experiences.
UltraCart is well-suited for this shift because it combines catalog management, StoreFronts, checkout, payment integrations, fulfillment workflows, reporting, CRM, AI agents, and REST API access in one platform. For eligible merchants, UltraCart’s PayPal Agentic Commerce integration provides a practical path for making catalog and checkout data available to supported AI shopping surfaces.
Use this tutorial to prepare your store for AI-assisted shopping by improving your product data, enabling PayPal Agentic Commerce when available, reviewing your checkout flow, and making shipping and return information easier for both customers and AI systems to understand.
## What You'll Need
Before you begin, make sure you have:
- Access to your UltraCart merchant account with administrative permissions
- A PayPal Business account
- PayPal enabled as a payment method in your UltraCart checkout
- Basic familiarity with your product catalog and checkout flow
- Configured shipping, fulfillment, and return policy information
- Access to an AI writing tool, such as Claude, ChatGPT, Gemini, or Grok, if you plan to improve product descriptions during the audit
- Time to review and update product records, especially top-selling or high-traffic items
> **Note:** Availability for PayPal Agentic Commerce features may depend on merchant eligibility, region, product type, PayPal requirements, and UltraCart account configuration.
## Related UltraCart AI Resources
Use these resources as you complete this setup:
- [Agentic Commerce documentation](/account-settings/agentic-commerce)
- [AI-Powered Conversational Commerce with PayPal and UltraCart](https://www.ultracart.com/resources/ai-powered-conversational-commerce/)
- [Agentic Commerce: What Ecommerce Merchants Need to Know](https://www.ultracart.com/Agentic-Commerce-Is-Here-Is-Your-Store-Ready.html)
- [How to Write Product Descriptions with AI](https://www.ultracart.com/resources/articles/How-to-Write-Product-Descriptions-with-AI-A-Practical-Playbook-for-Merchants.html)
- [UltraCart AI Agents for Ecommerce](https://www.ultracart.com/resources/crm/ai-agents/index.html)
- [UltraCart AI-Powered Report Builder](https://www.ultracart.com/resources/ai-report-builder/)
- [UltraCart REST API Overview](https://www.ultracart.com/resources/integrations/advanced/api/)
## Steps
## 1\. Audit Your Product Data
Complete, structured product data can improve product eligibility, relevance, and discoverability in AI shopping experiences. Incomplete or vague product records make it harder for AI agents, marketplaces, and commerce partners to understand what you sell.
UltraCart’s Agentic Commerce guidance emphasizes structured catalog data, product identifiers, attributes, clear descriptions, fresh feeds, API-accessible data, and transparent shipping and return information as core requirements for agent-ready commerce. UltraCart’s Agentic Commerce documentation also confirms that PayPal Agentic Commerce syncs catalog and pricing data from selected StoreFronts to PayPal, then routes resulting orders back into UltraCart for standard processing and fulfillment.
Start with your best-selling, highest-margin, or highest-traffic items.
1. Log in to the UltraCart Back Office.
2. Navigate to your item management area.
Common navigation paths may include:
- **Catalog → Items**
- **Main Menu → Items**
- The primary **Items** section in your UltraCart account
3. Review your items and identify products with missing or incomplete data.
4. For each priority item, confirm that the following fields are complete and accurate:
| Field | Description |
| --- | --- |
| SKU | The item’s unique stock keeping unit. Confirm that each SKU is stable, unique, and not reused for unrelated products. |
| Manufacturer Part Number (MPN) | The manufacturer’s part number, when available. This helps identify branded or manufacturer-specific products. |
| GTIN / UPC / EAN | Global product identifiers used for product matching, marketplace listings, and structured commerce feeds. Add these values when applicable. |
| Short Description | A concise product summary that clearly explains what the product is and why a customer would purchase it. |
| Long Description | A detailed product description that includes benefits, use cases, materials, dimensions, compatibility, specifications, and other decision-making details. |
| Attributes | Structured item data such as size, color, material, style, model, compatibility, or other product-specific details. |
| Options | Customer-selectable product choices, such as size, color, configuration, bundle selection, or other purchase variations. |
| Weight and Dimensions | Shipping-relevant product data used for fulfillment, delivery estimates, and carrier calculations. |
| Materials and Compatibility | Product-specific facts that help customers and AI agents match the item to a specific need. |
| Images | High-quality product images that accurately represent the item. Use descriptive image names and alt text where supported. |
| StoreFront Assignment | Confirm that the item is assigned to the StoreFront or StoreFronts selected for PayPal Agentic Commerce. Items not assigned to a selected StoreFront may not be distributed through that channel. |
5. Prioritize incomplete products using your sales, analytics, or reporting data.
6. Save your changes.
7. For larger catalogs, consider using UltraCart’s import/export tools to update product data in bulk.
> **Tip:** Treat product data as a strategic asset. The more complete and structured your product records are, the easier it is for commerce systems, feeds, and AI shopping agents to understand and present your products.
\[Image Placeholder: Screenshot of the UltraCart Item Editor showing SKU, MPN, GTIN, description, attributes, dimensions, and image fields\]
## 2\. Improve Product Descriptions with AI
AI-generated product descriptions can be useful during the product audit, especially when your catalog contains short, outdated, inconsistent, or manufacturer-provided copy.
UltraCart’s product description playbook recommends using AI with a structured prompt that includes brand context, product specs, differentiation, and a clear output format. It also warns that every AI-generated description still needs human review for spec accuracy, brand voice, uniqueness, SEO targeting, and consistency with structured item fields.
Use AI to improve descriptions, not to invent product facts.
### Write Descriptions for Both Humans and AI Agents
AI shopping agents parse product descriptions differently than human shoppers. Human shoppers skim; agents compare facts, categories, attributes, specifications, and claims across many products.
When revising descriptions, make sure each product description:
- States the product category and use case in the first sentence
- Includes specific facts, such as size, weight, material, capacity, compatibility, or included components
- Avoids unsupported superlatives such as “best,” “ultimate,” or “perfect” unless those claims are backed by evidence
- Matches the structured fields on the item record
- Includes the target search phrase naturally in the title or first sentence when appropriate
- Explains what makes the product different from similar products
> **Warning:** Do not allow AI to guess specifications. If the product source data does not include a measurement, material, compatibility statement, or warranty term, do not let the AI add one.
### Use a Four-Part AI Prompt
Use this prompt structure when rewriting descriptions.
```text
We are [brand name], a [one-line description of the business].
Our customer is [specific buyer profile].
Our brand voice is [3 adjectives, such as practical, friendly, technical, premium, direct, or understated].
We never use [banned words, phrases, or writing styles].
Product:
- Name: [product name]
- Category: [category]
- SKU: [SKU]
- Price tier: [budget, mid-range, premium]
- Key specs: [measurements, materials, capacity, compatibility, ingredients, included items, warranty, care instructions]
- Product options: [size, color, style, configuration, or other options]
- What makes this product different: [1 to 3 specific advantages over similar products]
- Target search phrase: [optional SEO phrase]
Write an UltraCart product description using this structure:
1. SEO title, 60 characters or fewer
2. One opening sentence that states the product category and use case
3. One short benefit paragraph
4. Four to six bullet points pairing each benefit with a specific product fact
5. Technical specs section
Rules:
- Do not invent specs.
- Do not use unsupported superlatives.
- Keep claims consistent with the structured product fields.
- Use a clear, helpful tone.
- Output only the revised product content.
```
---
# Creating a Click-to-Call Button in the Visual Builder
https://docs.ultracart.com/customers-crm/tutorials/creating-a-click-to-call-button-in-the-v
doc_type: how-to
# Introduction
This tutorial provide an example of a ‘**Click-to-Call**’ button using the Visual Builder editor.
## What is a Click-to-Call action button?
_A click-to-call button is a clickable element on a website or app that lets users instantly initiate a phone call with just one tap, typically by opening their device's dialer with a pre-filled number. It enhances user experience by removing the need to manually enter a phone number, especially on mobile devices._
**Why use Click-to-Call instead of the Contact Us page?**
A ‘Click-to-Call’ button is a inobtrusive method if initiating phone call communication.
## :blue-star: Why Choose Click-to-Call?
Click-to-Call offers distinct advantages over a traditional "Contact Us" page. Here's why:
| **Feature** | **Click-to-Call** | **Contact Us Page** |
| --- | --- | --- |
| Immediacy | Instant connection with a representative. | Requires filling out forms and waiting for a response. |
| User Effort | Single click to initiate a call. | Multiple steps: navigate, fill fields, submit. |
| Problem Resolution | Direct conversation allows for quicker and more nuanced problem-solving. | Often involves back-and-forth communication, delaying resolution. |
| Customer Experience | More personal and often leads to higher satisfaction. | Can feel impersonal and less efficient. |
# How is the Click-to-Call button created
Creating a Click-to-Call action button in it’s most basic form is to create a hyperlink button that initiates a phone call, which we will implement using an anchor (``) element with the `href` attribute set to `tel:` followed by the phone number.
For example, the following HTML code creates a button that, when clicked, opens the device's phone dialer:
```
Call Us
```
# Using Anchor Links In Your Storefront
note
Implementing **anchor links** in your storefront using the **Visual Builder editor** is accomplished using the **Link element**, assigning the **element ID** to the URL.
Implementing **anchor links** in your storefront using the **Visual Builder editor** is accomplished using the **Link element**, assigning the **element ID** to the URL.
# Steps
In this tutorial, we are adding a link to the into the header of our storefront, so that it remains immediate available to the customer during their entire shopping session.
Interacting with Visual Builder Editor
- **Accessing the Visual Editor**:
From the UltraCart backend, navigate:
Main Menu → StoreFronts → (Select StoreFront Host) → Browse Your Store.
Click the "Edit" button in the top toolbar to launch the Visual Editor. This opens a refreshed view with the main menu on the right side.
[Source: Accessing the Visual Editor](/storefronts-themes/storefront-visual-builder/quick-start-guide/accessing-the-visual-editor).
- **Interacting with Elements**: Hover over any element on the page to highlight it in blue, displaying its title and a toolbar in the upper right. The toolbar includes options like:
1. **Delete** (DEL key): Remove the element.
2. **Duplicate**: Copy the element.
3. **Settings**: Access configuration for the element.
4. **Hierarchy** (h key): View the element in the page structure.
5. **Add** (+ key): Insert a new element below it.
6. **Scoped CSS** (c key): Customize styles for this element.
7. **Comment** (m key): Add notes visible only in editor mode.
8. Movement arrows: Shift the element left/right/up/down (l, r, u, d keys) [Source: Working with Elements on the Page](/storefronts-themes/storefront-visual-builder/covering-the-basics/working-with-elements-on-the-page).
- **Previewing Changes**: To see how your edits appear on different devices, click the Preview icon in the right-side menu. This opens a popup window with options for Mobile, Tablet, Desktop, or All views. Ensure popups aren't blocked in your browser for this to work smoothly [Source: Previewing and Saving Changes](/storefronts-themes/storefront-visual-builder/covering-the-basics/previewing-and-saving-changes).
- **View Controls**: Use the top menu icons to switch between full page, mobile, tablet, or desktop views. In mobile view, enable "Full Height" to see vertical content limits [Source: Understanding the Visual Editor Menu](/storefronts-themes/storefront-visual-builder/quick-start-guide/understanding-the-visual-editor-menu).
1. From the Storefronts menu in the UltraCart Backend, Click ‘Browse your Store’.

2. In the Storefront Developers menu, click ‘Edit’

3. Click ‘**Hierarchy**’ in the Visual Builder menu that appears along the right side of the web browser window.

4. In the ‘Container-Header’ Container, The first element is the ‘SUBHEADER’ section, click the ‘**+**' button, then choose '**Add Child**’:

5. In the search field that appears, enter ‘**Row**’ then select the row element that appears.

6. Then select the column width of 12:

7. Next, click the ‘**+**' for the column element, then choose ‘**Add Child**’ and search for and then select ‘Image’. In the settings panel of the image, click the folder icon in the ‘Image URL’ field then browse for your image and then select it.

In this case we created an image using a stock photo of an old telephone handset icon combined with our phone number:

8. Click the ‘X' button to close the image settings panel, then in the hierarchy, mouse over the three dots menu for the image element, then choose ‘**Wrap**’, then choose ‘**Link**’. In the link settings, configure the ‘**Link URL**’ with the phone number, optionally set the ‘**Link URL Target**’, to ‘NewTab/Window, then enter 'Call +1-209-383-9870' into the '**Alt Text**’.
9. Click the ‘Save’ button which will be highlighted in the Visual Builder Editor.
10. Click the exit button to exit the Visual Builder Editor.

---
# External Email Form That adds a customer to a Flow
https://docs.ultracart.com/customers-crm/tutorials/external-email-form-that-adds-a-customer
doc_type: tutorial
## Step 1. Create a List
:::info
NAVIGATE:
**Main Menu → StoreFronts → Communication → List and Segments**
:::
To create your first list, click on the Lists & Segments sub-menu, click New List or Segment, and then click New List.

Give the list a name. If you check the “Allow members to configure their membership” then the list will be public. An additional field will appear to allow the configuration of the public description. Make sure the description is appropriate for customers to see. You can also quick add a few email addresses during the list creation.

## Step 2. Create the form
After creating the list simply click on the Signup Form Builder button you will be presented with the model shown below. From here simply select the list you would link to enroll people in and click Next.
:::info
There is also an option toggle to collect the customers name which will change the form
:::

Here you will be presented with two options the first is the CJSON file to add the form into an existing Storefront and the second will allow you to download the HTML version so that it can be added into an external website.

Once you have selected your download you can click Finish to close the model.
## Step 3. Create the flow
:::info
NAVIGATE:
**Main Menu → StoreFronts → Communication → Flows**
:::
Navigate to the Flows sub-menu under Communications and click on New Flow as shown below.

The new flow dialog will appear as shown below then simply select the New Flow option.

For a new flow you’ll be presented with the following form:

For the Trigger we want to select “List - When someone is added to a list” this will allow us to add someone into the flow when they use the signup form we create above.
Now that we have everything created we simply want to add the form code into our site which will not enroll the customers into the flow that we created above.
---
# How to Add the AI Agents Webchat Widget to a StoreFront Page
https://docs.ultracart.com/customers-crm/tutorials/how-to-add-the-ai-agents-webchat-widget
doc_type: how-to
This guide explains how to embed the AI Agents Webchat widget on an UltraCart StoreFront page using the Visual Builder. It assumes the AI Agent has already been configured in CRM > Workforce.
**Last Updated:** June 18, 2026
* * *
## Overview
The AI Agents Webchat widget provides a conversational interface for customers directly on your StoreFront pages. Once an AI Agent is set up in the CRM Workforce section, the widget can be added to any page built with the Visual Builder. This enables site-wide or page-specific support, product recommendations, order assistance, and more.
Key benefits include seamless integration with existing StoreFront themes and automatic handling of agent routing based on CRM configuration.
* * *
## Prerequisites
- An AI Agent configured and active in **CRM > Workforce**.
- The StoreFront must be linked to the correct CRM workspace:
1. In the UltraCart admin, navigate to **StoreFronts > \[Your Store\] > Settings**.
2. Locate the **CRM Integration** or **Workspace Linking** section.
3. Select and link the appropriate CRM workspace.
- Access to the UltraCart StoreFront editor with Visual Builder enabled for the target storefront.
- The StoreFront must be on a plan that supports Visual Builder widgets (Medium plan or higher recommended).
* * *
## Locating and Adding the Widget
1. Log in to the UltraCart administration panel and navigate to the StoreFront editor for your store.
2. Open the desired page (or footer template) in the **Visual Builder**.
3. Click the **+** (Add Element) button in the builder toolbar.
4. In the element search field that appears, type `webchat`.
5. Select the **AI Agents Webchat** widget from the results and click to add it to the canvas.
The widget will appear as a draggable, resizable component.
* * *
## Recommended Placement
For optimal customer experience:
- **Footer area (sitewide)**: Add the widget once to the footer template. This automatically applies site-wide coverage across all pages that inherit the footer. This is the recommended approach for general support.
- **Specific pages**: Place on individual pages (e.g., product or checkout pages) near relevant content for context-specific assistance.
- Avoid overlapping with critical checkout elements or navigation.
After placement, use the Visual Builder's layout tools to adjust positioning, width, and responsive behavior.
* * *
## Widget Configuration
Once added, select the widget on the canvas to access its properties panel on the right:
### Agent Selection
- Use the dropdown to select a specific AI Agent when multiple agents are configured in the CRM workspace.
- If no specific agent is chosen, the widget defaults to the primary (first active) agent.
- The selected agent is displayed in the properties panel for confirmation. Changes in CRM require a page refresh in the Visual Builder to update available options.
### Trigger Modes
Choose the mode that best fits your customer experience goals:
- **Always Visible**: The full chat window is persistently displayed. Best for high-engagement pages where immediate assistance is prioritized.
- **Icon Only (expands on click)**: Shows a floating chat icon that expands into the full widget when clicked. Recommended for most sites to minimize visual clutter while remaining accessible.
- **Triggered by User Action**: Hidden until activated by a custom event (e.g., button click or time delay). Requires additional configuration or custom JavaScript in advanced setups.
### Context Passing
Enable context passing to provide the AI Agent with real-time page data for more relevant responses. Available data typically includes:
- Current page URL
- Product SKU (on product pages)
- Cart contents summary (item count, total)
- Customer session data (if authenticated)
This is usually configured via a toggle/checkbox in the properties panel. No custom code is required for standard fields; advanced context can be extended via CRM Agent settings.
> **Note:** Configuration options are driven by the CRM Workforce settings. Changes there may require refreshing the widget properties.
* * *
## Testing the Widget
1. Save and publish (or preview) the StoreFront changes.
2. Open the live page in an incognito browser window.
3. Interact with the webchat icon or widget.
4. Verify the correct AI Agent responds and that context data (e.g., SKU, cart) is passed correctly.
5. Test on mobile devices to confirm responsive behavior.
6. Simulate no-agent scenarios by temporarily disabling the agent in CRM to observe fallback behavior.
* * *
## Troubleshooting
### Widget Does Not Appear in Search
**Symptoms**: Typing `webchat` yields no results.
**Solution**:
1. Confirm the AI Agent is active in CRM > Workforce.
2. Verify the StoreFront is linked to the correct CRM workspace (see Prerequisites).
3. Refresh the Visual Builder page or clear browser cache.
### Widget Not Visible on Live Site
**Symptoms**: Widget shows in preview but is missing on the published page.
**Solution**:
1. Verify the page (or footer template) was fully published.
2. Check for theme conflicts in the custom CSS/JS sections.
3. Confirm the widget was not accidentally set to hidden via visibility rules.
### Agent Not Responding or Wrong Agent Selected
**Symptoms**: Chat opens but receives no reply, errors, or uses the incorrect agent.
**Solution**:
- Review agent status, business hours, and logs in CRM > Workforce.
- Confirm the agent selection in the widget properties panel.
- Test the agent independently via the CRM preview interface.
### No Agent Available Behavior
When no agent is active (e.g., outside business hours or all agents disabled), the widget typically displays a fallback offline message defined in CRM settings, such as "Our team is currently offline. Please leave a message." The chat interface remains visible but does not route to a live agent.
## Related Documentation
- AI Agents Configuration in CRM Workforce - Agent setup, training, and business hours.
- StoreFront Visual Builder Overview - General builder usage and templates.
- StoreFront Theming and Layout Best Practices - Styling integration and footer templates.
---
# Workforce
https://docs.ultracart.com/customers-crm/workforce
doc_type: reference
Workforce is the supervisor and operations console for everyone who handles customer conversations in UltraCart -- human agents on the phone and in chat, and AI Agents handling webchat, SMS, voice, and tickets. It brings live status, activity history, daily performance, and shared configuration into a single area of the CRM.
## Overview
Workforce consolidates surfaces that used to live in separate places. Today it includes:
- **Dashboard** -- real-time fleet view of every agent (human and AI), their current status, channel activity, and queue coverage.
- **Timeline** -- a per-agent, per-day reconstruction of status changes, calls, and chats interleaved on a single time axis.
- **Daily Summary** -- date-range rollups of time-in-status, call counts, chat counts, and other activity metrics across the team.
- **Settings** -- shared configuration that applies across the workforce: agent status definitions, the account default timezone, AI budgets, and AI capabilities.
- **AI Agents** -- the configuration tree for AI Agents (personality, instructions, knowledge base, MCP servers). The dedicated AI Agents documentation section covers this in depth -- see [AI Agents](../ai-agents/index.md).
:::tip
AI Agents are managed inside Workforce in the app, but they have their own documentation section because of the depth of configuration involved. Use the [AI Agents](../ai-agents/index.md) docs for personality, instructions, capabilities, knowledge base, and MCP server topics.
:::
## Who can access Workforce
Workforce appears in the left navigation for any user who has at least one of these permissions: Calls Admin, Calls Supervisor, SMS/Web Chat Administrator, or the AI Agents permission. The pages a user actually sees inside Workforce depend on which of those permissions they hold:
| Permission | Pages available |
| --- | --- |
| Calls Admin or Calls Supervisor | Dashboard, Timeline, Daily Summary, Settings → Status & Timezone |
| SMS/Web Chat Administrator | Dashboard, Timeline, Daily Summary, Settings → Status & Timezone |
| AI Agents | Workforce → AI Agents (and any agent's detail page), Settings → AI Budgets, Settings → AI Capabilities |
A user with only the AI Agents permission lands on **Workforce → AI Agents** by default. They do not see the Dashboard, Timeline, Daily Summary, or Status & Timezone pages.
A user without any of these permissions does not see Workforce in the sidebar at all.
See [Permissions and roles](../calls/permissions-and-roles.md) for the Calls permission tiers.
## How Workforce fits with Calls and Conversations
Workforce is supervisory. It does not replace the agent-facing tools:
- **Calls** -- where an agent runs the softphone, manages their own status, and works the queues. Supervisors use Calls for [Queue monitoring](../calls/queue-monitoring-and-dashboard.md) and live call oversight.
- **Conversations** -- where an agent handles webchat and SMS threads.
- **Workforce** -- where supervisors look across the whole team, configure shared settings, and manage AI Agents.
Activity that happens in Calls and Conversations is what Workforce reports on. The same status changes, calls, and chats power the Dashboard, Timeline, and Daily Summary views.
## Key terminology
| Term | Definition |
| --- | --- |
| Agent | Any UltraCart user who handles conversations -- human or AI. AI Agents are users with the AI flag enabled. |
| Status | The agent's current availability state (Available, On Call, Wrap Up, Unavailable, or a custom status you define). Status drives whether the agent receives new work. |
| Routing effect | Whether a status makes the agent eligible for new calls and chats (`available`), keeps existing work but blocks new work (`busy`), or removes the agent from routing entirely (`unavailable`). |
| Heatmap | The Dashboard visualization that shows agent availability, call volume, or chat volume across a time window. |
| Rollup | A daily aggregation of an agent's time-in-status and activity counts. Daily Summary is built from rollups. |
| Timeline | A merged event log for one agent on one day, showing status changes, calls, and chats interleaved. |
## In this section
The Workforce Dashboard is the live fleet view. It shows every agent -- human and AI -- in one place, with their current status, the channels they are working, and the queues they cover. Use it to spot coverage gaps, see who is on a call right now, and understand how AI Agents and human agents are sharing the load.
Timeline reconstructs a single agent's day on a single time axis. It interleaves status changes, calls, and chats so you can see exactly what an agent was doing minute by minute. Use it to investigate specific incidents, audit time-in-status, or coach an agent through a difficult shift.
Daily Summary reports time-in-status and activity counts across your team for any date range. It is the right tool for performance review, payroll-adjacent reporting, and spotting trends across days, weeks, or months.
Workforce Settings holds the shared configuration that applies across your entire team. This includes the agent statuses available to everyone, the account default timezone, and the AI Agent budget and capability controls that govern all AI Agents on the account.
---
# Daily Summary
https://docs.ultracart.com/customers-crm/workforce/daily-summary
doc_type: reference
Daily Summary reports time-in-status and activity counts across your team for any date range. It is the right tool for performance review, payroll-adjacent reporting, and spotting trends across days, weeks, or months.
## Overview
Daily Summary is built from per-agent, per-day rollups. Each row represents one agent on one day and includes:
- **Time in each status** -- total seconds spent in Available, On Call, Wrap Up, Unavailable, and any custom statuses you have defined.
- **Call activity** -- inbound and outbound call counts and total talk time.
- **Chat activity** -- webchat and SMS thread counts.
- **Agent type** -- whether this row represents a human agent or an AI Agent.
Rollups are produced once per day in the agent's local timezone (using the [account default timezone](./workforce-settings.md#default-timezone) when an agent has not set their own).
## Selecting a date range
Daily Summary takes three inputs:
1. **Start date** -- the first day to include.
2. **End date** -- the last day to include (inclusive). Defaults to the same day as Start for a single-day view.
3. **Channel filter** -- All, PBX, or Chat. Filtering by channel hides activity columns from the other channel.
Rows are grouped by date so you can scan day-by-day, with each agent's row inside the day group.
## Separating human and AI activity
Each row is tagged as Human or AI. Use this to:
- Compare how many conversations AI Agents handled versus humans on a given day.
- Identify days when AI coverage filled in for absent human agents.
- Track AI Agent utilization as you tune budgets and capabilities.
The same data feeds the totals shown on the [Dashboard](./dashboard.md) for the current day -- Daily Summary is the historical view of the same numbers.
## Time-in-status accuracy
Time-in-status math is based on the status events recorded for the agent that day. If an agent stays in a status across midnight, the time is split between the two days at the midnight boundary in the relevant timezone.
If your team works across timezones and you want consistent rollups, set a common account default timezone in [Workforce Settings](./workforce-settings.md#default-timezone).
## When to use Daily Summary
- **Weekly or monthly performance reviews.**
- **Payroll cross-checks** for hours-paid versus hours-available.
- **Capacity planning** -- compare call/chat volume to time-available across the team.
- **AI ROI analysis** -- track AI Agent activity and time-saved over time.
For a single-agent, single-day deep dive, use [Timeline](./timeline.md). For real-time fleet status, use [Dashboard](./dashboard.md).
## Related pages
- [Dashboard](./dashboard.md)
- [Timeline](./timeline.md)
- [Workforce Settings](./workforce-settings.md)
---
# Dashboard
https://docs.ultracart.com/customers-crm/workforce/dashboard
doc_type: reference
The Workforce Dashboard is the live fleet view. It shows every agent -- human and AI -- in one place, with their current status, the channels they are working, and the queues they cover. Use it to spot coverage gaps, see who is on a call right now, and understand how AI Agents and human agents are sharing the load.

## Overview
The Dashboard pulls together three sources of truth:
- **Agent status** -- what each agent is set to right now (Available, On Call, Wrap Up, custom statuses, etc.).
- **Live PBX activity** -- which agents are on a call, and what queue the call came from.
- **Daily activity summary** -- today's call and chat counts so far, per agent.
The page refreshes automatically as status changes and calls flow through the system, so you do not need to reload to see updates.
## Reading the dashboard
Each agent appears as a card showing:
- **Name and avatar.**
- **Agent type indicator** -- AI Agents are marked with the AI iris icon. Human agents show their avatar.
- **Current status** with the status color and icon you configured in Settings.
- **Active call or chat**, if the agent is currently engaged.
- **Queue coverage** -- the queues this agent is logged into.
- **Today's totals** -- calls handled and chats handled so far today.
A low-availability indicator appears on the page when overall availability across the team drops below 60%. Use it as an early warning that you may need to bring more agents online or extend AI Agent coverage.
## Filtering by agent type
The Dashboard has an agent type filter at the top:
- **All** -- humans and AI together.
- **Human** -- only human agents.
- **AI** -- only AI Agents.
Filtering helps when you want to look at the human team and the AI fleet separately. AI Agents typically scale up and down differently than humans, so isolating them clarifies what each side of the workforce is doing.
## Fold-by-agent view
When the same human is configured as multiple agent identities, the Dashboard folds those rows together so you see one row per person. Expand the row to see the underlying agent identities.
## When to use the Dashboard
- **Start of shift** -- confirm the right agents are logged in and on the right queues.
- **During a surge** -- see who has capacity and whether AI Agents are absorbing load.
- **Spot checks** -- verify that an agent is actually in the status they should be in.
- **End of day** -- see today's running totals before pulling a full report.
For longer-range performance analysis, use [Daily Summary](https://ultracart.atlassian.net/wiki/pages/createpage.action?spaceKey=ucdoc&title=Daily%20Summary&linkCreation=true&fromPageId=4392386563). For a single agent's full day reconstruction, use [Timeline](https://ultracart.atlassian.net/wiki/pages/createpage.action?spaceKey=ucdoc&title=Timeline&linkCreation=true&fromPageId=4392386563).
## Related pages
- [Timeline](https://ultracart.atlassian.net/wiki/pages/createpage.action?spaceKey=ucdoc&title=Timeline&linkCreation=true&fromPageId=4392386563)
- [Daily Summary](https://ultracart.atlassian.net/wiki/pages/createpage.action?spaceKey=ucdoc&title=Daily%20Summary&linkCreation=true&fromPageId=4392386563)
- [Workforce Settings](https://ultracart.atlassian.net/wiki/pages/createpage.action?spaceKey=ucdoc&title=Workforce%20Settings&linkCreation=true&fromPageId=4392386563)
- [Queue monitoring](../calls/queue-monitoring-and-dashboard.md)
---
# Timeline
https://docs.ultracart.com/customers-crm/workforce/timeline
doc_type: reference
Timeline reconstructs a single agent's day on a single time axis. It interleaves status changes, calls, and chats so you can see exactly what an agent was doing minute by minute. Use it to investigate specific incidents, audit time-in-status, or coach an agent through a difficult shift.

## Overview
Timeline merges three event streams for the agent and date you select:
- **Status events** -- every transition between statuses (Available, On Call, Wrap Up, custom statuses, etc.) with timestamps.
- **Call events** -- every inbound and outbound call the agent participated in, with start/end times and disposition.
- **Chat events** -- every webchat and SMS thread the agent worked, with start/end times.
The events are sorted chronologically and shown as a unified log. You can filter to just calls, just chats, or both.
## Selecting an agent and date
Timeline requires three inputs:
1. **Agent** -- pick from any agent on your account (human or AI).
2. **Date** -- defaults to today. You can pick any date for which activity exists.
3. **Channel filter** -- All, PBX (calls), or Chat. Status events always appear regardless of the filter.
Once an agent is selected, the page loads and rerenders whenever you change date or channel.
## Reading the timeline
Each row in the unified log shows:
- **Time** -- the local time the event occurred.
- **Kind** -- status, call, or chat.
- **Label** -- a short description (e.g. "Available", "Inbound call from +1 555-0142", "Chat started -- support queue").
- **Detail** -- additional context like queue name, disposition, customer match, or duration.
Status events use the colors and icons you configured for each status in [Workforce Settings](https://ultracart.atlassian.net/wiki/pages/createpage.action?spaceKey=ucdoc&title=Workforce%20Settings&linkCreation=true&fromPageId=4392222725), so the same visual language carries from the Dashboard into the Timeline.
## When to use the Timeline
- **Investigating a specific incident.** A customer complains about a long hold time on a specific call -- pull up the agent's timeline for that day and see exactly what was happening around that minute.
- **Auditing time-in-status.** Verify that an agent's status reflects what they were actually doing.
- **Coaching.** Walk through an agent's shift with them to spot patterns and improvement areas.
- **Reviewing AI Agent activity.** Pick an AI Agent to see exactly what conversations it handled and when.
For aggregate trends across many days or many agents, use [Daily Summary](https://ultracart.atlassian.net/wiki/pages/createpage.action?spaceKey=ucdoc&title=Daily%20Summary&linkCreation=true&fromPageId=4392222725).
## Related pages
- [Dashboard](./dashboard.md)
- [Daily Summary](https://ultracart.atlassian.net/wiki/pages/createpage.action?spaceKey=ucdoc&title=Daily%20Summary&linkCreation=true&fromPageId=4392222725)
- [Workforce Settings](https://ultracart.atlassian.net/wiki/pages/createpage.action?spaceKey=ucdoc&title=Workforce%20Settings&linkCreation=true&fromPageId=4392222725)
- [Call history and analytics](../calls/call-history-and-analytics.md)
---
# Workforce Settings
https://docs.ultracart.com/customers-crm/workforce/workforce-settings
doc_type: reference
Workforce Settings holds the shared configuration that applies across your entire team. This includes the agent statuses available to everyone, the account default timezone, and the AI Agent budget and capability controls that govern all AI Agents on the account.
## Overview
Settings is organized into three sub-pages:
- **Status & Timezone** -- define the agent statuses your team uses and set the account default timezone for reporting.
- **AI Budgets** -- daily and monthly token-spend caps that apply collectively to all AI Agents.
- **AI Capabilities** -- the actions and data access that AI Agents are allowed to use.
The Status & Timezone page is available to PBX and Chat administrators. AI Budgets and AI Capabilities are available to users with the AI Agents permission.
:::tip
AI Budgets and AI Capabilities used to live under **AI Agents > Settings**. They now live under **Workforce > Settings**, alongside agent status configuration. The settings themselves are unchanged -- only the location moved.
:::
## Status & Timezone
This page configures the statuses your agents can choose from and the timezone used for reports.
### Agent statuses
UltraCart ships with a set of built-in parent statuses for both PBX (calls) and Chat:
| Channel | Built-in statuses |
| --- | --- |
| PBX | Available, On Call, Wrap Up, Unavailable |
| Chat | Available, Busy, Unavailable |
Each built-in status has a fixed **routing effect** that controls whether the agent receives new work:
| Routing effect | Behavior |
| --- | --- |
| Available | Agent is eligible for new calls and chats. |
| Busy | Agent stays connected to existing work but does not receive new work. |
| Unavailable | Agent is removed from routing entirely. |
You can add custom statuses (for example, "Lunch", "Training", "Coaching", "Meeting") and choose:
- **Channel** -- PBX, Chat, or Both.
- **Parent status** -- which built-in status this custom status falls under, which determines its routing effect.
- **Color** -- one of the curated palette colors, used in the Dashboard, Timeline, and Daily Summary.
- **Icon** -- a Material icon from the curated palette, used to make statuses visually scannable.
- **Sort order** -- how this status appears in the agent's status picker.
There is a cap on the number of active custom statuses to keep the picker manageable.
### Default timezone
The account default timezone is used for:
- Daily rollup boundaries in [Daily Summary](./daily-summary.md).
- Time-of-day labels in [Timeline](./timeline.md) when an agent has no explicit timezone.
- Heatmap and date filters across the Workforce views.
Choose a timezone that reflects the bulk of your operation. Individual agents can override this with their own timezone preference.
## AI Budgets
AI Budgets cap how much you spend on AI Agent token consumption per day and per month. Caps apply to **all AI Agents collectively**, not per agent. When a cap is reached, AI Agents stop picking up new conversations until the cap resets or you raise it.
For full guidance on planning daily and monthly budgets, including pricing and reset behavior, see [Budgets](../ai-agents/budgets.md).
## AI Capabilities
AI Capabilities control what actions your AI Agents can perform and what customer data they can access. Capabilities apply to all AI Agents on your account.
For the full list of capabilities and what each one enables, see [AI Agent capabilities](../ai-agents/ai-agent-capabilities.md).
## Related pages
- [Dashboard](./dashboard.md)
- [Timeline](./timeline.md)
- [Daily Summary](./daily-summary.md)
- [AI Agents overview](../ai-agents/index.md)
- [Budgets](../ai-agents/budgets.md)
- [AI Agent capabilities](../ai-agents/ai-agent-capabilities.md)
---
# Essentials
https://docs.ultracart.com/developer/essentials
doc_type: explanation
# Essentials
The foundations every integration needs, written once and linked from everywhere. Read these
before you write much code, they're all short, and they'll save you grief. The UltraCart API
is organized around REST and JSON: resource-oriented URLs, defined with the OpenAPI (Swagger)
specification, with JSON for the request and response bodies wherever possible.
## Getting started
- **[Authentication](./authentication.md)**: OAuth 2.0 for multi-merchant apps, or a Simple
Key for in-house automation.
- **[OAuth 2.0 Guide](./oauth.mdx)**: register a developer application and walk the full
authorization-code flow to a Bearer access token.
- **[Versioning](./versioning.md)**: the `X-UltraCart-Api-Version` header, required on every
request.
- Download and install your [SDK of choice](../sdks/index.md), then review the samples to
jump-start your project.
## How requests and responses work
- **[Standard Responses](./standard-responses.md)**: the `success` / `error` / `metadata`
envelope shared by every endpoint.
- **[Errors](./errors.md)**: HTTP status codes and the structured error object.
- **[Object Identifiers](./object-identifiers.md)**: OIDs, their human-friendly companions,
and how to set or clear them.
- **[Expanding Objects](./expanding-objects.md)**: the `_expand` parameter for partial
objects and leaner payloads.
- **[Pagination](./pagination.md)**: paging large result sets with `_offset` and
`result_set` metadata.
- **[Sorting](./sorting.md)**: ordering results with the `_sort` parameter.
- **[Date/Times](./date-times.md)**: ISO-8601 everywhere.
## Operating in production
- **[Rate Limiting](./rate-limiting.md)**: quotas, the leaky-bucket algorithm, and the
no-concurrency rule.
- **[Request IDs](./request-ids.md)**: the `X-UltraCart-Request-Id` header for tracing and
support.
- **[Webhooks](./webhooks.md)**: asynchronous event delivery instead of polling.
Once you know the essentials, head to the [API Reference](/developer/api) for the per-endpoint
details.
---
# Authentication
https://docs.ultracart.com/developer/essentials/authentication
doc_type: explanation
# Authentication
Our APIs support two primary methods of authentication:
- **OAuth 2.0**
- **Simple Key**
OAuth 2.0 authentication is the industry-standard way of authenticating a third-party
application, such as a plugin, to an UltraCart account with a limited set of permissions.
If you're developing an application that is going to be used by **multiple merchants**,
then OAuth 2.0 authentication is appropriate.
Simple key authentication is exactly what it sounds like: a simple key generated by the
system that is useful for authenticating API calls for your organization. If you're
developing an **in-house application** to automate interactions with UltraCart, then simple
key authentication is the appropriate mechanism to use.
All of the client libraries generated for the UltraCart REST API support both methods of
authentication.
## OAuth 2.0
Authenticating with OAuth 2.0 involves having the end user click the authorization link.
The URL contains the client ID for your Developer Application, redirect information
(optional), the request type of `code`, and a random number. When the user clicks the link,
they are taken to the UltraCart login page. The user must log in first, then they are shown
a page about your application and the permissions it is requesting, and are given the chance
to approve or deny it. If they approve the application, their browser is redirected to a
page that takes the `code` parameter from the URL and then calls the OAuth `/token` REST API
to exchange the temporary authorization code for a more permanent access token.
For a full walkthrough covering registration of your application and the complete
authorization-code flow, see the [OAuth 2.0 Guide](./oauth.mdx). The `/authorize` and `/token` endpoints themselves are
documented in the [OAuth reference](/developer/api/oauth).
## Simple Key
The simple key authentication is by far the simplest. When you create a new application under:
```
Configuration -> Back Office -> Authorized Applications
```
and choose simple key as your authentication scheme, a very long key is generated for your
application to use. This key is easily specified when instantiating the API. If you're doing
individual internal development, use this authentication scheme.
## Security requirements
All API requests must be made over HTTPS. Calls made over plain HTTP will fail. API requests
without authentication will also fail.
:::tip
If your application is running from a known IP address, we encourage you to also restrict API
calls to that particular IP address as an added security measure.
:::
:::note
Every request must also send the [API version header](./versioning.md). Requests without it
will fail.
:::
---
# Date/Times
https://docs.ultracart.com/developer/essentials/date-times
doc_type: reference
# Date/Times
All of the date/time objects within our REST API are String variables in the format
**ISO-8601**. This is the standard format utilized by the OpenAPI specification, but it also
provides a host of other benefits, including:
- **Natural sorting**: It sorts in any language without any additional work.
- **Time zone support**: Since the timestamp specifies the time zone, it can be converted to
the user's local time with minimal work in most languages.
- **Locale neutral**: There is no ambiguity about the order in which the date/time components
appear for an ISO-8601 string. You can use your language's libraries to format it in the
locale-specific way for display.
- **Language support**: Because ISO-8601 is used in standards published by the W3C and the
IETF, every major language has mature libraries available for parsing ISO-8601 formats.
Don't reinvent the wheel on this one!
---
# Error Reference
https://docs.ultracart.com/developer/essentials/error-reference
doc_type: reference
# Error Reference
A catalogue of the failures merchants actually hit against the REST API, what causes each one,
and how to fix it.
[Errors](./errors.md) covers the error object and what each status code means. This page starts
where that one stops: the specific failures, in the order you are likely to meet them.
* * *
## Reading an error
Every failed call returns an `error` object carrying a `developer_message` to log and a
`user_message` that is safe to show a customer. [Errors](./errors.md) documents the full shape
and the status-code semantics.
Two things trip people up. UltraCart application errors arrive on `apiResponse.error` with a
`200`, so checking the HTTP status alone is not enough. And `developer_message` is the one worth
logging; `user_message` is deliberately vague.
### Handling an error in each SDK
**PHP:**
```php
$api_response = $order_api->getOrder($order_id, $expansion);
if ($api_response->getError() != null) {
error_log($api_response->getError()->getDeveloperMessage());
error_log($api_response->getError()->getUserMessage());
exit();
}
```
**Python:**
```python
api_response = order_api.get_order(order_id, expand=expand)
if api_response.error:
print(f"Developer Message: {api_response.error.developer_message}")
print(f"User Message: {api_response.error.user_message}")
exit()
```
**JavaScript/TypeScript:**
```javascript
const apiResponse = await orderApi.getOrder({orderId, expand: expansion});
if (apiResponse.error) {
console.error('Developer Message:', apiResponse.error.developer_message);
console.error('User Message:', apiResponse.error.user_message);
throw new Error('Failed to retrieve order');
}
```
**C#:**
```csharp
OrderResponse apiResponse = orderApi.GetOrder(orderId, expansion);
if (apiResponse.Error != null) {
Console.Error.WriteLine(apiResponse.Error.DeveloperMessage);
Console.Error.WriteLine(apiResponse.Error.UserMessage);
Environment.Exit(1);
}
```
**Ruby:**
```ruby
api_response = order_api.get_orders_batch(
order_query_batch: order_batch,
opts: { '_expand' => expansion }
)
if api_response.error
warn "Developer Message: #{api_response.error.developer_message}"
warn "User Message: #{api_response.error.user_message}"
exit 1
end
```
* * *
## Rate limits and retries
[Rate limiting](./rate-limiting.md) documents the account-wide limits and the `429` response.
Some endpoints carry their own tighter limits on top of those:
| Endpoint Type | Rate Limit | Notes |
| --- | --- | --- |
| Most endpoints | Varies by endpoint | Standard rate limiting |
| Item inventory (`GET /items/inventory`) | Max 1 call per 15 minutes | Strictly enforced |
| Batch operations | 500 items max per request | Exceeding returns 400 error |
The PHP SDK retries automatically when a rate limit is hit. Pass `max_retry_seconds` to
`usingApiKey()` to set the budget. The other SDKs leave retrying to you.
**Manual Retry Logic:**
**JavaScript:**
```javascript
async function retryRequest(requestFunc, maxRetries = 5) {
for (let attempt = 0; attempt < maxRetries; attempt++) {
try {
const response = await requestFunc();
if (response.status !== 429) {
return response;
}
// Get retry-after header if present
const retryAfter = response.headers.get('Retry-After');
const delay = retryAfter ? parseInt(retryAfter) * 1000 : Math.pow(2, attempt) * 1000;
await new Promise(resolve => setTimeout(resolve, delay));
} catch (error) {
if (attempt === maxRetries - 1) throw error;
}
}
throw new Error('Max retries exceeded');
}
```
**Python:**
```python
import time
import random
def retry_request(request_func, max_retries=5):
for attempt in range(max_retries):
try:
response = request_func()
if response.status_code != 429:
return response
retry_after = response.headers.get('Retry-After')
delay = int(retry_after) if retry_after else (2 ** attempt)
time.sleep(delay + random.uniform(0, 1))
except Exception as e:
if attempt == max_retries - 1:
raise e
raise Exception("Max retries exceeded")
```
**Best Practices:**
1. Implement exponential backoff with jitter
2. Honor `Retry-After` header when present
3. Cache frequently accessed data (items, allowed countries)
4. Batch requests when possible
5. Monitor API usage patterns
* * *
## Cart and Checkout Errors
### Hosted Fields Required (PCI 3.0)
**Error Context:** As of June 2015, credit card numbers cannot be sent directly to the API.
**Solution:** Use UltraCart Hosted Fields for PCI 3.0 compliance.
**Old (No longer works):**
```
cart.creditCardNumber = '4111111111111111'; // ❌ Not allowed
```
**Correct (Hosted Fields):**
```
// 1. Load Hosted Fields library
// 2. Initialize Hosted Fields
UltraCart.HostedFields.initialize({
// configuration
});
// 3. Tokenize card before checkout
UltraCart.HostedFields.tokenize(function(token) {
cart.creditCardToken = token; // ✅ Use token instead
// Proceed with checkout
});
```
### Cart Session Expiration
**Symptom:** Cart ID becomes invalid, causing 404 errors.
**Cause:** Cart sessions expire after inactivity.
**Solution:**
1. Store `cartId` in browser cookie
2. Create new cart if existing cart returns 404
3. Implement cart recovery for logged-in customers
```
function getOrCreateCart() {
const savedCartId = getCookie('UltraCartCartId');
if (savedCartId) {
// Try to retrieve existing cart
return fetchCart(savedCartId).catch(error => {
if (error.status === 404) {
// Cart expired, create new one
return createNewCart();
}
throw error;
});
}
return createNewCart();
}
```
### Arbitrary Unit Cost Errors
**Error:** Using `arbitraryUnitCost` on items not configured for it.
**Cause:** Item must be configured in UltraCart admin to allow arbitrary pricing.
**Solution:**
1. Configure item in admin: **Items → Edit Item → Pricing**
2. Enable "Allow Arbitrary Unit Cost"
3. Set min/max bounds if needed
```
// Now this will work
{
"item_id": "DONATION",
"quantity": 1,
"arbitraryUnitCost": 50.00
}
```
### Distribution Center Not Configured for REST API
**HTTP Status:** 400
**Headers:**
```
HTTP/1.1 400
X-UltraCart-Request-Id: 8376DD8AC3EA6A019A4ADA5E291F43489
Content-Type: application/json; charset=UTF-8
UC-REST-ERROR: Distribution center is not configured for REST API transport.
```
**Error Response:**
```
{
"error": {
"developer_message": "Distribution center is not configured for REST API transport.",
"user_message": "Distribution center is not configured for REST API transport."
},
"metadata": {}
}
```
**Cause:** The distribution center is not properly configured to use REST API as its transmission mechanism.
**Solution:**
**Step 1: Navigate to Distribution Center Settings**
1. Log into [secure.ultracart.com](http://secure.ultracart.com)
2. Go to: **Configuration → Checkout → Shipping → Distribution Centers**
- Direct URL: `https://secure.ultracart.com/merchant/configuration/shipping/distributionCenterListLoad.do`
3. Click **Edit** next to the distribution center
**Step 2: Verify Basic Configuration** In the **Distribution Center** tab, ensure these required fields are filled:
- Code
- Name
- Postal Code
- State
- Country
**Step 3: Configure Transmission Mechanism**
1. Click on the **Transmission Mechanism** tab
2. Set **Transmission Method** to: **REST**
3. In the **Authorized Application (required)** dropdown:
- Select your authorized OAuth application
- This links your API application to the distribution center
4. **Important:** Scroll to bottom and click **Save**
**Step 4: Verify Configuration** After saving, the distribution center should now accept REST API calls for:
- Order creation via REST
- Order status updates
- Shipping notifications
- Inventory management
**Common Mistakes:**
- Forgetting to save after changing transmission method
- Not having an authorized OAuth application created yet
- Selecting wrong application from dropdown
- Missing required fields in Distribution Center tab (prevents saving)
**Create Authorized Application (if needed):**
1. Navigate to: **Configuration → OAuth Applications**
2. Create new OAuth application
3. Grant necessary permissions (orders, shipping, etc.)
4. Return to Distribution Center settings
5. Select newly created application from dropdown
**Verification Test:**
```
// Test if distribution center is properly configured
// Attempt to create or update an order via REST API
// Should succeed without the 400 error
```
**Related Errors:**
- If you haven't created an OAuth application yet, the "Authorized Application" dropdown will be empty
- If the distribution center basic info is incomplete, you won't be able to save the transmission mechanism settings
* * *
## Payment Processing Errors
These errors surface while the gateway processes the payment, not when the call returns:
### Credit Card Declined
**User Message:** "Your card was declined. Please use a different payment method."
**Common Reasons:**
- Insufficient funds
- Incorrect billing address (AVS mismatch)
- Card expired
- Card reported lost/stolen
- Incorrect CVV
**User Action:** User is redirected back to `redirectOnErrorUrl` to try again.
### Payment Gateway Timeout
**Symptom:** Order processing takes unusually long, then fails.
**Cause:** Payment gateway not responding.
**UltraCart Handling:**
- Timeout handled during redirect phase
- User redirected back to retry
- No browser timeout because processing happens server-side
### CVV Validation Failure
**Error:** CVV verification failed.
**Notes:**
- UltraCart does not store CVV values
- If using stored credit cards, configure gateway to not require CVV
- For new cards, CVV is always required unless gateway configured otherwise
* * *
## Resource Errors
### 404 Not Found - Resource Does Not Exist
**Common Causes:**
1. **Invalid Order ID:**
```
// Error: Order doesn't exist
orderApi.getOrder('INVALID-ORDER-ID', expansion)
```
2. **Invalid Item ID:**
```
// Error: Item not found
itemApi.getItem('NON_EXISTENT_ITEM')
```
3. **Typo in endpoint URL:**
```
// Error: Wrong endpoint
'/rest/v2/order/DEMO-123' // ❌ Missing 's'
'/rest/v2/orders/DEMO-123' // ✅ Correct
```
4. **Trailing slash causes 404:**
```
// Error: Trailing slash
'/rest/v2/orders/' // ❌
'/rest/v2/orders' // ✅
```
**Solution:** Verify:
- Resource identifier is correct
- Endpoint URL matches API documentation
- No trailing slashes
- Proper URL encoding of parameters
### 404 for Private Resources (Security Measure)
**Note:** UltraCart returns 404 (not 403) for private resources you don't have access to, avoiding confirmation of their existence.
**If you get 404 for a resource you know exists:**
1. Check authentication credentials
2. Verify API key has required scopes/permissions
3. Confirm user has necessary role (e.g., organization owner)
* * *
## Server Errors
### 500 Internal Server Error
**Cause:** Unexpected server-side error.
**Action:**
1. Check request for malformed data
2. Retry request after brief delay
3. If persists, contact UltraCart support with request details
4. Provide request ID if available
### 502 Bad Gateway / 503 Service Unavailable
**Cause:** Server temporarily unavailable or under maintenance.
**Action:**
1. Wait and retry after exponential delay
2. Check UltraCart status page
3. If prolonged, contact support
**Example Retry Logic:**
```
async function robustRequest(requestFunc) {
const delays = [1000, 2000, 5000, 10000]; // milliseconds
for (let delay of delays) {
try {
const response = await requestFunc();
if (response.status < 500) {
return response;
}
} catch (error) {
// Log error
}
await new Promise(resolve => setTimeout(resolve, delay));
}
throw new Error('Service unavailable after retries');
}
```
* * *
## Troubleshooting Tips
### Debugging Checklist
1. **Check browser console** (for frontend issues)
- Open developer tools (F12)
- Look for JavaScript errors
- Inspect network tab for API calls
- Check request/response headers and payloads
2. **Examine response headers**
- Error messages often in response headers
- Look for `X-UC-Error` or similar headers
3. **Enable debug mode** (SDK-specific)
```
// PHP - Enable debug mode
$client = new GuzzleHttp\Client(['verify' => true, 'debug' => true]);
```
4. **Use Server-Side Logging**
- Enable in UltraCart admin: **Developer Tools → Call History Log**
- Navigate to: Configuration → Manage Users → Edit User
- Grant "API Access" permission
- View last 100 API calls with full details
5. **Check API call history**
- Log into [secure.ultracart.com](http://secure.ultracart.com)
- Go to **Developer Tools → Call History Log**
- View request/response details
- Examine transmission logs for errors
### Common Pitfalls
1. **Not handling errors in response objects**
- Always check for `error` or `errors` field
- Don't assume success based on HTTP 200 status
2. **Using deprecated API version**
- Version 1 is legacy
- Use Version 2 with SDKs for all new development
3. **Incorrect content-type header**
```
// Wrong
headers: { 'Content-Type': 'text/plain' }
// Correct
headers: { 'Content-Type': 'application/json; charset=UTF-8' }
```
4. **Not URL encoding parameters**
```
// Wrong
`/rest/v2/item/${itemId}` // If itemId contains special chars
// Correct
`/rest/v2/item/${encodeURIComponent(itemId)}`
```
### Getting Help
**Community Support:**
- Post issues on GitHub: [https://github.com/UltraCart](https://github.com/UltraCart)
- Check existing issues for solutions
- Response time: 24-48 hours
**Professional Services:**
- Rate: $100/hour (1 hour minimum)
- For API development questions and troubleshooting
- Contact via UltraCart admin panel
**What to Include in Support Requests:**
1. Full error message (developer\_message and user\_message)
2. Request details (endpoint, method, parameters)
3. Response body and headers
4. Steps to reproduce
5. API call history log entry (from UltraCart admin)
6. SDK version and language
* * *
## Best Practices
### Error Handling
1. **Always check for errors first:**
```
if (apiResponse.error) {
// Handle error
return;
}
// Process success response
```
2. **Log errors appropriately:**
```
// Log technical details server-side
console.error('API Error:', apiResponse.error.developer_message);
// Show user-friendly message to customer
displayMessage(apiResponse.error.user_message);
```
3. **Implement retry logic with backoff:**
- Use exponential backoff for retries
- Add jitter to prevent thundering herd
- Respect `Retry-After` header
4. **Handle errors gracefully:**
```
try {
const result = await apiCall();
return result;
} catch (error) {
if (error.status === 429) {
// Rate limited - retry later
await retryWithBackoff();
} else if (error.status >= 500) {
// Server error - show maintenance message
showMaintenanceMessage();
} else {
// Client error - show specific message
showErrorMessage(error.message);
}
}
```
### Security
1. **Never expose API keys in client-side code:**
```
// ❌ WRONG - API key in browser
const API_KEY = 'your-api-key-here';
// ✅ CORRECT - API key on server only
// Use OAuth for browser-based apps
```
2. **Use OAuth for third-party integrations:**
- Simple API Key for internal/server-side use
- OAuth 2.0 for apps that access customer data
3. **Restrict API users:**
- Create dedicated API user
- Grant only "API Access" permission
- Restrict by IP address if possible
4. **Use HTTPS always:**
- All API endpoints require HTTPS
- Never send credentials over HTTP
### Performance
1. **Use expansion parameters wisely:**
```
// Only request fields you need
expansion = "items,summary" // ✅ Minimal payload
// Avoid requesting everything
expansion = "*" // ❌ Largest payload
```
2. **Implement caching:**
```
// Cache rarely-changing data
const allowedCountries = await cache.get('countries') ||
await fetchAndCache('countries');
```
3. **Batch operations when possible:**
```
// Batch order retrieval
orderApi.getOrdersBatch({
order_ids: ['ORDER1', 'ORDER2', 'ORDER3']
});
```
4. **Monitor API usage:**
- Track request counts
- Set up alerts near rate limits
- Optimize inefficient code patterns
### Development Workflow
1. **Use demo merchant ID for testing:**
- Merchant ID: `DEMO`
- Test without affecting production
2. **Test in sandbox before production:**
- Validate integrations thoroughly
- Test error scenarios
- Verify payment processing
3. **Keep SDKs updated:**
```
# Check for updates regularly
composer update ultracart/rest_api_v2_sdk_php
pip install --upgrade ultracart-rest-api-v2
npm update ultracart_rest_api_v2_typescript
```
4. **Follow SDK conventions:**
- Use language-specific SDK patterns
- Use the built-in retry logic (PHP SDK)
- Follow SDK documentation for your language
* * *
## Quick Reference
### Most Common Errors
| Error | HTTP Code | Quick Fix |
| --- | --- | --- |
| Permission Denied | 401 | Enable API Access for user |
| Rate Limited | 429 | Wait and retry with backoff |
| Order Not Found | 404 | Verify order ID is correct |
| Invalid JSON | 400 | Validate JSON syntax |
| Distribution Center Not Configured | 400 | Set transmission method to REST, select authorized app |
| Credit Card Declined | N/A | User must try different card |
### Essential Headers
```
// For Simple API Key authentication
{
'x-ultracart-simple-key': 'YOUR_API_KEY'
}
// For OAuth authentication
{
'Authorization': 'Bearer YOUR_ACCESS_TOKEN'
}
```
### Key Endpoints
| Endpoint | Method | Purpose |
| --- | --- | --- |
| `/rest/v2/checkout/cart` | GET | Retrieve cart |
| `/rest/v2/checkout/cart` | PUT | Update cart |
| `/rest/v2/checkout/cart/checkout` | POST | Submit checkout |
| `/rest/v2/checkout/cart/validate` | POST | Validate cart |
| `/rest/v2/order/orders/{order_id}` | GET | Get order details |
| `/rest/v2/item/items/{item_id}` | GET | Get item details |
* * *
## Additional Resources
- **API Reference:** [every operation, generated from the OpenAPI spec](../api)
- **Errors:** [the error object and status-code semantics](./errors.md)
- **Rate limiting:** [account limits and the 429 response](./rate-limiting.md)
- **SDKs & Samples:** [install and authenticate an SDK](../sdks/index.md)
- **SDK Samples:** [https://github.com/UltraCart/sdk\_samples](https://github.com/UltraCart/sdk_samples)
- **GitHub Repositories:** [https://github.com/UltraCart](https://github.com/UltraCart)
* * *
## FAQ
**Q: Why are my REST API requests blocked (403 error) when using Claude Code or another AI coding tool?**
A: UltraCart may block REST API requests when the application sends a generic Python user agent, such as the default user agent generated by some scripts, libraries, or AI coding tools. UltraCart’s firewall does not allow requests that appear to come from generic Python scripts because they can resemble automated scraping or abusive traffic.
To avoid this issue, configure your REST API application to send a more descriptive application user agent. For example:
```
OpenAPI-Generator/4.1.91/python
```
When using tools such as Claude Code, review the generated HTTP client code and confirm that the `User-Agent` header is set explicitly. The user agent should identify the application or SDK rather than relying on a default Python value.
Example header:
```
User-Agent: OpenAPI-Generator/4.1.91/python
```
> **Tip:** If your API requests suddenly receive firewall-related errors or appear to be blocked before reaching the UltraCart REST API, check the `User-Agent` header first. A generic Python user agent is a common cause when the client code was generated or modified by an AI coding tool.
* * *
## Support
**Free Support:**
- GitHub Issues: Post technical questions
- Documentation: Comprehensive guides and examples
- Community: Developer forums
**Paid Support:**
- Professional Services: $100/hour
- Custom integration assistance
- Priority troubleshooting
**Contact:**
- Email: [support@ultracart.com](mailto:support@ultracart.com)
- Portal: [secure.ultracart.com](http://secure.ultracart.com)
- Phone: Available in admin panel
* * *
_Last Updated: November 2025_
_API Version: 2.0_
_Guide Version: 1.0_
---
# Errors
https://docs.ultracart.com/developer/essentials/errors
doc_type: reference
# Errors
UltraCart uses conventional HTTP response codes to indicate the success or failure of an API
request. In general:
- **2xx** codes indicate success.
- **4xx** codes indicate an error that failed given the information provided (e.g., a required
parameter was omitted, a value is inappropriate, your requests are happening at too fast a
rate, etc.).
- **5xx** codes indicate an error with UltraCart's servers (these are rare).
Most API responses contain the following attributes:
| Attribute | Data Type |
|---|---|
| `success` | boolean |
| `error` | Error |
In addition to returning a non-2xx HTTP response code, the response body is a JSON object with
these particular fields populated. This gives you a more granular understanding of the error
that is returned.
:::tip
When you exceed your request quota you'll receive a `429 Too Many Requests` response. See
[Rate Limiting](./rate-limiting.md) for the limits and how to stay within them.
:::
---
# Expanding Objects
https://docs.ultracart.com/developer/essentials/expanding-objects
doc_type: explanation
# Expanding Objects
In order to limit the size of the responses and the number of API calls to the server,
UltraCart supports expanding certain objects through the `_expand` query parameter. The best
example of expansion is the item object, because items contain a large amount of data. Often
programs want to query an item, but only a portion of it, make a change, and then update the
item. REST expansion lets you indicate how you want the object expanded beyond the basic
object on the retrieval request. This reduces the need to make additional API calls to fetch
deeper information, as most REST APIs require. Then on the update API calls, if the object is
only partially expanded, then only those portions of the object are updated, the rest of the
object that exists on the server is left alone.
Using REST expansion will:
- Make your REST API calls faster
- Reduce the bandwidth consumed by your API calls
- Provide simpler objects to work with
Each REST API that supports expansion will have the `_expand` parameter documented on the API
call. The corresponding create/update REST APIs will handle receiving the partially expanded
object without any special action on your part.
:::note
The exact same expansion syntax used on the `_expand` parameter is also used in our
[webhook](./webhooks.md) configuration to specify the amount of expansion for the objects that
you receive notices on.
:::
## Example
Here is an example of a real-world `_expand` parameter from a WordPress plugin:
```
_expand=pricing,shipping.distribution_centers,content.multimedia.thumbnails[filter(100,100,"png", true),filter(360,360, "png", true)]
```
The sample expansion above tells the system that the call is interested in:
- pricing
- shipping
- distribution_centers (this contains the inventory information)
- content
- multimedia
- thumbnails (filtered to 100x100 square PNGs and 360x360 square PNGs)
**Basic item response**
```json
{
"merchant_item_oid": 875851,
"merchant_id": "DEMO",
"merchant_item_id": "Baseball Bat",
"description": "Wood Baseball Bat",
"description_translated_text_instance_oid": 649867,
"last_modified_dts": "2016-08-11T16:14:46-04:00",
"creation_dts": "2009-01-14T18:30:42-05:00"
}
```
**Expanded item response**
```json
{
"merchant_item_oid": 875851,
"merchant_id": "DEMO",
"merchant_item_id": "Baseball Bat",
"description": "Wood Baseball Bat",
"description_translated_text_instance_oid": 649867,
"last_modified_dts": "2016-08-11T16:14:46-04:00",
"creation_dts": "2009-01-14T18:30:42-05:00",
"pricing": {
"cost": 5.50
},
"shipping": {
"distribution_centers": [{
"distribution_center_oid": 29522,
"distribution_center_code": "DFLT",
"inventory_level": 4,
"handles": true,
"allocated_to_placed_orders": 2,
"allocated_to_shopping_carts": 0,
"available_to_allocate": 2
}]
},
"content": {
"view_url": "http://www.testajax.com/catalog/DEMO/products/facebook/fb-single/Baseball Bat.html",
"multimedia": [{
"merchant_item_multimedia_oid": 239393,
"file_name": "baseballbat.jpg",
"description": "Baseball Bat",
"url": "//secure.ultracart.com/itemmultimedia/DEMO/BASEBALL BAT/baseballbat.jpg",
"type": "Image",
"code": "default",
"width": 108,
"height": 120,
"thumbnails": [{
"height": 100,
"width": 100,
"http_url": "http://ultracartthumbs.s3.amazonaws.com/1363101689475/DEMO/0/1/100-100-01C192A2E7695865D44C6C51ECE91A29.jpg",
"https_url": "https://s3.amazonaws.com/ultracartthumbs/1363101689475/DEMO/0/1/100-100-01C192A2E7695865D44C6C51ECE91A29.jpg",
"square": true
}, {
"height": 360,
"width": 360,
"http_url": "http://ultracartthumbs.s3.amazonaws.com/1472069542543/DEMO/0/1/360-360-01C192A2E7695865D44C6C51ECE91A29.jpg",
"https_url": "https://s3.amazonaws.com/ultracartthumbs/1472069542543/DEMO/0/1/360-360-01C192A2E7695865D44C6C51ECE91A29.jpg",
"square": true
}]
}]
}
}
```
---
# Object Identifiers
https://docs.ultracart.com/developer/essentials/object-identifiers
doc_type: explanation
# Object Identifiers
As with many enterprise applications, internal objects are often assigned an object
identifier, **oid** for short, that is unique to each object of a given type. Throughout
the REST API specification you will see pairs of fields that provide the object identifier as
well as the human-friendly identifier.
Let's take a look at the `ItemShippingPackageRequirement` model. This model contains two fields:
- `package_name`
- `package_oid`
If you're trying to assign a package to an item for shipping, you're going to need to create
an `ItemShippingPackageRequirement` object. You may not know the oid of that particular
package object, but that is OK. You can just specify the name and the system will
automatically resolve the oid value.
:::warning
Don't make up a value for an OID or set it to zero. You will receive an error back from the
server.
:::
## Removing an identifier during an update
Another scenario is removing an identifier to a child object during an update. Take the
`ItemAutoOrder` model, for example, which has the following fields:
- `auto_order_cancel_item_id`
- `auto_order_cancel_item_oid`
When configured, this setting tells the system to charge the customer with a given item,
typically a cancellation fee, when they cancel their auto order. If you want to remove this
setting with a REST API call, you will need to null out **both** fields before making the
update. The oid field is what the system truly cares about, but if you null only that field
then the system will resolve the oid using the companion field, such as
`auto_order_cancel_item_id`.
---
# Pagination
https://docs.ultracart.com/developer/essentials/pagination
doc_type: reference
# Pagination
Some resources in UltraCart are capable of having so many objects that it's not feasible to
return them on a single API call. To accommodate these objects in an efficient manner, paging
of the result set is used. The response from an API that uses paging has the following
information:
- `metadata`
- `result_set`
- `count`
- `offset`
- `limit`
- `more`
- `next_offset`
If a response indicates that additional records are available in the `more` field, then a
subsequent request should be made with the `_offset` parameter set to `next_offset`.
Most API calls use a default result set limit of `100`. While this can be increased to reduce
round trips, we recommend keeping the limit at the default.
:::warning
UltraCart reserves the right to return a `400 Bad Request` response if the size you request is
larger than we want the system to handle in a single chunk. An upper limit on an API can be
further reduced at any point in time, if it is over 100, at the discretion of our system
administrators in order to maintain optimal system performance.
:::
---
# Rate Limiting
https://docs.ultracart.com/developer/essentials/rate-limiting
doc_type: reference
# Rate Limiting
For authenticated requests, you can make up to `1,000 requests per hour` and
`10,000 per day` by default. This limit is enforced by authorized application as well as by IP
address. The algorithm is implemented as a leaky bucket, so there is no fixed reset time. If
you exceed the maximum number of requests within the time period, you will receive a
`429 Too Many Requests` response from the API call.
:::warning
Do **not** perform concurrent requests by application or IP to the UltraCart system, or you
will also receive a `429 Too Many Requests` response.
:::
## Requesting a higher limit
Increases are granted case by case, after a review of your integration. Expect a
recommendation to spread the workload across 24 hours, to update objects only when something
changed, and to cache responses locally and refresh that cache from
[webhook](./webhooks.md) notifications rather than polling. Most requests are resolved by one
of those changes instead of a larger quota.
Email [support@ultracart.com](mailto:support@ultracart.com) with these four answers.
**Which application.** Limits are enforced per authorized application and per IP address, so
name the one being limited and the address its calls originate from. OAuth applications are
registered under Developer Applications and carry a client ID, covered in the
[OAuth 2.0 Guide](./oauth.mdx). Simple key applications are covered in
[Authentication](./authentication.md). The [`X-UltraCart-Request-Id`](./request-ids.md) header
returned by a throttled call identifies that call in the application logs, so include one if
you have it.
**Which endpoints, and how often.** Name the endpoints that need the higher limit and describe
the shape of the traffic: steady polling, a nightly batch, a one-time backfill, or bursts that
track order volume. An hourly breach and a daily breach have different answers.
**Whether the [BigQuery Data Warehouse SDK](../sdks/bigquery/index.md) fits.** Bulk reads over
history do not belong on the REST API. The warehouse answers them in a single query and the
REST rate limits do not apply, which covers backfills, nightly exports, and reporting
pipelines. It is read-only and lags live data by one to two minutes, so it does not replace
reads that have to be current.
**Whether [webhooks](./webhooks.md) replace the polling.** If the traffic is a loop asking
whether something changed, a webhook removes it. Subscribe to the event, cache what arrives,
and stop asking.
## Abuse rate limits
To protect the quality of service from UltraCart, additional rate limits may apply to some
actions. For example, rapidly creating content, polling aggressively instead of using
webhooks, making API calls with concurrency, or repeatedly requesting data that is
computationally expensive may result in abuse rate limiting.
It is not intended for this rate limit to interfere with any legitimate use of the API. Your
normal rate limits should be the only limit you target. Please contact UltraCart Support if
your use is affected by this rate limit.
---
# Request IDs
https://docs.ultracart.com/developer/essentials/request-ids
doc_type: reference
# Request IDs
Every request to a REST API returns an `X-UltraCart-Request-Id` header that contains a unique
request ID value. You can log this value and subsequently review the complete
request/response log for the API call under the Authorized Applications logging located under:
```
Configuration -> Back Office -> Authorized Applications
```
:::note
UltraCart retains up to 10,000 log requests for API calls for up to 31 days.
:::
---
# Sorting
https://docs.ultracart.com/developer/essentials/sorting
doc_type: reference
# Sorting Results
Methods that allow for more than one object to be returned generally supply a `_sort`
parameter that lets you specify the order in which the results are returned. For example,
orders can be sorted by the following fields:
- `order_id`
- `shipping.company`
- `shipping.first_name`
- `shipping.last_name`
- `shipping.city`
- `shipping.state_region`
- `shipping.postal_code`
- `shipping.country_code`
- `billing.phone`
- `billing.email`
- `billing.cc_email`
- `billing.company`
- `billing.first_name`
- `billing.last_name`
- `billing.city`
- `billing.state`
- `billing.postal_code`
- `billing.country_code`
- `creation_dts`
- `payment.payment_dts`
- `checkout.screen_branding_theme_code`
- `channel_partner.channel_partner_code`
- `channel_partner.channel_partner_order_id`
As with most data-set sorting routines, there is an ascending and a descending option. So to
sort the result set by billing last name (ascending) followed by billing first name
(ascending), you would use the following `_sort` parameter:
```http
+billing.first_name,+billing.last_name
```
If you wanted to find the most recent orders, then you would sort by `creation_dts` in a
descending fashion with:
```http
-creation_dts
```
:::warning
**Always URL-encode parameters!** If you fail to URL-encode the plus character, you are going
to receive a bad request error for an improper sort attribute.
:::
---
# Standard Responses
https://docs.ultracart.com/developer/essentials/standard-responses
doc_type: reference
# Standard Responses
We strive for all our responses to have a standard response envelope. This guarantees that
the interaction style for all REST APIs will feel similar. The standard response object has
the following properties.
| Property | Data Type | Description |
|---|---|---|
| `success` | boolean | Whether or not the REST API call was successful. |
| `error` | Error | If the API call was unsuccessful, this error object contains further details. See [Errors](./errors.md). |
| `metadata` | ResponseMetadata | Details about the response, such as the `payload_name` and `result_set`. The `result_set` contains information about paged results such as `count`, `offset`, `limit`, and a `more` flag. See [Pagination](./pagination.md). |
---
# Versioning
https://docs.ultracart.com/developer/essentials/versioning
doc_type: reference
# Versioning
We strive to provide stable APIs that can operate over a long time period, but still maintain
enough flexibility to improve and adapt the API over time. To accomplish stability in the API,
we accept a custom HTTP header to indicate which publication date of the API you are requesting:
```http
X-UltraCart-Api-Version: 2017-03-01
```
The current version of the API is **2017-03-01**. As we enhance the API, the object model may
evolve slightly. By tracking the API version date that your client supports, we can maintain
backwards compatibility.
Each language SDK provides an example of how to add a default header that will be transmitted
with each API call, making it simple to specify the API version. See the individual
[SDK](../sdks/index.md) for more details.
:::warning
Requests will **fail** if an `X-UltraCart-Api-Version` header is not specified.
:::
---
# Webhooks
https://docs.ultracart.com/developer/essentials/webhooks
doc_type: explanation
# Webhooks
A webhook is an asynchronous HTTPS callback to an external server to notify it of events that
the external party is interested in. The external party that wants to receive the notification
implements an endpoint to receive the JSON-based notifications as they occur. Since webhooks
are an outbound process from UltraCart to the external party, they happen quicker and are far
more efficient than polling an API.
All webhooks are associated with a Resource API, such as "item", and are triggered for a
defined set of events that the receiver has subscribed to. Each resource describes the
webhooks that are available to subscribe to, the REST model that is delivered in the
notification, as well as the [expansion](./expanding-objects.md) operations that are allowed.
:::warning
For security purposes, we always recommend that your webhook endpoint URLs be secured with
`HTTPS`. This is not a requirement for certain resource types, such as items, but it is
required whenever any customer information is transmitted to your server.
:::
## Responding to notifications
UltraCart expects that integrations will respond within `thirty seconds` of receiving the
webhook payload. Therefore you should favor asynchronous processing of the payload over
synchronous processing whenever possible. By receiving the payload and queuing it so that all
the "real work" happens in a background job, you ensure fast response times for the webhook
delivery and buffer your server against a large amount of notices.
There are various ways to queue background jobs depending upon your language, such as writing
the webhook payload to a database table and then processing it in a scheduled job, or
utilizing a message-queueing library such as Resque (for Ruby), RQ (for Python), or RabbitMQ
(for Java). When configuring the webhook, there are optional limits on the number of event
notifications that can be bundled together (the minimum is 10) and the maximum size of the
payload (900K/message maximum). The maximum limits allow for further tuning of the amount of
work that is delivered to your server per HTTPS POST.
## Delivery, ordering, and fairness
UltraCart currently makes a single concurrent notification at a time to each of the webhook
endpoints. Notifications are generally delivered in oldest-to-newest order. All webhooks
receive a fair shot at delivery of their notifications each processing cycle. So if one
merchant generates a lot of notifications (through an item import, for example), the system
makes sure that their notification workload does not adversely impact the delivery of
notifications for other merchants.
If your server goes down for a brief period of time, UltraCart will queue up the pending
notifications and retry them. If your server encounters errors or downtime for an extended
period of time, UltraCart will begin discarding the older notifications in the queue as newer
ones arrive, until ultimately the webhook is disabled.
:::note
While UltraCart strives for very fast delivery of webhook notifications, there are no
guarantees on the time frame between the triggering of the event and the actual delivery of
the notification. It can be as short as a few milliseconds at times, but you should not build
any business workflow that is critically dependent upon the speed of webhook delivery.
:::
## Versioning
For consistency, each webhook configuration determines the API version that the notifications
should conform to. By versioning the outbound webhook notices in the same fashion as the
inbound API calls, we can guarantee more stability in the API. It also allows you to parse the
webhook JSON that you receive into an SDK object. See [Versioning](./versioning.md) for more.
## A real-world example
If you're still wondering about the importance of webhooks, look at a real-world example of
their use in the WordPress plugin. When the plugin is first authorized via OAuth 2.0
authentication, it sets up a webhook with three item events (`item_create`, `item_update`, and
`item_delete`) so that all changes to the item information are quickly conveyed to the
WordPress instance. After the webhook is created, the plugin makes another API call asking
UltraCart to `reflow` all `item_update` events. UltraCart, in an asynchronous and controlled
fashion, resends all the existing items from the UltraCart account to the WordPress plugin's
webhook endpoint. Two API calls set up and trigger the entire process, and no polling is
required after that point.
:::tip
Looking to create and manage webhook subscriptions programmatically? See the
[Webhooks endpoints](/developer/api/webhook) in the API reference.
:::
---
# API Samples
https://docs.ultracart.com/developer/howtos/api-samples
doc_type: reference
# API Samples
## Overview
The [UltraCart SDK Samples](https://github.com/UltraCart/sdk_samples) repository contains working code examples for every UltraCart REST API v2 endpoint, organized by API category and available in **8 languages**: C#, Java, JavaScript, PHP, Python, Ruby, TypeScript, and cURL.
These are the same files rendered in the per-language tabs on each
[API Reference](../api) page, so a sample in the repository and a sample on this site are never
two different versions of the same code.
:::info
This is a living repository. If you need a sample that does not exist yet, email support to
request it.
:::
* * *
## Installing an SDK
Package names, registries, and per-language install and authentication guides live on
[SDKs & Samples](../sdks/index.md). That page is the single source of truth for which package to
install and how to authenticate it.
* * *
## Samples by API Category
| Language | Browse All Samples |
| --- | --- |
| C# | [csharp/affiliate](https://github.com/UltraCart/sdk_samples/tree/master/csharp/affiliate) |
| Java | [java/src/affiliate](https://github.com/UltraCart/sdk_samples/tree/master/java/src/affiliate) |
| JavaScript | [javascript/affiliate](https://github.com/UltraCart/sdk_samples/tree/master/javascript/affiliate) |
| PHP | [php/affiliate](https://github.com/UltraCart/sdk_samples/tree/master/php/affiliate) |
| Python | [python/affiliate](https://github.com/UltraCart/sdk_samples/tree/master/python/affiliate) |
| Language | Browse All Samples |
| --- | --- |
| C# | [csharp/auto\_order](https://github.com/UltraCart/sdk_samples/tree/master/csharp/auto_order) |
| Java | [java/src/auto\_order](https://github.com/UltraCart/sdk_samples/tree/master/java/src/auto_order) |
| JavaScript | [javascript/auto\_order](https://github.com/UltraCart/sdk_samples/tree/master/javascript/auto_order) |
| PHP | [php/auto\_order](https://github.com/UltraCart/sdk_samples/tree/master/php/auto_order) |
| Python | [python/auto\_order](https://github.com/UltraCart/sdk_samples/tree/master/python/auto_order) |
| Language | Browse All Samples |
| --- | --- |
| C# | [csharp/channel\_partner](https://github.com/UltraCart/sdk_samples/tree/master/csharp/channel_partner) |
| Java | [java/src/channel\_partner](https://github.com/UltraCart/sdk_samples/tree/master/java/src/channel_partner) |
| JavaScript | [javascript/channel\_partner](https://github.com/UltraCart/sdk_samples/tree/master/javascript/channel_partner) |
| PHP | [php/channel\_partner](https://github.com/UltraCart/sdk_samples/tree/master/php/channel_partner) |
| Python | [python/channel\_partner](https://github.com/UltraCart/sdk_samples/tree/master/python/channel_partner) |
| Language | Browse All Samples |
| --- | --- |
| C# | [csharp/chargeback](https://github.com/UltraCart/sdk_samples/tree/master/csharp/chargeback) |
| Java | [java/src/chargeback](https://github.com/UltraCart/sdk_samples/tree/master/java/src/chargeback) |
| JavaScript | [javascript/chargeback](https://github.com/UltraCart/sdk_samples/tree/master/javascript/chargeback) |
| PHP | [php/chargeback](https://github.com/UltraCart/sdk_samples/tree/master/php/chargeback) |
| Python | [python/chargeback](https://github.com/UltraCart/sdk_samples/tree/master/python/chargeback) |
| Language | Browse All Samples |
| --- | --- |
| C# | [csharp/checkout](https://github.com/UltraCart/sdk_samples/tree/master/csharp/checkout) |
| Java | [java/src/checkout](https://github.com/UltraCart/sdk_samples/tree/master/java/src/checkout) |
| JavaScript | [javascript/checkout](https://github.com/UltraCart/sdk_samples/tree/master/javascript/checkout) |
| PHP | [php/checkout](https://github.com/UltraCart/sdk_samples/tree/master/php/checkout) |
| Python | [python/checkout](https://github.com/UltraCart/sdk_samples/tree/master/python/checkout) |
| Language | Browse All Samples |
| --- | --- |
| C# | [csharp/configuration](https://github.com/UltraCart/sdk_samples/tree/master/csharp/configuration) |
| Java | [java/src/configuration](https://github.com/UltraCart/sdk_samples/tree/master/java/src/configuration) |
| JavaScript | [javascript/configuration](https://github.com/UltraCart/sdk_samples/tree/master/javascript/configuration) |
| PHP | [php/configuration](https://github.com/UltraCart/sdk_samples/tree/master/php/configuration) |
| Python | [python/configuration](https://github.com/UltraCart/sdk_samples/tree/master/python/configuration) |
| Language | Browse All Samples |
| --- | --- |
| C# | [csharp/conversation](https://github.com/UltraCart/sdk_samples/tree/master/csharp/conversation) |
| Java | [java/src/conversation](https://github.com/UltraCart/sdk_samples/tree/master/java/src/conversation) |
| JavaScript | [javascript/conversation](https://github.com/UltraCart/sdk_samples/tree/master/javascript/conversation) |
| PHP | [php/conversation](https://github.com/UltraCart/sdk_samples/tree/master/php/conversation) |
| Python | [python/conversation](https://github.com/UltraCart/sdk_samples/tree/master/python/conversation) |
| Language | Browse All Samples |
| --- | --- |
| C# | [csharp/coupon](https://github.com/UltraCart/sdk_samples/tree/master/csharp/coupon) |
| Java | [java/src/coupon](https://github.com/UltraCart/sdk_samples/tree/master/java/src/coupon) |
| JavaScript | [javascript/coupon](https://github.com/UltraCart/sdk_samples/tree/master/javascript/coupon) |
| PHP | [php/coupon](https://github.com/UltraCart/sdk_samples/tree/master/php/coupon) |
| Python | [python/coupon](https://github.com/UltraCart/sdk_samples/tree/master/python/coupon) |
| Language | Browse All Samples |
| --- | --- |
| C# | [csharp/customer](https://github.com/UltraCart/sdk_samples/tree/master/csharp/customer) |
| Java | [java/src/customer](https://github.com/UltraCart/sdk_samples/tree/master/java/src/customer) |
| JavaScript | [javascript/customer](https://github.com/UltraCart/sdk_samples/tree/master/javascript/customer) |
| PHP | [php/customer](https://github.com/UltraCart/sdk_samples/tree/master/php/customer) |
| Python | [python/customer](https://github.com/UltraCart/sdk_samples/tree/master/python/customer) |
| Language | Browse All Samples |
| --- | --- |
| C# | [csharp/datawarehouse](https://github.com/UltraCart/sdk_samples/tree/master/csharp/datawarehouse) |
| Java | [java/src/datawarehouse](https://github.com/UltraCart/sdk_samples/tree/master/java/src/datawarehouse) |
| JavaScript | [javascript/datawarehouse](https://github.com/UltraCart/sdk_samples/tree/master/javascript/datawarehouse) |
| PHP | [php/datawarehouse](https://github.com/UltraCart/sdk_samples/tree/master/php/datawarehouse) |
| Python | [python/datawarehouse](https://github.com/UltraCart/sdk_samples/tree/master/python/datawarehouse) |
| Language | Browse All Samples |
| --- | --- |
| C# | [csharp/fulfillment](https://github.com/UltraCart/sdk_samples/tree/master/csharp/fulfillment) |
| Java | [java/src/fulfillment](https://github.com/UltraCart/sdk_samples/tree/master/java/src/fulfillment) |
| JavaScript | [javascript/fulfillment](https://github.com/UltraCart/sdk_samples/tree/master/javascript/fulfillment) |
| PHP | [php/fulfillment](https://github.com/UltraCart/sdk_samples/tree/master/php/fulfillment) |
| Python | [python/fulfillment](https://github.com/UltraCart/sdk_samples/tree/master/python/fulfillment) |
| Language | Browse All Samples |
| --- | --- |
| C# | [csharp/gift\_certificate](https://github.com/UltraCart/sdk_samples/tree/master/csharp/gift_certificate) |
| Java | [java/src/gift\_certificate](https://github.com/UltraCart/sdk_samples/tree/master/java/src/gift_certificate) |
| JavaScript | [javascript/gift\_certificate](https://github.com/UltraCart/sdk_samples/tree/master/javascript/gift_certificate) |
| PHP | [php/gift\_certificate](https://github.com/UltraCart/sdk_samples/tree/master/php/gift_certificate) |
| Python | [python/gift\_certificate](https://github.com/UltraCart/sdk_samples/tree/master/python/gift_certificate) |
| Language | Browse All Samples |
| --- | --- |
| C# | [csharp/integration\_log](https://github.com/UltraCart/sdk_samples/tree/master/csharp/integration_log) |
| Java | [java/src/integration\_log](https://github.com/UltraCart/sdk_samples/tree/master/java/src/integration_log) |
| JavaScript | [javascript/integration\_log](https://github.com/UltraCart/sdk_samples/tree/master/javascript/integration_log) |
| PHP | [php/integration\_log](https://github.com/UltraCart/sdk_samples/tree/master/php/integration_log) |
| Python | [python/integration\_log](https://github.com/UltraCart/sdk_samples/tree/master/python/integration_log) |
| Language | Browse All Samples |
| --- | --- |
| C# | [csharp/item](https://github.com/UltraCart/sdk_samples/tree/master/csharp/item) |
| Java | [java/src/item](https://github.com/UltraCart/sdk_samples/tree/master/java/src/item) |
| JavaScript | [javascript/item](https://github.com/UltraCart/sdk_samples/tree/master/javascript/item) |
| PHP | [php/item](https://github.com/UltraCart/sdk_samples/tree/master/php/item) |
| Python | [python/item](https://github.com/UltraCart/sdk_samples/tree/master/python/item) |
| Language | Browse All Samples |
| --- | --- |
| C# | [csharp/oauth](https://github.com/UltraCart/sdk_samples/tree/master/csharp/oauth) |
| Java | [java/src/oauth](https://github.com/UltraCart/sdk_samples/tree/master/java/src/oauth) |
| JavaScript | [javascript/oauth](https://github.com/UltraCart/sdk_samples/tree/master/javascript/oauth) |
| PHP | [php/oauth](https://github.com/UltraCart/sdk_samples/tree/master/php/oauth) |
| Language | Browse All Samples |
| --- | --- |
| C# | [csharp/order](https://github.com/UltraCart/sdk_samples/tree/master/csharp/order) |
| Java | [java/src/order](https://github.com/UltraCart/sdk_samples/tree/master/java/src/order) |
| JavaScript | [javascript/order](https://github.com/UltraCart/sdk_samples/tree/master/javascript/order) |
| PHP | [php/order](https://github.com/UltraCart/sdk_samples/tree/master/php/order) |
| Python | [python/order](https://github.com/UltraCart/sdk_samples/tree/master/python/order) |
| Language | Browse All Samples |
| --- | --- |
| C# | [csharp/sso](https://github.com/UltraCart/sdk_samples/tree/master/csharp/sso) |
| Java | [java/src/sso](https://github.com/UltraCart/sdk_samples/tree/master/java/src/sso) |
| JavaScript | [javascript/sso](https://github.com/UltraCart/sdk_samples/tree/master/javascript/sso) |
| PHP | [php/sso](https://github.com/UltraCart/sdk_samples/tree/master/php/sso) |
| Python | [python/sso](https://github.com/UltraCart/sdk_samples/tree/master/python/sso) |
| Language | Browse All Samples |
| --- | --- |
| C# | [csharp/storefront](https://github.com/UltraCart/sdk_samples/tree/master/csharp/storefront) |
| Java | [java/src/storefront](https://github.com/UltraCart/sdk_samples/tree/master/java/src/storefront) |
| JavaScript | [javascript/storefront](https://github.com/UltraCart/sdk_samples/tree/master/javascript/storefront) |
| PHP | [php/storefront](https://github.com/UltraCart/sdk_samples/tree/master/php/storefront) |
| Python | [python/storefront](https://github.com/UltraCart/sdk_samples/tree/master/python/storefront) |
| Language | Browse All Samples |
| --- | --- |
| C# | [csharp/tax](https://github.com/UltraCart/sdk_samples/tree/master/csharp/tax) |
| Java | [java/src/tax](https://github.com/UltraCart/sdk_samples/tree/master/java/src/tax) |
| JavaScript | [javascript/tax](https://github.com/UltraCart/sdk_samples/tree/master/javascript/tax) |
| PHP | [php/tax](https://github.com/UltraCart/sdk_samples/tree/master/php/tax) |
| Python | [python/tax](https://github.com/UltraCart/sdk_samples/tree/master/python/tax) |
| Language | Browse All Samples |
| --- | --- |
| C# | [csharp/user](https://github.com/UltraCart/sdk_samples/tree/master/csharp/user) |
| Java | [java/src/user](https://github.com/UltraCart/sdk_samples/tree/master/java/src/user) |
| JavaScript | [javascript/user](https://github.com/UltraCart/sdk_samples/tree/master/javascript/user) |
| PHP | [php/user](https://github.com/UltraCart/sdk_samples/tree/master/php/user) |
| Python | [python/user](https://github.com/UltraCart/sdk_samples/tree/master/python/user) |
| Language | Browse All Samples |
| --- | --- |
| C# | [csharp/webhook](https://github.com/UltraCart/sdk_samples/tree/master/csharp/webhook) |
| Java | [java/src/webhook](https://github.com/UltraCart/sdk_samples/tree/master/java/src/webhook) |
| JavaScript | [javascript/webhook](https://github.com/UltraCart/sdk_samples/tree/master/javascript/webhook) |
| PHP | [php/webhook](https://github.com/UltraCart/sdk_samples/tree/master/php/webhook) |
| Python | [python/webhook](https://github.com/UltraCart/sdk_samples/tree/master/python/webhook) |
| Language | Browse All Samples |
| --- | --- |
| C# | [csharp/workflow](https://github.com/UltraCart/sdk_samples/tree/master/csharp/workflow) |
| Java | [java/src/workflow](https://github.com/UltraCart/sdk_samples/tree/master/java/src/workflow) |
| JavaScript | [javascript/workflow](https://github.com/UltraCart/sdk_samples/tree/master/javascript/workflow) |
| PHP | [php/workflow](https://github.com/UltraCart/sdk_samples/tree/master/php/workflow) |
| Python | [python/workflow](https://github.com/UltraCart/sdk_samples/tree/master/python/workflow) |
| Ruby | [ruby/workflow](https://github.com/UltraCart/sdk_samples/tree/master/ruby/workflow) |
| TypeScript | [typescript/workflow](https://github.com/UltraCart/sdk_samples/tree/master/typescript/workflow) |
| cURL | [curl/workflow](https://github.com/UltraCart/sdk_samples/tree/master/curl/workflow) |
**Available methods:** `getWorkflowAgentWebsocketAuthorization`, `getWorkflowAssignmentGroups`, `getWorkflowAssignmentUsers`, `getWorkflowMe`, `getWorkflowTask`, `getWorkflowTaskAttachmentUploadUrl`, `getWorkflowTaskByObjectType`, `getWorkflowTaskOpenCount`, `getWorkflowTaskTags`, `getWorkflowTasks`, `insertWorkflowTask`, `updateWorkflowTask`
* * *
## Related Resources
- **SDKs & Samples:** [install and authenticate an SDK](../sdks/index.md)
- **API Reference:** [every operation, generated from the OpenAPI spec](../api)
- **SDK Samples Repository:** [https://github.com/UltraCart/sdk\_samples](https://github.com/UltraCart/sdk_samples)
- **Hosted Fields Example:** [hosted\_fields](https://github.com/UltraCart/sdk_samples/tree/master/hosted_fields)
- **Webhooks Guide:** [webhooks](https://github.com/UltraCart/sdk_samples/tree/master/webhooks)
- **Responsive Checkout:** [responsive\_checkout](https://github.com/UltraCart/responsive_checkout)
- **Two Page Trial:** [two\_page\_trial](https://github.com/UltraCart/two_page_trial)
---
# API Simple Key
https://docs.ultracart.com/developer/howtos/authentication-and-keys/api-simple-key
doc_type: how-to
The simple key authentication is used for API implementations within your account.
The Simple Key is the appropriate authorization option for the following API's:
- Order
- AutoOrder
- Item
- Fulfillment
- Customer
- Coupon
- User
:::warning
The Checkout API uses browser keys. This page does **not** apply to browser based (javascript) checkouts.
:::
# API Simple Key
## Steps
Log into your UltraCart account and then navigate:
:::note
Main Menu → Configuration → Development → Authorized Applications / API Keys
:::
From the Authorized Applications page, select the "Authorized Applications" tab:

Then in the configuration section that appears, enter an App, then select Simple Key from the drop down list for "Authentication Key", and, optionally, enter in the Allowed IP Addresses. Then in the permission section to the right, select only the specific Read/Write permissions for the API:

Click Save to save your Simple Key:

## Related Documentation
[https://www.ultracart.com/api/#topics.html](https://www.ultracart.com/api/#topics.html)
---
# API Single Sign-On
https://docs.ultracart.com/developer/howtos/authentication-and-keys/api-single-sign-on
doc_type: how-to
# API Single Sign-On
## Introduction
This tutorial will explain how to use the REST SDK to perform a single sign-on integration. Developers interested in this tutorial are those that are building internal applications, what their users to login via UltraCart, and then have their permissions listed to that of their UltraCart user.
## Pre-requisites
The Single Sign-on endpoint is available in SDK versions 3.3 or higher. Make sure to upgrade your SDK to the minimum required version before attempting to follow this SDK.
Your authorized application will need the Single Sign-on write permission in order to perform these operations.

## Starting the Single Sign-on Process
The first step is to call the **ssoAuthorize** API function. This function will require you to specify two parameters:
- Redirect URI - the URL that you want the customer’s browser returned to after authentication
- State - a parameter value that you make up. We recommend a UUID that you then store in the user’s session so that you can compare when the user’s browser is redirected back.
The function will return two values:
- Login URL - this is the URL you should redirect the user’s browser to. It will begin the login process.
- Expiration - the expiration after which this single sign on must be completed.
So call **ssoAuthorize** and send the customer’s browser the login URL as a redirect.
## Handling the Return
After the customer authorizes the single sign-on, UltraCart will redirect the customer’s browser back to the URL that you specified. On the URL there were be two parameters:
- code
- state
The first thing you should do is verify that the state returned in the parameter matches the state that you originally passed in to the **ssoAuthorize** call.
Next, take the code value and call **ssoToken** API. This will exact your access code for a longer lived simple key. When calling ssoToken you will pass the parameters:
- grant\_type = simple\_key
- code = the value you received back as a URL parameter
This function will return two values:
- simple\_key - this is the key that you will then use to make SDK API calls on behalf of the user.
- expiration\_dts - the expiration of the key
At this point you will shift to using the simple\_key to make API calls on behalf of the user. Your API calls will be limited to the permissions of their user.
## Protect the Simple Key
The simple key is a critical piece of information. You should protect it all cost!
## Obtaining the User that You’re Signed Into
After they authenticate, you’ll often want to know which user logged in. To obtain that information you will want to call the **getSsoSessionUser** API call.
This API call will return a User object that provides all the details of the user including which permissions they have. You can consult this object to decide on which features of your application you want to expose to the user.
## Signing Out
We also provide an **ssoSessionRevoke** API that will expire the user’s session. We recommend that you have a logout button on your application that turns avoid and expires the session using this API.
---
# Creating a Browser Key for a JavaScript checkout
https://docs.ultracart.com/developer/howtos/authentication-and-keys/creating-a-browser-key-for-javascript-checkout
doc_type: how-to
# Creating a Browser Key for a JavaScript checkout
## Introduction
UltraCart's [Javascript Checkout](https://github.com/UltraCart/rest_api_v2_sdk_javascript) requires a **Browser Key** for [authentication](https://www.ultracart.com/api/#resource_checkout.html:~:text=Setup%20a%20browser,API%20to%20use.). This setup ensures secure and scoped access for checkout functionality via the REST API.
This guide walks you through the two-stage process to properly configure a browser-authenticated application using the `setupBrowserKey` SDK function. This method is commonly used by OAuth-based integrations such as the UltraCart WordPress plugin.
## Prerequisites
> **Prerequisite:** You must have access to an UltraCart merchant account with permissions to manage API credentials.
> **Note:** The JavaScript Checkout **does not support** simple key authentication. Only Browser Key authentication is valid for REST checkout operations.
## Step-by-step Instructions
### Stage 1: Create a Simple Key Application
1. **Log into your UltraCart account.**
2. Navigate to:
:::note
Main Menu → Advanced → Developer Tools → REST APIs → Setup API Credentials
:::

3. Click **New Application**.

4. In the configuration panel:
\* Enter a **name** for your application.
\* Select **Simple Key** as the **Authentication Type**.
\* Leave other settings default unless needed.
5. In the permissions section, select:
\* `checkout_read`
\* `checkout_write`
6. Click **Save**.
:::info
This application will serve as the parent for creating the Browser Key in the next stage.
:::
### Stage 2: Run the `setupBrowserKey` Script
Use the `setupBrowserKey` SDK function from your server or OAuth application (e.g., a WordPress plugin).
:::note
**Do not call this from the browser**, as it requires a non-browser authentication context.
:::
#### Example Script (JavaScript SDK)
```javascript
const ultracart = require('ultracart-rest-api');
// Configure the API client using your Simple Key
let defaultClient = ultracart.ApiClient.instance;
let simpleApiKey = defaultClient.authentications['simple_key'];
simpleApiKey.apiKey = 'YOUR_SIMPLE_KEY_HERE';
let api = new ultracart.CheckoutApi();
let browserKeyRequest = {
application: {
name: "JavaScript Checkout App",
authenticationType: "BrowserKey",
browserAllowedOrigins: ["https://www.yoursite.com"]
}
};
api.setupBrowserKey(browserKeyRequest, (error, response, data) => {
if (error) {
console.error("Error setting up browser key: ", error);
} else {
console.log("Browser Key setup complete.");
console.log(data);
}
});
```
:::note
**Warning:** The browser key created will be **linked to the parent application** that made the request.
\***If the parent application is deleted, the browser key will also be deleted.**
:::
Example of the generated Browser Key Application in the REST APIs Logs:

### Stage 3: Use the Browser Key in Your Checkout Script
Once the browser key is generated, embed it in your JavaScript Checkout implementation as follows:
```javascript
ultracart.checkout.configure({
browserKey: 'YOUR_BROWSER_KEY_HERE'
});
```
:::info
**Tip:** Be sure to configure your referrer restrictions properly in the browser key to prevent misuse.
:::
## Conclusion
Setting up a Browser Key is essential for secure JavaScript Checkout integration. The two-stage process, creating a simple key and then using it to call `setupBrowserKey`, keeps your checkout both secure and properly authenticated.
## Next Steps
- Review the [REST Checkout API documentation](https://www.ultracart.com/api/#resource_checkout.html)
- Download the [UltraCart JavaScript SDK](https://github.com/UltraCart/rest_api_v2_sdk_javascript)
- Implement your checkout form using the new browser key
---
# Channel Partner API
https://docs.ultracart.com/developer/howtos/channel-partner-api
doc_type: explanation
# Channel Partner API
The UltraCart channel partner API allows merchants to import orders into the UltraCart system from channels that we are not directly integrated into. For example if you are a call center that wants to take orders and send them into an UltraCart account you could use the Channel Partner API.
## Configuring the Channel Partner
You can create one or more custom channel partners on an UltraCart account. To do this go to:
:::note
**Main Menu → Configuration → Channel Partners → Custom (Generic)**
:::

First click the new button as shown below.

Now fill the basic information for the channel partner as shown below.

| Field | Description |
| --- | --- |
| Code | A letter code identifying the channel partner. This will appear throughout the back end of UltraCart and should be an abbreviation |
| Name | The name of the channel partner |
| FTP/Legacy API Password | This is the password that will be required to call the various channel partner systems. |
| Email FTP File Processing Reports To | Enter the email address to which you want to have the processing reports sent. |
| CVV2 Optional | Select this to make the CVV@ optional for payment processing of imported orders. |
| Skip Customer Emails | If selected, customer will not be order related emails. |
| Ignore Arbitrary Unit Cost on Auto Order Rebills | If selected, Arbitrary unit cost will not be applied to the auto order rebills. |
| Skip Tax Recording in Avalara or TaxJar | If selected, The orders will not be processed to tax calculation service (Applies to each of the third party Tax Service integrations: **Avalara**, **TaxJar** & **Sovos**) |
After you click save the channel partner will appear in the list.
## Methods of Integration
The channel partner API has the following interfaces at this time:
- HTTPS POST ([Documentation](/developer/howtos/channel-partner-api/channel-partner-api-https-post-guide))
- [Channel Partner API - Spreadsheet Import](/developer/howtos/channel-partner-api/channel-partner-api-spreadsheet-import)
- [Rest API](https://www.ultracart.com/api/#introduction.html) ([Code sample in C#](https://github.com/UltraCart/sdk_samples/blob/master/csharp/channel_partner/ImportChannelPartnerOrder.cs), most commonly used by Call Centers)
For further assistance, please email [support@ultracart.com](mailto:support@ultracart.com) attention "Engineers".
## Related Documentation
[Call Center Integration Information](/account-settings/channel-partners/call-center-integration-information) (checklist)
[https://github.com/UltraCart/sdk\_samples/blob/master/csharp/channel\_partner/ImportChannelPartnerOrder.cs](https://github.com/UltraCart/sdk_samples/blob/master/csharp/channel_partner/ImportChannelPartnerOrder.cs)
---
# Channel Partner API - HTTPS POST Guide
https://docs.ultracart.com/developer/howtos/channel-partner-api/channel-partner-api-https-post-guide
doc_type: how-to
# Channel Partner API - HTTPS POST Guide
The HTTPS POST interface for the channel partner API is intended to allow interaction with the API by posting name/value pairs and receiving back simply formatted data.
## Call Center Checklist
:::tip
This is a checklist of commonly need information for call centers who are implementing this API to take orders for a merchant. If you are the developer in charge of the integration, you should contact the merchant and request the following information. The merchant can (and should) provide all of this to you.
1. Merchant ID. This is a CHAR5 string that identifies the merchant. It is uppercase. You will need to include it in every communication with UltraCart.
2. Item IDs. These are CHAR20 strings that identify product. They are not skus or external identifiers. The merchants create them as they see fit. You will need a "Merchant Item ID" and (optionally) a description for each item you take orders for.
3. Available Shipping Methods. You need a list of available shipping method. The methods are configured and turned off/on by the merchant. Examples are: `UPS: Ground`, `FedEx: Residential`. Most shipping methods will contain , but the merchant is free to give them custom names.
4. If the merchant requires an "Advertising Source", i.e., _where did you hear from us_?, you may need a list of sources from them. The merchant has the option to require/not require advertising sources, and also the option for free form or pick list. If the merchant requires advertising sources and requires a pick list, you will need that list to complete an order.
5. If coupons are being used, you will need a list of applicable coupon codes.
**Summary**: Merchant ID, Item IDs, Shipping Methods, Advertising Sources, Coupon Codes
:::
## URL
The URL for the API is:
:::note
**`[https://secure.ultracart.com/cgi-bin/UCChannelPartnerAPIV1](https://secure.ultracart.com/cgi-bin/UCChannelPartnerAPIV1)`**
:::
:::warning
**HTTP POST** is required and HTTP GET will be rejected with a 400 Bad Request response. To illustrate, click the link above.
:::
:::note
Your post must have a Content-type header of `application/x-www-form-urlencoded` and must indeed be url encoded. Our firewalls will not allow un-encoded data to pass through. _Will not happen._
:::
## Credentials
You'll notice below three fields (credentials.merchantId, credentials.channelPartnerCode, credentials.channelPartnerPassword) used to authenticate each request. These are **NOT** your normal login credentials. You must create a custom channel partner and specify these values in the UltraCart backend.
Steps:
1. Navigate to Home → Configuration
2. Scroll down to the Channel Partners section
3. Click on the **Custom (Generic)** link
4. Click the `new` button.
5. Enter the values.

Code
Up to 5 characters. This code identifies the channel. LGCY for a legacy system? It can be anything you desire to identify the source of data.
Name
This is a login, up to 50 characters. Save yourself trouble and keep these simple. letters. numbers, underscores. Don't add spaces. You can. Just don't.
API Password
Min 8 characters and up to 50 characters. A password for the login. Go nuts. !@#$%^ and all that jazz.
## Importing an Order
The table below shows all the possible parameters for the HTTPS POST.
:::info
Acceptable values for boolean parameters:
`true`: true, TRUE, yes, YES, on, ON, y, Y, 1
`false` false, FALSE, no, NO, off, OFF, n, N, 0
:::
| Parameter Name | Format | Description | Required |
| --- | --- | --- | --- |
| method | String | This should be the value **importOrder** to trigger this particular API. | Y |
| credentials.merchantId | String | UltraCart merchant ID to import into. | Y |
| credentials.channelPartnerCode | String | Channel partner code to use. | Y |
| credentials.channelPartnerPassword | String | API password configured on the channel partner | Y |
| order.channelPartnerOrderId | String | A unique order ID from the external system. | Y |
| order.paymentMethod | String | The method of payment. Allowed values are: - **Amazon** (order.skipPaymentProcessing must be passed as true) - **Cash** - **Check** - **COD** - **Credit Card** - **eCheck** - **Money Order** - **PayPal** (order.skipPaymentProcessing must be passed as true) - **Purchase Order** - **Wire Transfer** | Y |
| order.noRealtimePaymentProcessing | Boolean | Leaves the order in Accounts Receivable instead of processing the card in real-time. | |
| order.skipPaymentProcessing | Boolean | Skip over the payment processing and move the order on to shipping. | |
| order.considerRecurring | Boolean | If the order is a recurring one generated by an outside system and you set this field to true, we will indicate the recurring flag to gateways that support it (Authorize.Net and PayPal Web Payments Pro) | |
| order.autoApprovePurchaseOrder | Boolean | Automatically approve the purchase order. | |
| order.storeIfPaymentDeclines | Boolean | Store the order in Accounts Receivable if the credit card declines | Recommend - Y |
| order.treatWarningsAsErrors | Boolean | Consider all warnings (such as a pre-order warning) as errors that prevent the order from importing. | Defaults to Y |
| order.storeCompleted | Boolean | Store the order in the completed orders stage. This is useful for importing historical orders from another system. | |
| order.creditCardAuthorizationReferenceNumber | String | If you authorized the order outside of UltraCart, this is the transaction identifier that UltraCart will use to capture the order. :::note Review your payment gateway's integration guide to make sure you pass the correct value. For example, Authorize.Net gateways need to pass the transaction ID in this field and not the six character authorization ticket number. ::: | |
| order.creditCardAuthorizationAmount | Number | If you authorized the order outside of UltraCart, this is the amount of the authorization. | |
| order.creditCardAuthorizationDts | Timestamp | If you authorized the order outside of UltraCart, this is the timestamp of the authorization in the format MM/DD/YYYY HH:MM:SS | |
| order.creditCardType | String | Visa, MasterCard, AMEX, or Discover | Y - CC Orders |
| order.creditCardNumber | String | 15 or 16 digit credit card number (spaces or dashes OK) | Y - CC Orders |
| order.creditCardToken | String | Token of the credit card (Stripe.com or other tokenizing gateway supported by UltraCart). | |
| order.creditCardExpirationMonth | Number | Month 1 through 12 (January = 1, December = 12) | Y - CC Orders |
| order.creditCardExpirationYear | Number | Four Digit Year | Y - CC Orders |
| order.creditCardExpirationMonthYear | String | The format MM/YY or MM/YYYY | |
| order.creditCardVerificationNumber | Number | | |
| order.rotatingTransactionGatewayCode | String | The rotating transaction gateway code to use for this order. | |
| order.purchaseOrderNumber | String | The purchase order number. | Y- Purchase Order |
| order.billToFirstName | String | | Y |
| order.billToLastName | String | | Y |
| order.billToTitle | String | | |
| order.billToCompany | String | | |
| order.billToAddress1 | String | | Y |
| order.billToAddress2 | String | | |
| order.billToCity | String | | Y |
| order.billToState | String | | Y |
| order.billToPostalCode | String | | Y |
| order.billToCountry | String | Use the full spelling that UltraCart uses or provide the ISO-3166 two letter country code. | Y |
| order.billToDayPhone | String | | |
| order.billToEveningPhone | String | | |
| order.email | String | | |
| order.ccEmail | String | | |
| order.associatedWithCustomerProfileIfPresent | String | If this is yes, the order will be associated with the customer profile that has the same email (if it exists) and they will receive their discounted pricing. | |
| order.shipToFirstName | String | | Y - physical goods |
| order.shipToLastName | String | | Y - physical goods |
| order.shipToTitle | String | | |
| order.shipToCompany | String | | |
| order.shipToAddress1 | String | | Y - physical goods |
| order.shipToAddress2 | String | | |
| order.shipToCity | String | | Y - physical goods |
| order.shipToState | String | | Y - physical goods |
| order.shipToPostalCode | String | | Y - physical goods |
| order.shipToCountry | String | Use the full spelling that UltraCart uses or provide the ISO-3166 two letter country code. | Y - physical goods |
| order.shipToPhone | String | | Y - physical goods |
| order.shipToEveningPhone | String | | |
| order.shippingMethod | String | If the order requires shipping then you either need to specify the name of the method in this field, or pass order.leastCostRoute = true and let UltraCart pick the method of shipment | Maybe |
| order.arbitraryTax | Number | The tax charged by the external system | |
| order.arbitraryTaxableSubtotal | Number | The taxable subtotal the tax was based upon by the external system | |
| order.arbitraryTaxRate | Number | The tax rate used by the external system | |
| order.arbitraryShippingHandlingTotal | Number | The shipping/handling cost charged by the external system | |
| order.taxExempt | Boolean | | |
| order.giftMessage | String | | |
| order.deliveryDate | Date | If specified, use the format MM/DD/YYYY | |
| order.shipOnDate | Date | | |
| order.ipAddress | String | The IP address of the remote customer (pass 127.0.0.1) if not available | Y |
| order.shipToResidential | Boolean | Will default to a business if not specified | Recommended |
| order.mailingListOptIn | Boolean | Will default to opted out if not specified | Recommended |
| order.specialInstructions | String | Special instructions from the customer about shipment | |
| order.screenBrandingThemeCode | String | The screen branding theme code to associate the order with. | Y |
| order.advertisingSource | String | | |
| order.customField1 | String | Custom value such as the DNIS of the caller up to 50 characters. | |
| order.customField2 | String | Custom value up to 50 characters. | |
| order.customField3 | String | Custom value up to 50 characters. | |
| order.customField4 | String | Custom value up to 50 characters. | |
| order.customField5 | String | Custom value up to 50 characters. | |
| order.customField6 | String | Custom value up to 50 characters. | |
| order.customField7 | String | Custom value up to 50 characters. | |
| order.taxCounty | String | Tax county name if the state the order is going to charges tax at the county level. | |
| order.affiliateId | String | The affiliate ID to associate the order with. | |
| order.gift | Boolean | True/False if the order is a gift (defaults to false) | |
| order.giftEmail | String | Email to send the gift receipt to. | |
| order.leastCostRoute | Boolean | Either this needs to be True or the name of a shipping method must be specified in \*order.shippingMethod\* | Maybe |
| order.leastCostRouteShippingMethods\[#\] | String | Restrict the least cost routing to these shipping methods. | |
| order.coupons\[#\] | String | Coupons to apply to the order. | |
| order.items\[#\].itemId | String | Item ID of the item | Y |
| order.items\[#\].quantity | Integer | Quantity to purchase | Y |
| order.items\[#\].arbitraryUnitCost | Number | Specific price for the item. If not specified, the unit cost will be whatever value is currently configured on the item within UltraCart. Only use this field if the integration allow for price overrides. | |
| order.items\[#\].autoOrderSchedule | Boolean | Auto order schedule if the item is a customer selectable auto order. | |
| order.items\[#\].upsell | Boolean | Flag indicating the item was an upsell (default to false) | |
| order.items\[#\].autoOrderLastRebillDate | String | The last time the order was rebilled. This will determine when the next shipment occurs. This is used for importing historical auto orders from another system. The format for the date is MM/DD/YYYY. | Y - if importing historical orders for items that have auto order schedules. |
| order.items\[#\].options\[#\].name | String | Name of the option | Y - if the item has options |
| order.items\[#\].options\[#\].value | String | Value of the option | Y - if the item has options |
### Understanding the Nested Data Structures
As you can see from the parameter names we're representing the nested data structure of an order using familiar dot and array notation. Let's look at the example of passing two items on the order, one of which has options associated with it. The psuedo code would look like:
```
parameters.put("order.items[0].itemId", "HAT");
parameters.put("order.items[0].quantity", "1");
parameters.put("order.items[1].itemId", "TSHIRT");
parameters.put("order.items[1].quantity", "1");
parameters.put("order.items[1].options[0].name", "Sizes");
parameters.put("order.items[1].options[0].value", "Medium");
parameters.put("order.items[1].options[1].name", "Color");
parameters.put("order.items[1].options[1].value", "Blue");
```
### Processing the Results
The API will return back an HTTP 200 (OK) for successful API calls and an HTTP 400 (Bad Request) when the API call fails. If the importOrder call is successful then the body of the response will be the new UltraCart order ID (you may want to store this in your system). If it fails for any reason, the body of the response will be error messages (one per line in plain text format).
### Retries
If you API call fails, you should code your system to gracefully retry in the future. Give yourself time to review the failure in your logs before hitting the order repeatedly against the system.
## Cancel an Order Using the UltraCart Order Id
The table below shows all the possible parameters for the HTTPS POST.
| Parameter Name | Format | Description | Required |
| --- | --- | --- | --- |
| method | String | This should be the value **cancelOrderByUltraCartOrderId** to trigger this particular API. | Y |
| credentials.merchantId | String | UltraCart merchant ID to import into. | Y |
| credentials.channelPartnerCode | String | Channel partner code to use. | Y |
| credentials.channelPartnerPassword | String | API password configured on the channel partner | Y |
| orderId | String | The UltraCart Order ID returned from importOrder to cancel. | Y |
### Processing the Results
The API will return back an HTTP 200 (OK) for successful cancellation, HTTP (409) Conflict if the cancellation was not successful, and an HTTP 400 (Bad Request) when the API call due to error or missing parameters.
### Retries
If you API call fails, you should not retry call the API and instruct the user to manually handle the order.
## Cancel an Order Using the Channel Partner Order Id
The table below shows all the possible parameters for the HTTPS POST.
| Parameter Name | Format | Description | Required |
| --- | --- | --- | --- |
| method | String | This should be the value **cancelOrderByChannelPartnerOrderId** to trigger this particular API. | Y |
| credentials.merchantId | String | UltraCart merchant ID to import into. | Y |
| credentials.channelPartnerCode | String | Channel partner code to use. | Y |
| credentials.channelPartnerPassword | String | API password configured on the channel partner | Y |
| channelPartnerOrderId | String | The channel partner's order ID passed into the original importOrder call. | Y |
### Processing the Results
The API will return back an HTTP 200 (OK) for successful cancellation, HTTP (409) Conflict if the cancellation was not successful, and an HTTP 400 (Bad Request) when the API call due to error or missing parameters.
### Retries
If you API call fails, you should not retry call the API and instruct the user to manually handle the order.
## Examples
## HTML Page
Here's a simple example using a web page. **Test out your data with this example to make sure any issue you're having is not content related.**
```html/xml
```
## Visual Basic Module
:::warning
This script comes with zero support. It works, and UltraCart support cannot help you if you can't get it to work.
:::
```vb
Imports System.IO
Imports System.Net
Module Module1
Public Sub Post(ByVal strPostURLArgs As String, Optional ByVal strPostURL As String = "https://secure.ultracart.com/cgi-bin/UCChannelPartnerAPIV1")
Dim request As System.Net.HttpWebRequest = System.Net.WebRequest.Create(strPostURL)
request.Method = System.Net.WebRequestMethods.Http.Post
request.ContentLength = strPostURLArgs.Length
request.ContentType = "application/x-www-form-urlencoded"
Dim writer As New StreamWriter(request.GetRequestStream())
writer.Write(strPostURLArgs)
writer.Close()
Dim response As HttpWebResponse
Try
response = request.GetResponse()
Dim reader As New StreamReader(response.GetResponseStream())
Dim tmp As String = reader.ReadToEnd()
response.Close()
Console.WriteLine("===================================================")
Console.WriteLine("SUCCESS")
Console.WriteLine(tmp)
Console.WriteLine("===================================================")
Catch e As WebException
response = e.Response
Console.WriteLine("===================================================")
Console.WriteLine("ERROR")
Console.WriteLine("Error code: {0}", response.StatusCode)
Dim data As Stream = response.GetResponseStream()
Dim text As String = New StreamReader(data).ReadToEnd()
Console.WriteLine(text)
Console.WriteLine("===================================================")
End Try
End Sub
Sub Main()
' FILL IN THE MISSING VALUES BELOW
Dim params As New Hashtable
params.Add("method", "importOrder")
params.Add("credentials.merchantId", "") ' FILL IN
params.Add("credentials.channelPartnerCode", "") ' FILL IN
params.Add("credentials.channelPartnerPassword", "") ' FILL IN
params.Add("order.channelPartnerOrderId", "") ' FILL IN
params.Add("order.paymentMethod", "Credit Card")
params.Add("order.noRealtimePaymentProcessing", "N")
params.Add("order.skipPaymentProcessing", "N")
params.Add("order.autoApprovePurchaseOrder", "N")
params.Add("order.storeIfPaymentDeclines", "N")
params.Add("order.creditCardType", "Visa")
params.Add("order.creditCardNumber", "4444333322221111")
params.Add("order.creditCardExpirationMonth", "10")
params.Add("order.creditCardExpirationYear", "2015")
params.Add("order.creditCardVerificationNumber", "233")
params.Add("order.billToFirstName", "TEST")
params.Add("order.billToLastName", "TEST")
params.Add("order.billToAddress1", "55 Main Street")
params.Add("order.billToAddress2", "#130")
params.Add("order.billToCity", "Duluth")
params.Add("order.billToState", "GA")
params.Add("order.billToPostalCode", "30097")
params.Add("order.billToCountry", "US")
params.Add("order.billToDayPhone", "5555551212")
params.Add("order.billToEveningPhone", "5555551212")
params.Add("order.email", "joe@test.com")
params.Add("order.shipToFirstName", "TEST")
params.Add("order.shipToLastName", "McGroovy")
params.Add("order.shipToAddress1", "44 Main Street")
params.Add("order.shipToAddress2", "#130")
params.Add("order.shipToCity", "Duluth")
params.Add("order.shipToState", "GA")
params.Add("order.shipToPostalCode", "30097")
params.Add("order.shipToCountry", "US")
params.Add("order.shipToPhone", "5555551212")
params.Add("order.shipToEveningPhone", "5555551212")
params.Add("order.shippingMethod", "USPS: Priority Mail") ' FILL IN - MIGHT NEED TO CHANGE BASED ON YOUR STORE
params.Add("order.shipToResidential", "Y")
params.Add("order.items[1].ItemID", "") ' FILL IN
params.Add("order.items[1].quantity", "1")
params.Add("order.items[1].arbitraryUnitCost", "49.97")
Dim payload As String
Dim firstParam As Boolean
firstParam = True
Dim item As DictionaryEntry
payload = ""
For Each item In params
If Len(Trim(item.Value)) = 0 Then
Continue For
End If
If Not firstParam Then
payload = payload & "&"
End If
payload = payload & item.Key & "=" & System.Web.HttpUtility.UrlEncode(CStr(item.Value))
firstParam = False ' no matter what, set this to true to ensure first run gets set.
Next
Console.WriteLine(payload)
Post(payload)
Console.Beep()
Console.ReadLine()
End Sub
End Module
```
---
# Channel Partner API - REST Guide
https://docs.ultracart.com/developer/howtos/channel-partner-api/channel-partner-api-rest-guide
doc_type: how-to
# Channel Partner API - REST Guide
This guide will walk through the steps needed to submit orders to UltraCart as a Channel Partner via REST API calls. This method is heavily used by Call Centers and Distribution websites.
:::note
The REST API does not accept credit card numbers or cvv numbers. If you are submitting orders with credit card payment information, you must use [hosted fields](/checkout-payments/ultracart-hosted-credit-card-fields) to create tokens first. You may then include the card number and (optionally) the cvv number tokens.
:::
### Create API Key
You must create an API key (Authorized Application).
- You may do so here: Home → Configuration → Development (tab) → [Authorized Applications / API Keys](https://secure.ultracart.com/merchant/configuration/apiManagementApp.do).
- The API key **must** have Channel Partner permissions checked on that screen. Only those keys with Channel Partner permissions will display on the Channel Partner creation screen.
- There is a one-to-one relationship between API Keys and Channel Partners. You must create a new API key for each Channel Partner.
- For help creating an API Key, please see this related document: [API Simple Key](/developer/howtos/api-simple-key)
### Create Custom Channel Partner
- With the UltraCart Merchant site, navigate to [Home](https://secure.ultracart.com/merchant/mainMenu.do) → [Configuration](https://secure.ultracart.com/merchant/configuration/configurationMenuLoad.do) → [Custom Channel Partners](https://secure.ultracart.com/merchant/configuration/customChannelPartnerListLoad.do)
- Click the New button to create a new channel partner.
- Fill out **all** fields in the first section.
- The `Code` field is a short alphanumeric code used to identify where the order originated.
- The `Name` field is a human readable description of this channel partner.
- The `FTP password` isn’t used by the REST API, but the same engine also powers our legacy methods and a check is done for it. It must be supplied.
- Within the REST API section, select your API key that you created. If the list is empty, your key is most likely missing the channel partner read/write permission.
### Select an UltraCart REST SDK
Official SDKs cover seven languages. See [SDKs & Samples](../../sdks/index.md) for the package
name, install command, and authentication setup for each one. If you need a language that has
no SDK, call the REST API directly.
A worked channel-partner example in C# is available as
[ImportChannelPartnerOrder.cs](https://github.com/UltraCart/sdk_samples/blob/master/csharp/channel_partner/ImportChannelPartnerOrder.cs).
### Program Calls
Call the ChannelPartnerAPI.insertChannelPartnerOrder( )
See: [https://www.ultracart.com/api/#Operation11](https://www.ultracart.com/api/#Operation11)
The api link above contains a complete example written in C#. _(Most call centers use C#.)_
### Check the Logs
[https://secure.ultracart.com/merchant/configuration/apiManagementApp.do](https://secure.ultracart.com/merchant/configuration/apiManagementApp.do)
Each API key has logging. Review the logs. Contact UltraCart is you have any problems. We support our REST API and SDKs via our free support and are eager to assist you with programming questions.
Documentation: [https://www.ultracart.com/resources/api-and-webhooks.html](https://www.ultracart.com/resources/api-and-webhooks.html)
---
# Channel Partner API - Spreadsheet Import
https://docs.ultracart.com/developer/howtos/channel-partner-api/channel-partner-api-spreadsheet-import
doc_type: how-to
# Channel Partner API - Spreadsheet Import
The spreadsheet import interface for the generic channel partner is intended to allow importing of complete orders from a spreadsheet. There are two methods of processing the spreadsheet:
1. Uploading it through the web interface, or
2. FTPing the file to UltraCart's Virtual FTP server
Irregardless of which way you send the file to UltraCart, the format of the file is the same. In this tutorial we will cover building the file first and then uploading it.
## Configuring the Custom Channel Partner
The first thing that needs to happen before you can import orders is to configure the custom channel partner. Channel partners are how UltraCart keeps track of orders that originate from a source other than the UltraCart checkout process. To configure your channel partner go to:
:::note
[Main Menu](https://secure.ultracart.com/merchant/mainMenu.do) → [Configuration](https://secure.ultracart.com/merchant/configuration/configurationMenuLoad.do) →[Custom Channel Partners](https://secure.ultracart.com/merchant/configuration/customChannelPartnerListLoad.do)
:::
At the 1st screen `click` the new button.

There are four text fields and two check boxes to be completed. Also, two check boxes are to be considerd.

## API Credentials
The following are brief descriptions of the fields.
| Field | Description | Required |
| --- | --- | --- |
| Code | A 1-10 character code identifying the channel partner. We recommend using the initials of the partner as this will be visible when viewing orders within UltraCart | Y |
| Name | The descriptive name of the channel partner. | Y |
| API/FTP Password | Create a strong password. This will be the same password used for the API (SOAP or HTTP) as well as the FTP interface. | Y |
| Email FTP File Processing Reports To | The email address to send processing reports. You can specify multiple emails separated by a comma. | Y |
## Building the Spreadsheet
UltraCart will support three different formats for the spreadsheet:
- .csv (comma separated values) - [Download Channel Partner Template CSV](https://ultracart.atlassian.net/wiki/download/attachments/1376714/Channel-Partner-Spreadsheet-Template.csv?api=v2)
- .xls (Microsoft Excel 1997-2002 format)
- .xlsx (Microsoft Excel 2007+ format) [Download Channel Partner Template (xlsx)](https://ultracart.atlassian.net/wiki/download/attachments/1376714/Channel-Partner-Spreadsheet-Template.xlsx?api=v2)
The first row of the spreadsheet must contain headers. The headers need to come from the table below.
Acceptable values for boolean parameters:
:::info
`true`: true, TRUE, yes, YES, on, ON, y, Y, 1
`false` false, FALSE, no, NO, off, OFF, n, N, 0
:::
| Header Name | Alternate Header Name | Format | Description | Required |
| --- | --- | --- | --- | --- |
| order.channelPartnerOrderId | | String | A unique order ID from the external system. | Y |
| order.paymentMethod | | String | The method of payment. **Credit Card** or **Purchase Order** | Y |
| order.noRealtimePaymentProcessing | | Boolean | Leaves the order in Accounts Receivable instead of processing the card in real-time. | |
| order.skipPaymentProcessing | | Boolean | Skip over the payment processing and move the order on to shipping. | |
| order.considerRecurring | | Boolean | If set to true, then we will pass the recurring flag to the gateways that support it (Authorize.Net and PayPal Web Payments Pro) | |
| order.autoApprovePurchaseOrder | | Boolean | Automatically approve the purchase order. | |
| order.storeIfPaymentDeclines | | Boolean | Store the order in Accounts Receivable if the credit card declines | Recommend - Y |
| order.treatWarningsAsErrors | | Boolean | Treat warnings (like the pre-oder warning) as errors that prevent the order from importing | Defaults to Y |
| order.storeCompleted | | Boolean | Store the order in the completed orders stage of the system. This is used for importing historical orders from other carts. | |
| order.creditCardAuthorizationReferenceNumber | | String | If you authorized the order outside of UltraCart, this is the transaction identifier that UltraCart will use to capture the order. | |
| order.creditCardAuthorizationAmount | | Number | If you authorized the order outside of UltraCart, this is the amount of the authorization. | |
| order.creditCardAuthorizationDts | | Timestamp | If you authorized the order outside of UltraCart, this is the timestamp of the authorization.** Required format: MM/DD/YYYY HH:MM:SS **Example ** 07/01/2014 14:23:32** **Required format: MM/DD/YYYY HH:MM:SS**Example: ** 07/01/2014 14:23:32** | |
| order.creditCardType | | String | Visa, MasterCard, AMEX, or Discover | Y - CC Orders |
| order.creditCardNumber | | String | 15 or 16 digit credit card number (spaces or dashes OK) | Y - CC Orders |
| order.creditCardToken | | String | Token of the credit card (Stripe.com or other tokenizing gateway supported by UltraCart). | |
| order.creditCardExpirationMonth | | Number | Month 1 through 12 (January = 1, December = 12) | Y - CC Orders |
| order.creditCardExpirationYear | | Number | Four Digit Year | Y - CC Orders |
| order.creditCardExpirationMonthYear | | String | The format MM/YY or MM/YYYY | |
| order.creditCardVerificationNumber | | Number | | |
| order.rotatingTransactionGatewayCode | | String | The rotating transaction gateway code to use for this order. | |
| order.purchaseOrderNumber | | String | The purchase order number. | Y- Purchase Order |
| order.billToFirstName | | String | | Y |
| order.billToLastName | | String | | Y |
| order.billToTitle | | String | | |
| order.billToCompany | | String | | |
| order.billToAddress1 | | String | | Y |
| order.billToAddress2 | | String | | |
| order.billToCity | | String | | Y |
| order.billToState | | String | | Y |
| order.billToPostalCode | | String | | Y |
| order.billToCountry | | String | Use the full spelling that UltraCart uses or provide the ISO-3166 two letter country code. | Y |
| order.billToDayPhone | | String | | |
| order.billToEveningPhone | | String | | |
| order.email | | String | | |
| order.ccEmail | | String | | |
| order.associatedWithCustomerProfileIfPresent | | String | If this is yes, the order will be associated with the customer profile that has the same email (if it exists) and they will receive their discounted pricing. | |
| order.shipToFirstName | | String | | Y - physical goods |
| order.shipToLastName | | String | | Y - physical goods |
| order.shipToTitle | | String | | |
| order.shipToCompany | | String | | |
| order.shipToAddress1 | | String | | Y - physical goods |
| order.shipToAddress2 | | String | | |
| order.shipToCity | | String | | Y - physical goods |
| order.shipToState | | String | | Y - physical goods |
| order.shipToPostalCode | | String | | Y - physical goods |
| order.shipToCountry | | String | Use the full spelling that UltraCart uses or provide the ISO-3166 two letter country code. | Y - physical goods |
| order.shipToPhone | | String | | Y - physical goods |
| order.shipToEveningPhone | | String | | |
| order.shippingMethod | | String | If the order requires shipping then you either need to specify the name of the method in this field, or pass order.leastCostRoute = true and let UltraCart pick the method of shipment | Maybe |
| order.arbitraryTax | | Number | The tax charged by the external system | |
| order.arbitraryTaxableSubtotal | | Number | The taxable subtotal the tax was based upon by the external system | |
| order.arbitraryTaxRate | | Number | The tax rate used by the external system | |
| order.arbitraryShippingHandlingTotal | | Number | The shipping/handling cost charged by the external system | |
| order.taxExempt | | Boolean | | |
| order.giftMessage | | String | | |
| order.deliveryDate | | Date | If specified, use the format MM/DD/YYYY | |
| order.shipOnDate | | Date | | |
| order.ipAddress | | String | The IP address of the remote customer (pass 127.0.0.1) if not available | Y |
| order.shipToResidential | | Boolean | Will default to a business if not specified | Recommended |
| order.mailingListOptIn | | Boolean | Will default to opted out if not specified | Recommended |
| order.specialInstructions | | String | Special instructions from the customer about shipment | |
| order.screenBrandingThemeCode | | String | The screen branding theme code to associate the order with. | Y |
| order.advertisingSource | | String | | |
| order.customField1 | | String | Custom value such as the DNIS of the caller up to 50 characters. | |
| order.customField2 | | String | Custom value up to 50 characters. | |
| order.customField3 | | String | Custom value up to 50 characters. | |
| order.customField4 | | String | Custom value up to 50 characters. | |
| order.customField5 | | String | Custom value up to 50 characters. | |
| order.customField6 | | String | Custom value up to 50 characters. | |
| order.customField7 | | String | Custom value up to 50 characters. | |
| order.taxCounty | | String | Tax county name if the state the order is going to charges tax at the county level. | |
| order.affiliateId | | String | The affiliate ID to associate the order with. | |
| order.gift | | Boolean | True/False if the order is a gift (defaults to false) | |
| order.giftEmail | | String | Email to send the gift receipt to. | |
| order.leastCostRoute | | Boolean | Either this needs to be True or the name of a shipping method must be specified in \*order.shippingMethod\* | Maybe |
| order.leastCostRouteShippingMethods\[#\] | | String | Restrict the least cost routing to these shipping methods. | |
| order.coupons\[#\] | | String | Coupons to apply to the order. | |
| order.items\[#\].itemId | order.items.itemId | String | Item ID of the item | Y |
| order.items\[#\].quantity | order.items.quantity | Integer | Quantity to purchase | Y |
| order.items\[#\].arbitraryUnitCost | order.items.arbitraryUnitCost | Number | Specific price for the item. | |
| order.items\[#\].autoOrderSchedule | order.items.autoOrderSchedule | String | Auto order schedule if the item is a customer selectable auto order. Should be one of the following values: - Weekly - Every 10 Days - Biweekly - Every 24 Days - Every 28 Days - Monthly - Every 45 Days - Every 2 Months - Every 3 Months - Every 4 Months - Every 6 Months - Yearly | |
| order.items\[#\].upsell | order.items.upsell | Boolean | Flag indicating the item was an upsell (default to false) | |
| order.items\[#\].autoOrderLastRebillDate | order.items.autoOrderLastRebillDate | Date | The last time the order was rebilled. This will determine when the next shipment occurs. This is used for importing historical auto orders from another system. The format for the date is MM/DD/YYYY. | Y - if importing historical orders for items that have auto order schedules. |
| order.items\[#\].options\[#\].name | order.items.options\[#\].name | String | Name of the option | Y - if the item has options |
| order.items\[#\].options\[#\].value | order.items.options\[#\].value | String | Value of the option | Y - if the item has options |
### Multiple Rows Per Order or Multiple Columns for Items
Order data by it's very nature is multi-dimensional which can be difficult to represent in a spreadsheet. If you are using multiple columns in your spreadsheet to represent the item data you would construct the headers like this:
| order.items\[0\].itemId | order.items\[0\].quantity | order.items\[1\].itemId | order.items\[1\].quantity |
| --- | --- | --- | --- |
| SHIRT | 1 | PANTS | 1 |
An optional method is to use multiple rows to represent the items. In this scenario the other non-item data is repeated on all the rows and the item data varies by row. UltraCart will roll up the rows based upon the order.channelPartnerOrderId value.
| order.items.itemId | order.items.quantity |
| --- | --- |
| SHIRT | 1 |
| PANTS | 1 |
### Channel Partner Uses Different Item SKU?
Not a problem. At the UltraCart Item Management screen, click on the appropriate Item Id. Inside the Item editor click on the Other tab.

Another set of dark grey Tabs will appear below the Other Tab. Click Channel Partner Item Mapping.

Enter your custom SKU as shown below. UltraCart will transmit the SKU to the UltraCart item ID during the import process.

## Uploading via the Web Interface.
First navigate to:
:::note
[Main Menu](https://secure.ultracart.com/merchant/mainMenu.do) → [Configuration](https://secure.ultracart.com/merchant/configuration/configurationMenuLoad.do) → Checkout → [Custom Channel Partners](https://secure.ultracart.com/merchant/configuration/customChannelPartnerListLoad.do)
:::
Click on the "import orders" button as shown below.

On the next screen click the Browse button, navigate within your system and locate the file to be imported. Want all the imported orders marked as "completed"? Click the check box as shown below. Lastly, click the Submit Job button at the bottom.

:::info
Use this flag if your are importing historical orders. This will keep them from processing payments on those orders.
:::
:::note
If you import orders associated with items that have an auto order schedule configured, they WILL setup an auto order schedule. This even applies to historical orders if the "Import as completed orders" check box is selected.
:::
Once you submit the job you will be shown a screen informing you that the results will be available soon under the report pickup.

### Spreadsheet Processing Errors:
| Error | Remediation steps |
| --- | --- |
| Invalid column name \[order.items\[#\].itemId\]. See the column-naming rules above. | Edit the column header text and replace the # with a number, starting with 0 and adding additional columns for additional items in a single order as described in the section above -> \[order.items\[0\].itemId\] (See previous section of this document "Multiple Rows Per Order or Multiple Columns for Items" for more details.) |
| Invalid column name \[order.items\[#\].quantity\]. See the column-naming rules above. | Edit the column header text and replace the # with a number, starting with a 0 and adding in in additional columns for additional items in a single order -> \[order.items\[0\].quantity (See previous section of this document "Multiple Rows Per Order or Multiple Columns for Items" for more details.) |
| | |
## FTPing the File to UltraCart's Virtual FTP Server
You can also FTP the file to the FTP server. To do this connect to:
| Setting | Value |
| --- | --- |
| Server | merchantftp.ultracart.com |
| Username | / |
| Password | The FTP/API password configured for this channel partner. |
Once you connect to the server you will see the following folders:
| Directory | Meaning |
| --- | --- |
| /import/in/ | Deposit the spreadsheets into this folder. Once a file is stored it can not be read again, but can be deleted if it was placed there erroneously |
| /import/out/ | The processing reports will appear in this folder. |
Processing of files occurs once per hour. If you configured the "Email FTP File Processing Reports To" field on the custom channel partner then an email with the processing report will be sent immediately after the processing is complete. This is a good way to keep tabs on the processing from a user perspective.
:::info
UltraCart will delete any processing reports in the /import/out/ folder older than sixty days.
:::
:::note
You must transfer the order data over FTP SSL or PGP encrypt the file if you are using FTP. To use PGP encryption make sure you use the UltraCart public PGP key [uc-file-transfer-pgp-public-2015.pgp](pathname:///confluence/1377246/uc-file-transfer-pgp-public-2015.pgp)
:::
## Processing Reports
The reports produced after processing contain three columns represented in a CSV format. The table below shows an example.
| channelPartnerOrderId | ultraCartOrderId | error |
| --- | --- | --- |
| 1000 | | Invalid credit card number. |
| 1000 | | Billing first name not specified. |
| 1001 | DEMO-00123456 | |
| In the example above the channel partner order 1000 produced two errors. The channel partner order 1001 imported successfully as UltraCart order ID DEMO-00123456. If you upload the spreadsheet via the web interface then you will retrieve the processing report from the report pickup section. If you upload it to the FTP interface then you can retrieve the processing report from /import/out/ on the FTP server. ## Shipment Confirmation When orders that are imported via the Channel Partner API are shipped, UltraCart automatically produces a shipment confirmation CSV file and places it on the FTP server under /export/shipment/. The format of the CSV file looks like this: | channelPartnerOrderId | ultraCartOrderId |
| channelPartnerOrderId | ultraCartOrderId | shippingMethod | trackingNumber |
| --- | --- | --- | --- |
| 1001 | DEMO-00123456 | USPS: Priority Mail | 1234567890 |
| 1002 | DEMO-00123457 | USPS: First Class Mail | 1234567891 |
| 1003 | DEMO-00123458 | UPS: Ground | 1Z1234567890 |
| 1003 | DEMO-00123458 | UPS: Ground | 1Z1234567891 |
:::info
If an order contains multiple tracking numbers then it will appear as multiple rows in the spreadsheet with the same channelPartnerOrderId and ultraCartOrderId.
:::
:::note
UltraCart will automatically remove shipment confirmations older than 60 days old.
:::
---
# Troubleshooting API Errors
https://docs.ultracart.com/developer/howtos/troubleshooting/troubleshooting-api-errors
doc_type: how-to
# Troubleshooting API Errors
## Information you need before contacting Support
1. What language are you using?
2. Are you using our SDK for that language? (You should. The SDKs are _excellent_.)
3. Using the information below, what is your error?
1. Is this an authentication issue?
2. Are you receiving an error in the logs? What error?
3. Are you receiving unexpected results? What were you expecting and what did you receive?
4. If we can't help you with the above information, we're going to need to see code. Pull out the smallest workable code block you can and let us see what you're doing.
1. Create an issue on GitHub: [https://github.com/UltraCart](https://github.com/UltraCart) (create the issue in the proper sdk project).
2. Email your script or a small zip file to [support@ultracart.com](mailto:support@ultracart.com)
## Examine the Response
Detailed error messages are returned for most API errors within the response body.
However, clients such as the PHP SDK raise an exception with a very generic message.
For better troubleshooting, fine tune your try/catch blocks to trap the ApiException. It yields more information.
Example:
```php
setApiKey('x-ultracart-simple-key', 'XXXXXXXXXXXXXXXXXXXXXXXXXXXXXXXXXXXXXXXXXXXXXXXXXXXXXXXXXXXXXXXX');
$api_instance = new ultracart\v2\api\CustomerApi();
$customer_profile_oid = 1234567; // int | The customer oid to retrieve.
try {
$result = $api_instance->customerCustomersCustomerProfileOidGet($customer_profile_oid);
print_r($result);
} catch (\ultracart\v2\ApiException $e) {
echo 'Exception when calling CustomerApi->customerCustomersCustomerProfileOidGet: ', $e->getMessage(), PHP_EOL;
// THE FOLLOWING LINE PROVIDES DETAILED ERROR INFORMATION
print_r($e->getResponseObject());
}
```
## Read the Logs
- Navigate to the API Management page: [https://secure.ultracart.com/merchant/configuration/apiManagementApp.do](https://secure.ultracart.com/merchant/configuration/apiManagementApp.do)
- Click on the log button for your API key.

- View the response and the request.
1. Are you sure you're sending what you think you're sending?
2. What does the response say? Is it an error? Is it a valid response? If it is valid, are you consuming it properly?

---
# UltraCart HTTP 403 Error Troubleshooting Guide
https://docs.ultracart.com/developer/howtos/troubleshooting/troubleshooting-http-403-errors
doc_type: how-to
# UltraCart HTTP 403 Error Troubleshooting Guide
## Introduction
An HTTP 403 occurs when a server understands the request but refuses to authorize it. In UltraCart environments they fall into four groups:
- StoreFront and checkout customer issues
- Merchant Portal access issues
- API and integration errors
- Firewall and Web Application Firewall (WAF) blocks, including automation and AI tools
:::note
Application-level 403 errors and firewall blocks have different causes and different fixes. Classify which one you have before you start troubleshooting.
:::
## Quick-reference troubleshooting matrices
Find the row matching your symptom, then read across for the cause and the fix.
### Customer-facing: StoreFront and checkout
| Symptom / Error Message | Most Likely Cause | Immediate Customer Fix | Merchant Prevention / Fix |
| --- | --- | --- | --- |
| “This site can’t be reached” during custom domain setup | DNS/SSL mismatch | Use temporary ultrastore domain | Complete SSL setup and allow propagation |
| “Access Denied” mid-checkout | Checkout session timeout | Refresh and restart checkout | Add session timeout UX guidance |
| “HTTP/1.1 403 - Your customer profile does not have permission” | Missing pricing tier | Log in with correct account | Assign proper pricing tier |
### Merchant-facing: portal and integrations
| Symptom / Error Message | Most Likely Cause | Immediate Fix | Prevention / Best Practice |
| --- | --- | --- | --- |
| Intermittent 403 resolved in incognito | Cached session or extensions | Clear cache; disable extensions | Reduce reliance on browser extensions |
| 403 on embedded checkout / mixed domain | Host/origin validation failure | Use primary domain | Avoid mixed-domain embeds |
| 403 after repeated attempts | Rate limiting / bot protection | Wait and retry | Implement CAPTCHA / reduce retries |
### Automation and bot detection
| Symptom / Behavior | Most Likely Cause | Immediate Fix | Prevention / Best Practice |
| --- | --- | --- | --- |
| Temporary lockout after multiple requests | Rate limit exceeded | Wait for block to clear | Reduce request frequency |
| 403 across all pages for several minutes | IP temporarily blocked | Wait and retry | Space out automated requests |
| Works in browser, fails in automation tool | Non-browser client | Run the task in a real browser | Drive an actual browser session rather than a scripted client |
| Works after a few minutes | Temporary block expired | Retry later | Stay within rate limits |
| Only fails from one IP | IP flagged | Change network or wait | Reduce request volume from a single address |
| Triggered after using a non-browser automation client | Raw HTTP, Python, or headless client rather than a real browser session | Switch to a browser-based automation tool | Use a tool that drives an actual browser instead of a raw HTTP client or headless script |
| Triggered immediately on script execution | Known non-browser client signature | Switch to browser-based automation | Do not point raw HTTP clients or header-spoofed headless scripts at the merchant UI |
## FAQ
### Why do customers get a 403 during checkout?
Usually a session timeout, an account restriction, or stale checkout state. Have the customer refresh and restart checkout, then confirm their account has the pricing tier the items require.
### Why am I getting 401 or 403 API errors?
Usually missing permissions or invalid API credentials. Confirm the API key is current and that its permissions cover the endpoint you are calling.
### Why does my automation tool get blocked?
Two separate controls can block it, and they have different fixes.
The first identifies clients that are not real browsers, such as generic HTTP libraries and headless scripts, and blocks them. The second applies rate limits to all traffic. A tool can pass the first and still trip the second.
### What triggers an automation block?
- Raw HTTP clients
- Headless instances that do not present as a standard browser
- Non-browser user agents
- Request rates above the limit, whatever the client
### How do I fix an automation block?
- Use a browser-based automation tool that drives an actual browser, such as Claude in Chrome or another tool operating through a real Chrome or Chromium session, instead of scripting raw HTTP requests or a headless client with spoofed headers.
- Slow down request frequency. A real browser session is still subject to rate limits, so an automation tool that drives Chrome can earn a temporary block by exceeding them.
- Prefer the UltraCart REST API for programmatic integrations. Reserve browser automation for tasks that require the merchant UI itself.
### What is the correct approach for automation?
Use:
- The **UltraCart REST API** for programmatic and integration work. It is the supported path and is not subject to the non-browser client block.
- A genuine browser-based automation tool when the task requires operating the merchant UI itself, kept within rate limits.
Avoid:
- Raw HTTP or Python clients, and headless scripts that spoof headers to impersonate a browser.
- Scraping the merchant portal UI outside a real browser session.
## Conclusion
UltraCart HTTP 403 errors fall into four categories:
1. Customer session and eligibility issues
2. Merchant permissions and authentication
3. Integration and configuration issues
4. Firewall and bot detection, including automation and AI tools
Classifying the error first is what makes the rest of the troubleshooting fast.
## Related Documentation
- [Authentication](../../essentials/authentication.md)
- [Troubleshooting API Errors](./troubleshooting-api-errors.md)
---
# Understanding Auto Order State
https://docs.ultracart.com/developer/howtos/understanding-auto-order-state
doc_type: explanation
# Understanding Auto Order State
Auto Orders can transition through multiple states based upon how the payments process, customer actions, and merchant actions. The list below describes several scenarios and how the properties on the auto order object will behave.
## Scenario: Auto order in good standing
- enabled = true
- credit\_card\_attempt = 0
- all item\[\].next\_shipment\_dts > now
## Scenario: Auto order runs the complete schedule successfully
- enabled = false
- disabled\_dts = date/time the auto order was disabled
- all item\[\].next\_shipment\_dts >= 1/1/2030
## Scenario: Card has declined at least once, but auto order is still active and will be retried
- enabled = true
- credit\_card\_attempt = number greater than zero
## Scenario: Card is attempted X times, declines, and the auto order disabled.
- enabled = false
- disabled\_dts = date/time the auto order was disabled
- credit\_card\_attempt = number of attempts that have been made
## Scenario: Customer cancels the auto order via an interactive cancellation form or easy cancel email (if the merchant has that enabled)
- enabled = false
- canceled\_by\_user = "customer"
- canceled\_dts = date/time of the activity
## Scenario: Merchant goes into the auto order editor and sets the status to "canceled by customer"
- enabled = false
- canceled\_by\_user = "customer"
- canceled\_dts = date/time of the activity
## Scenario: Merchant goes into the auto order editor and sets the status to "canceled by merchant"
- enabled = false
- canceled\_by\_user = "login that perform the cancel"
- canceled\_dts = date/time of the activity
## Scenario: Merchant goes into the auto order editor and sets the status to "disabled"
- enabled = false
- disabled\_dts = date/time the auto order was disabled
---
# Upsells via API
https://docs.ultracart.com/developer/howtos/upsells-via-api
doc_type: how-to
# Upsells via API
Here are the steps to offering Upsell via the UltraCart API.
**Use the built-in upsell gauntlet.** Don't use the API. If you're determined to use the API, please read on...
### Reasons to use the built-in Upsell
1. It's easy to use and allows for complex upsell paths.
2. It removes tremendous complexity from the checkout
3. It has a great dashboard and metric tracking.
### Objections to using the built-in Upsell
Objection: _"We want to keep control of the checkout on our site."_
Response: Why? You can hand off to UltraCart and then immediately redirect on the receipt page if needed. It's done all the time.
Objection: "_We'll have to style up the upsell and receipt pages to match our site"_
Response: Yes, but the time spent copying and pasting css code is nothing compared to the time required to implement an api based upsell.
Objection: _"I only know PHP. I don't know [Velocity](http://velocity.apache.org/engine/1.7/user-guide.html)__."_
Response: You probably won't even use the template language. Very few implementations have need of Velocity. But if you do, it's easy to learn and UltraCart Support is there to help you out.
### Steps for a manual Upsell
Okay, you have your reasons, so here's the gory details for implementing an Upsell with the UltraCart API.
This example is given using the PHP syntax, but applies to all.
1. Set the cart.upsell\_after property with an appropriate object. $cart→setUpsellAfter().
1. You must set one of two properties: finalize\_after\_dts or finalize\_after\_minutes. One is an absolute time and the other is a relative. These times instruct UltraCart when to finalize an order in case the customer closes the browser window. Sometimes the customer becomes annoyed with annoying upsells, excessive upsells, or upsells with long videos. They close the browser. If that happens, when the finalize time is reached, UltraCart will sweep the order into a completed state and charge their card. Setting this property is critical to doing api based upsells.
2. Do _**not**_ call $checkoutApi.finalizeOrder as normally done.
3. When the checkout is finished, instead do a full validation using $checkoutApi.validateCart, and if successful redirect your customer to your first upsell page.
4. One each upsell page, retrieve the cart id from wherever you have stored it (cookie, localstorage, server side session variable) and load their cart. If they choose an upsell, adjust the cart items appropriately and call $checkoutApi→updateCart().
5. Continue showing upsells as desired.
6. When the last upsell is reached, call $checkoutApi.finalizeOrder().
### PayPal Upsells
1. For PayPal upsells, you must do a $checkoutApi→handoff(). You cannot finalizeOrder a PayPal order since browser control must be given to PayPal.
2. The CheckoutHandoffRequest must contain several values:
1. paypal\_return\_url must be set to the page after PayPal is successful. This is the page that will receive control after a successful PayPal process.
2. paypal\_maximum\_upsell\_revenue must be set to the maximum amount you could possibly charge a customer who selected every possible upsell. Failure to do so will cause your order to fail when upsells are used. Note: UltraCart calculates this automatically using the built-in Upsells.
---
# Creating a Return Email Webhook
https://docs.ultracart.com/developer/howtos/webhooks/creating-a-return-email-webhook
doc_type: how-to
# Creating a Return Email Webhook
The following tutorial will explain how to configure a webhook that is fired when a return email should be sent. The send return email webhook can be used to drive a custom return email integration.
---
# Creating a Simple Webhook
https://docs.ultracart.com/developer/howtos/webhooks/creating-a-simple-webhook
doc_type: how-to
# Creating a Simple Webhook
## Configure a Webhook
- Login to [secure.ultracart.com](https://secure.ultracart.com) and navigate to Home → Configuration → Development → [Webhooks](https://secure.ultracart.com/merchant/configuration/webhookApp.do).
- Click the **New Webhook** button.
- Enter the **Target URL**. This is the full, absolute URL of your server. For this example, we entered [https://www.myserver.com:9999/order\_webhook.php](https://www.myserver.com:9999/order_webhook.php)
- **API Version**: Leave this at Latest Version if possible. If your webhook is mission critical, then specify a version to avoid changes.
- **Authentication Type**: For this example, we used no Authentication. You may configure Basic authentication if desired.
- **Event Subscription**: Select which events to receive for this webhook.
- Auto Order
- Chargeback
- Checkout
- Customer
- Fulfillment
- Item
- Order
:::info
- For a clean implementation, you may wish to only receive one event per webhook. Your application will likely do something different for most events and having them separate will provide clarity. For this example, we selected all the events.
:::
- Add the expansion you need. The expansion is a csv list of which order parts you desire. For event\_ship, you may only need the shipping part of an order. This reduces payload size considerably. The list of expansions are here: [https://www.ultracart.com/api/#resource\_order.html](https://www.ultracart.com/api/#resource_order.html) (you'll need to click on the Expansion link under the Order section in the left hand navigation).
- For this example, we added the kitchen sink. `affiliate,affiliate.ledger,auto_order,billing,channel_partner,checkout,coupon,customer_profile,digital_order,edi,fraud_score,gift,gift_certificate,internal,item,linked_shipment,marketing,payment,payment.transaction,quote,salesforce,shipping,summary,taxes`
- **Message Payload**: Configure **Max Size** and **Max Events / Payload**
- Click the **Save** button
- After saving, edit the webhook and add any expansions needed. See [http://www.ultracart.com/api/](http://www.ultracart.com/api/) for expansion lists.
## List of Webhooks
| **Event** | **Description** | **Response** | **Expansion** |
| --- | --- | --- | --- |
| order\_create | Fired when an order is created. | Order | Yes |
| order\_update | Fired when an order is updated. | Order | Yes |
| order\_delete | Fired when an order is deleted. | Order | Yes |
| order\_stage\_change | Fired when an order stage changes. | Order | Yes |
| order\_payment\_failed | Fired when a payment fails. | Order | Yes |
| order\_payment\_process | Fired when a payment is processed. | Order | Yes |
| order\_ship | Fired when an order is shipped. | Order | Yes |
| order\_ship\_expected | Fired when an order has an expected delivery date. | Order | Yes |
| order\_ship\_out\_for\_delivery | Fired when an order is out for delivery. | Order | Yes |
| order\_ship\_delivered | Fired when an order is delivered. | Order | Yes |
| order\_reject | Fired when an order is rejected. | Order | Yes |
| order\_refund | Fired when an order is refunded. | Order | Yes |
| order\_s3\_invoice | Fired when an order has a PDF invoice archived to S3. | Order | Yes |
## Webhook Expansions
:::tip
Webhooks have expansions! They are only visible after you create the webhook. Once you create your webhook, edit it and add expansions to your events to ensure you get all the data you need.

:::
### Additional Step for Fulfillment Webhooks
:::note
The fulfillment webhooks are built on top of the distribution center infrastructure. So fulfillment webhooks will not fire like other webhooks. When an order is placed, order\_create may fire nearly immediately, but the fulfillment\_transmit may fire 5 minutes later when the distribution center polling routine starts up. The distribution center transmitters may also have custom frequencies. If a distribution center is configured to only transmit once a day, there may be significant lag between an order entering shipping and a fulfillment\_transmit event firing.
:::
Fulfillment webhooks are designed to fire for a specific distribution center. The webhook must be connected to the distribution center. Here are the steps:
- After fully creating your webhook using the steps above, navigate to the Distribution Centers.
Home → Configuration → Checkout → Shipping → Distribution Centers (4th tab on Shipping screen)
Shortcut link: [https://secure.ultracart.com/merchant/configuration/shipping/distributionCenterListLoad.do](https://secure.ultracart.com/merchant/configuration/shipping/distributionCenterListLoad.do)
- Find the target distribution center and click the edit button.
- Click on the `Transmission Mechanism` tab when the distribution center loads.
- Scroll down until you find the mechanism named `REST`. Select that mechanism.
- Select the API User and then the webhook.
- Save your changes.

## Webhook Script Examples
Working receiver scripts in PHP and Python live in the samples repository:
[sdk_samples/webhooks](https://github.com/UltraCart/sdk_samples/tree/master/webhooks).
The webhook will receive a JSON payload as a POST body. The structure of the payload is an array of simple objects with key = event\_name and value = object.
## Test your Webhook
Once your webhook script is deployed, test out your webhook by clicking the `test` button on the configuration screen. All webhooks have detailed logging accessible via the `log` button.

## Sample JSON Payload
This webhook contains an **order\_create** event. Note that all payloads are arrays of events, even those containing a single event.
##### **Sample JSON of a webhook payload consisting of a single order**
```js
[
{"order_create":
{
"merchant_id": "DEMO",
"order_id": "DEMO-0009103373",
"current_stage": "Shipping Department",
"creation_dts": "2016-04-07T14:07:36-04:00",
"language_iso_code": "ENG",
"billing": {
"first_name": "Test",
"last_name": "Order",
"address1": "Test Street",
"city": "ELK GROVE",
"state_region": "CA",
"postal_code": "95758",
"country_code": "US",
"email": "adam@kontor.hu"
},
"shipping": {
"weight": {
"value": 5,
"uom": "LB"
},
"shipping_method": "USPS: Priority Mail",
"first_name": "Test",
"last_name": "Order",
"address1": "Test Street",
"city": "ELK GROVE",
"state_region": "CA",
"postal_code": "95758",
"country_code": "US",
"ship_to_residential": true,
"day_phone": "(234) 234-2342",
"tracking_numbers": [
""
],
"lift_gate": false
},
"taxes": {
"tax_rate": 0.08000,
"tax_rate_state": 0.07250,
"tax_rate_city": 0.00750
},
"payment": {
"payment_method": "Credit Card",
"payment_status": "Processed",
"test_order": true,
"hold_for_fraud_review": false,
"credit_card": {
"card_type": "VISA",
"card_number": "1111",
"card_number_truncated": true,
"card_expiration_month": 12,
"card_expiration_year": 2018,
"card_auth_ticket": "TEST"
},
"payment_dts": "2016-04-07T14:07:36-04:00",
"transactions": [
{
"transaction_gateway": "WorldPay Business Gateway",
"transaction_timestamp": "2016-04-07T14:07:36-04:00",
"details": [
{
"name": "Authorization Code",
"value": "TEST",
"type": "AuthTicket"
},
{
"name": "Test Transaction",
"value": "Yes"
}
],
"successful": true
}
]
},
"summary": {
"shipping_handling_total": {
"value": 2.96,
"localized": 2.96,
"localized_formatted": "$2.96"
},
"subtotal": {
"value": 20.00,
"localized": 20.00,
"localized_formatted": "$20.00"
},
"tax": {
"value": 1.60,
"localized": 1.60,
"localized_formatted": "$1.60"
},
"total": {
"value": 24.56,
"localized": 24.56,
"localized_formatted": "$24.56"
},
"shipping_handling_total_discount": {
"value": 0.00,
"localized": 0.00,
"localized_formatted": "$0.00"
},
"subtotal_discount": {
"value": 0.00,
"localized": 0.00,
"localized_formatted": "$0.00"
},
"taxable_subtotal_discount": {
"value": 0.00,
"localized": 0.00,
"localized_formatted": "$0.00"
},
"taxable_subtotal": {
"value": 20.00,
"localized": 20.00,
"localized_formatted": "$20.00"
}
},
"internal": {
"exported_to_accounting": true
},
"marketing": {
"mailing_list": true
},
"items": [
{
"merchant_item_id": "Bone",
"quantity": 1,
"description": "TJ\u0027s DOGGIE BONES (5 lbs.)\nCode: JQXZPZWBFQ",
"cost": {
"value": 20.00,
"localized": 20.00,
"localized_formatted": "$20.00"
},
"weight": {
"value": 2.26796,
"uom": "KG"
},
"tax_free": false,
"special_product_type": "",
"free_shipping": false,
"discount": {
"value": 0,
"localized": 0.00,
"localized_formatted": "$0.00"
},
"item_reference_oid": 50786363,
"accounting_code": "Bone",
"length": {
"value": 0.394,
"uom": "IN"
},
"height": {
"value": 0.394,
"uom": "IN"
},
"width": {
"value": 0.394,
"uom": "IN"
},
"no_shipping_discount": false,
"ship_separately": false,
"distribution_center_code": "DFLT",
"hazmat": false,
"kit": false,
"kit_component": false,
"upsell": false,
"exclude_coupon": false,
"unit_cost_with_discount": {
"value": 20.00,
"localized": 20.00,
"localized_formatted": "$20.00"
},
"total_cost_with_discount": {
"value": 20.00,
"localized": 20.00,
"localized_formatted": "$20.00"
},
"cogs": 3.0000,
"barcode": "078742226583",
"country_code_of_origin": "US"
}
],
"customer_profile": {
"customer_profile_oid": 1971831,
"email": "adam@kontor.hu",
"track_separately": false,
"tax_exempt": false,
"allow_purchase_order": false,
"auto_approve_purchase_order": false,
"allow_cod": false,
"auto_approve_cod": false,
"free_shipping": false,
"unapproved": false,
"send_signup_notification": false,
"no_realtime_charge": false,
"allow_selection_of_address_type": false,
"exempt_shipping_handling_charge": false,
"no_free_shipping": false,
"allow_3rd_party_billing": false,
"no_coupons": false,
"allow_quote_request": false
},
"checkout": {
"customer_ip_address": "79.121.124.98",
"custom_field7": "Y",
"screen_branding_theme_code": "CSTM",
"upsell_path_code": "DFLT"
},
}
}
]
```
## Alternatives to JSON format
If you're interested in extracting a sub-set of the JSON data into a flatter format, I would really encourage you to have a look at our [Data Warehouse for BigQuery](/reports-analytics/tutorials/data-warehouse-bigquery). You can have all that order information flow into your BigQuery account for next to nothing cost wise. It's incredibly economical. You can then write queries to extract a sub-set of the data into a flat result and save that as a "view". From there you can do:
- easy reporting in Google Data Studio / Microsoft Power BI
- connect data to Microsoft Excel or Google Sheets
- extract querying using the BigQuery CLI or SDK to extract the data set
## Frequently Asked Questions
**Q: Is there a way to customize our webhook call to apply only to specific storefront?**
A: The Event Ruler JSON allows you to specify filtering. Here is an example ruler to filter to a specific StoreFront:
```
{
"checkout": {
"storefront_host_name": ["store.yourstorefrontURL.com"]
}
}
```
**Q: How can we identify Upsell orders via either a Webhook or REST API? We have a webhook setup to get real-time orders from Ultracart, and we would like to know if there is a chance we can determine if that order is an Upsell (1, 2, 3). Either through API or Webhook.)**
A: The payload you are receiving is an order object. If the **webhook expansion contains 'item',** you'll receive the order items.
**OrderItem.upsell** is a **boolean flag** that is **true** if the item was added as part of an upsell. So, you may need iterate the items in order to determine what role upsells played in the order. (\*This same property is exposed on orders returned through the rest api.)
---
# Using Event Ruler JSON to Filter a Webhook to a Specific Storefront
https://docs.ultracart.com/developer/howtos/webhooks/creating-a-simple-webhook/filtering-a-webhook-with-event-ruler-json
doc_type: how-to
# Using Event Ruler JSON to Filter a Webhook to a Specific Storefront
## Introduction
UltraCart's webhook system allows merchants to receive real-time notifications of various events occurring within their store. In some cases, you may wish to limit the scope of these events to a specific StoreFront. This guide explains how to use the Event Ruler JSON syntax to filter webhook events to a particular StoreFront host.
Event Ruler is a Java library developed by AWS that allows matching rules to events. Events and rules are expressed as JSON objects, enabling sophisticated filtering patterns. UltraCart leverages this library within its webhook event subscription system.
> **Note:** The WebhookEventSubscription `event_ruler` field uses the AWS Event Ruler syntax. You'll need to reference UltraCart's object models to construct your filter rules accurately.
note
If you wish to employ a ruler filter, see [https://github.com/aws/event-ruler](https://github.com/aws/event-ruler) for syntax examples.
Email UltraCart support at [support@ultracart.com](mailto:support@ultracart.com) if you need assistance creating the proper ruler expression.
If you wish to employ a ruler filter, see [https://github.com/aws/event-ruler](https://github.com/aws/event-ruler) for syntax examples.
Email UltraCart support at [support@ultracart.com](mailto:support@ultracart.com) if you need assistance creating the proper ruler expression.
## Prerequisites
- Active UltraCart account with StoreFronts configured.
- Webhook subscription configured within UltraCart.
- Familiarity with JSON syntax.
- Access to UltraCart Developer documentation for object models.
## Example: Filtering a Webhook to a Specific StoreFront Host
Suppose you want your webhook to only trigger for events originating from a specific StoreFront host, such as `demo.ultracartstore.com`.
To accomplish this, you would configure your webhook subscription with the following `event_ruler` JSON:
```
{
"checkout": {
"storefront_host_name": ["demo.ultracartstore.com"]
}
}
```
In this example:
- The filter targets the `checkout` object.
- The rule checks that the `storefront_host_name` matches `demo.ultracartstore.com`.
When this rule is applied, only checkout events that originate from the specified StoreFront host will trigger the webhook.
## Additional Resources
- [AWS Event Ruler GitHub Repository](https://github.com/aws/event-ruler)
- [UltraCart Webhook Developer Documentation](https://www.ultracart.com/api/#resource_webhook.html)
## Support
If you need assistance constructing your Event Ruler JSON filter, please contact UltraCart Support at [support@ultracart.com](mailto:support@ultracart.com).
---
# Understanding Auto Order Webhooks
https://docs.ultracart.com/developer/howtos/webhooks/understanding-auto-order-webhooks
doc_type: explanation
# Understanding Auto Order Webhooks
## Introduction
The purpose of this document is to explain how auto order webhooks operate. First let’s re-cap what an auto order is. An auto order is an object that handles repeat processing of items in a sequence. An auto order is created when a customer first purchases an item configured with an auto order schedule. That means there is a 1:1 relationship between an auto order and the original order that the customer purchased. Within the REST API this is referred to as the reference\_order\_id.
## Webhook Overview
Next let’s cover the webhooks associated with auto orders and provide a brief description. The table below is going to show them in the order in which they can occur instead of alphabetized.
| **Webhook** | **Description** |
| --- | --- |
| auto\_order\_create | The create webhook is fired after the payment on the original order is processed successfully. At this point the auto order is activated. |
| auto\_order\_update | The update webhook is fired whenever an update to the auto order record is performed within the UltraCart system. This can be caused by other REST API calls or users performing changes to the auto order. |
| auto\_order\_rebill | The rebill webhook is fired whenever an auto order is successfully processed and generates a new order. |
| **Sequence** | **Webhooks Fired** |
| --- | --- |
| Order #1 <– Start subscription with an auto order | auto\_order\_create |
| Order #2 (auto order) | auto\_order\_rebill + auto\_order\_update |
| Order #3 (auto order) | auto\_order\_rebill + auto\_order\_update |
| Order #4 (auto order) | auto\_order\_rebill + auto\_order\_update |
| Attempt to charge for Order #5 failed. | auto\_order\_decline |
| Order #5 (auto order) | auto\_order\_rebill + auto\_order\_update |
| Customer contacts customer service. Customer service makes an adjustment to either the price or date of the next shipment | auto\_order\_update |
| Order #6 (auto order) | auto\_order\_rebill + auto\_order\_update |
| | auto\_order\_cancel |
You’ll notice that auto\_order\_update will fire in conjunction with other operations. This webhook is fired whenever the database record is updated. If you’re storing a copy of the auto order record off in your own database then listening to the auto\_order\_update operation is a good idea.
## Related Documentation
[https://www.ultracart.com/api/#resource\_auto\_order.html](https://www.ultracart.com/api/#resource_auto_order.html)
## Questions
If you have further questions about auto order webhooks and implementing your custom business logic using them, please contact [support@ultracart.com](mailto:support@ultracart.com) and we will be glad to expand upon this documentation.
---
# UltraCart Developers
https://docs.ultracart.com/developer/intro
doc_type: explanation
# UltraCart Developers
Welcome to the UltraCart developer documentation. This is a separate property from the
merchant [Guides](/), organized around what you're building rather than merchant admin tasks.
There are two developer journeys. Pick the one that fits what you're building:
## REST API & Webhooks
Programming against the UltraCart platform: place and manage orders, sync catalog and customer
data, and react to events with webhooks.
- **[Quickstart](./quickstart.md)**: make your first authenticated call and place a test order.
- **[Essentials](./essentials/)**: authentication, versioning, responses and errors,
expansion, pagination, sorting, dates, rate limits, request IDs, and webhooks.
- **[API Reference](./api)**: the unified, OpenAPI-generated reference for every endpoint.
- **[SDKs & Samples](./sdks/index.md)**: official SDKs in seven languages, with install and
authentication for each.
- **[BigQuery Data Warehouse SDK](./sdks/bigquery/index.md)**: bulk reads straight from the
data warehouse, hydrated into the same SDK models.
## StoreFront Development
Building or customizing a storefront theme with Velocity: the StoreFront Object Model, screen
interfaces, and theme tutorials.
- **[StoreFront Development](./storefront/)**: the developer's guide to Foundation, the object
model, screen interfaces, and worked examples.
Not sure which path? The [developer home](/developer) has a "What are you building?" guide.
Looking for the merchant walkthrough instead? Head to the [merchant docs](/).
---
# Quickstart
https://docs.ultracart.com/developer/quickstart
doc_type: tutorial
# Quickstart
Three steps from nothing to a working integration: create an API key, call the REST API with
it, and pull back exactly the data you need.
Every request in this guide goes to `https://secure.ultracart.com/rest/v2`.
## Prerequisites
- An UltraCart account with access to **Configuration → Back Office → Authorized Applications**.
- `curl`, or any HTTP client you prefer.
:::warning
UltraCart has no sandbox environment. An API key acts on the account that issued it, and a
test order is a real order in that account. To keep experiments away from live data, sign up
for a second UltraCart account and use it as your developer account.
:::
## Step 1: Create an API key
Simple key authentication fits in-house code that talks to a single account. If you are
building an application that multiple merchants will install, use
[OAuth 2.0](./essentials/oauth.mdx) instead of the steps below.
1. Go to **Configuration → Back Office → Authorized Applications**.
2. Create an application and choose **simple key** as the authentication scheme.
3. Copy the generated key.
[API Simple Key](./howtos/authentication-and-keys/api-simple-key.md) covers the screen in
detail. The key carries the permissions of the account that issued it, so store it the way you
would store a password. If your code runs from a fixed IP address, restrict the key to it.
## Step 2: Make your first request
Retrieve a single item to confirm the key works:
```bash
curl -X GET "https://secure.ultracart.com/rest/v2/item/items?_limit=1" \
-H "Accept: application/json" \
-H "X-UltraCart-Api-Version: 2017-03-01" \
-H "x-ultracart-simple-key: YOUR_API_KEY" # <- the key from step 1
```
A successful call returns `200 OK` and an `items` array:
```json
{
"items": [
{
"merchant_item_oid": 6532718,
"merchant_id": "DEMO",
"merchant_item_id": "1",
"description": "Example single bottle item"
}
]
}
```
Two details matter from here on:
- **The version header is required.** Requests without `X-UltraCart-Api-Version` fail. It is
the most common reason a first call returns an error. See [Versioning](./essentials/versioning.md).
- **Every response carries `X-UltraCart-Request-Id`.** Record it. Support can trace a request
by that value.
## Step 3: Expand a single item
Step 2 returned a list. To work with one record, request it by its `merchant_item_oid` and use
`_expand` to pull in the related data you want in the same call:
```bash
curl -X GET "https://secure.ultracart.com/rest/v2/item/items/YOUR_ITEM_OID?_expand=pricing,shipping" \
-H "Accept: application/json" \
-H "X-UltraCart-Api-Version: 2017-03-01" \
-H "x-ultracart-simple-key: YOUR_API_KEY"
```
Substitute `YOUR_ITEM_OID` with a `merchant_item_oid` from the step 2 response.
Without `_expand`, an item comes back in its basic form:
```json
{
"merchant_item_oid": 875851,
"merchant_id": "DEMO",
"merchant_item_id": "Baseball Bat",
"description": "Wood Baseball Bat",
"last_modified_dts": "2016-08-11T16:14:46-04:00",
"creation_dts": "2009-01-14T18:30:42-05:00"
}
```
Each name you add to `_expand` attaches another branch of the object. Expansion nests, so
`shipping.distribution_centers` reaches inventory data one level down. Ask for what you need
and nothing else: every expansion costs response size and server time.
[Expanding Objects](./essentials/expanding-objects.md) covers the full syntax, including
thumbnail filters.
## Troubleshooting
| Symptom | Cause |
|---|---|
| Request fails with no useful body | The `X-UltraCart-Api-Version` header is missing. |
| `401` or `403` | The key is wrong, revoked, or restricted to a different IP address. |
| Request fails over plain HTTP | All API traffic must use HTTPS. |
| `404` on a single item | The `merchant_item_oid` belongs to a different account, or the item was deleted. |
## Next steps
- [Essentials](./essentials/index.md) covers authentication, pagination, rate limits, error
handling, and webhooks.
- [API reference](/developer/api/ultracart-rest-api-v-2) documents every endpoint, with runnable
samples in eight languages.
- [SDKs](./sdks/index.md) wrap the REST API for your language and set the version header for
you.
- Before you place orders against a live account, read
[Test Payments in UltraCart](/checkout-payments/payments/test-payments-in-ultracart). A test
order is a real order placed with a registered test card, not an isolated one.
---
# SDKs & Samples
https://docs.ultracart.com/developer/sdks
doc_type: reference
# SDKs & Samples
Seven official SDKs wrap the UltraCart REST API. Each one is generated from the same OpenAPI
specification that produces the [API reference](../api), so the method names, model properties,
and expansion fields on this site match the ones in your editor.
The current SDK version is **4.1.129**. Every language ships that version, and they are
released together.
## Available SDKs
Each guide covers installation, authentication, and a first working call.
| Language | Package | Registry | Guide |
|---|---|---|---|
| JavaScript (Node.js) | `ultra_cart_rest_api_v2` | [npm](https://www.npmjs.com/package/ultra_cart_rest_api_v2) | [JavaScript SDK](./javascript.md) |
| TypeScript | `ultracart_rest_api_v2_typescript` | [npm](https://www.npmjs.com/package/ultracart_rest_api_v2_typescript) | [TypeScript SDK](./typescript.md) |
| Python | `ultracart-rest-sdk` | [PyPI](https://pypi.org/project/ultracart-rest-sdk/) | [Python SDK](./python.md) |
| PHP | `ultracart/rest_api_v2_sdk_php` | [Packagist](https://packagist.org/packages/ultracart/rest_api_v2_sdk_php) | [PHP SDK](./php.md) |
| Java | `com.ultracart:rest-sdk` | [Maven Central](https://mvnrepository.com/artifact/com.ultracart/rest-sdk) | [Java SDK](./java.md) |
| C# | `com.ultracart.admin.v2` | [NuGet](https://www.nuget.org/packages/com.ultracart.admin.v2/) | [C# SDK](./csharp.md) |
| Ruby | `ultracart_api` | [RubyGems](https://rubygems.org/gems/ultracart_api) | [Ruby SDK](./ruby.md) |
The Python package installs as `ultracart-rest-sdk` but imports as `ultracart`. The Ruby gem
installs as `ultracart_api` and exposes the `UltracartClient` module.
## Source repositories
| Language | Repository |
|---|---|
| JavaScript | [rest_api_v2_sdk_javascript](https://github.com/UltraCart/rest_api_v2_sdk_javascript) |
| TypeScript | [rest_api_v2_sdk_typescript](https://github.com/UltraCart/rest_api_v2_sdk_typescript) |
| Python | [rest_api_v2_sdk_python](https://github.com/UltraCart/rest_api_v2_sdk_python) |
| PHP | [rest_api_v2_sdk_php](https://github.com/UltraCart/rest_api_v2_sdk_php) |
| Java | [rest_api_v2_sdk_java](https://github.com/UltraCart/rest_api_v2_sdk_java) |
| C# | [rest_api_v2_sdk_csharp](https://github.com/UltraCart/rest_api_v2_sdk_csharp) |
| Ruby | [rest_api_v2_sdk_ruby](https://github.com/UltraCart/rest_api_v2_sdk_ruby) |
| JavaScript (BigQuery) | [rest_api_v2_sdk_javascript_bigquery](https://github.com/UltraCart/rest_api_v2_sdk_javascript_bigquery) |
The organization also hosts Go, Haskell, and Clojure clients. All three were last updated in
2016, none has a published package, and none tracks the current API. Treat them as
unmaintained.
## The API version header
Every request carries an `X-UltraCart-Api-Version` header, currently `2017-03-01`. See
[Versioning](../essentials/versioning.md) for what the header controls.
Four SDKs set it for you inside their convenience constructor: Java, C#, PHP, and Ruby. The
JavaScript, TypeScript, and Python SDKs require it as part of client setup, and a request
without it fails. Each language guide above shows the correct setup for that SDK.
## Code samples
Every operation in the REST API has a hand-written sample in the
[UltraCart/sdk_samples](https://github.com/UltraCart/sdk_samples) repository, covering C#,
Java, JavaScript, PHP, Python, Ruby, TypeScript, and cURL.
Those files are the same ones rendered in the per-language tabs on each
[API reference](../api) page, so a sample in the repository and a sample on this site are never
two different versions of the same code. [API Samples](../howtos/api-samples.md) indexes the
repository by API category.
## Extensions
Beyond the REST API wrappers, one companion package reads the same objects from a different
source:
- **[BigQuery Data Warehouse SDK](./bigquery/index.md)** for Node.js. Runs SQL against your
UltraCart data warehouse and returns the same `Order`, `Customer`, and `AutoOrder` model
instances the JavaScript SDK produces. Built for bulk reads, where the REST API would be
slow.
## Related
- [Quickstart](../quickstart.md) for the shortest path to a first authenticated call.
- [Essentials](../essentials/index.md) for authentication, pagination, expansion, errors, and
rate limits, which apply to every SDK.
- [Creating a Simple Key](../howtos/authentication-and-keys/api-simple-key.md) for the credential each guide expects.
- [StoreFront Development](../storefront/) if you are building a Velocity theme rather than
programming against the REST API. The SDKs do not apply there.
---
# BigQuery Data Warehouse SDK
https://docs.ultracart.com/developer/sdks/bigquery
doc_type: explanation
# BigQuery Data Warehouse SDK
`@ultracart/bigquery-sdk` is a Node.js companion to the
[JavaScript REST API SDK](https://github.com/UltraCart/rest_api_v2_sdk_javascript). It runs SQL
against your UltraCart data warehouse in BigQuery and streams each row back as a native SDK
model instance: `Order`, `Customer`, `AutoOrder`, and the rest of the same classes the REST API
returns.
Source and issues: [UltraCart/rest_api_v2_sdk_javascript_bigquery](https://github.com/UltraCart/rest_api_v2_sdk_javascript_bigquery).
:::note
This package is an early release (0.2.0). The authentication, transform, and hydration paths
are working and unit tested, and the API surface may still change before 1.0.
:::
## When to use it instead of the REST API
Use it for bulk reads over history: seeding a loyalty portal, a nightly customer export, a
reporting pipeline, or any job that would otherwise page through tens of thousands of REST
responses. The warehouse answers those in one query, and the REST API rate limits do not
apply.
Keep using the REST API for everything else. The warehouse is read-only and lags live data by
one to two minutes, so it is the wrong source for writes, for checkout-time lookups, and for
anything that must reflect the current state of a single record right now.
| Job | Source |
|---|---|
| Full order history for a new system | BigQuery SDK |
| Nightly sync of what changed | BigQuery SDK |
| Aggregate reporting across linked accounts | BigQuery SDK |
| Creating or updating any object | REST API |
| Reading one order during checkout | REST API |
## Why the objects line up
The warehouse tables are generated from the same domain model that powers the REST API, so
column names and nesting already match the SDK model properties one to one. Only three
differences exist, and the package normalizes all three before hydration:
- **Dates.** BigQuery `DATETIME` columns hold UTC wall-clock values with no zone. The package
emits ISO 8601 strings with an explicit `Z`, which is what the SDK models expect.
- **Primitive arrays.** A `string[]` or `number[]` is stored as a `REPEATED RECORD` with a
single `value` sub-field. The package flattens those back to a primitive array. Object
arrays are left as arrays of objects.
- **Numbers.** `INTEGER` and `NUMERIC` values can arrive as wrapper objects or strings, and are
normalized to JavaScript `Number`.
The transform is driven by the BigQuery result schema rather than by runtime type checks, so
the same code path handles every table.
## What it does not do
The package exposes raw SQL only. You write the `SELECT`, pass a model class, and iterate the
results. There are no `getOrders()`-style helpers, no query builder, and no write path.
Because the SDK models and the warehouse schema are generated separately, a schema drift guard
ships with the repository and fails when an SDK field no longer has a matching warehouse
column. That check runs against a live dataset, so it belongs in the package's own CI rather
than in your application.
## How access works
Authentication uses Google Application Default Credentials, so no keys appear in code. The
Google account or service account you authenticate as must be registered as an UltraCart user
with data warehouse permissions, which is what provisions read access to your warehouse project
and sets the taxonomy level you can reach. The account owner grants that access, and the
merchant documentation covers the grant, the pricing, and the four data access levels:
[Data Warehouse (BigQuery)](/reports-analytics/tutorials/data-warehouse-bigquery/).
Customer names, emails, and addresses live only in the taxonomy-gated `_medium` and `_high`
datasets. Elsewhere those fields are present only as `*_hash` columns, which have no matching
SDK model property and therefore drop during hydration.
## Related tooling
The [`uc-bq` Claude Code CLI](/reports-analytics/tutorials/data-warehouse-bigquery/claude-code-cli/)
also reads the same warehouse, but it solves a different problem. It builds and replays
reports, charts, and scheduled deliveries for a merchant analyst. This package is a library for
pulling records into your own application.
## Next
- [Quickstart](./quickstart.md) to install, authenticate, and run a first query.
- [Extracting order history](./extracting-order-history.md) for backfill and incremental sync
patterns.
- [API reference](./reference.md) for the full option and return surface.
---
# Extracting Order History
https://docs.ultracart.com/developer/sdks/bigquery/extracting-order-history
doc_type: how-to
# Extracting Order History
Pull UltraCart order data out of BigQuery and into your own system, such as a loyalty portal or
a customer data platform, with a one-time backfill followed by an ongoing sync. The same
patterns work for customers, auto orders, and items.
Working examples for each entity ship in the package repository under
[`examples/`](https://github.com/UltraCart/rest_api_v2_sdk_javascript_bigquery/tree/main/examples).
## Pick the right dataset first
This is where most first extracts go wrong. Two questions decide the dataset name:
**Is the account a parent of linked accounts?** If so, its order history lives in the
`ultracart_dw_linked` datasets, which span every merchant ID under the parent. The base
`ultracart_dw` dataset can be completely empty for an administrative-only parent, so a query
against it returns zero orders for an account that has hundreds of thousands. Filter by
`merchant_id` to narrow a linked dataset to one child account, or omit the filter to get all of
them.
**Do you need customer names and emails?** Those live only in the taxonomy-gated `_medium` and
`_high` datasets. Everywhere else they appear as `*_hash` columns, which have no matching SDK
property and drop silently during hydration, leaving `billing.first_name` undefined. The full
mapping is in the [API reference](./reference.md#dataset-selection).
`merchant_id` is case sensitive in the data, so `ACME` and `acme` are different values even
though the project ID is always lowercased.
## Backfill the full history
Stream the whole history once to seed your store. Because `query()` is an async iterator, this
holds one page in memory no matter how many rows come back:
```js
const sql = `SELECT * FROM ultracart_dw.uc_orders
WHERE merchant_id = @mid
ORDER BY creation_dts`;
for await (const order of ucbq.query(sql, {
params: { mid: 'ACME' }, // <- your merchant ID, exact case
model: UltraCartApi.Order,
})) {
await upsertIntoYourStore(order); // idempotent on order_id
}
```
Make the write idempotent on `order_id` so a re-run after a failure is safe.
Resist the urge to chunk a backfill by date to bound it. The `_linked` tables are views, and
they do not push row predicates down to partition pruning, so each date chunk rescans the whole
table and N chunks cost roughly N times a single pass. One streaming pass is the cheapest
option.
## Keep it current
After the backfill, pull only what changed since the last run, tracked with a watermark you
persist between runs.
A `creation_dts` filter catches new orders only. It misses later edits such as refunds,
shipments, and status changes, because the deduped view has no last-modified column. For most
systems that is not good enough, so prefer the change data capture pattern below.
:::warning
`creation_dts`, `refund_dts`, and `RecordTime` are BigQuery `DATETIME` columns with no zone.
The package emits ISO strings with a trailing `Z` on read, and BigQuery rejects that `Z` in a
`DATETIME` comparison with "Invalid datetime string". Strip it with the exported helper before
using a value as a filter parameter.
:::
```js
const { toBigQueryDatetime } = require('@ultracart/bigquery-sdk');
// '2026-06-25T21:41:40Z' -> '2026-06-25T21:41:40'
const params = { since: toBigQueryDatetime(watermark) };
```
Two details keep the boundary correct:
- **Overlap, then dedupe.** Compare with `>=` against a watermark shifted back a few minutes,
and dedupe by `order_id` on write. The upsert handles this, and it stops you dropping orders
that share the boundary timestamp.
- **Advance the watermark last.** Persist it only after the batch commits.
### Catch updates with the streaming changelog
The underlying changelog table keeps one row per version of each record, stamped with
`RecordTime`. Everything that changed since a given time is the set of IDs with a changelog row
newer than that time, and the current state of those records comes from the view, in a single
query:
```sql
SELECT * FROM ultracart_dw.uc_orders
WHERE merchant_id = @mid
AND order_id IN (
SELECT order_id
FROM ultracart_dw_streaming.uc_order_streaming
WHERE merchant_id = @mid
AND RecordTime > @since
)
```
This catches new and updated records, including edits to orders that are years old. Each
entity joins its view to its own `uc_*_streaming` changelog on that entity's ID column:
`order_id`, `customer_profile_oid`, `auto_order_oid`, or `merchant_item_oid`.
Two things to get right:
- **No `partition_date` filter on the changelog subquery.** `partition_date` is the week the
order was created, not the week it changed, so a recently edited old order sits in an old
partition and a partition filter would silently drop it. Scanning `RecordTime` is columnar and
costs a few megabytes.
- **Advance the watermark to the time the run started**, not to the newest row seen, so
anything written mid-run gets re-examined next time.
Deletes are ignored by this pattern. A deleted order's newest changelog row is an `IsDelete`
row, which the view filters out, so the record simply stops being returned. Handle hard deletes
separately if your system needs them.
## Control what it costs
Selecting fewer columns is the main lever, and on linked accounts it is the only one.
Column pruning works through the views because BigQuery storage is columnar. On a measured
parent account, selecting four columns instead of `SELECT *` dropped one query from 1.352 GB to
0.166 GB. Row filters do not have the same effect: through a `_linked` view, a `SELECT *` scans
the same bytes whether you filter on `creation_dts`, `partition_date`, `merchant_id`, or
nothing at all. Those `WHERE` clauses still limit the rows you get back correctly, they just do
not reduce bytes scanned.
Three habits follow from that:
- Run [`dryRun()`](./reference.md#dryrunsql-opts) before any query you have not run before.
- List the columns you actually need instead of `SELECT *`, especially for a repeating sync.
- Pick a sync cadence deliberately, since a frequent incremental sync against a linked view
rescans the selected columns every run.
To get real partition pruning, query the underlying partitioned table directly instead of the
linked view.
## Next
- [API reference](./reference.md) for options, defaults, and the dataset table.
- [Data Warehouse (BigQuery)](/reports-analytics/tutorials/data-warehouse-bigquery/) for
sample SQL against the same tables, access levels, and pricing.
---
# BigQuery SDK Quickstart
https://docs.ultracart.com/developer/sdks/bigquery/quickstart
doc_type: how-to
# BigQuery SDK Quickstart
Install the package, authenticate, and stream your first hydrated `Order` objects out of the
data warehouse.
## Before you start
- **Node.js 22 or newer.** The package follows `@google-cloud/bigquery` v9, which sets the same
floor. If you are still on Node 18 or 20, both of which are past end of life, pin
`@ultracart/bigquery-sdk@0.1.x`, which tracks `@google-cloud/bigquery` v8.
- **Data warehouse access.** Your Google account or service account has to be registered as an
UltraCart user with data warehouse permissions before any query will run. The account owner
grants that under **Configuration → Account & Users → Users**, and provisioning takes about
five minutes. See
[Data Warehouse (BigQuery)](/reports-analytics/tutorials/data-warehouse-bigquery/) for the
grant and the four access levels.
- **Your merchant ID.** The warehouse project is derived from it as `ultracart-dw-{merchantid}`,
lowercased.
## Install
```bash
npm install @ultracart/bigquery-sdk ultra_cart_rest_api_v2 @google-cloud/bigquery
```
`ultra_cart_rest_api_v2` is an optional peer dependency. Install it when you want hydrated model
instances; without it the package still returns plain SDK-shaped objects.
## Authenticate
Authentication uses Google Application Default Credentials, so nothing goes in code:
```bash
# Developer machine
gcloud auth application-default login
# Server or CI
export GOOGLE_APPLICATION_CREDENTIALS=/path/to/service-account.json # <- your key file
```
For a server, create a service account in your own Google project, then add its email as an
UltraCart user with the data warehouse permissions that job needs. UltraCart provisions read
access at the taxonomy level you grant.
## Run a query
`query()` returns an async iterator. Rows are fetched a page at a time, so a small incremental
sync and a full-history backfill run through the same constant-memory path.
```js
const { UltraCartBigQuery } = require('@ultracart/bigquery-sdk');
const UltraCartApi = require('ultra_cart_rest_api_v2');
// Project is derived as ultracart-dw-demo
const ucbq = new UltraCartBigQuery({ merchantId: 'DEMO' }); // <- your merchant ID
const sql = `SELECT * FROM ultracart_dw.uc_orders
WHERE creation_dts >= @since
ORDER BY creation_dts`;
for await (const order of ucbq.query(sql, {
params: { since: '2025-01-01' },
model: UltraCartApi.Order,
})) {
// order is a real UltraCartApi.Order instance:
// order.creation_dts -> "2025-01-15T10:30:00Z"
// order.items[0] -> OrderItem instance
console.log(order.order_id, order.summary.total.value);
}
```
Omit `model` to stream plain SDK-shaped objects instead of hydrated instances.
Two things decide which dataset name belongs in that `FROM` clause: whether the account is a
parent of linked accounts, and whether you need customer names and emails.
[Extracting order history](./extracting-order-history.md) covers both.
## Estimate the cost first
BigQuery bills by bytes scanned, and `LIMIT` does not reduce that number. Check any query you
have not run before:
```js
const est = await ucbq.dryRun(sql, { params: { since: '2025-01-01' } });
console.log(`${est.gigabytesProcessed.toFixed(2)} GB (~$${est.estimatedCostUsd.toFixed(2)})`);
```
Every `query()` is capped at 10 GB billed by default, so a runaway `SELECT *` aborts rather than
running up a bill. Override the ceiling per client or per call with `maxBytesBilled`, or pass
`0` to remove it. The [API reference](./reference.md) lists the defaults and the full option
set.
:::warning
Query cost is billed to your UltraCart data warehouse project and appears on your UltraCart
bill. Raising or disabling `maxBytesBilled` removes the only guard against a single expensive
query. See [pricing](/reports-analytics/tutorials/data-warehouse-bigquery/#pricing).
:::
## Next
- [Extracting order history](./extracting-order-history.md) for backfill, incremental sync, and
change data capture.
- [API reference](./reference.md) for every constructor and query option.
- [BigQuery Data Warehouse SDK](./index.md) for how the warehouse objects map to SDK models.
---
# BigQuery SDK Reference
https://docs.ultracart.com/developer/sdks/bigquery/reference
doc_type: reference
# BigQuery SDK Reference
The complete surface of `@ultracart/bigquery-sdk`. For the concepts behind it, see
[BigQuery Data Warehouse SDK](./index.md); for a first working query, see the
[quickstart](./quickstart.md).
## Exports
```js
const {
UltraCartBigQuery,
DEFAULT_MAX_BYTES_BILLED, // 10737418240 (10 GB)
DEFAULT_PAGE_SIZE, // 50000
resolveDataset,
projectIdForMerchant,
DATASET_STANDARD, // 'ultracart_dw'
DATASET_MEDIUM, // 'ultracart_dw_medium'
DATASET_HIGH, // 'ultracart_dw_high'
DATASET_STREAMING, // 'ultracart_dw_streaming'
transformRows,
toBigQueryDatetime,
} = require('@ultracart/bigquery-sdk');
```
The linked dataset names have no exported constants at the package root. `resolveDataset()`
produces them.
## new UltraCartBigQuery(options)
Either `merchantId` or `projectId` is required. Passing neither throws
`Provide either a merchantId or an explicit projectId`.
| Option | Type | Default | Description |
|---|---|---|---|
| `merchantId` | string | none | Merchant ID. The project is derived as `ultracart-dw-{merchantid}`, lowercased. |
| `projectId` | string | derived | Explicit project ID. Overrides the `merchantId` derivation. |
| `bigquery` | `BigQuery` | ADC client | An injected `@google-cloud/bigquery` client, for testing or custom auth. A client using Application Default Credentials is created when this is omitted. |
| `maxBytesBilled` | number | `10737418240` | Default per-query ceiling on bytes billed. `0` or `null` disables the cap. |
| `pageSize` | number | `50000` | Rows fetched per page while streaming. Bounds memory, since one page is held at a time. |
The page size default balances throughput against per-page memory for wide rows. Streaming is
round-trip bound, so larger pages mean fewer HTTP fetches.
## query(sql, opts)
Runs a SQL query and returns an `AsyncGenerator` that yields one object per result row.
Iterated with `for await`. Rows are fetched a page at a time, so memory stays bounded no matter
how large the result set is.
| Option | Type | Default | Description |
|---|---|---|---|
| `params` | object | none | Named query parameters, referenced as `@name` in the SQL. |
| `model` | class | none | An UltraCart SDK model class, such as `UltraCartApi.Order`. Each row is hydrated through its static `constructFromObject`. Omitted, rows are yielded as plain SDK-shaped objects. |
| `maxBytesBilled` | number | client value | Per-query override of the byte ceiling. `0` or `null` disables it for this call. |
| `pageSize` | number | client value | Per-query override of the page size. |
A query that would exceed `maxBytesBilled` fails rather than running, and the error comes from
BigQuery rather than from this package.
## dryRun(sql, opts)
Estimates what a query would scan without running it, using a BigQuery dry run. Accepts
`params`, and resolves to:
| Field | Type | Description |
|---|---|---|
| `totalBytesProcessed` | number | Bytes BigQuery reports it would scan. |
| `gigabytesProcessed` | number | The same figure in GiB. |
| `estimatedCostUsd` | number | An estimate, computed at a fixed on-demand rate of 6.25 USD per TiB scanned. |
`estimatedCostUsd` is an approximation for guarding a large extract, not a quote. Actual
billing follows Google's current pricing and your project's terms. See
[pricing](/reports-analytics/tutorials/data-warehouse-bigquery/#pricing).
Because `LIMIT` does not reduce bytes scanned, a dry run is the only reliable way to size a
query before running it.
## hydrate(rows, schemaFields, model) and hydrateRow(row, schemaFields, model)
Transform rows already in hand, for callers running their own BigQuery job. `hydrateRow`
handles one row and `hydrate` maps an array. Both take the result schema's `fields` array and
an optional model class, and both return the same objects `query()` would yield. `query()`
remains the streaming path.
## Helpers
| Function | Returns | Description |
|---|---|---|
| `projectIdForMerchant(merchantId)` | string | `'DEMO'` resolves to `'ultracart-dw-demo'`. Throws when the merchant ID is missing or not a string. |
| `resolveDataset({ linked, taxonomy })` | string | Dataset name for a combination of linked and PII tier. `{ linked: true, taxonomy: 'high' }` resolves to `'ultracart_dw_linked_high'`. |
| `toBigQueryDatetime(value)` | string | Strips the trailing `Z` from an ISO string so it can be compared against a `DATETIME` column, normalizing a non-UTC offset to UTC first. The inverse of what the transform emits on read. |
| `transformRows(rows, schemaFields)` | array | The low-level schema-driven transform, without model hydration. |
## Dataset selection
| Goal | Dataset | Filter |
|---|---|---|
| A single standard account | `ultracart_dw` | `merchant_id = 'ACME'` |
| A parent account, all children | `ultracart_dw_linked` | `merchant_id` optional |
| One child of a parent | `ultracart_dw_linked` | `merchant_id = 'ACME'` |
| Customer names and emails | `ultracart_dw_medium` or `_high`, `ultracart_dw_linked_medium` or `_linked_high` | as above |
| Change data capture | `ultracart_dw_streaming.uc_*_streaming` | `RecordTime > @since` |
Which tiers you can reach depends on the data warehouse permissions granted to your user. The
access levels and what each one exposes are documented under
[Data Warehouse (BigQuery)](/reports-analytics/tutorials/data-warehouse-bigquery/#data-security).
The `_linked` tables are views, so their `numRows` and partitioning metadata read as empty. The
data is still there.
## Type mapping
| BigQuery | SDK model property | Note |
|---|---|---|
| `DATETIME` | ISO 8601 string with `Z` | Stored as UTC wall-clock with no zone. |
| `TIMESTAMP` | ISO 8601 string with `Z` | Normalized to a canonical `Z` form. |
| `DATE`, `TIME` | string, unchanged | `YYYY-MM-DD` and `HH:MM:SS`. |
| `INTEGER`, `NUMERIC` | `Number` | Wrapper objects and strings are normalized. |
| `REPEATED RECORD` with a single `value` sub-field | primitive array | How the warehouse stores `string[]` and `number[]`. |
| `REPEATED RECORD` with several sub-fields | array of objects | Left as is. Nested models hydrate normally. |
| `*_hash` columns | dropped | No matching SDK property, so hydration discards them. |
The transform reads the BigQuery result schema rather than checking runtime types, so it
behaves the same for every table.
## Requirements
Node.js 22 or newer, matching the floor set by `@google-cloud/bigquery` v9.
`@ultracart/bigquery-sdk@0.1.x` tracks `@google-cloud/bigquery` v8 for older runtimes.
`ultra_cart_rest_api_v2` is an optional peer dependency, needed only for model hydration.
---
# C# SDK
https://docs.ultracart.com/developer/sdks/csharp
doc_type: how-to
# C# SDK
Install the C# SDK from NuGet, authenticate, and retrieve an order.
## Before you start
- **A Simple Key.** Generate one under **Configuration → Back Office → Authorized
Applications**. See [Creating a Simple Key](../howtos/authentication-and-keys/api-simple-key.md). For an application
that multiple merchants connect to their own accounts, use
[OAuth 2.0](../essentials/oauth.mdx) instead.
- **.NET 4.0 or later.**
## Install
```
Install-Package RestSharp -Version 105.1.0
Install-Package Newtonsoft.Json
Install-Package JsonSubTypes
Install-Package com.ultracart.admin.v2 -Version 4.1.129
```
Check [NuGet](https://www.nuget.org/packages/com.ultracart.admin.v2/) for the current release
before pinning a different version.
:::warning
Pin RestSharp at 105.1.0. Later versions carry a bug that breaks file uploads
([RestSharp#742](https://github.com/restsharp/RestSharp/issues/742)), which affects any
operation that sends a file, including chargeback evidence and item digital delivery.
:::
The SDK also needs Json.NET 7.0.0 or later and JsonSubTypes 1.2.0 or later. The DLLs bundled in
the package are not always current, so installing all four from NuGet is more reliable than
referencing the bundled copies.
## Authenticate
Every API class has a constructor that takes a Simple Key and builds a configured client:
```csharp
using com.ultracart.admin.v2.Api;
OrderApi orderApi = new OrderApi(Environment.GetEnvironmentVariable("UC_API_KEY")); // <- your merchant Simple Key
```
That constructor sets the `X-UltraCart-Api-Version` header along with the credential, so no
further client setup is needed.
:::warning
Read the key from the environment or a secret store rather than hardcoding it. The samples
repository hardcodes a shared development key, which does not belong in your code.
:::
## Retrieve an order
This is the `GetOrder` sample from
[sdk_samples](https://github.com/UltraCart/sdk_samples/blob/master/csharp/order/GetOrder.cs),
trimmed to the call itself:
```csharp
// Trimmed from sdk_samples/csharp/order/GetOrder.cs
using System;
using com.ultracart.admin.v2.Model;
using Newtonsoft.Json;
string expansion = "item,summary,billing,shipping,shipping.tracking_number_details";
string orderId = "DEMO-0009104390"; // <- an order ID in your account
OrderResponse apiResponse = orderApi.GetOrder(orderId, expansion);
if (apiResponse.Error != null)
{
Console.Error.WriteLine(apiResponse.Error.DeveloperMessage);
Console.Error.WriteLine(apiResponse.Error.UserMessage);
Environment.Exit(1);
}
Order order = apiResponse.Order;
Console.WriteLine(JsonConvert.SerializeObject(
order, new JsonSerializerSettings { Formatting = Formatting.Indented }));
```
The expansion string controls how much of the order comes back. Order objects are large, and
requesting every branch across thousands of orders is the most common cause of slow SDK code.
[Expanding objects](../essentials/expanding-objects.md) lists the valid values.
Method names are PascalCase in this SDK (`GetOrder`, not `getOrder`), while the model properties
keep the API's own casing. UltraCart application errors arrive on `apiResponse.Error` rather
than as a thrown exception.
## Next
- [Essentials](../essentials/index.md) for pagination, expansion, errors, and rate limits.
- [API Samples](../howtos/api-samples.md) to browse a sample for every operation, or go
straight to [csharp/](https://github.com/UltraCart/sdk_samples/tree/master/csharp) in the
samples repository.
- [Error reference](../essentials/error-reference.md) for the specific failures you are likely
to hit, and how to handle each one.
---
# Java SDK
https://docs.ultracart.com/developer/sdks/java
doc_type: how-to
# Java SDK
Add the Java SDK to your build, authenticate, and retrieve an order.
## Before you start
- **A Simple Key.** Generate one under **Configuration → Back Office → Authorized
Applications**. See [Creating a Simple Key](../howtos/authentication-and-keys/api-simple-key.md). For an application
that multiple merchants connect to their own accounts, use
[OAuth 2.0](../essentials/oauth.mdx) instead.
- **Java 1.8 or newer**, with Maven 3.8.3 or newer, or Gradle 7.2 or newer.
## Install
Maven:
```xml
com.ultracartrest-sdk4.1.129
```
Gradle:
```groovy
repositories {
mavenCentral()
}
dependencies {
implementation "com.ultracart:rest-sdk:4.1.129"
}
```
Check [Maven Central](https://mvnrepository.com/artifact/com.ultracart/rest-sdk) for the current
release before pinning a different version.
## Authenticate
Every API class has a constructor that takes a Simple Key and builds a configured client:
```java
import com.ultracart.admin.v2.OrderApi;
OrderApi orderApi = new OrderApi(System.getenv("UC_API_KEY")); // <- your merchant Simple Key
```
That constructor sets the `X-UltraCart-Api-Version` header along with the credential, so no
further client setup is needed.
:::warning
Read the key from the environment or a secret store rather than hardcoding it. The samples
repository hardcodes a shared development key and disables TLS verification; neither belongs in
your code.
:::
## Retrieve an order
This is the `GetOrder` sample from
[sdk_samples](https://github.com/UltraCart/sdk_samples/blob/master/java/src/order/GetOrder.java),
trimmed to the call itself:
```java
// Trimmed from sdk_samples/java/src/order/GetOrder.java
import com.google.gson.Gson;
import com.google.gson.GsonBuilder;
import com.ultracart.admin.v2.models.*;
import com.ultracart.admin.v2.util.ApiException;
String expansion = "item,summary,billing,shipping,shipping.tracking_number_details";
String orderId = "DEMO-0009104390"; // <- an order ID in your account
OrderResponse apiResponse = orderApi.getOrder(orderId, expansion);
if (apiResponse.getError() != null) {
System.err.println(apiResponse.getError().getDeveloperMessage());
System.err.println(apiResponse.getError().getUserMessage());
System.exit(1);
}
Order order = apiResponse.getOrder();
Gson gson = new GsonBuilder().setPrettyPrinting().create();
System.out.println(gson.toJson(order));
```
The expansion string controls how much of the order comes back. Order objects are large, and
requesting every branch across thousands of orders is the most common cause of slow SDK code.
[Expanding objects](../essentials/expanding-objects.md) lists the valid values.
Failures reach you two ways. Transport and HTTP failures throw `ApiException`, while UltraCart
application errors come back on the response through `getError()`. Handle both.
## Next
- [Essentials](../essentials/index.md) for pagination, expansion, errors, and rate limits.
- [API Samples](../howtos/api-samples.md) to browse a sample for every operation, or go
straight to [java/src/](https://github.com/UltraCart/sdk_samples/tree/master/java/src) in the
samples repository. Java is a Maven project there, so its samples sit under `java/src/`
rather than `java/`.
- [Error reference](../essentials/error-reference.md) for the specific failures you are
likely to hit, and how to handle `ApiException`.
---
# JavaScript SDK
https://docs.ultracart.com/developer/sdks/javascript
doc_type: how-to
# JavaScript SDK
Install the Node.js SDK, authenticate, and retrieve an order.
## Before you start
- **A Simple Key.** Generate one under **Configuration → Back Office → Authorized
Applications**. See [Creating a Simple Key](../howtos/authentication-and-keys/api-simple-key.md). If you are building
an application that multiple merchants will connect to their own accounts, use
[OAuth 2.0](../essentials/oauth.mdx) instead.
- **Node.js.** The package is published for Node and also runs in a browser bundle. Writing
TypeScript? Use the [TypeScript SDK](./typescript.md), which is a separate package with typed
models and a promise-based client.
## Install
```bash
npm install ultra_cart_rest_api_v2 --save
```
## Authenticate
`ApiClient` carries the credential and the API version header. Its `usingApiKey()` method sets
both, then each API class takes the configured client:
```javascript
import { ApiClient, OrderApi } from 'ultra_cart_rest_api_v2';
const apiClient = new ApiClient();
apiClient.usingApiKey(process.env.UC_API_KEY); // <- your merchant Simple Key
const orderApi = new OrderApi(apiClient);
```
`usingApiKey()` sets `X-UltraCart-Api-Version` to `2017-03-01` alongside the key. Building the
client by hand without that header produces a failed request, so prefer this method over
assigning `authentications.ultraCartSimpleApiKey.apiKey` yourself.
:::warning
Keep the key out of source control and out of browser bundles. A Simple Key carries the
permissions of the application it belongs to. For client-side code, use a
[browser key](../howtos/authentication-and-keys/creating-a-browser-key-for-javascript-checkout.md) instead.
:::
## Retrieve an order
The JavaScript client is callback-based. This is the `getOrder` sample from
[sdk_samples](https://github.com/UltraCart/sdk_samples/blob/master/javascript/order/getOrder.js),
trimmed to the call itself and wrapped in a promise:
```javascript
// Trimmed from sdk_samples/javascript/order/getOrder.js
// Expansion controls how much of the order is returned. The full object is
// large, so request only the branches you need.
const expansion = 'item,summary,billing,shipping,shipping.tracking_number_details';
const orderId = 'DEMO-0009104390'; // <- an order ID in your account
const apiResponse = await new Promise((resolve, reject) => {
orderApi.getOrder(orderId, { _expand: expansion }, (error, data) => {
error ? reject(error) : resolve(data);
});
});
if (apiResponse.error) {
console.error('Developer Message:', apiResponse.error.developer_message);
console.error('User Message:', apiResponse.error.user_message);
throw new Error('Failed to retrieve order');
}
console.log(JSON.stringify(apiResponse.order, null, 2));
```
The `_expand` value controls how much of the order comes back. Order objects are large, and
requesting every branch across thousands of orders is the most common cause of slow SDK code.
[Expanding objects](../essentials/expanding-objects.md) lists the valid values.
Errors arrive two ways. Transport and HTTP failures reach the callback's `error` argument, while
UltraCart application errors come back on `apiResponse.error` with a `developer_message` and a
`user_message`. Handle both.
## Running in a browser
The package works in the browser through [browserify](http://browserify.org/). With
`main.js` as your entry file:
```bash
npm install -g browserify
browserify main.js > bundle.js
```
Webpack builds can fail with "Module not found: Error: Cannot resolve module" because of the
AMD loader. Disable it:
```javascript
module: {
rules: [
{
parser: {
amd: false
}
}
]
}
```
## Next
- [Essentials](../essentials/index.md) for pagination, expansion, errors, and rate limits.
- [API Samples](../howtos/api-samples.md) to browse a sample for every operation, or go
straight to
[javascript/](https://github.com/UltraCart/sdk_samples/tree/master/javascript) in the samples
repository.
- [BigQuery Data Warehouse SDK](./bigquery/index.md) for bulk reads that would otherwise page
through thousands of REST responses.
---
# PHP SDK
https://docs.ultracart.com/developer/sdks/php
doc_type: how-to
# PHP SDK
Install the PHP SDK with Composer, authenticate, and retrieve an order.
## Before you start
- **A Simple Key.** Generate one under **Configuration → Back Office → Authorized
Applications**. See [Creating a Simple Key](../howtos/authentication-and-keys/api-simple-key.md). For an application
that multiple merchants connect to their own accounts, use
[OAuth 2.0](../essentials/oauth.mdx) instead.
- **PHP 7.4 or later.** The SDK also works on PHP 8.
## Install
Add the package to `composer.json`:
```json
{
"require": {
"ultracart/rest_api_v2_sdk_php": "4.1.129"
}
}
```
Then install and include the autoloader:
```bash
composer install
```
```php
getOrder($order_id, $expansion);
if ($api_response->getError() != null) {
error_log($api_response->getError()->getDeveloperMessage());
error_log($api_response->getError()->getUserMessage());
exit();
}
$order = $api_response->getOrder();
var_dump($order);
```
The expansion string controls how much of the order comes back. Order objects are large, and
requesting every branch across thousands of orders is the most common cause of slow SDK code.
[Expanding objects](../essentials/expanding-objects.md) lists the valid values.
UltraCart application errors arrive on the response through `getError()`, with a developer
message and a user message, rather than as a thrown exception.
## Next
- [Essentials](../essentials/index.md) for pagination, expansion, errors, and rate limits.
- [API Samples](../howtos/api-samples.md) to browse a sample for every operation, or go
straight to [php/](https://github.com/UltraCart/sdk_samples/tree/master/php) in the samples
repository.
- [Troubleshooting API errors](../howtos/troubleshooting/troubleshooting-api-errors.md) when a call fails.
---
# Python SDK
https://docs.ultracart.com/developer/sdks/python
doc_type: how-to
# Python SDK
Install the Python SDK, build an authenticated client, and retrieve an order.
## Before you start
- **A Simple Key.** Generate one under **Configuration → Back Office → Authorized
Applications**. See [Creating a Simple Key](../howtos/authentication-and-keys/api-simple-key.md). For an application
that multiple merchants connect to their own accounts, use
[OAuth 2.0](../essentials/oauth.mdx) instead.
- **Python 3.6 or newer.**
## Install
```bash
pip install ultracart-rest-sdk
```
The package installs under the name `ultracart-rest-sdk` and imports as `ultracart`:
```python
import ultracart
```
## Authenticate
The Python SDK has no one-line convenience constructor. Build a `Configuration`, set the key on
it, then pass the API version header to `ApiClient`:
```python
import ultracart
from ultracart import ApiClient
from ultracart.apis import OrderApi
def api_client():
config = ultracart.Configuration()
config.api_key['x-ultracart-simple-key'] = 'YOUR_API_KEY' # <- your merchant Simple Key
return ApiClient(
configuration=config,
header_name='X-UltraCart-Api-Version',
header_value='2017-03-01',
)
order_api = OrderApi(api_client())
```
Both halves are required. The key authenticates the request and the header selects the API
version, and a request missing either one fails. See
[Versioning](../essentials/versioning.md) for what the version controls.
:::warning
Read the key from the environment or a secret store rather than hardcoding it. The samples
repository hardcodes a shared development key and sets `verify_ssl = False`; neither belongs in
your code. Leave TLS verification on.
:::
## Retrieve an order
This is the `get_order` sample from
[sdk_samples](https://github.com/UltraCart/sdk_samples/blob/master/python/order/get_order.py),
trimmed to the call itself:
```python
# Trimmed from sdk_samples/python/order/get_order.py
expand = "item,summary,billing,shipping,shipping.tracking_number_details"
order_id = 'DEMO-0009104390' # <- an order ID in your account
api_response = order_api.get_order(order_id, expand=expand)
if hasattr(api_response, 'error') and api_response.error:
print(f"Developer Message: {api_response.error.developer_message}")
print(f"User Message: {api_response.error.user_message}")
exit()
print(api_response.order)
```
The `expand` argument controls how much of the order comes back. Order objects are large, and
requesting every branch across thousands of orders is the most common cause of slow SDK code.
[Expanding objects](../essentials/expanding-objects.md) lists the valid values.
UltraCart application errors arrive on `api_response.error` with a `developer_message` and a
`user_message`, rather than as a raised exception.
## Next
- [Essentials](../essentials/index.md) for pagination, expansion, errors, and rate limits.
- [API Samples](../howtos/api-samples.md) to browse a sample for every operation, or go
straight to [python/](https://github.com/UltraCart/sdk_samples/tree/master/python) in the
samples repository.
- [Building a turnkey functional cart](../tutorials/api-tutorials/tutorial-building-a-turnkey-functional-c.md),
a worked Python tutorial.
---
# Ruby SDK
https://docs.ultracart.com/developer/sdks/ruby
doc_type: how-to
# Ruby SDK
Install the Ruby gem, authenticate, and retrieve an order.
## Before you start
- **A Simple Key.** Generate one under **Configuration → Back Office → Authorized
Applications**. See [Creating a Simple Key](../howtos/authentication-and-keys/api-simple-key.md). For an application
that multiple merchants connect to their own accounts, use
[OAuth 2.0](../essentials/oauth.mdx) instead.
## Install
Add the gem to your `Gemfile`:
```ruby
gem 'ultracart_api'
```
Or install it directly:
```bash
gem install ultracart_api
```
The gem is published as `ultracart_api` and exposes the `UltracartClient` module. Check
[RubyGems](https://rubygems.org/gems/ultracart_api) for the current release if you need to pin a
version.
## Authenticate
Every API class has a `new_using_api_key` factory that builds a configured client in one call:
```ruby
require 'ultracart_api'
order_api = UltracartClient::OrderApi.new_using_api_key(ENV['UC_API_KEY']) # <- your merchant Simple Key
```
That factory sets the API version to `2017-03-01` along with the credential, so no further
client setup is needed. It also accepts optional arguments for TLS verification and debug
output. Leave TLS verification at its default of `true`.
:::warning
Read the key from the environment or a secret store rather than hardcoding it. The samples
repository hardcodes a shared development key and sets `VERIFY_SSL = false`; neither belongs in
your code.
:::
## Retrieve an order
This is the `get_order` sample from
[sdk_samples](https://github.com/UltraCart/sdk_samples/blob/master/ruby/order/get_order.rb),
trimmed to the call itself:
```ruby
# Trimmed from sdk_samples/ruby/order/get_order.rb
expansion = "item,summary,billing,shipping,shipping.tracking_number_details"
order_id = 'DEMO-0009104390' # <- an order ID in your account
opts = { '_expand' => expansion }
begin
api_response = order_api.get_order(order_id, opts)
if api_response.error
puts "Developer Message: #{api_response.error.developer_message}"
puts "User Message: #{api_response.error.user_message}"
exit
end
puts api_response.order.inspect
rescue StandardError => e
puts "An error occurred: #{e.message}"
end
```
Expansion goes in the options hash under the `_expand` key, not as a positional argument. It
controls how much of the order comes back, and order objects are large, so request only the
branches you need. [Expanding objects](../essentials/expanding-objects.md) lists the valid
values.
Failures reach you two ways. Transport and HTTP failures raise, while UltraCart application
errors come back on `api_response.error`. Handle both.
## Next
- [Essentials](../essentials/index.md) for pagination, expansion, errors, and rate limits.
- [API Samples](../howtos/api-samples.md) to browse a sample for every operation, or go
straight to [ruby/](https://github.com/UltraCart/sdk_samples/tree/master/ruby) in the samples
repository.
- [Error reference](../essentials/error-reference.md) for the specific failures you are likely
to hit, and how to handle each one.
---
# TypeScript SDK
https://docs.ultracart.com/developer/sdks/typescript
doc_type: how-to
# TypeScript SDK
Install the TypeScript SDK, configure a client, and retrieve an order with typed models.
## Before you start
- **A Simple Key.** Generate one under **Configuration → Back Office → Authorized
Applications**. See [Creating a Simple Key](../howtos/authentication-and-keys/api-simple-key.md). For an application
that multiple merchants connect to their own accounts, use
[OAuth 2.0](../essentials/oauth.mdx) instead.
- **Node.js.** The client returns promises and uses the platform `fetch`.
This is a separate package from the [JavaScript SDK](./javascript.md), not a set of type
definitions layered over it. The two have different client setup and different method
signatures, so pick one.
## Install
```bash
npm install ultracart_rest_api_v2_typescript --save
```
## Authenticate
Each API class takes a `Configuration`. Pass both the key and `apiVersion`:
```typescript
import { Configuration, OrderApi } from 'ultracart_rest_api_v2_typescript';
const orderApi = new OrderApi(new Configuration({
apiKey: process.env.UC_API_KEY!, // <- your merchant Simple Key
apiVersion: '2017-03-01',
}));
```
`apiVersion` populates the `X-UltraCart-Api-Version` header on every request. Omitting it sends
the header empty and the request fails, so treat it as required rather than optional. See
[Versioning](../essentials/versioning.md) for what the value controls.
:::warning
Keep the key out of source control and out of anything that ships to a browser. A Simple Key
carries the permissions of the application it belongs to.
:::
## Retrieve an order
This is the `GetOrder` sample from
[sdk_samples](https://github.com/UltraCart/sdk_samples/blob/master/typescript/order/GetOrder.ts),
trimmed to the call itself:
```typescript
// Trimmed from sdk_samples/typescript/order/GetOrder.ts
import { OrderResponse } from 'ultracart_rest_api_v2_typescript';
const expansion = 'item,summary,billing,shipping,shipping.tracking_number_details';
const orderId = 'DEMO-0009104390'; // <- an order ID in your account
const apiResponse: OrderResponse = await orderApi.getOrder({ orderId, expand: expansion });
if (apiResponse.error) {
console.error('Developer Message:', apiResponse.error.developer_message);
console.error('User Message:', apiResponse.error.user_message);
throw new Error('Failed to retrieve order');
}
console.log(JSON.stringify(apiResponse.order, null, 2));
```
Methods take a single object argument rather than positional parameters, which is the clearest
difference from the JavaScript SDK. The `expand` value controls how much of the order comes
back; [Expanding objects](../essentials/expanding-objects.md) lists the valid values.
A returned `order` is typed as optional, so narrow it before use. UltraCart application errors
arrive on `apiResponse.error` rather than as a thrown exception.
## Next
- [Essentials](../essentials/index.md) for pagination, expansion, errors, and rate limits.
- [API Samples](../howtos/api-samples.md) to browse a sample for every operation, or go
straight to
[typescript/](https://github.com/UltraCart/sdk_samples/tree/master/typescript) in the samples
repository.
- [API Reference](../api) for every operation, with a TypeScript tab on each page.
---
# StoreFront Developers
https://docs.ultracart.com/developer/storefront
doc_type: explanation
:::note
[The StoreFront Template Language](/guides/ultracart-documentation/storefronts/storefront-topics/the-storefront-template-language)
[Finding and fixing template Syntax errors](/guides/ultracart-documentation/storefronts/storefront-topics/finding-and-fixing-template-syntax-error)
[An introduction to the Admin Panel](/guides/ultracart-documentation/storefronts/storefront-topics/an-introduction-to-the-admin-panel)
[StoreFront Template File Specification](/guides/ultracart-documentation/storefronts/storefront-topics/storefront-template-file-specification)
[Page Directive Reference](/guides/ultracart-documentation/storefronts/storefront-topics/page-directive-reference)
[Programming forms and fields in a StoreFront template](/guides/ultracart-documentation/storefronts/storefront-topics/programming-forms-and-fields-in-a-storef)
[Understanding How StoreFronts Processes URLs](/storefronts-themes/pages-content/how-urls-resolve)
[Finding a template or snippet in the filesystem](/guides/ultracart-documentation/storefronts/storefront-topics/finding-a-template-or-snippet-in-the-fil)
:::
:::note
\-- coming soon --
:::
:::note
[StoreFront Template Context Variables](/guides/ultracart-documentation/storefronts/storefront-topics/storefront-template-context-variables)
[StoreFront Object Model](./storefront-object-model/index.md)
[StoreFront Screen Interfaces](./storefront-screen-interfaces/index.md)
:::
:::note
All Themes
[All Themes - Developer Tutorials](./developer-tutorials/all-themes-developer-tutorials/index.md)
Natural Theme
[Natural Theme - Developer Tutorials](./developer-tutorials/natural-theme-developer-tutorials/index.md)
Mr. Teas Theme
[Mr Teas Theme - Developer Tutorial](./developer-tutorials/mr-teas-theme-developer-tutorial/index.md)
:::
:::info
Transcluded from [Developers Guide to Foundation](./developers-guide-to-foundation/index.md).
:::
---
# Developer Examples
https://docs.ultracart.com/developer/storefront/developer-examples
doc_type: reference
:::tip
This is a colection of developer examples. They are categorized on the [main developer page](../index.md). You may find them easier to browse on [that page](../index.md).
:::
---
# A simple page with editable content - Developer Example
https://docs.ultracart.com/developer/storefront/developer-examples/a-simple-page-with-editable-content-deve
doc_type: tutorial
TODO-UC: Explain
```
## uc:contains-velocity="true"
## uc:page-type="static"
## uc:page-attribute-string="subtitle"
## uc:page-attribute-html="content"
## uc:menu-used="header"
## uc:menu-used="footer"
## uc:menu-used="help"
## uc:menu-used="account"
#parse("/snippets/top.vm")
#parse("/snippets/bottom.vm")
```
---
# Adding Breadrumb Trails in the Storefront Visual Builder
https://docs.ultracart.com/developer/storefront/developer-examples/adding-breadrumb-trails-in-the-storefron
doc_type: how-to
# Introduction
Breadcrumb trails are a navigational aid that helps shoppers understand their current location within your storefront hierarchy. They provide a clear, clickable path back to higher-level pages, improving usability and overall shopping experience.
In UltraCart StoreFronts, you can add a **Breadcrumb** element within the Visual Builder. Once placed, it automatically generates breadcrumb trails for your storefront pages.
**Example:**

> **Tip:** Breadcrumbs are especially useful for complex category hierarchies or deep navigation structures.
* * *
## Prerequisites
- An active UltraCart StoreFront.
- Access to the **Storefront Visual Builder**.
- Familiarity with adding and managing elements in the builder.
The **Storefront Visual Builder** contains an element titled ‘**Breadcrumb**'. The breadcrumb element should be nested within a Container, and within a Row and Column. The breadcrumb element will auto generate the breadcrumb trail within the storefront pages.
## Step-by-Step Instructions
1. **Open the Visual Builder**
- Navigate to **StoreFronts → \[Your Storefront\] → Visual Builder**.
2. **Locate the Container**
- Ensure you have a **Container** element available where you want the breadcrumb to appear.
3. **Add a Row and Column**
- Within the container, add a **Row** and then a **Column**.
- Breadcrumbs should be placed inside a column for proper alignment.
**Insert the Breadcrumb Element**
- From the Hierarchy panel, Click the '+' button for the Column element, then choose add as child
- The system will automatically generate breadcrumb trails based on the storefront page structure.

4. **Review and Save**
- Preview the storefront to confirm the breadcrumb trail displays correctly.
- Save your changes.
* * *
## Conclusion
Breadcrumbs improve navigation and user experience by providing a clear path back through your storefront hierarchy. Using the Visual Builder makes adding them straightforward and ensures they dynamically update as your storefront structure changes.
* * *
## FAQ
**Q: Can I customize the breadcrumb design?**
Yes. You can apply custom CSS to style the breadcrumb element to match your storefront’s branding, including font size, colors, and spacing.
**Q: Will breadcrumbs update automatically if I change my storefront structure?**
Yes. The breadcrumb element dynamically generates its trail based on the storefront hierarchy, so updates to menus or page structures are automatically reflected.
**Q: Where should I place breadcrumbs for best usability?**
We recommend placing breadcrumbs near the top of the content area, just below the header or navigation menu, so shoppers can easily see their location.
**Q: Do breadcrumbs affect SEO?**
Yes. Breadcrumbs improve internal linking and help search engines better understand your storefront’s hierarchy. They can positively impact SEO when implemented correctly.
* * *
## Next Steps
- Learn more about [Storefront Visual Builder Elements](#).
- Explore [Organizing Menus in Your Storefront](#).
## View of the Breadcrumb element in the Storefront Hierarchy

---
# Breadcrumbs - Developer Example
https://docs.ultracart.com/developer/storefront/developer-examples/breadcrumbs-developer-example
doc_type: tutorial
TODO-UC: Explain
```xml
##
## See the comments below. Comments are preceded by double no. signs (##)
## This theme attribute is used to notify the theme that it should not generate
## a breadcrumb since only the checkout is used.
## uc:theme-attribute-boolean="Checkout Only Theme"
## if the following attribute is false, generate a breadcrumb
#if($theme.attr("Checkout Only Theme", "false") != "true")
#else
## The breadbrumb trail will look at a $group object (represents a product group), and travel
## up through all the parents of that group to contructs an ancestry. That list of ancestors
## is then looped through and links created for each one.
#foreach($crumb in $breadcrumbHelper.getBreadcrumbTrail($group))
## ignore 1) the current page, 2) the /products/ directory, and 3) the /info/ directory.
#if($crumb.path != $group.path && $crumb.path != "/products/" && $crumb.path != "/info/")
#end
#end ##end-for each crumb
## after listing out all the parents, deal with the current page.
## if $item is false, then this is a product group page. So use the group title.
#if(!$item)
## if the title is long, truncate it
#if($group.getTitle().length() > 35)
$formatHelper.excerpt($group.title, 35)…
#else
$group.title
#end
## if this is a specific product page, create a breadcrumb for the direct parent page (it's not part of the crumbs above)
## then create a crumb for the product page itself.
#else
#end
```
---
# Code to render a menu - Developer Example
https://docs.ultracart.com/developer/storefront/developer-examples/code-to-render-a-menu-developer-example
doc_type: tutorial
TODO-UC: explain. links to building a menu. show the rendered output from the getHtml() call.
```
## uc:menu-used="header"
## uc:theme-attribute-boolean="Checkout Only Theme"
#if($theme.attr("Checkout Only Theme", "false") != "true")
#end
```
---
# Creating a Page Sort-By Select Box - Developer Example
https://docs.ultracart.com/developer/storefront/developer-examples/creating-a-page-sort-by-select-box-devel
doc_type: reference
TODO-UC: Explain
```
#if ($parameters["changeItemSortOrder"])
$group.setCurrentItemSortOrder($parameters["changeItemSortOrder"])
#end
#if($group.getItemCount() > 0)
#end
```
---
# Creating an Items-per-Page Select Box - Developer Example
https://docs.ultracart.com/developer/storefront/developer-examples/creating-an-items-per-page-select-box-de
doc_type: reference
TODO-UC: Explain
```
#if ($parameters["changeItemsPerPage"])
## Test being able to remove the parseInt call after the next build.
$group.setCurrentItemsPerPage($formatHelper.parseInt($parameters["changeItemsPerPage"]))
#end
#if($group.getItemCount() > 10)
#end
```
---
# Displaying a list of products on a page - Developer Example
https://docs.ultracart.com/developer/storefront/developer-examples/displaying-a-list-of-products-on-a-page
doc_type: reference
See Also: [Displaying Subpages - Developer Example](./displaying-subpages-developer-example.md)
TODO-UC: Explain
TODO-UC: Note the difference between displaying products (items) and sub pages (groups).
```
##
## UltraCart - Mr Teas Template
## http://www.ultracart.com/
##
## Copyright (c) 2015 BPS Info Solutions Inc.
## License located here:
## http://www.ultracart.com/storefront/license/
##
## Designed by Level 2 Design, LLC http://www.level2d.com/
##
## uc:display-items="true"
## uc:item-multimedia-default-used="true"
## uc:theme-attribute-boolean="Hide Sale Banner"
## uc:theme-attribute-boolean="Hide Out of Stock Banner"
#set($groupItems = $group.getItemsForPage($page))
## $formatHelper.sortByAttribute($groupItems, "sort_order", false)
## $formatHelper.removeItemsWithoutCost($groupItems)
## $formatHelper.removeOutOfStockItems($groupItems)
## Below manually sets the url segment that is used to construct the item path
## #set($groupItems = $formatHelper.getItemsForPage($groupItems, $page, 2))
#foreach($item in $groupItems)
#if($item.getSaleCost())
#set($saleClass = "sale")
#else
#set($saleClass = "")
#end
#if($item.isInventoryTracked())
#if($item.getAvailableQuantity() && $item.getAvailableQuantity() < 1)
#set($stockClass = "out-of-stock")
#else
#set($stockClass = "")
#end
#else
#set($stockClass = "")
#end
```
---
# Displaying Subpages - Developer Example
https://docs.ultracart.com/developer/storefront/developer-examples/displaying-subpages-developer-example
doc_type: tutorial
TODO-UC: Explain how to render out the subpages (sub groups)
```
##
## UltraCart - Mr Teas Template
## http://www.ultracart.com/
##
## Copyright (c) 2015 BPS Info Solutions Inc.
## License located here:
## http://www.ultracart.com/storefront/license/
##
## Designed by Level 2 Design, LLC http://www.level2d.com/
##
## uc:child-page-multimedia-default-used="true"
#set($subgroups = $group.getChildren())
## $formatHelper.sortByAttribute($subgroups, "sort_order", false)
## $formatHelper.removeItemsWithoutCost($subgroups)
## $formatHelper.removeOutOfStockItems($subgroups)
## Below manually sets the url segment that is used to construct the item path
## #set($subgroups = $formatHelper.getItemsForPage($subgroups, $page, 2))
#foreach($group in $subgroups)
```
---
# Featuring product on your home page - Developer Example
https://docs.ultracart.com/developer/storefront/developer-examples/featuring-product-on-your-home-page-deve
doc_type: tutorial
TODO-UC: Explain how to set a page (group) attribute for featured items and then looping through it on the page.
```
## uc:page-attribute-itemset="home slider items"
#end
#parse("/snippets/bottom.vm")
```
---
# schema.org information on product page - Developer Example
https://docs.ultracart.com/developer/storefront/developer-examples/schema-org-information-on-product-page-d
doc_type: reference
The schema.org website defines a standardized way to include information about your organization, as well as the content of an individual page, in a format that is easy for search engines to consume and process. It is important to include this information, often called metadata, in all of your pages. The Storefront system allows you to populate this information quickly and easily.
Each page should contain both an Organization block, as well as an Item block.
```
## uc:item-multimedia-default-used="true"
## uc:site-attribute-string="storefrontSEODescription"
## uc:site-attribute-string="title"
```
```
## Organization block for Schema.org
#end
```
---
# Developer Tutorial: Safe Order Updates in UltraCart REST API (Preventing Order Record Corruption)
https://docs.ultracart.com/developer/storefront/developer-tutorial-safe-order-updates-in
doc_type: tutorial
# Introduction
This guide documents a real-world support case where an **order update call unintentionally “nuked” fields** and left an order **unviewable in the UltraCart UI** due to an update performed with an **incomplete expansion**. It provides **developer-safe guidelines** for using _update_ APIs on **live orders**, along with a recommended **test-first procedure** to protect real customer order records.
> **Warning:** Order update calls are high-risk. If you update an order using a “smaller” object (missing fields due to limited expansion), you can unintentionally overwrite/drop data.
* * *
## What happened (sanitized case summary)
A developer built a script to append **merchant notes** onto orders via the Order API. During testing on a real order, the script performed an update in a way that caused the stored order JSON to become inconsistent enough that the order could no longer be opened in the UltraCart UI.
Support identified the underlying issue:
- The developer **read** the order using one set of expansion fields, but **updated** the order **without using the same expansion**
- As a result, the update operation sent a **partial order representation**, which can lead to **data loss** when persisted
- Support recommended using **the exact same expansion** for both **GET** and **UPDATE**, and verifying SDK parameter naming (`_expand` vs `expand` depending on the language SDK)
UltraCart’s Order API supports returning different “sizes” of an order via the `_expand` parameter, and encourages limiting expansions for performance.
That performance feature is also what makes **update calls dangerous** if you don’t keep your GET/UPDATE expansions consistent.
* * *
## Why updates can corrupt or “nuke” order data
### Expansion controls what fields you _have in-hand_
UltraCart Order API responses may be partial unless you request expansions.
### Many “update” patterns are read-modify-write
A typical script does:
1. `GET /order/{orderId}?_expand=...`
2. Modify a field (e.g., `merchant_notes`)
3. `PUT /order/{orderId}?_expand=...` (or SDK equivalent)
If step (3) uses **no expansion** or a **different expansion**, you can accidentally send an order object missing fields that existed on the server, risking overwrites, dropped nested structures, or inconsistent stored state.
* * *
## Developer-safe rules for updating real orders
### 1) Always use the same expansion for GET and UPDATE
Declare one variable and reuse it everywhere.
> **Prerequisite:** Confirm whether your SDK uses `expand` or `_expand`. Some language SDKs differ.
Example (pattern-only; field names vary by SDK):
```
EXPAND = "items,billing,shipping,properties,payment" # example only
order = api.get_order(order_id, _expand=EXPAND)
# Modify ONLY what you intend to change
order.merchant_notes = (order.merchant_notes or "") + "\nTechnician update: ..."
api.update_order(order_id, order, _expand=EXPAND)
```
### 2) Prefer SDK objects over manual JSON string building
Don’t hand-assemble JSON strings for nested order structures unless you absolutely must.
- SDK models reduce malformed payloads
- They also help ensure types/structure are consistent with the API spec
### 3) Minimize your changes (surgical updates)
Only change the fields you intend to change.
Best practices:
- Avoid rewriting large sections of the order object “just because it’s present”
- Do not “rebuild” the order from scratch
- Treat update code as **sensitive migration code**, not casual scripting
### 4) Add validation + logging before sending updates
At minimum:
- Validate the final payload is valid JSON (if you’re serializing)
- Log the outbound request (redact credentials + PII)
- Log the response status and body
- Keep a “replay log” so you can reconstruct what changed
### 5) Use a dry-run mode
Build the updated order payload, but don’t send it unless explicitly enabled.
```
python update_order_notes.py ORDER_ID "Message here" --dry-run
python update_order_notes.py ORDER_ID "Message here" --commit
```
### 6) Implement guardrails for “real” orders
Recommended guards:
- Block updates unless the order matches an allowed test prefix/tag
- Block updates on orders with a shipment/refund state (unless your use case requires it)
- Require explicit confirmation flags for production use (`--commit --i-understand-risk`)
* * *
## Recommended procedure (test-first workflow)
### Phase 1: Test in your own developer account (preferred)
1. Create a dedicated **developer account** for integration testing.
2. Generate multiple sample orders covering common edge cases:
- multiple items
- coupons/discounts
- taxes/shipping
- digital + physical mix
3. Run your update script against these orders until stable.
> **Tip:** A dev account removes the “real customer record” risk while you iterate quickly.
### Phase 2: Test on _test orders_ inside the merchant’s account
1. Create clearly labeled test orders (e.g., internal email address, internal SKUs).
2. Add an obvious marker in merchant notes like:
- `TEST ORDER — API UPDATE SCRIPT`
3. Run the script only on those orders.
4. Verify in the UltraCart UI:
- the order opens normally
- merchant notes updated as expected
- no unexpected changes occurred elsewhere
### Phase 3: Controlled rollout on production orders
1. Enable production mode only after Phases 1–2 are complete.
2. Roll out with a small batch size:
- 1 order → 5 orders → 25 orders
3. Add monitoring:
- error alerts
- audit logs
- quick rollback plan (restore from logged “before” payload if applicable)
* * *
## Troubleshooting checklist
### Symptom: Order becomes unviewable in the UI after update
Do this immediately:
1. Stop running the script.
2. Locate the last successful “before” snapshot (your logs).
3. Confirm GET/UPDATE expansions were identical.
4. Provide Support with:
- sanitized request/response logs
- your expansion string
- which SDK + version you used
- the minimal repro steps (no credentials)
### Symptom: Fields disappear after update
Most common causes:
- Update call used a smaller/no expansion than the GET call
- Script serialized an incomplete object back to the API
- Incorrect field naming / wrong model object
* * *
## Implementation checklist (copy/paste for dev teams)
- \[\_\] Use SDK models, not manual JSON building
- \[\_\] Single `EXPAND` variable reused for **GET and UPDATE**
- \[\_\] Verify `_expand` vs `expand` for your SDK/language
- \[\_\] Modify only intended fields
- \[\_\] Dry-run mode implemented
- \[\_\] Logging implemented (redacted)
- \[\_\] Tested in developer account first
- \[\_\] Tested on merchant test orders next
- \[\_\] Production rollout is gradual with monitoring
* * *
---
# Developer Tutorials
https://docs.ultracart.com/developer/storefront/developer-tutorials
doc_type: reference
---
# All Themes - Developer Tutorials
https://docs.ultracart.com/developer/storefront/developer-tutorials/all-themes-developer-tutorials
doc_type: reference
The following customization tutorials are not theme specific, but give you real world examples on theme customization.
:::note
[Adding Olark Live Chat to your Website](./adding-olark-live-chat-to-your-website.md)
[Adding text to the checkout when a specific item is being purchased](/developer/storefront/developer-tutorials/all-themes-developer-tutorials/adding-text-to-the-checkout-when-a-specific)
[Changing i18n checkout text within the template](./changing-i18n-checkout-text-within-the-t.md)
[Creating an extended description longer than 2000 characters](./creating-an-extended-description-longer.md)
[Fix insecure content warning due to template modification](./fix-insecure-content-warning-due-to-temp.md)
[Hide Update and Continue Shopping Button on Single Page Checkout](./all-themes-hide-update-and-continue-shop.md)
[Implementing Amazon.com Conversion Pixel](./implementing-amazon-com-conversion-pixel.md)
[Porting IfPurchased Tokens on the legacy receipt over to Velocity](./porting-ifpurchased-tokens-on-the-legacy.md)
[Apply a specific Font Family to throughout a theme via CSS](./apply-a-specific-font-family-to-a-theme.md)
:::
---
# Adding Conditional Text to the Receipt Email
https://docs.ultracart.com/developer/storefront/developer-tutorials/all-themes-developer-tutorials/adding-conditional-text-to-the-receipt-email
doc_type: how-to
This tutorial will explain how to modify the receipt templates within StoreFronts to add text when the customer purchases a particular item.
First click on the Email tab of the StoreFront.

Now scroll down and click on the receipt\_html.vm template.

The next step is to add a conditional if statement. We're going to ask the [Order object](/developer/storefront/storefront-object-model/order-sfo) if a particular item has been purchased. That code snippet looks like. Consult the [Order object](/developer/storefront/storefront-object-model/order-sfo) documentation for a detailed list of all the methods available on this object.
```xml
#if($order.ifPurchased("ITEM_ID"))
Text to output if order contained item ID "ITEM_ID"
#end
```
You can see a real world example in the screenshot below.

Finally when we save and preview the template we can see the text conditionally displaying.

---
# Using CSS to apply custom button image in place of the default image
https://docs.ultracart.com/developer/storefront/developer-tutorials/all-themes-developer-tutorials/adding-conditional-text-to-the-receipt-email/using-css-to-apply-custom-button-image-i
doc_type: how-to
You may find a situation where you would like to replace the defaulted image for a button with your own custom image. For example, you may wish to replace the default image for the Amazon Pay button. To do this all you need to do is upload the image to a secured URL. Typically you'll upload the image to the storefront file manager, but it could be located outside of UltraCart so long as the URL can load using the secured https:// prefix to the URL.
The CSS to accomplish applying your own image to the button looks like this:
```groovy
#payWithAmazonDiv > img {
content:url("http://imgur.com/SZ8Cm.jpg");
}
```
In the storefront themes using the Visual Builder (\*recommended), you will:
1. Navigate to edit the page.
2. Highlight and select the button.
3. Click the settings button to open the settings panel, then scroll down to the "Scoped CSS".
4. Click to edit CSS and paste the CSS there.
5. Save the changes.
:::info
This technique applies to any button images within the storefront.
:::
---
# Adding LiveChat to your Website
https://docs.ultracart.com/developer/storefront/developer-tutorials/all-themes-developer-tutorials/adding-livechat-to-your-website
doc_type: how-to
This brief tutorial will demonstrate how to add the LiveChat script to your website.
## Prerequisites
For you need to have the LiveChat chat snippet of code that was provided by LiveChat. It should look something like this.
```xml
```
## Creating livechat.vm template
The first thing we need to do is create a snippet template that will contain the LiveChat code above. Click on the File Manager tab within your StoreFront.

Now click on "themes", then your active theme (shown in green) and then "snippets" as shown below.


Now that we're in the snippets folder, click on the new file icon and name the file "livechat.vm".


In the file editor, paste the snippet of LiveChat code into the template click Save and then click Close.

## Including LiveChat on every page.
To have LiveChat appear on every one of our pages, we need to include this template within another template that every page uses. To do this click on the "Templates" tab as shown below.

Now click on "Misc". This is the folder that all snippets live in.

Scroll down until you find "snippets/document\_bottom.vm" and click it.

At the bottom of the file add the following lines and click Save.
```xml
## LiveChat Script
#parse("livechat.vm")
```

## Advanced - Showing chat only on affiliate portal
If you only want to make the chat script available for affiliates, add the following if statement around the parse.
```xml
## LiveChat only on affiliate pages
#if( $pageGroup == 'affiliate' )
## LiveChat Script
#parse("livechat.vm")
#end
```

---
# Adding new tab to Item page
https://docs.ultracart.com/developer/storefront/developer-tutorials/all-themes-developer-tutorials/adding-new-tab-to-item-page
doc_type: how-to
# About
This tutorial will guide you through the process of adding a new TAB to the item page.
## Visual Builder Enabled Themes
This tutorial will guide you through the process of adding a "Facts" tab to the item page in the Elements theme. This process will apply to other Visual Builder enabled themes.
Log into Ultracart, then navigate to the storefront host, then click the "Browse Your Store" button that appears to the right of the storefront preview image:

Next, navigate to an item page and then click the 'Edit' button in the top left corner of the page:

(Please note that you must be actively logged into the UltraCart backend in order to see the Visual Builder menu at the top of the page.)
Next, scroll down to the tabs, there you'll see an "Add Tab" button:

Clicking the tab adds the new tab, and you'll be prompted to "Add element" to the tab. In this case, I added a Text Block element (which initially appears with lorim Ipsum placeholder text .)
Please note: The new tab will initially appear with a placeholder for the tab name "Sample Tab Title", to rename the tab title, you'll need to go ahead and save the changes (click the save button that appears tin the menu along the right side of the page), then exit the Visual Editor by highlighting and removing the portion of the URL "**?editMode=true**" then reloading the page.
Once the page loads in the non editing view, click the edit button again to engage the Visual Editor. Then scroll back down and highlight the tab section and click the 'H' or the three boxes icon in the visual editor menu to open the Hierarchy panel, the scroll over the new tab and click the setting icon then in the setting panel, change the tab title, then click the save button to save the changes.
Please see the screenshot video for more details to this process:
[example - VB - adding a tab to item page.mp4](pathname:///confluence/24051749/example%20-%20VB%20-%20adding%20a%20tab%20to%20item%20page.mp4)
## Legacy Non Visual Builder themes
This tutorial will guide you through the process of adding a "Facts" TAB to the item page of the Mr Teas theme. This tab will automatically display if Facts information is added to the item.
First click on Templates, Catalog Item, and then templates/template\_item.vm as shown below.

The first thing we need to do is add a new attribute to the top item template, this can be done with the following code, for this example we will use a multiline attribute for "Facts".
```
## uc:item-attribute-multiline="facts"
```
The full code block at the top would look something like this.
```
## uc:theme-attribute-boolean="Information Only Theme"
## uc:theme-attribute-boolean="Use Cart Snapshot||none"
## uc:theme-attribute-string="Item No Image Available Image URL||.UC-default-item-multimedia"
## uc:theme-attribute-string="Item Image Processing URL|/core/assets/imgs/image-processing.png|.UC-default-item-multimedia"
## uc:item-attribute-multiline="facts"
```
Now that we have our item attribute we can add our code.
```
#if ($item.getAttribute("Facts"))
Facts
$item.getAttribute("Facts")
#end
```
to add the tab to the page as shown below. This should be inside of the ul tag with the class of ultratabs around line 283.

This code will contain both the tab and the content within a single block of code.
Now any item where we add content for Facts, the facts tab will appear.

---
# Adding Olark Live Chat to your Website
https://docs.ultracart.com/developer/storefront/developer-tutorials/all-themes-developer-tutorials/adding-olark-live-chat-to-your-website
doc_type: how-to
This brief tutorial will demonstrate how to add the Olark live chat script to your website.
## Prerequisites
For you need to have the Olark chat snippet of code that was provided by Olark. It should look something like this.
```xml
```
## Creating olark.vm template
The first thing we need to do is create a snippet template that will contain the Olark code above. Click on the File Manager tab within your StoreFront.

Now click on "themes", then your active theme (shown in green) and then "snippets" as shown below.


Now that we're in the snippets folder, click on the new file icon and name the file "olark.vm".


In the file editor, paste the snippet of Olark code into the template click Save and then click Close.

Including Olark on every page.
To have the Olark chat script appear on every one of our pages, we need to include this template within another template that every page uses. To do this click on the "Templates" tab as shown below.

Now click on "Misc". This is the folder that all snippets live in.

Scroll down until you find "snippets/document\_bottom.vm" and click it.

At the bottom of the file add the following lines and click Save.
```xml
## Olark Chat Script
#parse("olark.vm")
```

A warning about modifying the file will appear. Click on the OK button. We've been intelligent about adding our code as another snippet so if we ever have a merge conflict on the document\_bottom.vm it will be trivial to resolve.

## Making sure it works
Simply go to your website and make sure the Olark chat loaded. Notice our Olark chat offer is properly pinned to the bottom of the page.

---
# Adding text to the checkout when a specific item is being purchased
https://docs.ultracart.com/developer/storefront/developer-tutorials/all-themes-developer-tutorials/adding-text-to-the-checkout-when-a-specific
doc_type: how-to
The following quick tutorial will demonstrate how to place text on the checkout when a certain item is being purchased. First let's start off by defining what our goal is. In the screen shot below you can see we want to place some text in this region of the page whenever the item "fancy\_teacup" is being purchased.

To get started go up to the admin panel bar at the top, hover over "Developer Tools" and then click on "Edit Template" as shown below.

Notice that this took us to the exact template that is powering the page which is templates/system/checkout/view\_cart.vm

Now let's get down to the actual code that will power this message.
We have a simple Velocity if statement asking the [cart object](/developer/storefront/storefront-object-model/cart-sfo) if it contains the "fancy\_teacup" item. If it does then we want to output a block of HTML. The block of HTML is simply a div that spans the entire page properly. For more information on why the div is formatted this way, please see the article [Adding instructional text to the checkout](/developer/storefront/developers-guide-to-foundation/adding-instructional-text-to-the-checkou).
```xml
#if ($cart.isPurchasing("fancy_teacup"))
Place a message here if they are buying fancy_teacup
#end
```
Now we'll need to position it properly within the template. You can see we've placed it just above the output of the cart itself and clicked save.

The final result is the message on the view cart page.

Doing just the opposite: Showing a message if an item or items are not purchased.
Apache Velocity uses the exclamation symbol as a negation operator. So putting it before the test condition will test for the opposite.
```xml
## This tests for a purchase:
## $cart.isPurchasing("fancy_teacup")
## This tests for the opposite:
## ! $cart.isPurchasing("fancy_teacup")
#if (! $cart.isPurchasing("fancy_teacup"))
You really should buy some fancy_teacup and/or fancy_saucer. They are simply delightful.
#end
```
Now we'll need to position it properly within the template. You can see we've placed it just above the output of the cart itself and clicked save.
---
# Testing UltraCart StoreFront Performance
https://docs.ultracart.com/developer/storefront/developer-tutorials/all-themes-developer-tutorials/adding-text-to-the-checkout-when-a-specific/testing-ultracart-storefront-performance
doc_type: how-to
This video tutorial will guide you through the performance testing process for your Storefront.
[View video](https://www.youtube.com/watch?v=eR7QQNyHhWo).
---
# All Themes - Hide Update and Continue Shopping Button on Single Page Checkout
https://docs.ultracart.com/developer/storefront/developer-tutorials/all-themes-developer-tutorials/all-themes-hide-update-and-continue-shop
doc_type: how-to
This tutorial will guide you through the process of hiding the update and continue shopping buttons on the single page checkout using a [CSS override](/storefronts-themes/themes/customize#override-css). First let's take a look at the buttons we want to remove from the checkout.

To remove these buttons we're going to add some CSS to the override.css file. First click on the File Manager tab.

Now click on the following directories
- themes
-
- assets
- css
Screenshots of this are shown below.


Now we need to click on the "override.css" file as shown below.

The two buttons that we're interested in hiding have id attributes on them so it is easy to paste the following code into the override.css file and save it.
```css
#continueShopping {
display: none;
}
#ucUpdateQuantityId {
display: none;
}
```

Once we've saved the override.css file we can check the checkout page again and see that the buttons are now properly hidden.

---
# Apply a specific Font Family to a theme via CSS
https://docs.ultracart.com/developer/storefront/developer-tutorials/all-themes-developer-tutorials/apply-a-specific-font-family-to-a-theme
doc_type: how-to
If you find you prefer to use a different font family that the defaulted one to your theme, you can use CSS to apply your preferred font family to the storefront.
For example, if you are want to replace the Default font used in the Elements theme with the one used in the Mr Tea's theme (Font-family "Lato"), navigate to the storefront menu then select CSS then enter the following:
```groovy
h1, h2, h3, h4, h5, body.catalog.sidebar aside h2, body.product-review-page .product-review h2, .titles, .title {
font-family: "Lato";
}
```
Here's an example of how this will appear in the CSS editor:

# Related Documentation
[Font SFO](../../storefront-object-model/font-sfo.md)
---
# Changing i18n checkout text within the template
https://docs.ultracart.com/developer/storefront/developer-tutorials/all-themes-developer-tutorials/changing-i18n-checkout-text-within-the-t
doc_type: explanation
:::info
Transcluded from [How StoreFront handles static text and multi-lingual support](/storefronts-themes/languages/how-storefront-handles-static-text-and-m).
:::
---
# Creating an extended description longer than 2000 characters
https://docs.ultracart.com/developer/storefront/developer-tutorials/all-themes-developer-tutorials/creating-an-extended-description-longer
doc_type: how-to
This tutorial will explain a technique for creating an extended description that can handle more than 2,000 characters (the limit for the built in field). First let's take a look at a page where this 2,000 character limit is causing a problem.

The area highlighted in red shows how this block of HTML is being abruptly cut off. To fix this problem we are going to introduce a new item level attribute called "alt extended description". The template that we need to edit is named template\_item.vm. Below you can see where this is located on the template editor.

The first thing we need to do on this template is to add a directive at the top declaring this new item attribute. The directive is what will tell the GUI to present a field to the user when they edit the item.
```xml
## uc:item-attribute-html="alt extended description"
```

The next step is to create a single variable that will hold the proper extended description. The alt extended description attribute if it's specified, otherwise the normal extended description.
```xml
## Create a single variable that contains the alt extended description if specified, otherwise the regular extended description
#set($extendedDescription = $item.getExtendedDescriptionNoEscape())
#if ($item.getAttributeValue("alt extended description") && $item.getAttributeValue("alt extended description").length() > 0)
#set($extendedDescription = $item.getAttributeValue("alt extended description"))
#end
```
You can see we've spaced this snippet of code just below the directive.

The final step is to use CTRL-F (Find) and CTRL-G (Find Next) to located all the instances of **$item.getExtendedDescriptionNoEscape()** and **$item.getExtendedDescriptionNoEscape()** other than our new code and replace them with **$extendedDescription**.
One example of replacing some of the instances looks like this.

At this point you should be able to save the template and refresh your product page and nothing show appear to change (because you haven't populated the alt extended description of the item). When you go to the item editor now, you will see a new StoreFront attribute appear for the alt extended description.

Copy the extended description down to the alt extended description and add the additional content.
---
# Fix insecure content warning due to template modification
https://docs.ultracart.com/developer/storefront/developer-tutorials/all-themes-developer-tutorials/fix-insecure-content-warning-due-to-temp
doc_type: how-to
If you've modified your templates to add something like a trust logo then you may have accidentally broken the HTTPS lock in the browser. Each browser displays this error condition differently. Chrome for example shows it like this:

The first step to fixing your templates is navigating to your StoreFront and clicking the templates tab as shown below.

In the search field enter **src="http://** and then click the search icon to the right as shown below.

Any file that has this string in it will appear below. In this example we can see there are a couple of templates that could contain the bad code. Click on the individual template filename to bring it up. Now hit CTRL+F to bring up the search and type src="http:// and hit ENTER as shown below.

You'll see that this search found the bad code highlighted below.

```xml
## 365D Seal and Customer Testimonial
```
To fix this particular example we are going to remove the http:// from the link and then adjust the URL to use the format that will work with Amazon S3 for both HTTP and HTTPS. That gives us the following good code.
```xml
## 365D Seal and Customer Testimonial
```
:::tip
Whenever possible use // instead of https:// or http:// at the beginning of the URL. Browsers will automatically use the same protocol as the page which will prevent loading content insecurely if the page is running over HTTPS and at the same time not burden the web server if the page is running over HTTP.
:::
To see if there are additional instances in the page of the src="http:// snippet hit CTRL+G. When you are through fixing all the URLs that will break the page save the template. Repeat this process for other templates that you may have modified.
:::tip
Ignore snippets that you have not modified such as **snippets/comodo.vm**. These snippets will have the string you're searching for, but they are properly coded by the theme developer for their purpose.
:::
Now refresh your page in the checkout and the HTTPS lock should be happy.

---
# Implementing Amazon.com Conversion Pixel
https://docs.ultracart.com/developer/storefront/developer-tutorials/all-themes-developer-tutorials/implementing-amazon-com-conversion-pixel
doc_type: how-to
Some merchants choose to advertise their products on Amazon.com. To gauge the effectiveness of the advertising, a conversion pixel needs to be deployed onto the receipt. At this point in time UltraCart does not have built in support for this particular pixel, but this tutorial will walk you through how to deploy in the conversion HTML section.
First let's take a look at the pixel code that is provided by Amazon.
```xml
```
First we need to change this code to use Velocity calls to provide the information we're looking for. We'll also remove all the extra comment code that doesn't need to be sent down to the browser.
```xml
```
To deploy this code let's click on the Conversion Tracking tab of StoreFronts.

Now click on the "Custom" tab.

Paste in the code into the Conversion HTML field. Make sure you notice the line highlighted in the screenshot below where you need to enter your own Amazon merchant ID.

Place a test order and make sure that the pixel fired properly on your receipt.
---
# Porting IfPurchased Tokens on the legacy receipt over to Velocity
https://docs.ultracart.com/developer/storefront/developer-tutorials/all-themes-developer-tutorials/porting-ifpurchased-tokens-on-the-legacy
doc_type: how-to
# Overview
This tutorial will cover how to port existing \[IfPurchase\] HTML \[/IfPurchased\] snippets from your legacy Screen Branding Theme receipt over to the StoreFront Checkout.
# Legacy code
First let 's look at an example of the legacy code.

Let's take a closer look at the legacy token code outside of the screenshot.
```xml
[IfPurchased=jdh-dvd-ah-md, jdh-sov-1x-ah-md, jdh-sov-90-ah-md,jdh-dvd-eh-yy, jdh-sov-1x-eh-yy, jdh-sov-90-eh-yy, jdh-dvd-rp-jd,jdh-sov-1x-rp-jd, jdh-sov-90-rp-jd]
Also: check out our friend Dusan Milenkovic' fantastic Jazz
Drum Transcription Book "The
Magnificent Seven"! (Transcriptions of Solos by Jeff "Tain" Watts,
Eric Harland, Bill Stewart & more)
[/IfPurchased]
```
# Porting Legacy to Velocity
Now let's port this over to Velocity code using the [Order object](../../storefront-object-model/order-sfo.md) that is available on the receipt page. So the first thing we need to do is create a Velocity if statement that has the multiple conditions and call $order.isPurchase("itemId") multiple times.
```xml
## COMMENT: This will output additional content on the receipt if the customer purchased one of these products.
#if ($order.isPurchased("jdh-dvd-ah-md") || $order.isPurchased("jdh-sov-1x-ah-md") || $order.isPurchased("jdh-sov-90-ah-md") || $order.isPurchased("jdh-dvd-eh-yy") ||$order.isPurchased("jdh-sov-1x-eh-yy") || $order.isPurchased("jdh-sov-90-eh-yy") || $order.isPurchased("jdh-dvd-rp-jd") || $order.isPurchased("jdh-sov-1x-rp-jd") || $order.isPurchased("jdh-sov-90-rp-jd"))
Also: check out our friend Dusan Milenkovic' fantastic Jazz
Drum Transcription Book "The Magnificent Seven"! (Transcriptions of Solos by Jeff "Tain" Watts, Eric Harland, Bill Stewart & more)
#end
```
Now that we understand the code, we need install it into the receipt. First click on the "Templates" tab on your StoreFront.

Now click on the "Checkout" section.

Scroll down and click on the receipt.vm file.

Now scroll to the bottom of the file. Pay attention to the line numbers in the screenshot. Install the code just above the order output as shown and Save.

:::note
Make sure you place a test order and confirm that your code is working properly.
:::
---
# Creating A New Tab In Elements Theme For Product PDFs
https://docs.ultracart.com/developer/storefront/developer-tutorials/creating-a-new-tab-in-elements-theme-for
doc_type: how-to
# Overview
This tutorial will document the steps using the Visual Builder tool to create an additional tab onto the Items page for displaying PDF documents about the item.
The storefront element to create the PDF list is "Item PDF List".
# Initiate Visual Web Builder
Log into your UltraCart account and from the main menu click on your StoreFront. Then click on the "Browse Your Store" button.

Initiate the Visual Web Builder by [clicking the "edit" button](/guides/ultracart-documentation/storefronts/storefront-visual-builder/quick-start-guide/accessing-the-visual-editor) that appears at the top Left portion of the page.

# Choose the location to add the "Item PDF List" element.
In this example the merchant chooses to create an additional tab to the Item template. So they navigated to one of their items and then clicked the "add Tab" button that appears after the existing tabs in the page:

Then choose the tab and click the a"Add Element" button then when the Visual Builder Panel opens along the right side of the page, Click into the Search field and "Type Item PDF List" and select it. You'll see a panel view like this:

In this case, we only want the PDF tab to appear on the item page when the item has one or PDF's to view. So, the "Hide Ancestor If Empty" has been assigned to the PDF tab (reference here as tab-22212")
# Assign PDF to an item in the Item Editor
Navigate to an item that you will configure with one or more PDF files. Edit the item and then scroll down the first tab of the item editor to the "Additional Product Images" section then click the "upload image" button to upload the PDF file:

Save the changes after uploading your PDF(s) and your done!
# Final View
Here's how the tabs appear for an item with an PDF:

Versus how the tabs appear when no PDF is configured for the item:

---
# Installing the Hero Single Page Checkout into the Elements theme
https://docs.ultracart.com/developer/storefront/developer-tutorials/installing-the-hero-single-page-checkout
doc_type: how-to
The following brief tutorial video describes the process of installing the Hero theme Visual Builder Single Page Checkout into the Elements theme:
---
# Mr Teas Theme - Developer Tutorial
https://docs.ultracart.com/developer/storefront/developer-tutorials/mr-teas-theme-developer-tutorial
doc_type: tutorial
:::note
[Adding Instructions Tab to the Item Page](./mr-teas-adding-an-instructions-tab-to-it.md)
[Adding TrustLogos and text to the footer](./mr-teas-adding-trustlogos-and-text-to-th.md)
[Adjusting the Home Slider Settings](./mr-teas-adjusting-the-home-slider-settin.md)
[Home Slider - Alternate Approach to Image Display](./mr-teas-home-slider-alternate-approach-t.md)
[How do I prevent the home slider from stretching the picture](./mr-teas-how-do-i-prevent-the-home-slider.md)
[Replacing Home Page Item Slider with Complete Listing](./mr-teas-replacing-home-page-item-slider.md)
[Remove overlay opacity on the home slider](#page-not-found)
[Use Full Size Images Instead of Thumbnails](./mr-teas-use-full-size-images-instead-of.md)
:::
---
# Mr Teas - Adding an Instructions Tab to Item Page
https://docs.ultracart.com/developer/storefront/developer-tutorials/mr-teas-theme-developer-tutorial/mr-teas-adding-an-instructions-tab-to-it
doc_type: how-to
:::warning
This tutorial is now deprecated . Please see the" [Adding new tab to Item page](../all-themes-developer-tutorials/adding-new-tab-to-item-page.md)." for new documentation.
:::
This tutorial will guide you through the process of adding an instructions tab to the item page of the Mr Teas theme. This tab will automatically display all of the PDF files attached to an item.
First click on Templates, Catalog Item, and then templates/template\_item.vm as shown below.

Now we need to instruct the following block of code:
```xml
## INSTRUCTIONS TAB
#if($item.getMultimedia("PDF").size() > 0)
#set($firstTabActive = "")
#end
## /INSTRUCTIONS TAB
```
to add the tab to the page as shown below. This should be inside of the dl tag with the class of tabs around line 326.

Now we need to insert the following code to output the instructions tab content.
```xml
## INSTRUCTIONS TAB CONTENT
#if($item.getMultimedia("PDF").size() > 0)
#foreach ($multimedia in $item.getMultimedia("PDF"))
#set($firstTabActive = "")
#end
## /INSTRUCTIONS TAB CONTENT
```
This should be inside of the div with the class tabs-content around line 353 of the template as shown below.

Upload the pdf\_icon.jpg attached to this article into the root directory of your StoreFront file manager.
Now any item where we upload a .pdf file to, the instructions tab will appear. If the file has a description then it will display.

---
# Mr Teas - Adding TrustLogos and text to the footer
https://docs.ultracart.com/developer/storefront/developer-tutorials/mr-teas-theme-developer-tutorial/mr-teas-adding-trustlogos-and-text-to-th
doc_type: how-to
In this example we're going to take some text and trust logos that were installed into the home page only and show how to move them down into the footer so they appear throughout the site. First let's look at these logos on the site.

The content in red that we've highlighted is what we would like to move down to the bottom. Let's go find that particular HTML within the home page content. We navigate to pages, click edit on the home page, click the Content tab and then click the fullscreen icon next to content.

When we scroll to the bottom of the editor we can see the HTML code that we're interested in.

So here is the old code.
```xml
PatioPads.com is a division of Island Coast LLC 100% Satisfaction Guarantee Since 1968
```
All we need to do is take the code and place it in a Foundation row that spans all 16 columns of the grid.
```xml
PatioPads.com is a division of Island Coast LLC 100% Satisfaction Guarantee Since 1968
```
To install click on the Themes tab.

Click on "Misc" folder

Scroll down and click on snippets/footer.vm.

Just inside the footer tag place the new code.

Now let's look at our upgraded footer with trust logos and text.

---
# Mr Teas - Adjusting the Home Slider Settings
https://docs.ultracart.com/developer/storefront/developer-tutorials/mr-teas-theme-developer-tutorial/mr-teas-adjusting-the-home-slider-settin
doc_type: reference
The Mr Teas theme has a home slider which has a few settings. Notice we went to the Pages section of StoreFronts, clicked the edit button for the home page, and then clicked on the Content tab. From Here we need to click on the "Setting" button within the Slider Section as shown below.
:::info
The "home slide autoplay speed" setting appears in version .24 and later of the Mr.Tea's Theme.
:::

After clicking on setting a popup will display on the page that allows you to make changes to the slider setting.

| Attribute | Description |
| --- | --- |
| Auto Play | If checked, the slider automatically plays as the user stays on the page. |
| Auto Play Speed | If auto play is enabled, this is the number of milliseconds that each slide displays for. 1000 milliseconds = 1 seconds. The default is 2000 milliseconds (2 seconds). |
| Cover Mode | This allows the image to stretch to fit into the slider. |
After Making your changes simply click "Save" and then also Click "Save" on the Home page to save these changes.
---
# Mr Teas - Home Slider - Alternate Approach to Image Display
https://docs.ultracart.com/developer/storefront/developer-tutorials/mr-teas-theme-developer-tutorial/mr-teas-home-slider-alternate-approach-t
doc_type: how-to
The default home slider works great for pictures, but due to the background cover approach used in the CSS, some of the image may be cut off depending upon the size of the image and the current dimensions of the device. The following tutorial will illustrate how some minor modifications to the home template and adding a few CSS classes can alter the home slider behavior.
First click on the Templates tab on the left navigation as shown below.

Expand the "Catalog Dynamic" folder and click on template\_home.vm as shown below.

Now scroll down to around line 72 of the template until you see the highlighted block shown below.

Replace that block with the following snippet of HTML + Velocity code. What we are doing is moving the image from a background image on the LI to an IMG tag inside of the LI.
```xml
#if($item.getPath()) ## we do this so the link doesn't 404 if an item is assigned to the slider, but not actually assigned anywhere in the catalog
#end
```
Once the change is made click "Save" in the upper right corner of the template editor. Now we need to move on to a few minor CSS adjustments. To do this we are going to [override the CSS properly](/storefronts-themes/themes/customize#override-css) by editing override.css. Click on File Manager on the left navigation as shown below.

Now enter "override.css" into the quick search dialog as shown below.

In the results pain, click on the override.css shown in green (the active theme) as shown below.

Now paste the following code into the file as shown below and click save.
```css
/* Remove the constraint on the LI used by the home slider */
.featured-products-gallery li {
height: auto;
}
/* Center the image within the home slider */
.featured-products-gallery li img {
margin: 0 auto;
}
/* Reduce the font size of the home slider overlay text on small because the image will shrink in height */
@media only screen and (max-width: 40em) {
.featured-products-gallery h1 {
font-size: 24px;
}
.featured-products-gallery h2 {
font-size: 18px;
}
}
```

At this point the change is complete. People often ask, what size should I make the home slider image? Let's look at what the home slider will look like if the image is 1000 pixels wide by 563 pixels tall.
Large Format Devices (Desktop/Laptop)

Medium Devices (Tablets)

Small Devices (Phone)

---
# Mr Teas - How do I prevent the home slider from stretching the picture
https://docs.ultracart.com/developer/storefront/developer-tutorials/mr-teas-theme-developer-tutorial/mr-teas-how-do-i-prevent-the-home-slider
doc_type: how-to
Here is an example of the home page with the image for the slider stretched to "cover" the background area.

If we inspect the home slider carefully on the Mr Teas theme we will see that the following CSS style is responsible for stretching the image so that it covers.
```css
.featured-products-gallery li {
height: 350px;
position: relative;
background-repeat: no-repeat;
background-position: center center;
background-size: cover;
}
```
To prevent the image from stretching, which could cause a pixel-ated look if it's not high enough quality, we can override the CSS for the theme. To do this we navigate to the override.css file within the File Manager.

Once we clicked on the override.css file we add the following code to change the background-size back to the default and click save
```css
.featured-products-gallery li {
background-size: auto;
}
```

Now we can see the change this had on the image within the slider. It no longer is streched to cover.
**Before**

**After**

---
# Mr Teas - Replacing Home Page Item Slider with Complete Listing
https://docs.ultracart.com/developer/storefront/developer-tutorials/mr-teas-theme-developer-tutorial/mr-teas-replacing-home-page-item-slider
doc_type: how-to
This brief tutorial will show you how to replace the home page slider of featured items with a complete listing. When we look at the template\_home.vm we can see that there is a block of code beneath the Featured separator responsible for generating the slider.

All we need to do is remove that particular
through
from the template and then use a snippet of code from template\_catalog\_simple.vm. The snippet of code is:
```xml
```
The end code should look like this:

Notice that we are basically reusing the group\_item\_list.vm snippet that does all the hard rendering work for us.
---
# Mr Teas - Use Full Size Images Instead of Thumbnails
https://docs.ultracart.com/developer/storefront/developer-tutorials/mr-teas-theme-developer-tutorial/mr-teas-use-full-size-images-instead-of
doc_type: how-to
In the Mr. Teas theme, all the product images are thumbnails of one size or another unless the lightbox is shown with the full size image. Sometimes the creation of the thumbnail can degrade the picture quality. This tutorial will walk you through the process of changing the templates to use the full size images.
First click on the pages tab of your StoreFront.

Now click on the pencil icon to edit the Home page.

Now click on the pencil icon for the Page template as shown below.

On template\_home.vm we want to comment out the block of code on approximately line 154:
```xml
#if($item.getDefaultMultimedia('Image') && $item.getDefaultMultimedia('Image').getThumbnail(220, 220, true, $PNGThumbnails))
#else
#end
```
and add the block of code:
```xml
## New code to output the full image.
#if($item.getDefaultMultimedia('Image'))
#else
#end
```
You can see this change made below. Make sure to hit Save after editing the template.

Now click on the Items tab and then click the pencil next to the item template as shown below.

On template\_item.vm we want to comment out the block of code on approximately line 54:
```xml
#if(!$img.isExcludeFromGallery() && $formatHelper.notNull($img.getCode()) != 'featured')
#if($img.getThumbnail(100, 100, false, $PNGThumbnails) && $img.getThumbnail(360, 360, false, $PNGThumbnails)) ## if this check fails, the thumbnail creation probably failed.
#end
```
You can see this change made below. Make sure to hit Save after editing the template.

After saving the template\_item.vm, save the changes to the Home Page. Then scroll down to the Shop page and click the edit pencil as shown below.

Now click the edit pencil next to the page template template\_catalog.vm as shown below.

Scroll down the template and click on #parse("/snippets/group\_item\_list.vm") as shown below.

On group\_item\_list.vm we want to comment out the block of code on approximately line 60:
```xml
#if($item.getDefaultMultimedia('Image') && $item.getDefaultMultimedia('Image').getThumbnail(220, 220, true, $PNGThumbnails))
#else
#end
```
and add the block of code:
```xml
#if($item.getDefaultMultimedia('Image'))
#else
#end
```
You can see this change made below. Make sure to hit Save after editing the template.

---
# Natural Theme - Developer Tutorials
https://docs.ultracart.com/developer/storefront/developer-tutorials/natural-theme-developer-tutorials
doc_type: reference
The following page lists out tutorials that have been written for the Natural theme. If you need to know how to do something to the Natural theme code base not covered in this tutorial list, please contact UltraCart Support.
:::note
[Natural - Hide Continue Shopping and Update Buttons](./natural-hide-continue-shopping-and-updat.md)
:::
---
# Natural - Hide Continue Shopping and Update Buttons
https://docs.ultracart.com/developer/storefront/developer-tutorials/natural-theme-developer-tutorials/natural-hide-continue-shopping-and-updat
doc_type: how-to
This tutorial will cover how to edit the template associated with the checkout and hide the continue shopping and update buttons.
First hover over the StoreFronts menu on the left navigation and select the StoreFront that you would like to work on.

Click on the Store Location URL. This will open up your StoreFront in a new window.

Click Add to Cart on any of the items within your StoreFront to add it to the basket.

Hover over the Developer Tools menu and then select Edit Template as shown below.

This will open up the template tab automatically to the template associated with this screen.

As you read through the source of the template you will often notice that snippets are pulled into the page. This is a good example of that. Click on the #parse statement located around line 77 of the template for mpc\_items.vm.

If you scroll down through the source you will see the two buttons located on lines 263 or 271 (at the time this tutorial was written).

All we need to do is add a div tag with the style of display:none before the buttons and then close it after. Below is a picture of this code. We've added some Velocity ## comments before and after the source so that it stands out.

Save out the template and then click the refresh button on your checkout. The buttons are gone!

You can use this technique to edit any content within the checkout that you would like to change. If you have questions on editing additional content, please contact UltraCart Support.
---
# Developers Guide to Foundation
https://docs.ultracart.com/developer/storefront/developers-guide-to-foundation
doc_type: explanation
:::note
[Basic Concepts of Responsive Layouts](./basic-concepts-of-responsive-layouts/index.md)
[Adding instructional text to the checkout](./adding-instructional-text-to-the-checkou.md)
TODO: More Examples
:::
---
# Adding instructional text to the checkout
https://docs.ultracart.com/developer/storefront/developers-guide-to-foundation/adding-instructional-text-to-the-checkou
doc_type: how-to
So let's first take a look at the basic HTML.
```xml
TEST EXTRA TEXT IN VIEW CART SCREEN
```
Let's look below at the rendering to see why this is a problem. Notice that the left is off to the left.

The solution to this is to start a new Foundation div row and then a div column. Let's take a look at how to do it the correct way.
```xml
TEST EXTRA TEXT IN VIEW CART SCREEN
```
Now the text properly lines up.

---
# Basic Concepts of Responsive Layouts
https://docs.ultracart.com/developer/storefront/developers-guide-to-foundation/basic-concepts-of-responsive-layouts
doc_type: explanation
This tutorial covers some of the basic concepts that you're going to have to understand if you want to modify the theme templates or create rich responsive content.
## Framework
The first concept that is critical to understand is the framework in which the themes are developed. All our themes currently use Zurb's Foundation framework. This popular framework is used by hundreds of thousands of web developers around the world and is battle tested. If you're new to Foundation then some useful resources are:
- Website: [Foundation - Getting Started](http://foundation.zurb.com/docs/)
- Book: [Learning Zurb Foundation](http://www.amazon.com/Learning-Zurb-Foundation-Kevin-Horek-ebook/dp/B00MXS4ZDU/ref=sr_1_2?ie=UTF8&qid=1438270784&sr=8-2&keywords=zurb+foundation)
## Grid
Everything in Foundation is a grid. So you have to understand the grid layout concept. We highly recommend you reach through this quick tutorial on Zurb's site.
[Foundation Grid Documentation](http://foundation.zurb.com/docs/components/grid.html)
Once you understand the concept of a grid, it's important to know how your theme uses the grid. The first template we released Mr Teas used a 16 column layout. All other themes use a 12 column layout. We moved to the 12 column layout because it's easier to do 1/4, 1/3rd, and 1/2 width layouts whereas 1/3rd width layouts were not possible with a 16 column layout.
| Theme | Columns | Small | Medium | Large |
| --- | --- | --- | --- | --- |
| Mr Teas | 16 | Y | Y | Y |
| Craft | 12 | Y | Y | Y |
| Natural | 12 | Y | Y | Y |
TODO: More concepts.
---
# Storefronts - Static Pages - Converting existing table based page into responsive compatible format
https://docs.ultracart.com/developer/storefront/developers-guide-to-foundation/basic-concepts-of-responsive-layouts/storefronts-static-pages-converting-exis
doc_type: tutorial
# Overview
In this tutorial we are going to examine a portion of a merchants' storefront, specifically a static page from the merchant's website that was built using tables for the pay layout.
The Storefront system is built upon a responsive framework that automatically adjusts to the screen size of the customers device.
But tables do not play nicely with the responsive framework, so the solution is to convert the table based styling of this page to a responsive friendly CSS based design.
## Example Static Page Using Tables for Styling

So here we see the page looks fine (other than a few broken images) when viewed from a typical desktop environment.
### View with screen at smallest view (Desktop)

We are not seeing the responsive framework we want to see, due to the table based styling copied over fro the original page.
### View from iphone 4s


We see again that the responsive framework is no longer active, the table structure is not adjusting to the width of the device screen as it ideally would with responsive friendly page styling in place of the table styling.
## Using Storefronts Admin bar to open the static page content editor
UltraCart has an editing tool available when we view the storefronts from a browser that we are currently logged into the back end editor.

Here we see this from the perspective of the static page of this merchants' storefront:

We can edit the content by choosing "Page" from the Storefronts Admin menu, then choosing "Edit" in the pop-up menu, then clicking on "Content" in the second menu, which opens the page content editor in the UltraCart backend:

Here is where we get the source code that needs to be converted from tables to the equivalent styling via CSS.
---
# StoreFront Object Model
https://docs.ultracart.com/developer/storefront/storefront-object-model
doc_type: explanation
---
# Address SFO
https://docs.ultracart.com/developer/storefront/storefront-object-model/address-sfo
doc_type: reference
### Properties
| Field | Type | Comment/Sample |
| --- | --- | --- |
| `address1` | `string` | |
| `address2` | `string` | |
| `city` | `string` | |
| `company` | `string` | |
| `country` | `string` | |
| `dayPhone` | `string` | |
| `eveningPhone` | `string` | |
| `firstName` | `string` | |
| `id` | `integer` | |
| `lastName` | `string` | |
| `postalCode` | `string` | |
| `state` | `string` | |
| `title` | `string` | |
### Methods
| Method | Returns | Parameters | Parameter Types | Comments/Sample |
| --- | --- | --- | --- | --- |
### See Also
---
# AdvancedItemSearchManager SFO
https://docs.ultracart.com/developer/storefront/storefront-object-model/advanceditemsearchmanager-sfo
doc_type: reference
---
# AffiliatateProgram SFO
https://docs.ultracart.com/developer/storefront/storefront-object-model/affiliatateprogram-sfo
doc_type: reference
### Properties
| Field | Type | Comment/Sample |
| --- | --- | --- |
| `agreement` | `string` | |
| `allowGoogleAdwordsTrackingDefault` | `boolean` | |
| `allowPaymentViaPaypal` | `boolean` | |
| `allowTaxEdit` | `boolean` | |
| `allowYahooSearchMarketingTrackingDefault` | `boolean` | |
| `associateAffiliateWithCustomerProfile` | `boolean` | |
| `autoApproveCommissions` | `boolean` | |
| `autoApproveSignup` | `boolean` | |
| `automaticEnrollment` | `boolean` | |
| `automaticEnrollmentDownline` | `boolean` | |
| `automaticEnrollmentLetter` | `string` | |
| `commissionHtml` | `string` | |
| `cookieTTL` | `integer` | |
| `dashboardNews` | `string` | |
| `defaultPayDayOfMonth` | `integer` | |
| `description` | `string` | |
| `emailNotificationSchedule` | `string` | |
| `enterAffiliateIdDuringCheckout` | `boolean` | |
| `hasTC` | `integer` | |
| `keepCommissionOnRefundedOrder` | `boolean` | |
| `makeAffiliateInactiveAfterXDays` | `integer` | |
| `merchantID` | `string` | |
| `multipleTierProgramName` | `string` | |
| `name` | `string` | |
| `noSimpleLink` | `boolean` | |
| `oid` | `integer` | |
| `payComissionsOnAutoOrders` | `boolean` | |
| `payComissionsOnRepeatOrdersByEmail` | `boolean` | |
| `preventCookieStomping` | `boolean` | |
| `recruitDownlineAffiliatesApprovalOnly` | `boolean` | |
| `recruitDownlineAffiliatesTerms` | `string` | |
| `recruitDownlineAffiliatesTermsLastUpdated` | `Timestamp` | |
| `requirePaymentViaPayPal` | `boolean` | |
| `showCustomerName` | `boolean` | |
| `signupRequireCaptcha` | `boolean` | |
| `simpleLinkTo` | `string` | |
| `simpleLInkToStoreUrl` | `boolean` | |
| `status` | `integer` | |
| `tcURL` | `string` | |
| `termsLastUpdated` | `Timestamp` | |
| `thirdPartyListIds` | `string` | |
| `tierCount` | `integer` | |
| `welcomeLetter` | `string` | |
### Methods
| Method | Returns | Parameters | Parameter Types | Comments/Sample |
| --- | --- | --- | --- | --- |
### See Also
---
# Affiliate SFO
https://docs.ultracart.com/developer/storefront/storefront-object-model/affiliate-sfo
doc_type: reference
:::note
There are two Affiliate objects within the StoreFronts system. The affiliates system templates uses the first. The StoreFronts catalog uses the second.
(Both systems were designed long ago separately before the concept of opening up the system fully through the StoreFronts was conceived.)
:::
## Affiliate (Catalog Templates)
### Properties
| Field | Type | Comment/Sample |
| --- | --- | --- |
### Methods
| Method | Returns | Parameters | Parameter Types | Comments/Sample |
| --- | --- | --- | --- | --- |
| `getAffiliateId()` | `integer ` | | | |
| `getFirstName()` | `string ` | | | |
| `getLastName() ` | `string ` | | | |
| `getCompanyName() ` | `string ` | | | |
| `getEmail() ` | `string ` | | | |
| `getAttributes()` | `[Array](./array-sfo.md) of Attributes` | | | The object returned has the following methods: `getType()` `getName()` |
| `getAttributes(type)` | `[Array](./array-sfo.md) of Attributes` | `type` | `string` | similar to the call with no parameters, but this returns a filtered list of only the attributes of the matching type |
| `getAttributes(name)` | `string` | | | |
### See Also
## Affiliate (Affiliate Management Templates)
### Properties
| Field | Type | Comment/Sample |
| --- | --- | --- |
| `acceptedDownlineRecruitingTerms` | `boolean` | |
| `address1` | `string` | |
| `address2` | `string` | |
| `affiliateGroupOid` | `integer` | |
| `allowDownlineRecruiting` | `boolean` | |
| `autoApplyCouponOid` | `integer` | |
| `city` | `string` | |
| `companyName` | `string` | |
| `country` | `string` | |
| `dob` | `Timestamp` | |
| `eMail` | `string` | |
| `emailNotificationSchedule` | `string` | |
| `fax` | `string` | |
| `firstName` | `string` | |
| `googleConversionId` | `string` | |
| `lastName` | `string` | |
| `lastTermsAcceptance` | `Timestamp` | |
| `marketingStrategy` | `string` | |
| `membershipStatus` | `integer` | |
| `merchantId` | `string` | |
| `minimumPayout` | `[BigDecimal](./bigdecimal-sfo.md)` | |
| `password` | `string` | |
| `paypalEmail` | `string` | |
| `phone` | `string` | |
| `postalCode` | `string` | |
| `sfdcAccountId` | `string` | |
| `sfdcContactId` | `string` | |
| `state` | `string` | |
| `status` | `string` | |
| `taxId` | `string` | |
| `tierRelationships` | `Hash(integer,integer)` | |
| `usingAdNetwork` | `boolean` | |
| `usingAdware` | `boolean` | |
| `usingBlog` | `boolean` | |
| `usingOther` | `boolean` | |
| `usingPerAcquisition` | `boolean` | |
| `usingPpc` | `boolean` | |
| `usingSeo` | `boolean` | |
| `usingWebsite` | `boolean` | |
| `websiteName` | `string` | |
| `websiteUrl` | `string` | |
| `ysmAccountId` | `string` | |
### Methods
| Method | Returns | Parameters | Parameter Types | Comments/Sample |
| --- | --- | --- | --- | --- |
### See Also
---
# AffiliateClickEventRecord SFO
https://docs.ultracart.com/developer/storefront/storefront-object-model/affiliateclickeventrecord-sfo
doc_type: reference
### Properties
| Field | Type | Comment/Sample |
| --- | --- | --- |
| `clickDate` | `string` | |
| `ipAddress` | `string` | |
| `referralSource` | `string` | |
| `subCategoryId` | `string` | |
### Methods
| Method | Returns | Parameters | Parameter Types | Comments/Sample |
| --- | --- | --- | --- | --- |
### See Also
---
# AffiliateEmailTemplate SFO
https://docs.ultracart.com/developer/storefront/storefront-object-model/affiliateemailtemplate-sfo
doc_type: reference
### Properties
| Field | Type | Comment/Sample |
| --- | --- | --- |
| `affiliateProgramOid` | `integer` | |
| `afiliateEmailTemplateOid` | `integer` | |
| `body` | `string` | |
| `name` | `string` | |
| `subject` | `string` | |
### Methods
| Method | Returns | Parameters | Parameter Types | Comments/Sample |
| --- | --- | --- | --- | --- |
| `getLines` | `integer ` | | | returns back the number of lines in the body of the email. if the body is empty, the default return values is 20. legacy method used during the days of text emails. |
| | | | | |
| | | | | |
| | | | | |
| | | | | |
| | | | | |
### See Also
---
# AffiliateGroup SFO
https://docs.ultracart.com/developer/storefront/storefront-object-model/affiliategroup-sfo
doc_type: reference
### Properties
| Field | Type | Comment/Sample |
| --- | --- | --- |
| `affiliateGroupOid` | `integer` | |
| `affiliateProgramOid` | `integer` | |
| `defaultGroup` | `boolean` | |
| `hideRecruitingLink` | `boolean` | |
| `name` | `string` | |
### Methods
| Method | Returns | Parameters | Parameter Types | Comments/Sample |
| --- | --- | --- | --- | --- |
### See Also
---
# AffiliateItemCommission SFO
https://docs.ultracart.com/developer/storefront/storefront-object-model/affiliateitemcommission-sfo
doc_type: reference
### Properties
| Field | Type | Comment/Sample |
| --- | --- | --- |
| `comission` | `[BigDecimal](./bigdecimal-sfo.md)` | |
| `comissionFormatted` | `string` | |
| `currentEarnings` | `[BigDecimal](./bigdecimal-sfo.md)` | |
| `currentEarningsFormatted` | `string` | |
| `description` | `string` | |
| `merchantItemId` | `string` | |
| `price` | `[BigDecimal](./bigdecimal-sfo.md)` | |
| `priceFormatted` | `string` | |
| `repeatCustomerComissionFormatted` | `string` | |
| `repeatCustomerComissions` | `[BigDecimal](./bigdecimal-sfo.md)` | |
| `viewUrl` | `string` | |
### Methods
| Method | Returns | Parameters | Parameter Types | Comments/Sample |
| --- | --- | --- | --- | --- |
### See Also
---
# AffiliatePaymentRecord SFO
https://docs.ultracart.com/developer/storefront/storefront-object-model/affiliatepaymentrecord-sfo
doc_type: reference
### Properties
| Field | Type | Comment/Sample |
| --- | --- | --- |
| `amount` | `[BigDecimal](./bigdecimal-sfo.md)` | |
| `balance` | `[BigDecimal](./bigdecimal-sfo.md)` | |
| `date` | `string` | |
| `firstName` | `string` | |
| `lastName` | `string` | |
| `memo` | `string` | |
| `paid` | `[BigDecimal](./bigdecimal-sfo.md)` | |
| `paymentInfoLegendOid` | `integer` | |
| `percentage` | `[BigDecimal](./bigdecimal-sfo.md)` | |
| `state` | `string` | |
| `subId` | `string` | |
| `tierNumber` | `integer` | |
### Methods
| Method | Returns | Parameters | Parameter Types | Comments/Sample |
| --- | --- | --- | --- | --- |
### See Also
---
# AffiliateSimpleLink SFO
https://docs.ultracart.com/developer/storefront/storefront-object-model/affiliatesimplelink-sfo
doc_type: reference
### Properties
| Field | Type | Comment/Sample |
| --- | --- | --- |
| `affiliateLinkOid` | `integer` | |
| `affiliateOfferItemOid` | `integer` | |
| `affiliateOid` | `integer` | |
| `affiliateProgramCreativeOid` | `integer` | |
| `affiliateProgramManagedLinkOid` | `integer` | |
| `code` | `string` | |
| `customHtml` | `string` | |
| `customHtmlApprovalStatus` | `string` | |
| `customLandingUrl` | `string` | |
| `deleted` | `boolean` | |
| `googleConversionId` | `string` | |
| `invisibleLinkApprovalStatus` | `string` | |
| `invisibleLinkUrlPrefix` | `string` | |
| `linkSubId` | `string` | |
| `merchantId` | `string` | |
| `name` | `string` | |
| `type` | `string` | |
| `ysmAccountId` | `string` | |
### Methods
| Method | Returns | Parameters | Parameter Types | Comments/Sample |
| --- | --- | --- | --- | --- |
### See Also
---
# AffiliateViewEventRecord SFO
https://docs.ultracart.com/developer/storefront/storefront-object-model/affiliatevieweventrecord-sfo
doc_type: reference
### Properties
| Field | Type | Comment/Sample |
| --- | --- | --- |
| `ipAddress` | `string` | |
| `referralSource` | `string` | |
| `subCategoryId` | `string` | |
| `viewDate` | `string` | |
### Methods
| Method | Returns | Parameters | Parameter Types | Comments/Sample |
| --- | --- | --- | --- | --- |
### See Also
---
# Agreement SFO
https://docs.ultracart.com/developer/storefront/storefront-object-model/agreement-sfo
doc_type: reference
### Properties
| Field | Type | Comment/Sample |
| --- | --- | --- |
| `agreement` | `string` | |
| `html` | `boolean` | |
### Methods
| Method | Returns | Parameters | Parameter Types | Comments/Sample |
| --- | --- | --- | --- | --- |
| getAgreement | String | forceHtml | boolean | Can be called to return the agreement and force it to HTML if it is not already. |
### See Also
---
# AmazonS3 SFO
https://docs.ultracart.com/developer/storefront/storefront-object-model/amazons3-sfo
doc_type: reference
Allows you to easily create signed URLs for content that you have stored on S3
### Properties
| Field | Type | Comment/Sample |
| --- | --- | --- |
### Methods
| Method | Returns | Parameters | Parameter Types | Comments/Sample |
| --- | --- | --- | --- | --- |
| `getAwsAccessKey` | `string ` | | | |
| `getAwsSecretKey` | `string ` | | | |
| `signUrl(bucketName, listingKey, secure, expirationSeconds) ` | `string ` | `bucketName` `listingKey` `secure` `expirationSeconds` | `string` `string` `boolean` `integer` | |
### See Also
---
# Array SFO
https://docs.ultracart.com/developer/storefront/storefront-object-model/array-sfo
doc_type: reference
The arrays in the [StoreFront Template Language](/guides/ultracart-documentation/storefronts/storefront-topics/the-storefront-template-language) are Java List objects .
The reference for the List object is here: [http://docs.oracle.com/javase/7/docs/api/java/util/List.html](http://docs.oracle.com/javase/7/docs/api/java/util/List.html)
Here is a brief tutorial on how to use them with the Apache Velocity Template Language:
[http://stackoverflow.com/questions/5683690/how-to-use-for-loop-in-velocity-template](http://stackoverflow.com/questions/5683690/how-to-use-for-loop-in-velocity-template)
---
# BigDecimal SFO
https://docs.ultracart.com/developer/storefront/storefront-object-model/bigdecimal-sfo
doc_type: reference
The BigDecimal is a Java object. You may find the complete reference for it here: [http://docs.oracle.com/javase/7/docs/api/java/math/BigDecimal.html](http://docs.oracle.com/javase/7/docs/api/java/math/BigDecimal.html).
You may render it just like a normal decimal. It will print it's decimal value. However, it has methods for doing comparisons and such, so do not try to do less than or greater than using two BigDecimal objects.
---
# BlogPost SFO
https://docs.ultracart.com/developer/storefront/storefront-object-model/blogpost-sfo
doc_type: reference
### Properties
| Field | Type | Comment/Sample |
| --- | --- | --- |
### Methods
| Method | Returns | Parameters | Parameter Types | Comments/Sample |
| --- | --- | --- | --- | --- |
| `attrDefinitionList` | `[DefinitionList](./definitionlist-sfo.md)` | `attributeName` | `string` | |
| `attrSimpleList` | `[SimpleList](./simplelist-sfo.md)` | `attributeName` | `string` | |
| `getAttribute(string attributeName)` | `string` | `attributeName` | `string` | |
| `getAttributeI18N(string attributeName)` | `string` | `attributeName` | `string` | Same as getAttribute(), but returns the content translated to the customers desired language. |
| `getAttributeI18NHtmlLang(string attributeName)` | `string` | `attributeName` | `string` | Returns the HTML lang attribute to be used on the surround DOM element to tell search engines how the content was translated. |
| `getAuthor()` | `string` | ` ` | ` ` | |
| `getBody()` | `string` | | | |
| `getBodyHtmlLang()` | `string` | | | Returns the HTML lang attribute to be used on the surround DOM element to tell search engines how the content was translated. |
| `getCreationDate()` | `[Date](./date-sfo.md)` | ` ` | ` ` | |
| `getDefaultMultimedia()` | `[BlogPostMultimedia](./blogpostmultimedia-sfo.md) ` | ` ` | ` ` | |
| `getExcerpt()` | `string` | ` ` | ` ` | |
| `getExcerptHtmlLang()` | `string` | | | Returns the HTML lang attribute to be used on the surround DOM element to tell search engines how the content was translated. |
| `getMultimedia()` | `[BlogPostMultimedia](./blogpostmultimedia-sfo.md) []` | ` ` | ` ` | |
| `getMultimedia(string type)` | `[BlogPostMultimedia](./blogpostmultimedia-sfo.md) ` | `type` | `string` | |
| `getMultimediaByCode(string code)` | `[BlogPostMultimedia](./blogpostmultimedia-sfo.md) ` | `code` | `string` | |
| `getMultimediaByFilename(string filename)` | `[BlogPostMultimedia](./blogpostmultimedia-sfo.md) ` | `filename` | `string` | |
| `getMultimediaDefaultFirst(string type)` | `[BlogPostMultimedia](./blogpostmultimedia-sfo.md) ` | `type` | `string` | same as the method above, but will return the first multimedia if there is no default |
| `getPublicationDate()` | `[Date](./date-sfo.md)` | ` ` | ` ` | |
| `getStoreFrontBlogPostOid()` | `int ` | ` ` | ` ` | this is the the unique key of for the blog post |
| `getTags()` | `string[ ]` | ` ` | ` ` | |
| `getTitle()` | `string ` | ` ` | ` ` | |
| `getTitleHtmlLang()` | `string` | | | Returns the HTML lang attribute to be used on the surround DOM element to tell search engines how the content was translated. |
| `getUrlPart()` | `string` | ` ` | ` ` | |
| `getVisibility` | `string` | ` ` | ` ` | |
### See Also
---
# BlogPostMultimedia SFO
https://docs.ultracart.com/developer/storefront/storefront-object-model/blogpostmultimedia-sfo
doc_type: reference
---
# BlogPostSummary SFO
https://docs.ultracart.com/developer/storefront/storefront-object-model/blogpostsummary-sfo
doc_type: reference
### Properties
| Field | Type | Comment/Sample |
| --- | --- | --- |
### Methods
| Method | Returns | Parameters | Parameter Types | Comments/Sample |
| --- | --- | --- | --- | --- |
| `getAttribute(string attributeName)` | `string` | `attributeName` | `string` | |
| `getAttributeI18N(string attributeName)` | `string` | `attributeName` | `string` | same as getAttribute, but returns the content translated into the customer's desired language. |
| `getAttributeI18NHtmlLang(string attributeName)` | `string` | `attributeName` | `string` | Returns the HTML lang attribute to be used on the surround DOM element to tell search engines how the content was translated. |
| `getAuthor()` | `string` | | | |
| `getCreationDate()` | `[Date](./date-sfo.md)` | | | |
| `getDefaultMultimedia()` | `[BlogPostSummaryMultimedia](./blogpostsummarymultimedia-sfo.md) ` | | | |
| `getExcerpt()` | `string` | | | |
| `getExcerptHtmlLang()` | `string` | | | Returns the HTML lang attribute to be used on the surround DOM element to tell search engines how the content was translated. |
| `getMultimedia()` | `[BlogPostSummaryMultimedia](./blogpostsummarymultimedia-sfo.md)[ ]` | | | |
| `getMultimedia(string type)` | `[BlogPostSummaryMultimedia](./blogpostsummarymultimedia-sfo.md)` | `type` | `string` | |
| `getMultimediaByCode(string code)` | `[BlogPostSummaryMultimedia](./blogpostsummarymultimedia-sfo.md) ` | `code` | `string` | |
| `getMultimediaByFilename(string filename)` | `[BlogPostSummaryMultimedia](./blogpostsummarymultimedia-sfo.md) ` | `filename` | `string` | |
| `getMultimediaDefaultFirst(string type)` | `[BlogPostSummaryMultimedia](./blogpostsummarymultimedia-sfo.md)` | `type` | `string` | same as the method above, but will return the first multimedia if there is no default |
| `getPublicationDate()` | | | | |
| `getStoreFrontBlogPostOid()` | `int ` | | | this is the the unique key of for the blog post |
| `getTags()` | `string[ ]` | | | |
| `getTitle()` | `string ` | | | |
| `getTitleHtmlLang()` | `string` | | | Returns the HTML lang attribute to be used on the surround DOM element to tell search engines how the content was translated. |
| `getUrlPart()` | `string` | | | |
| `getVisibility` | `string` | | | |
### See Also
---
# BlogPostSummaryMultimedia SFO
https://docs.ultracart.com/developer/storefront/storefront-object-model/blogpostsummarymultimedia-sfo
doc_type: reference
### Properties
| Field | Type | Comment/Sample |
| --- | --- | --- |
| `amazonS3ListingKey` | `string` | |
| `code` | `string` | |
| `defaultMultimedia` | `boolean` | |
| `description` | `string` | |
| `filename` | `string` | |
| `imageHeight` | `number` | |
| `imageWidth` | `number` | |
| `lastModifiedDts` | `[Date](./date-sfo.md)` | |
| `merchantId` | `string` | |
| `mimeType` | `string` | |
| `size` | `number` | |
| `type` | `string` | |
| `url` | `string` | |
### Methods
| Method | Returns | Parameters | Parameter Types | Comments/Sample |
| --- | --- | --- | --- | --- |
| `getThumbnail(integer width)` | `string` | `width` | `integer` | |
| `getThumbnail(integer width, integer height)` | `string` | `width` `height` | `integer` `integer` | |
| `getThumbnail(integer width, integer height, boolean squareThumbnail, boolean pngFormat)` | `string` | `width` `height` `squareThumbnail` `pngFormat` | `integer` `integer` `boolean` `boolean` | |
| `getThumbnailWithHeight(integer height)` | `string` | `height` | `integer` | |
| `getThumbnailWithHeight(integer height, boolean pngFormat)` | `string` | `height` `pngFormat` | `integer` `boolean` | |
| `getThumbnailWithWidth(integer width)` | `string` | `width` | `integer` | |
| `getThumbnailWithWidth(integer width, boolean pngFormat)` | `string` | `width` `pngFormat` | `integer` `boolean` | |
### See Also
---
# BreadcrumbHelper SFO
https://docs.ultracart.com/developer/storefront/storefront-object-model/breadcrumbhelper-sfo
doc_type: reference
This helper class may be used within a page template to construct a breadcrumb of the parent pages. Pass in the current $group variable and it will return the trail you may then loop through and display.
### Properties
| Field | Type | Comment/Sample |
| --- | --- | --- |
### Methods
| Method | Returns | Parameters | Parameter Types | Comments/Sample |
| --- | --- | --- | --- | --- |
| `getBreadcrumbTrail(group)` | `[Array](./array-sfo.md) of [ProductGroups](./productgroup-sfo.md)`` ` | group | [ProductGroup](./productgroup-sfo.md) | |
| ` isElderOf(group, potentialElder)` | `boolean ` | | | returns true if a potentialElder is indeed an elder of group. |
### See Also
[Breadcrumbs - Developer Example](../developer-examples/breadcrumbs-developer-example.md)
---
# Cart SFO
https://docs.ultracart.com/developer/storefront/storefront-object-model/cart-sfo
doc_type: reference
### Properties
| Field | Type | Comment/Sample |
| --- | --- | --- |
### Methods
| Method | Returns | Parameters | Parameter Types | Comments/Sample |
| --- | --- | --- | --- | --- |
| `addCoupon(code)` | `boolean` | `code` | `string` | adds a coupon. True if successful. |
| `addExpiringCoupon(code, expirationMillis)` | `boolean` | `code expirationMillis` | `string long` | adds an expiring coupon. True if successful |
| `addPricingTier(pricingTierName)` | `void` | `pricingTierName` | `string` | adds a pricing tier to the cart |
| `deleteCoupon(couponCode)` | `void` | `couponCode` | `string` | deletes a specific coupon from the cart |
| `deleteCoupons()` | `void` | `none` | `none` | deletes all coupons from the cart |
| `getCouponCodes(uniqueCodes)` | `[Array](./array-sfo.md) of string` | `uniqueCodes` | `boolean` | returns all coupons associated with this cart. If uniqueCoupons is true, only a unique set is returned. |
| `getCurrencies()` | `[Array](./array-sfo.md) of [CartCurrency](./cartcurrency-sfo.md)` | `none` | `none` | returns an array of all available cart currencies |
| `getCurrency()` | `[CartCurrency](./cartcurrency-sfo.md)` | `none` | `none` | returns the cart currency |
| `getCustomerProfile()` | `[CustomerProfile](./customerprofile-sfo.md)` | `none` | `none` | returns the cart customer profile or null if there is not one. |
| `getCustomField1()` | `string` | `none` | `none` | returns the custom field value |
| `getCustomField2()` | `string` | `none` | `none` | returns the custom field value |
| `getCustomField3()` | `string` | `none` | `none` | returns the custom field value |
| `getCustomField4()` | `string` | `none` | `none` | returns the custom field value |
| `getCustomField5()` | `string` | `none` | `none` | returns the custom field value |
| `getCustomField6()` | `string` | `none` | `none` | returns the custom field value |
| `getCustomField7()` | `string` | `none` | `none` | returns the custom field value |
| `getItemCount()` | `string` | `none` | `none` | returns the count of items in the cart, as a string |
| `getItemCount()` | `string` | `none` | `none` | returns the count of items in the cart, as a string, rounded up to the nearest int |
| `getItems()` | `[Array](./array-sfo.md) of [CartItem](./cartitem-sfo.md)` | `none` | `none` | gets an array of all items in the cart |
| getLanguageIsoCode() | string | none | none | gets the ISO 3-letter language code |
| `getPricingTierNames()` | `[Array](./array-sfo.md) of string` | `none` | `none` | returns all the pricing tiers allowed to assign |
| `getShippingHandlingAsBigDecimal()` | `[BigDecimal](./bigdecimal-sfo.md)` | `none` | `none` | cart S&H as a BigDecimal |
| `getShippingHandlingTotal()` | `string` | `none` | `none` | cart S&H as a formatted string |
| `getShippingHandlingTotalLocalized()` | `string` | `none` | `none` | cart S&H as a formatted string, in the cart currency |
| `getShipToCountryCode()` | `string` | `none` | `none` | get the country code of the cart. If none specified, attempt to use geo location to find it. |
| `getShipToCountryCode(useGeoLocationIfNotSpecified)` | `string` | `useGeoLocationIfNotSpecified` | `boolean` | get the country code of the cart. If none specified, attempt to use geo location to find it, if desired. |
| `getShipToPostalCode()` | `string` | `none` | `none` | returns the ship to zip code, or an empty string if there is not one |
| `getShipToState()` | `string` | `none` | `none` | returns the ship to state, or an empty string if there is not one |
| `getSubTotal()` | `string` | `none` | `none` | cart subtotal as a formatted string |
| `getSubTotalAsBigDecimal()` | `[BigDecimal](./bigdecimal-sfo.md)` | `none` | `none` | cart subtotal as a BigDecimal |
| `getSubTotalLocalized()` | `string` | `none` | `none` | cart subtotal as a formatted string, in the cart currency |
| `getTax()` | `string` | `none` | `none` | cart tax as a formatted string |
| `getTaxAsBigDecimal()` | `[BigDecimal](./bigdecimal-sfo.md)` | `none` | `none` | cart tax as a BigDecimal |
| `getTaxLocalized()` | `string` | `none` | `none` | cart tax as a formatted string, in the cart currency |
| `getTotal()` | `string` | `none` | `none` | cart total as a formatted string |
| `getTotalAsBigDecimal()` | `[BigDecimal](./bigdecimal-sfo.md)` | `none` | `none` | cart total as a BigDecimal |
| `getTotalLocalized()` | `string` | `none` | `none` | cart total as a formatted string, in the cart currency |
| `hasPricingTier(pricingTierName)` | `boolean` | `pricingTierName` | `string` | true if the cart is associated with the given pricing tier |
| isLanguageIsoCode(string\[\] codes\] | boolean | codes | string\[\] | true if the cart's language ISO code is one of the ones passed in via the array |
| `isLockedForQuote()` | `boolean` | `none` | `none` | returns true if the shopping cart has been locked to allow a merchant to provide a quote for it. |
| `isLoggedIn()` | `boolean` | `none` | `none` | true if the cart has an active customer profile logged in |
| isPurchasing(String itemId) | boolean | itemId | String | true if the cart contains the specified item id |
| `isShipToCountryCodeEuropean()` | `boolean` | `none` | `none` | true if the country code is european |
| `setCustomField(index, value)` | `void` | `index value` | `integer string` | sets the custom field indicated by the index position |
| `setCustomField1(value)` | `void` | `value` | `string` | sets the custom field 1 value |
| `setCustomField2(value)` | `void` | `value` | `string` | sets the custom field 2 value |
| `setCustomField3(value)` | `void` | `value` | `string` | sets the custom field 3 value |
| `setCustomField4(value)` | `void` | `value` | `string` | sets the custom field 4 value |
| `setCustomField5(value)` | `void` | `value` | `string` | sets the custom field 5 value |
| `setCustomField6(value)` | `void` | `value` | `string` | sets the custom field 6 value |
| `setCustomField7(value)` | `void` | `value` | `string` | sets the custom field 7 value |
### See Also
---
# CartCurrency SFO
https://docs.ultracart.com/developer/storefront/storefront-object-model/cartcurrency-sfo
doc_type: reference
:::info
The Currency object differs from the CartCurrency object. The cart currency is a simple object that is mainly supplied as a list of possible currencies so a select box can be created which allows the customer to change the currency. The Currency object has additional methods that help with conversion rates, etc. The Currency object is used on Catalog pages, and the CartCurrency object is found within Checkout pages.
:::
CartCurrency object represents currencies that can be used during the checkout. The selected field is present because the page will usually have access to a collection of possible currencies, and the current one will have selected = true.
### Properties
| Field | Type | Comment/Sample |
| --- | --- | --- |
| `name` | `string` | |
| `selected` | `string` | |
| `symbol` | `string` | |
###
### Methods
| Method | Returns | Parameters | Parameter Types | Comments/Sample |
| --- | --- | --- | --- | --- |
### See Also
---
# CartItem SFO
https://docs.ultracart.com/developer/storefront/storefront-object-model/cartitem-sfo
doc_type: reference
:::note
| Field | Type | Comment/Sample |
| --- | --- | --- |
| `amount` | `[BigDecimal](./bigdecimal-sfo.md)` | total amount of item (unit cost \* quantity) |
| `autoOrderSchedule` | `string` | if the item is an auto order and the customer has chosen a schedule, this field will contain it. this field is modified later in the checkout stream. |
| `description` | `string` | item description |
| `descriptionWithBreaks` | `string` | item description with newlines changed to tags for easier display |
| `discount` | `[BigDecimal](./bigdecimal-sfo.md)` | discount, if any |
| `formattedAmount` | `[BigDecimal](./bigdecimal-sfo.md)` | formatted amount with currency symbols, commas, and periods |
| `formattedDiscount` | `string` | formatted discount with currency symbols, commas, and periods |
| `hasDiscount` | `boolean` | if true, the item has a discount. useful to show/hide table colums or divs |
| `highlight` | `boolean` | if true, this item should be highlighted for some reason |
| `itemIndex` | `integer` | the item position in the current cart. |
| `merchantItemOid` | `integer` | internal unique id of the item |
| `merchantItemId` | `string` | item id |
| `options` | `[CartItemOption](./cartitemoption-sfo.md)[ ]` | an array of item options, if any |
| `quantity` | `[BigDecimal](./bigdecimal-sfo.md)` | quantity of item in the cart |
| `remove` | `boolean` | flag to instruct cart engine to remove this item. if remove is true, the item is removed. used when posting the cart back from a cart screen. |
| `showArbitraryUnitCost` | `boolean` | if true, the arbitrary unit cost should be displayed. |
| `thumbnailHeight` | `integer` | default is 80 (pixels) |
| `thumbnailUrl` | `string` | |
| `thumbnailWidth` | `integer` | default is 80 (pixels) |
| `viewUrl` | `string` | the url of viewing this item. this points to the catalog page for the item, if there is one. check this value for null before automatically creating a link to it. |
### Methods
| Method | Returns | Parameters | Parameter Types | Comments/Sample |
| --- | --- | --- | --- | --- |
### See Also
## CartItem
### Properties
| Field | Type | Comment/Sample |
| --- | --- | --- |
| `amount` | `string` | notice this is a formatted string with currency symbols |
| `arbitraryUnitCost` | `string` | if an arb. cost is in place, this is the value. |
| `description` | `string` | |
| `discount` | `string` | notice this is a formatted string with currency symbols |
| `itemIndex` | `integer` | the item position in the current cart. |
| Method | Returns | Parameters | Parameter Types | Comments/Sample |
| --- | --- | --- | --- | --- |
| `getItem()` | `[Item](./item-sfo.md)` | | | returns the underlying Item. While CartItem contains information specific to the current shopping cart (quantity in cart, etc), this Item object contains the general item information. |
### See Also
---
# CartItemOption SFO
https://docs.ultracart.com/developer/storefront/storefront-object-model/cartitemoption-sfo
doc_type: reference
### Properties
| Field | Type | Comment/Sample |
| --- | --- | --- |
| `file` | `File` | if the option is a type == file, this file field should be the uploaded file. |
| `highlight` | `boolean` | **deprecated.** legacy carts only. |
| `label` | `string` | |
| `labelI18N` | `string` | same as label, but translated to the customers desired language. |
| `name` | `string` | |
| `nameI18N` | `string` | same as name, but translated to the customers desired language. |
| `pofa` | `integer` | stands for Placed Order File Attachments. It's an internal identifier for a file attachment. If this is non-null non-zero, then a file has been uploaded for this option. |
| `type` | `string` | |
| `value` | `string` | this represents the selected value. |
| `values` | `[Array](./array-sfo.md) of string` | |
| `valuesI18N` | `[Array](./array-sfo.md) of string` | same as values, but translated to the customers desired language. |
### Methods
| Method | Returns | Parameters | Parameter Types | Comments/Sample |
| --- | --- | --- | --- | --- |
### See Also
---
# CatalogSession SFO
https://docs.ultracart.com/developer/storefront/storefront-object-model/catalogsession-sfo
doc_type: reference
### Properties
| Field | Type | Comment/Sample |
| --- | --- | --- |
### Methods
| Method | Returns | Parameters | Parameter Types | Comments/Sample |
| --- | --- | --- | --- | --- |
| `get(key)` | `string` | `key` | `string` | gets the session value by key |
| `put(key)` | `void` | `key` | `string` | sets a session value by key |
| `remove(key)` | `void` | `key` | `string` | removes a session value by key |
### See Also
---
# Comodo SFO
https://docs.ultracart.com/developer/storefront/storefront-object-model/comodo-sfo
doc_type: reference
### Properties
| Field | Type | Comment/Sample |
| --- | --- | --- |
### Methods
| Method | Returns | Parameters | Parameter Types | Comments/Sample |
| --- | --- | --- | --- | --- |
| `getSiteSeal()` | `String` | `none` | `none` | returns the site url markup |
| `isLoadComodo()` | `boolean` | `none` | `none` | true if the comodo trust logo is displayed |
| `isSecure()` | `boolean` | `none` | `none` | true if the current page is https |
### See Also
---
# Coupon SFO
https://docs.ultracart.com/developer/storefront/storefront-object-model/coupon-sfo
doc_type: reference
### Properties
| Field | Type | Comment/Sample |
| --- | --- | --- |
| `couponCode` | `string` | coupon code |
| `remove` | `string` | if true, the coupon will be removed from the cart |
| `shoppingCartCouponOid` | `integer` | internal identifier of the coupon. doubtful a theme developer would ever need this field. |
### Methods
| Method | Returns | Parameters | Parameter Types | Comments/Sample |
| --- | --- | --- | --- | --- |
### See Also
---
# Currency SFO
https://docs.ultracart.com/developer/storefront/storefront-object-model/currency-sfo
doc_type: reference
:::info
The Currency object differs from the CartCurrency object. The cart currency is a simple object that is mainly supplied as a list of possible currencies so a select box can be created which allows the customer to change the currency. The Currency object has additional methods that help with conversion rates, etc. The Currency object is used on Catalog pages, and the CartCurrency object is found within Checkout pages.
:::
### Properties
| Field | Type | Comment/Sample |
| --- | --- | --- |
### Methods
| Method | Signature | Comments/Sample |
| --- | --- | --- |
| `add` | `Currency add(Currency val)` | |
| `compareTo` | `integer compareTo(Currency val)` | |
| `getConversionRate` | `[BigDecimal](./bigdecimal-sfo.md) getConversionRate(string fromCurrency, string toCurrency)` | |
| `getInUOM` | `Currency getInUOM(string uom)` | |
| `getUom` | `string getUom()` | |
| `getValue` | `[BigDecimal](./bigdecimal-sfo.md) getValue()` | |
| `getValueInUOM` | `[BigDecimal](./bigdecimal-sfo.md) getValueInUOM(string uom)` | |
| `isNonZero` | `boolean isNonZero()` | |
| `isZero` | `boolean isZero()` | |
| `multiply` | `Currency multiply(integer val)` | |
| `multiply` | `Currency multiply([BigDecimal](./bigdecimal-sfo.md) val)` | |
| `subtract` | `Currency subtract(Currency val)` | |
### See Also
---
# CustomerProfile SFO
https://docs.ultracart.com/developer/storefront/storefront-object-model/customerprofile-sfo
doc_type: reference
### Properties
| Field | Type | Comment/Sample |
| --- | --- | --- |
### Methods
| Method | Returns | Parameters | Parameter Types | Comments/Sample |
| --- | --- | --- | --- | --- |
| `addWishListItem(itemId)` | `void` | `itemId` | `string` | |
| `getAddress1()` | `string` | `none` | `none` | |
| `getAddress2()` | `string` | `none` | `none` | |
| `getCity()` | `string` | `none` | `none` | |
| `getCompany()` | `string` | `none` | `none` | |
| `getCountry()` | `string` | `none` | `none` | |
| `getDayPhone()` | `string` | `none` | `none` | |
| `getEmail()` | `string` | `none` | `none` | |
| `getEveningPhone()` | `string` | `none` | `none` | |
| `getFax()` | `string` | `none` | `none` | |
| `getFirstName()` | `string` | `none` | `none` | |
| `getLastName()` | `string` | `none` | `none` | |
| `getOrders()` | `[Array](./array-sfo.md) of [Order](./order-sfo.md)` | `none` | `none` | |
| `getPostalCode()` | `string` | `none` | `none` | |
| `getState()` | `string` | `none` | `none` | |
| `getTerms()` | `string` | `none` | `none` | |
| `getWishListItemCount()` | `integer` | `none` | `none` | returns the count of wish list items this customer has |
| `getWishListItems()` | `[Array](./array-sfo.md) of [WishListItem](./wishlistitem-sfo.md)` | | | |
| `isItemOnWishList(itemId)` | `boolean` | `itemid` | `string` | true if item is on the wishlist |
| `isUnapproved()` | `boolean` | `none` | `none` | |
| `moveWishListItemDown(itemId)` | `void` | `itemId` | `string` | |
| `moveWishListItemUp(itemId)` | `void` | `itemId` | `string` | |
| `removeWishListItem(itemId)` | `void` | `itemId` | `string` | |
| `updateWishListPositions()` | `void` | `none` | `none` | call this after moving an item up or down the wishlist |
### See Also
---
# CustomerService SFO
https://docs.ultracart.com/developer/storefront/storefront-object-model/customerservice-sfo
doc_type: reference
### Properties
| Field | Type | Comment/Sample |
| --- | --- | --- |
| `email` | `string` | |
| `merchantId` | `string` | |
| `name` | `string` | |
| `phone` | `string` | |
### Methods
| Method | Returns | Parameters | Parameter Types | Comments/Sample |
| --- | --- | --- | --- | --- |
### See Also
---
# Date SFO
https://docs.ultracart.com/developer/storefront/storefront-object-model/date-sfo
doc_type: reference
The Date object is a Java object. You may find the complete reference for it here: [https://docs.oracle.com/javase/8/docs/api/java/util/Date.html](https://docs.oracle.com/javase/8/docs/api/java/util/Date.html).
You may render it just like a string and it will print out a long version of the date. However, it has methods for doing comparisons, so do not try to do less than or greater than using two Date objects.
### See Also
[DateManager SFO](./datemanager-sfo.md)
---
# DateManager SFO
https://docs.ultracart.com/developer/storefront/storefront-object-model/datemanager-sfo
doc_type: reference
### Properties
| Field | Type | Comment/Sample |
| --- | --- | --- |
### Methods
| Method | Returns | Parameters | Parameter Types | Comments/Sample |
| --- | --- | --- | --- | --- |
| `currentTime` | `date` | `none` | `none` | |
| `differenceInDays(earlierDate, laterDate)` | `integer` | `earlierDate laterDate` | `date date` | number of whole days difference between the two dates |
| `isCurrentTimeAfter(timeMilitaryFormat` | `boolean` | `timeMilitaryFormat` | `string` | true if the current time is after the military formatted date string |
| `isCurrentTimeBefore(timeMilitaryFormat` | `boolean` | `timeMilitaryFormat` | `string` | true if the current time is before the military formatted date string |
| `isCurrentTimeBetween(startDayOfWeek, startTimeMilitaryFormat, stopDayOfWeek, stopTimeMilitaryFormat)` | `boolean` | `startDayOfWeek\\startTimeMilitaryFormat\\endDayOfWeek endTimeMilitaryFormat` | `string\\string\\string string` | the days of week should be "Sun" or "Sunday" |
| `parse(format, strDate)` | `date` | `format strDate` | `string string` | |
### See Also
---
# Definition SFO
https://docs.ultracart.com/developer/storefront/storefront-object-model/definition-sfo
doc_type: reference
### Properties
| Field | Type | Comment/Sample |
| --- | --- | --- |
### Methods
| Method | Signature | Comments/Sample |
| --- | --- | --- |
| `getDefinition` | `string getDefinition()` | |
| `getTerm` | `string getTerm()` | |
### See Also
---
# DefinitionList SFO
https://docs.ultracart.com/developer/storefront/storefront-object-model/definitionlist-sfo
doc_type: reference
### Properties
| Field | Type | Comment/Sample |
| --- | --- | --- |
### Methods
| Method | Signature | Comments/Sample |
| --- | --- | --- |
| `getHtml` | `string getHtml()` | returns the definition list in an html fragment as an unordered list
|
| `getHtml` | `string getHtml(string htmlClass)` | returns the definition list in an html fragment as an unordered list
and the ul element will have a class = htmlClass |
| `getHtmlDL` | `getHtmlDL()` | returns the definition list in an html fragment using
,
, and
|
| `getHtmlDL` | `getHtmlDL(string htmlClass)` | returns the definition list in an html fragment using
,
, and
and the dl element with have a class = htmlClass |
| `getValue` | `[Definition](#) getValues()` | |
| `isEmpty` | `boolean isEmpty()` | |
### See Also
---
# DigitalDownload SFO
https://docs.ultracart.com/developer/storefront/storefront-object-model/digitaldownload-sfo
doc_type: reference
### Properties
| Field | Type | Comment/Sample |
| --- | --- | --- |
| `activiationCodes` | `string` | |
| `canEmail` | `boolean` | |
| `description` | `string` | |
| `downloadServerHostName` | `string` | |
| `fileName` | `string` | |
| `fileSize` | `string` | |
| `noDownloadServerFound` | `boolean` | |
### Methods
| Method | Returns | Parameters | Parameter Types | Comments/Sample |
| --- | --- | --- | --- | --- |
### See Also
---
# Error SFO
https://docs.ultracart.com/developer/storefront/storefront-object-model/error-sfo
doc_type: reference
### Properties
| Field | Type | Comment/Sample |
| --- | --- | --- |
| `message` | `string` | the actual error message |
| `alreadyEscaped` | `boolean` | if true, the error is already html escaped, otherwise, the error should be wrapped in a call to `$i18n.escape($error.message)` |
| | | |
### Methods
| Method | Returns | Parameters | Comment/Sample |
| --- | --- | --- | --- |
### See Also
`errors.vm`
---
# EscapeTool SFO
https://docs.ultracart.com/developer/storefront/storefront-object-model/escapetool-sfo
doc_type: reference
The EscapeTool object is a built-in object from the Apache Velocity software distribution.
You may find the docs for it here: [http://velocity.apache.org/tools/devel/generic/EscapeTool.html](http://velocity.apache.org/tools/devel/generic/EscapeTool.html)
---
# ExternalAutoResponder SFO
https://docs.ultracart.com/developer/storefront/storefront-object-model/externalautoresponder-sfo
doc_type: reference
### Properties
| Field | Type | Comment/Sample |
| --- | --- | --- |
### Methods
| Method | Returns | Parameters | Parameter Types | Comments/Sample |
| --- | --- | --- | --- | --- |
| `reset()` | `void` | `none` | `none` | clear out subscriptions |
| `setList(list)` | `void` | `list` | `string` | set the list the email is about to subscribe to |
| `setLists(lists)` | `void` | `list` | `[Array](./array-sfo.md) of string` | set the lists the email is about to subscribe to |
| `subscribe(email)` | `boolean` | `email` | `string` | true if subscribed |
| `subscribe(email, firstName, lastName)` | `boolean` | `email` `firstName` `lastName` | `string` `string` `string` | true if subscribed |
| `subscribe(email, fullName)` | `boolean` | `email` `fullName` | `string string` | true if subscribed |
### See Also
---
# Font SFO
https://docs.ultracart.com/developer/storefront/storefront-object-model/font-sfo
doc_type: reference
### Properties
| Field | Type | Comment/Sample |
| --- | --- | --- |
### Methods
| Method | Returns | Parameters | Parameter Types | Comments/Sample |
| --- | --- | --- | --- | --- |
| `addFontFamily()` | `[Font](#) ` | `fontFamily` | `[FontFamily](./fontfamily-sfo.md)` | Return a new Font object that adds the additional font family passed to this method. This method is used to add backup font families to the primary font. |
| `css()` | `String` | `none` | `none` | Returns all of the applicable CSS statements for the font family, size, style, weight, and variant on this Font object. Use this method within your .css files. |
| `getFamily()` | `[S](./geolocationresponse-sfo.md)tring` | `none` | `none` | If there is one or more families assigned to this Font object, it will return the complete font-family CSS statement, otherwise an empty string is returned. |
| `getSize()` | `String` | `none` | `none` | If the size is configured on the Font object, it will return the complete font-size CSS statement, otherwise an empty string is returned. |
| `getStyle()` | `String` | `none` | `none` | If the style is configured on the Font object, it will return the complete font-style CSS statement, otherwise an empty string is returned. |
| `getWeight()` | `String` | `none` | `none` | If the weight is configured on the Font object, it will return the complete font-weight CSS statement, otherwise an empty string is returned. |
| `getVariant()` | `String` | `none` | `none` | If the variant is configured on the Font object, it will return the complete font-variant CSS statement, otherwise an empty string is returned. |
| `inline()` | `String` | `none` | `none` | Returns all of the applicable CSS statements for the font family, size, style, weight, and variant on this Font object. The result does not use any new line separators so this method is useful for the style attribute of an HTML element. |
| `override()` | `[Font](#)` | `overrideFont` | `[Font](#)` | Returns a new Font object that is based upon the first font object with each of it's family, size, style, weight, and variant properties overridden by the Font object passed in. Make sure to assign this to a new variable within your Velocity template. |
| `overrideSize()` | `[Font](#) ` | `overrideSize` | `String` | Returns a new Font object that is based upon the current font object with the size attribute overridden by the parameter passed ni. Make sure to assign the result to a new variable within your Velocity template. |
| `overrideStyle` | `[Font](#) ` | `overrideStyle` | `String` | Same as the above override method, but for the style property. |
| `overrideWeight()` | `[Font](#) ` | `overrideWeight` | `String` | Same as the above override method, but for the weight property. |
| `overrideVariant()` | `[Font](#) ` | `overrideVariant` | `String` | Same as the above override method, but for the variant property. |
### See Also
[Apply a specific Font Family to a theme via CSS](../developer-tutorials/all-themes-developer-tutorials/apply-a-specific-font-family-to-a-theme.md)
---
# FontFamily SFO
https://docs.ultracart.com/developer/storefront/storefront-object-model/fontfamily-sfo
doc_type: reference
### Properties
| Field | Type | Comment/Sample |
| --- | --- | --- |
| `type` | `String` | generic, google, typekit, or native |
| `family` | `String` | The name of the font family. |
| `kitId` | `String` | The kit id (only for TypeKit) |
### Methods
| Method | Returns | Parameters | Parameter Types | Comments/Sample |
| --- | --- | --- | --- | --- |
### See Also
---
# FontManager SFO
https://docs.ultracart.com/developer/storefront/storefront-object-model/fontmanager-sfo
doc_type: reference
### Properties
| Field | Type | Comment/Sample |
| --- | --- | --- |
### Methods
| Method | Returns | Parameters | Parameter Types | Comments/Sample |
| --- | --- | --- | --- | --- |
| `createFont()` | `[Font](./font-sfo.md)` | `none` | `none` | Create an empty Font object. |
| `createGenericFont()` | `[Font](./font-sfo.md) ` | `family` `size` `weight` | `String` `String` `String ` | Create a complete Font object with the specified name for a generic font family, size and weight. The variable generic font families are: sans-serif, serif, cursive, fantasy, and monospace. |
| `createGenericFontFamily()` | `[FontFamily](./fontfamily-sfo.md)` | `family` | `String` | createGoogleWebFont() |
| `createGoogleWebFont()` | `[Font](./font-sfo.md) ` | `family` `size` `weight ` | `String` `String` `String ` | Create a complete Font object with the specified family, size and weight for a Google web font. |
| `createGoogleWebFontFamily()` | `[FontFamily](./fontfamily-sfo.md) ` | `family` | `String` | Create a font family object with the specified name for Google Fonts. |
| `createNativeFont()` | `[Font](./font-sfo.md) ` | `family` `size` `weight ` | `String` `String` `String ` | Create a complete Font object with the specified family, size, and weight for natively supported fonts. Only use fonts that all browsers support natively like: Arial, Arial Black, Courier New, Times New Roman, Helvetica, and Verdana. |
| `createNativeFontFamily()` | `[FontFamily](./fontfamily-sfo.md) ` | `family` | `String` | Create a font family object with the specified name. Only use fonts that all browsers support natively like: Arial, Arial Black, Courier New, Times New Roman, Helvetica, and Verdana. |
| `createTypeKitFont()` | `[Font](./font-sfo.md) ` | `family` `size` `weight ` `kitId` | `String` `String` `String String ` | Creaet a complete Font object with teh specified family, size, weight, and kit id for a TypeKit font. |
| `createTypeKitFontFamily()` | `[FontFamily](./fontfamily-sfo.md) ` | `family` `kitId` | `String` `String ` | Create a font family object with the specified TypeKit family and kit id. |
| `load()` | `String` | `none` | `none` | Returns the HTML code that must be included in the page to load the external Google or TypeKit fonts. |
| `register()` | `void` | `font` | `[Font](./font-sfo.md)` | Register a font object with the manager so that when load() is called the proper loading code will generate. |
### See Also
---
# Form SFO
https://docs.ultracart.com/developer/storefront/storefront-object-model/form-sfo
doc_type: reference
The form object is a special object that will have a different properties on each screen. It contains all of the input/select/textarea fields, as well as conditional flags needed to properly display those input fields.
For a list of form properties, please consult the appropriate [StoreFront Screen](../storefront-screen-interfaces/index.md).
---
# FormatHelper SFO
https://docs.ultracart.com/developer/storefront/storefront-object-model/formathelper-sfo
doc_type: reference
### Properties
| Field | Type | Comment/Sample |
| --- | --- | --- |
### Methods
| Method | Returns | Parameters | Parameter Types | Comments/Sample |
| --- | --- | --- | --- | --- |
| `arrayFromCSV(csv)` | `[Array](./array-sfo.md)` | `csv` | `string` | parses a string by csv and returns back an array. |
| `contains(text,search)` | `boolean` | `text search` | `string string` | returns true if text contains search within it |
| `copy(collection)` | `[Array](./array-sfo.md)` | `collection` | `[Array](./array-sfo.md)` | creates a copy of an array and returns it |
| `doesIPAddresMatch(address, matchAddresses)` | `boolean` | `address matchAddresses` | `string [Array](./array-sfo.md) of string` | checks to see if address matches any of the ip addresses in the matchAddresses array and returns true if a match is made |
| `equalsIgnoreCase(str1,str2)` | `boolean` | `str1 str2` | `string string` | returns true if the two strings match in a case-insensitive manner |
| `escapeHtml(input)` | `string` | `input` | `string` | escapes a string of html |
| `escapeJavascript(input)` | `string` | `input` | `string` | escapes a string of javascript |
| `exerpt(input, maxLength)` | `string` | `input` `maxLength` | `string` `integer` | takes a chuck of text and returns back the first maxLength characters of it. |
| `exerptSentence(input, maxLength)` | `string` | `input` `maxLength` | `string` `integer` | takes a chuck of text and returns back the first maxLength characters of it. If the chunk contains a period, The routine finds the last period within the excerpt and returns everything up to and including that period. This allows for excerpts that are whole sentences. |
| `excerptXhtml(xhtml, maxLength)` | `string` | `xhtml maxLength` | `string integer` | returns back an except from a block of xhtml |
| excerptXhtml(xhtml, maxLength, finishSentence) | string | xhtml maxLength finishSentence | string integer boolean | returns back an except from a block of xhtml, but it will finish out the sentence so that there is not an odd break. |
| `filterByAttribute(collection, attributeName, attributeValue, removeOnMatch)` | `[Array](./array-sfo.md)` | `collection attributeName attributeValue removeOnMatch` | `[Array](./array-sfo.md) string string boolean` | filters a collection and removes any members that do not have a matching attribute name/value pair. The last parameter flips this behavior by removing any matches |
| `filterByEbay(items)` | `void` | `items` | `[Array](./array-sfo.md) of [Item](./item-sfo.md)` | loops through a collection and removes any items that do not have an ebay auction id associated with it. |
| `filterByElderOfItem(groups)` | `void` | `groups` | `[Array](./array-sfo.md) of [ProductGroup](./productgroup-sfo.md)` | loops through a collection of product groups and removes any that does not have at least one item assigned to it |
| `firstLine(str)` | `string` | `str` | `string` | examines a string and returns the characters preceeding the first newline |
| `formatDate(timestamp, format, timezone)` | `string` | `timestamp` `format` `timezone` | `[Timestamp](https://docs.oracle.com/javase/8/docs/api/java/sql/Timestamp.html)` `string` `string (optional)` | This method is useful for formatting raw timestamp objects into strings. As a reminder, the UltraCart platform is java based, and this method uses the [SimpleDateFormat](https://docs.oracle.com/javase/7/docs/api/java/text/SimpleDateFormat.html) object underneath. So the format and timezone strings should be based on that object's requirements. See the official [SimpleDateFormat docs](https://docs.oracle.com/javase/7/docs/api/java/text/SimpleDateFormat.html) for example formats and timezones. `Sample usage: $formatHelper.formatDate($form.expirationDateRaw, "dd.MM.yyyy", "GMT")` |
| | | | | |
| `getFromCollection(objects, index)` | `object` | `objects index` | `[Array](./array-sfo.md) of objects integer` | returns the object found at the index position of the objects array. |
| `getItemsForPage(objects, pageNumber, itemsPerPage)` | `[Array](./array-sfo.md) of [Item](./item-sfo.md)` | `objects pageNumber itemsPerPage` | `[Array](./array-sfo.md) of [Item](./item-sfo.md)\\integer integer` | takes an array of items and returns back a slice to help with pagination |
| `getPageCount(objects, itemsPerPage)` | `integer` | `objects itemsPerPage` | `[Array](./array-sfo.md) of [Item](./item-sfo.md) integer` | returns the count of items. objects.size() will do the same thing. |
| `getWordCount(str)` | `integer` | `str` | `string` | returns the number of words in a string |
| `htmlId(str)` | `string` | `str` | `string` | takes a string and returns a valid string for an html id. Strips out invalid characters. |
| `indexOf(text,search)` | `integer` | `text search` | `string string` | returns the index of search if it is found in text, or -1 otherwise |
| `injectAfter(str,search,occurrence,inject)` | `string` | `str` `search` `occurrence inject` | `string` `string` `integer string` | injects the string variable 'inject' after the nth occurrence of the search variable. |
| `isBetween(s, d1, d2)` | `boolean` | `s` `d1 d2` | `string` `double double` | true if the value converts to a number that is between d1 and d2. |
| `isOutsideTraffic(referrer, hostName)` | `boolean` | `referrer` `hostName` | `string` `string` | |
| `notNull(str)` | `boolean` | `str` | `string` | returns true if the string is not null |
| `parseBigDecimal(obj)` | `[BigDecimal](./bigdecimal-sfo.md)` | `obj` | `object` | parses an object and returns back a BigDecimal |
| `parseInt(str)` | `integer` | `str` | `string` | parses a string and returns an integer |
| `random(collection)` | `object` | `collection` | `[Array](./array-sfo.md) of objects` | returns a random object from an array |
| `random(collection, count)` | `[Array](./array-sfo.md) of objects` | `collection count` | `[Array](./array-sfo.md) of objects integer` | returns n count of random objects from an array |
| `random(num)` | integer | nun | integer | |
| `removeHtml(str)` | `string` | `str` | `string` | strips html from a string |
| `removeItemsWithoutCost(items)` | `[Array](./array-sfo.md) of [Item](./item-sfo.md)` | `items` | `[Array](./array-sfo.md) of [Item](./item-sfo.md)` | removes all items from an array which are free |
| `removeNewLines(str)` | `string` | `str` | `string` | converts all newlines to a single space each |
| `removeOutOfStockItems(items)` | `[Array](./array-sfo.md) of [Item](./item-sfo.md)` | `items` | `[Array](./array-sfo.md) of [Item](./item-sfo.md)` | removes all items from an array which are out of stock |
| `removeOutOfStockItems(items,keepBackorderable,keepPreorder)` | `[Array](./array-sfo.md) of [Item](./item-sfo.md)` | `items` | `[Array](./array-sfo.md) of [Item](./item-sfo.md)` | removes all items from an array which are out of stock and not preorder nor backorder |
| `replaceNewLinesWithHtmlBreaks(str)` | `string` | `str` | `string` | converts newlines to tags. Useful for displaying long item descriptions or terms and conditions in a nicely formatted paragraph. |
| `replaceStr(str, search, replace)` | `string` | `str` `search replace` | `string` `string string` | does a search and replace on a string |
| `reverse(collection)` | `[Array](./array-sfo.md) of objects` | `collection` | `[Array](./array-sfo.md)` | reverses a collection based on ordinal position |
| `singleLine(str)` | `string` | `str` | `string` | removes newlines from a string |
| `sort(items, sortMap)` | `[Array](./array-sfo.md) of [Item](./item-sfo.md)` | `items sortMap` | `[Array](./array-sfo.md) of [Item](./item-sfo.md) [Array](./array-sfo.md) of string` | sorts a collection of items by a list of sort values (i.e. Small, Medium, Large, X-Large, etc) |
| `sortAttributesByName(attributes)` | `[Array](./array-sfo.md) of Attributes` | `attributes` | `[Array](./array-sfo.md) of Attributes` | sorts a collection of attributes by name. There are many different types of attributes: product group attributes, item attributes, and affiliate attributes. This method handles them all. |
| `sortByAttribute(items, attributeName, ascending)` | `[Array](./array-sfo.md) of [Item](./item-sfo.md)` | `items` `attributeName ascending` | `[Array](./array-sfo.md) of [Item](./item-sfo.md) string boolean` | sorts a collection of items by looking at the item attributes and sorting by attribute specified by the 2nd parameter. ascending is an optional value used to switch the sorting direction. |
| `sortByAttributes(items, attributes, ascendings)` | `[Array](./array-sfo.md) of [Item](./item-sfo.md)` | `items` `attributes ascendings` | `[Array](./array-sfo.md) of [Item](./item-sfo.md) [Array](./array-sfo.md) of string [Array](./array-sfo.md) of boolean` | sorts a collection of items by looking at the item attributes and sorting by the attribute list specified by the 2nd parameter. ascending is an optional value used to switch the sorting direction for each attribute. |
| `sortByFirstNumber(strings, ascending)` | `[Array](./array-sfo.md) of strings` | `strings` `ascending` | `[Array](./array-sfo.md) of strings boolean` | sorts an array of strings |
| `sortByItemId(items)` | `[Array](./array-sfo.md) of [Item](./item-sfo.md)` | `items` | `[Array](./array-sfo.md) of [Item](./item-sfo.md)` | sorts a collection of items by item id. |
| `sortByPrice(items, ascending)` | `[Array](./array-sfo.md) of [Item](./item-sfo.md)` | `items ascending` | `[Array](./array-sfo.md) of [Item](./item-sfo.md) boolean` | sorts a collection of items. ascending is a an optional parameter that can be used to sort high-low if desired. |
| `sortByReviewOverall(items, ascending)` | `[Array](./array-sfo.md) of [Item](./item-sfo.md)` | `items ascending` | `[Array](./array-sfo.md) of [Item](./item-sfo.md) boolean` | sorts a collection of items by review stars. ascending is a an optional parameter that can be used to sort high-low if desired. |
| `sortCompare(av1, av2, ascending)` | `integer` | `av1` `av2 ascending` | `string string boolean` | compares the two values. Returns back -1 if av1 is less than. Returns back 1 if av2 is less than, and returns zero if they're equal. av1 and av2 may also be integers |
| `sortReviews(reviews, sortOn, ascending)` | `[Array](./array-sfo.md) of [ItemReview](./itemreview-sfo.md)` | `reviews` `sortOn ascending` | `[Array](./array-sfo.md) of [ItemReview](./itemreview-sfo.md) string boolean` | sorts an array of reviews based on the sortOn fields. Valid values for sortOn are "featured", "date", "rating", "helpfulness", "length", "reviewRank", "expert" |
| `toLowerCase(s)` | `string` | `str` | `string` | converts a string to lower case |
| `toUpperCase(s)` | `string` | `str` | `string` | converts a string to upper case |
| `trimIfTooLong(str,len)` | `string` | `str len` | `string integer` | trims a string if it exceeds 'len' |
| `urlDecode(str)` | `string` | `str` | `str` | url decodes a string |
| `urlEncode(str)` | `string` | `str` | `string` | url encodes a string |
### See Also
---
# GeolocationManager SFO
https://docs.ultracart.com/developer/storefront/storefront-object-model/geolocationmanager-sfo
doc_type: reference
### Properties
| Field | Type | Comment/Sample |
| --- | --- | --- |
### Methods
| Method | Returns | Parameters | Parameter Types | Comments/Sample |
| --- | --- | --- | --- | --- |
| `getLocation()` | `[GeolocationResponse](./geolocationresponse-sfo.md)` | `none` | `none` | |
### See Also
---
# GeolocationResponse SFO
https://docs.ultracart.com/developer/storefront/storefront-object-model/geolocationresponse-sfo
doc_type: reference
### Properties
### Methods
| Method | Signature | Comments/Sample |
| --- | --- | --- |
| `getCity` | String getCity() | |
| `getCountry` | String getCountry() | |
| getCountryCode | String getCountryCode() | [Two letter ISO-3166 country code](https://www.iso.org/obp/ui/#search) |
| getPostalCode | `String getPostalCode()` | |
| getProvinceState | String getProvinceState() | |
| `getLatitude` | [BigDecimal](./bigdecimal-sfo.md) getLatitude() | |
| `getLongitude` | [BigDecimal](./bigdecimal-sfo.md) getLongitude() | |
| `isSuccessful` | `boolean isSuccessful()` | |
### See Also
---
# Hash SFO
https://docs.ultracart.com/developer/storefront/storefront-object-model/hash-sfo
doc_type: reference
Whenever an object is documents as being a "Hash", the object is really a Java HashMap.
The documentation for this object may be found here: [http://docs.oracle.com/javase/7/docs/api/java/util/HashMap.html](http://docs.oracle.com/javase/7/docs/api/java/util/HashMap.html)
---
# I18n SFO
https://docs.ultracart.com/developer/storefront/storefront-object-model/i18n-sfo
doc_type: reference
Basic Example Usage:
$i18n.write("checkout.viewcart.yourContactEmailField", "Your contact email")
See Also: [How StoreFront handles static text and multi-lingual support](/storefronts-themes/languages/how-storefront-handles-static-text-and-m)
### Properties
| Field | Type | Comment/Sample |
| --- | --- | --- |
### Methods
| Method | Returns | Parameters | Parameter Types | Comment/Sample |
| --- | --- | --- | --- | --- |
| `escape` | `string` | `input` | `boolean` | Returns the text "true" or "false" based upon the boolean input parameter. |
| `escape` | `string` | `input` | `string` | Takes a block of text and html escapes it so it can be safely added to a web page without causing harm. Example: ``` #foreach($error in $formSupport.errors) #if($error.alreadyEscaped)$!error.message#{else}$i18n.escape($error.message)#{end} #end ``` |
| `getCurrencies` | `[I18NCurrency](./i18ncurrency-sfo.md)[]` | | | Returns back a list of supported currencies. The names of the currencies are translated into the language that the customer is using. |
| `getLanguages()` | `[I18NLanguage](./i18nlanguage-sfo.md)[]` | | | Returns back a list of support languages. The languages are each translated into the native way the language is spelled. Used by the language picker. |
| `getPopularLanguages()` | `[I18NLanguage](./i18nlanguage-sfo.md)[]` | `countryCode` | `string` | Given a two letter ISO country code, return the languages that are popular that country. Used by the language picker. |
| `getUnpopularLanguages()` | `[I18NLanguage](./i18nlanguage-sfo.md)[]` | `countryCode` | `string` | Given a two letter ISO country code, return back all the languages that are considered unpopular for a country. Used by the language picker. |
| `getIsoCode` | `string` | | | returns back the current ISO Code for the page. Default is `ENG`. |
| `getJavaScriptHash` | `string` | | | returns a JavaScript has object created by all the calls to pushJavaScriptHash. These two methods work together to create a hash map of translated text used by dynamic elements on the page, such as the cart snapshot, which still need to display translated content. |
| `htmlLang` | `string` | `key` | `string` | Generates the lang attribute associated with this key. The lang attribute is used to identify what type of translation has occurred for a given element and is required by Google when auto translation is used. |
| `ignoreHtmlLang` | `void` | `key` | `string` | Registers that we want to ignore outputting an htmlLang call for a given key. Prevents an i18n violation from being generated. Also registers the key for use by a subsequent shorthand write call. |
| `isGoogleTranslateUsed` | `boolean` | | | Returns true if any text on the page was automatically translated by Google Translate. Used for displaying the attribution mark in the footer. |
| `newlineToBreaks` | `string` | `input` | `string` | Takes a block of text and converts all newlines to ` ` tags so that the text remains consistent rendered in html. |
| `pushJavaScriptHash` | `void` | `key` `defaultText` `args..` | `string` `string` `string... ` | This method is similar to a write call, but will queue up the entry which is returned by getJavaScriptHash. |
| `write` | `string` | `defaultMessage` | `string` | The key associated with this write call is the one last used on an htmlLang or ignoreHtmlLang call. It enables a shorter syntax in the template. |
| `write` | `string` | `defaultMessage` `escape` | `string` `boolean` | The key associated with this write call is the one last used on an htmlLang or ignoreHtmlLang call. It enables a shorter syntax in the template. if true, the return value is html escaped first |
| `write` | `string` | `key` `defaultMessage` | `string` `string` | key is the full dot separated path to the message key as found in the [language file](/storefronts-themes/languages/how-storefront-handles-static-text-and-m). Example: `checkout.accessaccount.emailField` If the key isn't found, this default is used instead |
| `write` | `string` | `key` `defaultMessage` `args...` | `string` `string` `string... ` | key is the full dot separated path to the message key as found in the [language file](/storefronts-themes/languages/how-storefront-handles-static-text-and-m). Example: `checkout.accessaccount.emailField` If the key isn't found, this default is used instead Arguments to merge into the message. {0} = first argument place holder, {1} = second argument place holder, etc. |
| `write` | `string` | `key` `defaultMessage` `escape` | `string` `string` `boolean` | key is the full dot separated path to the message key as found in the [language file](/storefronts-themes/languages/how-storefront-handles-static-text-and-m). Example: `checkout.accessaccount.emailField` If the key isn't found, this default is used instead if true, the return value is html escaped first |
### See Also
---
# I18NCurrency SFO
https://docs.ultracart.com/developer/storefront/storefront-object-model/i18ncurrency-sfo
doc_type: reference
This object is returned from a call to $i18n.getCurrencies()
### Properties
| Field | Type | Comment/Sample |
| --- | --- | --- |
| `currencyIsoCode` | `string` | |
| `englishName` | `string` | |
| `languageIsoCode` | `string` | |
| `name` | `string` | |
| `symbolHtml` | `string` | |
###
### Methods
| Method | Returns | Parameters | Parameter Types | Comments/Sample |
| --- | --- | --- | --- | --- |
### See Also
---
# I18NLanguage SFO
https://docs.ultracart.com/developer/storefront/storefront-object-model/i18nlanguage-sfo
doc_type: reference
This object is returned from a call to $i18n.getLanguages()
### Properties
| Field | Type | Comment/Sample |
| --- | --- | --- |
| `englishName` | `string` | |
| `languageIsoCode` | `string` | |
| `name` | `string` | |
| `popularCountryCodes` | `string` | |
###
### Methods
| Method | Returns | Parameters | Parameter Types | Comments/Sample |
| --- | --- | --- | --- | --- |
### See Also
---
# Item SFO
https://docs.ultracart.com/developer/storefront/storefront-object-model/item-sfo
doc_type: reference
### Properties
| Field | Type | Comment/Sample |
| --- | --- | --- |
### Methods
| Method | Signature | Comments/Sample |
| --- | --- | --- |
| `attrDefinitionList` | `[DefinitionList](./definitionlist-sfo.md) attrDefinitionList(string key)` | returns the definition list for the given key value |
| `attrSimpleList` | `[SimpleList](./simplelist-sfo.md) attrSimpleList(string key)` | returns the simple list for the given key value |
| `getAssignedGroups` | `[ProductGroup](./productgroup-sfo.md)[ ] getAssignedGroups()` | returns not only the parent group, but all the Product Groups (Group Pages) to which this item is assigned to |
| `getAttribute` | `string getAttribute(string attributeName)` | |
| `getAttributeI18N` | `string getAttributeI18N(string attributeName)` | returns the attribute, translated into the customer's desired language. |
| `getAttributeI18NHtmlLang` | `string getAttributeI18NHtmlLang(string attributeName)` | returns the HTML lang attribute to be usd on the surround DOM element to tell search engines about how the content was translated. |
| `getAttributes` | `[ItemAttribute](./itemattribute-sfo.md)[ ] getAttributes(string type)` | type is optional. Calling this with no parameters returns all attributes |
| `getAttributeValue` | `string getAttributeValue(string attributeName)` | same as getAttribute except it returns an emtpy string instead of null if the attribute does not exist |
| `getAttributeValueI18N` | `string getAttributeValueI18N(string attributeName)` | same as getAttributeValue, but translates the content into the customer's desired language. |
| `getAttributeValueI18NHtmlLang` | `string getAttributeValueI18NHtmlLang(string attributeName)` | returns the HTML lang attribute to be usd on the surround DOM element to tell search engines about how the content was translated. |
| `getAvailableQuantity` | `integer getAvailableQuantity()` | |
| `getAvailableQuantityString` | `string getAvailableQuantityString()` | |
| `getBarcode` | `string getBarcode()` | |
| `getCanonicalPath` | `string getCanonicalPath()` | the canonical url of this item display page. see also getPath() |
| `getCanonicalURI` | `string getCanonicalURI()` | this canonical URL of this item's display page. Recommend using this vs getCanonicalPath(). See also getURI(). |
| `getCaseItems` | `[ItemCase](./itemcase-sfo.md)[ ] getCaseItems()` | returns all the cases (large packs of this item) that are available for purchase. for example, a single can of coke might have two cases: a six pack, and a 20 pack. |
| `getCOGS` | `string getCOGS()` | returns the Cost of Goods Sold |
| `getCost` | `string getCost(integer quantity)` | quantity is optional. If omitted, 1 is assumed |
| `getCostAsBigDecimal` | `[BigDecimal](./bigdecimal-sfo.md) getCostAsBigDecimal(integer quantity)` | quantity is optional. If omitted, 1 is assumed |
| `getCostLocalized` | `string getCostLocalized(integer quantity)` String getCostLocalized(int quantity, boolean totalCost) | returns cost in local currency. quantity is optional. If omitted, 1 is assumed returns cost multiplied by the quantity. Optional. If omitted, 1 is assumed |
| `getCostLocalizedAsBigDecimal` | `[BigDecimal](./bigdecimal-sfo.md) getCostLocalizedAsBigDecimal()` | local currency code |
| `getCostLocalizedCurrencyCode` | `string getCostLocalizedCurrencyCode` | returns the currency code of the item |
| `getCurrencyCode` | `string getCurrencyCode()` | |
| `getDefaultMultimedia` | `[ItemMultimedia](./itemmultimedia-sfo.md) getDefaultMultimedia(string code)` | |
| `getDescription` | `string getDescription()` | |
| `getDescriptionHtmlLang` | `string getDescriptionHtmlLang()` | returns the HTML lang attribute that should be used on the DOM element surrounding the description to tell search engines how the content was translated. |
| `getDescriptionNoEscape` | `string getDescriptionNoEscape()` | |
| `getEbayAuctionId` | `string getEbayAuctionId()` | returns null if no auction for this item |
| `getEbayAuctionURL` | `string getEbayAuctionURL()` | |
| `getEbayListingPrice` | `string getEbayListingPrice()` | |
| `getEta` | `string getEta()` | if the item has an ETA, return it, else return null |
| `getExtendedDescription` | `string getExtendedDescription()` | |
| `getExtendedDescriptionNoEscape` | `string getExtendedDescriptionNoEscape()` | |
| `getFacebookLikeButton` | `string getFacebookLikeButton(string layoutStyle, integer width, boolean sendButton, boolean showFaces, string verb, string colorScheme)` | parameters are optional. If you include any parameters, include them all. If you omit all parameters, the following defaults are used: layoutStyle="standard", width=450, sendButton=true, showFaces=true, verb="like", colorScheme="light" |
| `getFacebookShareButton` | `string getFacebookShareButton()` | |
| `getFreightClass` | `string getFreightClass()` | |
| `getGooglePlusButton` | `string getGooglePlusButton(string annotationType, integer width, integer height, string alignment)` | parameters are optional. If you include any parameters, include them all. If you omit all parameters, the following defaults are used: annotationType="bubble", width=0, height=20, alignment="left" |
| `getHeight` | `string getHeight()` | returns the height and unit of measure |
| `getImageURL` | `string getImageUrl()` | |
| `getInternalInventoryByDistributionCenter` | `string getInternalInventoryByDistributionCenter` | returns back a bracketed string of dc code: inventory for this item |
| `getKitComponents` | `[ItemKitComponent](./itemkitcomponent-sfo.md)[ ] getKitComponents()` | |
| `getLength` | `string getLength()` | returns the length and unit of measure |
| `getMadeToOrderLeadTime` | `integer getMadeToOrderLeadTime()` | If the item is made to order, then this is the number of days that it takes to produce the product before it can ship. |
| `getManufacturerName` | `string getManufacturerName()` | |
| `getManufacturerSKU` | `string getManufacturerSKU()` | |
| `getManufacturerSuggestedRetailPriceLocalized` | `string getManufacturerSuggestedRetailPriceLocalized()` | |
| `getManufacturerSuggestedRetailPriceLocalizedAsBigDecimal` | `[BigDecimal](./bigdecimal-sfo.md) getManufacturerSuggestedRetailPriceLocalizedAsBigDecimal()` | |
| `getManufacturerSuggestedRetailPriceLocalizedAsCurrency` | `[Currency](./currency-sfo.md) getManufacturerSuggestedRetailPriceLocalizedAsCurrency()` | |
| `getMAP` | `string getMAP(boolean costIfNotSpecified)` | returns the Minimum Advertised Price. If costIfNotSpecified is true, and this item has no MAP, then the cost is returned instead. costIfNotSpecified is optional and may be omitted altogether |
| `getMAPLocalized` | `string getMAPLocalized()` | same as getMAP, but returns back a formatted string in the localized currency |
| `getMAPLocalizedCurrency` | `[Currency](./currency-sfo.md) getMAPLocalizedCurrency()` | same as getMAP, but returns back a Currency object in the localized currency |
| `getMaximumQuantity` | `integer getMaximumQuantity()` | |
| `getMerchantItemID` | `string getMerchantItemID()` | |
| `getMinimumQuantity` | `integer getMinimumQuantity()` | |
| `getMSRP` | `string getMSRP(boolean costIfNotSpecified)` | returns the Manufacturer Suggested Retail Price. If costIfNotSpecified is true, and this item has no MSRP, then the cost is returned instead. costIfNotSpecified is optional and may be omitted altogether |
| `getMSRPPriceBreak` | `string getMSRPPriceBreak()` | returns the difference between MSRP and the item best price |
| `getMultimedia` | `[ItemMultimedia](./itemmultimedia-sfo.md) getMultimedia(string type)` | type is the multimedia type: Image, Video. type is optional |
| `getMultimediaByCode` | `[ItemMultimedia](./itemmultimedia-sfo.md) getMultimediaByCode(string code)` | |
| `getMultimediaByFilename` | `[ItemMultimedia](./itemmultimedia-sfo.md) getMultimediaByFilename(string filename)` | |
| `getMultimediaDefaultFirst` | `[ItemMultimedia](./itemmultimedia-sfo.md)[ ] getMultimediaDefaultFirst(string type)` | |
| `getOptionByName` | `[ItemOption](./itemoption-sfo.md) getOptionsByName(string name)` | |
| `getOptionMatrixJson` | `string getOptionMatrixJson()` | returns back a complex _json_ object for use with the catalog.js script. see [Modifying Item Variations in a StoreFront](/guides/ultracart-documentation/storefronts/storefront-topics/modifying-item-variations-in-a-storefron) |
| `getOptions` | `[ItemOption](./itemoption-sfo.md)[ ] getOptions()` | |
| `getParent` | `[ProductGroup](./productgroup-sfo.md) getParent()` | |
| `getPath` | `string getPath()` | the relative url of this item display page |
| `getPinterestPin` | `string getPinterestPin(boolean advanced)` | |
| `getPricingTiers` | `[PricingTier](./pricingtier-sfo.md)[ ] getPricingTiers()` | gets a list of all pricing tiers for this item |
| `getRegularCost` | `string getRegularCost(integer quantity)` | quantity is optional. If omitted, 1 is assumed |
| `getRegularCostAsBigDecimal` | `[BigDecimal](./bigdecimal-sfo.md) getRegularCostAsBigDecimal(integer quantity)` | quantity is optional. If omitted, 1 is assumed |
| `getRegularCostLocalized` | `string getRegularCostLocalized(integer quantity)` | returns Regular cost in local currency. quantity is optional. If omitted, 1 is assumed |
| `getRelatedItems` | `Item[ ] getVolumeDiscounts()` | |
| `getReviewFilter` | `string getReviewFilter()` | returns the [ItemReviewFilter](./itemreviewfilter-sfo.md) |
| `getReviewFilterAsJson` | `string getReviewFilterAsJson()` | returns the [ItemReviewFilter](./itemreviewfilter-sfo.md) in json format |
| `getReviewCount` | `int getReviewCount()` | returns the number of approved reviews for this item. |
| `getReviewOverall` | `[BigDecimal](./bigdecimal-sfo.md) getReviewOverall()` | |
| `getReviewOverallAsHtml` | `string getReviewOverallAsHtml(string[ ] snippets)` | the snippets array should contain 5 snippets for the review: zero, quarter, half, three/fourths, and full. The overall review is compared and the appropriate snippet is returned |
| `getReviewOverallAsImages` | `string getReviewOverallAsImages(string[ ] images)` | the images array should contain 5 imges. The appropriate one is returned. If the array is missing any or all values, defaults are used. |
| `getReviewOverallAsRectangles` | `string getReviewOverallAsRectangles()` | |
| `getReviewOverallAsStars` | `string getReviewOverallAsStars()` | |
| `getReviews` | `[ItemReview](./itemreview-sfo.md)[ ] getReviews()` | returns all product reviews |
| `getReviewsAsJson` | `string getReviewsAsJson()` | returns an array of [ItemReview](./itemreview-sfo.md) in json format |
| `getReviewSummary` | `[ItemReviewSummary](./itemreviewsummary-sfo.md) getReviewSummary()` | returns a summary of customer reviews |
| `getReviewSummaryAsJson` | `[ItemReviewSummary](./itemreviewsummary-sfo.md) getReviewSummaryAsJson()` | returns a summary of customer reviews in json format |
| `getReviewUrl` | `string getReviewUrl()` | relative url of the product review page |
| `getSaleCost` | `string getSaleCost(integer quantity)` | quantity is optional. If omitted, 1 is assumed |
| `getSaleCostAsBigDecimal` | `[BigDecimal](./bigdecimal-sfo.md) getSaleCostAsBigDecimal(integer quantity)` | quantity is optional. If omitted, 1 is assumed |
| `getSaleCostLocalized` | `string getSaleCostLocalized(integer quantity)` | returns sale cost in local currency. quantity is optional. If omitted, 1 is assumed |
| `getSaleEnd` | `[Date](./date-sfo.md) getSaleEnd()` | |
| ``` getSaleExpiration ``` | ``` ItemSaleExpiration getSaleExpiration() ``` | returns remaining time of sale |
| ``` getSaleExpiresIn ``` | ``` string getSaleExpiresIn(string dateFormat) ``` | [**DEPRECATED**](/glossary/deprecated) - use getSaleExpiration() instead. Format a string to show time remaining in sale. Returns null if there is no sale going on, or the sale hasn't started, or has expired. Use these tokens to specify which data to include in your string
```
The code is pretty clean. It seems that `/cart/index.jsp` is their view cart page. Okay, let's change that to point to UltraCart. For this example, I'm going to assign Petsmart a Merchant ID of PSMART. Since PSMART is six characters (max allowed is 5), I know no one is already using it. Here's their new View Cart, now pointing to UltraCart.
```xml
```
What about buy links? For that, let's dive down into the site a little, and click on an individual item. I chose a Classic Cake Balls. So you'll see below an `ADD TO CART` link. Let's change that.

```xml
```
Other sites may be using some javascript. That's cool. But it's even simpler with UltraCart. I'll just replace their href with our buy link, and we're done.
```xml
```
---
# Navigating UltraCart
https://docs.ultracart.com/get-started/navigating-ultracart
doc_type: explanation
# **Getting Started with UltraCart: Navigating the Dashboard**
Welcome to UltraCart! This guide will help you familiarize yourself with the primary navigation within your UltraCart account dashboard. Understanding the layout is the first step to setting up and managing your online store effectively.
## **Understanding the Main Navigation**
The UltraCart dashboard features a main navigation menu located on the left-hand side of the screen.

This menu provides access to all the core functions of the platform. Here is a breakdown of the main sections:
### **Home**
This is your central landing page when you log in. It provides an overview of your store's performance, recent orders, and quick links to common tasks. It's a great place to start your day and get a snapshot of your business.
- If you're just getting started, you can use the getting started checklist to go through the basics to quickly begin selling your products online.
- You can easily rearrange widgets and components to make your dashboard as useful as possible for your UltraCart account and for each individual user in your organization.
### **Configuration**
This is where you'll configure various aspects of your account and the UltraCart platform to meet your specific business needs.
- **Account and Users**: Modify your plan, add and modify users, and link other UltraCart accounts for easy account switching.
- **Checkout**: Your central hub for everything that has to do with your checkout process, including Payment Processing, Shipping details, Gift Certificates, Single Page Checkout settings, Coupons, Customer Profiles, Return Policy, Terms and Conditions, Universal Sales Tax, Loyalty programs, and more.
- **Development**: Configure API Keys, access the Data Warehouse, Webhooks, and more for advanced integrations and data management.
- **Integrations**: Setup and configure specific integrations for accounting, channel partners, CRM, Memberships, migration services, and more.
- **Order Management**: Configure order settings like Accounts Receivable retry settings, order processing, chargebacks, custom fields, setup POS terminals and locations, automate task generation, refund and reject reasons, export orders, and more.
- **Email Notifications**: Customize email notifications sent to your customers and configure wholesale-specific email settings.
- **Items**: Configure universal item settings such as pricing tiers, reviews, storewide item options, automate task generation related to items, and more.
### **StoreFronts**
This is where you customize the appearance and functionality of your online store, including marketing pages, checkout content, A/B Tests, Marketing Flows, Email communication, and more. You can manage themes, layouts, content pages, navigation menus, and integrate with third-party services to enhance your customer's shopping experience. Each UltraCart account can have multiple storefronts, and each storefront that is set up will be displayed here.
Within the StoreFronts section, you will find a variety of sub-menus to configure specific aspects of your online store:
- **General**: Basic settings for the selected storefront, such as store name, theme selection, and contact information displayed on the storefront.
- **Appearance**: Control the overall look and feel, including fonts, colors, and visual styles.
- **Themes**: Select, customize, and manage the visual themes applied to your storefront.
- **Templates**: Edit the underlying Velocity templates that structure your storefront pages.
- **CSS**: Directly edit the Cascading Style Sheets for advanced styling customization.
- **Content**: Manage various content blocks and elements used throughout the storefront.
- **Blog Posts**: Create and manage blog content for your storefront.
- **Pages**: Create and edit custom content pages (e.g., About Us, Contact Us, FAQs).
- **A/B Experiments**: Set up and manage A/B tests to optimize storefront elements for conversion.
- **Menus**: Configure the navigation menus displayed on your storefront.
- **Search**: Configure storefront search settings and indexing.
- **Search Engine Optimization**: Manage SEO settings like meta titles, descriptions, and sitemaps for your storefront.
- **Social**: Link social media accounts and configure social sharing features.
- **Store Locator**: Set up and manage a store locator if you have physical locations.
- **Upsells**: Configure rules and display settings for upsell promotions.
- **Language**: Manage multi-language settings for your storefront.
- **Communication**: Configure customer communication preferences related to this storefront.
- **Campaigns & Flows**: Access tools for creating marketing campaigns and automated flows specific to this storefront.
- **Library**: Store, modify and access your own prebuilt campaigns and flows or access pre-built flows shared by UltraCart or other merchants.
- **Lists and Segments**: Create and manage customer lists and segments for targeted marketing.
- **Transactional Emails**: Customize the design and content of transactional emails sent from this storefront.
- **Customers**: View customer information related to interactions on this specific storefront.
- **Settings**: Settings specific to the storefront's communication.
- **Recordings**: Access session recordings or analytics related to user behavior on the StoreFront.
- **File Manager**: Manage files uploaded for use on the storefront.
- **Privacy & Tracking**: Configure cookie policies, tracking scripts, and privacy settings.
- **Advanced**: Access deeper, more technical settings for the storefront.
- **Server Logs**: View logs related to the storefront's server activity.
When first setting up your storefront, you will likely focus on sections like **General**, **Appearance**, **Themes**, **Templates**, **Pages**, and **Menus** to establish the basic look and structure of your online store.
### **Items**
This section is where you manage all your products and services. You'll create or import new items, configure pricing, manage inventory levels, add descriptions and images, and set up item-specific shipping and tax rules, manage reviews, and anything else that has to do with specific items.
### **Operations**
Operations contains general operational sections like Customers, Orders, Reporting, and 3rd Party Email Marketing integrations.
- **Customers**: Manage and view customer activity, import or export customers, set up pricing tiers and loyalty programs, and more.
- **Orders**: View, process, fulfill, and manage customer orders from placement to completion.
- **Reporting**: Access various reports to analyze sales data, customer behavior, inventory, and other key metrics.
- **3rd Party Email Marketing**: Configure connections and settings for external email marketing services.
### **Advanced**
The **Advanced** section contains the Affiliate management section and Developer Tools.
- **Affiliate Management**: Allows you to set up specific Affiliate marketing groups, configure commissions, set up Custom email templates, manage affiliate and Merchant links, list Affiliates and their commissions, and view related reports.
- **Developer Tools**: Access tools and settings primarily for developers, potentially including API access details beyond the main Configuration section.
### **Conversations**
The conversations engine allows you to interact with your customers using the integrated StoreFronts webchat as well as SMS (using the Twilio integration). This powerful platform provides a streamlined and completely integrated chat platform within the UltraCart system, allowing you to send coupons, manage customer orders, and more directly within one unified chat interface.
### **Tasks**
Add, assign, and manage tasks for users in your UltraCart Account. For example, you can assign users tasks for orders, item updates or management, customer communication, StoreFront management, and more, contextually within the UI so the user doesn't have to go find the data or information that the task is related to. Users can quickly view active tasks and jump right to the order, item, or section within the platform so the context is immediately apparent for quick task resolution.
### **Support**
Add, manage, and update support tickets. Ask any questions about all things UC here. Our staff will respond quickly and help with any issues that you have with the platform.
This is the first in a series of pages designed to help you setup your UltraCart account.
:::note
**Next Page:** [**Managing Your Items**](../managing-items/index.md)
:::
---
# UltraCart Dashboard
https://docs.ultracart.com/get-started/navigating-ultracart/ultracart-dashboard
doc_type: reference
# Getting Started with Your UltraCart Dashboard Widgets
## Introduction
The UltraCart dashboard provides a centralized view of key information and quick access to essential tools for managing your online store. This is achieved through the use of modular components called **widgets**. Upon starting your UltraCart trial, a default set of widgets, including the **Getting Started Checklist**, **Statistics (Basic)**, **Accounts Receivable**, and **Shipping Department** are automatically displayed to guide you through the initial account configuration and provide a general overview of the account.

## Understanding Dashboard Widgets
### What are Widgets?
Widgets are dynamic content blocks that display specific information or provide shortcuts to various UltraCart features directly on your dashboard. They offer a customizable overview tailored to your individual needs and preferences. Each user within an UltraCart account can configure their dashboard to display the widgets most relevant to their daily tasks.
### Available Widgets
- **Statistics (Basic)** - UltraCart Analytics metrics on the general activity of your account.
- **Statistics (RTG)** - UltraCart Analytics metrics on rotating transaction gateways.
- **Statistics (Affiliate)** - UltraCart Analytics metrics on affiliate activity.
- **Integration Health** - Displays log details details for integrations, with the following columns:
- Logs
- Warnings
- Errors
- Critical
- **Find an Order** - A search tool for locating specific orders.
- **Affiliate Management** - Shows Pending affiliate(s) needing approval.
- **Sales Summary** - Count and Dollar Amount of Sales for Today, Month to Date, and Year to Date.
:information: **Important Note:** Please note that due to the event driven nature of this widget it is not precisely accurate. For most accurate sales reporting, please use the Statistic widget, the Period Sales report in reporting and Google BigQuery.
- **Accounts Receivable** - Total count of orders pending in Accounts Receivable Department.
- **Fraud Review:** List of orders that have been flagged for fraud review.
- **Getting Started Checklist** - Shows primary steps to complete basics setup.
- **Shipping Department** - Display of number of orders pending by shipping method.
- **Order Entry** - A button to load and run the Back End Order Entry (BEOE) program.
- **Quote Requests** - Displays any pending Quote Requests. A **Quick Jump** button will take you to: **Operations → Order Management → Pre-Orders**
- **Pre-Orders** - Displays a list of Pre-Orders. A **Quick Jump** button will take you to: **Operations Order → Management → Quote Requests**
### Widget Icons
Depending on the specific widget, you may see up to three clickable icons in the widget's title bar:
- :blue-star: **Preferences:** - Allows you to configure additional settings specific to that widget.
- **Refresh:** - Updates the information displayed within the widget to reflect the most current data.
- :blue-star: **Close:** - Removes the widget from your dashboard. You can add it back later if needed.
## Managing Your Dashboard Widgets
### Default Widgets
When a new UltraCart account is created or a new user is added, the following four widgets are automatically placed on the dashboard:
1. Getting Started Checklist
2. Accounts Receivable
3. Shipping Department
### Adding a Widget
To add a new widget to your dashboard:
1. Click the **Arrange Widgets** button located in the top right-hand corner of the page.

2. A new screen will appear, displaying two sections:
- **Active Widgets** (left side, white background): Shows the widgets currently displayed on your dashboard.
- **Available Widgets** (right side, dark gray background): Lists the widgets that can be added to your dashboard.

3. To add a widget, click and drag it from the **Available Widgets** section on the right to the desired location on the left (**Active Widgets**).
4. Once you have added all the desired widgets, click the **Apply & Close** button.
### Relocating a Widget
To move a widget to a different position on your dashboard:
1. Place your mouse pointer over the title bar of the widget you want to move.
2. Click and hold down the left mouse button.
3. Drag the widget to its new desired location on the dashboard. As you drag, existing widgets will automatically shift to make space.
4. Release the mouse button.
5. Click the **Apply & Close** button to save the new layout.

### Removing a Widget
To remove a widget from your dashboard:

1. Locate the **X** icon on the right side of the widget's title bar.
2. Click the **X** icon. The widget will be removed from your dashboard and will reappear in the **Available Widgets** section.
## Using the "Quick Jump" Link
Some widgets, such as **Quote Requests** and **Pre-Orders**, include a **Quick Jump** link at the bottom of the data displayed. Clicking this link will directly navigate you to the relevant section within the UltraCart platform, allowing for quick access to more detailed information and management tools.
For example, clicking the "Quick Jump" link in the **Shipping Department** widget will take you directly to the **Shipping Department** section within **Operations → Order Management**.

## Configuring the "Find an Order" Widget Preferences
The **Find an Order** widget allows you to customize the default search fields displayed. To configure these preferences:
1. Locate the **Preferences** icon in the title bar of the **Find an Order** widget and click it.
2. A pop-up window will appear with a list of available search fields (e.g., Order ID, Email, Customer Name, Zip Code).
3. Select the checkbox next to each search field you want to be displayed by default in the widget. To remove a search field, simply deselect its checkbox.

4. Click the **Save** button to apply your changes.
Once saved, the **Find an Order** widget will display the search fields you selected.

To perform a search:
1. Enter your search criteria into any of the displayed fields.
2. Click the **Search** button.
UltraCart will then redirect you to the **Review Orders** screen, displaying all orders that match your specified search criteria.
---
# Using UltraCart Analytics
https://docs.ultracart.com/get-started/navigating-ultracart/ultracart-dashboard/using-ultracart-analytics
doc_type: how-to
* * *
## Overview
This guide covers the UltraCart Analytics platform: how it works, how to configure expenses for accurate profit reporting, how to deploy tracking on external websites, and how to instrument marketing campaigns with UTM parameters.
UltraCart Analytics provides near real-time insight into your business performance with a level of depth that most reporting platforms do not achieve. It tracks profit (not just revenue), captures the full customer lifecycle, and attributes sales back to the campaigns that generated them.
## Background
We've helped merchants gain insight into their business from end-to-end for a long time. In the end we've always come down to three problems with external reporting tools:
- They have no built-in way for you to track profit (most focus only on revenue by default)
- They are focused on their view of the universe
- They don't track the customer close enough to capture the entire lifecycle
UltraCart Analytics seeks to provide true answers to the questions most merchants have:
- Was that particular campaign profitable?
- How profitable was a particular time period?
- What expenses are reducing my profit?
UltraCart Analytics also wants to make it easier on merchants:
- Quickly see key performance indicators and compare them over time
- Quickly set up required data flows that need to be captured
## Metrics
The UltraCart Analytics system provides reporting on the following metrics across three categories:
**Basic**
- Key Performance Indicators
- Total Sales
- Upsells
- Profit
- Expense
- Total online store visitors
- Repeat customer rate
- Online store conversion rate
- Average order value
- Top products by units sold
- Online store visits by location
- Total sales attributed to marketing campaigns
- Total profit attributed to marketing campaigns
- Online store visits by traffic source
- Top landing pages by visit
- Online store visits from social sources
- Sales by traffic source
- Online store visits by device type
- Sales by social sources
- API calls (metered)
**RTG (Rotating Transaction Gateways)**
- One report per gateway
**Affiliates**
- Affiliate Order Count
- Affiliate Networks
## Understanding the Math
```
Profit = Revenue - Expense
```
The goal of business is to make a profit and we believe that any analytics system that doesn't focus on actual profit is completely flawed.
## Revenue
This is simple for UltraCart to capture since we're handling all the orders. Other tracking systems have more trouble with this because you have to fire pixels on your receipt, etc. to report the revenue.
## Expenses
UltraCart Analytics tracks the following types of expenses.
### Shipping
Shipping is often a non-trivial component in the expense structure of an e-commerce business. Capturing the cost of shipping can be challenging.
#### UltraShip
If you're processing your orders with UltraShip then we are automatically capturing the shipping costs reported by the different carriers for each shipment.
#### Fulfillment Integrations
Some fulfillment integrations automatically provide the cost of shipping each order back at the same time as the tracking numbers. The following integrations currently support this:
- DCL Corp
- Specialty Fulfillment
If you believe that your fulfillment company can provide this information, but the integration currently doesn't support it, please contact UltraCart Support.
#### Collecting at Time of Shipment
When you mark an order as shipped in the Shipping Department you can specify the postage cost as shown in the screenshot below:

**Specifying Averages for a Distribution Center**
Under the Distribution Center → Analytics you can configure the average shipment fee. This is OK if you have a fairly predictable shipment cost per order.

#### Fulfillment
Similar to shipment costs, fulfillment costs can be specified. At this time there are no integrations that provide the fulfillment pick fees in an automated fashion. The best solution is to configure this under each distribution center as shown below.

### Affiliate
There are two types of affiliate scenarios that UltraCart Analytics can track:
#### Integrated Affiliate System
The integrated affiliate system will automatically track without any additional configuration.
#### Affiliate Networks
If you're working with external affiliate networks such as ClickBooth, AboveAllOffers, etc. then you should be using the Affiliate Network Pixel. When you configure your Affiliate Network Pixel, you will have the ability to specify the commission amount. UltraCart will automatically detect when this network's pixel has fired and count that commission as an expense.

### Cost of Goods Sold
The cost of the products you are selling is easy to configure on a per item basis. In the item editor click on the "COGS/MAP/MSRP..." link as shown below.

Next specify the cost of goods sold in the COGS field.

You can also specify the cost in an item import or the price update tool.
### Marketing
At this point in time, UltraCart Analytics can download marketing data from Google Adwords (via Google Analytics) and Facebook via API connection.
#### Google Adwords
First make sure that you have linked your Google Adwords account to your Google Analytics account (this is recommended by Google). Next click on **StoreFronts → Conversion and Tracking → Google**. Scroll down to the Google Analytics Experiments section and populate the Account Id, Property Id and Profile ID then click Connect. More detail on finding these values and connecting the API is found under the Performing an Experiment. In the future this section will be renamed "Google Analytics API" as the connection does more than use the Google Analytics experiment engine.

Google Adwords campaign spend data will download daily into UltraCart once the report is considered "golden" by Google (will not change further). So your campaign spend data for Google will typically download by noon the next day. UltraCart is checking hourly for this data to become available.
#### Facebook
UltraCart Analytics communicates with Facebook using their Graph API. In order to connect your Facebook account click on **StoreFronts → Conversion and Tracking → Other → Facebook Analytics**. You'll need to specify your Facebook account ID (since any accounts can be controlled by a single Facebook user) and then click on connect. This Facebook article will provide help on [finding your Facebook account id](https://www.facebook.com/business/help/1492627900875762).
UltraCart will download Facebook campaign spend data hourly from Facebook. UltraCart will also feed Facebook your customers as a "custom audience" to assist you in retargeting customers that are similar.
### Payment Processing & Reserve
UltraCart automatically knows the fee structure associated with PayPal and Amazon payments. By default UltraCart will assume that your credit card processing rate is 2.9% and $0.30/transaction. If you're paying more than that, consider checking out UltraCart Payments!
If you need to configure different rates than the default, configure a merchant account profile and specify the rates. After configuring the merchant account profile, navigate to the payments configuration and then into the transaction gateways configuration page. Scroll down to the configured gateway and to the right of the card types checkbox fields, select the configured merchant account profile from the drop-down list, then click the save button to save the changes.
Some high risk merchant accounts also place a reserve on the funds processed. You can also configure that under the merchant account profile.
### Marketplace
UltraCart automatically captures the fees associated with the eBay marketplace. These fees include listing fees and final value fees on orders. The fees associated with PayPal payment processing for eBay orders are also captured and reported under the Payment Processing expense automatically.
## Tracking on External Websites
UltraCart Analytics tracks everything to a channel. Each StoreFront or legacy screen branding theme is considered a channel. If you are using an external website connected to an UltraCart StoreFront in checkout only mode or the legacy checkout, you can place a tracking script on your external site.
### Standard Script
For example if your merchant id is **SAMPL**, your StoreFront is **sampl**.ultracartstore.com and your website is [www.mysamplesite.com](http://www.mysamplesite.com), then you connect the two by placing the following tracking script on the pages of the [www.mysamplesite.com](http://www.mysamplesite.com) website:
```html
```
Just change the `data-mid` and `data-channel` to match your UltraCart account.
You can place this script anywhere within the web page's source. The script is both asynchronous and deferred so it will have no impact on the performance of your site. We load this script off the Amazon CloudFront CDN so it will load extremely fast.
This script will record:
- URL visited (including parameters to capture UTM)
- Referring website
- Time on page
:::info
The full URL query string is captured at the time the page loads. If third-party scripts (such as ad platform auto-tagging) modify the URL after the initial page load, those modifications will also be captured. UltraCart Analytics handles this by detecting and separating duplicate UTM parameter groups. See the [Duplicate UTM Parameters](#duplicate-utm-parameters-ad-platform-auto-tagging) section under Tracking Campaigns for details.
:::
This script will set a tracking cookie in order to keep track of the customer through multiple engagements with your website.
The script tag supports the following attributes:
| Attribute | Required | Purpose |
| --- | --- | --- |
| `data-mid` | Yes | UltraCart merchant ID. |
| `data-channel` | Yes | StoreFront hostname (or your marketing-site hostname when used externally). |
| `data-crosslink` | No | JSON array of partner hostnames for cross-domain identity stitching. See [Cross-Domain Identity Stitching (Crosslink)](#cross-domain-identity-stitching-crosslink). |
#### Passing the ucacid Parameter
By default, the UltraCart Analytics script will automatically append the `ucacid` value as a parameter on any link tag (``) on the page whose `href` attribute contains `UCEditor` (standard buy links to the UltraCart checkout). If you are not seeing complete tracking and have multiple pages on your external website, you can add an additional class to the tag named `ucalink` which will cause the UC Analytics script to append the `ucacid` parameter to that link as well.
Auto-decoration also applies to any link whose hostname matches a configured crosslink domain. If you configure crosslink and notice `ucacid` and click-ID parameters appearing on links that don't contain `UCEditor` or the `ucalink` class, that is expected behavior. See [Cross-Domain Identity Stitching (Crosslink)](#cross-domain-identity-stitching-crosslink).
**Example Before Tag**
```html
BUY NOW
```
**Example After Tag**
```html
BUY NOW
```
If you don't want to selectively add the `ucalink` to relevant `` tags on your site, the following JavaScript in your document ready handler function can append the class to all links on the page:
```js
document.querySelectorAll('a[href]').forEach(link => {
link.classList.add('ucalink');
});
```
### Google Tag Manager
The way Google Analytics loads scripts, it will not replicate the data tags. To solve this problem use a URL syntax instead of data attributes. For example if your merchant id is **SAMPL**, your StoreFront is **sampl**.ultracartstore.com and your website is [www.mysamplesite.com](http://www.mysamplesite.com), then you connect the two by placing the following tracking script into the Google Tag Manager container for the [www.mysamplesite.com](http://www.mysamplesite.com) website:
```html
```
Just change the `mid` and `channel` to match your UltraCart account.
:::tip
The preferred pattern for Google Tag Manager is the `window.__ucaconfig` object. It keeps your configuration readable, supports every option the data attributes do (including `crosslink`), and avoids GTM's inconsistent handling of `data-*` attributes across containers — the reason the URL-parameter form exists in the first place. Set `__ucaconfig` before the script loads:
```html
```
The URL-parameter form above remains fully supported as a fallback.
:::
### Different Domains
This section covers the case where your marketing website is on one domain (for example, [www.mysamplesite.com](http://www.mysamplesite.com)) and your UltraCart StoreFront is on another (for example, **sampl**.ultracartstore.com). Configuring `mid` and `channel` correctly is sufficient for this scenario. Visitor identity is carried to the StoreFront via the `ucacid` parameter that UltraCart Analytics appends to your buy links, so no additional changes are required beyond deploying the tracking script.
If you instead need to stitch identity across two of your own website domains — for example, landing pages on one domain and checkout on another — see [Cross-Domain Identity Stitching (Crosslink)](#cross-domain-identity-stitching-crosslink).
### Cross-Domain Identity Stitching (Crosslink)
If you operate multiple website domains and want to track a single visitor as they move between them (for example, marketing landing pages on `landing.com` and a checkout on `cart.com`), use the `crosslink` configuration. When configured, UltraCart Analytics rewrites every outbound `` on the page that points at one of your partner domains, appending the visitor's UCA ID and any active ad-platform click IDs as URL parameters. When the visitor lands on the partner domain, UltraCart Analytics reads those parameters and pins them to first-party storage so the same visitor identity continues across the hop.
#### Configuring crosslink domains
There are three ways to specify the crosslink domain list. Use whichever fits your existing deployment.
**Option A — Data attribute on the script tag**
```html
```
**Option B — `window.__ucaconfig` object** (use this when deploying via Google Tag Manager, which strips data attributes)
```html
```
**Option C — URL query parameter on the script src** (comma-separated)
```html
```
Hostnames in the list are matched exactly or as suffix matches against the link hostname, so listing `partner.com` will also match `shop.partner.com`.
#### What gets carried across the hop
When a link is rewritten, the following are appended (if available on the source page):
- `ucacid`: UCA visitor identity
- `gclid`, `gbraid`, `wbraid`: Google Ads click IDs (including iOS variants)
- `msclkid`: Microsoft Ads click ID
- `fbclid`: Facebook click ID
- `twclid`: X / Twitter click ID
- `_kx`: Klaviyo profile parameter
- `__cvg_uid`, `__cvg_sid`: Converge stitching IDs (added approximately 5 seconds after page load to allow the Converge cookie to set)
- `cbsuid`, `cbshost`: Internal A/B-test user IDs, when present
- `_fbp`, `_fbc`: Meta first-party cookies (added at click time only, not on page load, to avoid search crawlers indexing them)
#### Requirements and caveats
- The call-to-action must be a real anchor tag (``) or carry the `widget-faux-a` class. JavaScript-driven navigation (`window.location = '...'`, `