Passing Custom Fields to UltraCart During the Checkout
Introduction
Custom Fields allow you to store additional metadata on a cart or order, often identifiers or values from external systems that need to be referenced after checkout. UltraCart supports multiple Custom Fields and exposes them through standard order retrieval methods, exports, and postback integrations.
This guide explains how to pass Custom Field values into UltraCart at various points in the purchasing flow and how to retrieve them once the order is placed.
Understanding Custom Fields
UltraCart currently supports the following fields and character limits:
| Field Name | Max Length | Notes |
|---|---|---|
| CustomField1 | 50 chars | |
| CustomField2 | 50 chars | |
| CustomField3 | 50 chars | |
| CustomField4 | 50 chars | |
| CustomField5 | 75 chars | |
| CustomField6 | 50 chars | |
| CustomField7 | 50 chars | |
| CustomField8 | n/a | Stored as internal order property |
| CustomField9 | n/a | Stored as internal order property |
| CustomField10 | n/a | Stored as internal order property |
Note: Always pass and reference these fields using Camel Case, such as
CustomField1.
Passing Custom Fields on a Buy Link
Custom Fields can be appended directly to Buy Links.
&CustomField1=VALUE
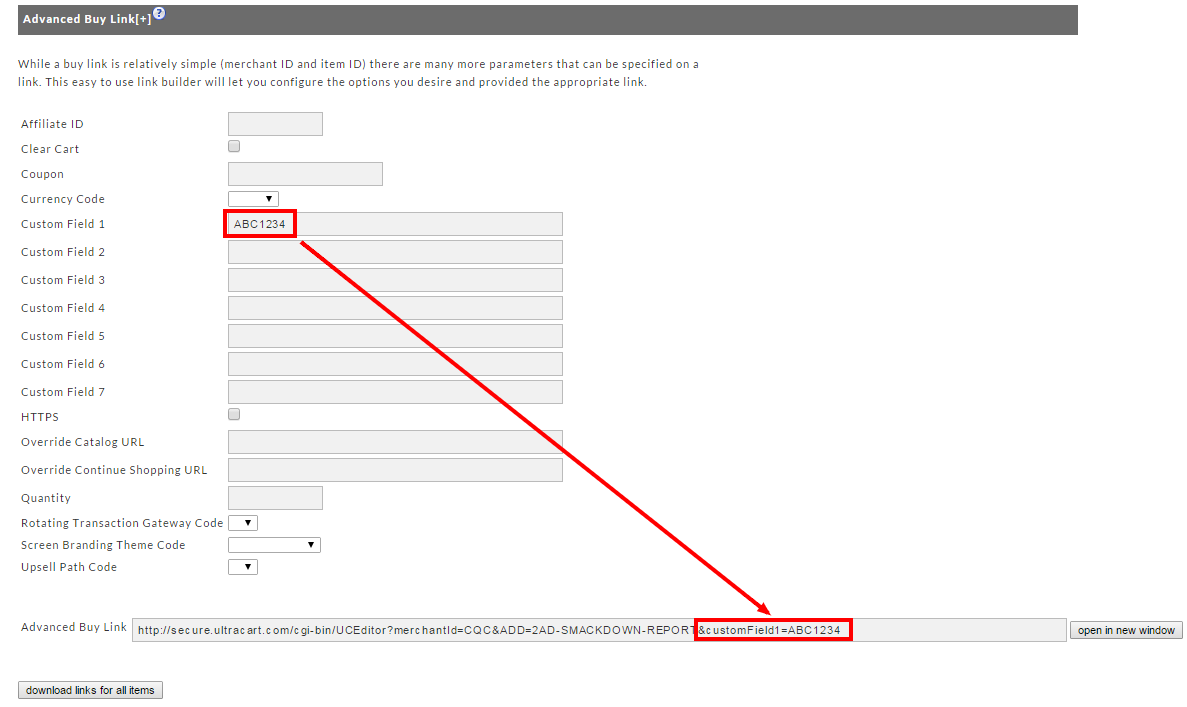
The Advanced Buy Link Builder will generate these parameters for you.
Passing Custom Fields from Buy Form Code
Here is an example of including Custom Fields directly in a Buy Form:
<form method="post" action="https://secure.ultracart.com/cgi-bin/UCEditor">
  <input type="hidden" name="merchantId" value="DEMO" />
  <input type="hidden" name="add" value="Bone" />

  <!-- CustomField1 passed as a hidden value -->
  <input type="hidden" name="CustomField1" value="New Landing Page" />

  <!-- CustomField2 collected from customer -->
  <label>What breed of dog(s) do you have?</label>
  <input type="text" name="CustomField2" />

  <input type="submit" value="Add to Cart" />
</form>
Inserting Custom Fields Into Checkout
If your checkout process requires gathering additional information from the customer, you can surface Custom Fields in the checkout itself.
StoreFront Checkout (Visual Builder)
Modern UltraCart StoreFronts use the Visual Builder.
Custom Fields should be added to the checkout using the checkoutcustomfield element.
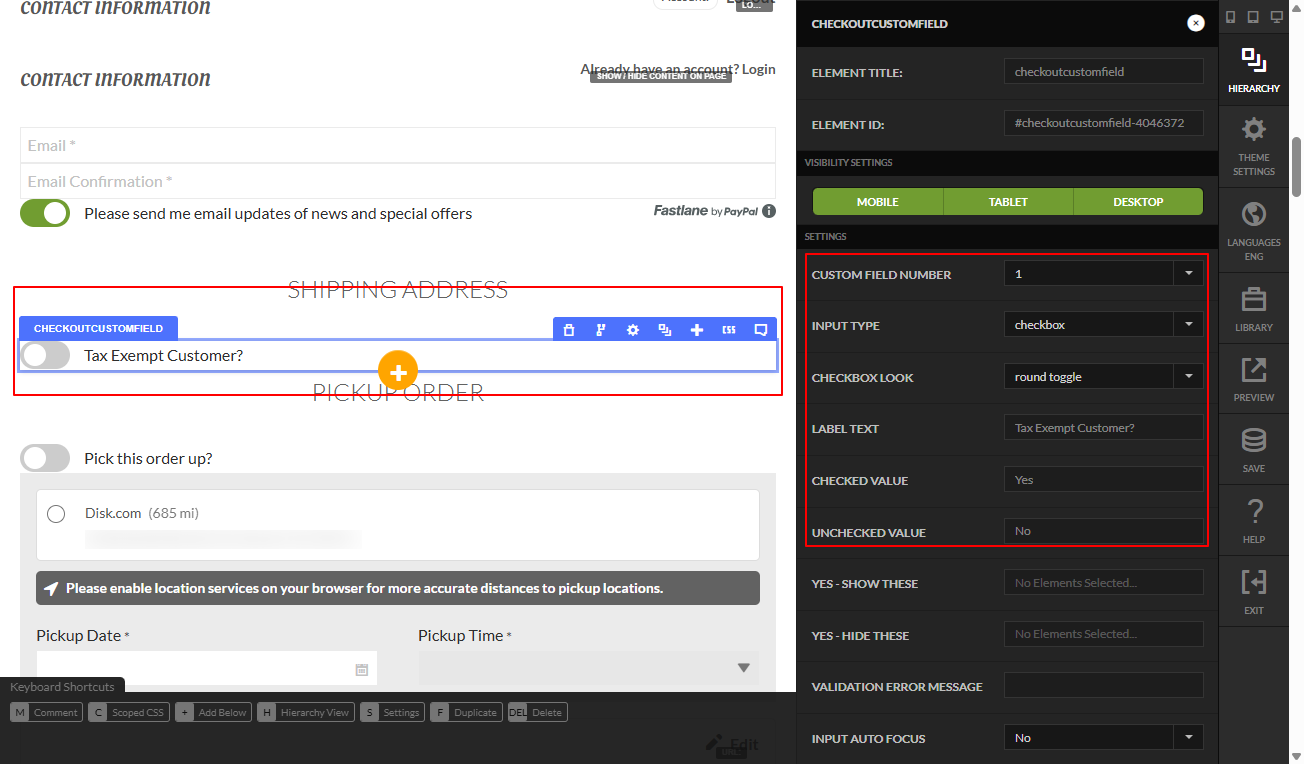
Recommended Method: Using the checkoutcustomfield Element
In the Visual Builder:
-
Open your StoreFront.
-
Navigate to StoreFronts → Visual Builder.
-
Edit the Checkout page template.
-
Add the element
checkoutcustomfieldwherever you want the field to appear.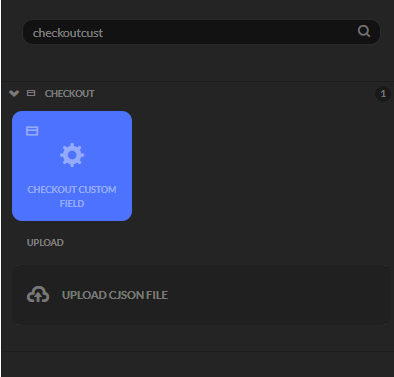
-
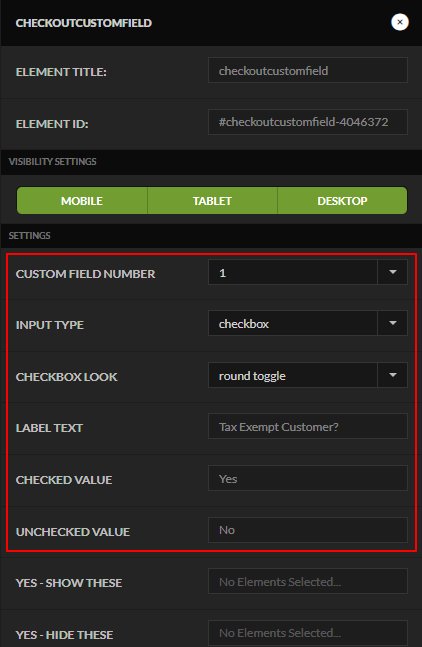
Configure:
-
Custom Field Number (1-7)
-
Input Type (text, email, number,url,checkbox)
-
Checkbox Look (native, square toggle, round toggle)
-
Label Text
-
Checked Value (i.e. - Yes)
-
Unchecked Value (i.e. - No)
-
Important:
This element automatically binds to the cart’s CustomField values.
No HTML, Velocity, or CSS insertion is required (and all legacy examples have been removed).
Why This Replaces Legacy Implementation
Older StoreFront documentation included HTML/Velocity template snippets for manually adding Custom Fields.
These were designed for pre–Visual Builder themes.
Modern Visual Builder themes should exclusively use checkoutcustomfield.
Manual HTML/CSS methods are deprecated for StoreFront checkout and should no longer be used.
Legacy Checkout
Merchants still using the older Single Page Checkout (non-StoreFront) may insert Custom Field HTML manually.
Example:
<span class="ucColorSubHeader ucCommentsHeader">CustomField1 Label</span>
<input type="text" name="CustomField1" class="ucFormField" />
This is configured under:
Configuration → Checkout → Screen Branding Themes → Screens → Single Page Checkout
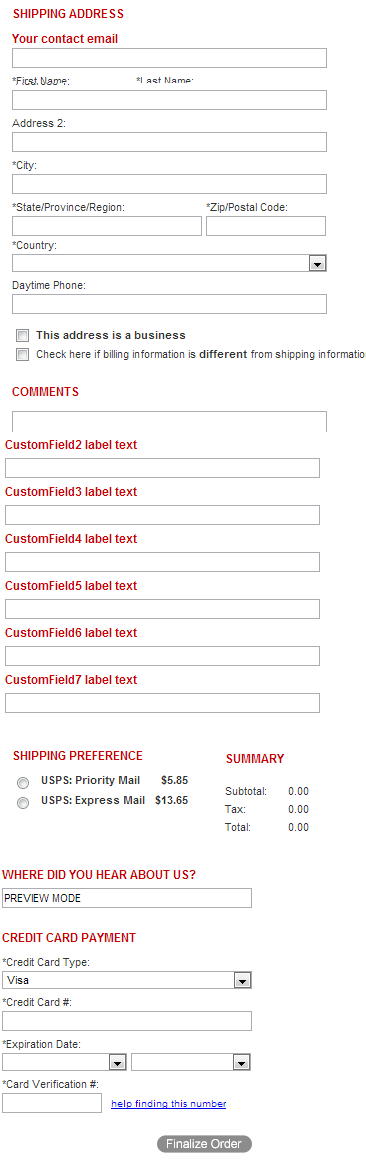
Example of placing the custom field HTML into the single page checkout editor:

Inserting Custom Fields into the checkout
<table><table id='CustomFields'>
<tr>
<td>
<span class="ucColorSubHeader ucCommentsHeader">CustomField1 label text </span>
</td>
</tr>
<tr>
<td>
<input type='text' class="ucFormField" style="width:315px" name="customField1" />
</td>
</tr>
<tr>
<td>
<span class="ucColorSubHeader ucCommentsHeader">CustomField2 label text </span>
</td>
</tr>
<tr>
<td>
<input type='text' class="ucFormField" style="width:315px" name="customField2" />
</td>
</tr><tr>
<td>
<span class="ucColorSubHeader ucCommentsHeader">CustomField3 label text </span>
</td>
</tr>
<tr>
<td>
<input type='text' class="ucFormField" style="width:315px" name="customField3" />
</td>
</tr><tr>
<td>
<span class="ucColorSubHeader ucCommentsHeader">CustomField4 label text </span>
</td>
</tr>
<tr>
<td>
<input type='text' class="ucFormField" style="width:315px" name="customField4" />
</td>
</tr><tr>
<td>
<span class="ucColorSubHeader ucCommentsHeader">CustomField5 label text </span>
</td>
</tr>
<tr>
<td>
<input type='text' class="ucFormField" style="width:315px" name="customField5" />
</td>
</tr><tr>
<td>
<span class="ucColorSubHeader ucCommentsHeader">CustomField6 label text </span>
</td>
</tr>
<tr>
<td>
<input type='text' class="ucFormField" style="width:315px" name="customField6" />
</td>
</tr><tr>
<td>
<span class="ucColorSubHeader ucCommentsHeader">CustomField7 label text </span>
</td>
</tr>
<tr>
<td>
<input type='text' class="ucFormField" style="width:315px" name="customField7" />
</td>
</tr>
</table>
The above HTML code would render into the single page checkout like this:
Viewing Custom Field Values in UltraCart
To view submitted Custom Field values:
-
Open the order.
-
Click Edit Customer Information.
-
Go to the Other tab.
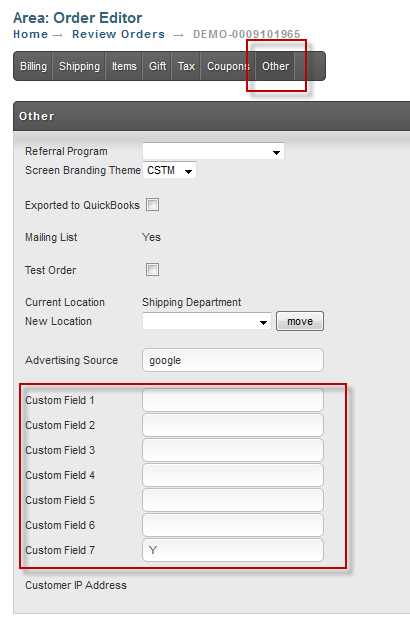
All CustomField1–CustomField7 values appear there.
Using Custom Fields on the Receipt
Custom Fields can be inserted into receipt templates (conversion scripts) using bracket tokens:
[CustomField1]
Navigate to:
Configuration → Screen Branding Themes → Edit → Conversion and Tracking
Retrieving Custom Fields After Order Placement
Whenever you see an order in the system you can click Edit Customer Information and then click the Other tab. The other tab will display the contents of the seven custom fields as shown below.
Using on the Receipt
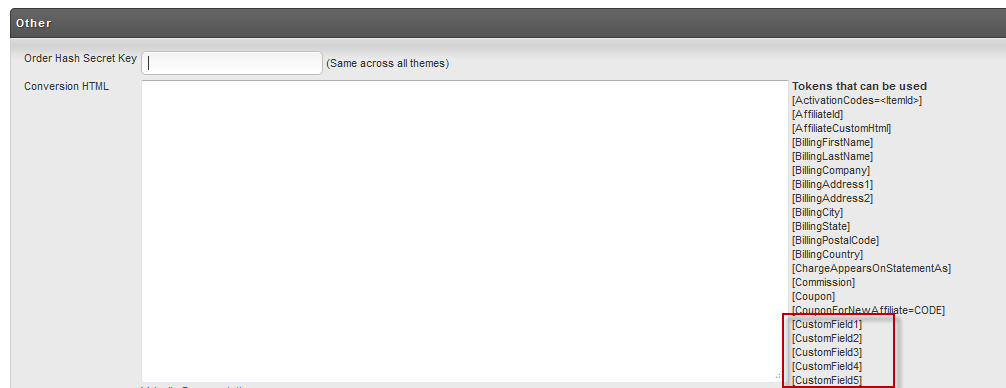
The values of the custom fields can also be used in conversion scripts on the receipt. If you navigate to:
Main Menu → Configuration → Screen Branding Themes → [edit] → Conversion and Tracking
You can use tokens like [CustomField1] within your conversion HTML. These will be replaced with the actual value from the order.
Retrieving Back the Custom Fields
There are 3 ways to receive back the custom fields that you passed in.
Export Orders
A merchant can configure an export to collect the custom field values. Exports are configured under:
XML Postback
XML Postback is a method of communication whereby UltraCart notifies the merchant's web server of order activity by posting XML versions of the order to the merchant's server. You can read more about XML Postback here. XML Postback is configured under:
Conclusion
Custom Fields provide a flexible way to capture and store additional order-level metadata from Buy Links, Buy Forms, or during checkout.
Modern StoreFront implementations should always use the checkoutcustomfield Visual Builder element, ensuring fields bind cleanly to the UltraCart cart object without custom HTML or template modifications.