How to Add External Hyperlinks to Item Pages and Storefront Menus
Last Updated: June 12, 2026
Overview
This guide explains two methods for linking customers to external websites from your UltraCart storefront:
-
Adding a hyperlink within an item's description.
-
Adding a custom link to a storefront navigation menu.
These techniques allow you to direct customers to external resources, partner websites, sizing guides, manufacturer information, promotional pages, or other destinations outside of your storefront.
Prerequisites
Before beginning:
-
You must have administrative access to your UltraCart account.
-
The item you want to edit must already exist.
-
The storefront theme must already be configured and published.
-
You must know the full external URL you want customers to visit.
Important: Always include the full URL including
<https://> when creating external links.
Add an External Hyperlink to an Item Description
1. Open the Item in the Storefront
Navigate to the storefront and open the item page you wish to edit.
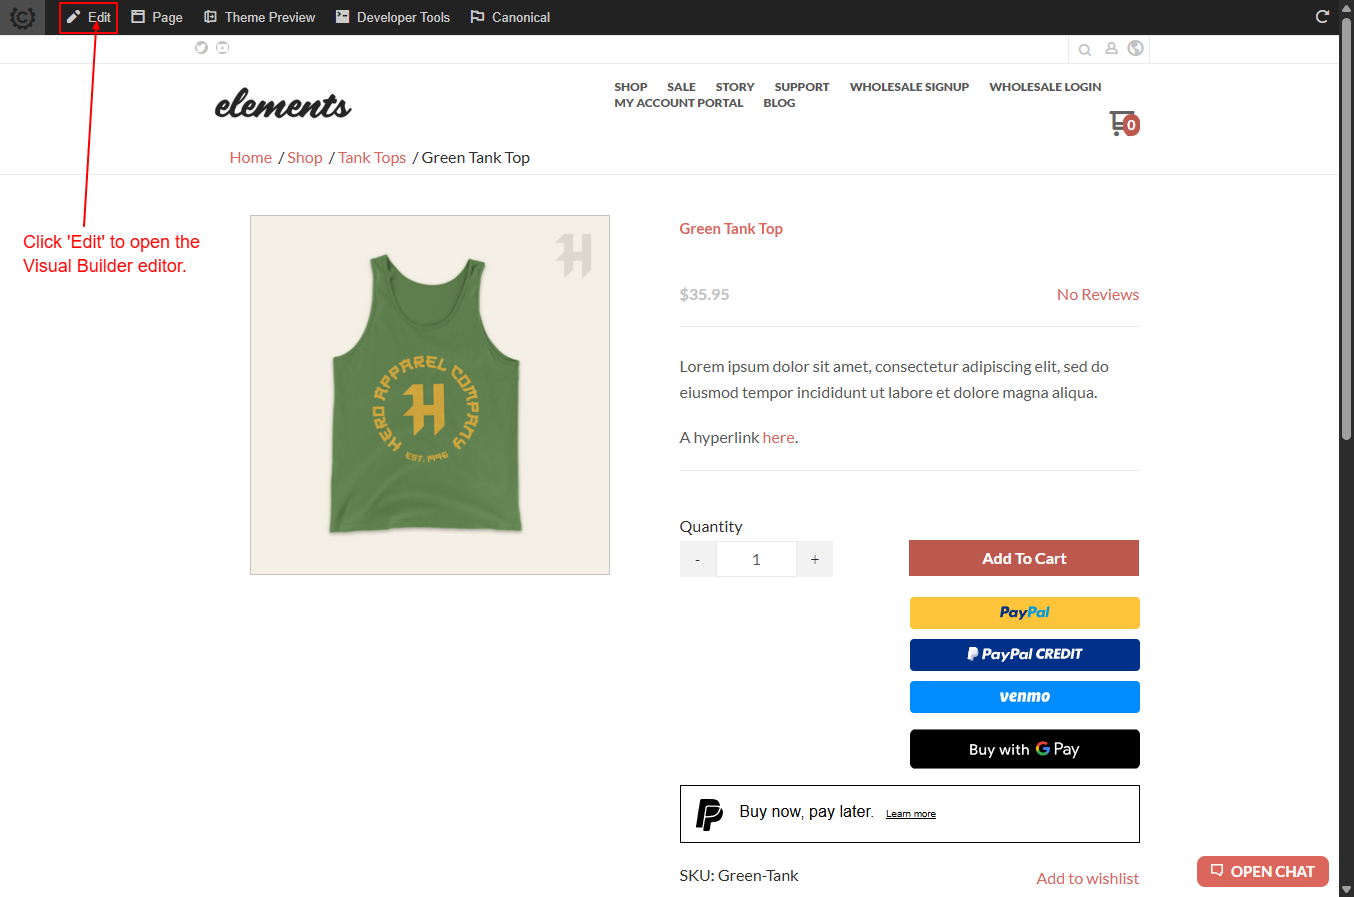
2. Open the Item Editor
From the item administration screen, open the item for editing and locate the Description field.
[SCREENSHOT PLACEHOLDER]
Timestamp: 00:01:55
Description: Item editor displaying the Description field containing existing product description text.
3. Highlight the Text to Become a Link
Within the Description editor:
-
Select the text that should become clickable.
-
Highlight only the words customers should click.
[SCREENSHOT PLACEHOLDER]
Timestamp: 00:02:15
Description: Text within the description editor highlighted and selected.
4. Insert the Hyperlink
Click the hyperlink button in the editor toolbar.
[SCREENSHOT PLACEHOLDER]
Timestamp: 00:02:30
Description: Rich text editor toolbar with the hyperlink icon selected.
5. Enter the External URL
In the hyperlink dialog:
-
Paste the destination URL.
-
Confirm the link settings.
-
Save the hyperlink.
[SCREENSHOT PLACEHOLDER]
Timestamp: 00:03:05
Description: Hyperlink dialog displaying a URL entry field with an external website URL being entered.
6. Save the Item
Save the item changes after the hyperlink has been added.
[SCREENSHOT PLACEHOLDER]
Timestamp: 00:03:25
Description: Description editor showing linked text and the item save controls.
Verify the Hyperlink on the Storefront
Return to the storefront item page and verify the hyperlink appears correctly.
-
Open the item page.
-
Locate the linked text in the description.
-
Click the link.
-
Confirm the browser navigates to the correct external page.
[SCREENSHOT PLACEHOLDER]
Timestamp: 00:04:20
Description: Storefront item page displaying the linked text within the item description.
Note: If the link does not appear, verify that the item changes were saved and that any storefront caching has been refreshed.
Add an External URL to a Storefront Menu
1. Open Storefront Menu Management
Navigate to the storefront menu configuration area.
[SCREENSHOT PLACEHOLDER]
Timestamp: 00:05:15
Description: UltraCart storefront administration showing menu configuration settings.
2. Select the Menu to Edit
Choose the navigation menu where the external link should appear.
[SCREENSHOT PLACEHOLDER]
Timestamp: 00:05:40
Description: Menu editor displaying existing menu items and configuration options.
3. Add a New Menu Entry
Create a new menu item.
[SCREENSHOT PLACEHOLDER]
Timestamp: 00:06:05
Description: Menu editor showing controls for adding a new menu item.
4. Choose Custom Link
Set the menu item type to a custom link.
[SCREENSHOT PLACEHOLDER]
Timestamp: 00:06:20
Description: Dropdown menu displaying menu item types with Custom Link selected.
5. Configure the External URL
Enter:
-
Menu Label
-
External URL
-
Any desired display options
[SCREENSHOT PLACEHOLDER]
Timestamp: 00:06:40
Description: Menu item editor displaying fields for menu title and destination URL.
6. Save the Menu
Save the menu configuration.
[SCREENSHOT PLACEHOLDER]
Timestamp: 00:06:55
Description: Menu configuration page showing the Save button and completed custom link settings.
Verify the Menu Link
After saving:
-
Open the storefront.
-
Locate the navigation menu.
-
Click the newly created menu item.
-
Confirm that it opens the external destination.
[SCREENSHOT PLACEHOLDER]
Timestamp: 00:07:05
Description: Storefront navigation menu displaying the newly created custom link.
Troubleshooting
Hyperlink Does Not Appear in the Item Description
Cause
The description changes were not saved or the link was not inserted correctly.
Solution
-
Reopen the item editor.
-
Verify the text is still linked.
-
Save the item again.
External Link Opens the Wrong Page
Cause
The URL was entered incorrectly.
Solution
-
Edit the hyperlink.
-
Confirm the full URL including
<https://.> -
Save and retest.
Menu Link Does Not Display
Cause
The menu item was not saved or assigned correctly.
Solution
-
Verify the menu item exists.
-
Confirm the menu configuration was saved.
-
Refresh the storefront and test again.
Menu Link Is Not Clickable
Cause
The menu item type was not configured as a Custom Link.
Solution
-
Edit the menu item.
-
Confirm Custom Link is selected.
-
Re-enter the external URL and save.