Introduction
Zapier, an app and data automation tool, moves info between your web apps automatically, so you can focus on your most important work.
03/10/2020 - The UltraCart integration to Zapier is currently in beta. You can connect to our Zapier integration using our public invite.
Navigation: Main Menu → Configuration → (Middle menu) Development > Zapier
The current Zapier integration supports triggers for:
-
Order Placed
-
Order Payment Processed
-
Order Shipped
-
Order Refund
This tutorial will walk you through the process of configuring UltraCart to talk to Zapier which in turn communicates with New Kajabi.
Configuration Steps
First log in to your New Kajabi account. From the dashboard click the "Make a Zap!" button as shown below.

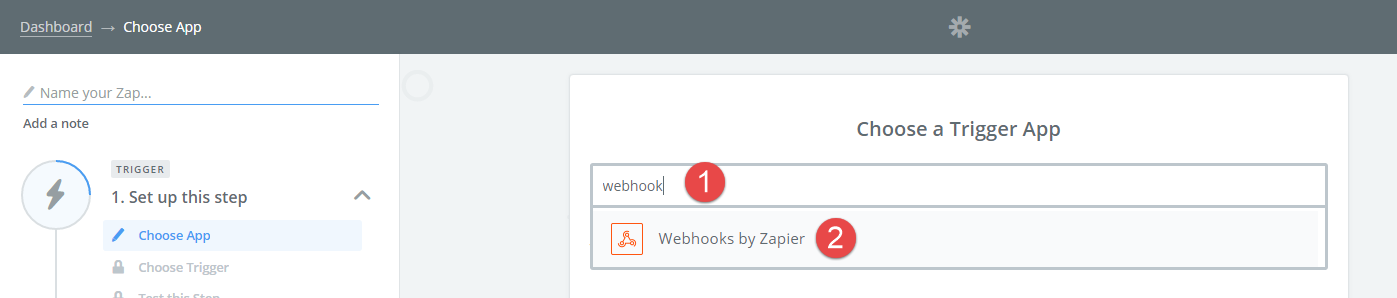
Type in "Webhook" into the search field and click on "Webhooks by Zapier"
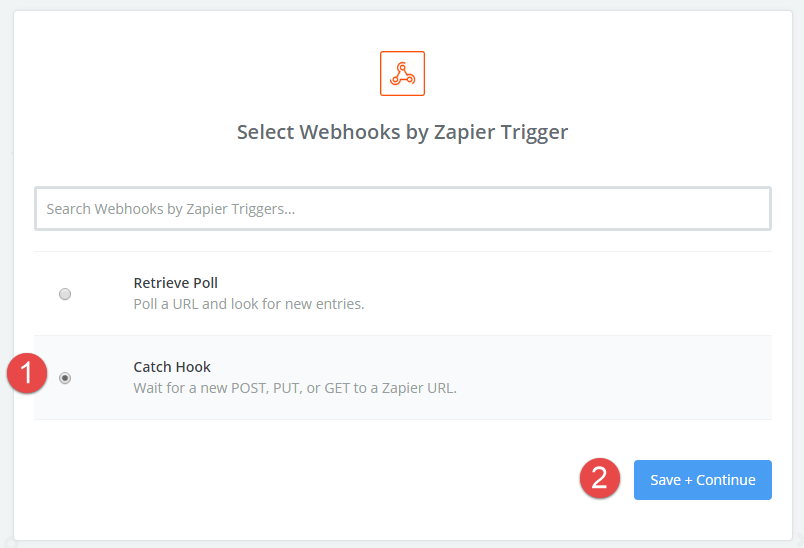
Select "Catch Hook" and click "Save + Continue" as shown below.
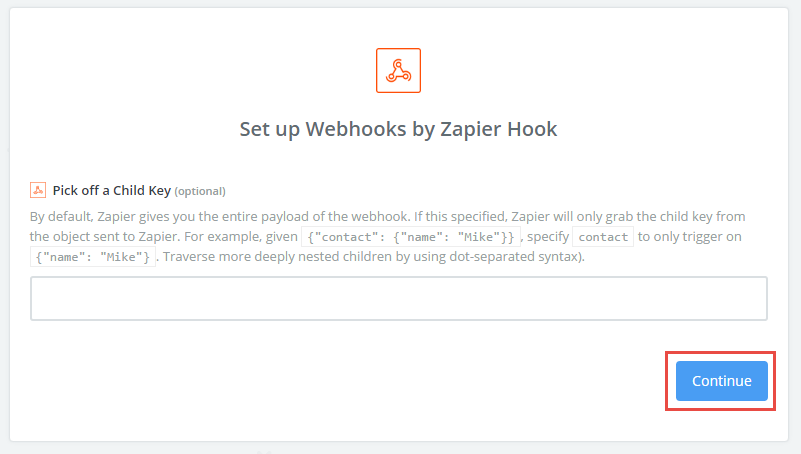
On the next step just click Continue.
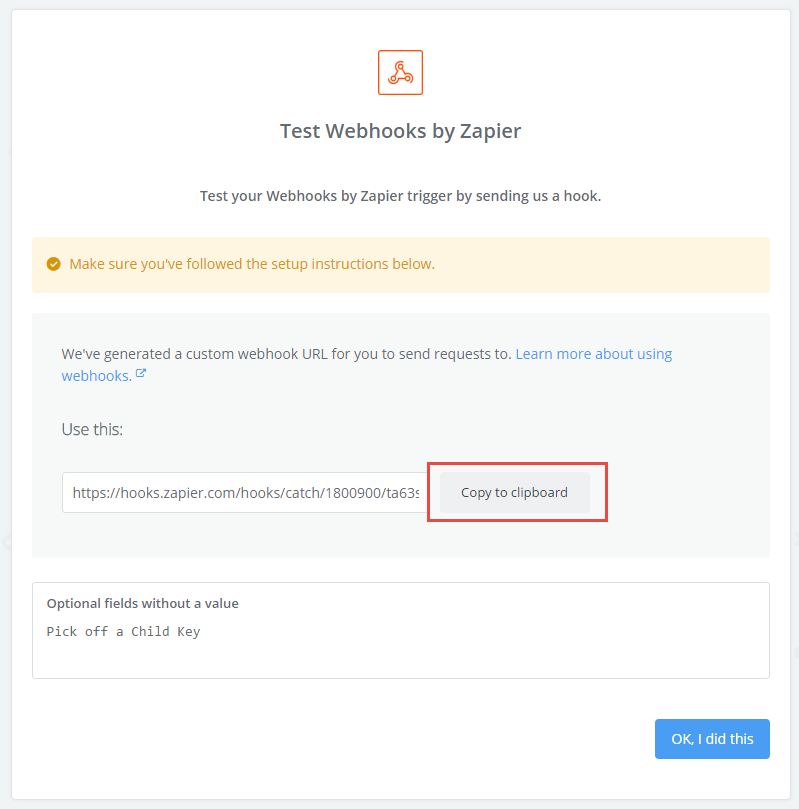
The next page will show you the webhook URL. Click the Copy to clipboard button.
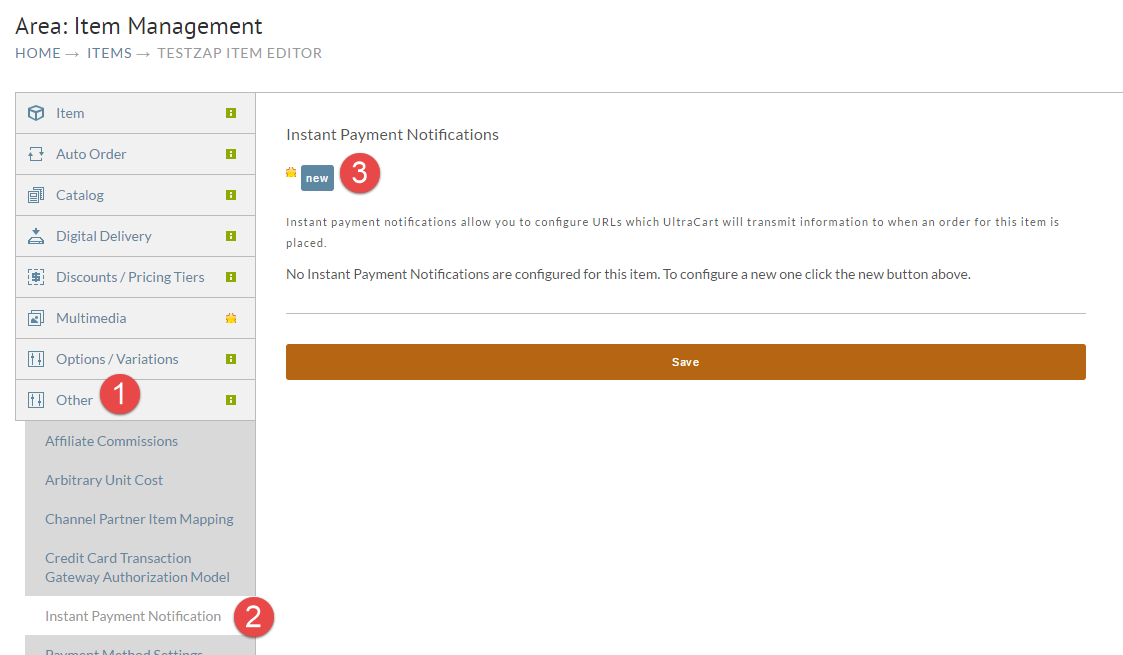
Now that we have the URL for the webhook, we need to go over to the UltraCart item editor and configure an instant payment notification to contact this URL. In the item editor click on Other → Instant Payment Notification → new as shown below.
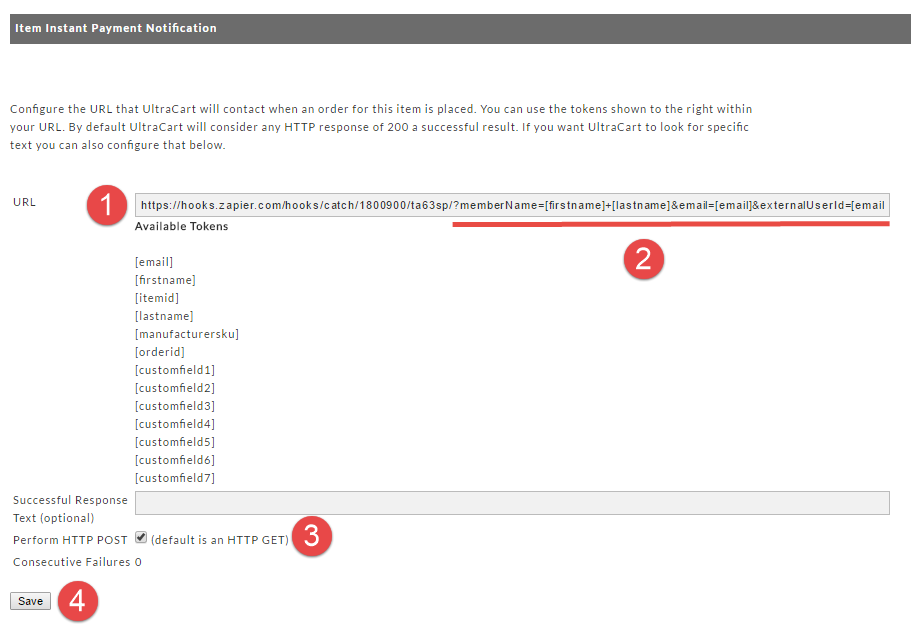
In the next dialog paste in the Zapier URL and then append the following to the URL:
Parameters for Zapier Webhook URL
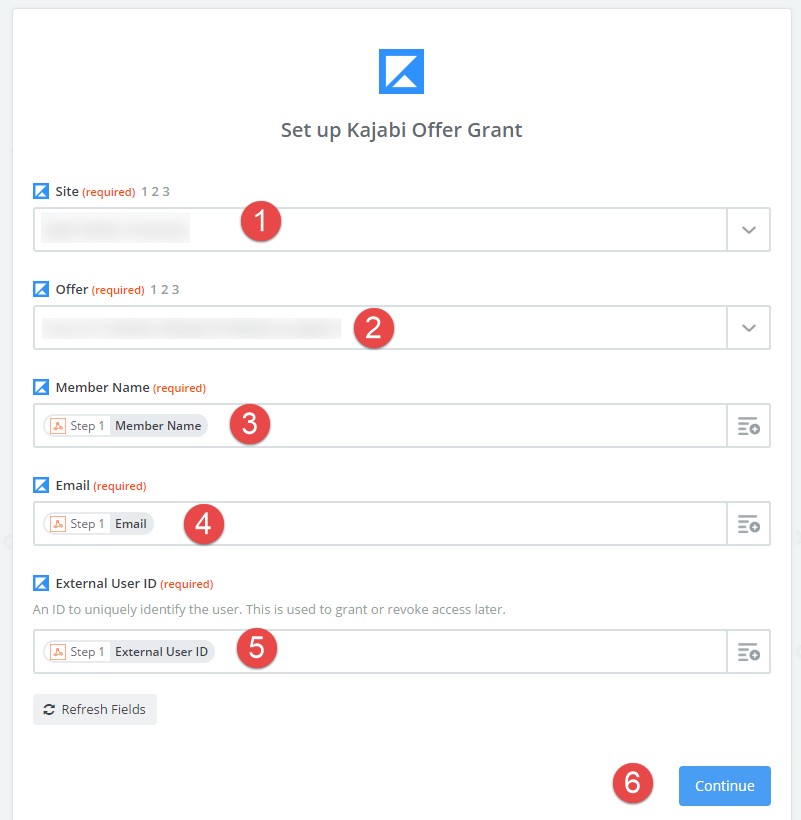
?memberName=[firstname]+[lastname]&email=[email]&externalUserId=[email]
Now you need to place a test order for this item and make sure the payment is processed.
You can not proceed with the tutorial until this test order has been placed. Zapier needs the sample post from this notification to continue the configuration on their side.
HTTP POST vs. HTTP GET
This setting is dependent upon the target server. In this case, Zapier wants the date trtansmitted via the "HTTP POST" method, which inserts the date into the body of the transmission, whereas the get method places the data onto the URL. (We show an URL by default, clicking the checkbox for the "HTTP POST" tells ultracart to convert the transmission to the HTTP POST" format.
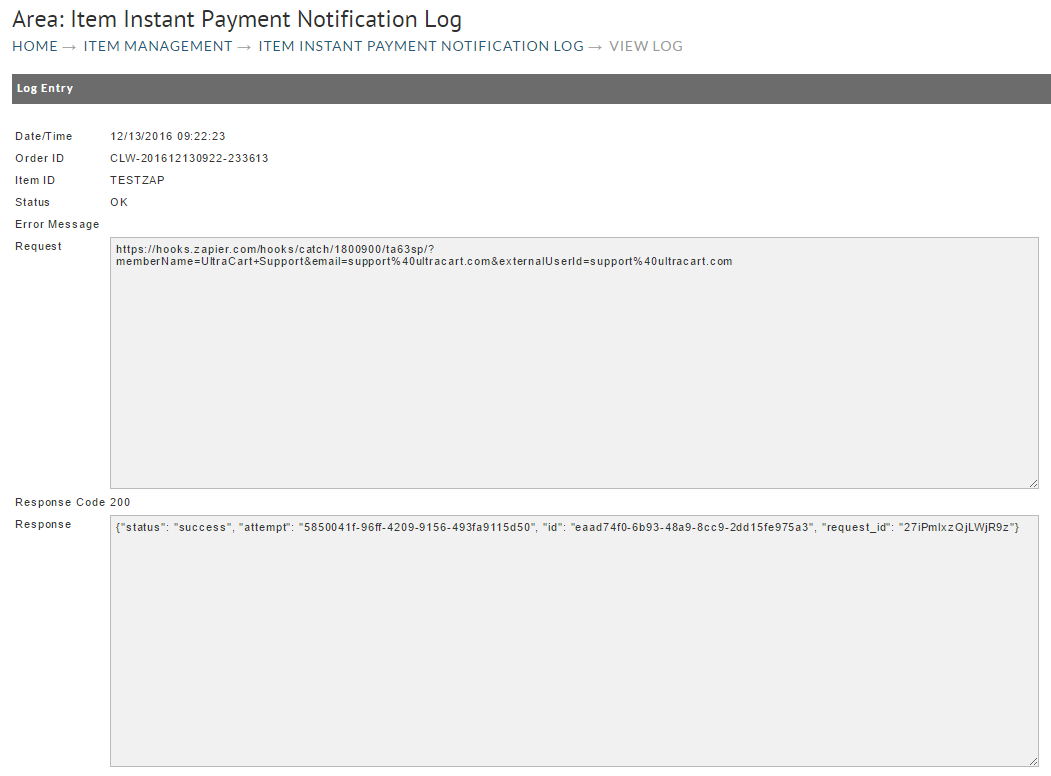
Once you've completed your test order, if you look at the log associated with this instant payment notification it should look like this:
Back in the Zapier screen click the "OK, I did this" button as shown below.
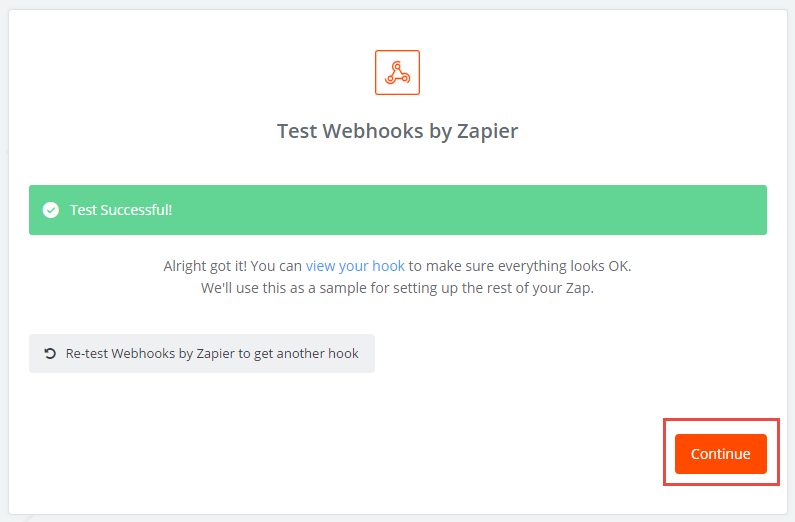
Zapier will display a Test Successful screen. Click Continue.
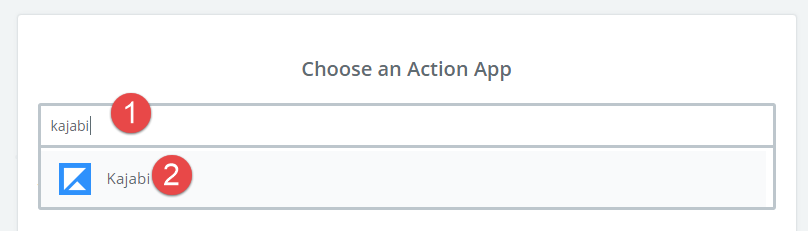
In the Action App section search for Kajabi and then click their icon as shown below.
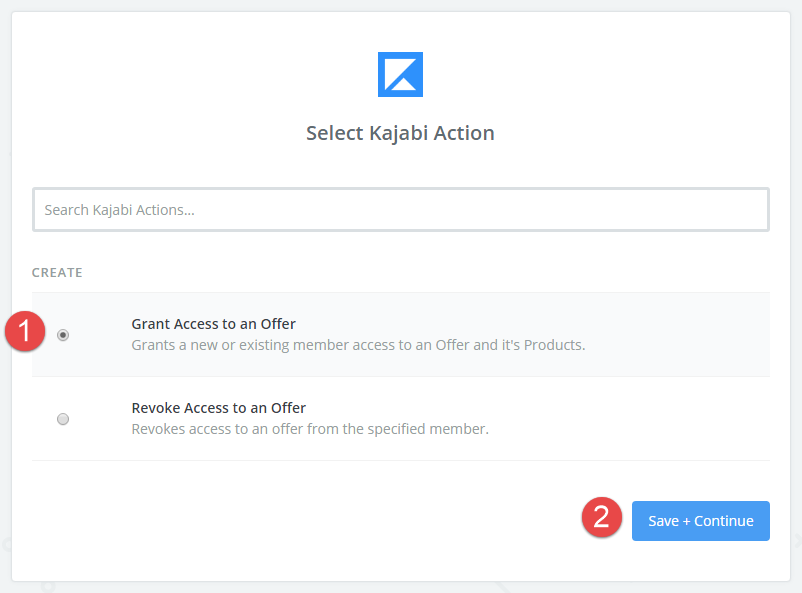
Choose Grant Access to an Offer and click Save + Continue
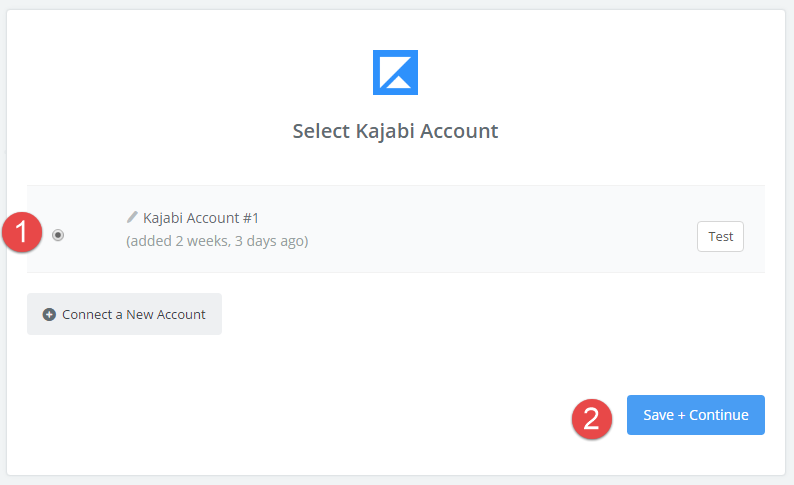
Select the Kajabi account and then click "Save + Continue"
Setup the Kajabi Offer Grant as shown below.
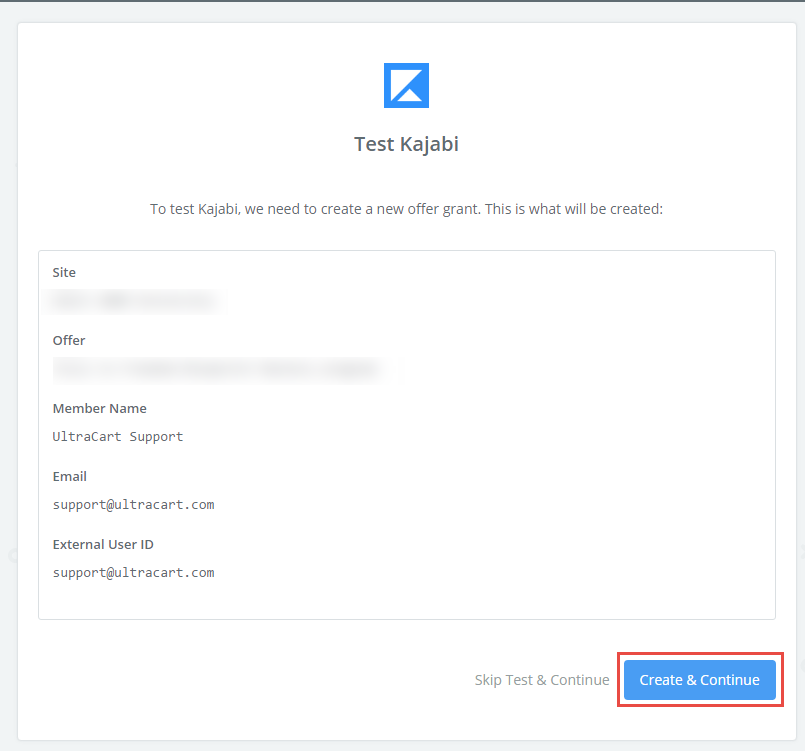
Click on the Create & Continue button.
Name your ZAP and turn it on.
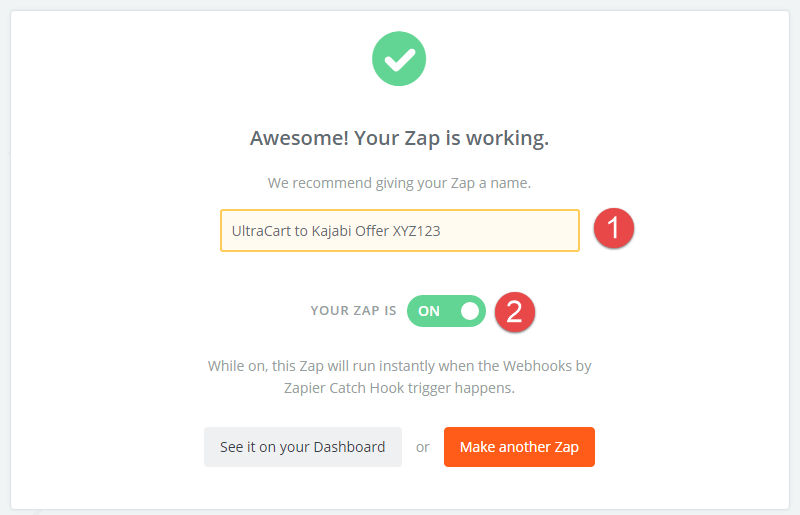
Congratulations! You have just connected an item from UltraCart to your Kajabi account.