Create and manage a blog
A blog on a StoreFront is a page, not a separate feature, and the posts live on their own screen. So the work splits in two: you create the blog page in StoreFronts → Pages, then you write posts in StoreFronts → Blogs and decide which blog each one appears on.
You can run as many blogs as you like on one storefront. See StoreFront Blogs for what the feature covers.
Create a blog page
A blog sits inside your existing page hierarchy, alongside product groups and item pages, so you can put one anywhere:
/products/shirts/mens/
/products/shirts/womens/
/myblog/
/mysecondblog/
/products/shirts/deeplynestedthirdblog/
-
Go to Main Menu → StoreFronts → [select your storefront] → Pages and create a new page where you want the blog to appear.
-
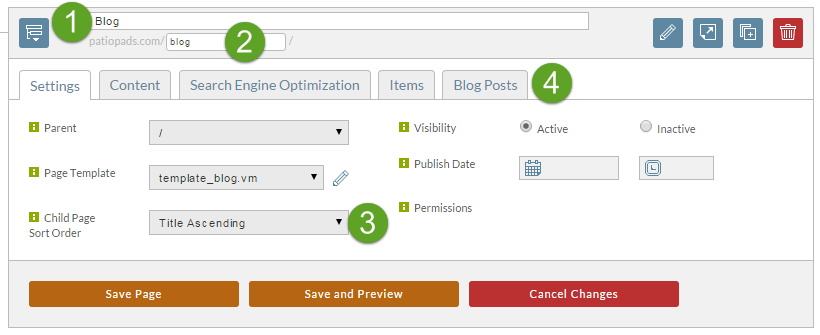
Set the page title and the page directory.
-
Select template_blog.vm as the page template. The Blog Posts tab does not appear until you do.
-
Open the Blog Posts tab.
-
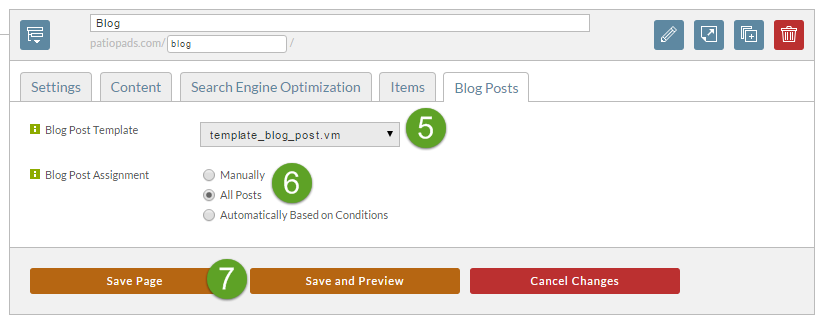
Select template_blog_post.vm, which renders the individual posts.
-
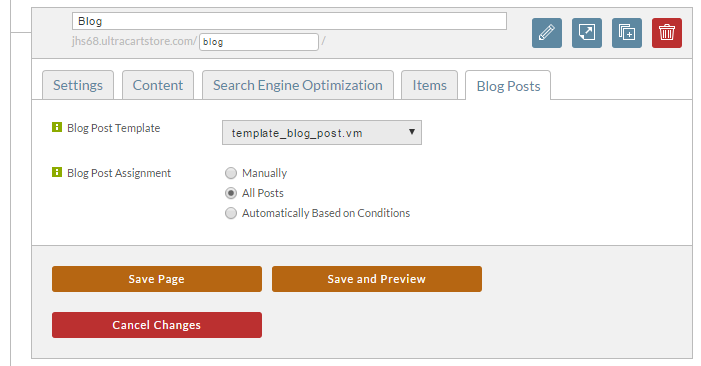
Choose how posts get onto this blog. If you only plan to run one blog, select All Posts.
-
Save the page.
If the Blog Posts tab never appears after you select template_blog.vm, your active theme
does not support blogs. Contact your theme developer to request support.
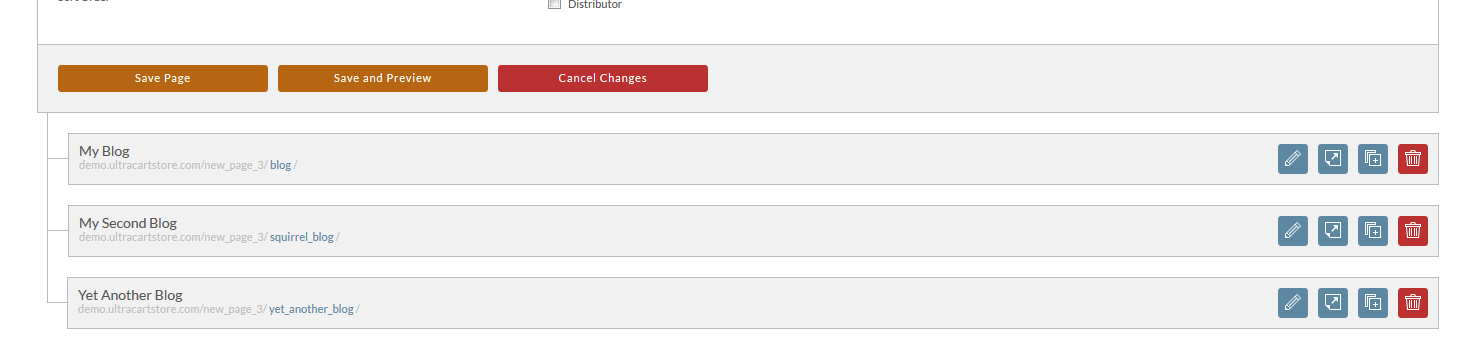
To run a second blog, repeat the whole procedure on another page. There is no separate setting for multiple blogs, and no limit on how many you create.
Write a post
Posts are created on the Blogs screen, not in the page editor.
Add your authors first. Open Blog Settings and create them there, because you will be asked to pick an author while writing the post.
-
Go to Main Menu → StoreFronts → [select your storefront] → Blogs.
-
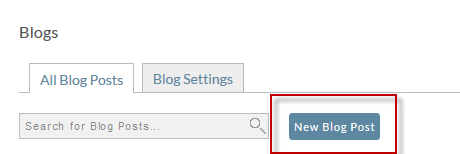
Select New Blog Post.
-
On the Content tab, fill in:
Field What to put in it Title Generates the post's URL automatically. Keep it descriptive and distinct. The maximum is 1000 characters, but 50 to 100 makes a URL someone can paste into an email. Main Body The article itself. Excerpt The short summary shown on the blog page when several posts are listed. Keep it brief. Tags Categories for the post, separated by commas. Tags also drive automatic post assignment, so a tag you invent here can route the post to a blog later. Author Picked from the authors you created in Blog Settings. 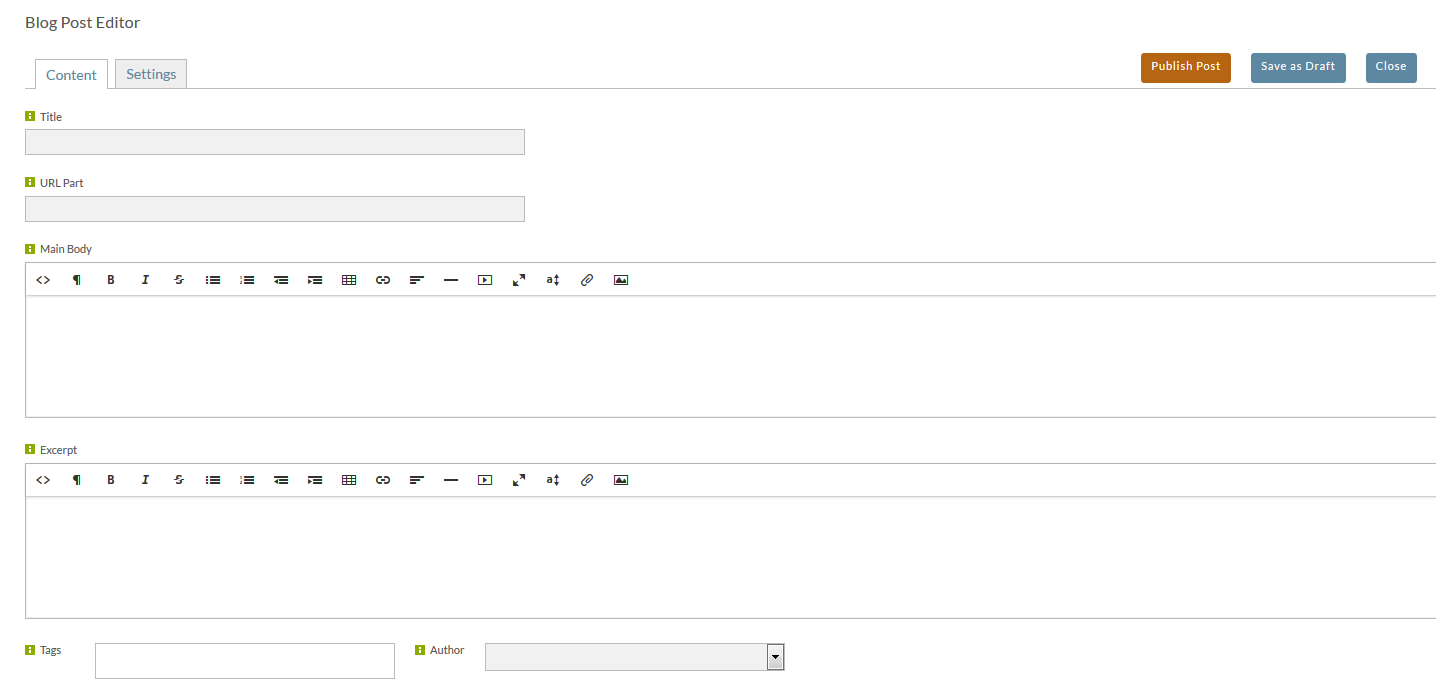
Add images and video
The body accepts multimedia through either editor. The WYSIWYG editor has two multimedia tools in its toolbar:
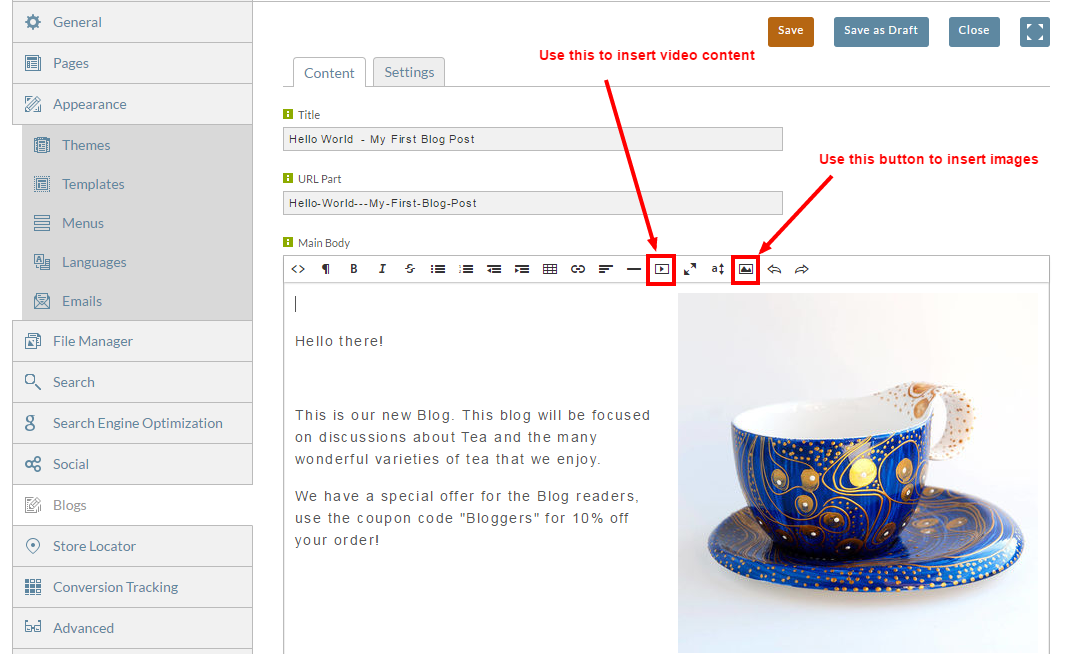
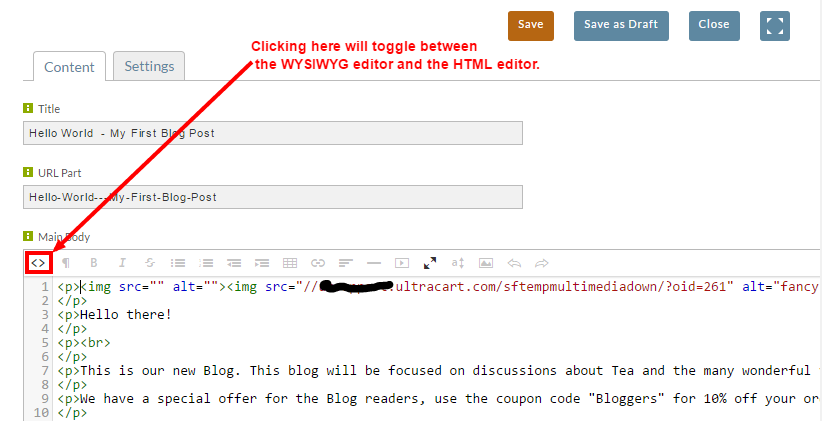
To edit the raw markup instead, select the <> button at the far left of the toolbar:
Set visibility and publish date
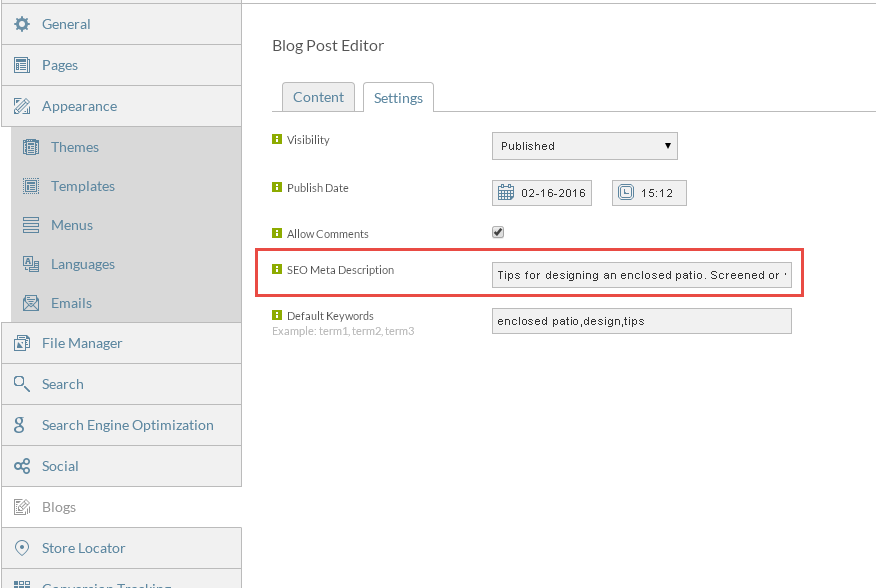
On the Settings tab you control when the post appears and who can see it. Visibility is Draft, Published, or Logged in Customers Only. The last one hides the post from anyone who is not registered and signed in.
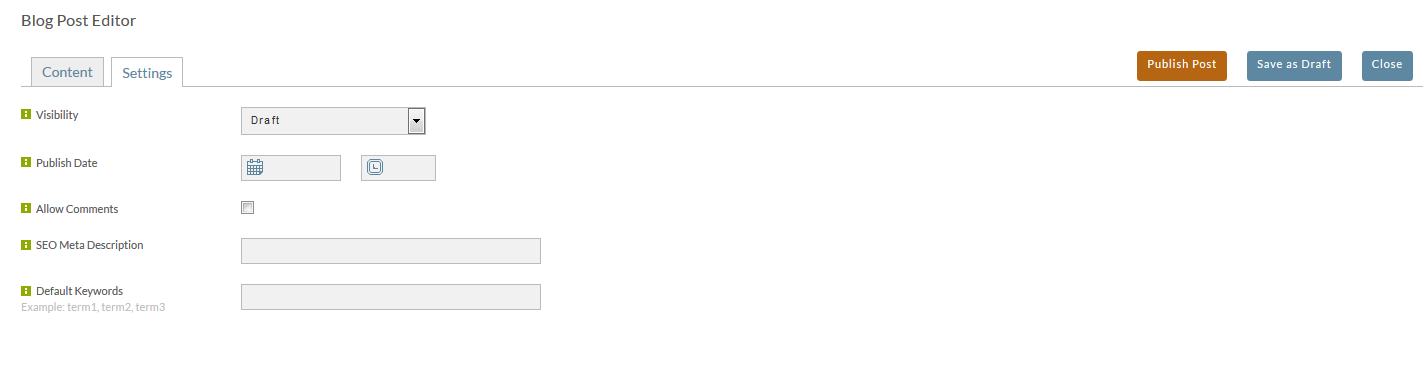
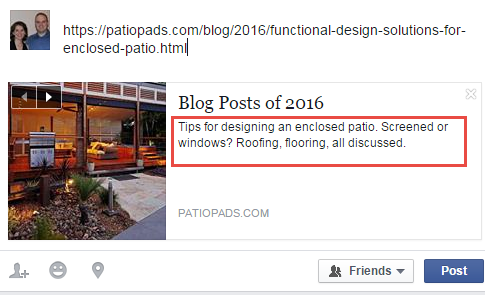
Fill in the SEO Meta Description on every post. When anyone shares the post on Facebook, that field becomes the text of the link post, alongside an image the sharer picks. A post without one shares badly.
Decide which posts a blog shows
The Blog Post Assignment setting on a page's Blog Posts tab has three options.
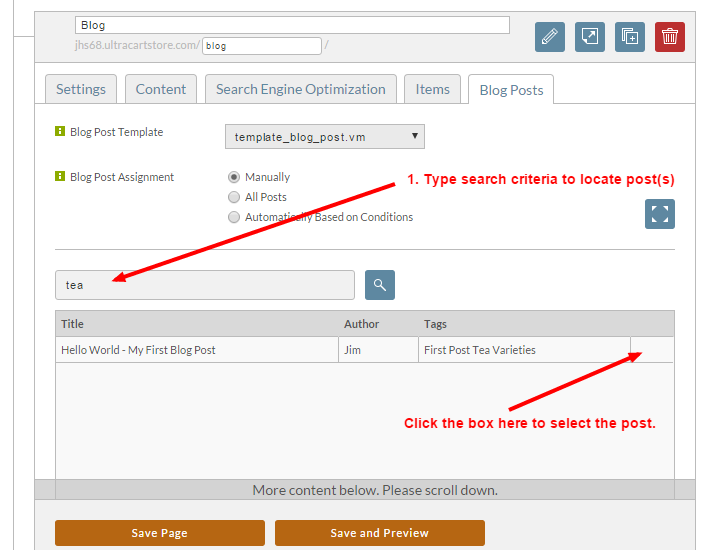
Manually
Search the posts, then select the checkbox at the far right of each post you want on this blog.
All Posts
Every post on the storefront appears on this blog. This is the right choice when you only run one.
Automatically based on conditions
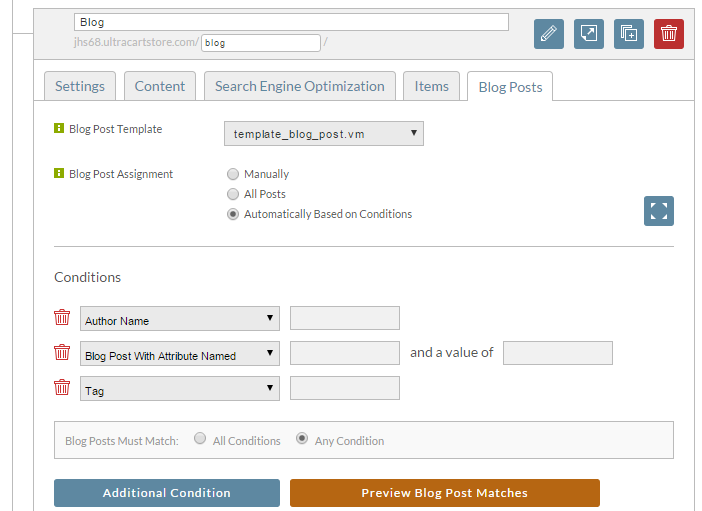
Posts land on the blog when they match rules you set, which means posts you write later get routed without you touching the page again. There are three conditions:
-
Author Name assigns every post by a given author.
-
Blog Post with Attribute Named assigns posts carrying a named attribute. Attributes come from the blog post template: if the template declares one, it appears as a field on the post editor. Declare an attribute such as
Couponin the template, set it on your discount posts, and a promotions blog can then collect them by itself.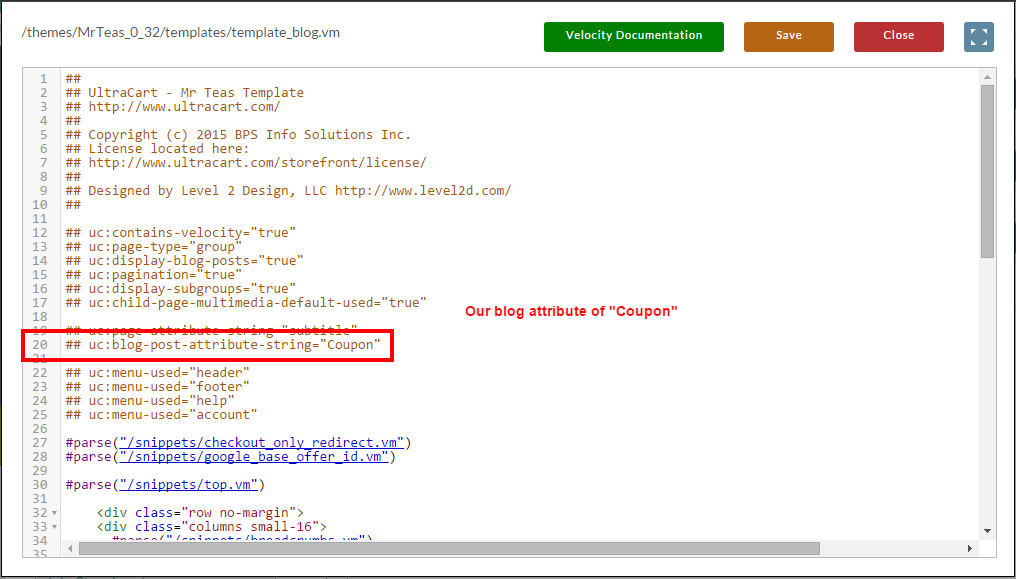
-
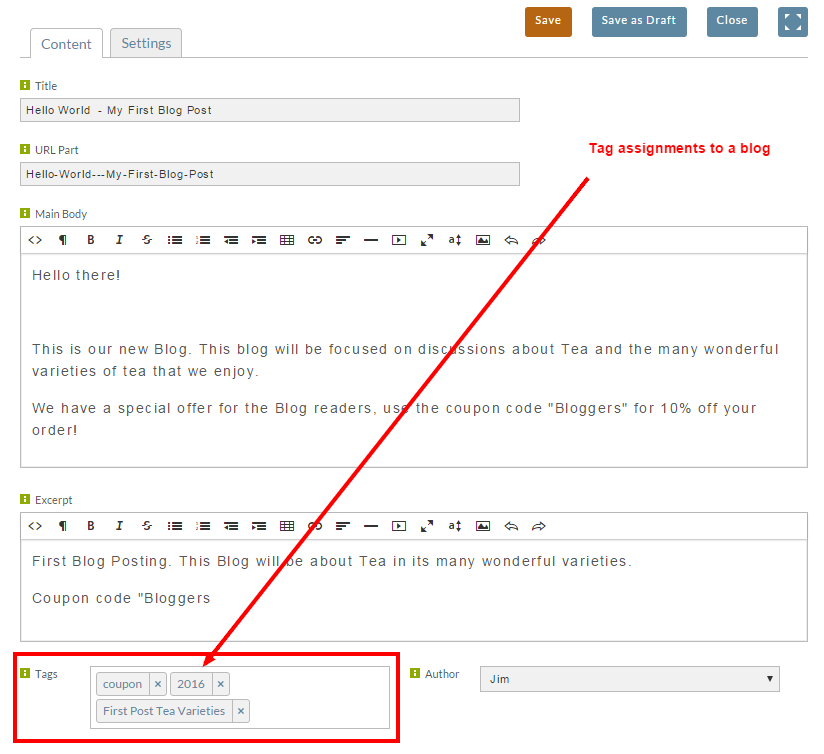
Tag assigns posts carrying a tag. Tags are set in the post editor, which makes this the quickest of the three to set up.
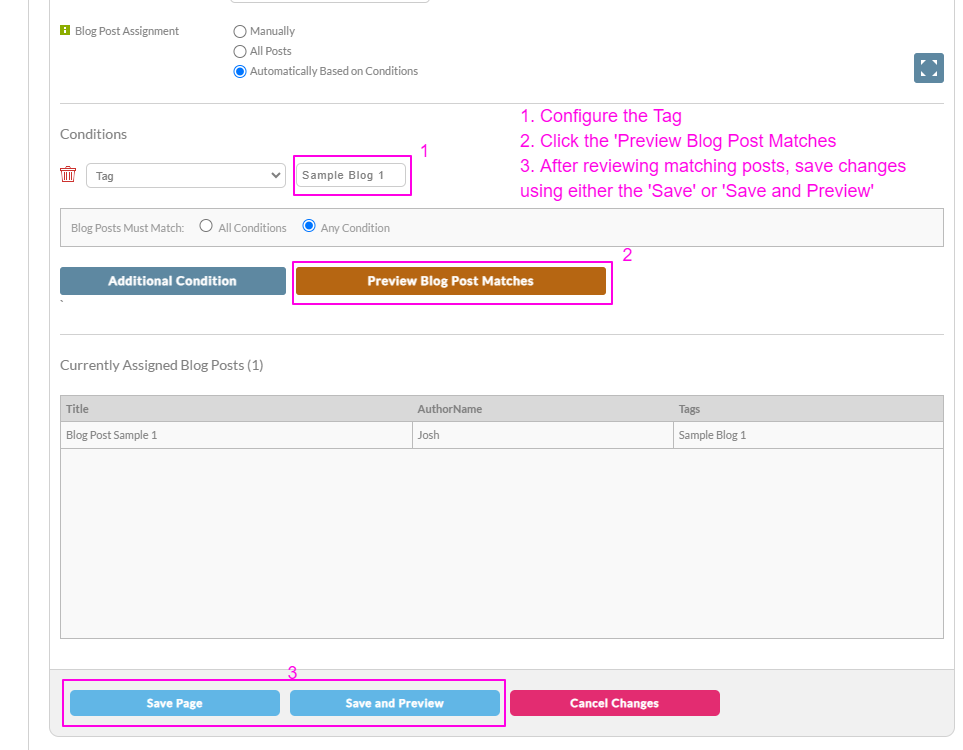
You can combine conditions, and Blog Posts Must Match decides whether a post has to satisfy All Conditions or Any Condition. Preview Blog Post Matches shows what your rules currently select before you save.
Sending a post to one blog and not another
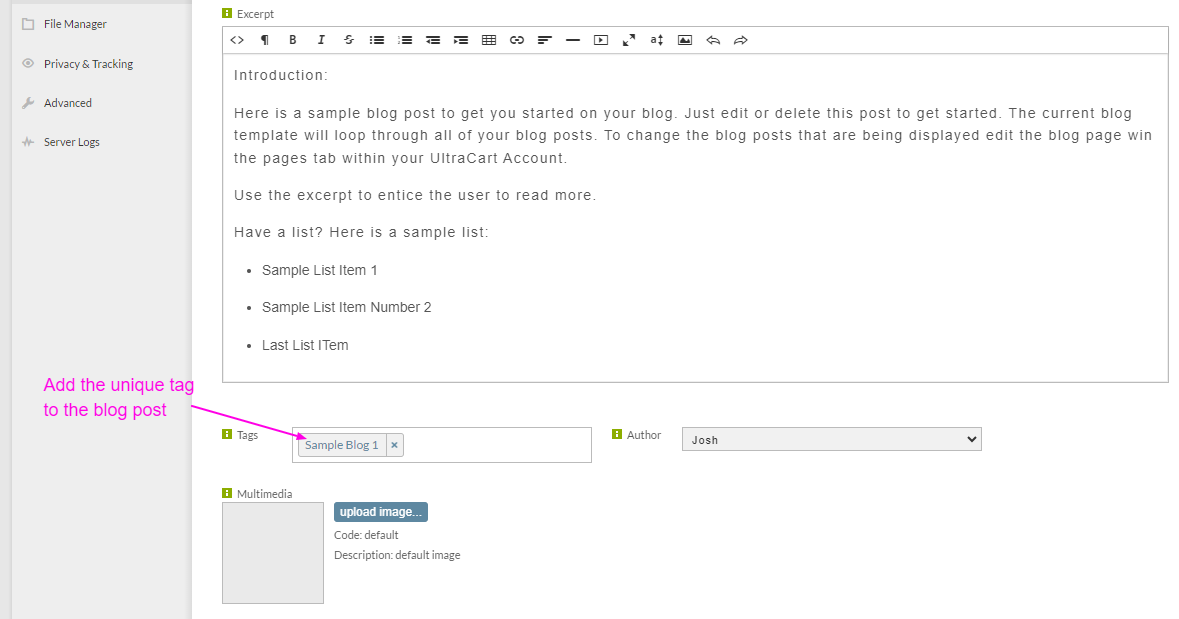
A post can belong to one blog, several, or none. When you run two blogs and want a post on only one of them, give it a tag or attribute unique to that blog and use it as the condition.
Edit several posts at once
-
Go to the Blogs screen.
-
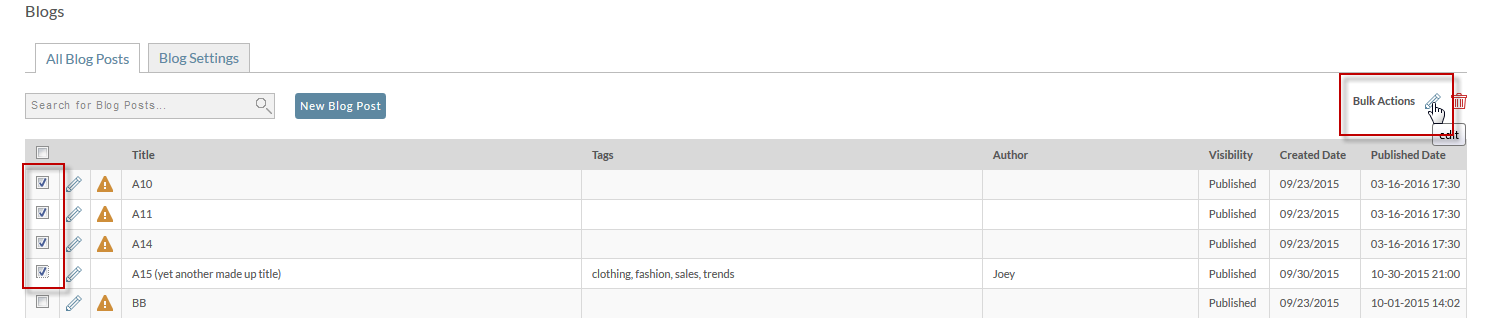
Select the posts you want to change.
-
Select Edit.
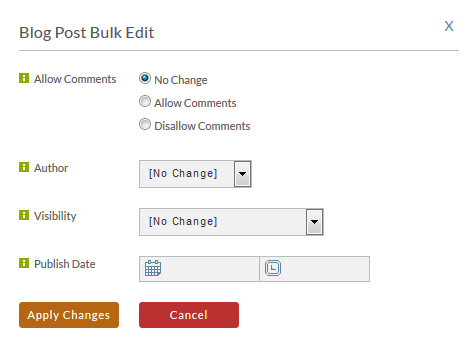
The dialog changes comment behavior, author, visibility, and publish date. You can change any combination in one action. Select Apply Changes when you are done.
Turn on comments with Disqus
Disqus is a third-party comment system that UltraCart uses for StoreFront blog comments. It is free for this purpose, and once configured, comments appear below every post automatically.
Setup takes about two minutes.
Register with Disqus
-
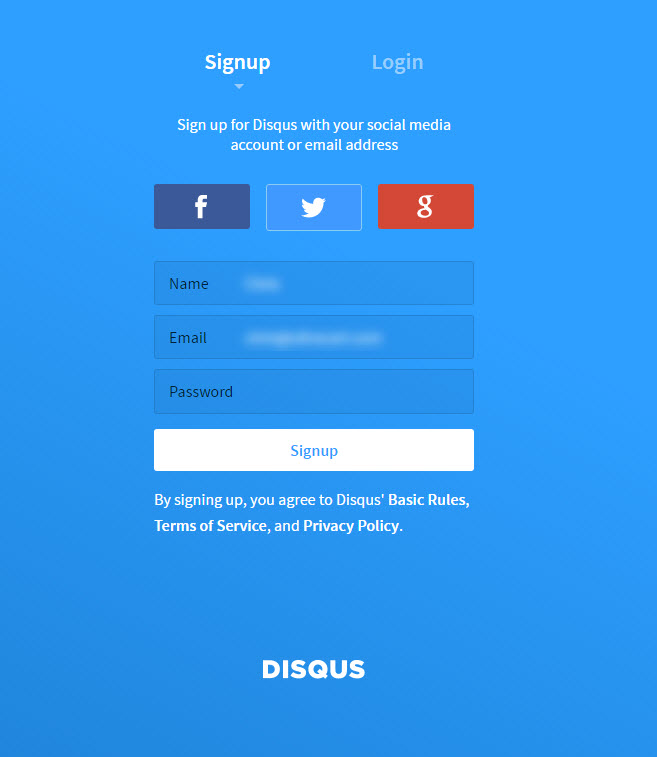
Go to disqus.com and select Sign Up.

-
Provide your name, email, and password.
-
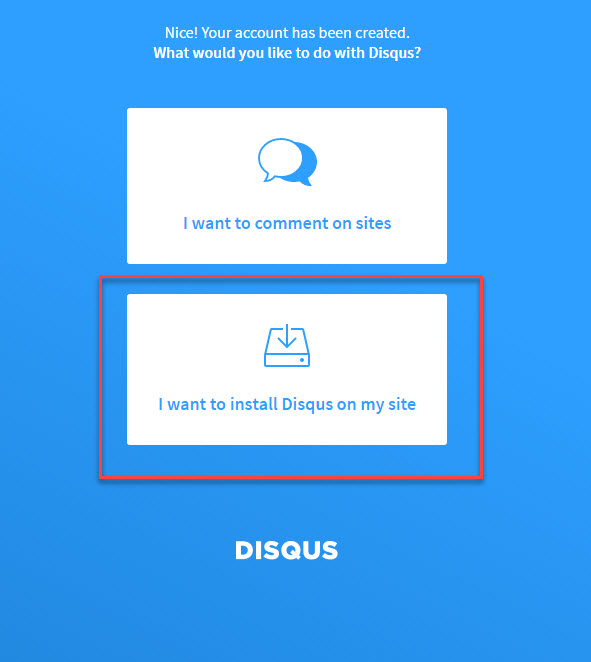
Choose I want to install Disqus on my site.
-
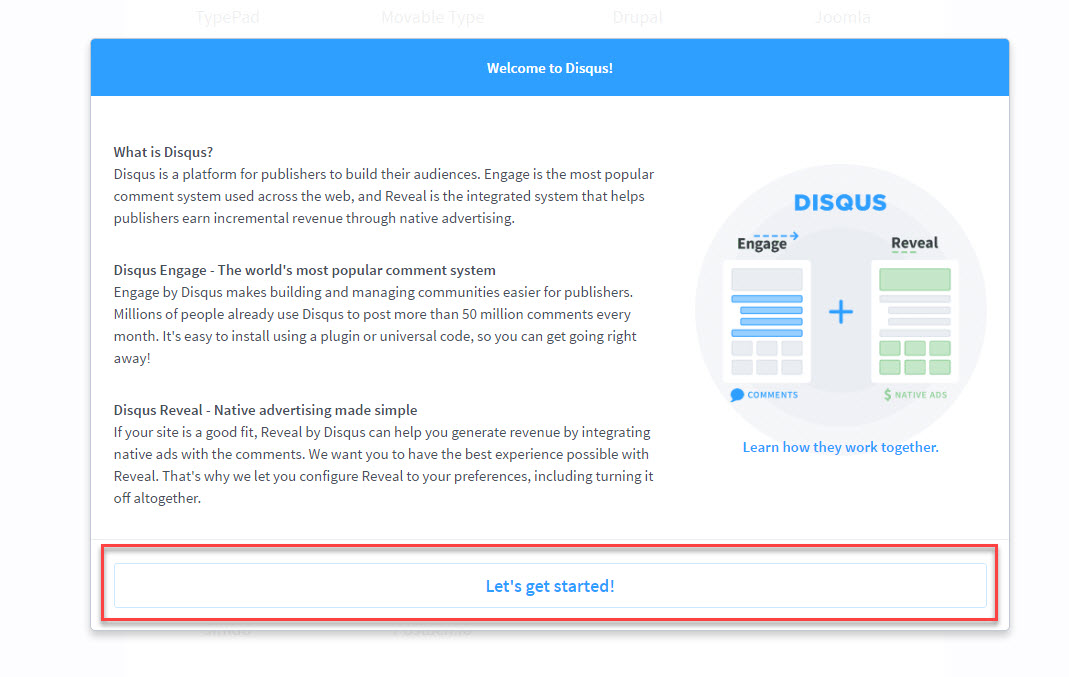
Select Let's get started.
-
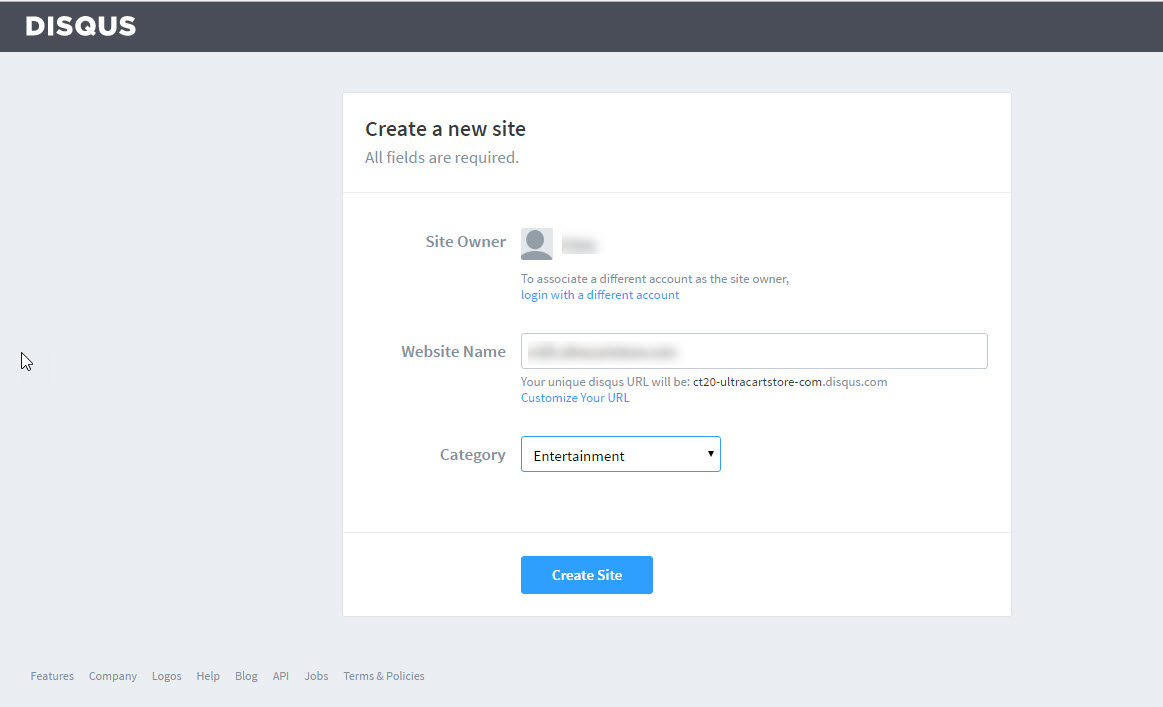
Enter a site name and a shortname. The shortname is the value that ties your Disqus account to your blogs, so note it down.
Enter the shortname in UltraCart
The shortname goes in once, at the blog settings level. It does not need repeating on each blog or each post. UltraCart identifies each post to Disqus on its own, using an internal id plus the post title, so comments are easy to find in the Disqus tools.
-
Go to Main Menu → StoreFronts → [select your storefront] → Blogs.
-
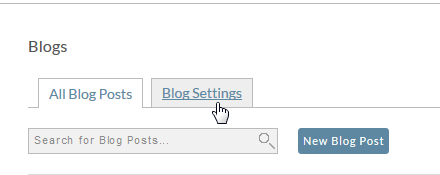
Open Blog Settings.
-
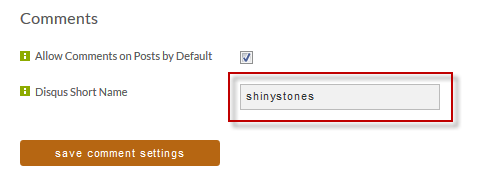
Select Allow Comments.
-
Enter the shortname.
-
Select Save comment settings.
Your blog now accepts comments. Moderate them from the Disqus moderation settings.
What to do next
- Add your blog to your menu so readers can find it.
- StoreFront Blogs covers RSS feeds, scheduling, and how posts appear in Page Search.