Creating a Contact Capture Form in UltraCart StoreFronts
Last Updated: July 7, 2026
Overview
This guide walks through building a contact capture form on a UltraCart StoreFront page — suitable for use cases like a Due Diligence intake form, a Meeting Request form, or any lead capture scenario that does not involve a purchase.
When a visitor submits the form, UltraCart emails the captured fields to one or more designated recipients. Submissions can also be tied to CRM contact records once your CRM setup is in place.
What you will build: A Due Diligence intake page at a clean custom URL (e.g., /due-diligence) with fields for name, email, phone, and a message — configured to email submissions to your team.
Prerequisites
-
Access to the UltraCart admin panel at secure.ultracart.com
-
An active StoreFront configured for your account
-
At least one UltraCart user with the Customer Feedback email notification enabled (required to receive form submission emails)
Note: To enable Customer Feedback notifications for a user, go to Configuration > Users, select the user, and check Customer Feedback under Email Notifications.
Create a New StoreFront Page
-
From the UltraCart admin main menu, navigate to StoreFronts.
-
Select the StoreFront you want to add the form to.
-
Click Pages in the left sidebar.
-
Click Add Page.
-
Give the page a name (internal label only — e.g.,
Due Diligence Form).
Set a Custom URL Slug
The URL slug is the portion of the address after your domain. Keep it short, lowercase, and hyphen-separated.
-
In the page settings, locate the URL / Path field.
-
Enter your desired slug — for example:
due-diligence -
The resulting URL will be:
https://yourdomain.com/due-diligence
Guidelines for slugs used in marketing:
-
Use hyphens, not underscores (
due-diligencenotdue_diligence) -
Keep it under 30 characters
-
Avoid version numbers or dates — these URLs may appear in print materials and should remain stable
Add the Form to Your Page
UltraCart StoreFront pages are built using the Email Form Wizard or via direct template editing. The Email Form Wizard is the recommended starting point.
-
From the page editor, open the Email Form Wizard (found under Content or Widgets depending on your theme).
-
The wizard will insert a pre-built form block into your page.
Important: The Email Form Wizard generates a form that emails submissions to recipients you configure. It does not write to a database by default. If you need a searchable submission history, configure CRM contact creation as an additional step.
Configure Form Fields
The visual builder form block uses LABEL elements — each LABEL contains both the visible label text and a child INPUTTEXT (or INPUTTEXTAREA) element. To add a field, duplicate an existing LABEL from the Hierarchy panel's ... context menu, then update the label text and input settings.
The Due Diligence form uses the following field configuration:
| Label Text | Input Name | Input Type | Required |
|---|---|---|---|
| Name | name | Text | Yes |
replyTo | Yes | ||
| Phone Number | phone | Text | No |
| How did you hear about us? | how_did_you_hear | Text | No |
| Message | (textarea) | Textarea | No |
Note: UltraCart's visual builder INPUT TYPE options are: Text, Email, Number, Password, URL. There is no tel type — use Text for phone number fields.
To add a field using the Hierarchy panel:
-
Open the Hierarchy panel from the right sidebar.
-
Expand the form's CONTAINER-CONTACT-FORM > SECTION > ROW > COLUMN > FORM.
-
Click
...next to an existing LABEL and choose DUPLICATE. -
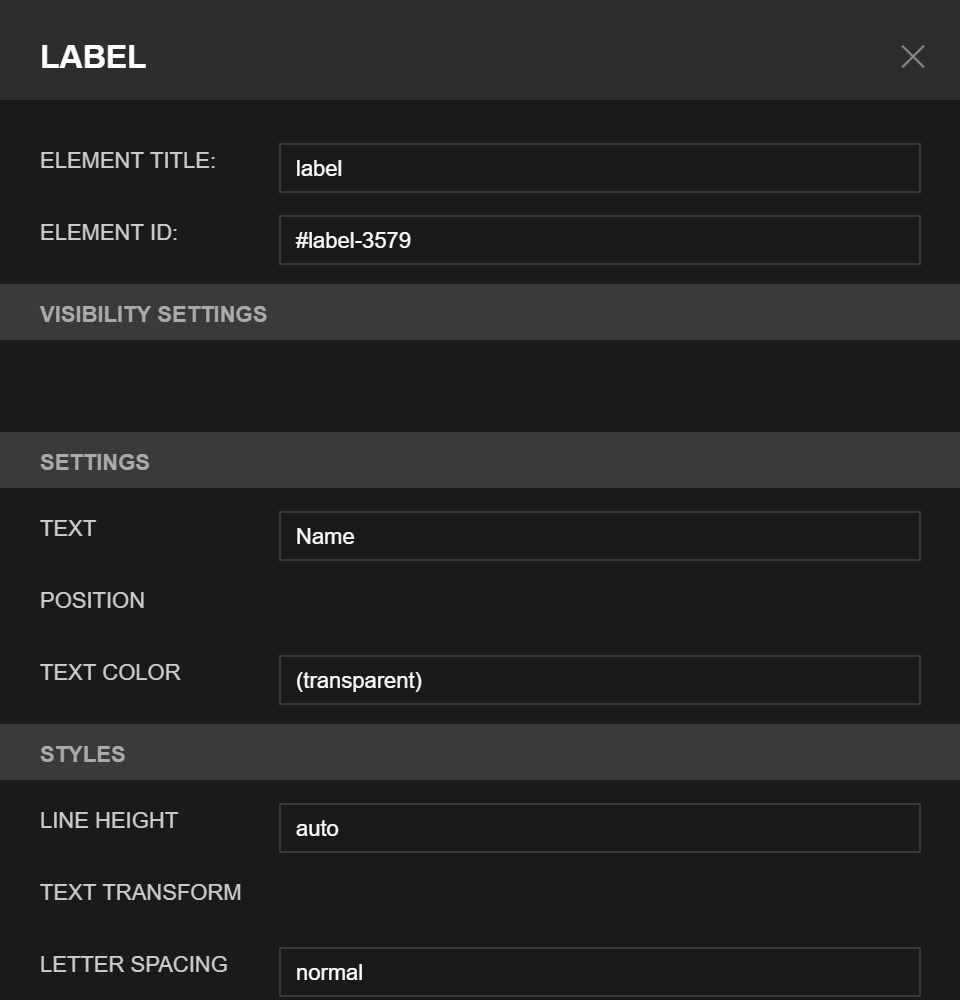
Select the new LABEL and update its TEXT setting (the visible label). Click the gear icon on the selected LABEL to open its settings panel.
-
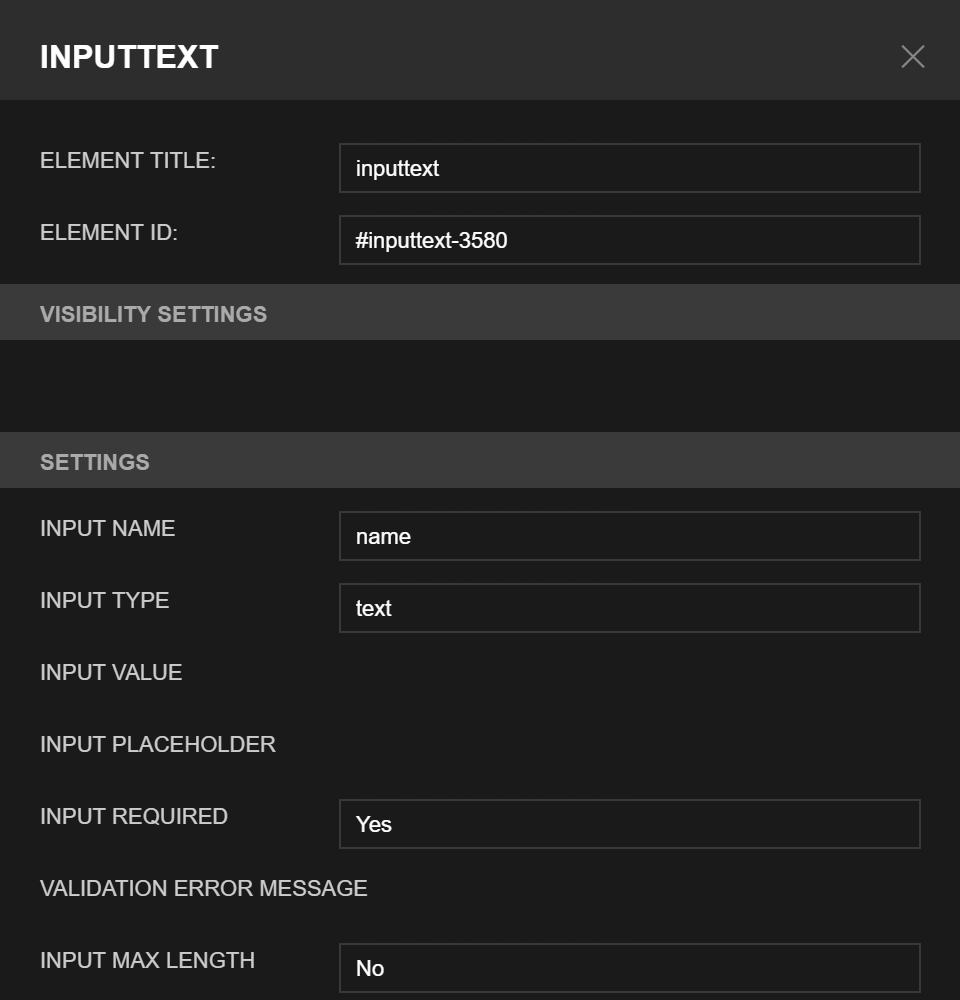
Expand the LABEL and select its child INPUTTEXT to update INPUT NAME, INPUT TYPE, and INPUT REQUIRED.
The LABEL settings panel — the TEXT field sets the visible label text displayed above the form input:
The INPUTTEXT settings panel — INPUT NAME maps to the email field name, INPUT TYPE controls validation, and INPUT REQUIRED marks the field as mandatory:
For the Meeting Request form variation, add a second set of contact fields for cases where the submitter is requesting a meeting on behalf of multiple people. Use distinct input names (e.g., name2, replyTo2, phone2).
Set Up Email Notifications
-
In the form block settings, locate Notification Settings (or Email Settings).
-
Set the Email Subject — for example:
Due Diligence Form Submission. -
Under Recipients, select the UltraCart user(s) who should receive submission emails.
-
Set the Redirect URL — the page the visitor is sent to after submitting. Recommended: a simple thank-you page.
Tip: Send a test submission to yourself before publishing to confirm the email arrives and the field values are formatted as expected.
Publish and Test
-
Click Save to save your page draft.
-
Click Publish to make the page live.
-
Navigate to your form URL in a private/incognito browser window and submit a test entry.
-
Confirm you receive the notification email with all submitted field values.
Troubleshooting
I am not receiving submission emails
Symptoms: Form submits successfully but no email arrives.
Root Cause: The recipient user does not have Customer Feedback notifications enabled, or no recipient is configured.
Solution: Go to Configuration > Users, select the user, enable Customer Feedback under Email Notifications, then re-check the form's recipient list.
The form URL returns a 404
Symptoms: Navigating to the custom slug returns a page not found error.
Root Cause: The page has not been published, or the slug contains a typo.
Solution: Return to StoreFronts > Pages, verify the slug matches what you are entering in the browser, and confirm the page status is Published.
The redirect after submission is not working
Symptoms: After submitting, the visitor sees a blank page or an error.
Root Cause: The redirect URL is empty or points to an invalid path.
Solution: In the form's Notification Settings, set the Redirect URL to a valid page on your StoreFront (e.g., /thank-you).
Related Documentation
-
Email Form Wizard - Built-in form creation tool
-
Programming Forms and Fields in a StoreFront Template - Custom field configuration via template editing
-
StoreFront Overview - StoreFront platform documentation
-
StoreFront FAQ - Common questions