DNS at your registrar
Overview
After UltraCart issues your certificate, it emails you the DNS values your domain needs. You enter those wherever your DNS is managed, which is usually your domain registrar. Until you do, the domain does not reach your StoreFront.
Two records matter for a full domain:
| Record | Set it to | Notes |
|---|---|---|
Root, shown as @ or the bare domain | The numeric IP address from your DNS setup email | Root records cannot be a CNAME, so this one is an A record |
www | The MID.ultracartssl.com CNAME target from the same email | MID is your merchant ID |
If you are pointing only a subdomain such as secure.yourdomain.com or shop.yourdomain.com,
create just that one record rather than touching the root.
Set the TTL to a custom value of 600 seconds before you make the change. A shorter TTL means DNS reacts faster if you need to correct something, which matters most on the day you cut over.
Turn off Cloudflare's DNS proxy. UltraCart does not support proxying through Cloudflare. Point the CNAME directly at UltraCart, or UltraCart reports the DNS as misconfigured even though Cloudflare's interface shows it as correct.
Find out who manages your DNS
If UltraCart has emailed you asking for a DNS record and you are not sure who to ask, the WHOIS record for your domain tells you. It lists the registrar and the name servers currently answering for the domain, which is who controls DNS.
DNS is usually managed in one of two places:
- Your domain registrar, such as Network Solutions or GoDaddy
- Your hosting company
Look up your domain at whois.icann.org and scroll past the registrant and administrative contacts to the name servers, or to the "Registration Service Provider" line. That is the company to log into.
If you are not comfortable editing DNS, call that provider's support line and read them the values from your UltraCart setup email. You can find them again under Main Menu → Configuration → Checkout → SSL Certificate (Custom) with Advanced View enabled.
GoDaddy
-
Sign in at GoDaddy.com.
-
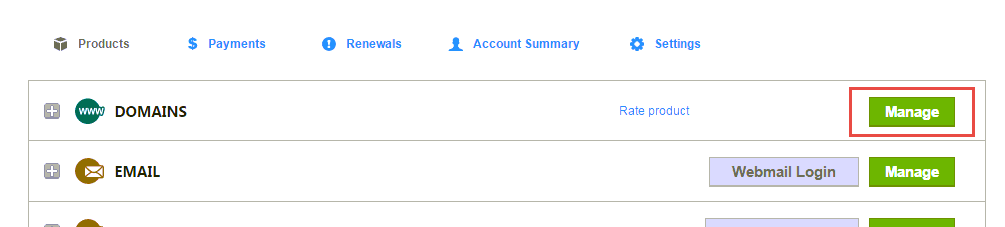
Click Manage on the Domains section.
-
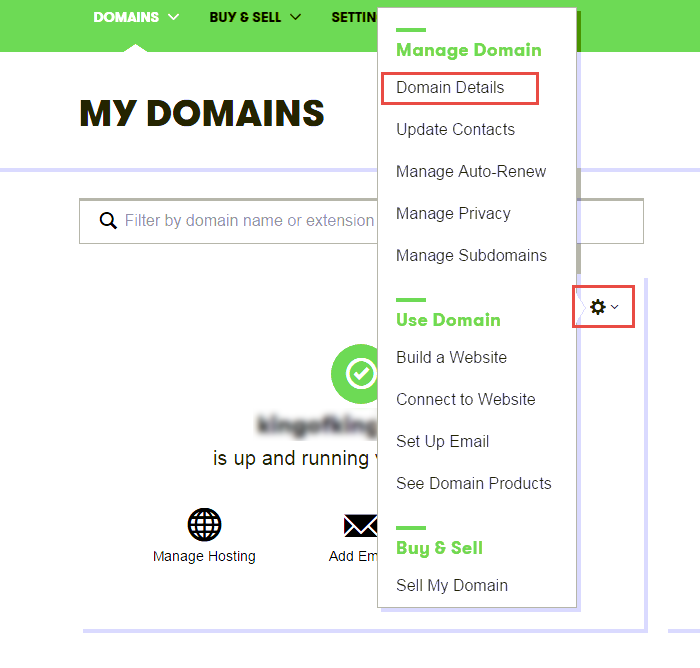
Click the settings gear for your domain, then Domain Details.
-
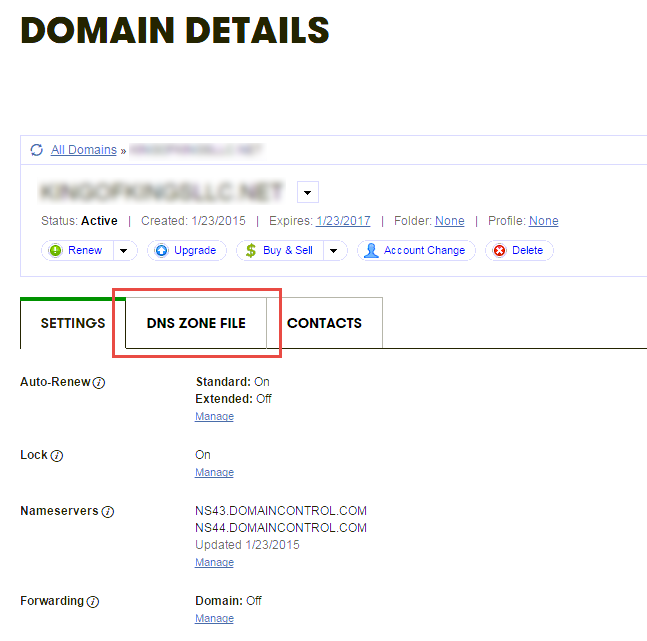
Click DNS Zone File.
-
Locate the
@record and thewwwCNAME and click the pencil icon on each.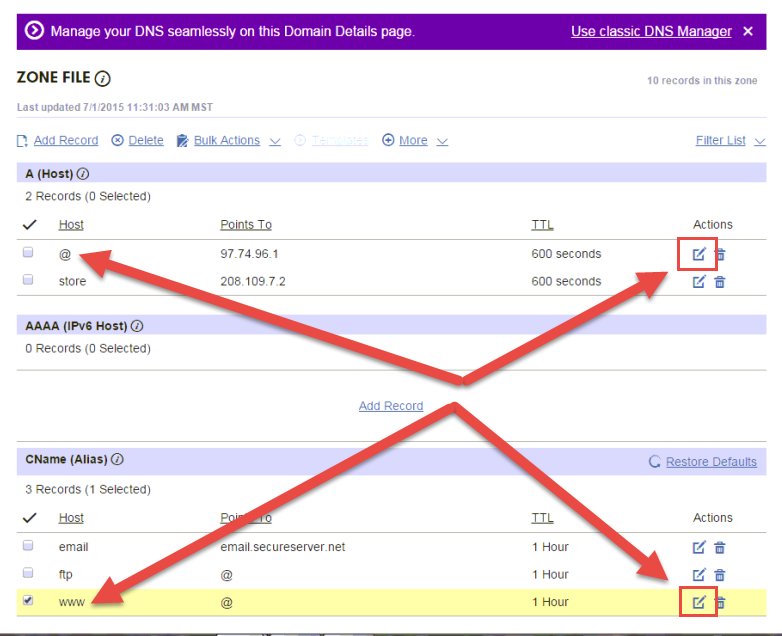
-
For the
@record, enter the numeric IP address from your UltraCart DNS setup email into Points to, set the TTL to a custom 600 seconds, and click Finished.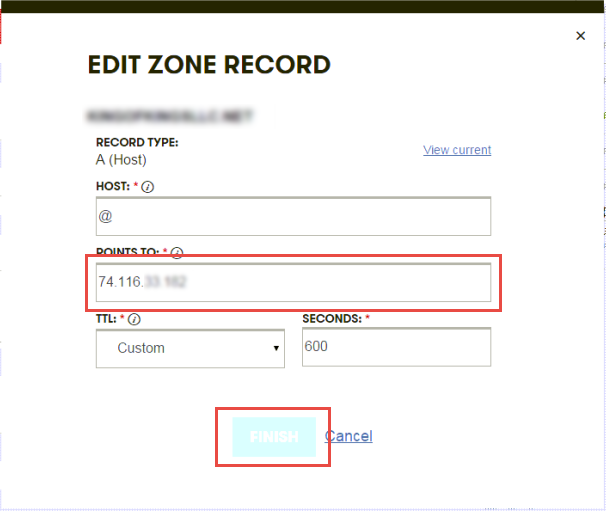
-
For the
wwwCNAME, enter theMID.ultracartssl.comvalue from the same email, again with a 600 second TTL.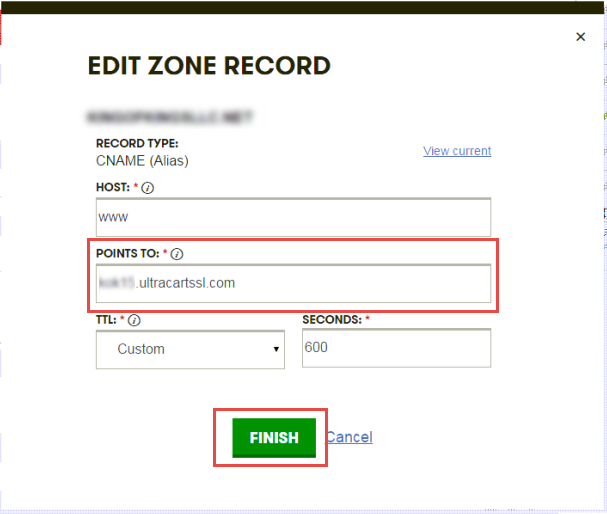
-
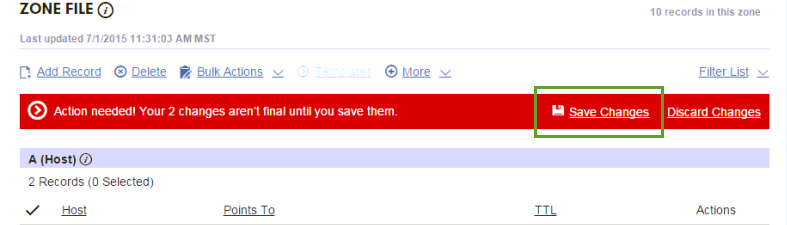
Click Save Changes.
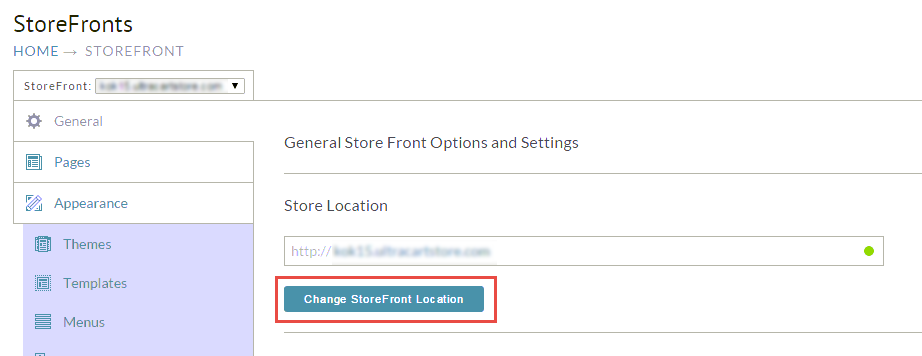
Then return to your StoreFront's General tab, click Change StoreFront Location, and complete the activation.
Network Solutions
-
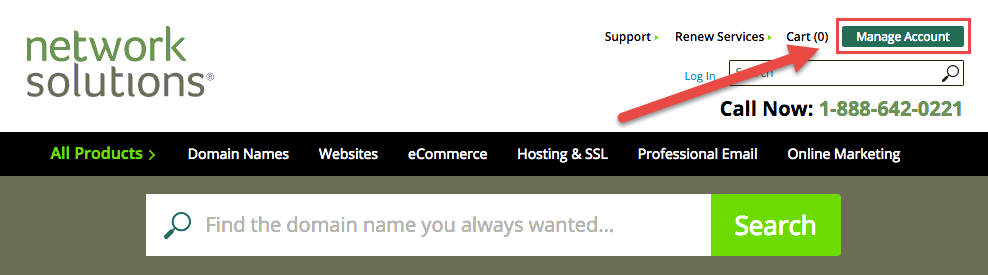
Go to the Network Solutions website and click Manage Account.
-
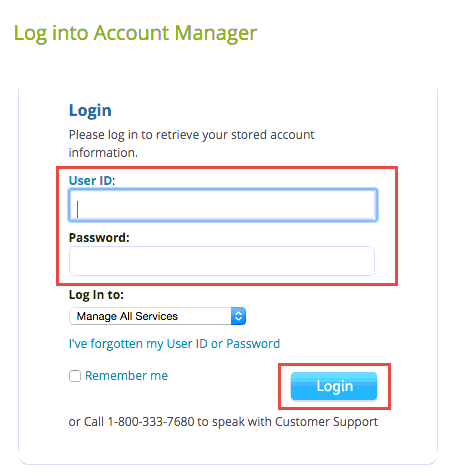
Enter your User ID and password and click Login.
-
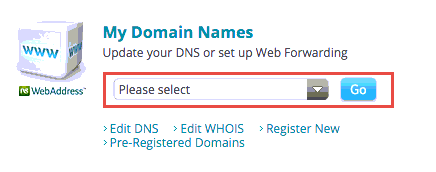
Under My Domain Names, select your domain from the dropdown and click Go.
-
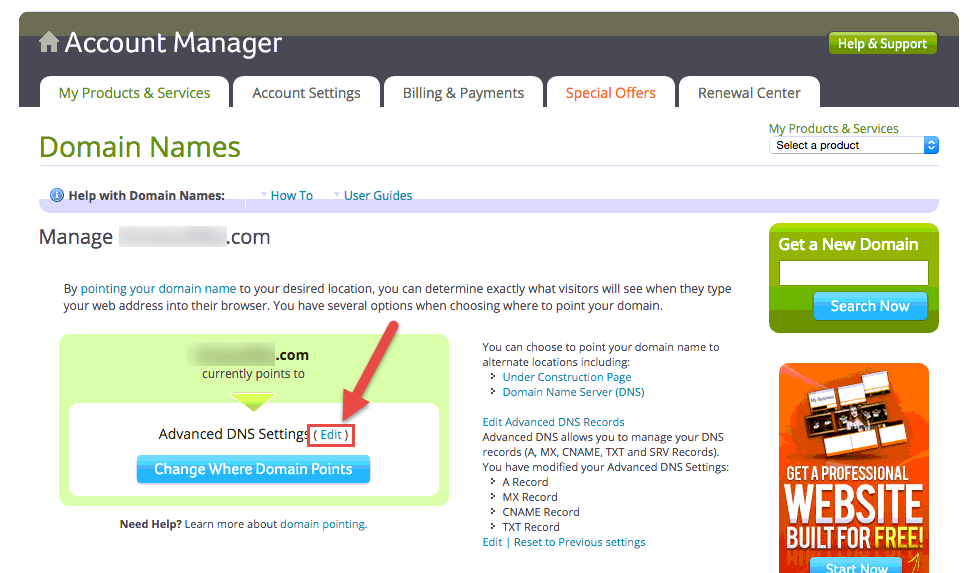
Click Edit next to Advanced DNS settings.
-
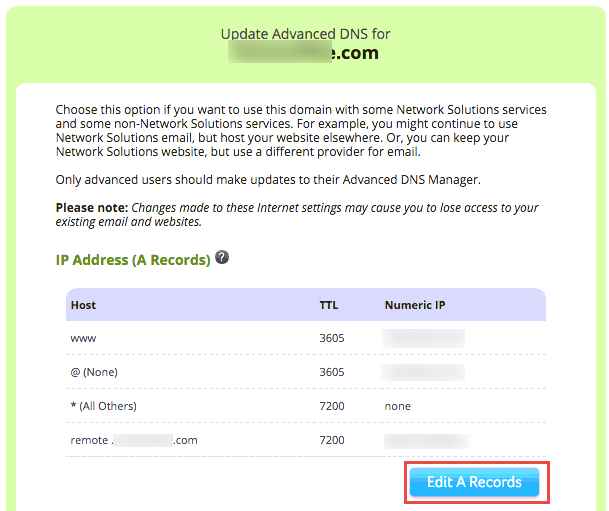
Click Edit A Records.
-
Edit the
wwwand@(none)records. Enter600for the TTL and the numeric IP from your UltraCart DNS setup email.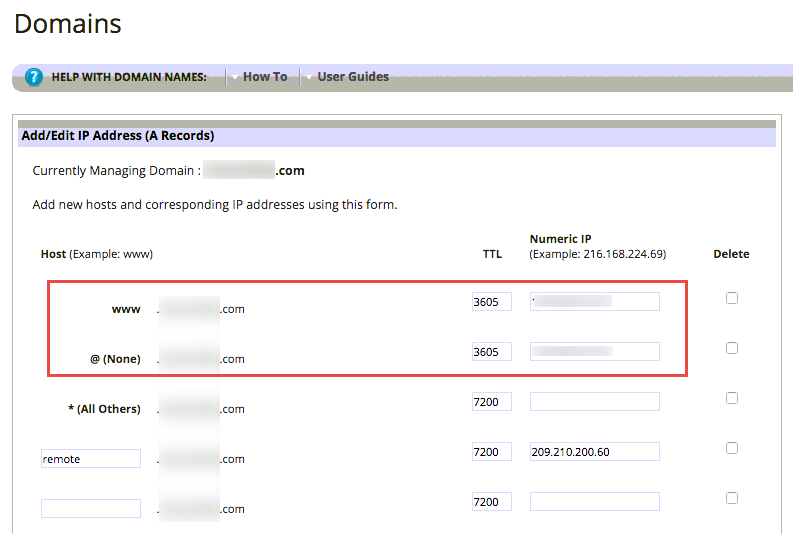
For a subdomain such as
secure.yourdomain.com, enter the prefix into the input field provided, then set the TTL and IP. -
Save and apply the settings, then return to the StoreFront Change Location dialog and activate the certificate.
HostGator
-
Go to HostGator.com and click Login to Customer Portal.
-
Enter your credentials and click Login.
-
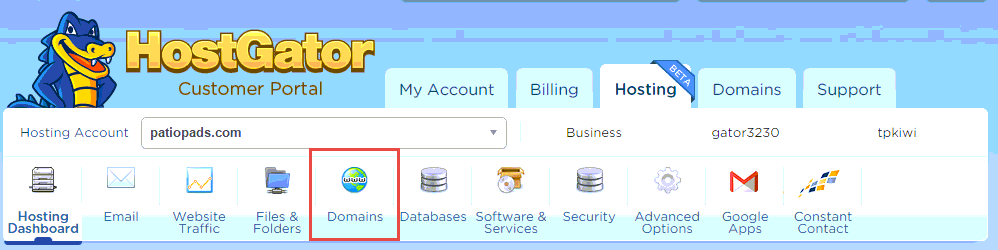
Click the Hosting tab, then Domains.
-
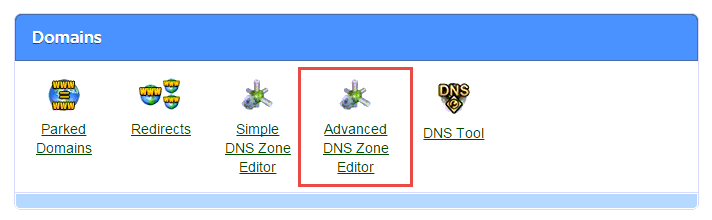
Scroll down and click Advanced DNS Zone Editor.
-
HostGator already points
wwwat the root as a CNAME, so you only need to change the root entry. Click Edit on the root host name.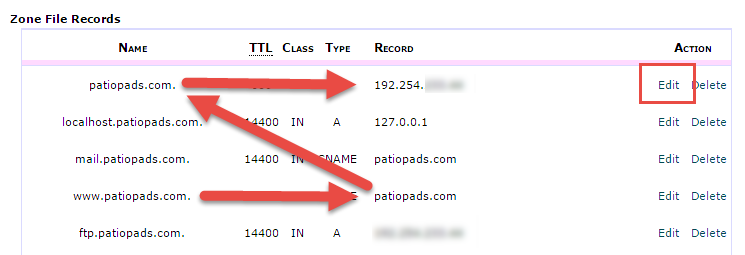
-
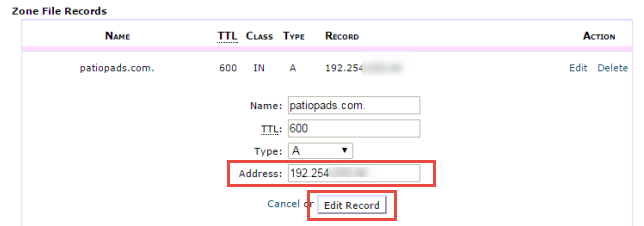
Change the Address to the IP provided by UltraCart and click Edit Record.
-
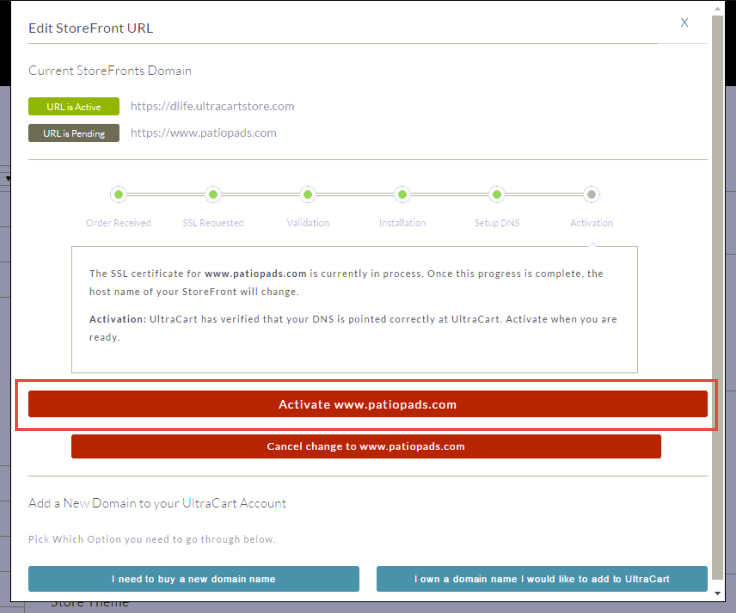
Return to your StoreFront's General tab, click Change StoreFront Location, and click the activate button.
-
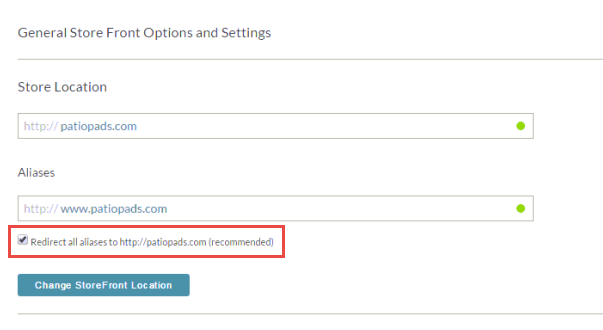
Check the box to redirect everything to the primary host name, then save.
Web.com, formerly Dotster
Dotster was acquired by Web.com and its domains were migrated there, so dotster.com is no
longer where you manage DNS. If you registered your domain with Dotster, you now sign in at
Web.com.
- Sign in at support.web.com.
- Click the Domains tile, then Manage next to your domain.
- Open Advanced Settings and select DNS Records.
- Click the edit icon next to the A record for the root, shown as
@, and enter the numeric IP address from your UltraCart DNS setup email. - Click the edit icon next to the
wwwCNAME record and enter theMID.ultracartssl.comvalue from the same email. - Click Save Changes.
Then return to your StoreFront's General tab, click Change StoreFront Location, and complete the activation.
DNS changes made through Web.com can take 24 to 48 hours to reach the rest of the internet, which is longer than most registrars.
My registrar is not listed
The records are the same wherever your DNS lives: a root A record pointing at the IP address
UltraCart gave you, and a www CNAME pointing at MID.ultracartssl.com. Any registrar's DNS
editor can set both.
If you have any questions, contact UltraCart support. UltraCart's DNS specialists can help with the configuration and the launch of your StoreFront.