Experiments and split tests
Experiments are server-side A/B tests you build with the same Visual Builder tools you already use for content. UltraCart Analytics powers the test engine, and it is included at no extra cost.
Find them under StoreFronts → [select your storefront] → Content → Experiments.
What you get:
- Server-side rendering of the test content, so there is no flicker while JavaScript swaps it.
- Traffic that shifts automatically toward the winner, unless you turn that off.
- Automatic promotion of the winner and cleanup of the losing variations.
- Search engine crawlers and traffic from IPs signed in to your UltraCart account filtered out of the results.
Name each variation for what it actually is: "CTA button, green" rather than "Variation 1". When the experiment ends the variations are removed from the element, so the report is all you have left. Generic names make it worthless months later.
The three experiment types
| Type | What it tests | Use it for |
|---|---|---|
| On-page content | An element or section inside a page | Buttons, headlines, images, layout and spacing |
| URL | Two or more whole pages against each other | Landing pages and funnels, usually with paid traffic |
| Theme | Two whole StoreFront themes | Checkout redesigns and any change to the payment section |
Only one theme experiment can run at a time. Starting a second before ending the first returns an error.
Run an on-page content experiment
-
Open the Visual Builder and go to the page section you want to test.

-
Open the hierarchy panel, select the plus icon, and search for Experiment.
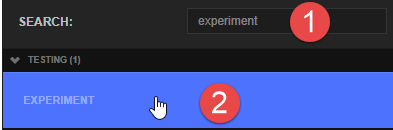
-
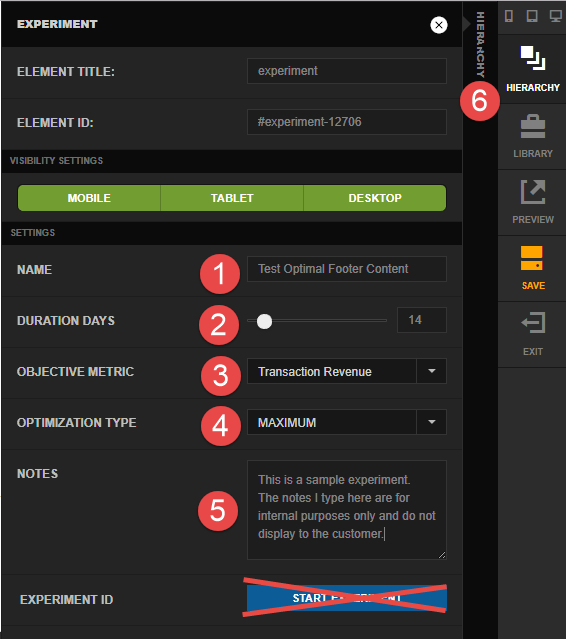
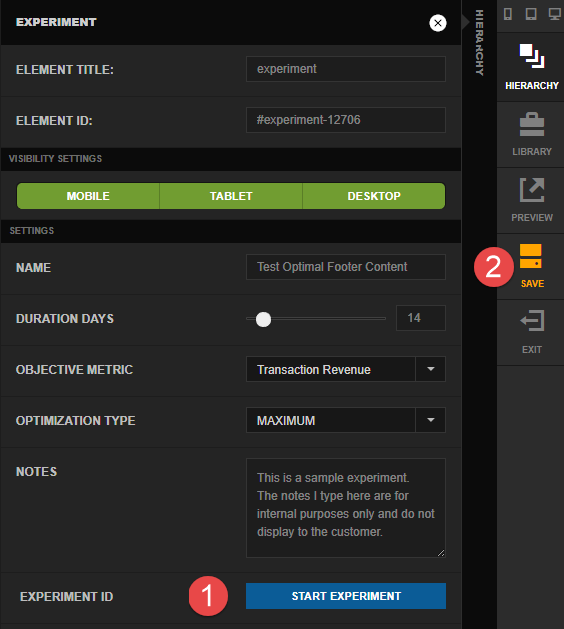
Insert the Experiment element. In its settings panel, fill in the name, duration in days, objective metric, optimization type, and any notes.
 warning
Do not select Start Experiment yet. Build and label the variations first.
-
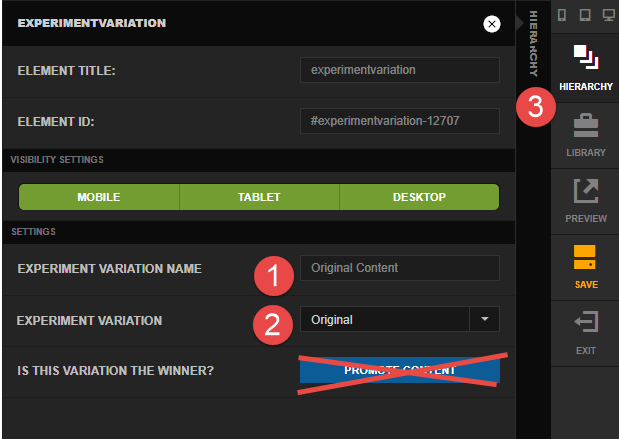
Back in the hierarchy, select the plus icon on the Experiment element to create the first variation. Name it and set Experiment Variation to Original. Do not select Promote Content.
-
Select the plus icon on the Experiment element again for the second variation, setting Experiment Variation to 1 rather than Original.
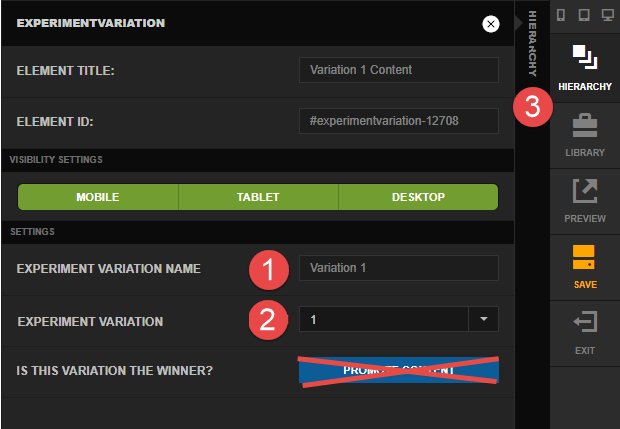
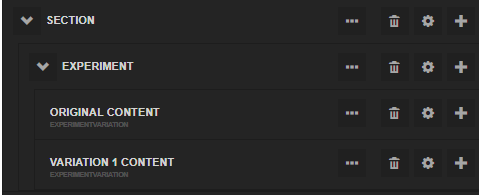
The hierarchy now holds an Experiment with two variations:
-
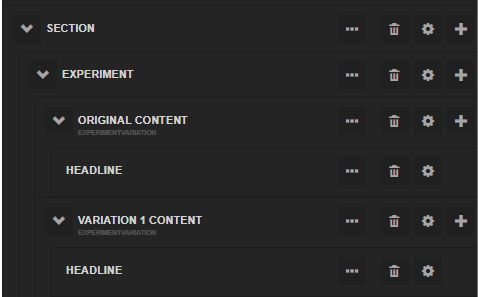
Add the content you want to test under each variation. In this example the test is two different headlines:
-
Open the Experiment settings, select Start Experiment, and once the Experiment ID appears, save the page.
Testing content you already have
Use the wrap tool in the hierarchy. Wrapping existing content in an Experiment element makes that content the original variation automatically, and you can then duplicate it into variation 1, 2, and so on and edit from there. That saves rebuilding a large block from scratch to test a small change to it.
Run a URL experiment
Use this to test whole pages, such as two landing pages, against each other.
-
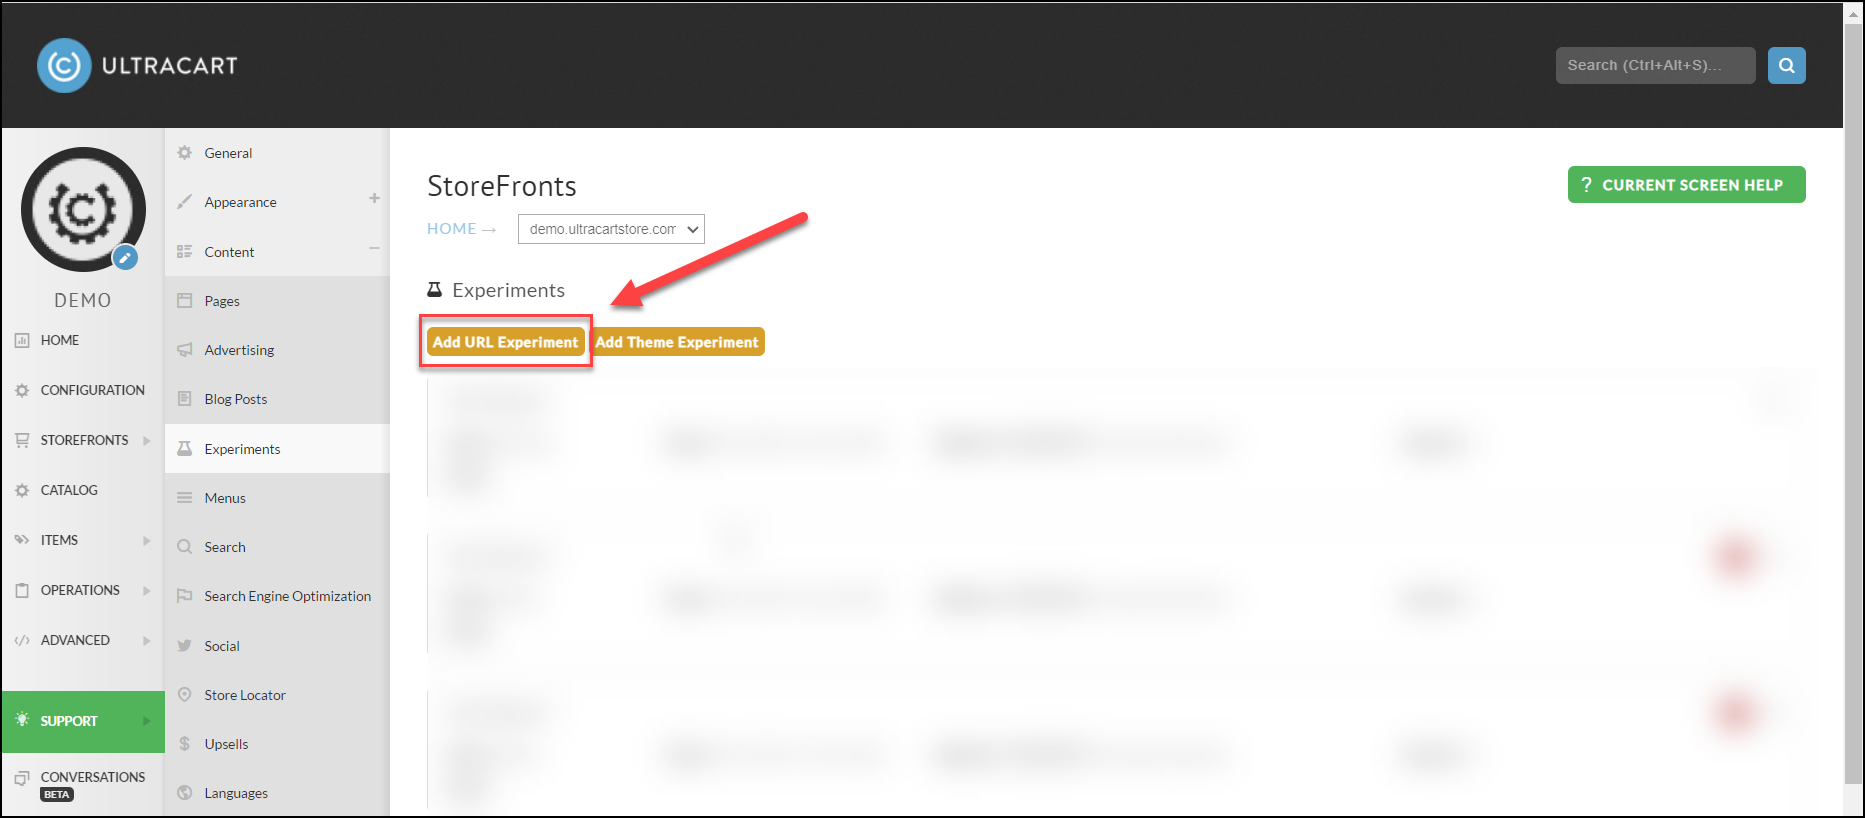
Under Content → Experiments, select Add URL Experiment.
-
Configure the experiment with at least two URLs, both on your StoreFront.
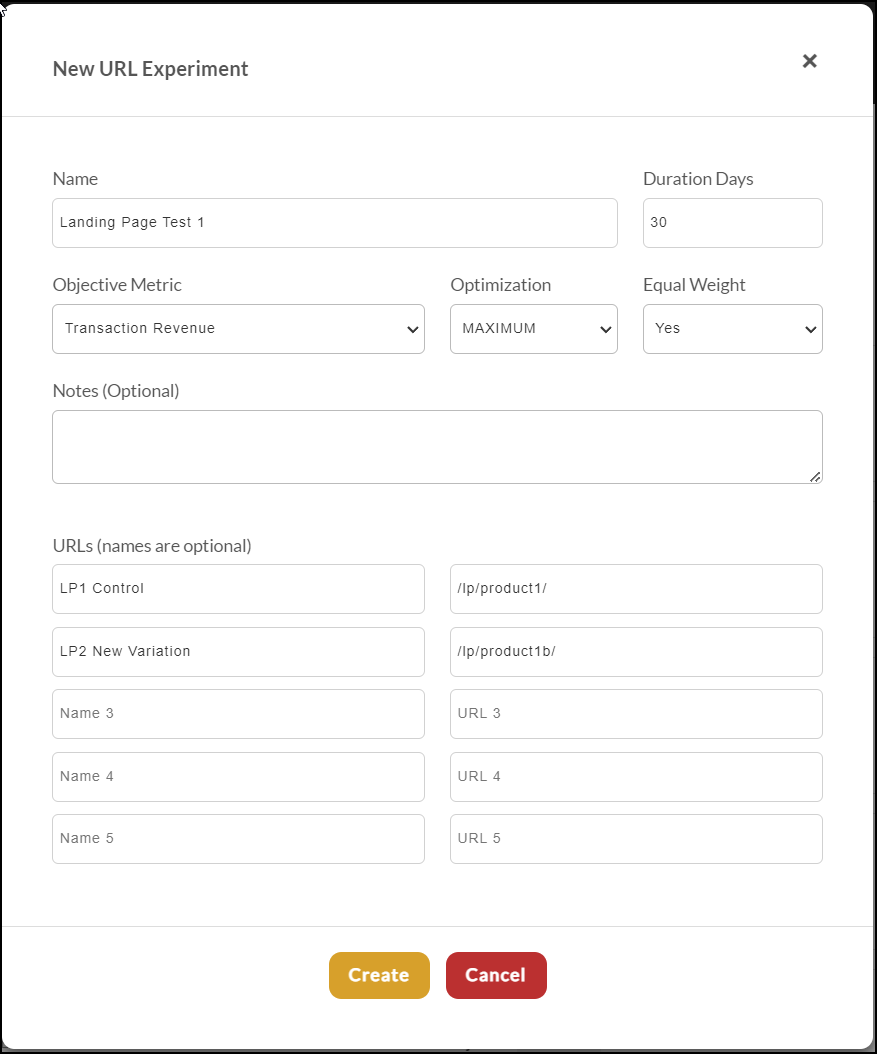
The system returns a router URL. Point your traffic at that URL, for example from paid advertising, and it splits visitors across the landing pages according to your configuration.

Run a theme experiment
Use this to test one whole StoreFront theme against another, which is the right tool for two genuinely different checkout designs.
-
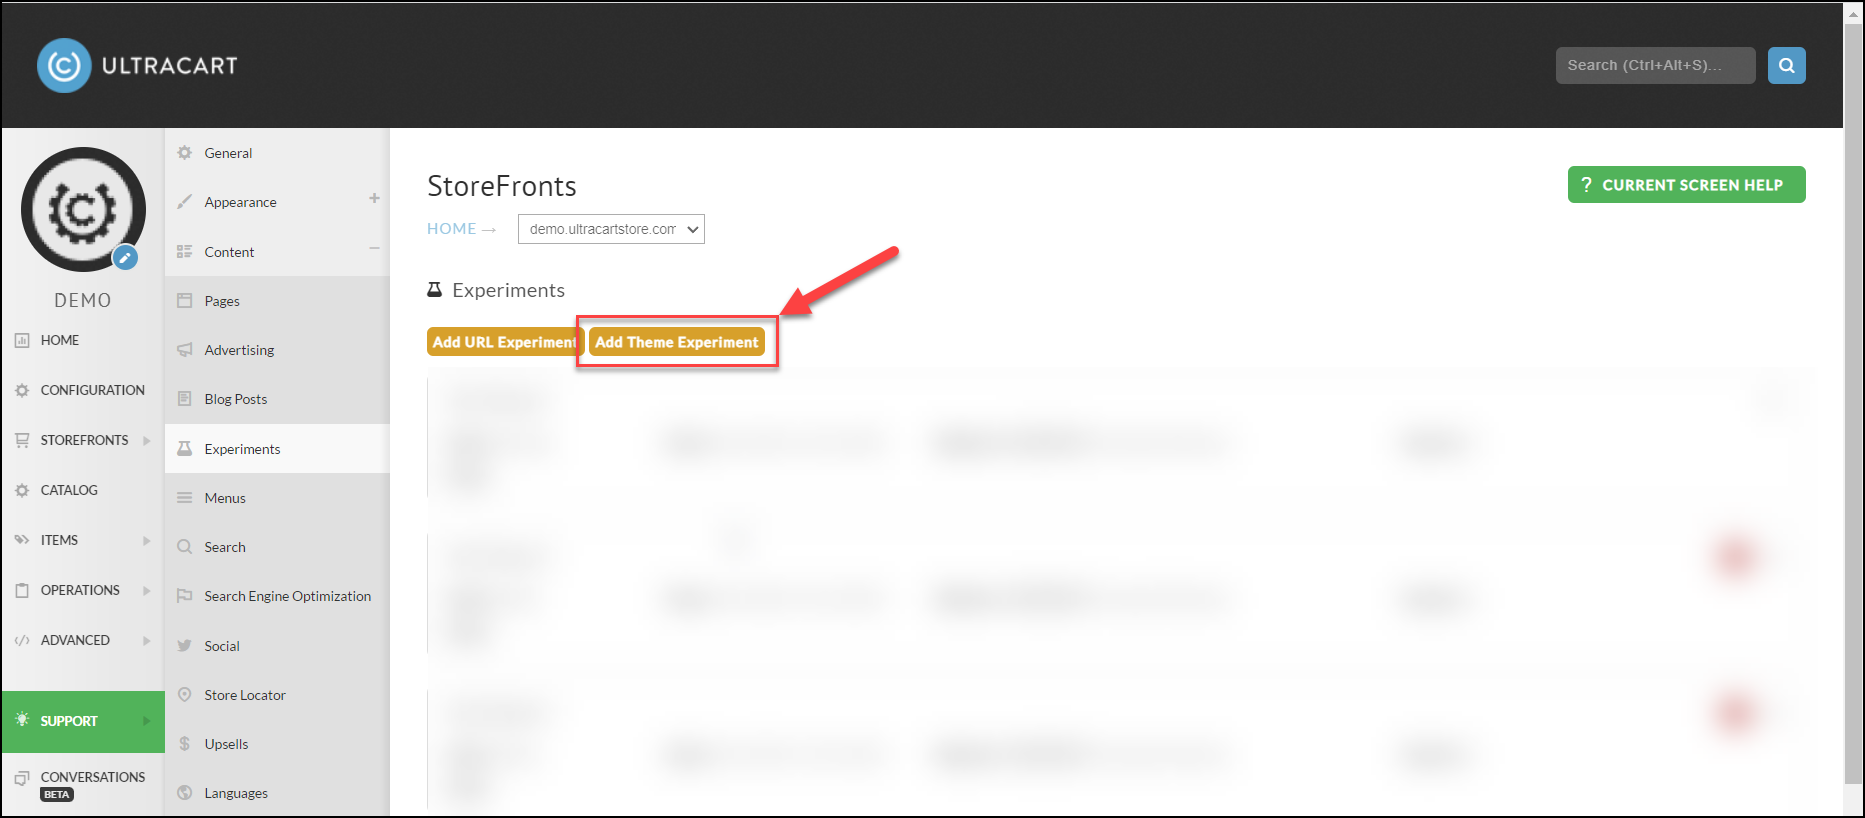
Under Content → Experiments, select Add Theme Experiment.
-
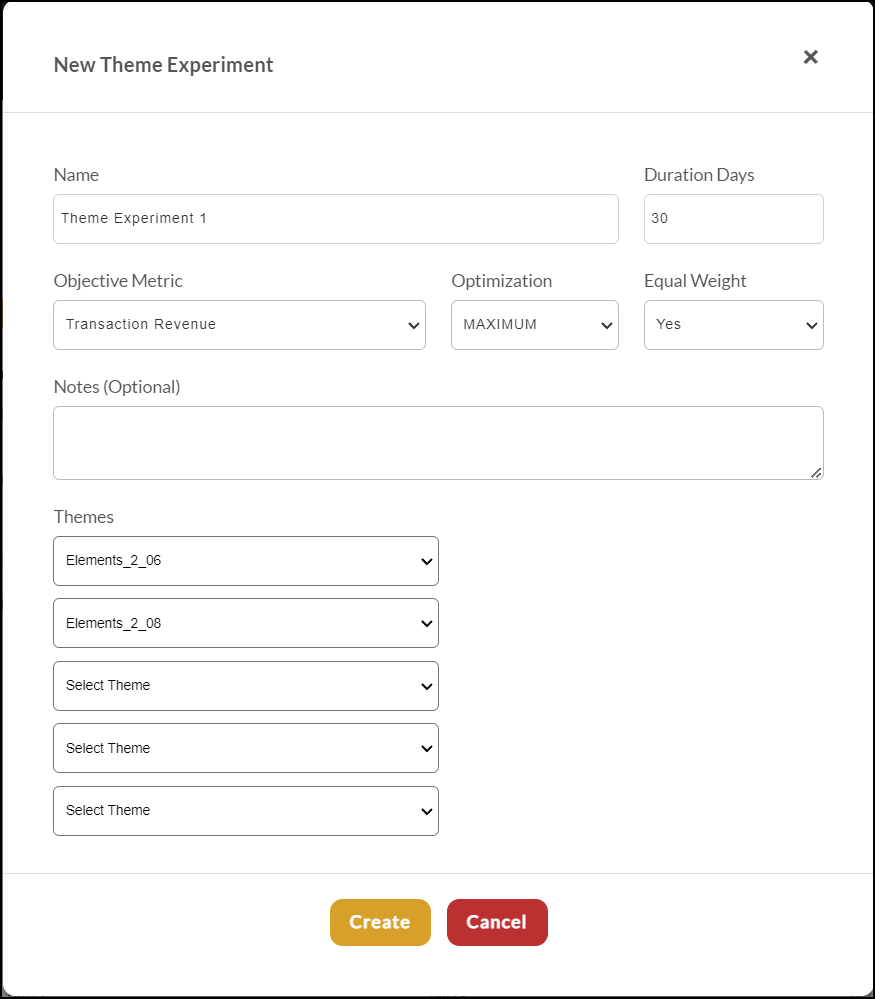
Select at least two themes.
Experiments on a checkout that uses hosted payment fields
This is the constraint that decides which experiment type you can use, and getting it wrong breaks the checkout rather than degrading it quietly.
UltraCart's checkout uses hosted fields to handle card number and CVV in a PCI-compliant way. The hosted fields system finds a specific input with a selector and replaces it with a secure iframe, which requires exactly one element of each field type on the page.
An element or section experiment puts the original and the variant in the DOM at the same time and then activates one. So if either version contains a credit card number field, the hosted fields initializer finds two and fails with:
There is more than one checkout credit card number element on the page. This is not supported and will cause problems.
That is an architectural constraint, not a misconfiguration. Hiding one field with CSS does not help, because the initializer scans the DOM regardless of visibility.
Which approach to use
| Your change | Use |
|---|---|
| Anything touching the payment section | A theme experiment |
| Header, progress indicator, order summary, item display, shipping selection, trust badges, copy | An element experiment, as long as no hosted field is inside it |
| A large checkout redesign | A separate test storefront, promoted with a theme pull request |
For a theme experiment, build the variant checkout on a separate storefront or test environment, submit it as a pull request into the production storefront, then configure the experiment to use the new theme as the variant. Only one checkout layout renders per session, which satisfies the constraint.
What not to do
- Do not copy a section containing the card number or CVV input into an experiment variant on a live checkout page. This is the most common cause of the error.
- Do not try to hide one of the duplicated fields with CSS.
- Do not replicate the whole checkout form across two variants.
Read the results
Results live under Content → Experiments. Expand an experiment for the detail.
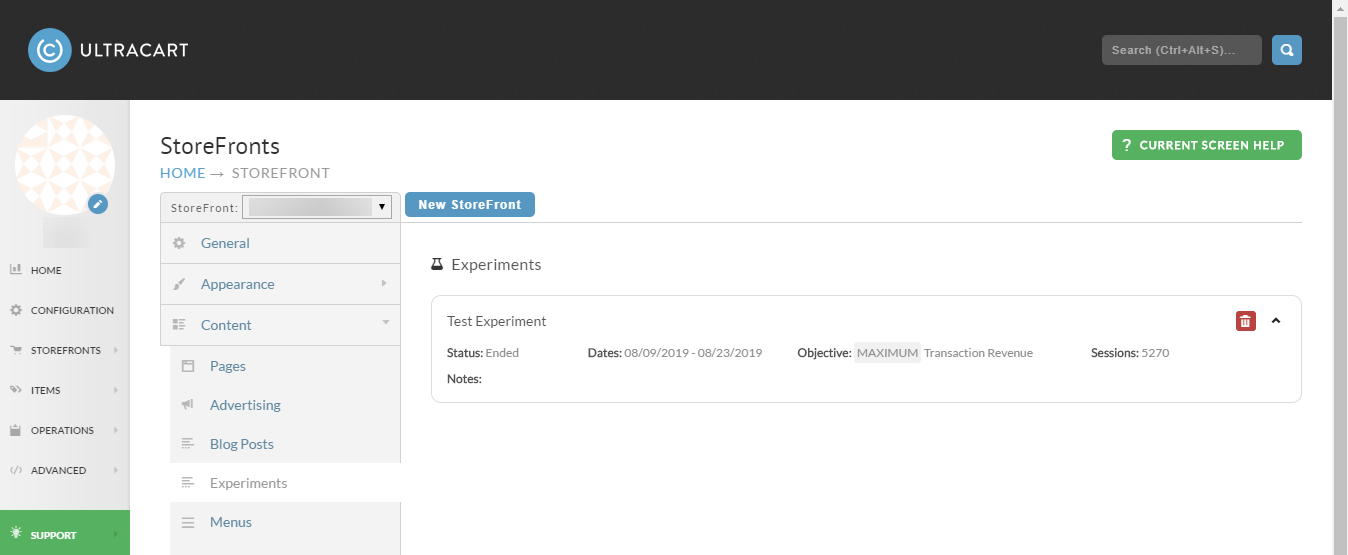
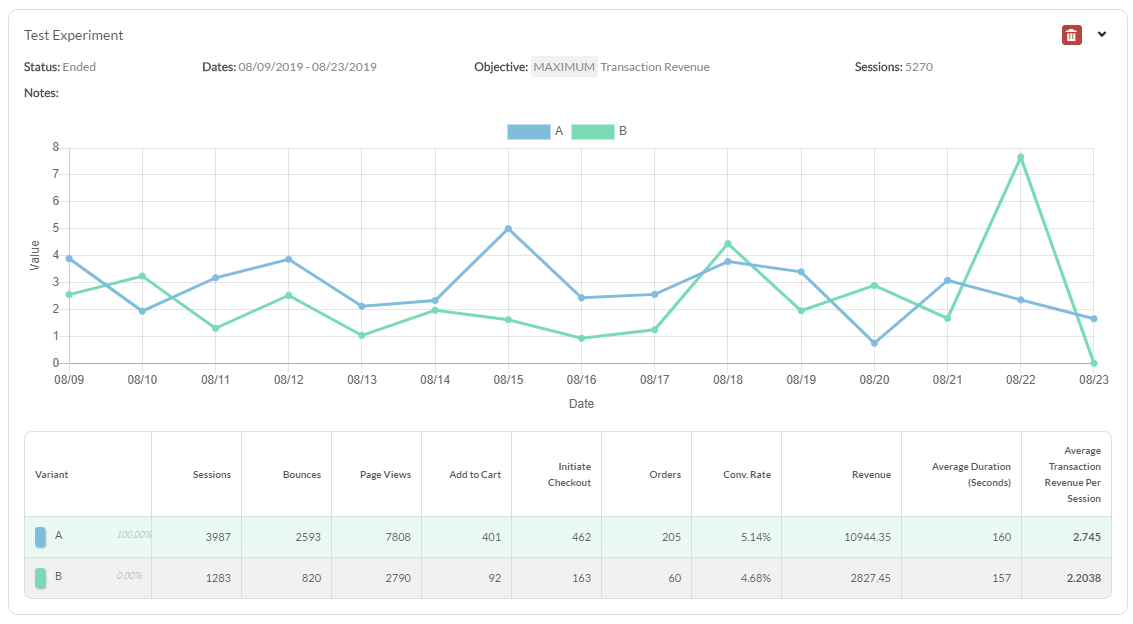
| Column | What it counts |
|---|---|
| Sessions | Total sessions, meaning visitors |
| Bounces | Sessions that bounced |
| Page Views | Page views |
| Add To Cart | Times the Add to Cart button was selected |
| Initiate Checkout | Times a checkout was started |
| Orders | Orders placed |
| Conversion Rate | Orders divided by sessions |
| Revenue | Total revenue of placed orders |
| Average Duration (Seconds) | Average seconds per session |
| Average Transaction Revenue Per Session | Average transaction revenue per session |
Promote a variation by hand
Expand the experiment, scroll to the variations, and select the blue Promote button on the one you want.
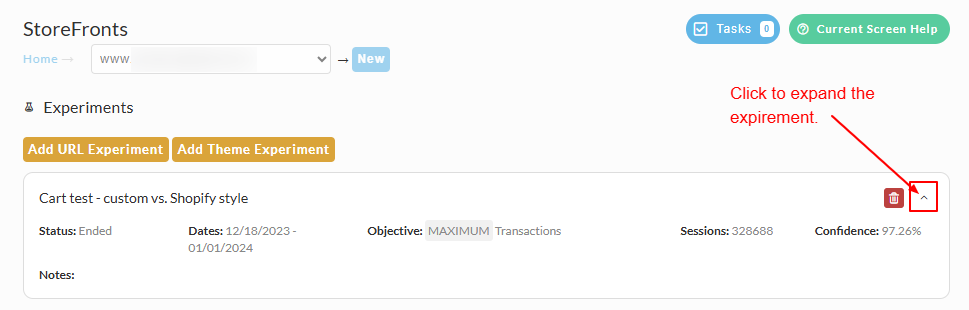
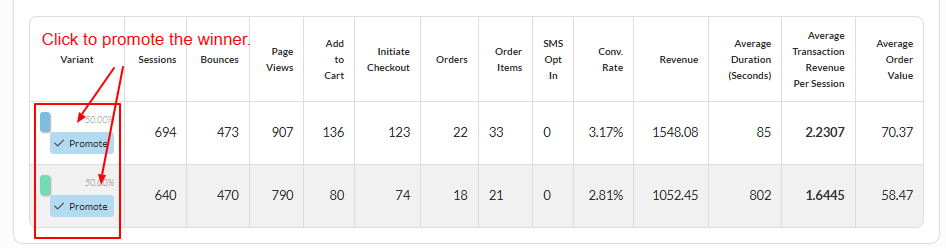
The Visual Builder editor also has a promotion button, but promoting from the Experiments screen is the recommended route.
How the data is collected
StoreFronts use the UltraCart Analytics engine to track session events, processed with roughly a 45 minute lag. A variation is only counted when both of these hold:
- The content could be seen. Testing something mobile-only reports nothing for a desktop visitor.
- The customer actually saw it. Testing something in the footer reports nothing for a visitor who never scrolled down.
Those two conditions are what make the numbers trustworthy. Traffic is also excluded when it comes from a search engine crawler, or from an IP address signed in to your UltraCart account, so your own call center does not skew the result. Orders placed with a test credit card number are excluded too.
How traffic splits
Traffic starts out split evenly. What happens next depends on the equal weighting setting:
- Equal weighting off: the allocation is adjusted once a day toward the winner, until the winner holds all of the traffic by the end of the experiment.
- Equal weighting on: every variation keeps the same share for the whole test, and the winner takes all the traffic when it ends.
When an experiment finishes
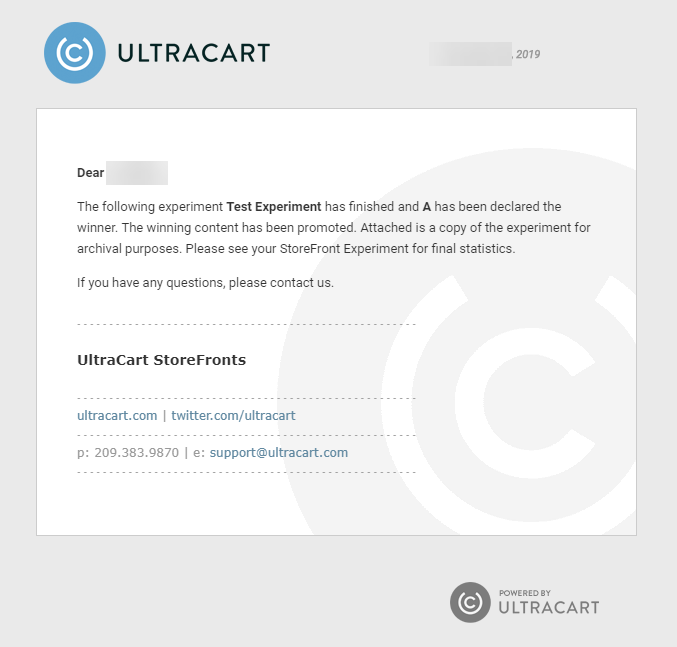
UltraCart identifies the winner, promotes that variation's content, and removes the rest from
your template. There is no manual cleanup. The notification email carries a .cjson attachment
holding a complete copy of the experiment hierarchy for your records.
Force a variation to display
Sign in to UltraCart first. If you cannot see the admin bar at the top of your StoreFront, you are not signed in and this will not work.
Variations are numbered from 0, where 0 is the original. Add the expvid parameter to the URL
with the number you want:
http://www.mysite.com/?expvid=1
Under Developer Tools → Server Log, entries labeled EXPERIMENT confirm which variation
was chosen.
This also lets your team preview an experiment before customers see it. An experiment that has
not been started always shows the original variation to customers, while a signed-in user can
append &expvid=1 to view the variant. Once you start the experiment it begins splitting
traffic normally.
Troubleshooting
More than one checkout credit card number element on the page
What you see: an error during checkout saying multiple credit card number elements were detected. The checkout may not load, or the payment fields may not initialize.
Why: an element or section experiment has a credit card number input in both its original and variant content, so both are in the DOM at once.
Check: inspect the DOM while the experiment is active and search for every input or
container matching your hosted fields selector, typically #creditCardNumber or a class-based
selector. More than one confirms it.
Fix: switch to a theme experiment, or take the payment section out of the element experiment's scope.
Express checkout options missing on a copied storefront
What you see: after copying a storefront or section for testing, express checkout options such as Link or Amazon Pay do not appear.
Why: express checkout availability depends on the item type and on account-level payment method configuration. Auto-order items suppress Link and Amazon Pay, and payment method availability is scoped per storefront, so copying a theme does not bring the payment gateway configuration with it.
Fix: confirm the item is not on auto-order if you expect Link or Amazon Pay, and configure the payment methods on the test storefront separately.
Related
- Hosted credit card fields covers PCI-compliant payment field setup.
- Duplicating a theme covers promoting a theme between storefronts.
- Upsells has its own experiment system for testing offers and paths.