Images
StoreFront themes are built around particular image sizes, and the image CDN generates everything else from what you upload. Give it one good source image per item and it produces the modern formats and the responsive variants for you.
Formats to use
Upload item and theme images as JPEG/JPG, GIF, PNG, or SVG. If you have images in another format, such as TIFF, convert them before uploading.
Item images look best square rather than rectangular, and consistent across your catalog. Sampling every item image to the same dimensions is worth the effort.
Sizes to upload
Upload a single high-quality source image per item and let the CDN do the resizing.
| Guidance | Value |
|---|---|
| Recommended source image | 1 to 4 megapixels |
| Maximum useful size | 9 megapixels |
A 4K monitor is 3840 x 2160 pixels, which is 8.2 megapixels. Uploading beyond 9 megapixels wastes storage and bandwidth, and makes thumbnail generation slower, without improving what the customer sees.
Theme image sizes
Each theme is designed around particular dimensions. Items are 600 x 600 or larger as a PNG in every theme; the featured item image is 600 x 600 as a PNG in every theme. The sizes that differ by theme are the home slider images:
| Theme | Home slider |
|---|---|
| Coffee | 1400 x 1200 |
| Craft | 1020 x 680 |
| Elements | 1920 x 1080 |
| Fashion | 1280 x 590 |
| Gridzy | No slider |
| Hero | Not specified |
| Jewel | Not specified |
| Lifty | 1080 x 720 (banner) |
| Mr. Teas | 1000 x 563 |
| Native | Not specified |
| Natural | 1020 x 680 |
| Trial | No slider |
| Woodland | 1500 x 1000 |
Center the focal point of a slider image. Expect slight cropping at the top and bottom on desktop, and at the left and right on mobile.
What the image CDN does automatically
Uploading one image is enough, because the CDN generates the rest:
- Modern formats. AVIF and WebP, served when the customer's browser supports them.
- Responsive sizes. Visual Builder image elements support responsive images, and a single upload can produce up to 30 variants across breakpoints so each device gets an appropriately sized file.
Add an image to a page
Adding an image to a page takes two steps: upload the file, then reference it in the page content.
Upload the file
-
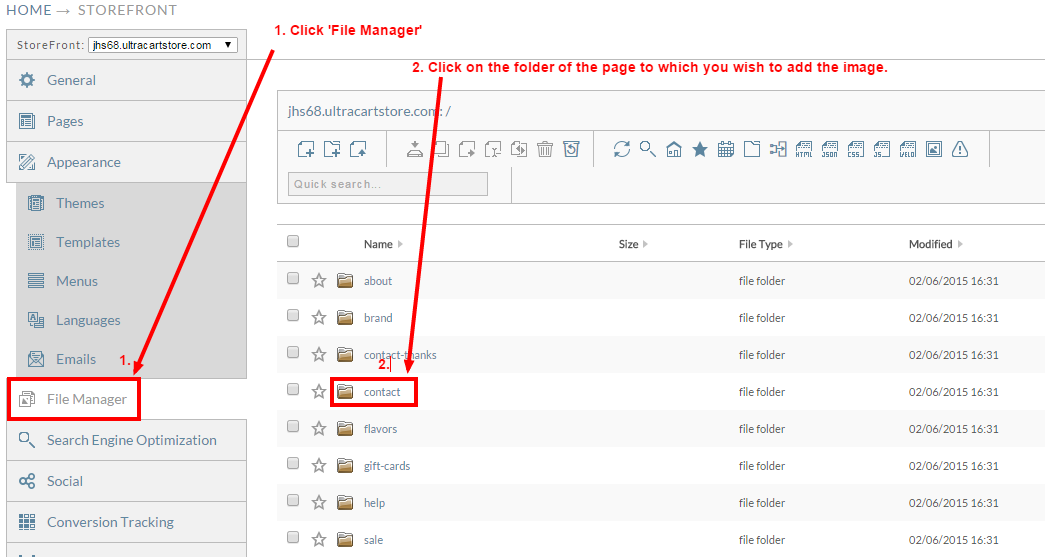
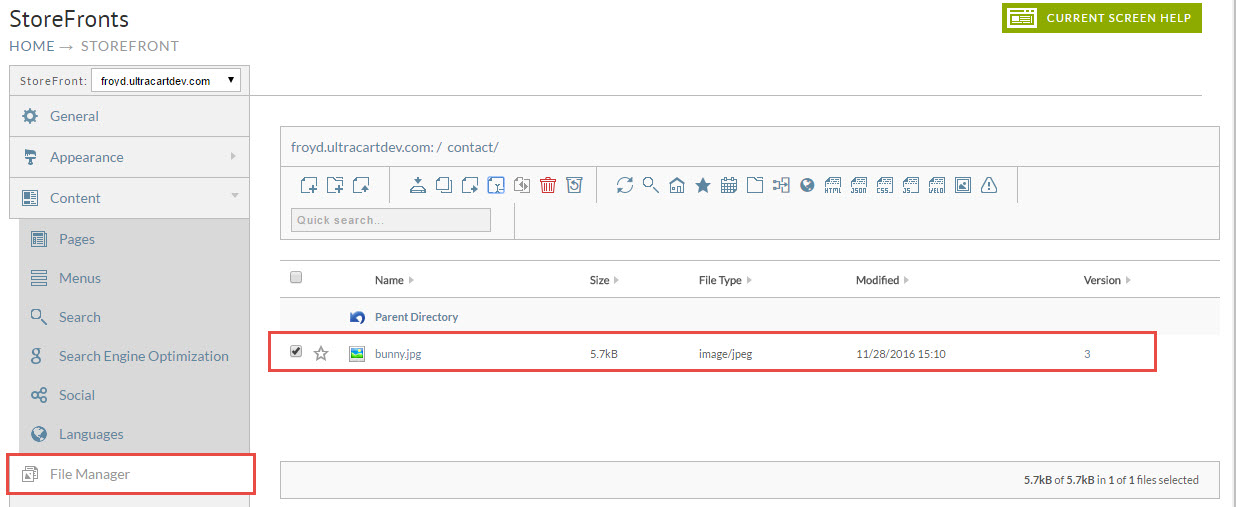
Open your StoreFront's File Manager tab and go to the folder you want the image in.
-
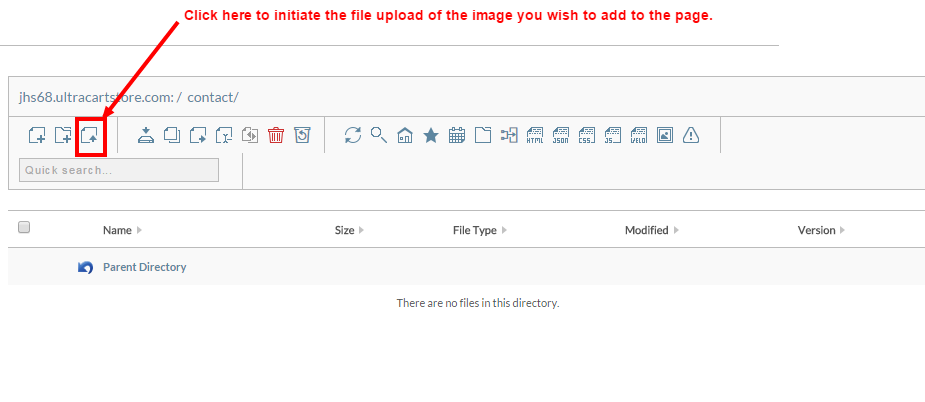
Click the File Upload icon.
-
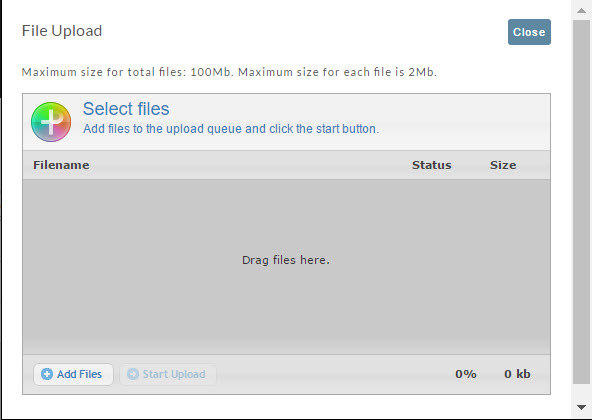
Either drag the file onto the Drag files here area, or click Add Files and browse for it.
-
Click Start Upload.
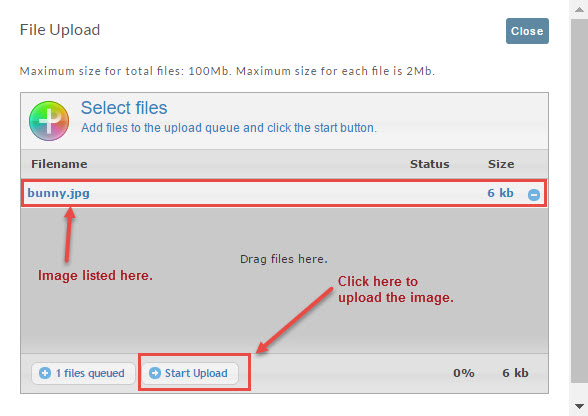
The file then appears in the File Manager.
Place it on the page
-
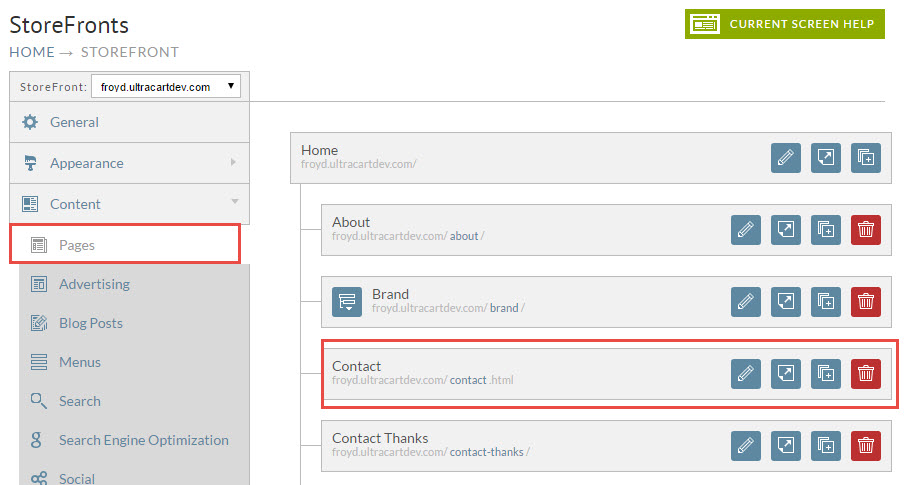
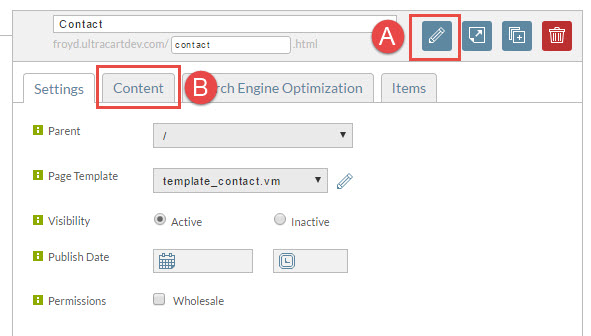
Go to StoreFronts → Pages and click the pencil icon for the page.
-
Open the Content tab.
-
Add an
imgtag referencing the uploaded file.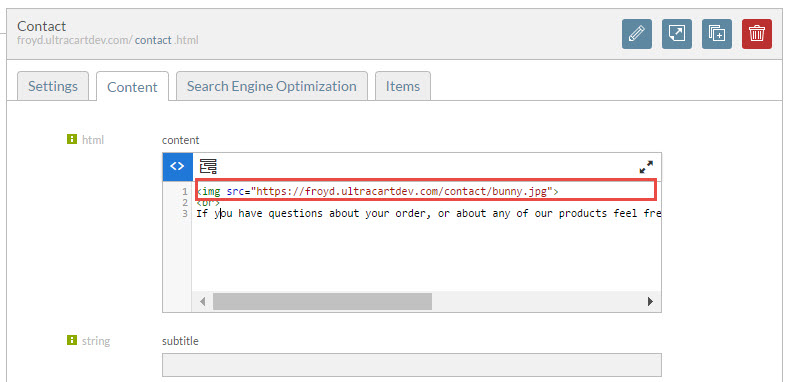
-
Click Save and Preview.
The URL is case sensitive. The filename in your img tag must match the uploaded file exactly, or the image will not load.
Upload your store logo
Upload your logo as GIF, JPG, or PNG.
Use PNG. It gives better quality for the limited color range of a typical logo, and it supports transparency, which lets the logo sit on any theme background cleanly.
How you upload it depends on whether your theme has the Visual Builder.
On a Visual Builder theme
-
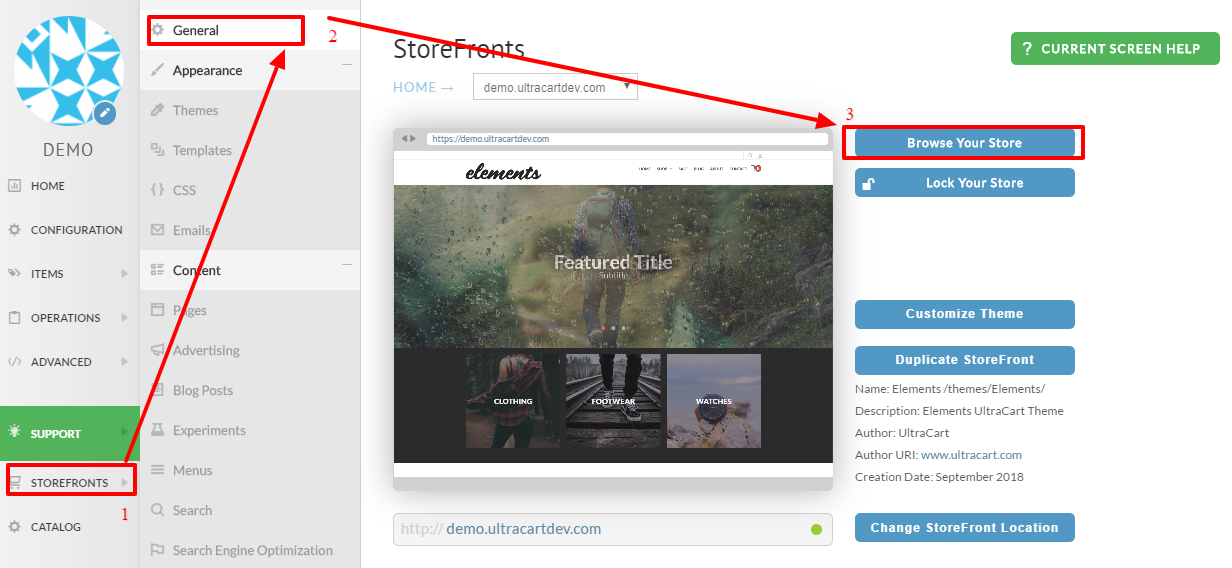
From the StoreFront menu, click Browse your Store.
-
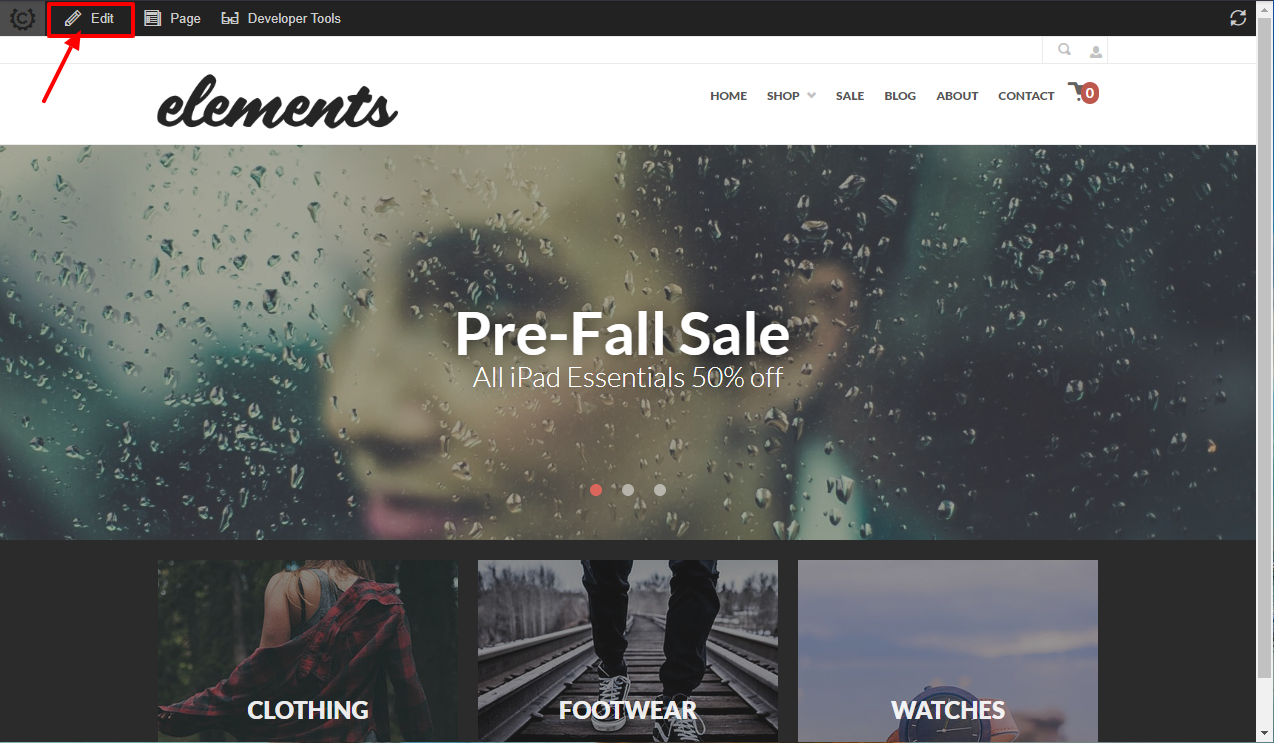
Click Edit at the top left of the page. This menu appears only while you are logged into the UltraCart back end, never to your customers.
-
Hover the sample logo until it is outlined in blue, then click the gear icon or press
sto open the settings panel.
On a theme without the Visual Builder
-
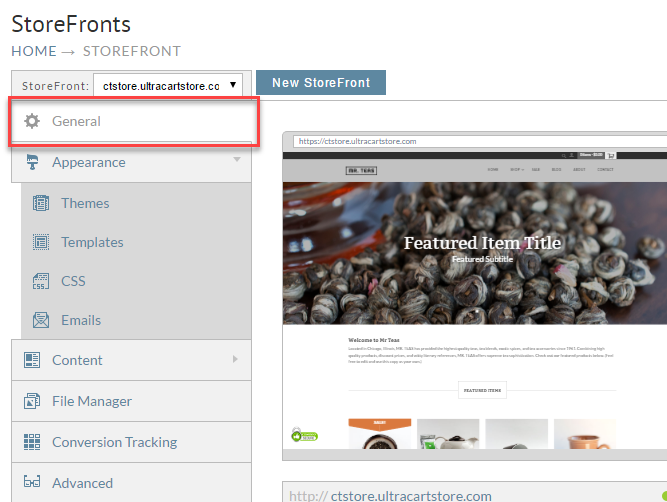
From the StoreFronts page, click the General tab.
-
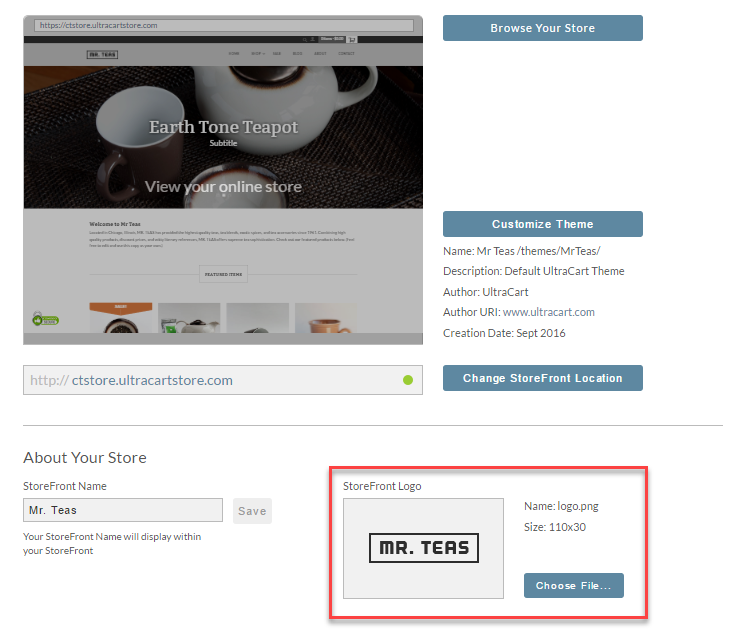
Under About Your Store, find StoreFront Logo. Your current logo appears below the label, or "No Logo" if none is set.
-
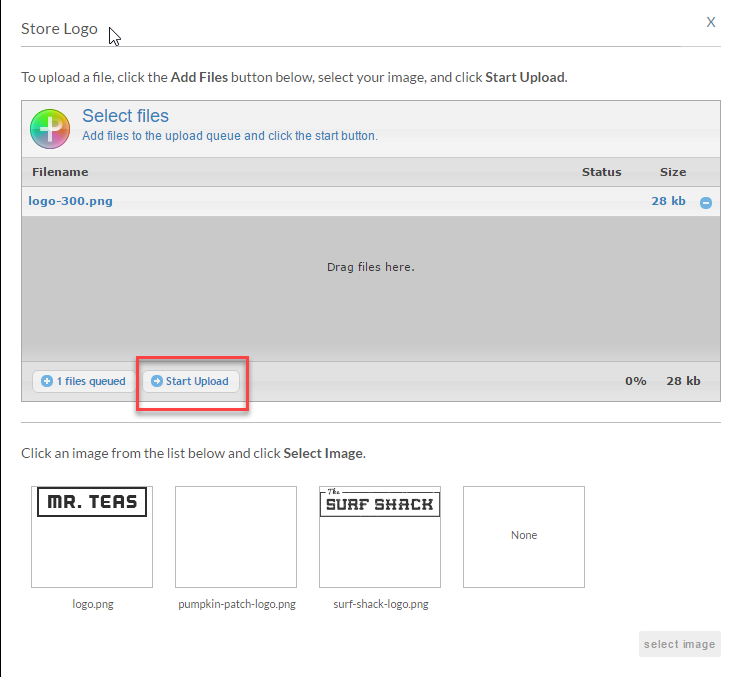
Click Choose File, then Add Files, or drag the graphic onto the dialog.
-
Click Begin Upload.
Set a favicon
A favicon is the small icon a browser shows in the tab, the address bar, bookmarks, and history. StoreFronts accepts a favicon.png and converts it to the .ico format browsers expect.
Prepare the image first:
- Start from your logo, or a simplified version of it.
- Use square dimensions. The icon has to fit in a square.
- Check that it stays legible at 16 x 16 and 32 x 32 pixels, which is how it is usually displayed.
- Start from at least 260 x 260 pixels.
Save it as favicon.png, then upload it:
- Go to StoreFronts and select the storefront.
- Open the General tab.
- In the About your Store section, find StoreFront Favicon.
- Upload your
favicon.png.
Change the image an item shows in the home slider
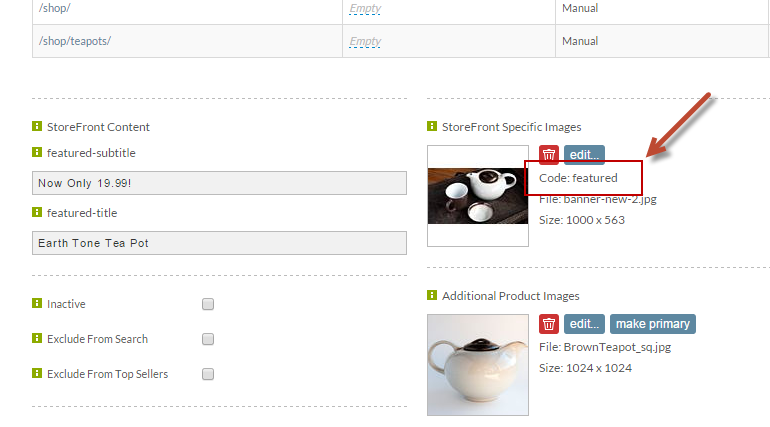
An item in the home slider displays its default image when only one image is configured. When an item has several, the slider uses the one whose image code is Featured.
-
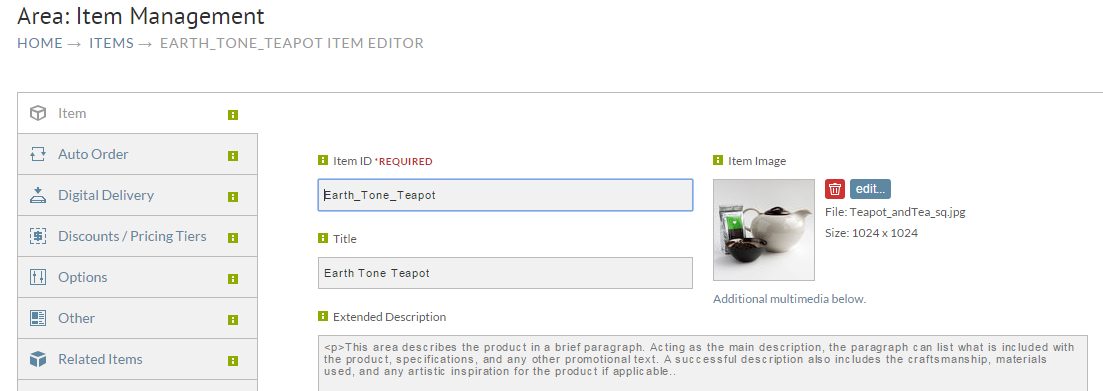
Go to Main Menu → Items → Item Management and open the item.
-
Scroll to the StoreFronts section of the item editor.
-
Set the Featured code on the image you want the slider to show.
For the slider's own settings, see Home page slider.