Overview
UltraCart's Checkout Only Mode lets you seamlessly integrate UltraCart’s secure and customizable checkout process into your existing website, blog, or landing pages—without migrating your entire storefront. Keep your current site as-is, and just drop in a high-converting UltraCart checkout experience.
Configuring Checkout Only Mode
If you're using a modern storefront theme, setting up Checkout Only Mode is quick and code-free, thanks to the Visual Builder.
1. Launch the Storefront Visual Builder
-
Log in at secure.ultracart.com.
-
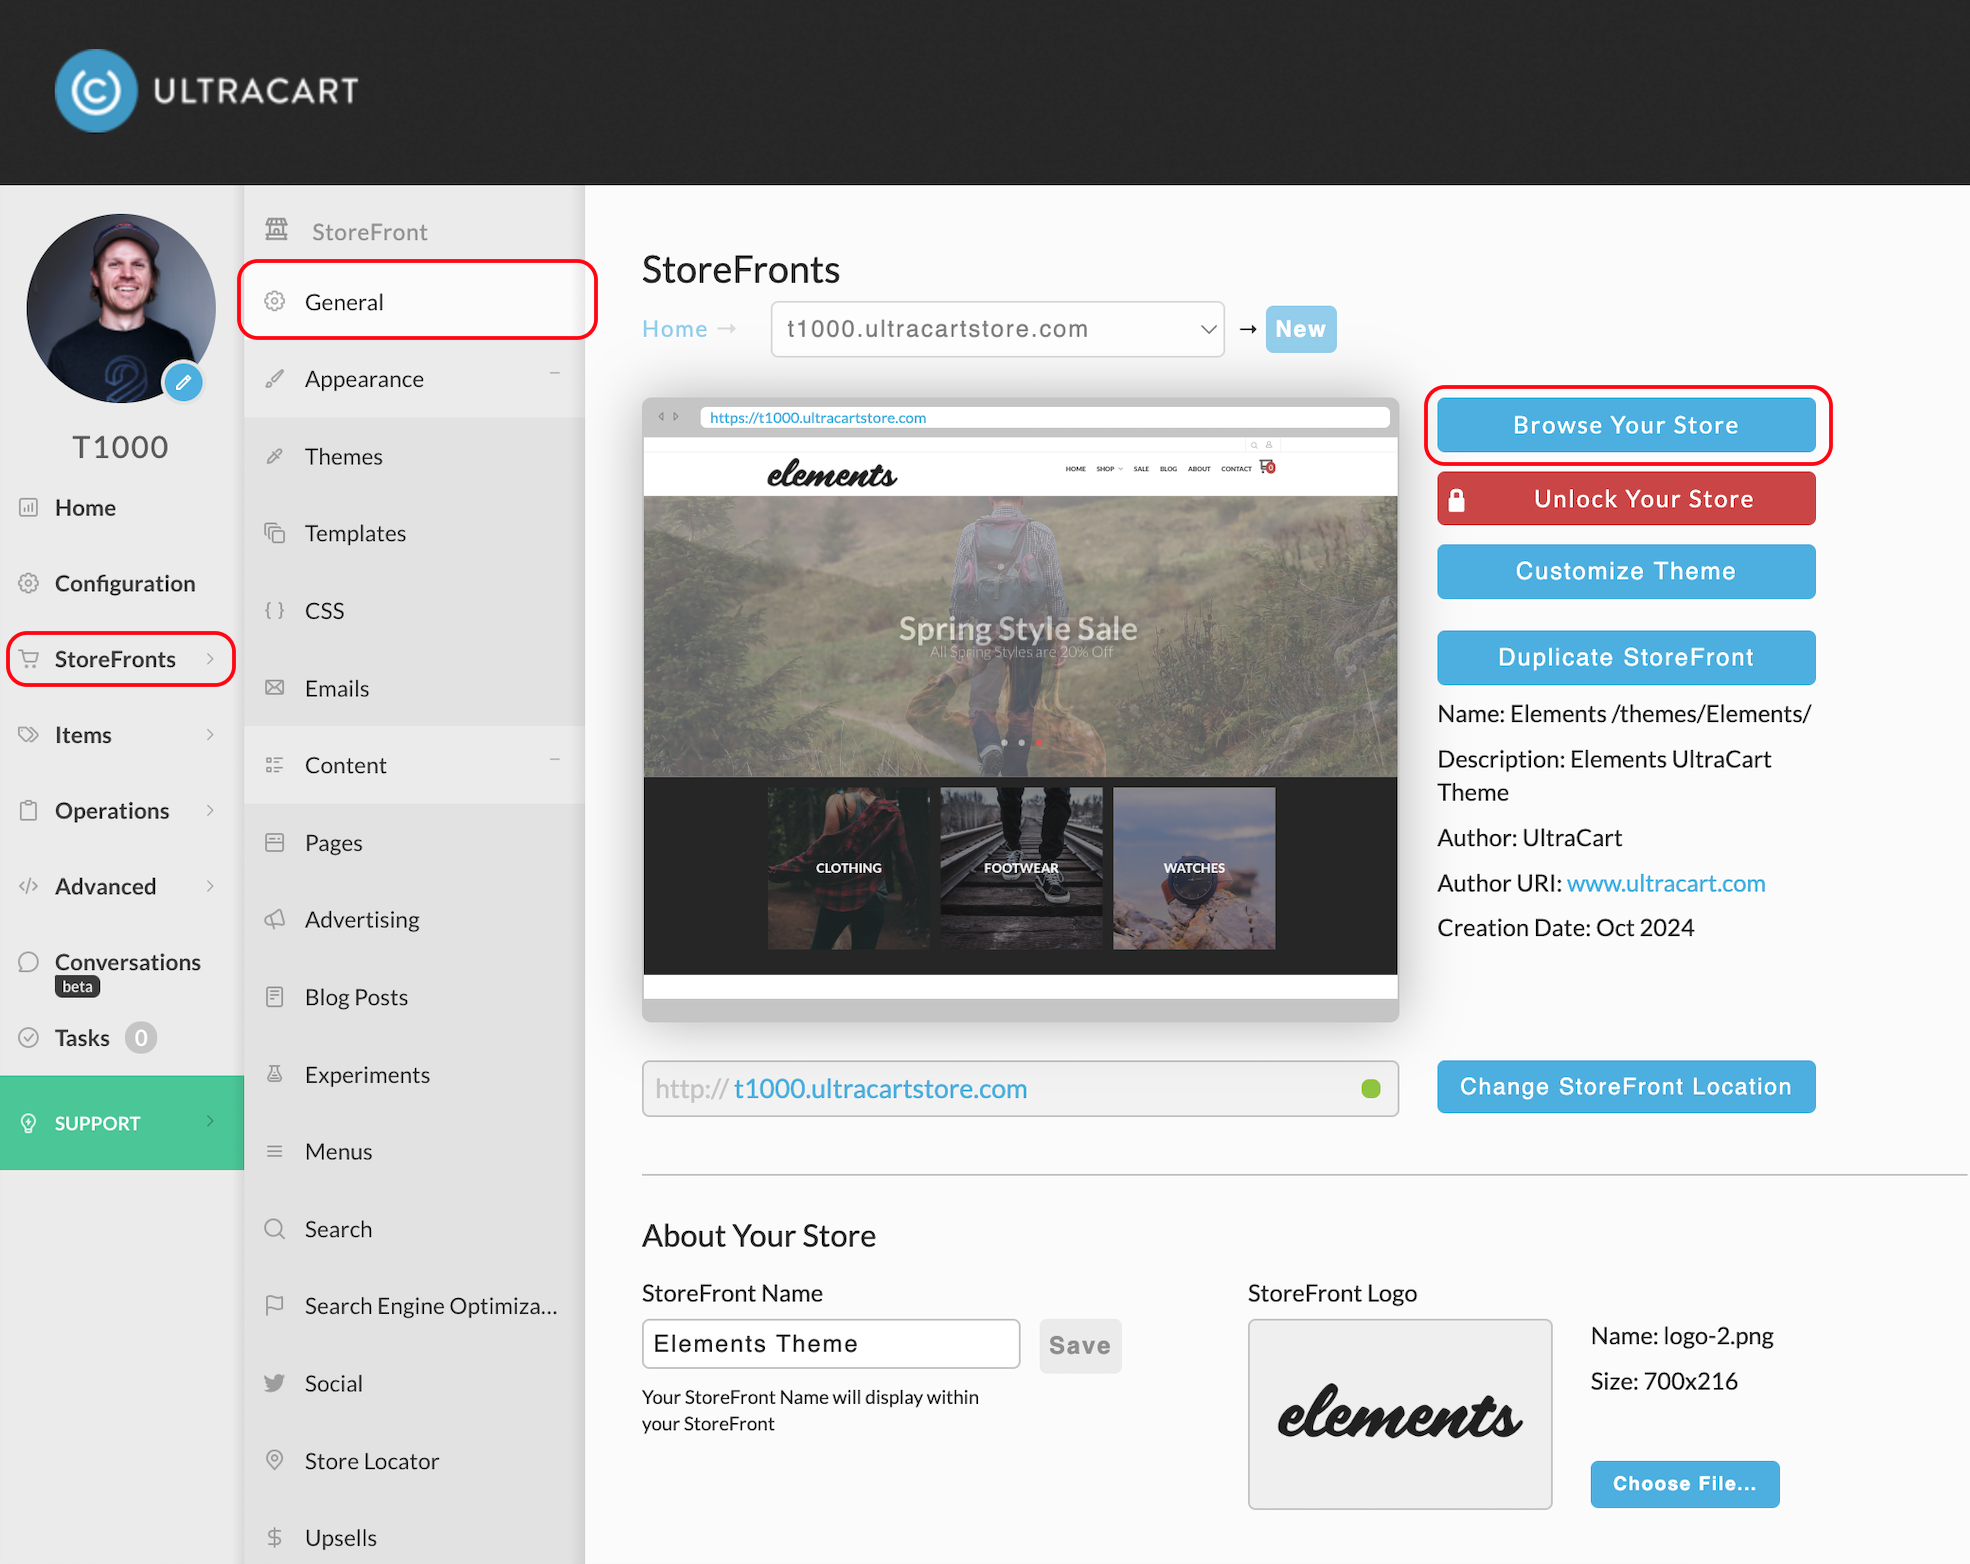
Navigate to StoreFronts → select your StoreFront →
-
Within the General Settings click Browse your Store.
2. Access Theme Settings
-
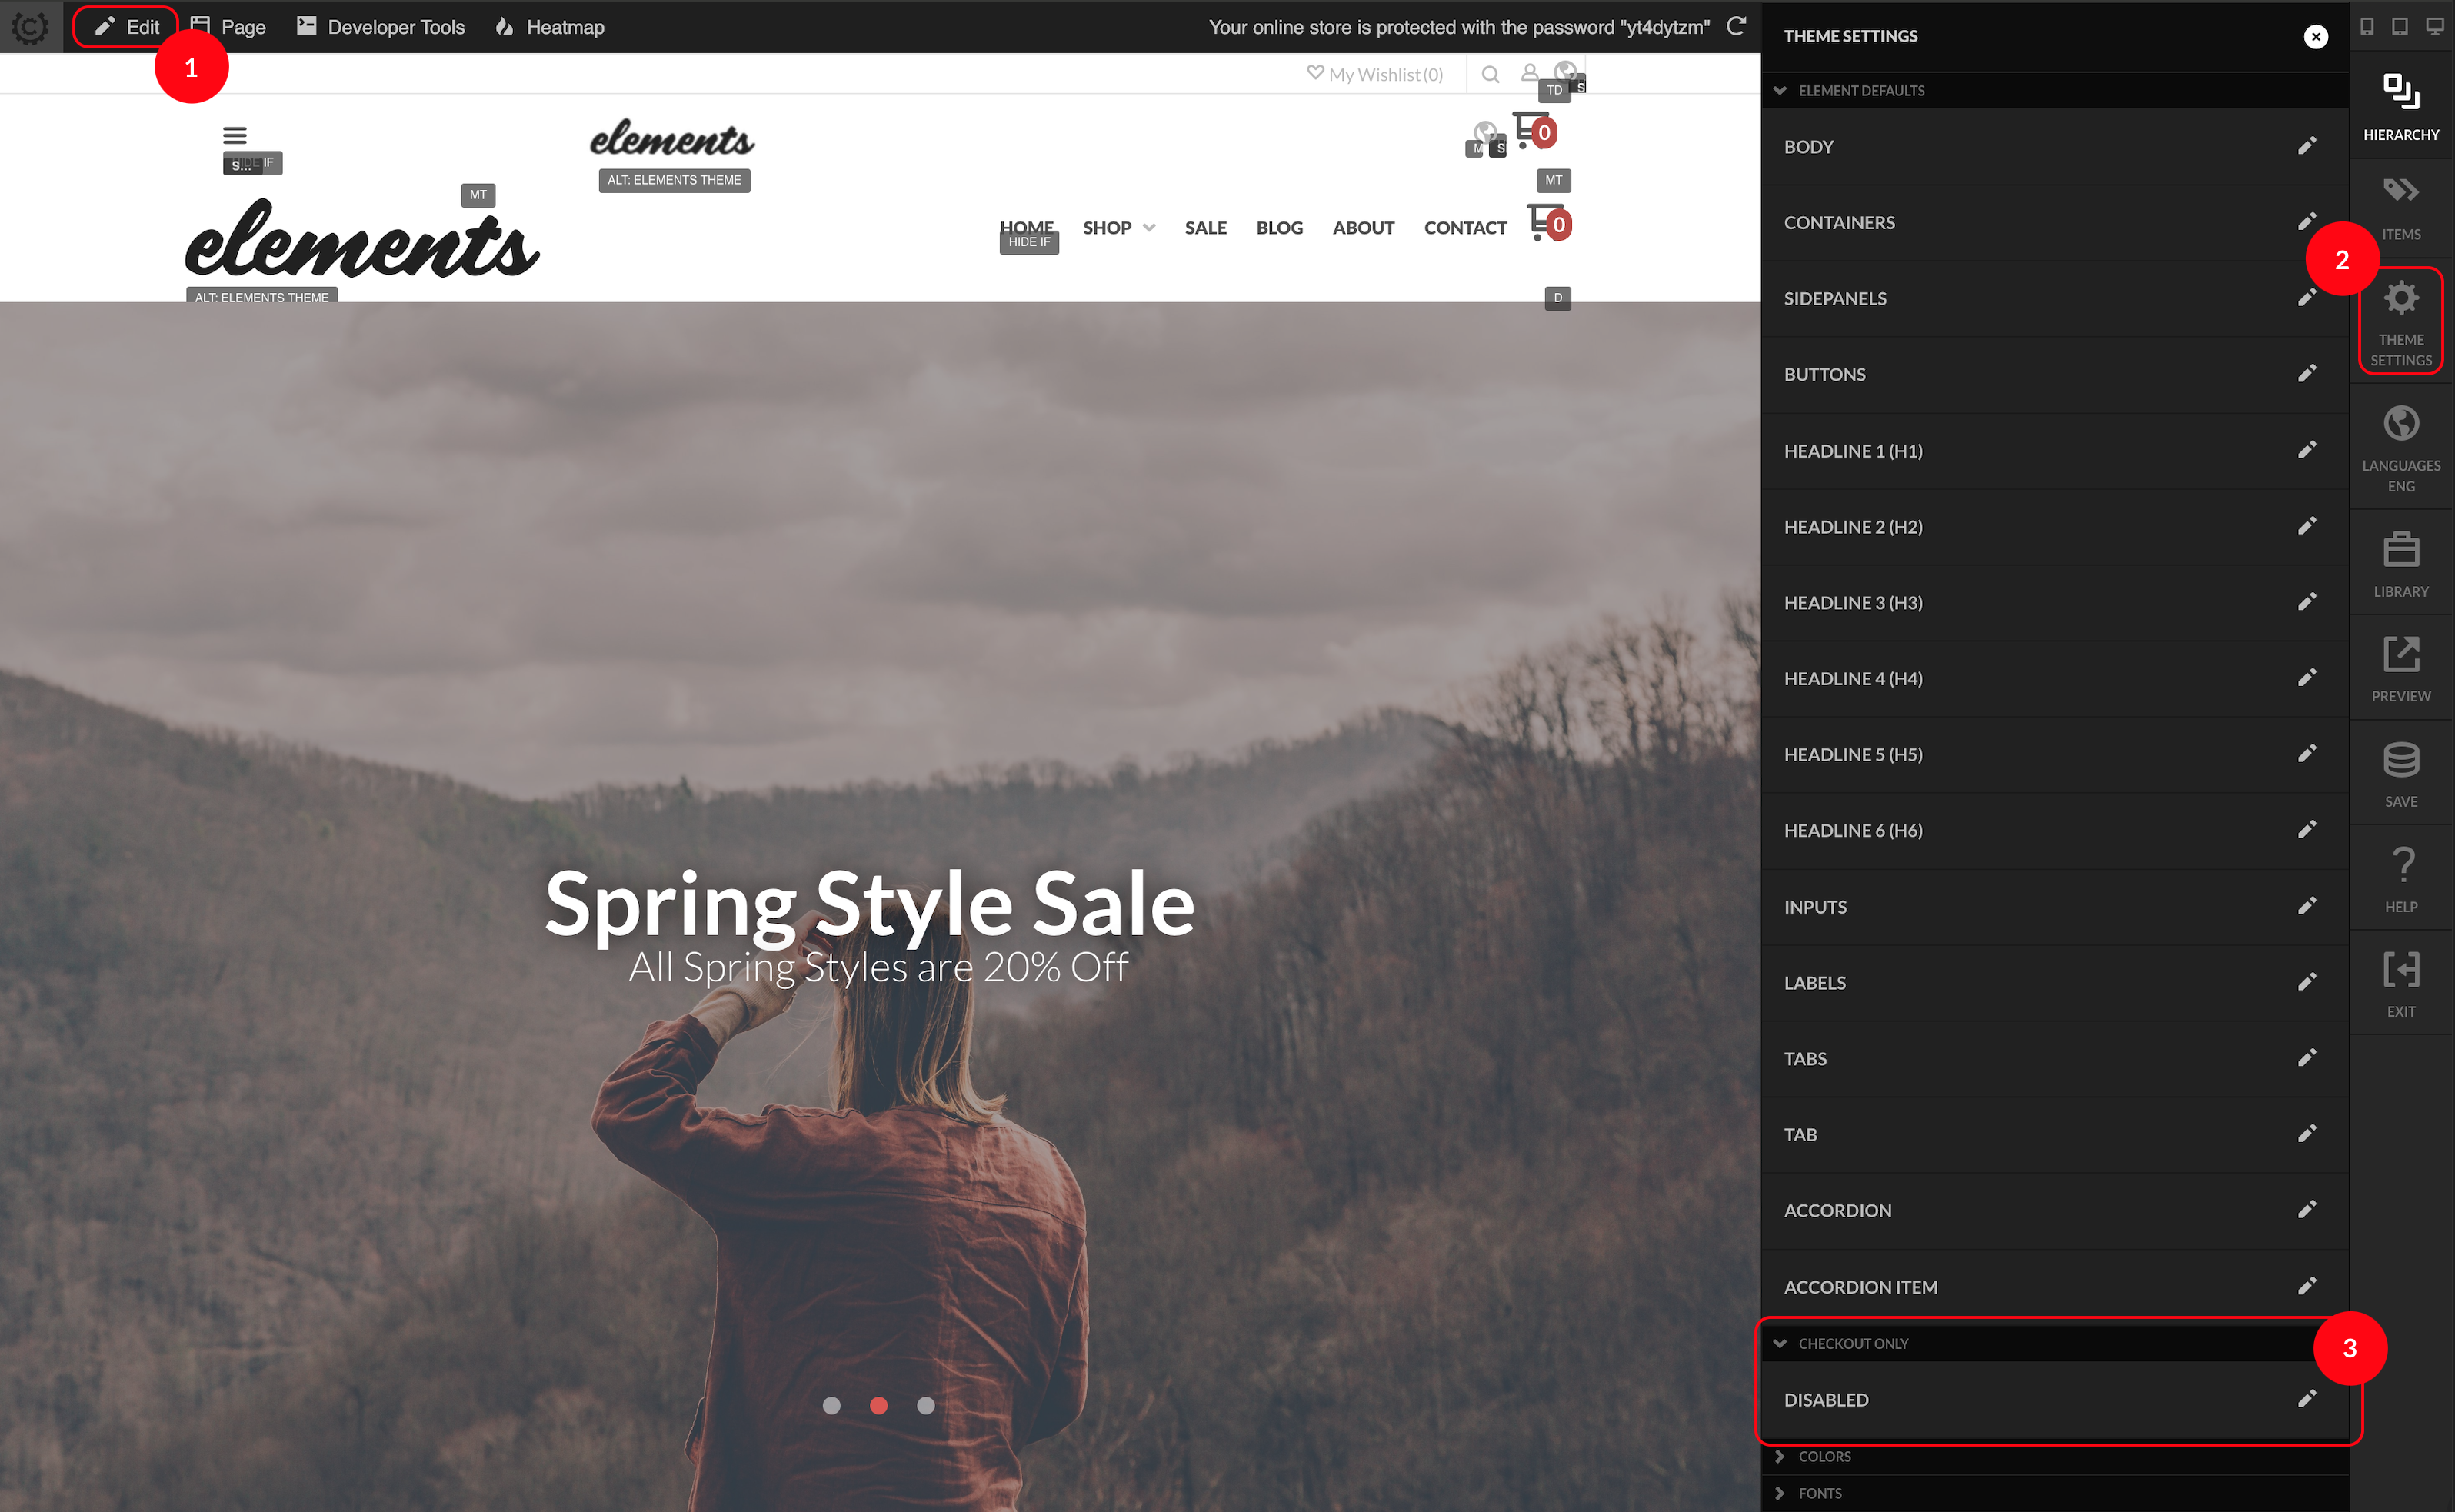
Once on your storefront, click the Edit (1) button located at the top left of the page next to the UltraCart logo.
-
Open the right-hand menu and select Theme Settings (2).
3. Enable Checkout Only Mode
-
In Theme Settings, scroll down to the Checkout Only section.
-
Click Edit (3) next to the "Disabled" status.
4. Configure Checkout Only Options
-
Set Checkout Only Mode to Enabled.
-
Provide a URL for the Link Logo to URL setting. This should be the homepage or primary landing page of your external site.
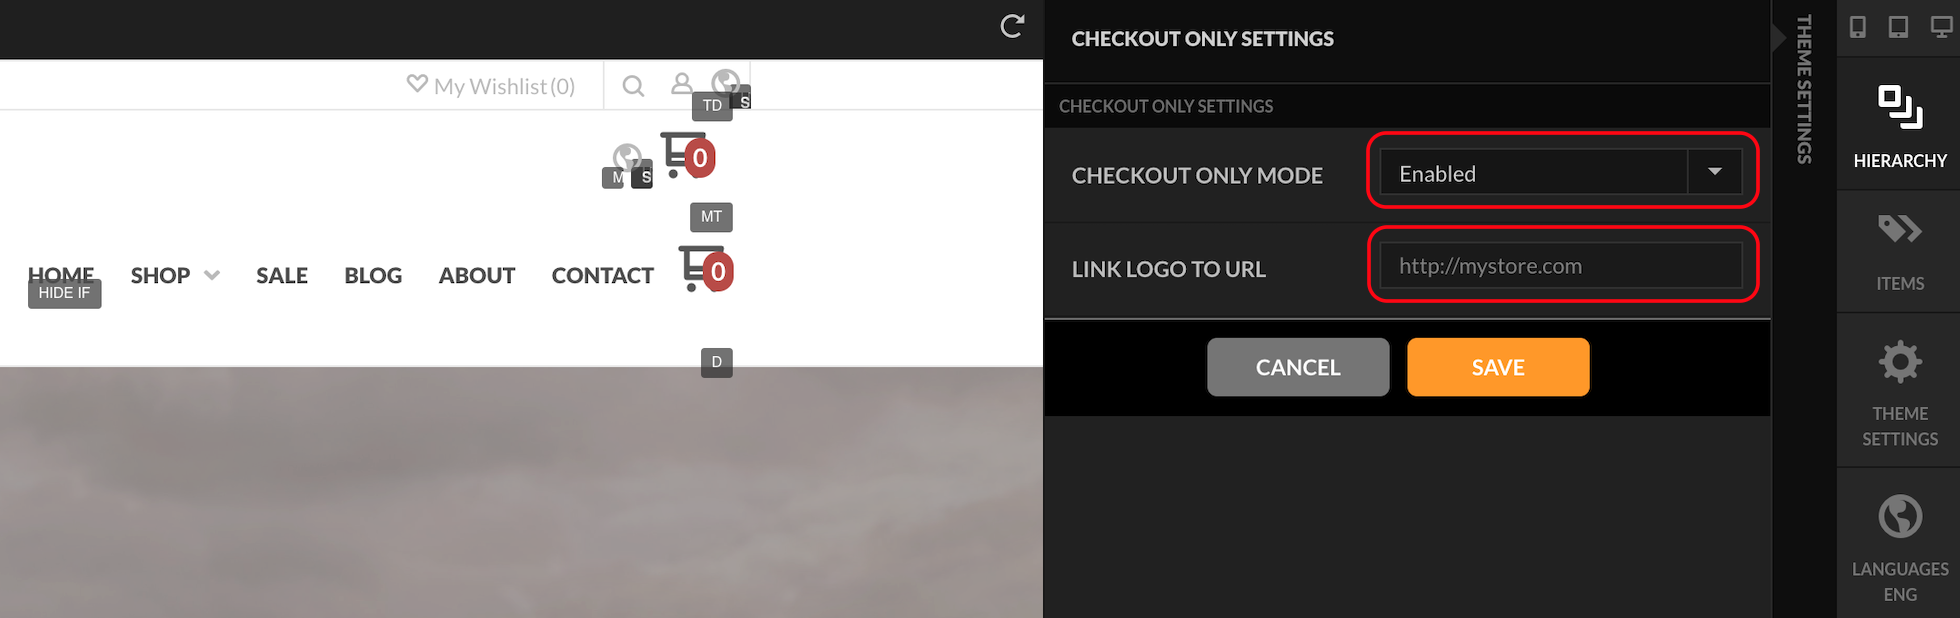
Note: Any storefront page other than the checkout page will automatically redirect visitors to the URL you specify here. For example, if someone tries to access my-uc-storefront.com/any-page.html, they'll be redirected to your provided link.
Warning: the Link Logo to URL value is required to redirect users to your external site. If this value is not set users will be able to access pages other than your storefront on your site.
5. Save Your Settings
- Click Save to apply your changes. Your storefront is now operating in Checkout Only Mode!
Related Resources
-
Excluding specific pages from the checkout redirect: Disable Checkout Only Redirect on Store Locator
-
Setting up and using Buy Links: Using buy links
-
Parameters and values that can be passed into the checkout: Parameters that can be passed to UCEditor
For Legacy StoreFront Themes
Still on a legacy StoreFront? No worries—you can still activate Checkout Only Mode, just through a slightly different path.
1. Select Your StoreFront
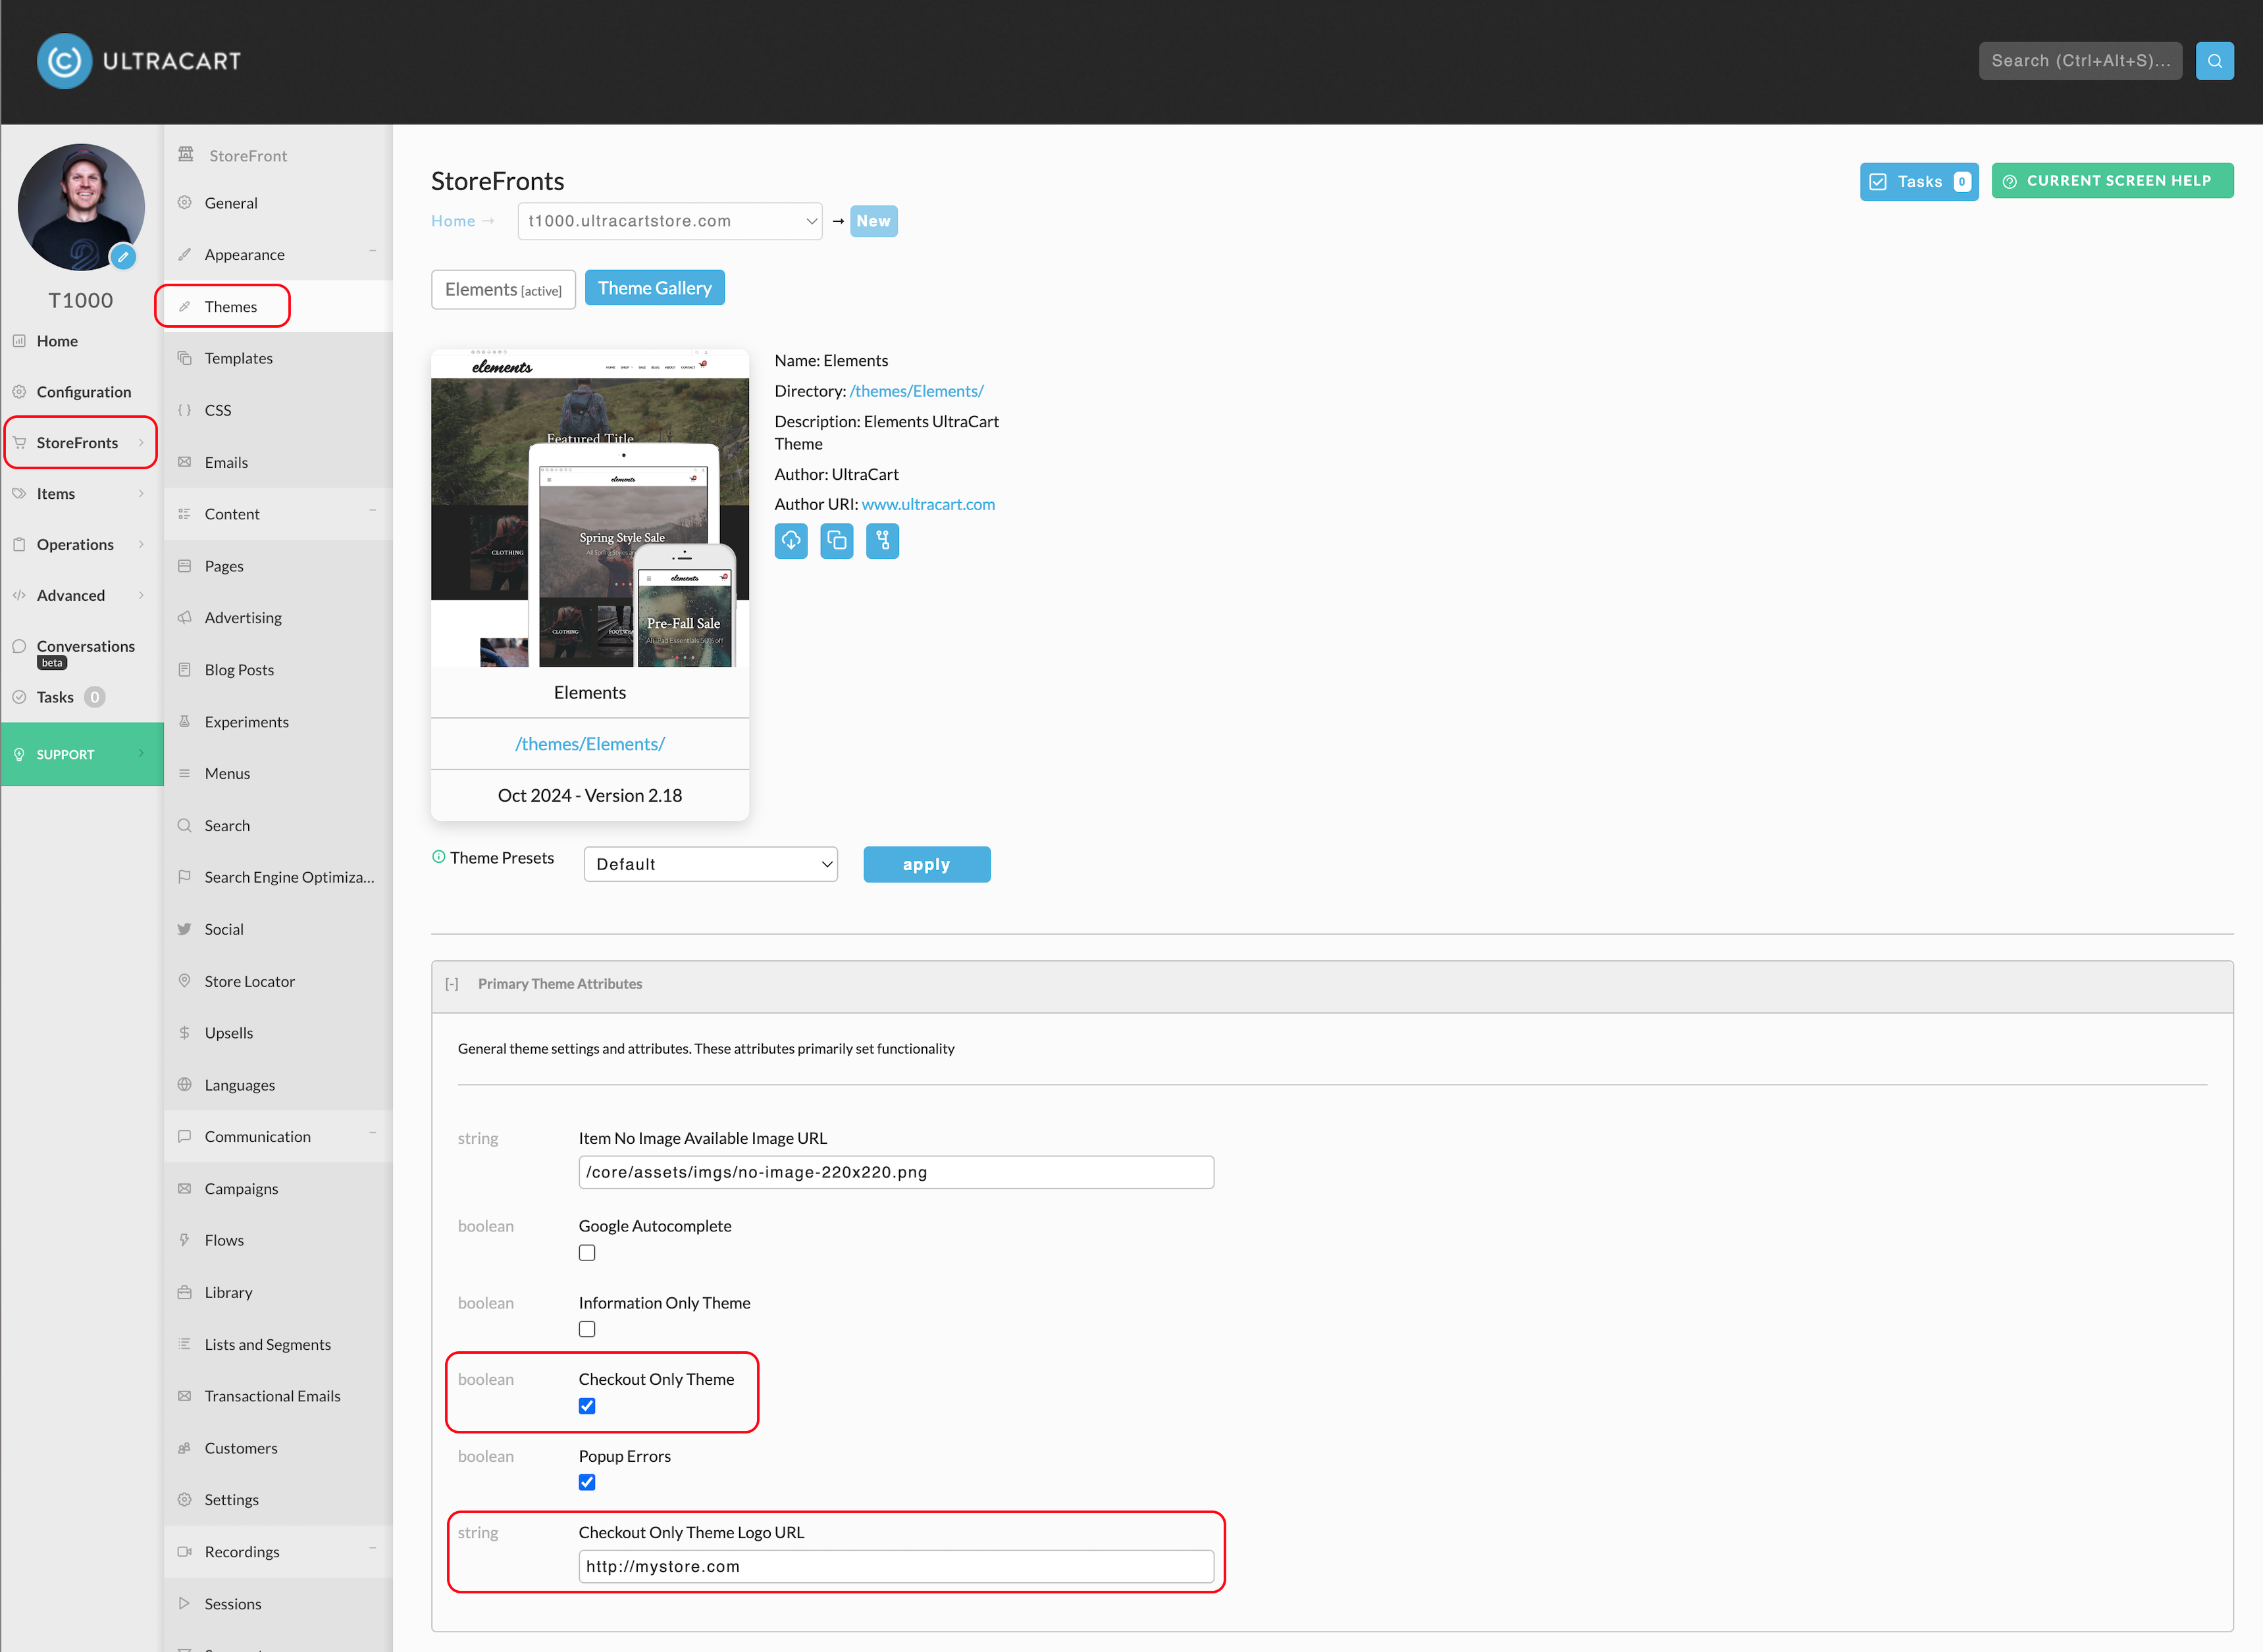
- In the left-hand menu, hover over StoreFronts and select your desired StoreFront.
2. Open Theme Settings
- Click Themes within the StoreFront menu.
3. Enable Checkout Only Theme
-
Locate the Checkout Only Theme option.
-
Check the box to enable it.
-
Enter your external site’s homepage URL into the Checkout Only Theme Logo URL field.
4. Save Your Settings
- Click Save to activate Checkout Only Mode on your legacy storefront.
Legacy Checkout Migration with SSL certificates
If you have an existing legacy UltraCart checkout you can continue reading Using existing SSL certificate for a checkout only theme.