StoreFront Menus
Overview
A StoreFront menu is a Menu element placed in Visual Builder. The Header Menu that ships with your theme is the most common one, but you can add as many additional menus as your StoreFront needs. Once a menu exists, you can edit its items either directly in Visual Builder or from the StoreFronts admin Menus page, whichever is faster for the change you're making.
Add a menu with the Menu element
- Open your StoreFront in the Visual Editor.
- Click Add Element at the spot where the new menu should appear.
- Search for "menu" and select the Menu element to insert it.
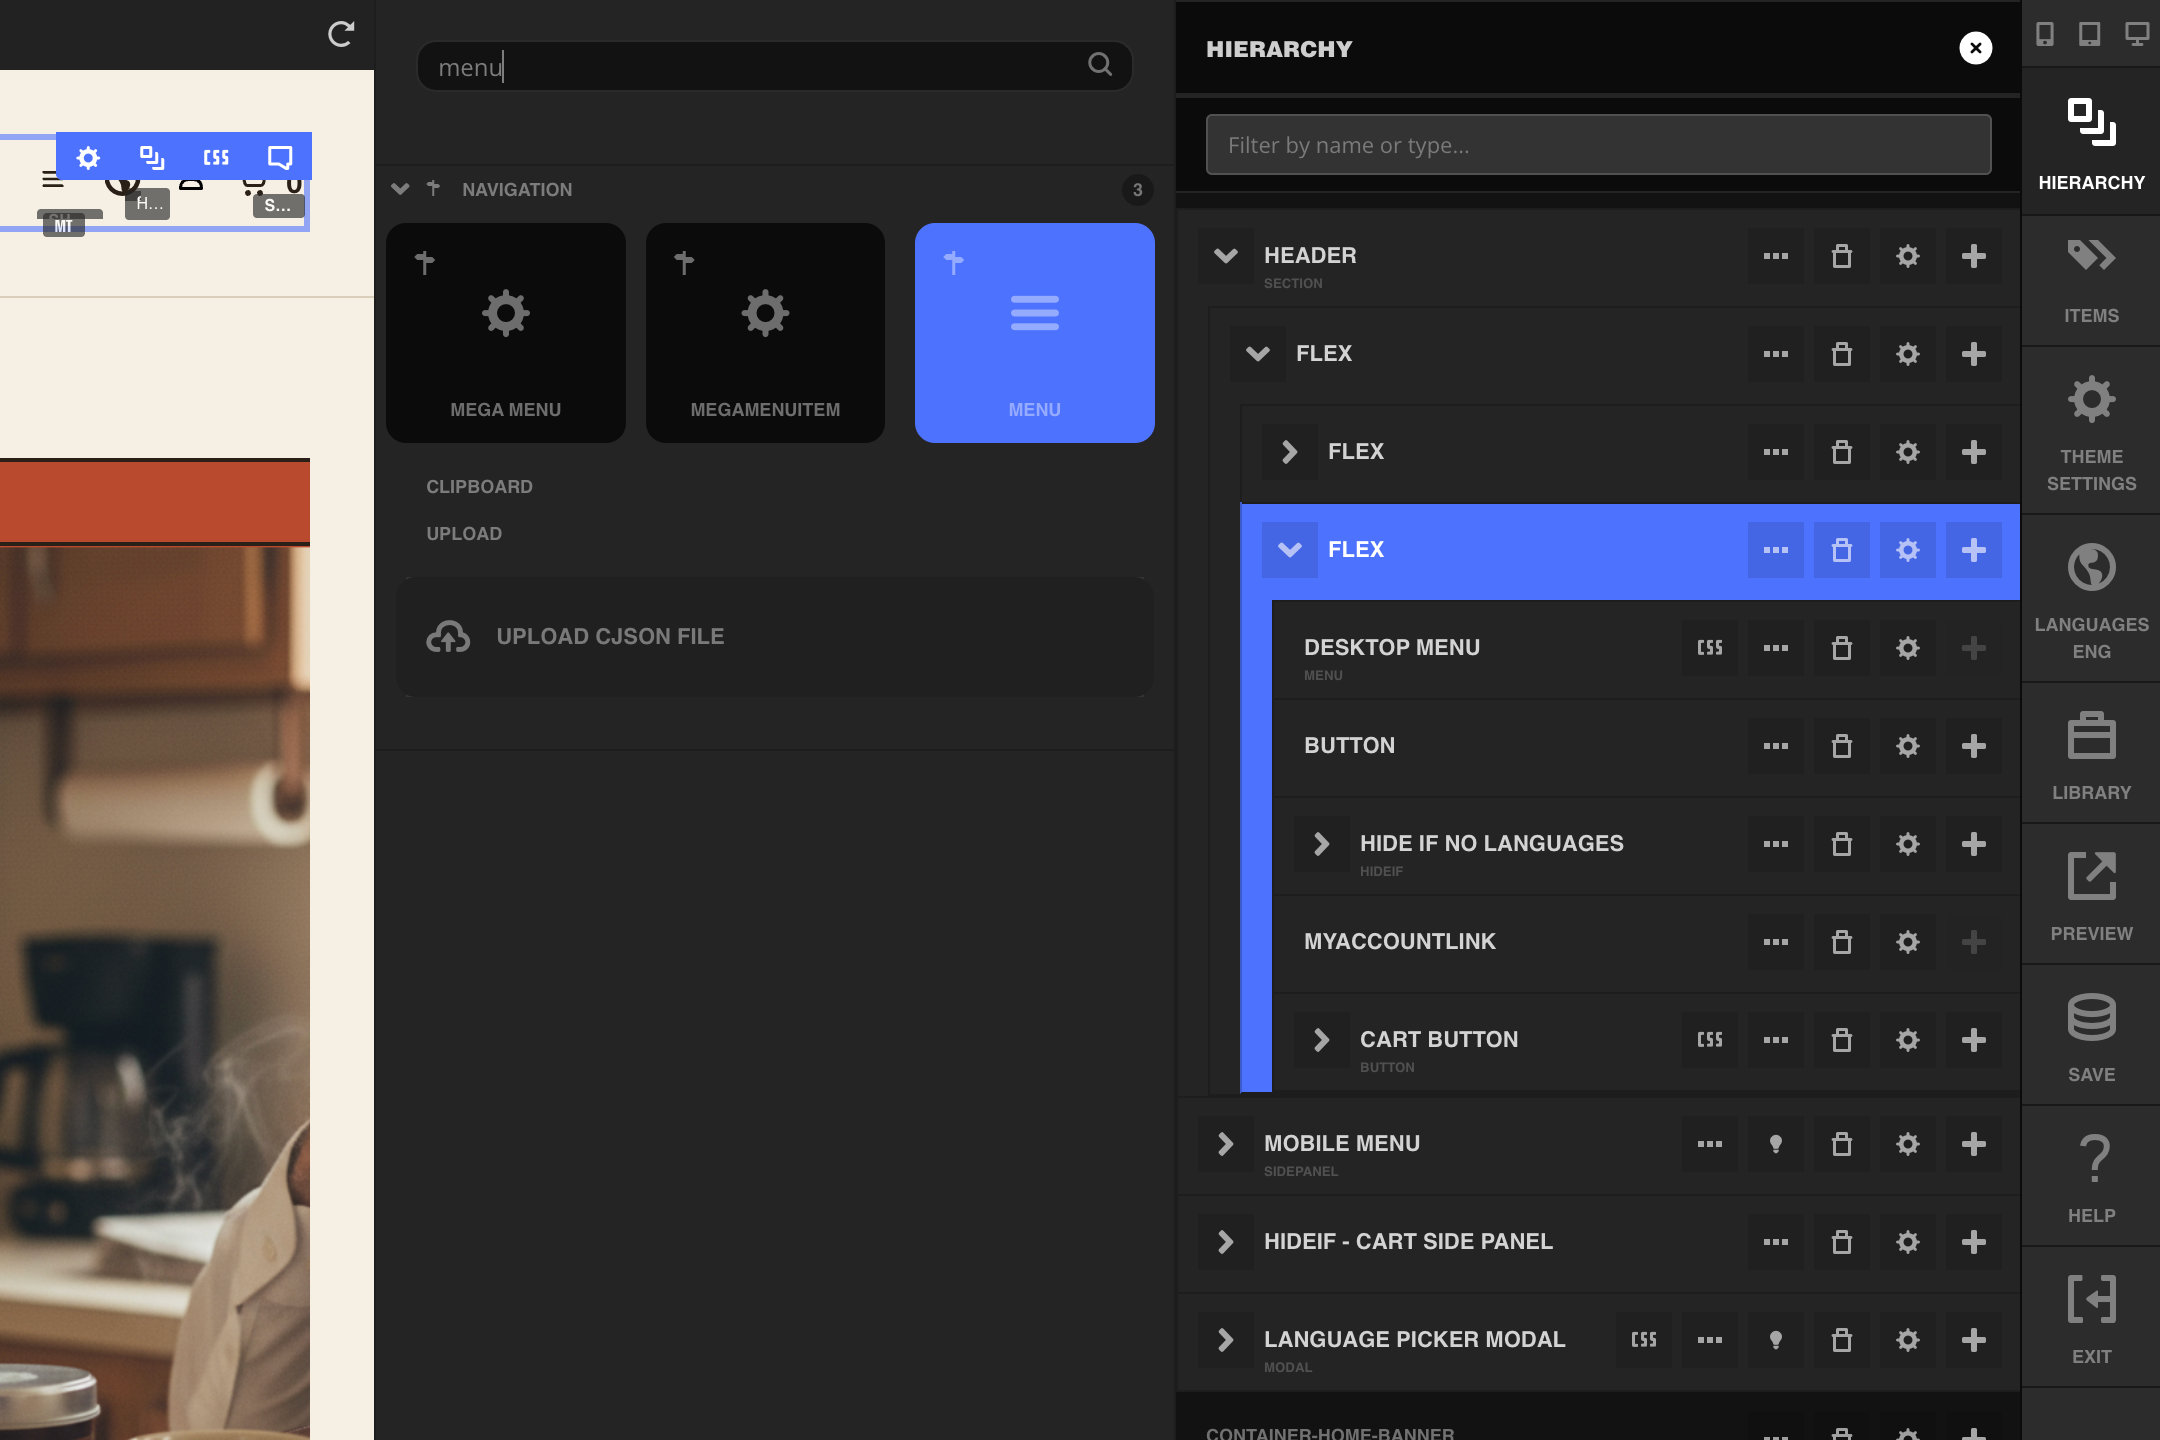
A new Menu element starts out as a duplicate of the Header Menu, including its name. Open its settings panel and rename it to something that reflects its purpose (for example, "Footer Menu") so you don't confuse it with the header menu later.
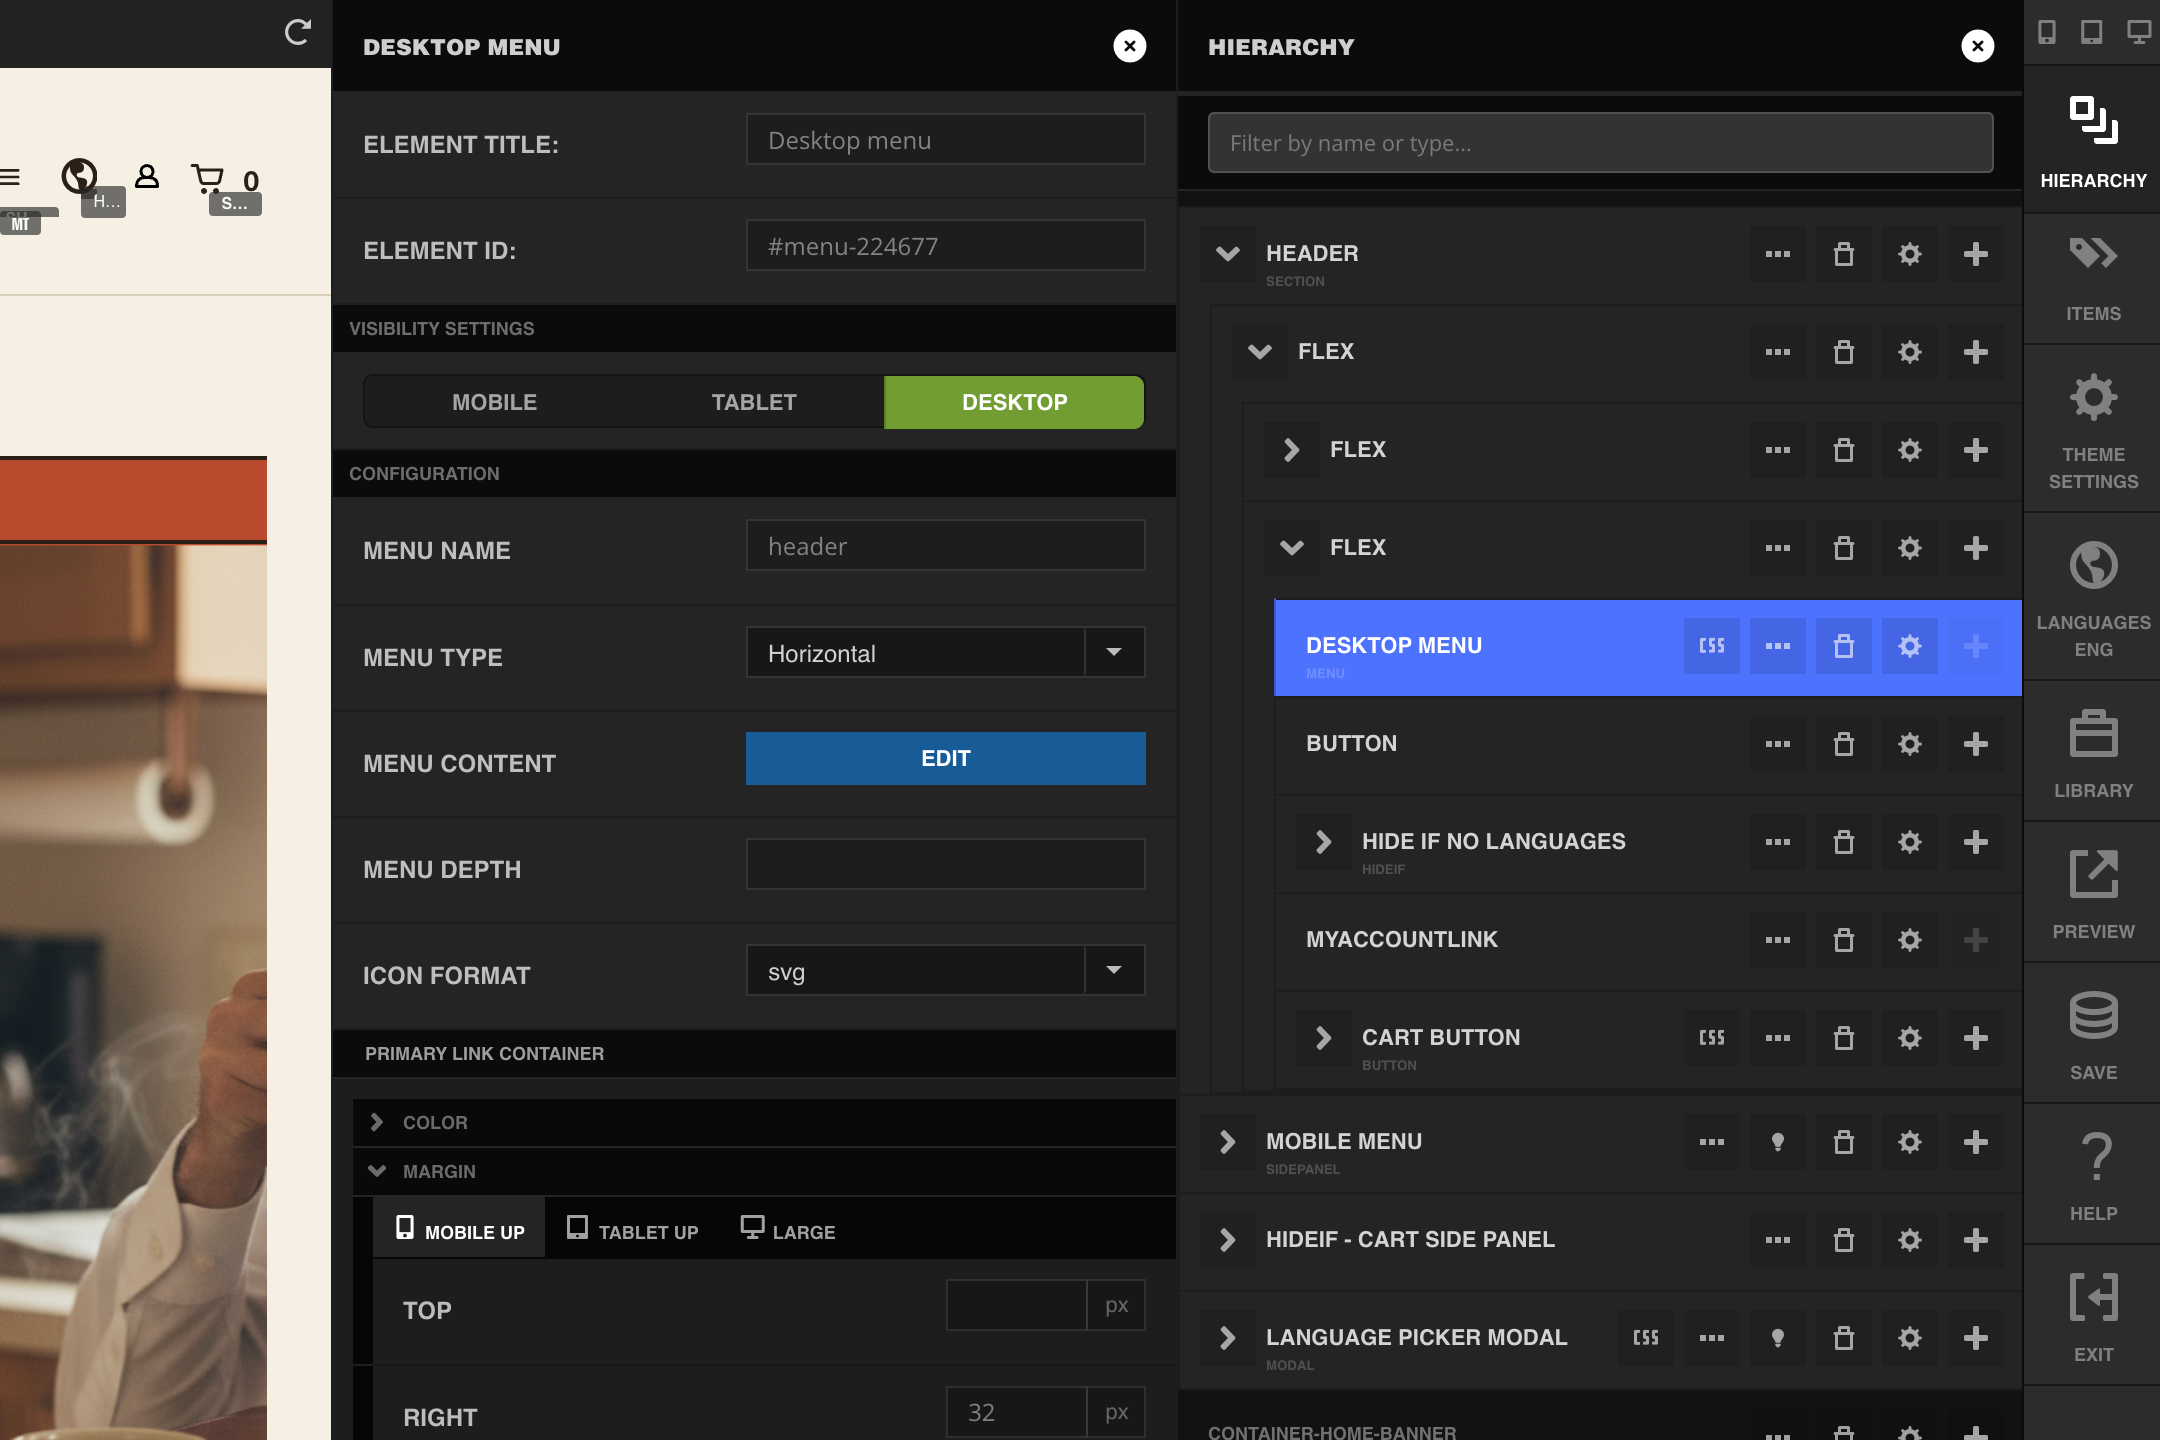
Rename the menu before you populate it. The StoreFronts admin Menus page lists menus by name, and a page full of menus still called "Header Menu" is hard to tell apart.
Edit menu items directly in Visual Builder
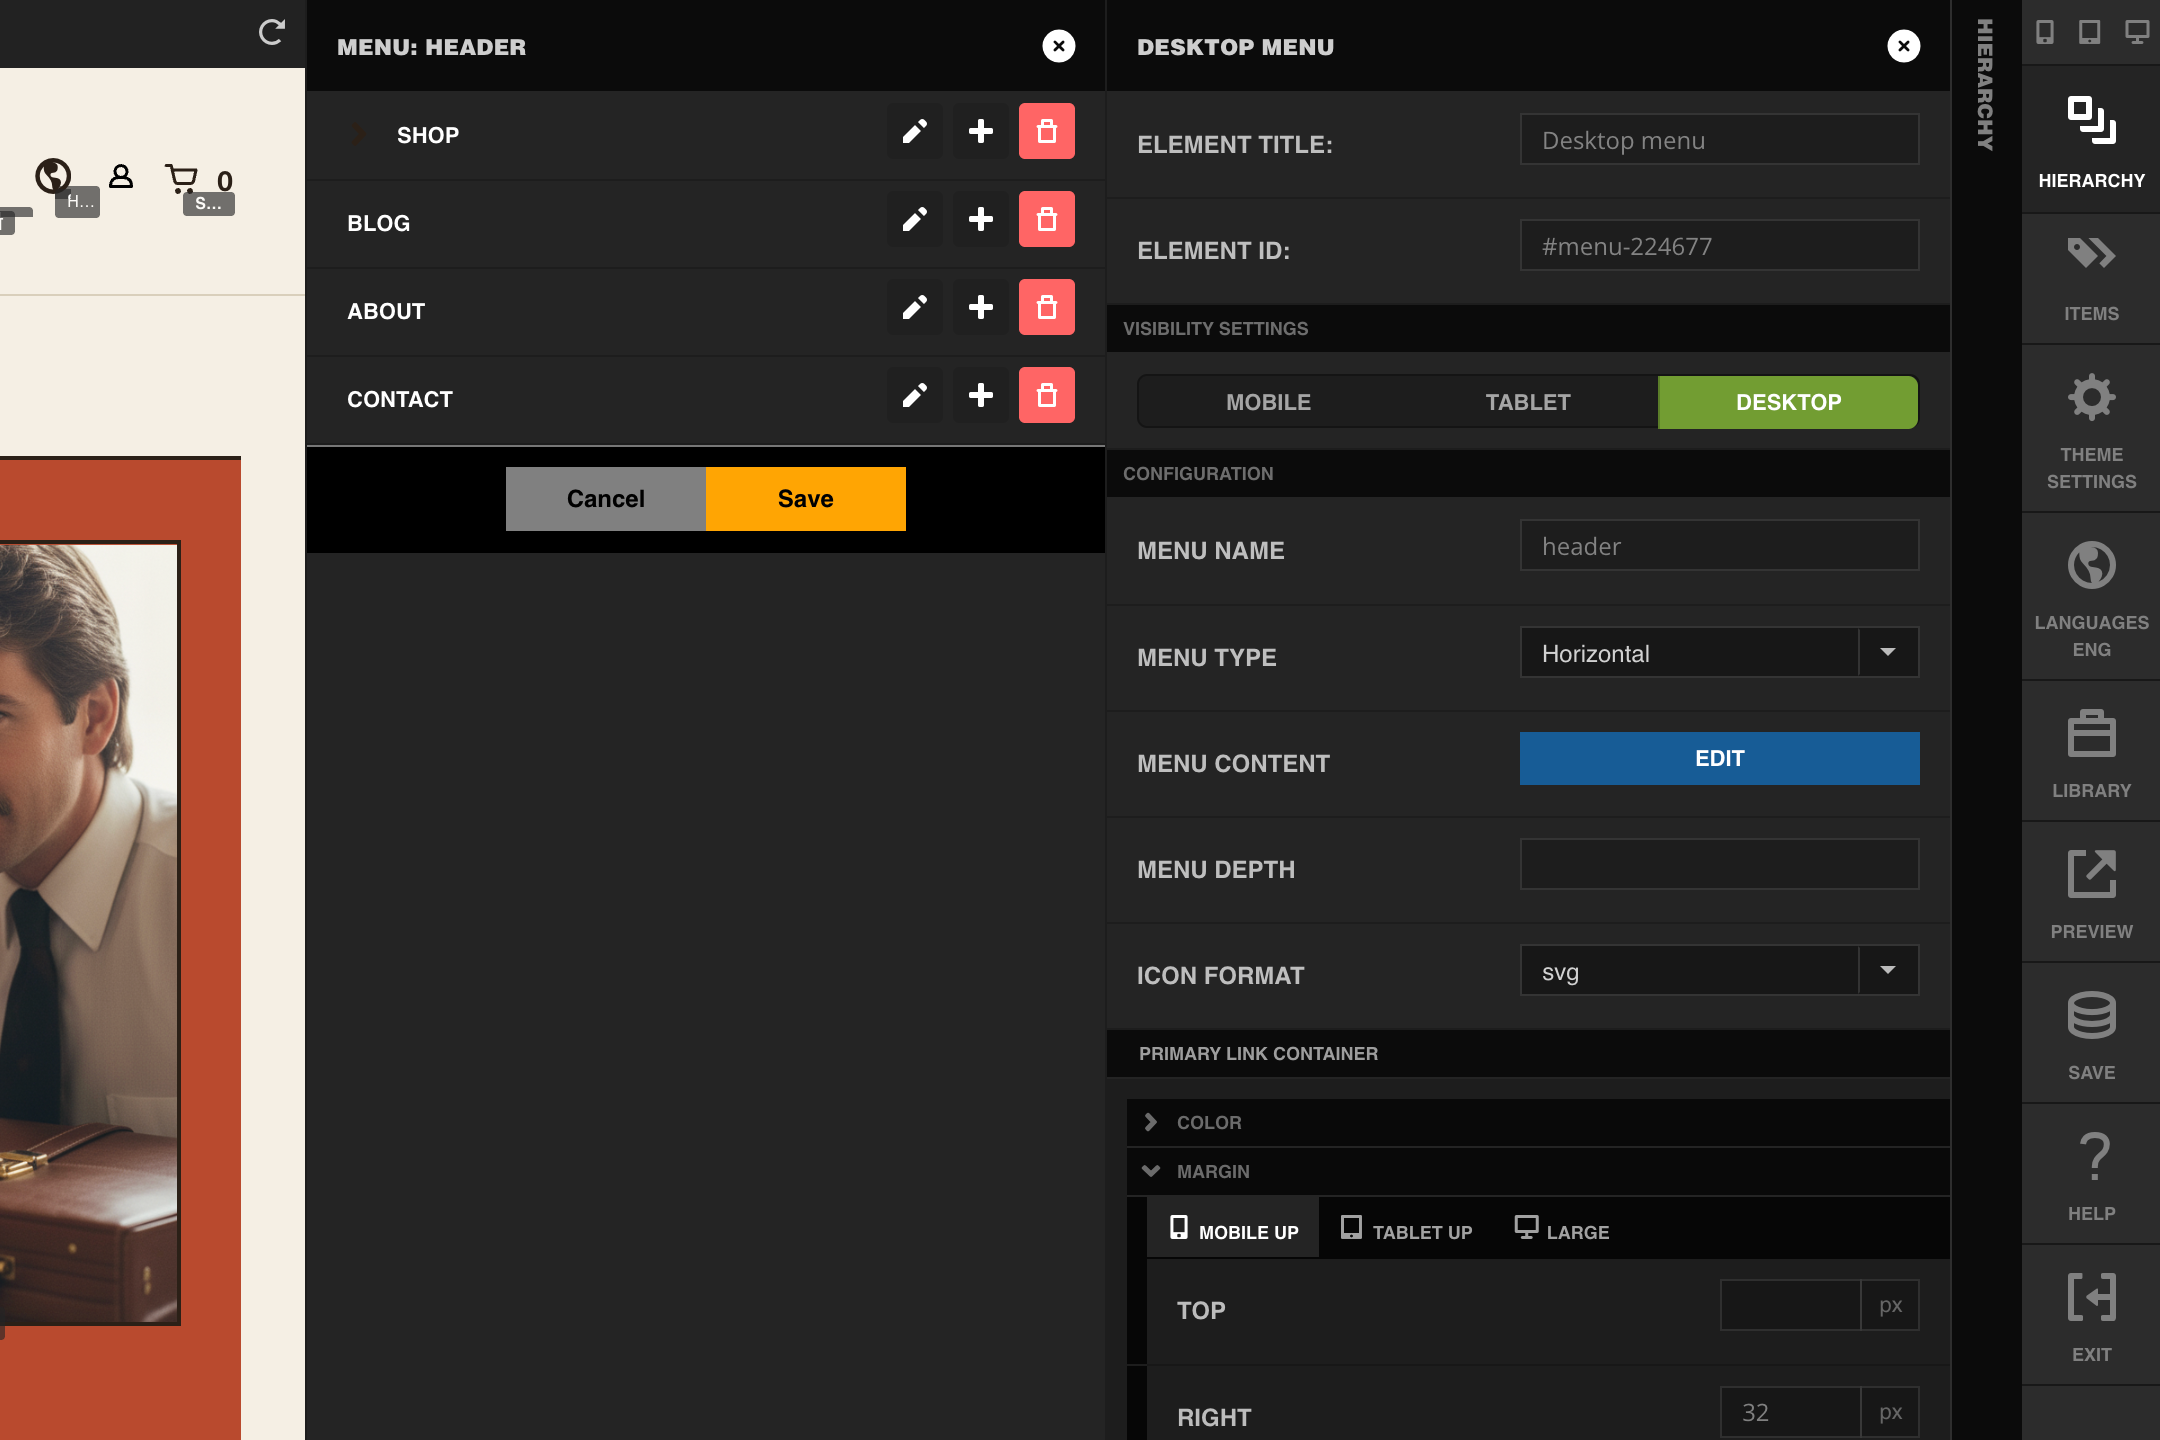
- Select the Menu element and open its settings panel.
- Click Edit next to Menu Content to open the menu item editor.
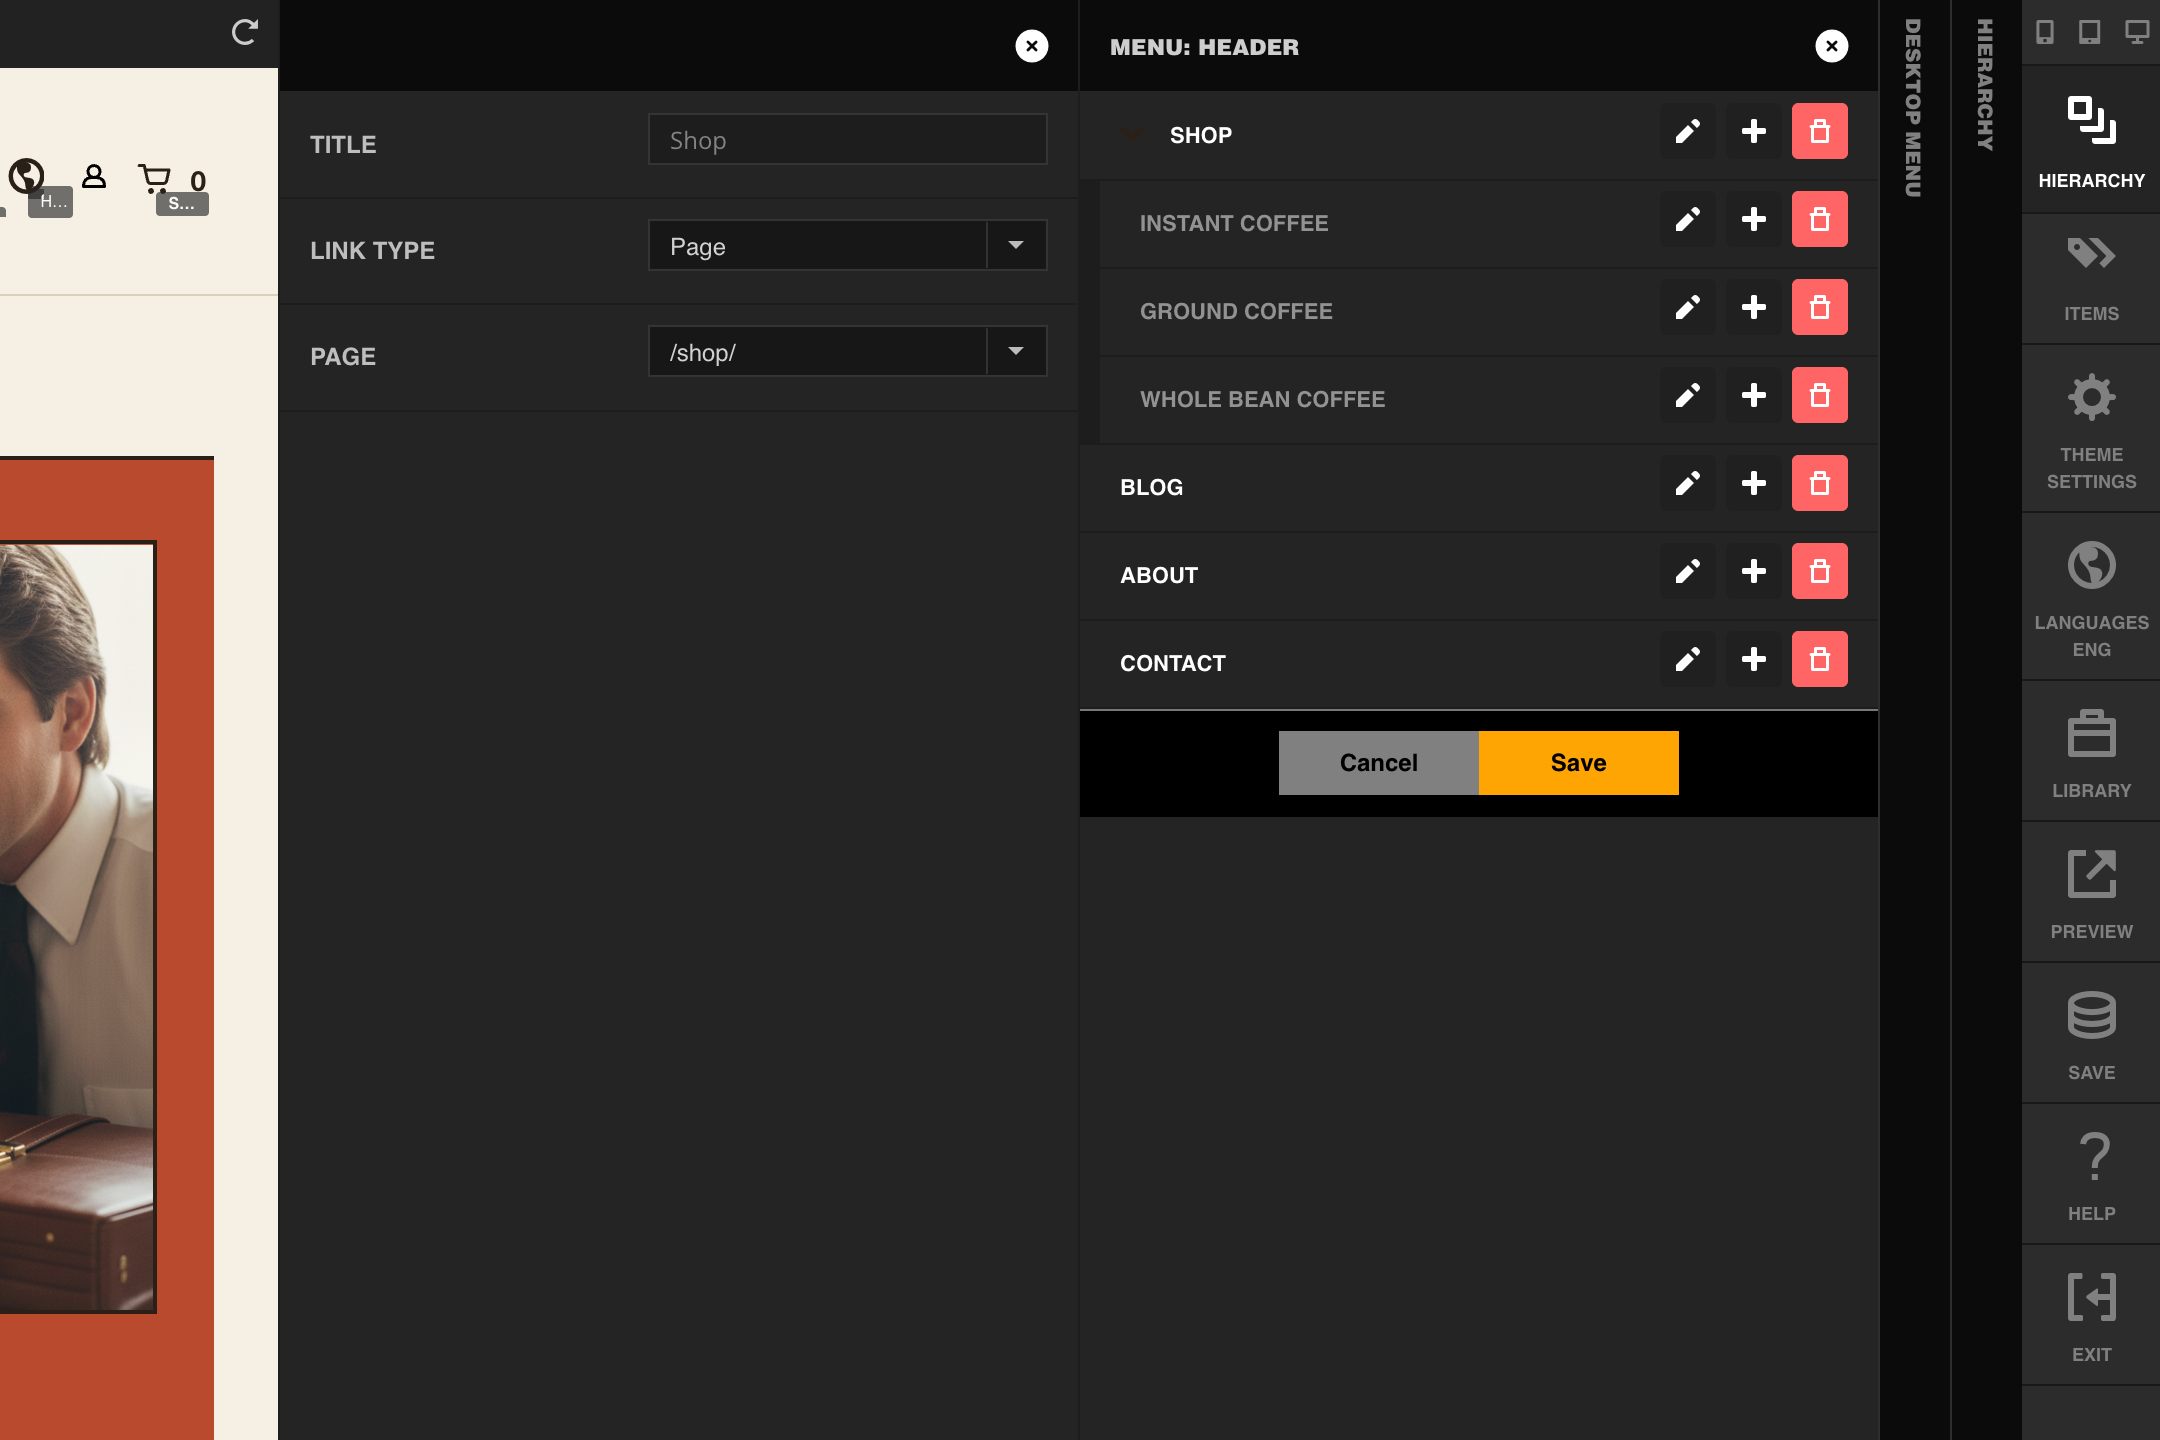
- Use the pencil icon to edit an item, the plus icon to add a new item or submenu item, and the trashcan icon to delete an item.
- Click Save in the menu editor, then click Save again in Visual Builder to publish the change to your live StoreFront.
Edit menu items from the StoreFronts admin Menus page
You can make the same edits from the UltraCart backend instead of Visual Builder. This is useful when you're not already in the editor, or when you want to update a menu without opening a live preview of the StoreFront.
- Go to Main Menu → StoreFronts → (select your StoreFront host) → Menus.
- Find the menu you want to change in the list.
- Add, reorder, or delete choices, then save.
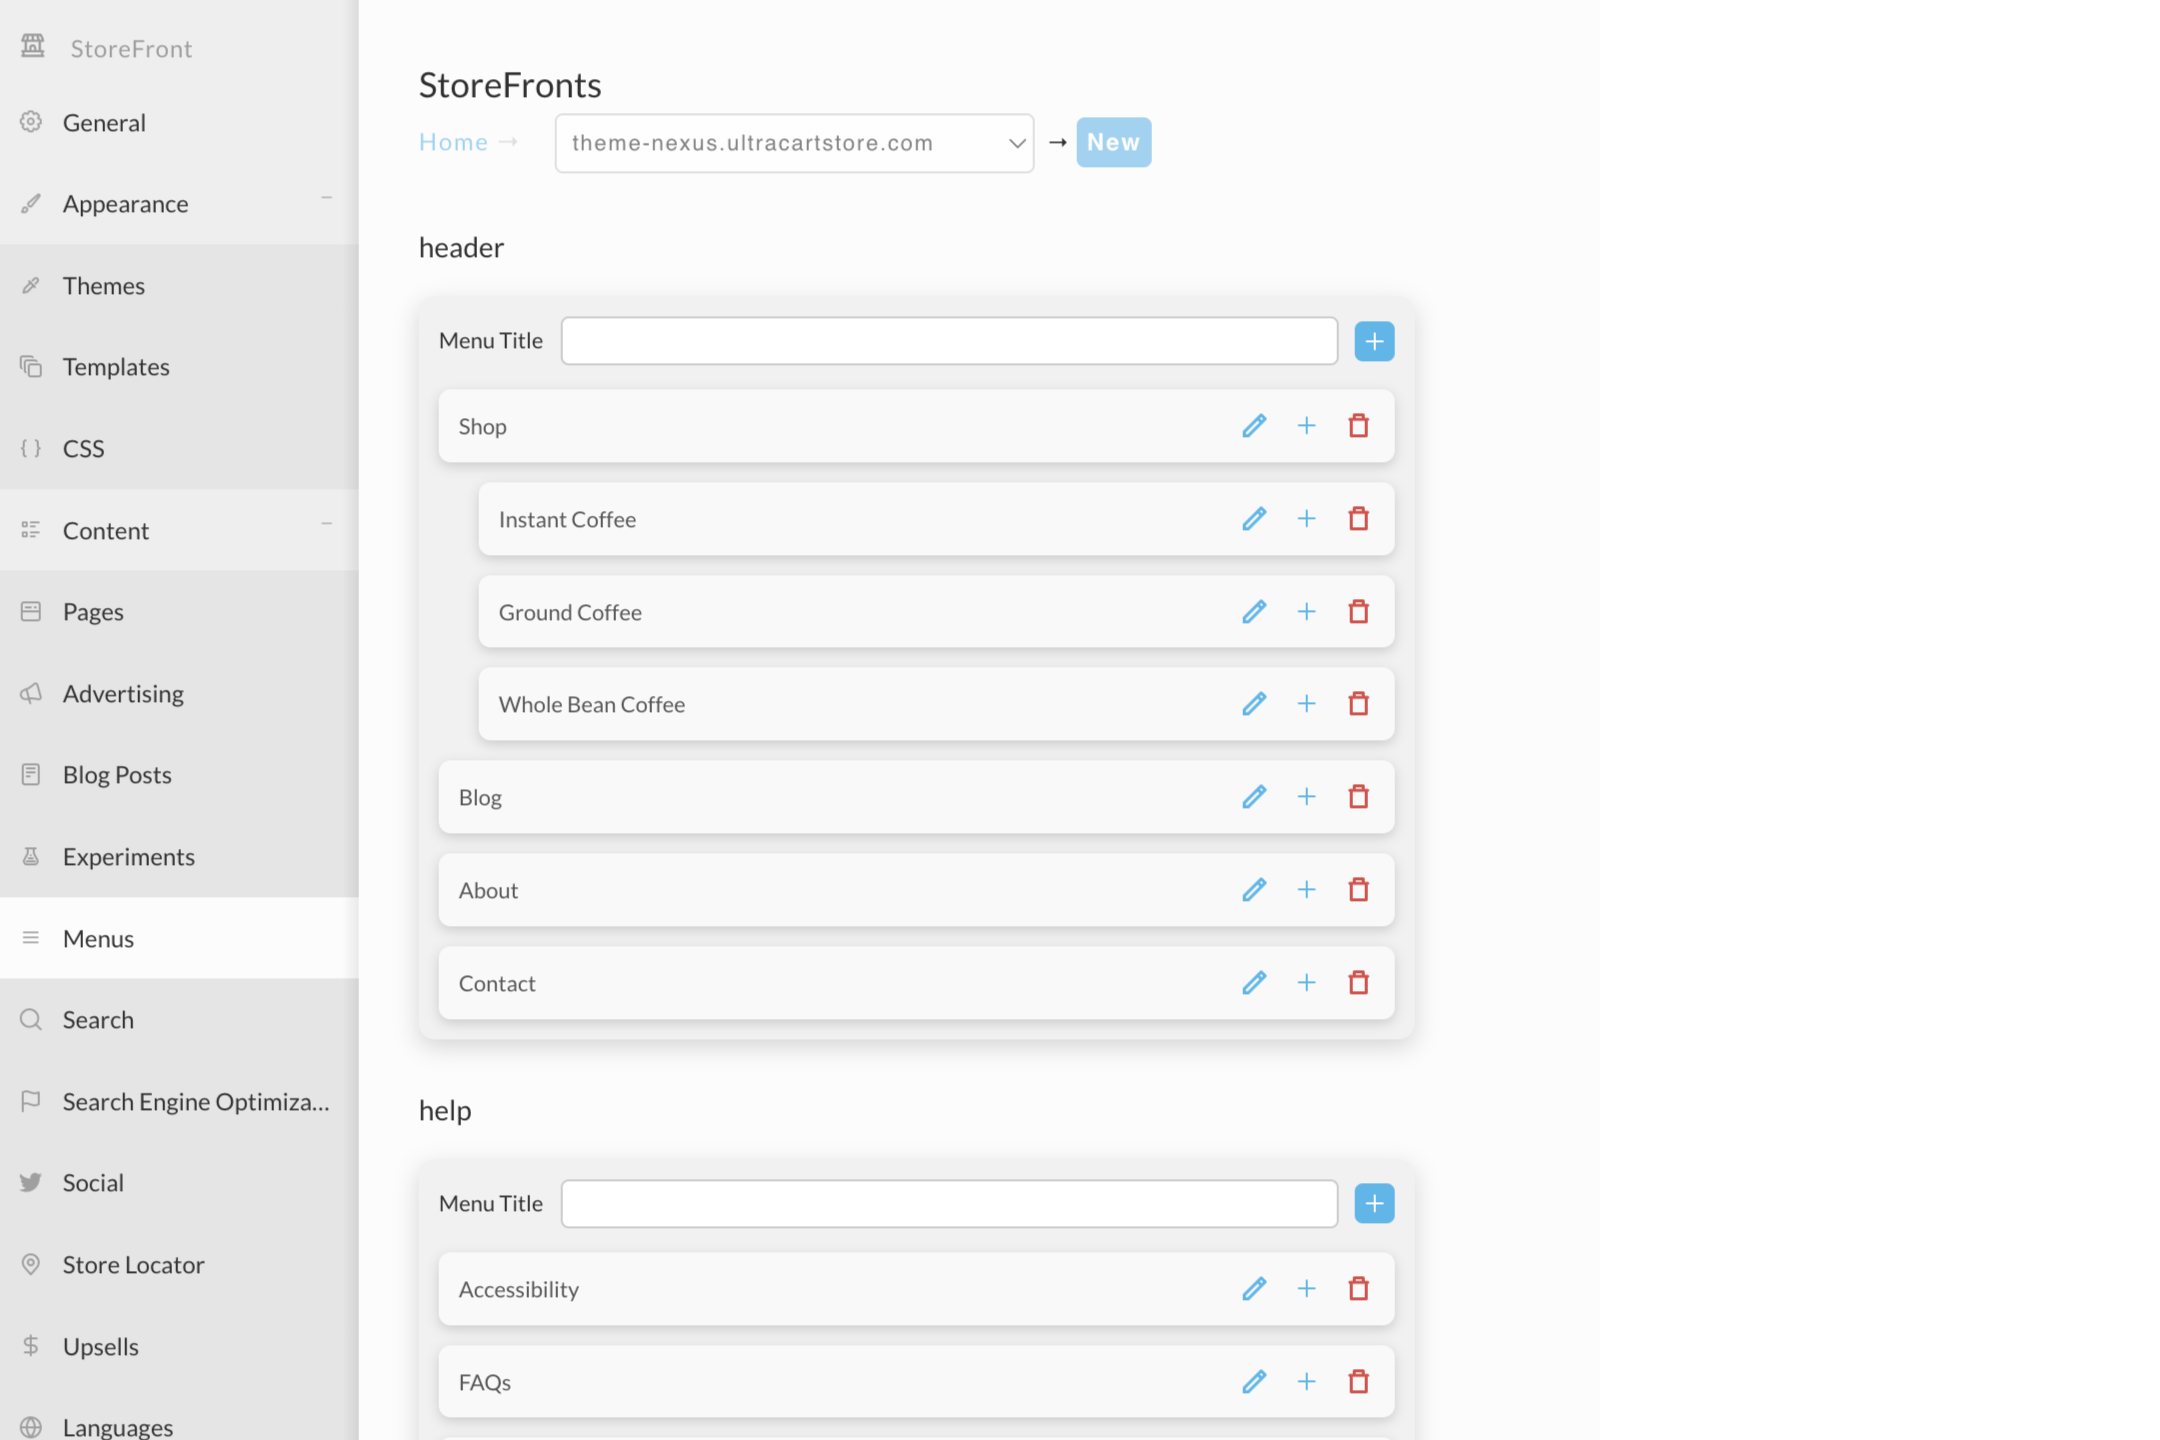
For the finer-grained tasks on this page, see:
Editing the mobile menu
The mobile menu starts out as a copy of the Header Menu. Edits you make to the Header Menu through either method above carry over to the mobile menu automatically, until you customize the mobile menu directly in Visual Builder. Once you do that, the two menus are independent and further Header Menu changes won't appear on mobile. See Editing the mobile menu for the Visual Builder steps.
Mega Menu
Mega Menu is a separate Visual Builder element from the standard Menu element covered on this page, built for menus that need a wider dropdown with more structure than a simple list of links and submenus. See Mega Menu for how to add one and build out its content.
Locating a menu in a template or component
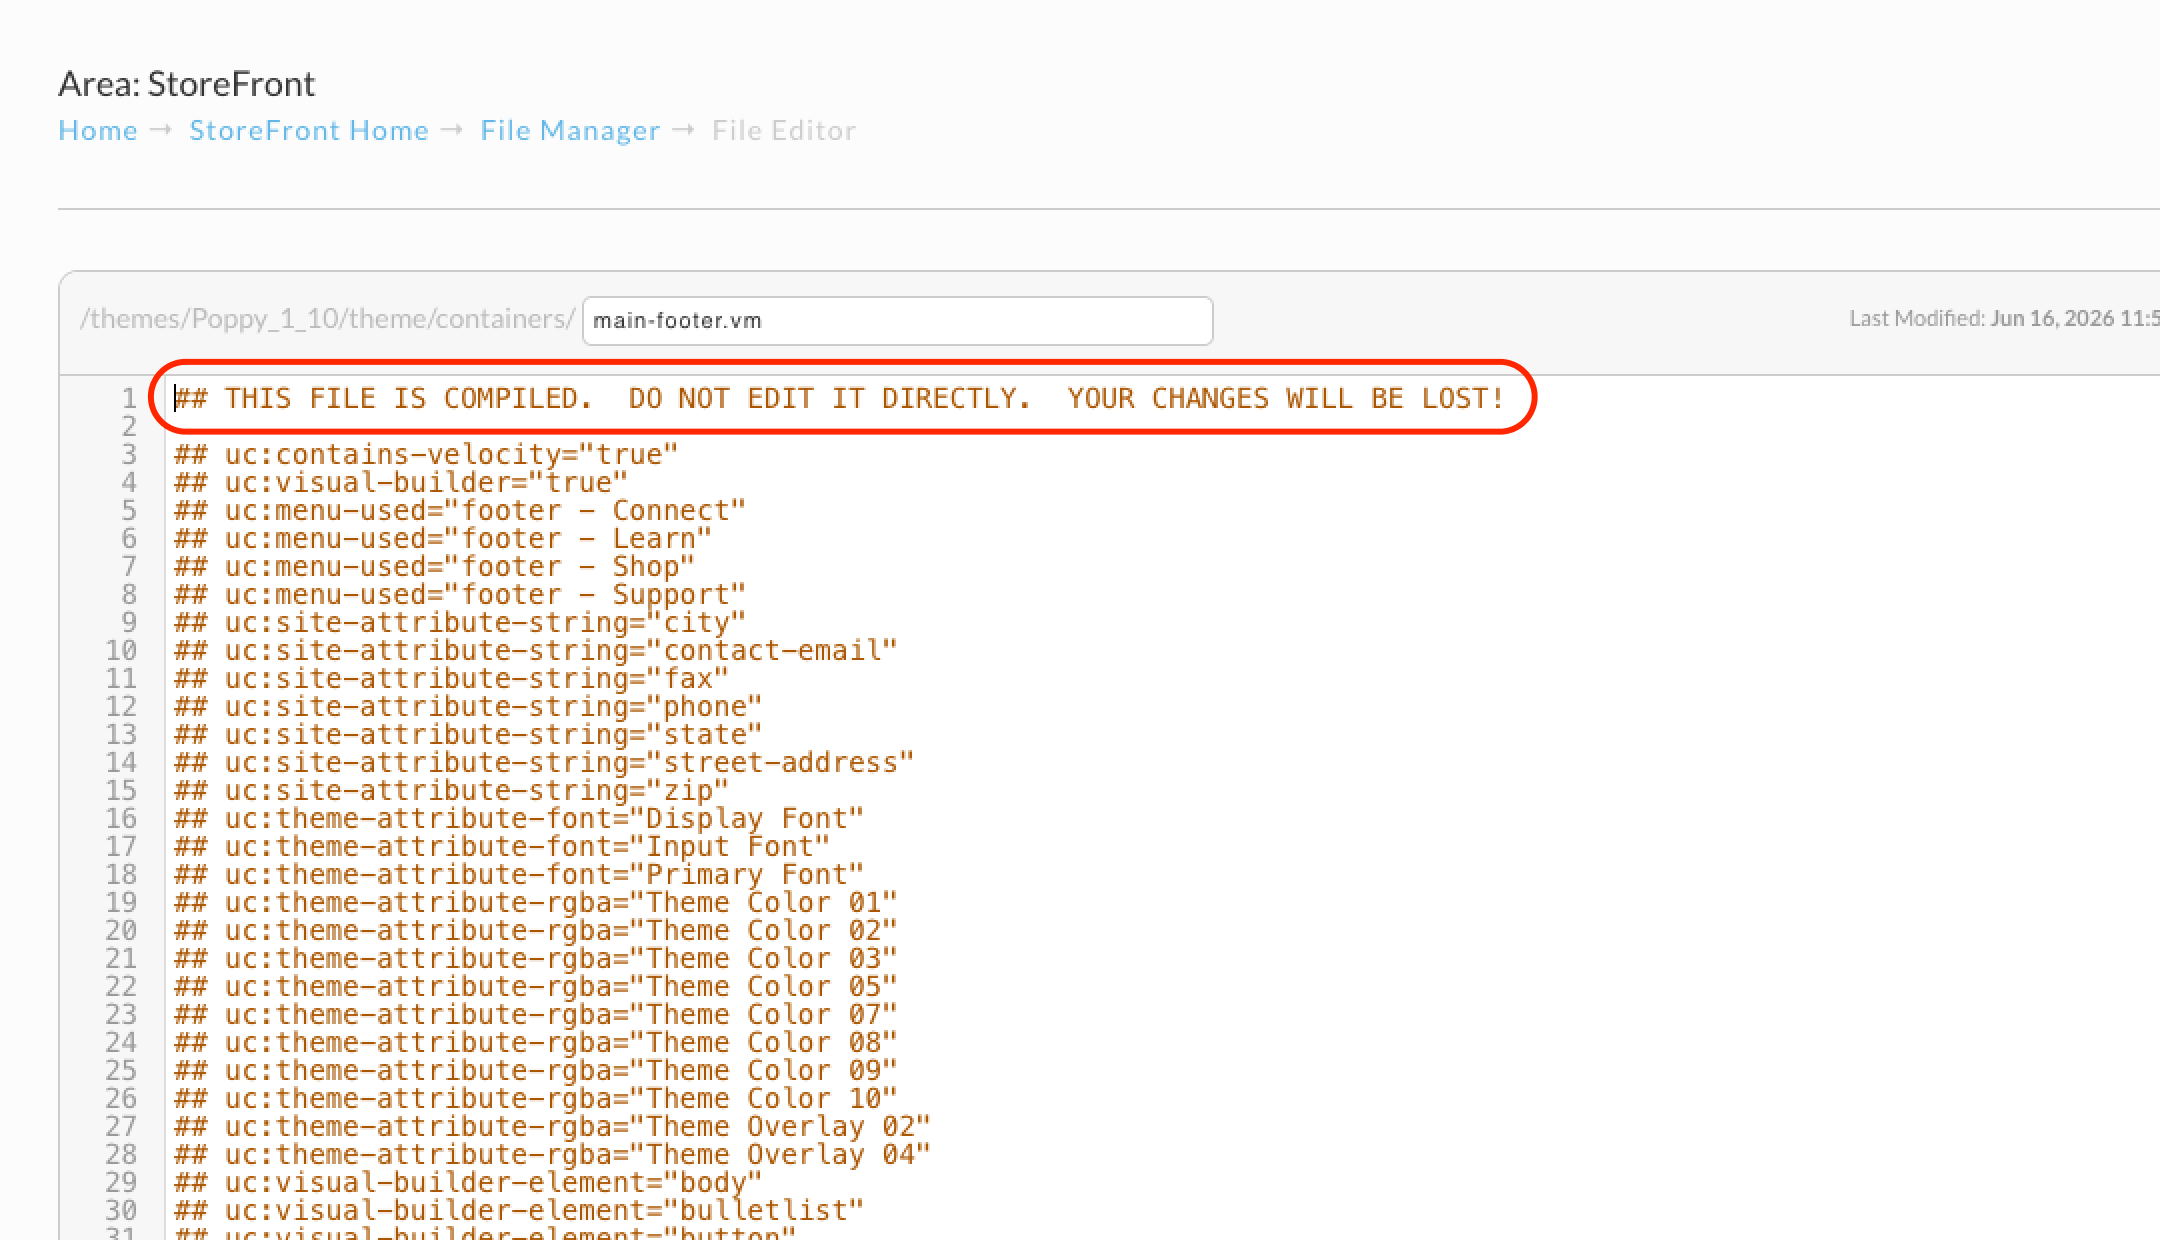
Every template and Visual Builder component that renders a menu carries a directive comment
recording which menu it uses, in the form ## uc:menu-used="<menu name>". Search your
StoreFront's files for that directive when you need to find everywhere a menu appears,
for example before you delete a menu or change one that several pages might depend on.
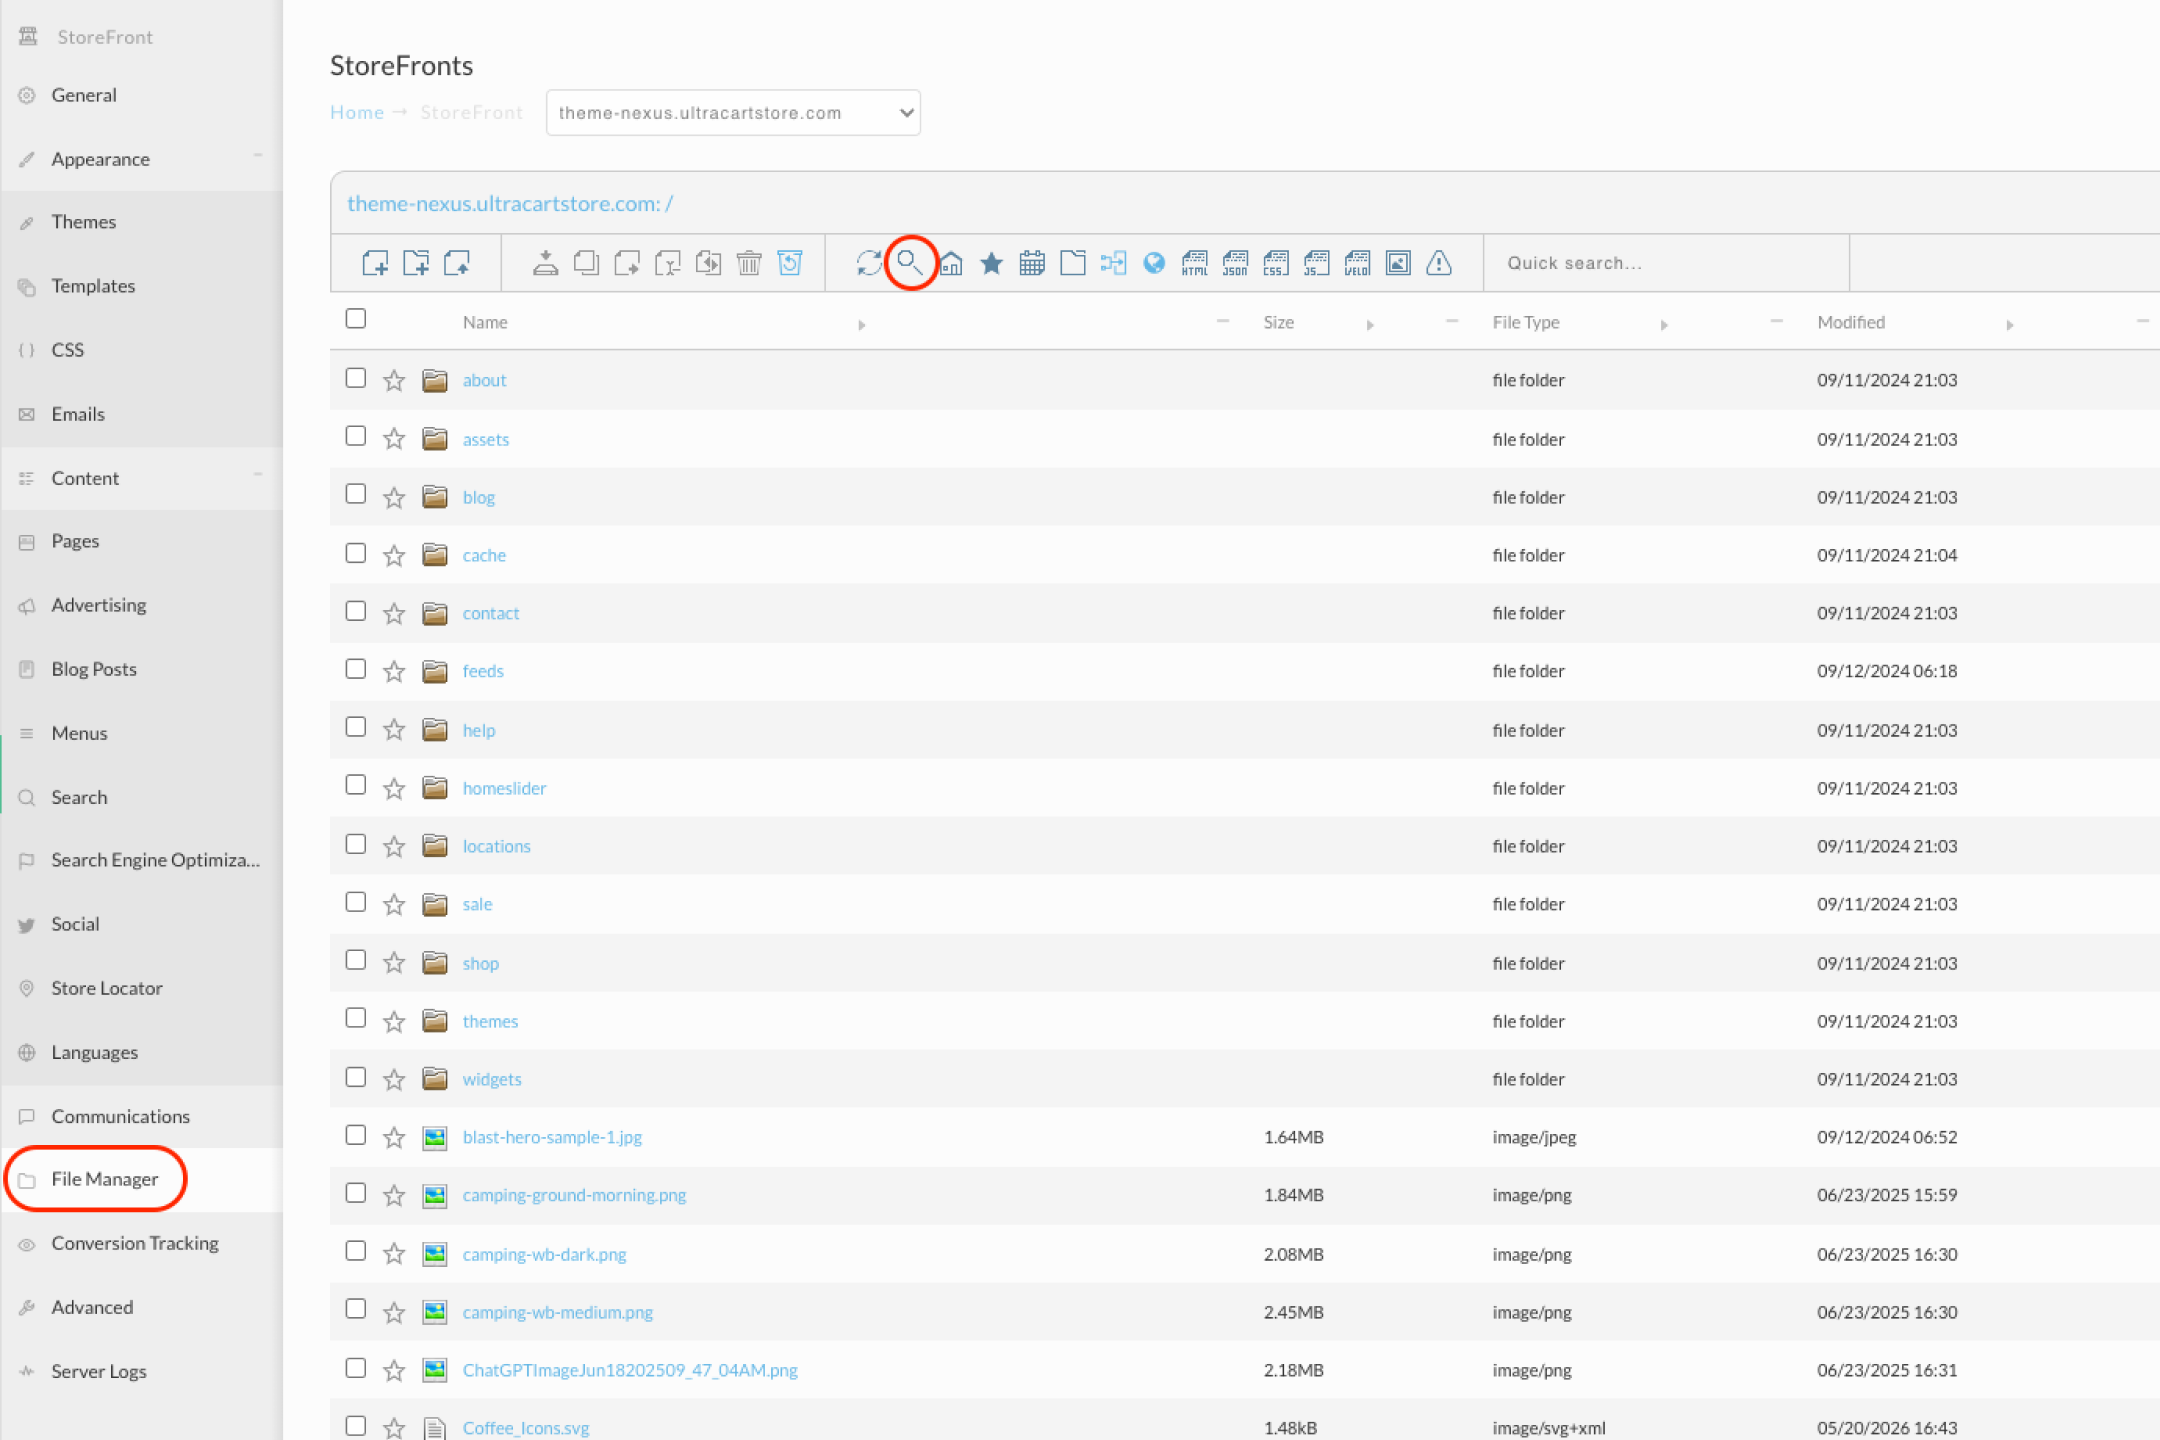
- Go to Main Menu → StoreFronts → (select your StoreFront host) → File Manager.
- Click the search icon in the File Manager toolbar.
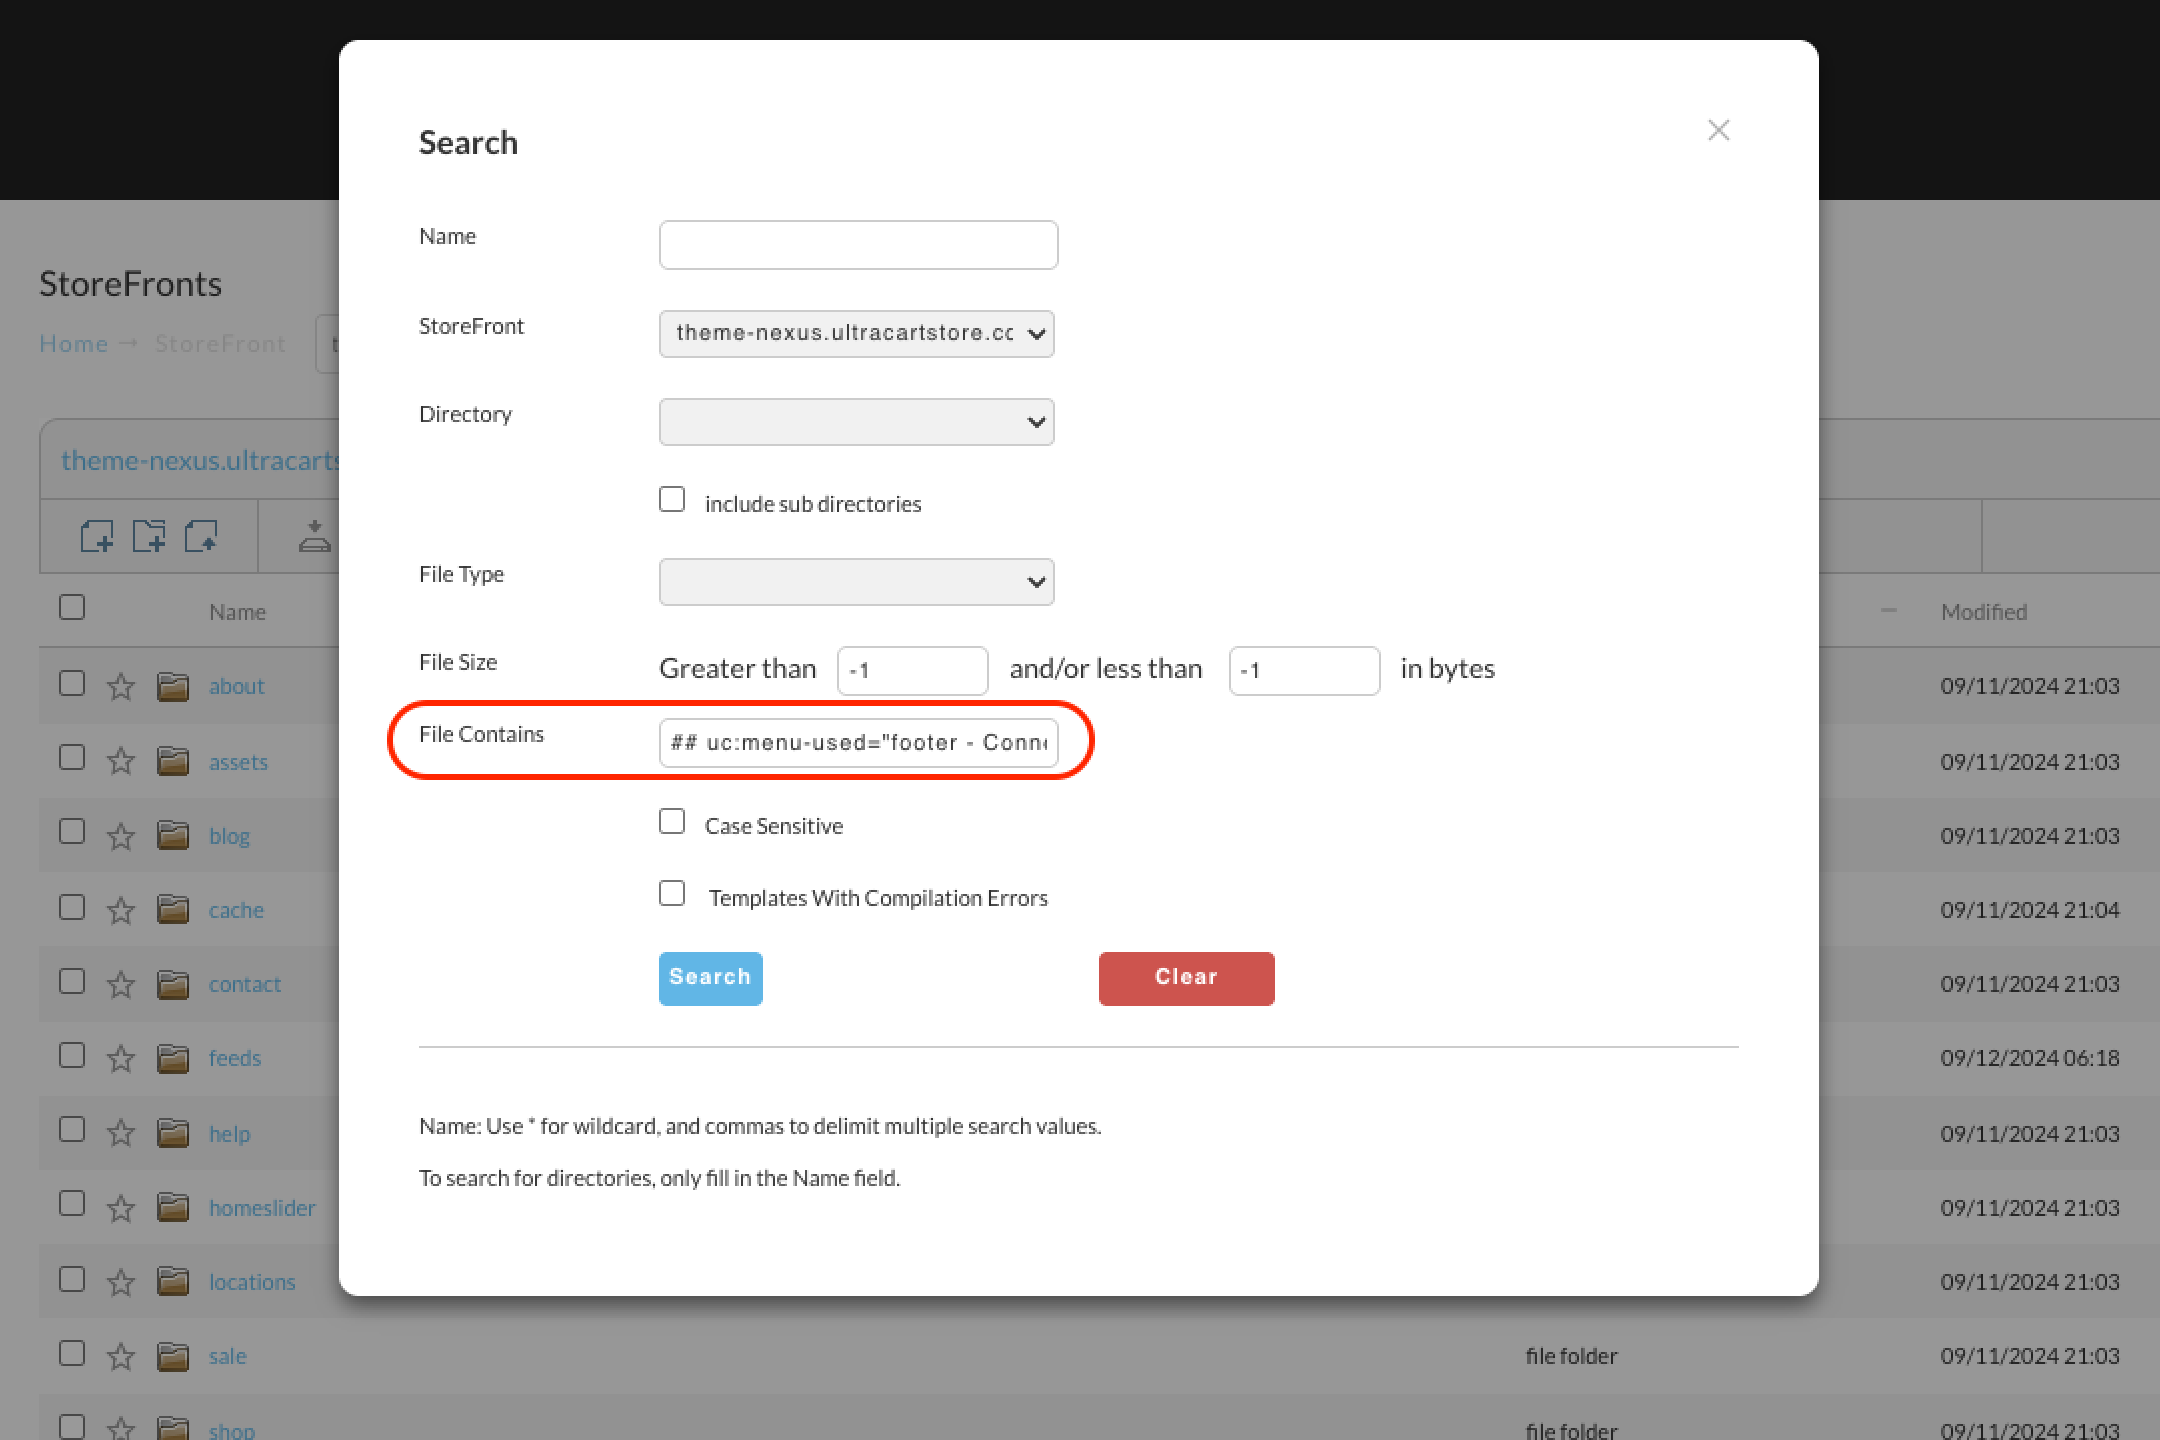
- In the File Contains field, enter the directive with the menu's name, for example
## uc:menu-used="footer - Connect". - Click Search.
The results list every template and component, across all of your StoreFront's themes, that uses the menu.
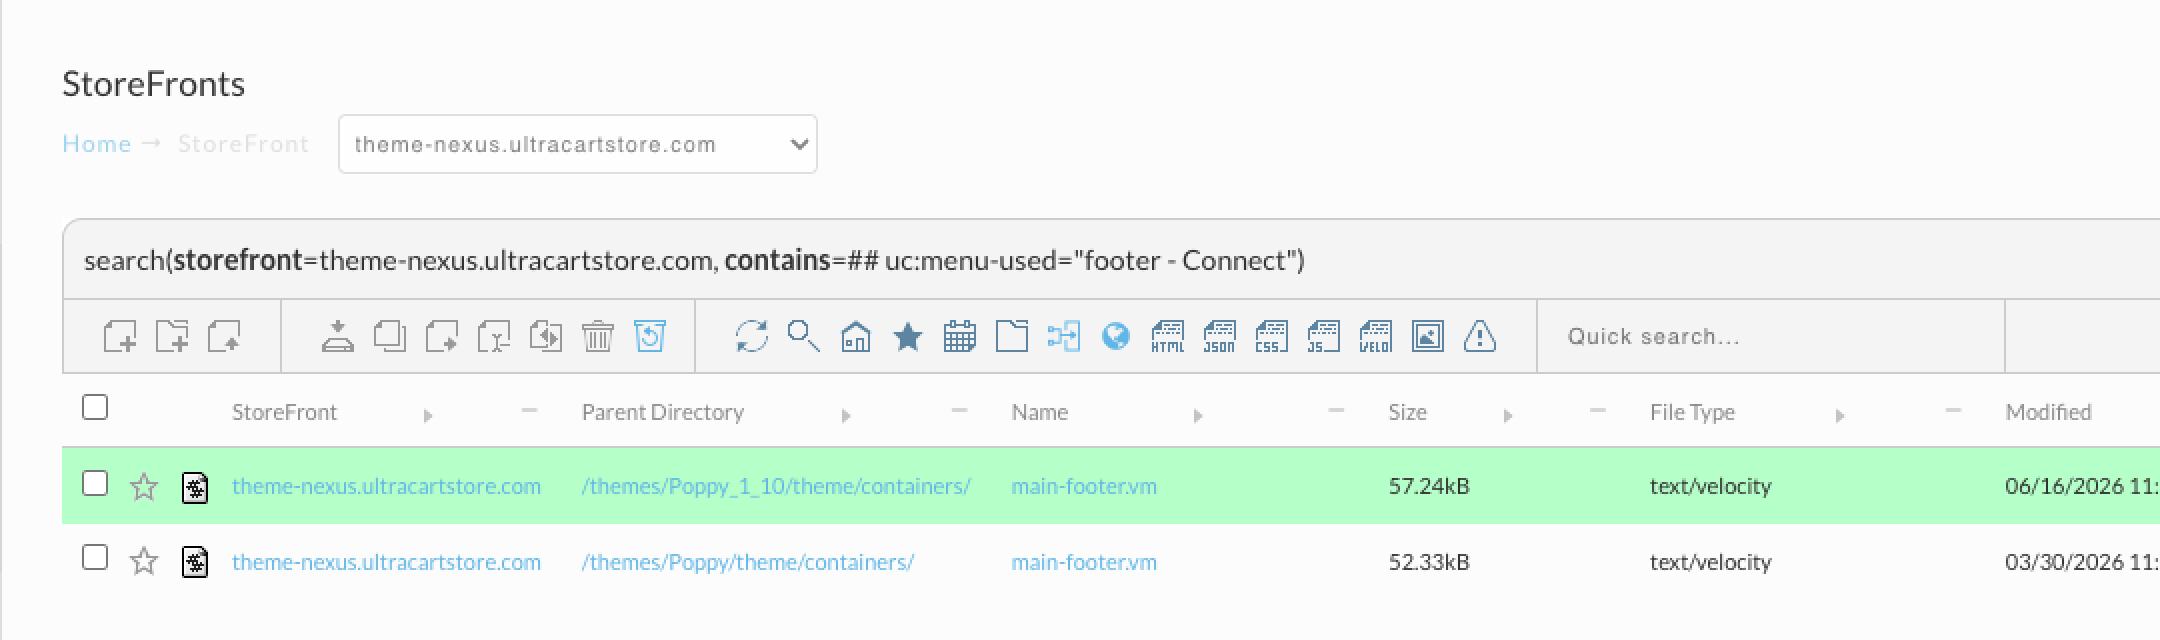
Only the rows highlighted green belong to the theme currently selected for your StoreFront. The other rows are inactive themes or unused copies and don't affect what your visitors see.
If a result opens with a banner reading "THIS FILE IS COMPILED. DO NOT EDIT IT DIRECTLY. YOUR CHANGES WILL BE LOST!", it's a component Visual Builder generates automatically. Don't edit it in File Manager. Instead, open Visual Builder, find the component on any page where it's used, and edit or remove the menu there. Visual Builder overwrites the compiled file the next time it republishes the page, so direct edits don't stick.
Frequently asked questions
A menu link goes to my events page, but the rendered menu jumps straight to one event. Why?
Storefront menus optimize a link that points at a page with only one item under it: instead of loading that page, the menu sends the visitor straight to the single item. If you don't want that behavior for a specific menu link, email support@ultracart.com with the details and support can turn off the redirect for that link.