Customizing a Theme
There are three ways to change how a theme looks, and they are not equal. Reach for them in this order: theme settings first, CSS overrides second, editing template files last. The further down that list you go, the more work a theme upgrade becomes.
Before you start
Three things are worth setting before you touch colors, because they appear on every page:
Theme settings
Theme settings, also called theme attributes, control the look and feel of a theme without touching any code. They survive theme upgrades cleanly, which is why they are the first place to look.
-
Go to Main Menu → StoreFronts, choose your host, then select Themes.
-
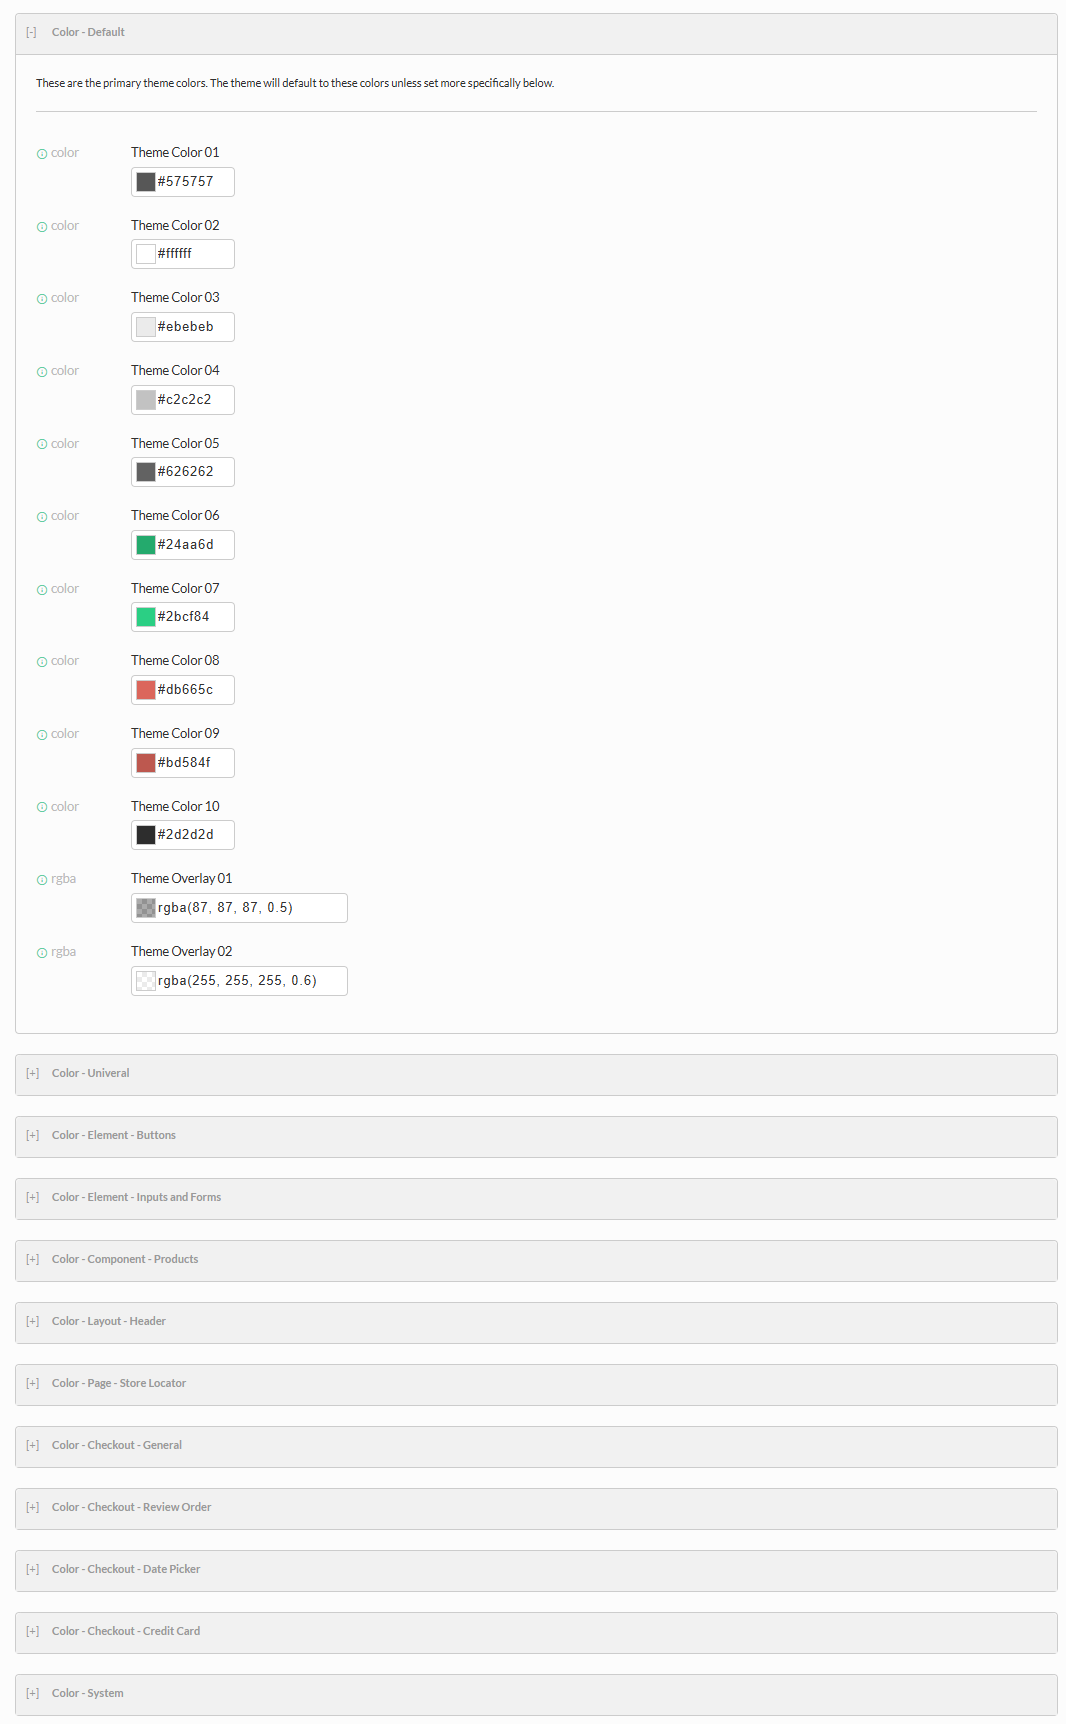
Your active theme is first in the list. Scroll down to see its attributes.
-
To change a color, select the field. Enter an HTML color as
#RRGGBB, or use the color picker.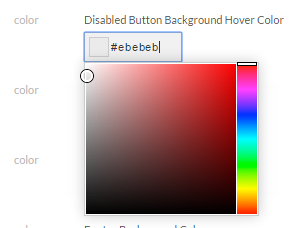
-
Select Save Theme Settings.
If the thing you want to change has no attribute, override the CSS instead.
Override CSS
Overriding CSS in the right place is what keeps your changes from being wiped out the next time the theme is upgraded. Put them in the StoreFront's override file, never in the theme's own stylesheets.
-
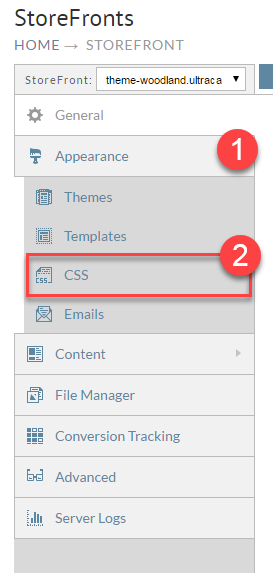
Go to Appearance → CSS.
-
Add your rules in the editor and save.
-
Select the reload icon on your StoreFront's admin bar. That forces the browser to refetch every asset on the page, including the override file.

Worked example: hiding the Continue Shopping button
First find what to target. Open the cart page, right-click the Continue shopping button, and choose Inspect. The element ID appears in the developer tools:
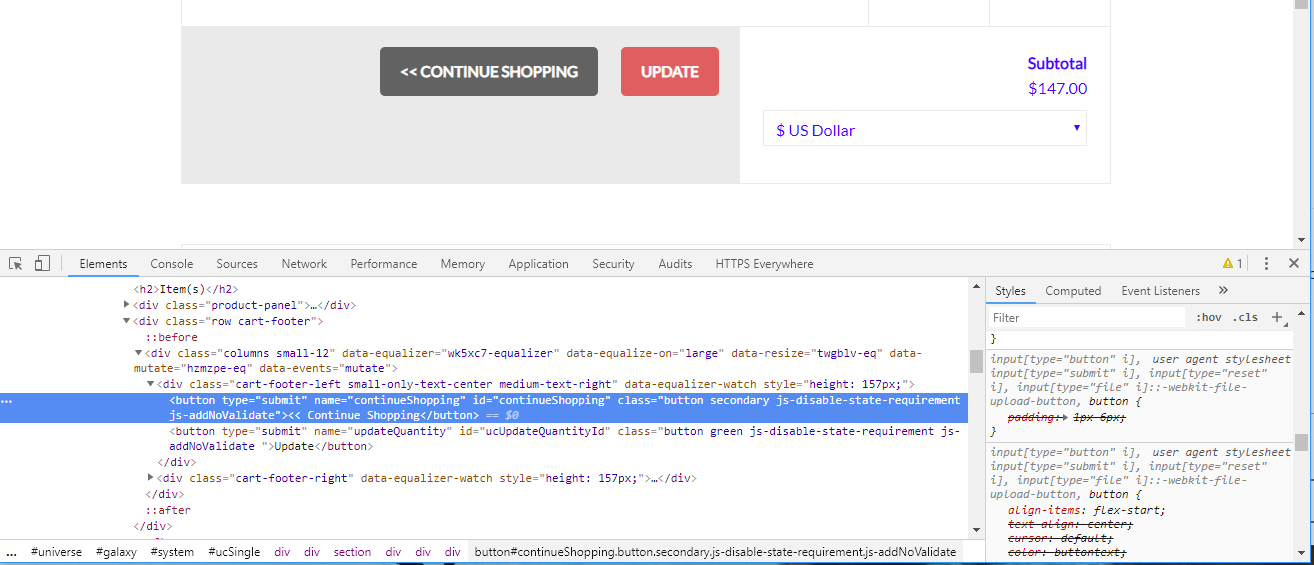
Then write a rule against it:
#continueShopping {
      display: none;
}
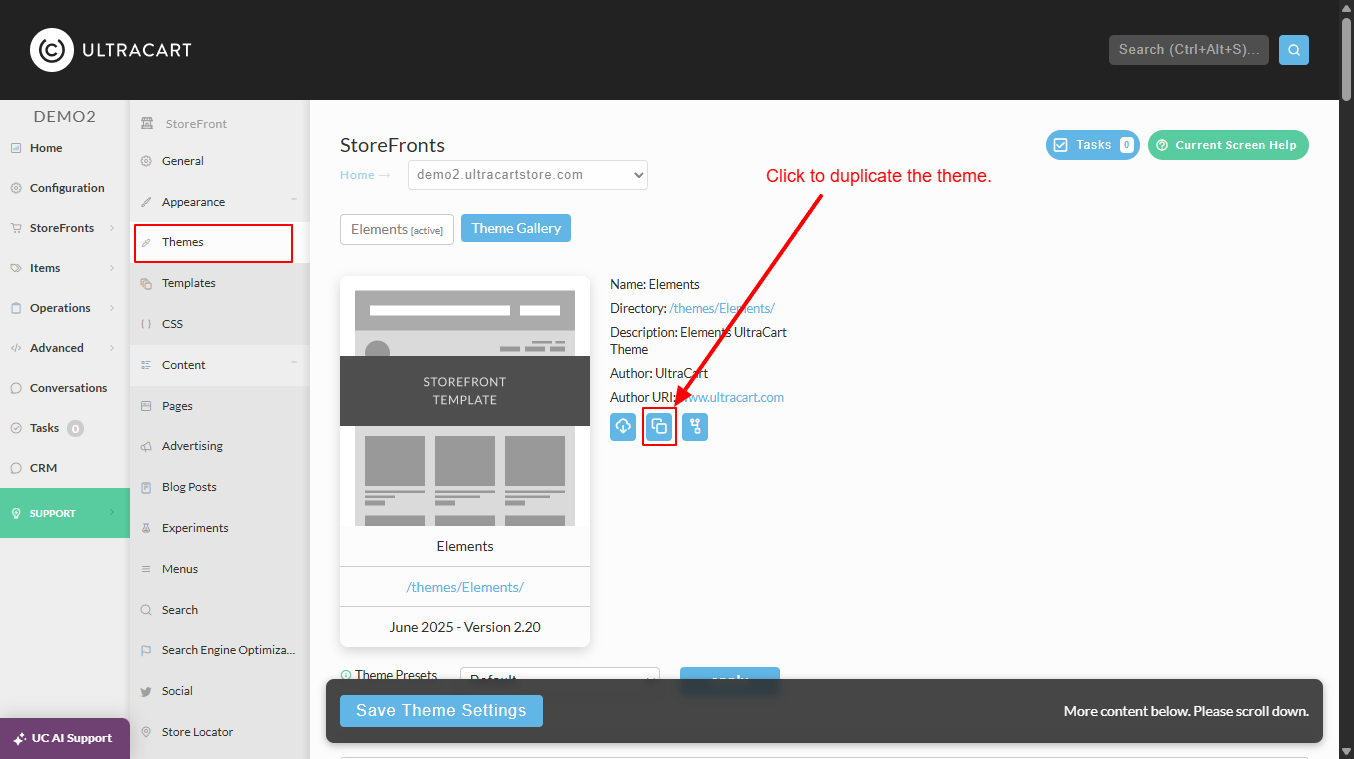
Duplicate a theme
Duplicating gives you a copy to experiment on while the original stays live. Do this before any significant change, and before every upgrade.
-
On the Themes screen, hover over the theme's thumbnail and select the Duplicate icon.
-
Enter an alphanumeric name for the new theme folder, for example
Elements_Dev, then select Duplicate.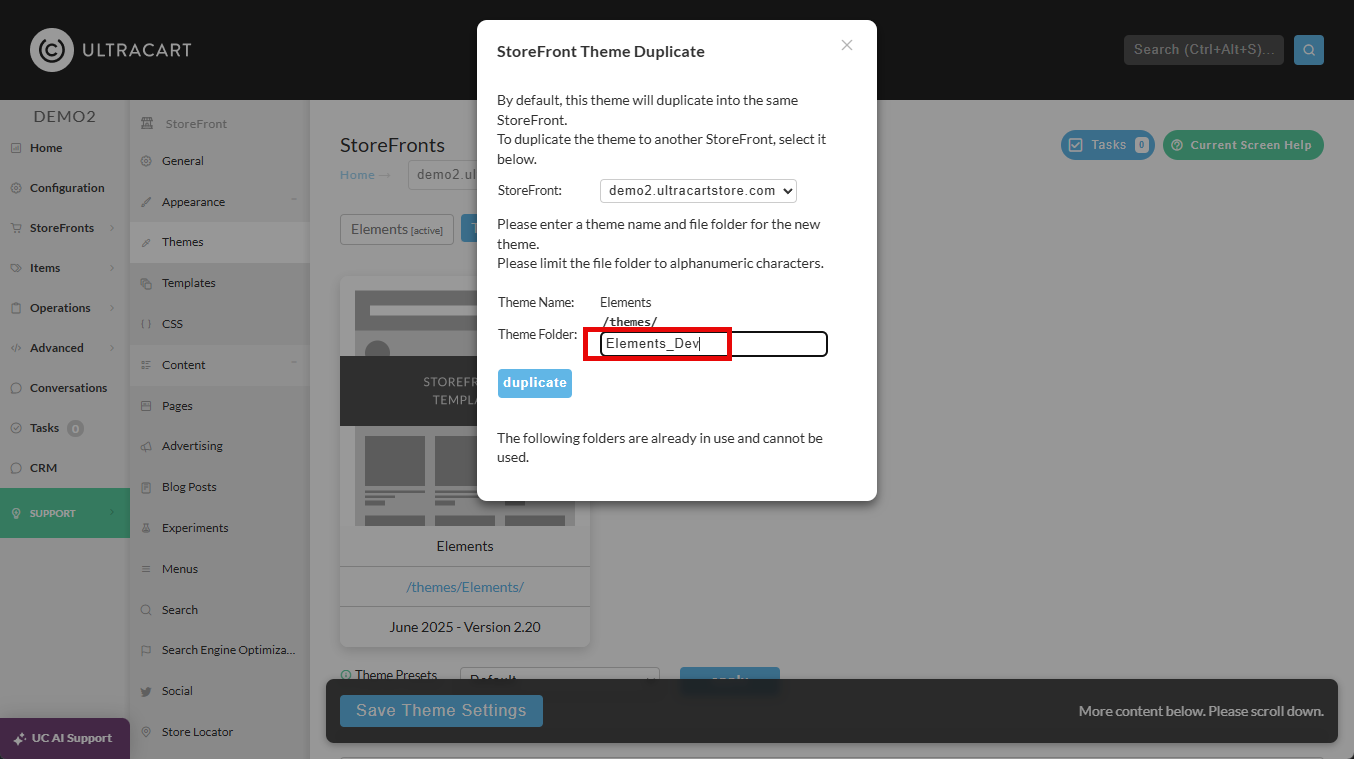
-
Wait for the copy to finish. Do not close the tab or navigate away while it runs.
The duplicate appears in your theme list under the folder name you gave it.
Copy a theme to another StoreFront
Theme duplication also works StoreFront to StoreFront, which is what makes a development
sandbox practical: build on merchantid.ultracartdev.com, copy to
merchantid.ultracartstore.com, preview, then activate.
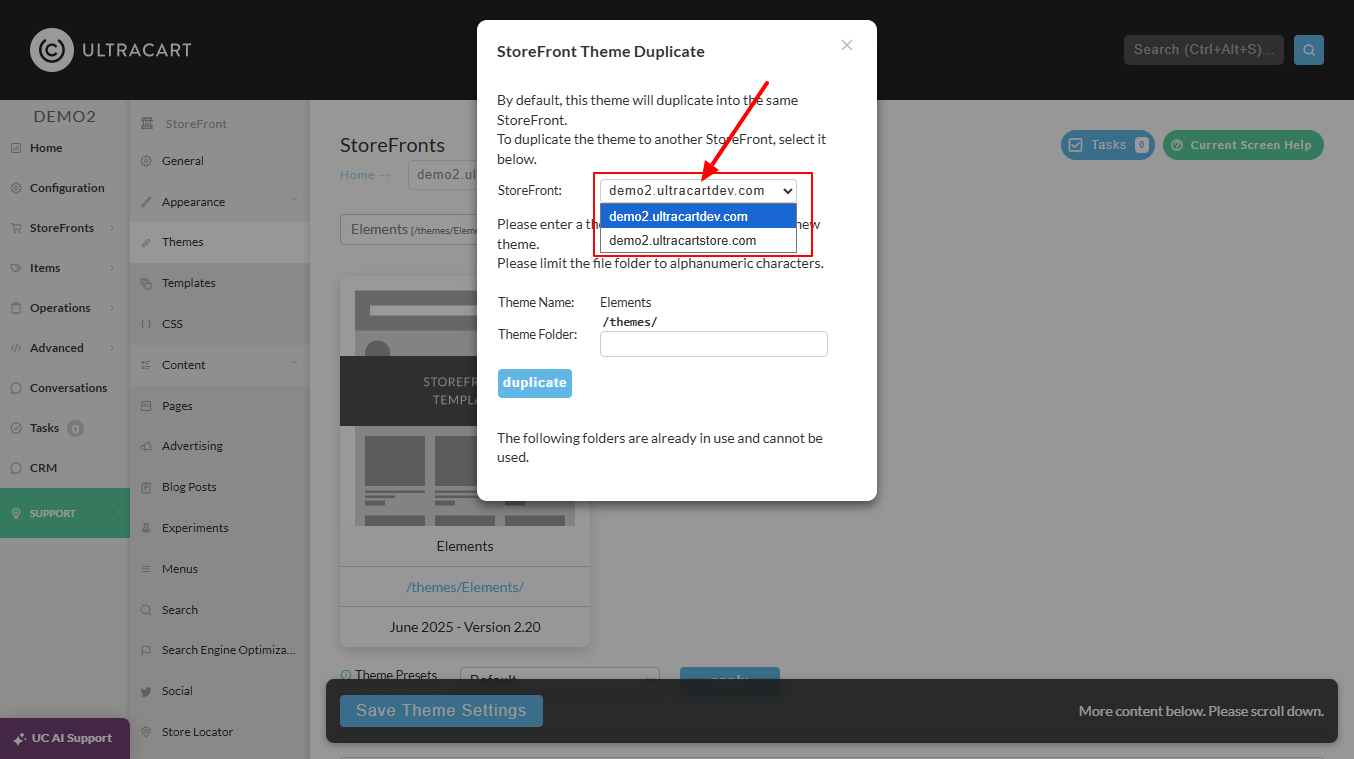
Browse to the source StoreFront, open Themes, and use the duplicate option, choosing the destination StoreFront rather than a folder on the same host.
Copying a theme and cloning an entire StoreFront are different operations. A theme carries the look and feel: templates, JavaScript, CSS, and images. Cloning an entire StoreFront also copies pages, menus, and every configuration option down to conversion tracking, and it destroys whatever exists in the target. UltraCart keeps no backups of entire StoreFronts.
Cloning an entire StoreFront also requires the Create Sample File option at the bottom of
the Themes tab. If you have changed your host away from the default
merchantid.ultracartstore.com or merchantid.ultracartdev.com, that option does not appear
and you can only copy the theme, then reconfigure the rest by hand.
For the entire-StoreFront procedure, including the sample file archive, see Duplicate a StoreFront.
Next steps
- Upgrading a theme, and why duplicating first matters.
- Custom tracking scripts if what you are adding is a pixel rather than styling.