Resolving Merge Conflicts When You Upgrade a Theme
When UltraCart releases a new version of your theme, the upgrade merges the new theme code into your theme and keeps the template edits you made. Usually that merge happens on its own. When you and the theme developer changed the same lines of the same file, UltraCart cannot choose for you. That is a merge conflict, and you resolve it in a three-pane editor.
This tutorial walks through a real upgrade of the Hero theme from version 1.25 to 1.26 with three conflicts, one for each kind of decision you will make: take the new code, combine both changes, and take the new code and re-apply your own change. It also covers how to back out if the result is wrong.
Merchants who skip conflicts tend to stop upgrading altogether, and their theme falls many versions behind on fixes and security updates. Each conflict is usually a single line and takes a minute or two once you know what the three panes mean.
Before you start
- Read the theme's revision log so you know what the new version changes.
- Know which template files you, or a developer, edited by hand. The upgrade check lists them for you.
- Settings, theme attributes, and
override.csssurvive upgrades cleanly. Only hand edits to template files can conflict. See Customizing a theme.
Step 1: Run the upgrade check
- Go to Main Menu → StoreFronts, select your StoreFront, then select Themes under Appearance.
- Select the theme tab, then select the orange Upgrade to x.xx banner on the theme image.
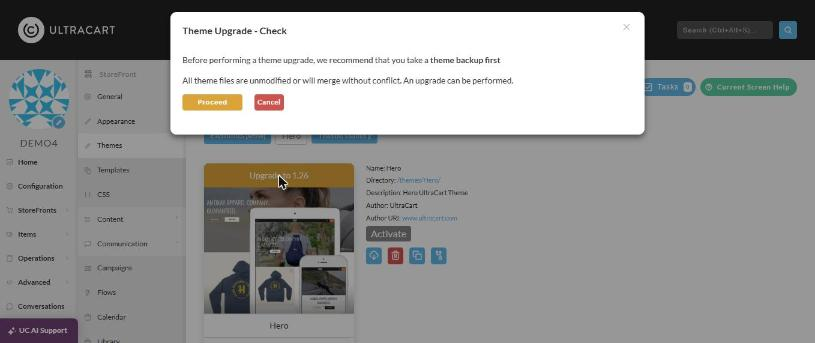
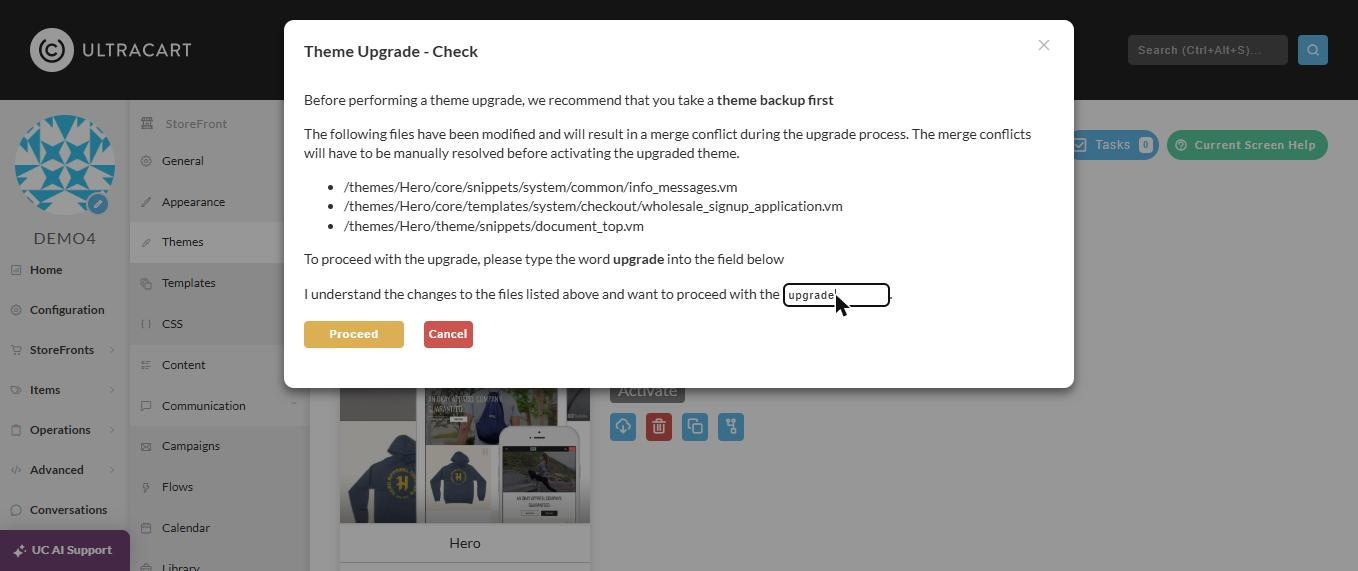
The Theme Upgrade - Check dialog appears. It reads your theme before changing anything and shows one of three results.
No modified files. Nothing you edited is affected, and the upgrade can go ahead.
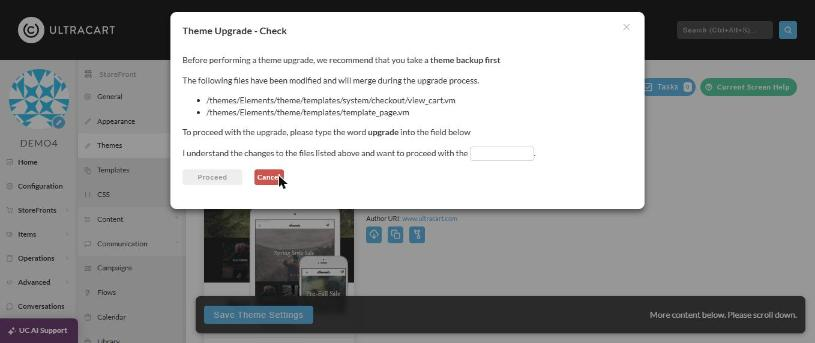
Modified files that will merge. You edited these files, but in places the new version did not touch. UltraCart merges them for you. You type upgrade to confirm.
Modified files that will conflict. You and the new version changed the same lines. The dialog lists each file. You resolve them after the upgrade, before you activate the theme.
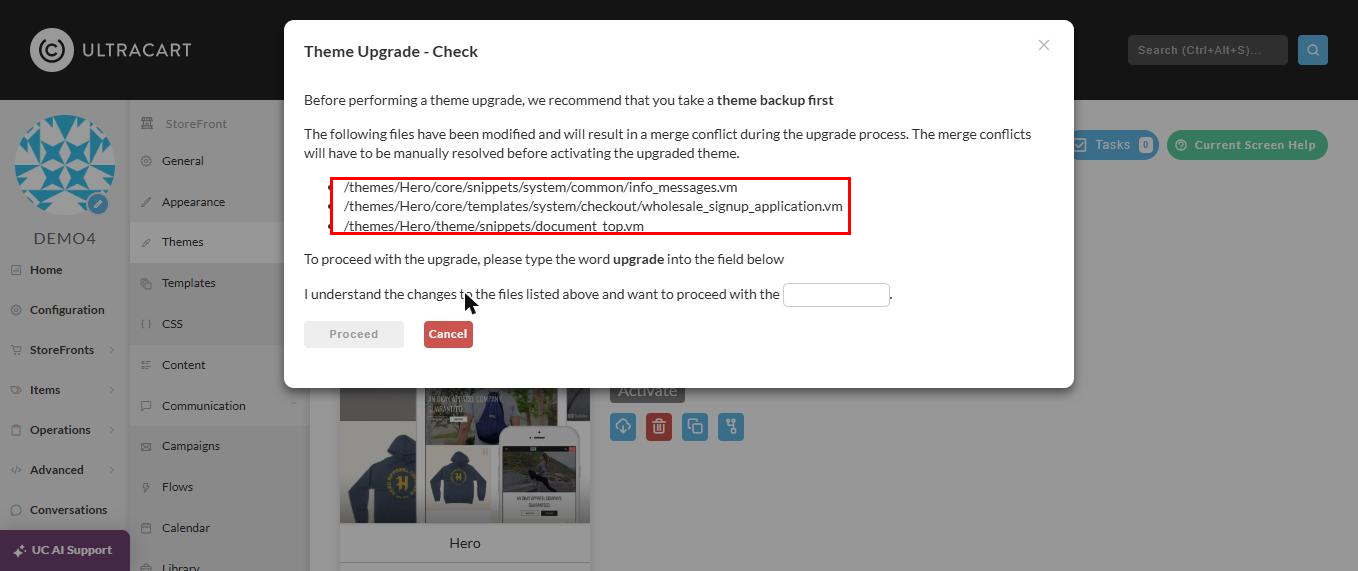
Write down the files in the list, then select Cancel. Back up the theme before you continue.
Step 2: Back up the theme
A duplicate of the theme is your undo button for the whole upgrade.
- Hover over the theme image and select the Duplicate icon.
- Leave the StoreFront as it is. Enter a folder name that says what it is, such as
HeroBackup125for Hero version 1.25. Letters and numbers only. - Select duplicate and wait for the copy to finish. Do not leave the page while it runs.
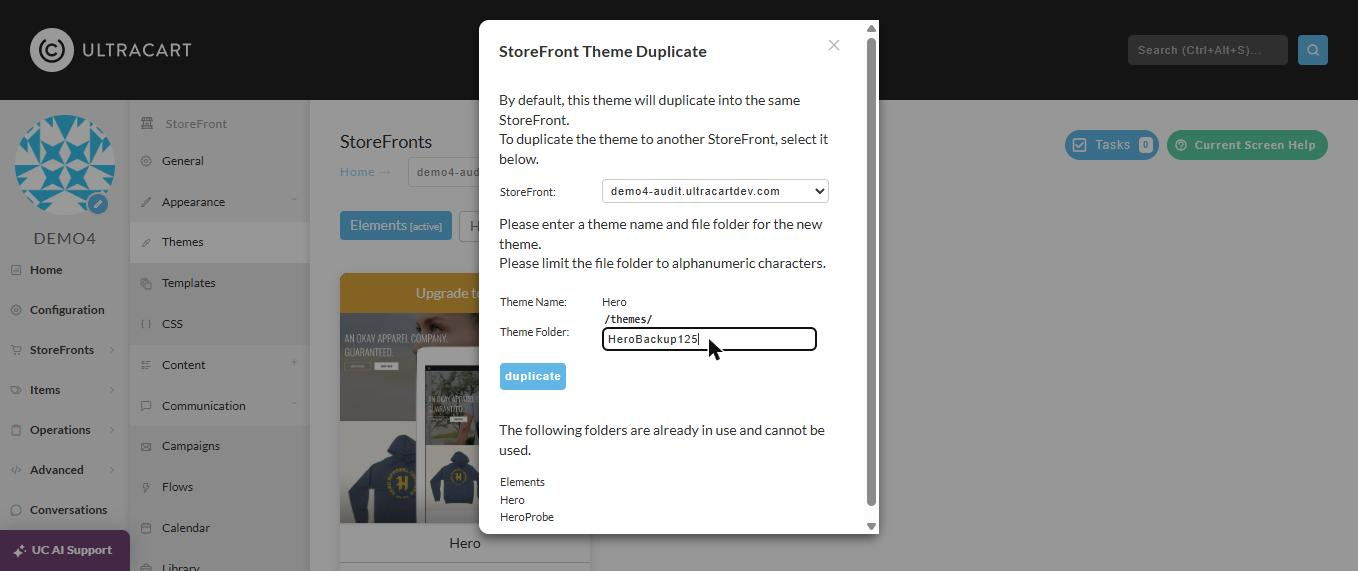
The backup appears as its own tab on the Themes screen. Do not upgrade or edit it. It stays on the old version so you can return to it.
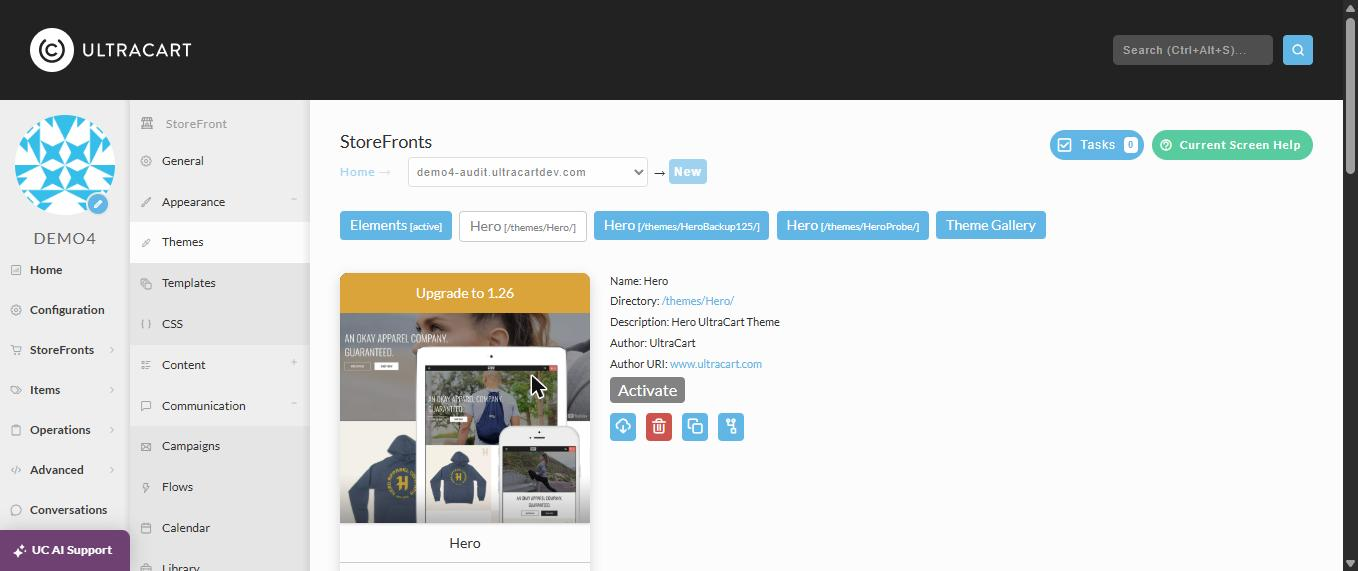
If the theme is your active theme, resolve the conflicts on a copy rather than on the theme your live site is running. When the pre-upgrade check finds conflicts, it offers Duplicate and Upgrade: the copy is upgraded, you resolve the conflicts in the copy, and you activate the copy when it is right. Your live site keeps running the old version in the meantime.
Step 3: Run the upgrade
- Select Upgrade to x.xx again.
- Type
upgradein the confirmation field and select Proceed.
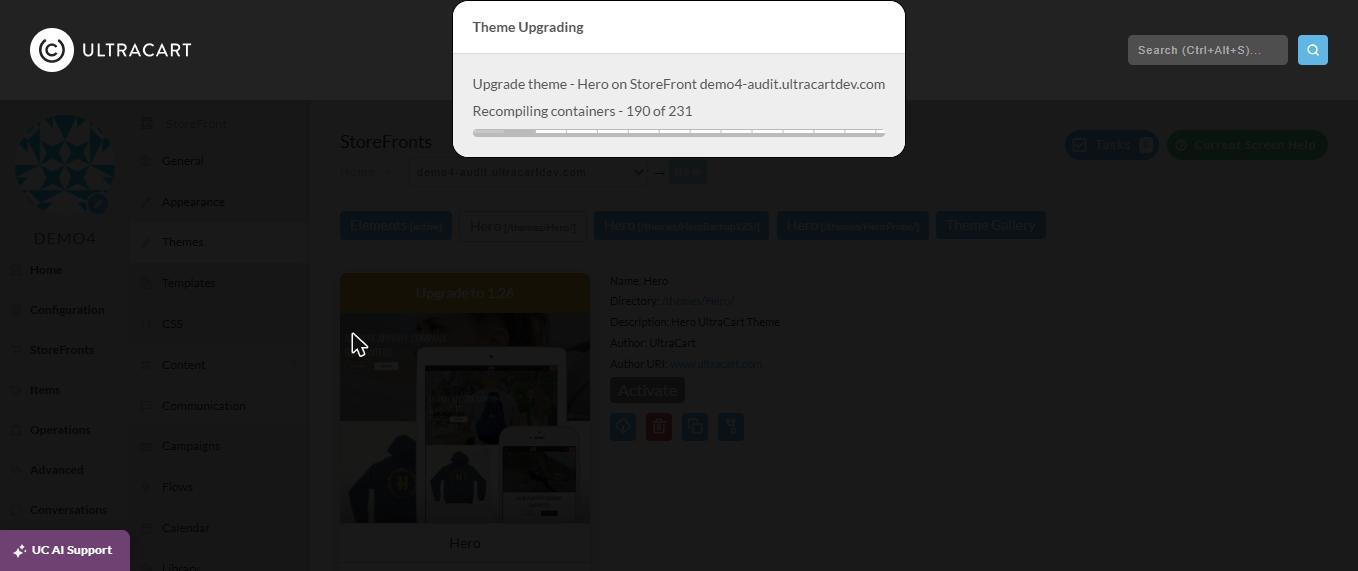
The upgrade writes the new files, recompiles containers, and recalculates template metadata. Keep the tab open until it finishes.
Step 4: Find the files in conflict
When the upgrade finishes, UltraCart emails you a StoreFront Theme Upgrade notification. It names the StoreFront, the theme, and the new version. Under Merged with Conflicts, it lists each customized file that needs your attention.
Keep that email until every listed file is resolved. If you closed the browser tab during the upgrade, the email is your list of files to fix.
- Go to File Manager.
- Select the merge conflicts icon in the toolbar. It searches the whole StoreFront.
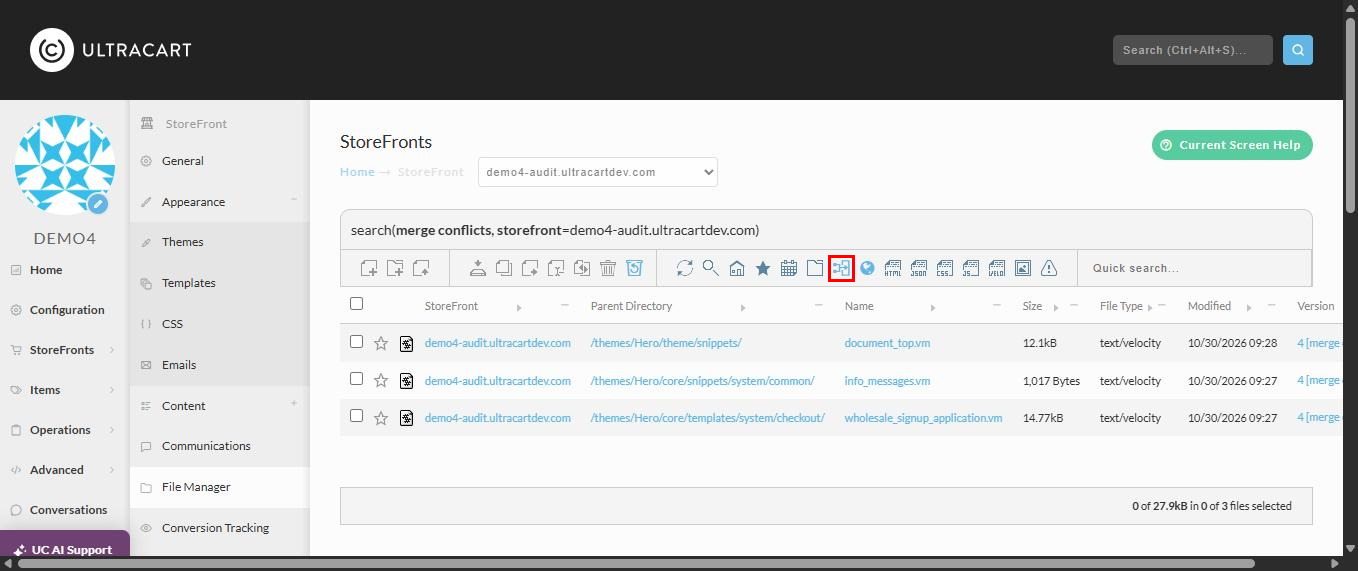
Each file in conflict shows [merge conflict] next to its version number. Select a file name to open it.
A banner at the top of the editor confirms the file has conflicts. Select it to dismiss it, then select the full screen icon at the right of the toolbar. The panes are much easier to read full screen.
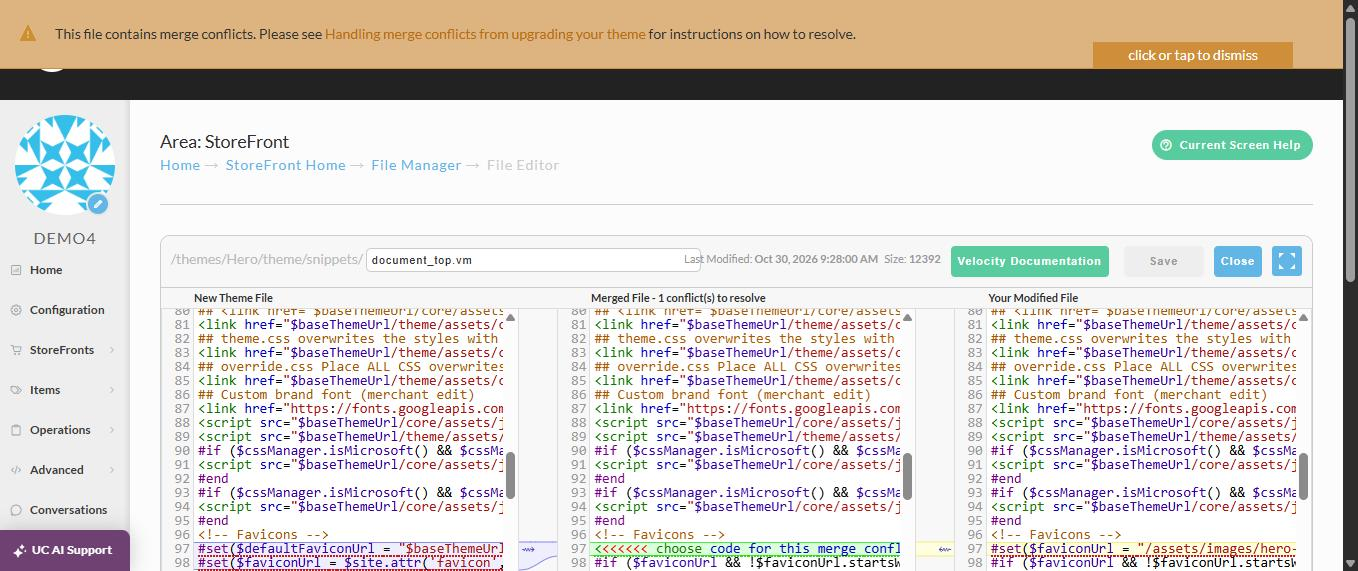
Step 5: Read the three panes
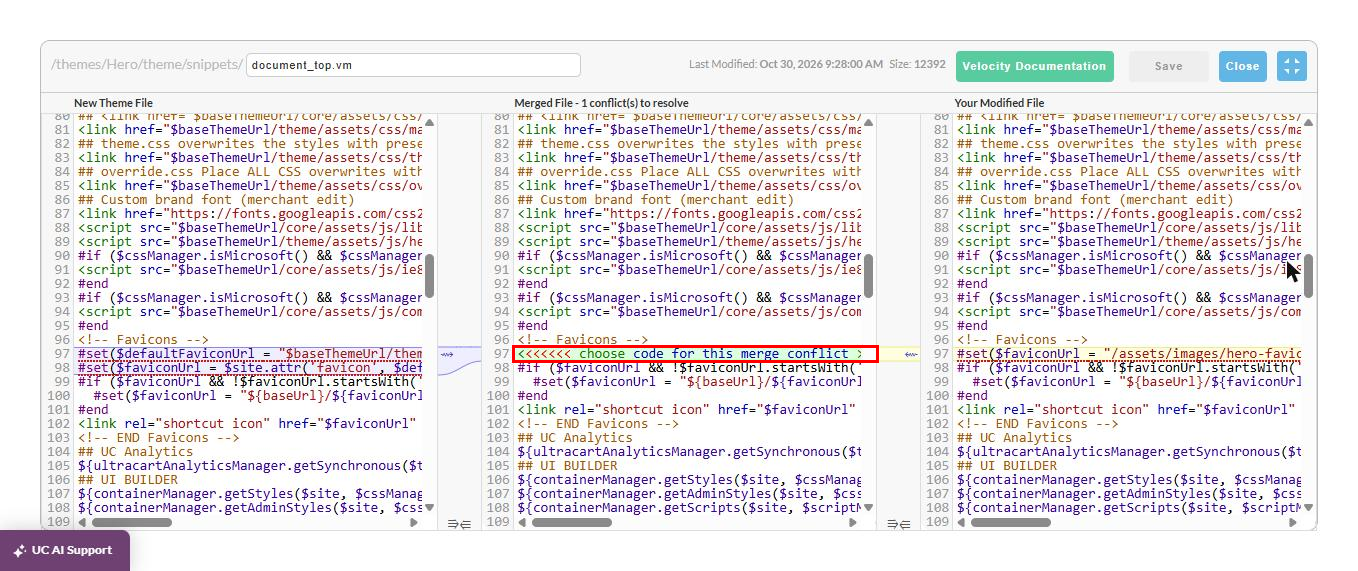
| Pane | What it is |
|---|---|
| New Theme File (left) | The new version of the file from UltraCart. |
| Merged File (middle) | The file you are building. This is what gets saved. Its header counts the conflicts left. |
| Your Modified File (right) | Your version of the file, with your edits. |
Edits of yours that did not conflict are already in all three panes. In this example the brand font link added near the top of the file merged by itself.
Each conflict shows in the middle pane as one line:
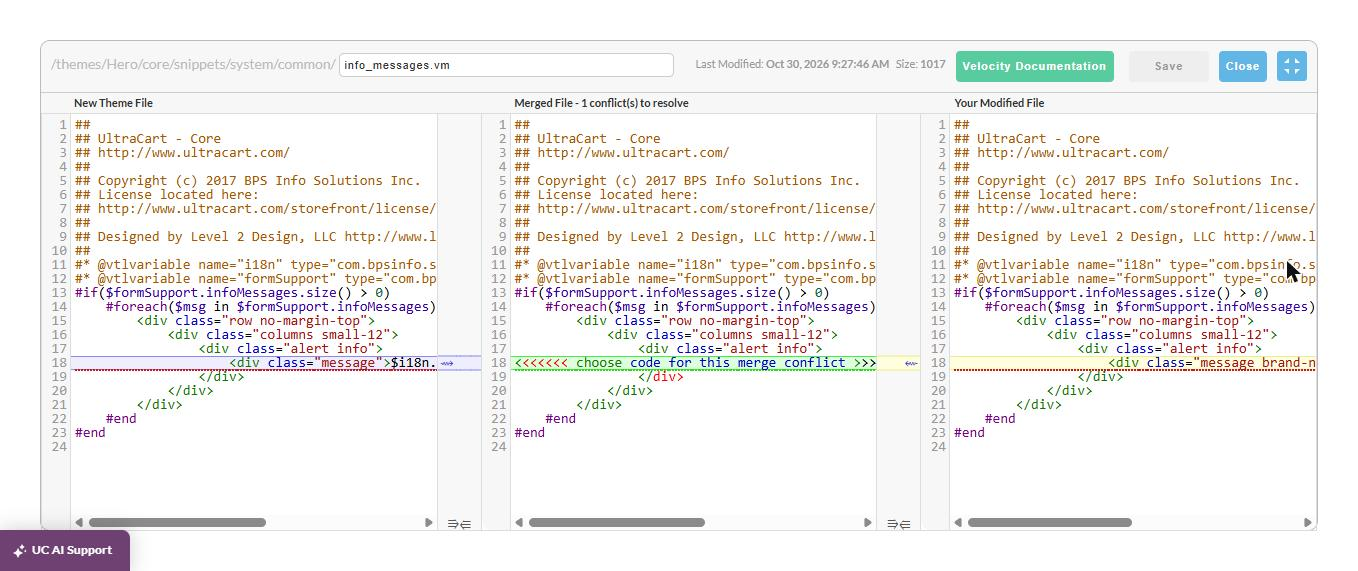
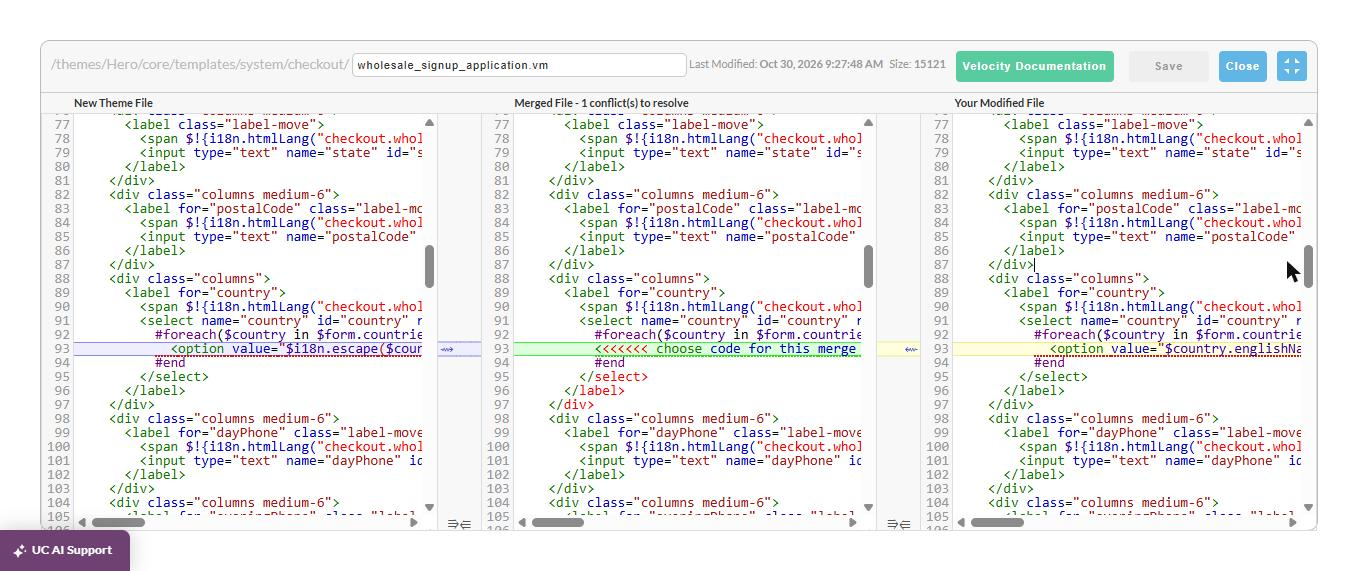
<<<<<<< choose code for this merge conflict >>>>>>>

The arrow in the gutter between two panes copies that side's lines into the merged file:
- The arrow between the left and middle panes takes the new theme code.
- The arrow between the right and middle panes takes your code.
You can also type directly in the middle pane. You need to for a combined fix.
Step 6: Decide each conflict
Ask one question for each conflict: what was the new version trying to fix, and what was my edit for? Then pick one of these three resolutions.
Take the new code, and move your change to a setting
Use this when the new version now does what your edit did, usually through a setting.
In this example the merchant had hard-coded a custom favicon path in document_top.vm. The new version fixed a broken default favicon and reads the favicon from the StoreFront Favicon setting.
-
Select the arrow between the left and middle panes. The new lines replace the conflict line, and the header changes to 0 conflict(s) to resolve.
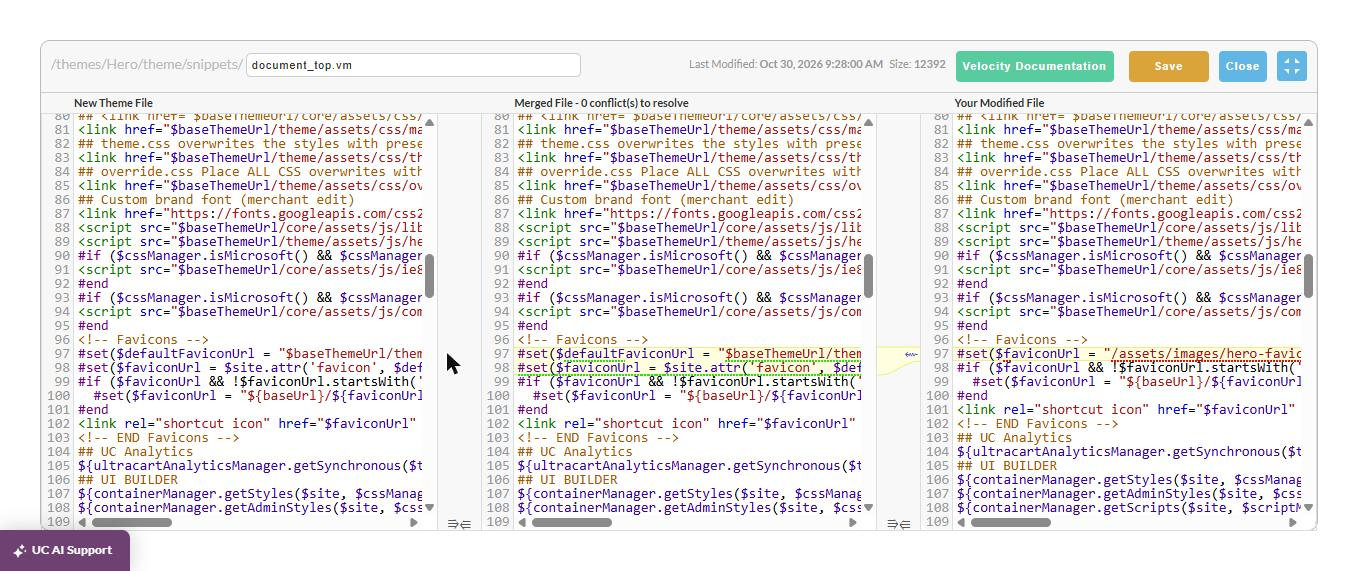
-
Select Save.
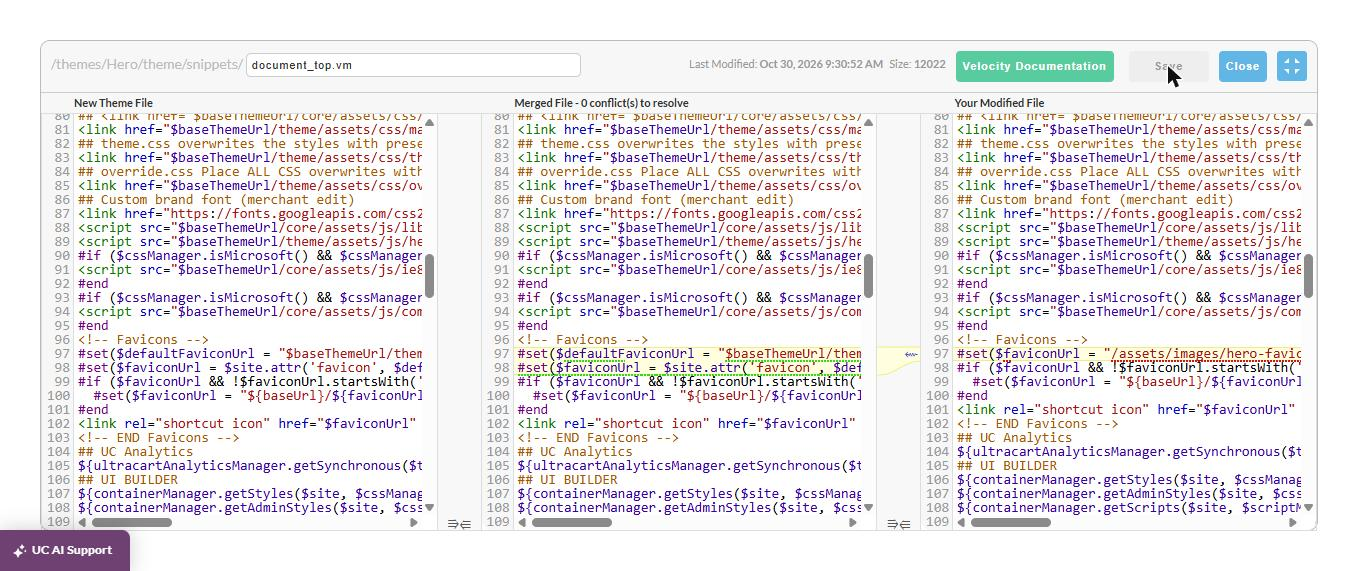
-
Put your custom value where the new code reads it. Here that is the StoreFront Favicon setting on the General tab. See Set a favicon.
Combine both changes
Use this when both sides matter. This is the most common case, and it matters most when the new version is a security fix.
In this example the merchant had added a CSS class and an icon to the info message line in info_messages.vm. The new version wrapped the message in $i18n.escape() so that message text is always displayed as plain text.
-
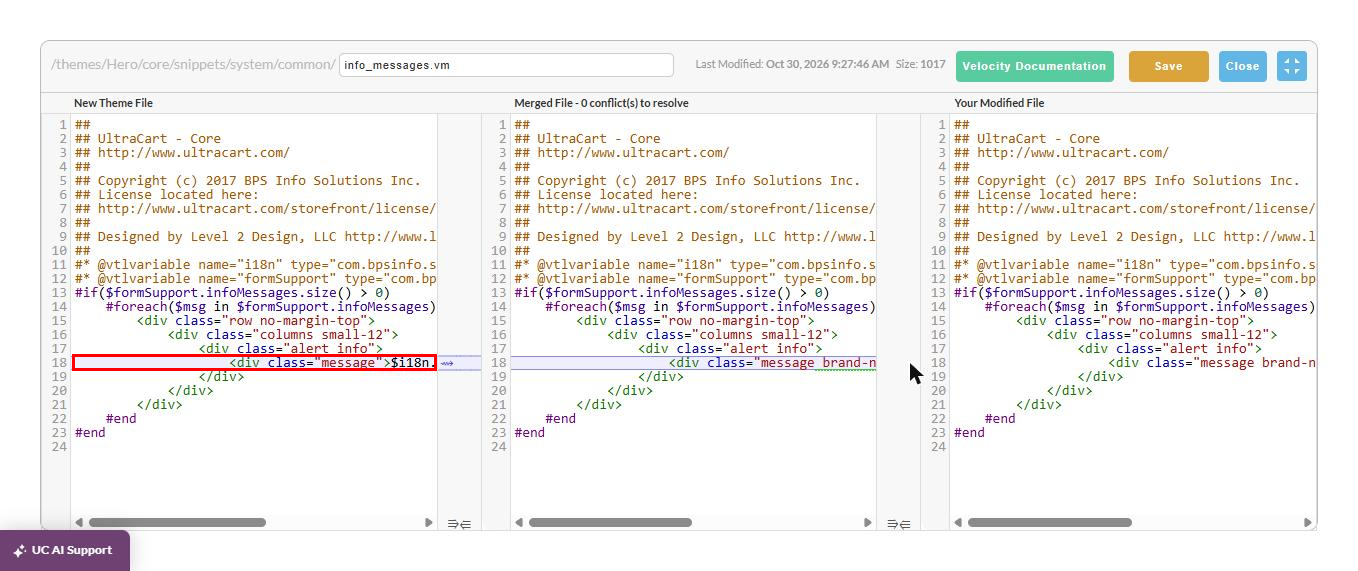
Select the arrow between the right and middle panes to bring in your line.
The header now says 0 conflict(s), but the new escaping is gone. The left pane still highlights the line as different. Zero conflicts does not mean the file is correct.
-
In the middle pane, edit the line to add the new code. Here, change
$!msgto$i18n.escape($!msg).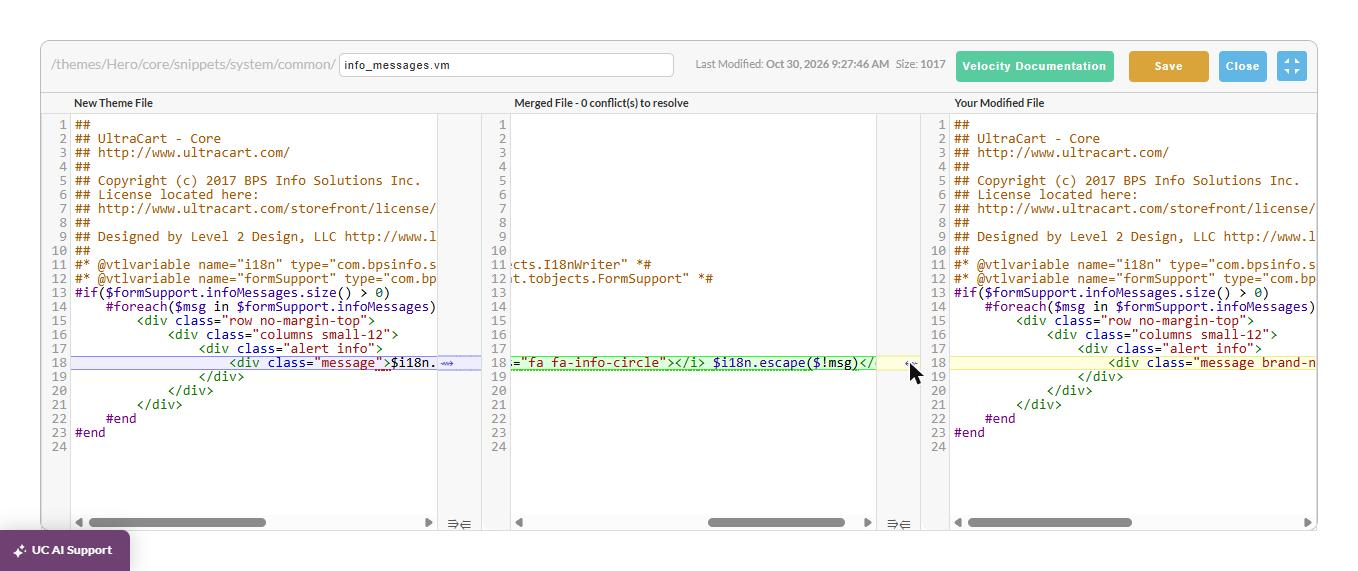
-
Select Save.
A correctly combined line looks different from both the left and right panes. That is expected.
Take the new code, then re-apply your change
This gives the same result as combining, starting from the other side. It is the safer choice when the new version changed a lot on the line and your edit was small.
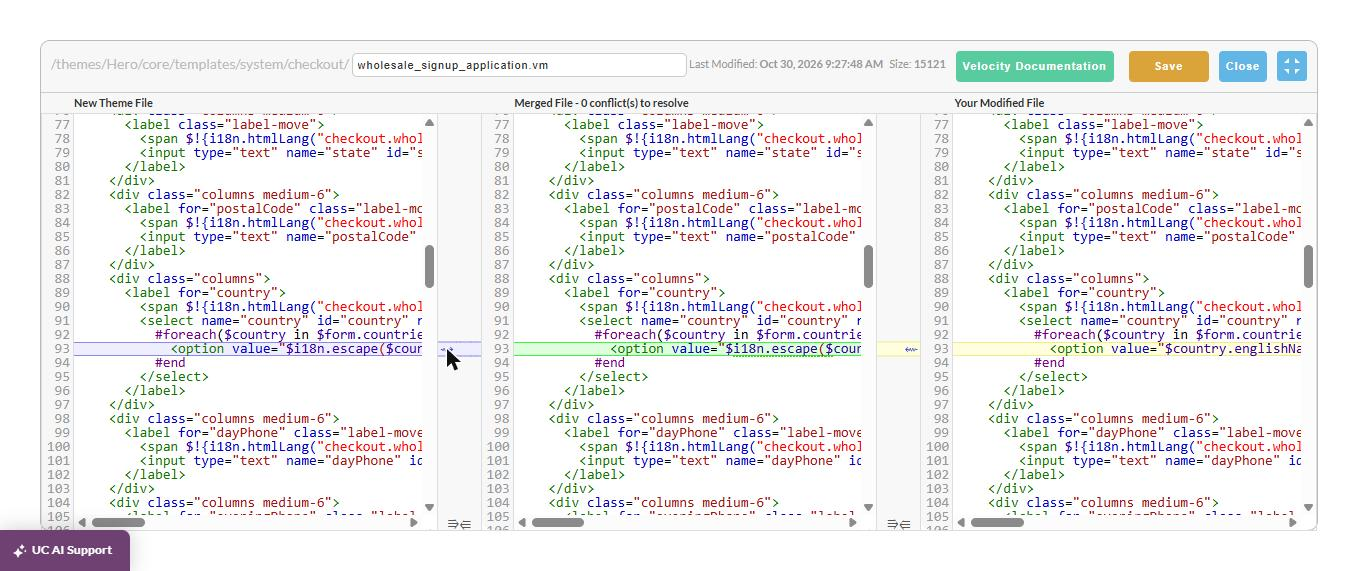
In this example the merchant had made the wholesale signup form default to United States. The new version escaped the country values.
-
Select the arrow between the left and middle panes to take the new line.
-
In the middle pane, make your edit again on top of it.
-
Select Save.
When to keep only your version
Rarely. Keep only your version when the new code does not apply to your store and the revision log shows the change is cosmetic. Never drop a change the revision log describes as a security, escaping, or checkout fix. Combine instead.
Step 7: Check your work
-
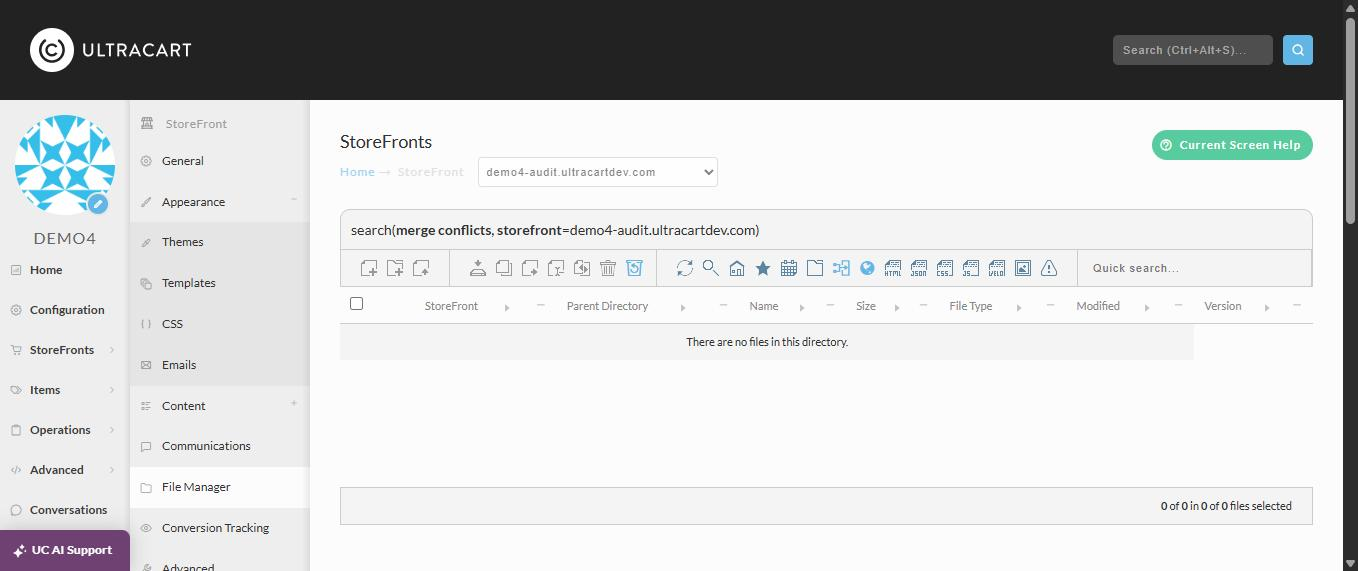
Run the merge conflicts search in the File Manager again. It should return no files.
-
Run the files with compile errors search (the warning triangle icon). A resolved file with a typo will show up here.
-
Preview the upgraded theme before you activate it. See Preview a theme before activating it. Check the pages that use the files you resolved, and place a test order if you resolved a checkout file.
-
Activate the theme when it is right.
Back out if something is wrong
Undo one file
Every save is kept in the file's version history. Select the file's version number in the File Manager to open it.
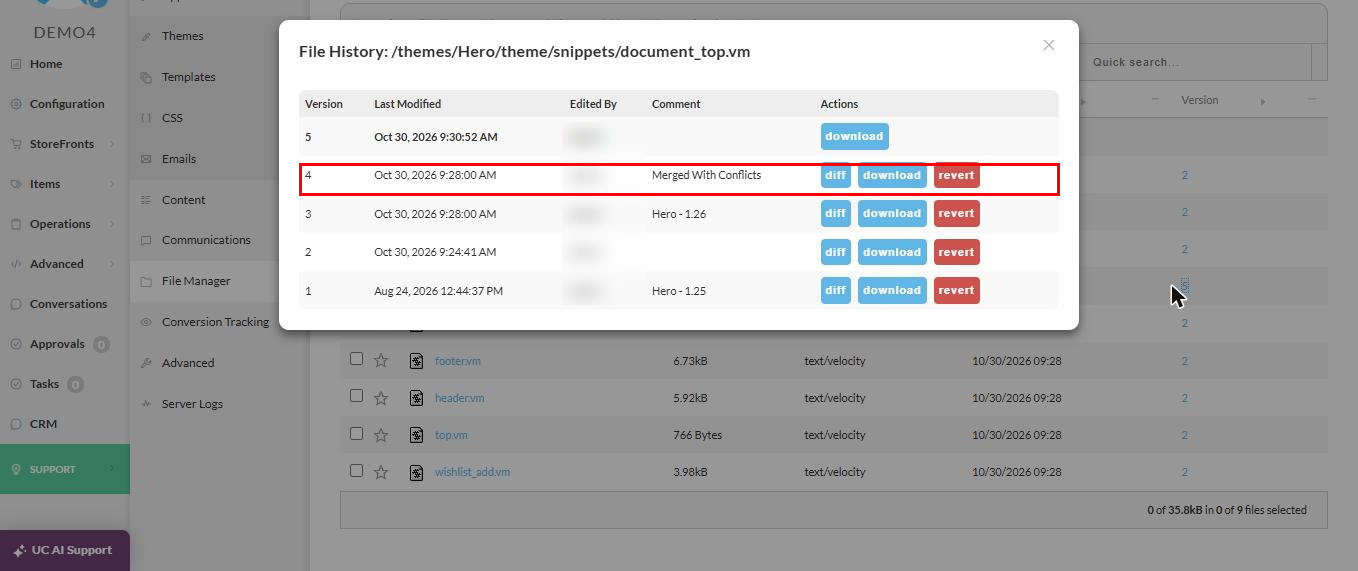
An upgraded file with a conflict has a history like this, newest first:
| Comment | What that version is |
|---|---|
| (none) | Your resolved file |
| Merged With Conflicts | What the upgrade produced, with the conflict lines in it |
| Theme - new version | The new theme file exactly as UltraCart ships it |
| (none) | Your edit, before the upgrade |
| Theme - old version | The file exactly as UltraCart shipped the old version |
- Select diff to compare any version with the current one.
- Select revert on Merged With Conflicts to start the file's resolution over.
- Select revert on the new theme version to drop your edit and use UltraCart's file as shipped.
A revert saves a new version, so you can undo it too.
Undo the whole upgrade
Activate the backup theme you made in Step 2. Your StoreFront goes back to the old version immediately. Delete the upgraded copy later, or keep working on it until it is ready.